Functional & Aesthetic Closet Makeover | That 70s House
If you've ever felt the frustration of dealing with a small and cluttered closet, you're not alone. Welcome back to That 70s House. In this week’s blog post, I'll take you through my journey of transforming my cramped closet space into a practical and stylish area that I can truly enjoy. With some thrifted materials, and a couple DIY projects, I really turned my farmhouse-style bedroom closet into an aesthetic, yet functional space to store my clothing!
Watch the full makeover from start to finish linked here!

What needed to change?
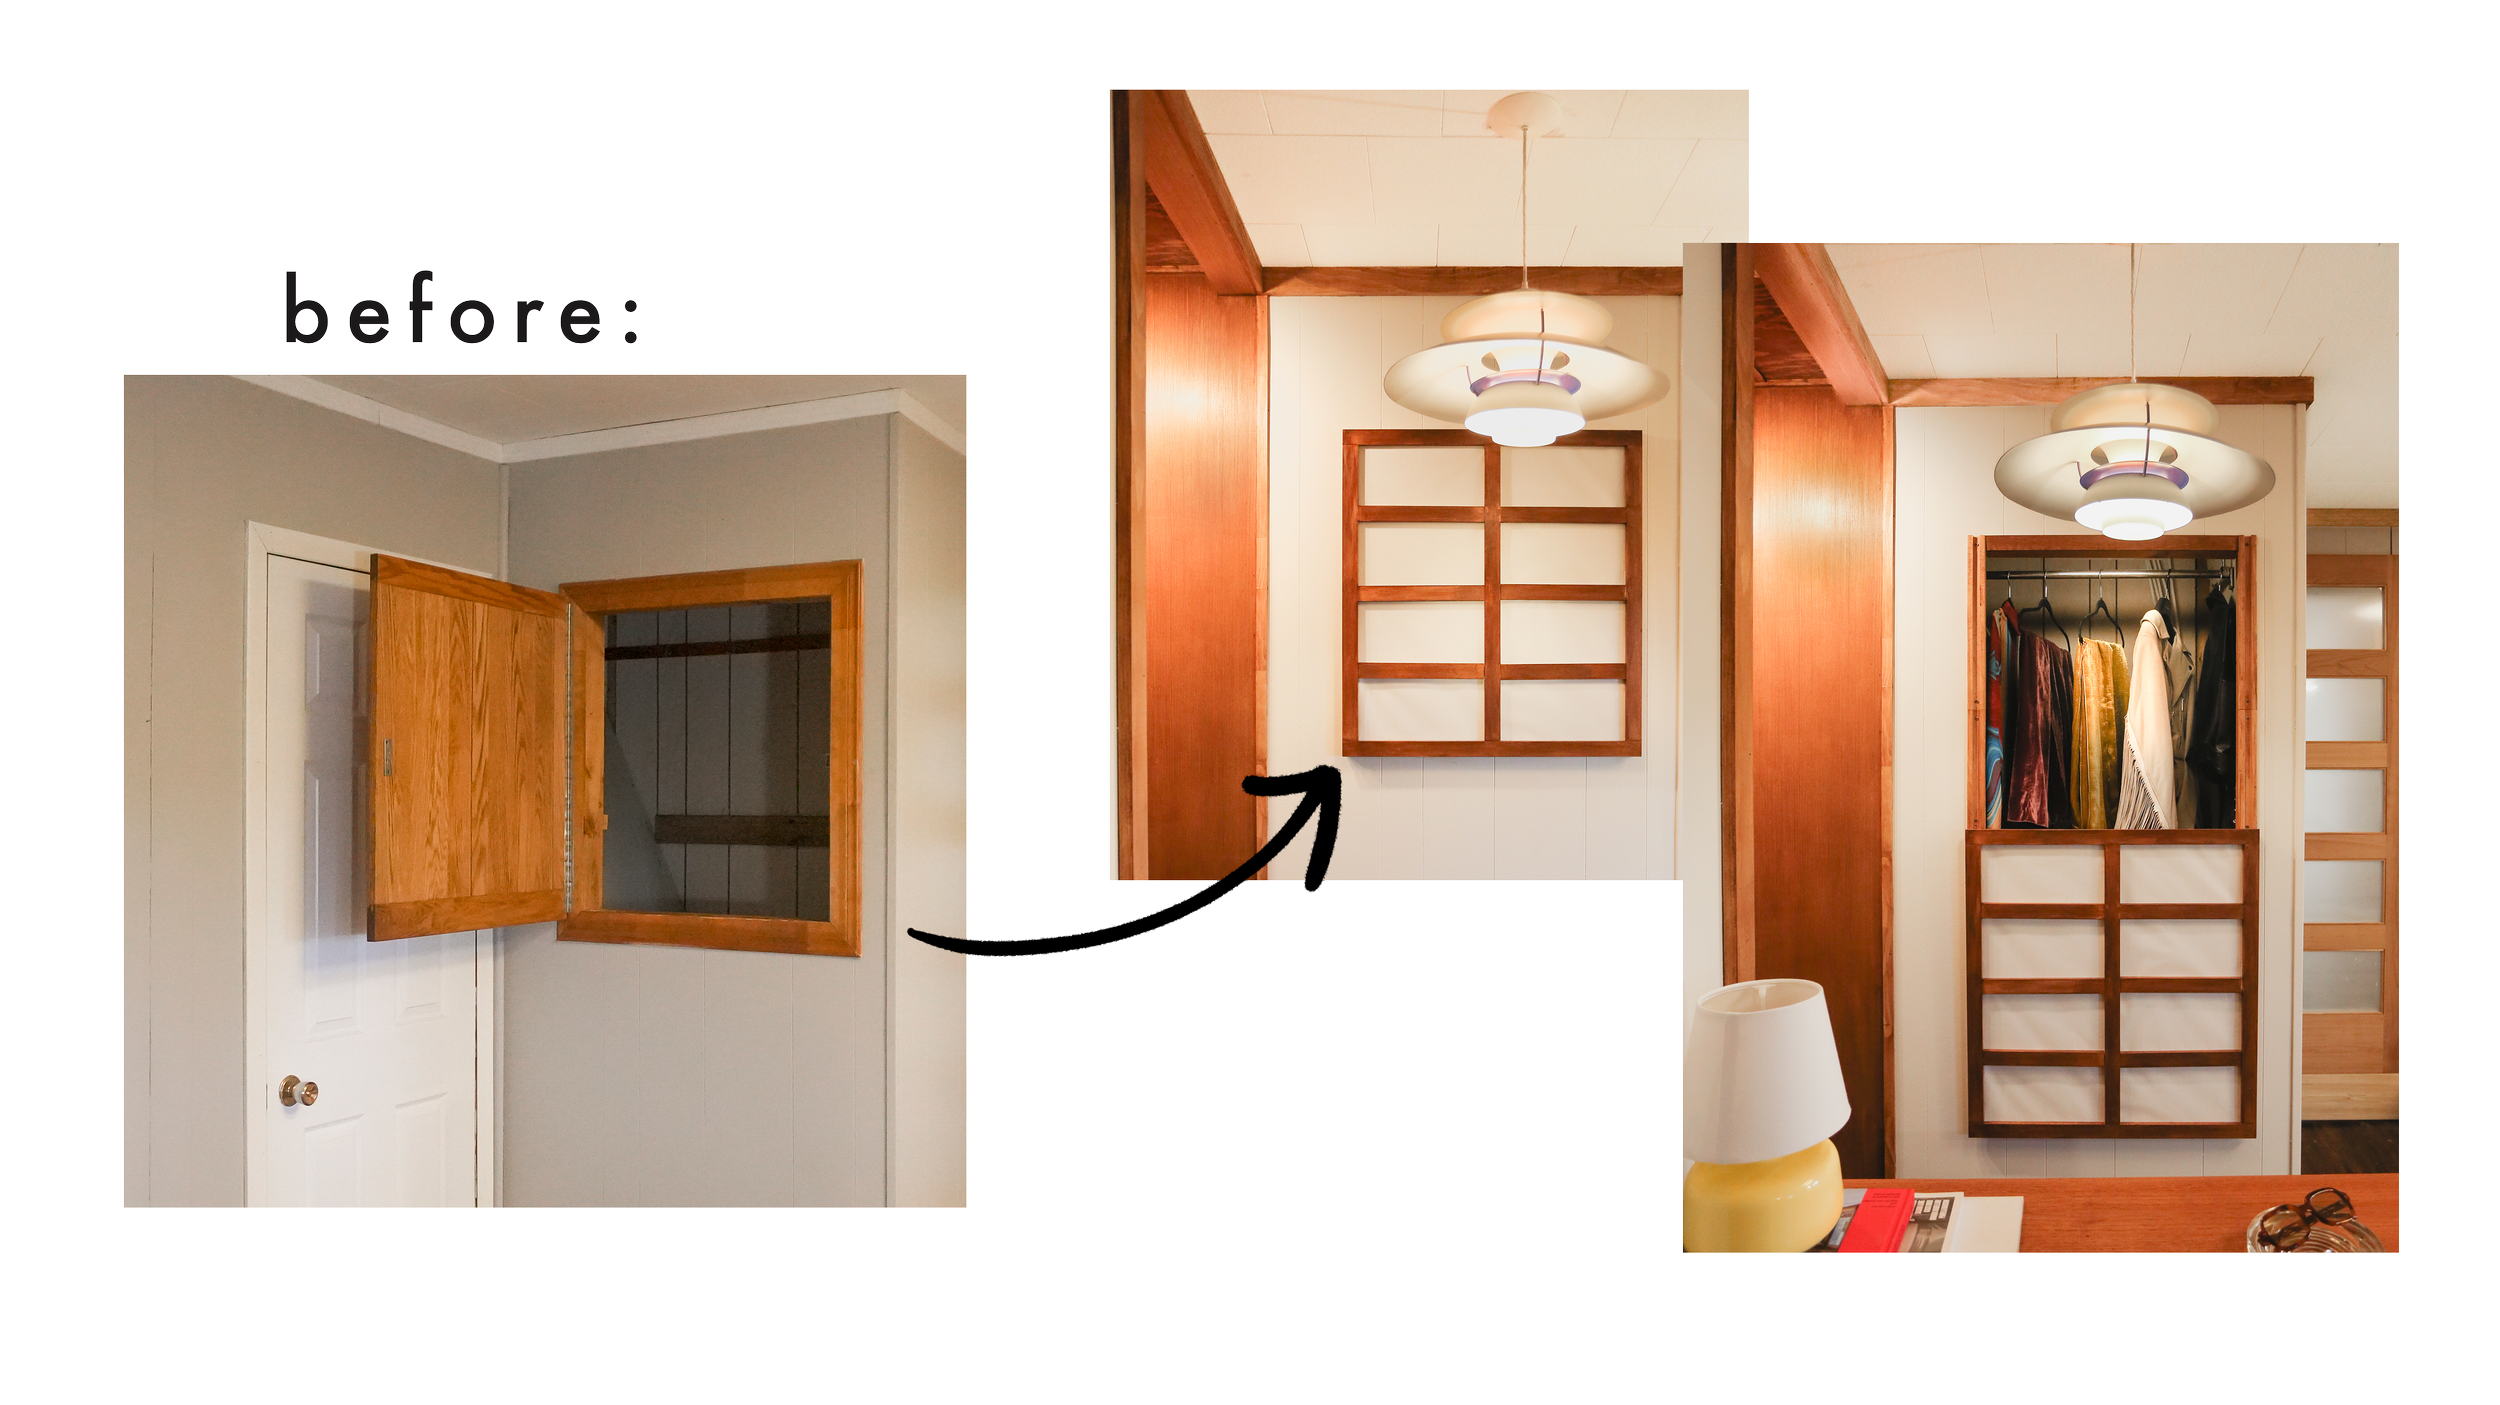
Let's start with addressing the problems at hand. Tucked away in my bedroom, my clothing closet is a space that had caused me endless frustration. Despite numerous attempts to organize it, the closet remained a chaotic mess of intersecting rails and inaccessible shelves. Not to mention, there was a completely usless empty miniature door in the wall beside the closet, that seemed like a waste of perfectly good space!


Not only is the space small and impractical, but after emptying out the closet I found that the walls were covered with holes, chips, and bends, making them unsuitable for a simple patch-up job. It quickly became evident that a more drastic solution was required: a complete overhaul of the closet's infrastructure.


Inspired by the idea of a true walk-in closet experience, I decided to remove the door and some of the wall around it to create a more open and accessible layout. This involved tearing down old paneling, reconfiguring the walls, and optimizing the space for both storage and functionality.
Without a door, I needed something to designate the space to make the closet its own section in the room. After a lot of Facebook marketplace searches, I finally stumbled on a vintage teak cabinet with a finished back—a rare gem that perfectly suited my needs, not having to be place up against a wall! Perfect serving as both a room divider and additional storage space.

To make the cabinet seem almost built in, I trimmed and stained everything to a beautiful teak shade that really emulated the 70s aesthetic that I have been doing throughout the house.
Now, let's tackle that little empty door. To really make the most of the space, I decided to go with ceiling-suspended clothing rail brackets. They're a genius way to add more storage without making it hard to reach stuff. At first, I thought about putting in some regular shelves, but the space was too deep, and it just wouldn't work out well. So, I opted for the hanging rail, and let me tell you, it was a total game-changer. Now, organizing and grabbing stuff is a breeze.
To cover up the clutter, I DIYed a mini sliding japandi style door in place of the old outdated wood door that was there before.
Once the foundation was all done, it was finally time for some final touches! I thrifted some vintage finds, like a set of 1960s-era spotlight fixtures, to some books & ashtrays.
Through these finds, innovative design choices, and a healthy dose of DIY spirit, I was able to turn a problem space into a stylish sanctuary that reflects my personal aesthetic and organizational needs.


Read Next


