DIY Mid-century Scandinavian Lights
I’ve been absolutely obsessed by midcentury modern Scandinavian lights. My absolute faves right now are the PH5 pendant light created by Poul Henningson in 1958 and the Flowerpot Lamp designed by Verner Panton in 1967. I wouldn’t exactly call these lights budget-friendly but on closer look, they kind of look like a bunch of plates and bowls stacked together to create shapes and so I feel like there has to be an easy DIY solution for these lights. So let’s get started!
Items used:
Ikea blanda bowl, Threaded rod, Carbide drill bit, Quikrete, Glossy spray paint, Copper tubing, Pipe cutter, Industrial glue, Paint primer, Plugin light fixture, Hole saw, Glue gun.
FLOWERPOT LAMP
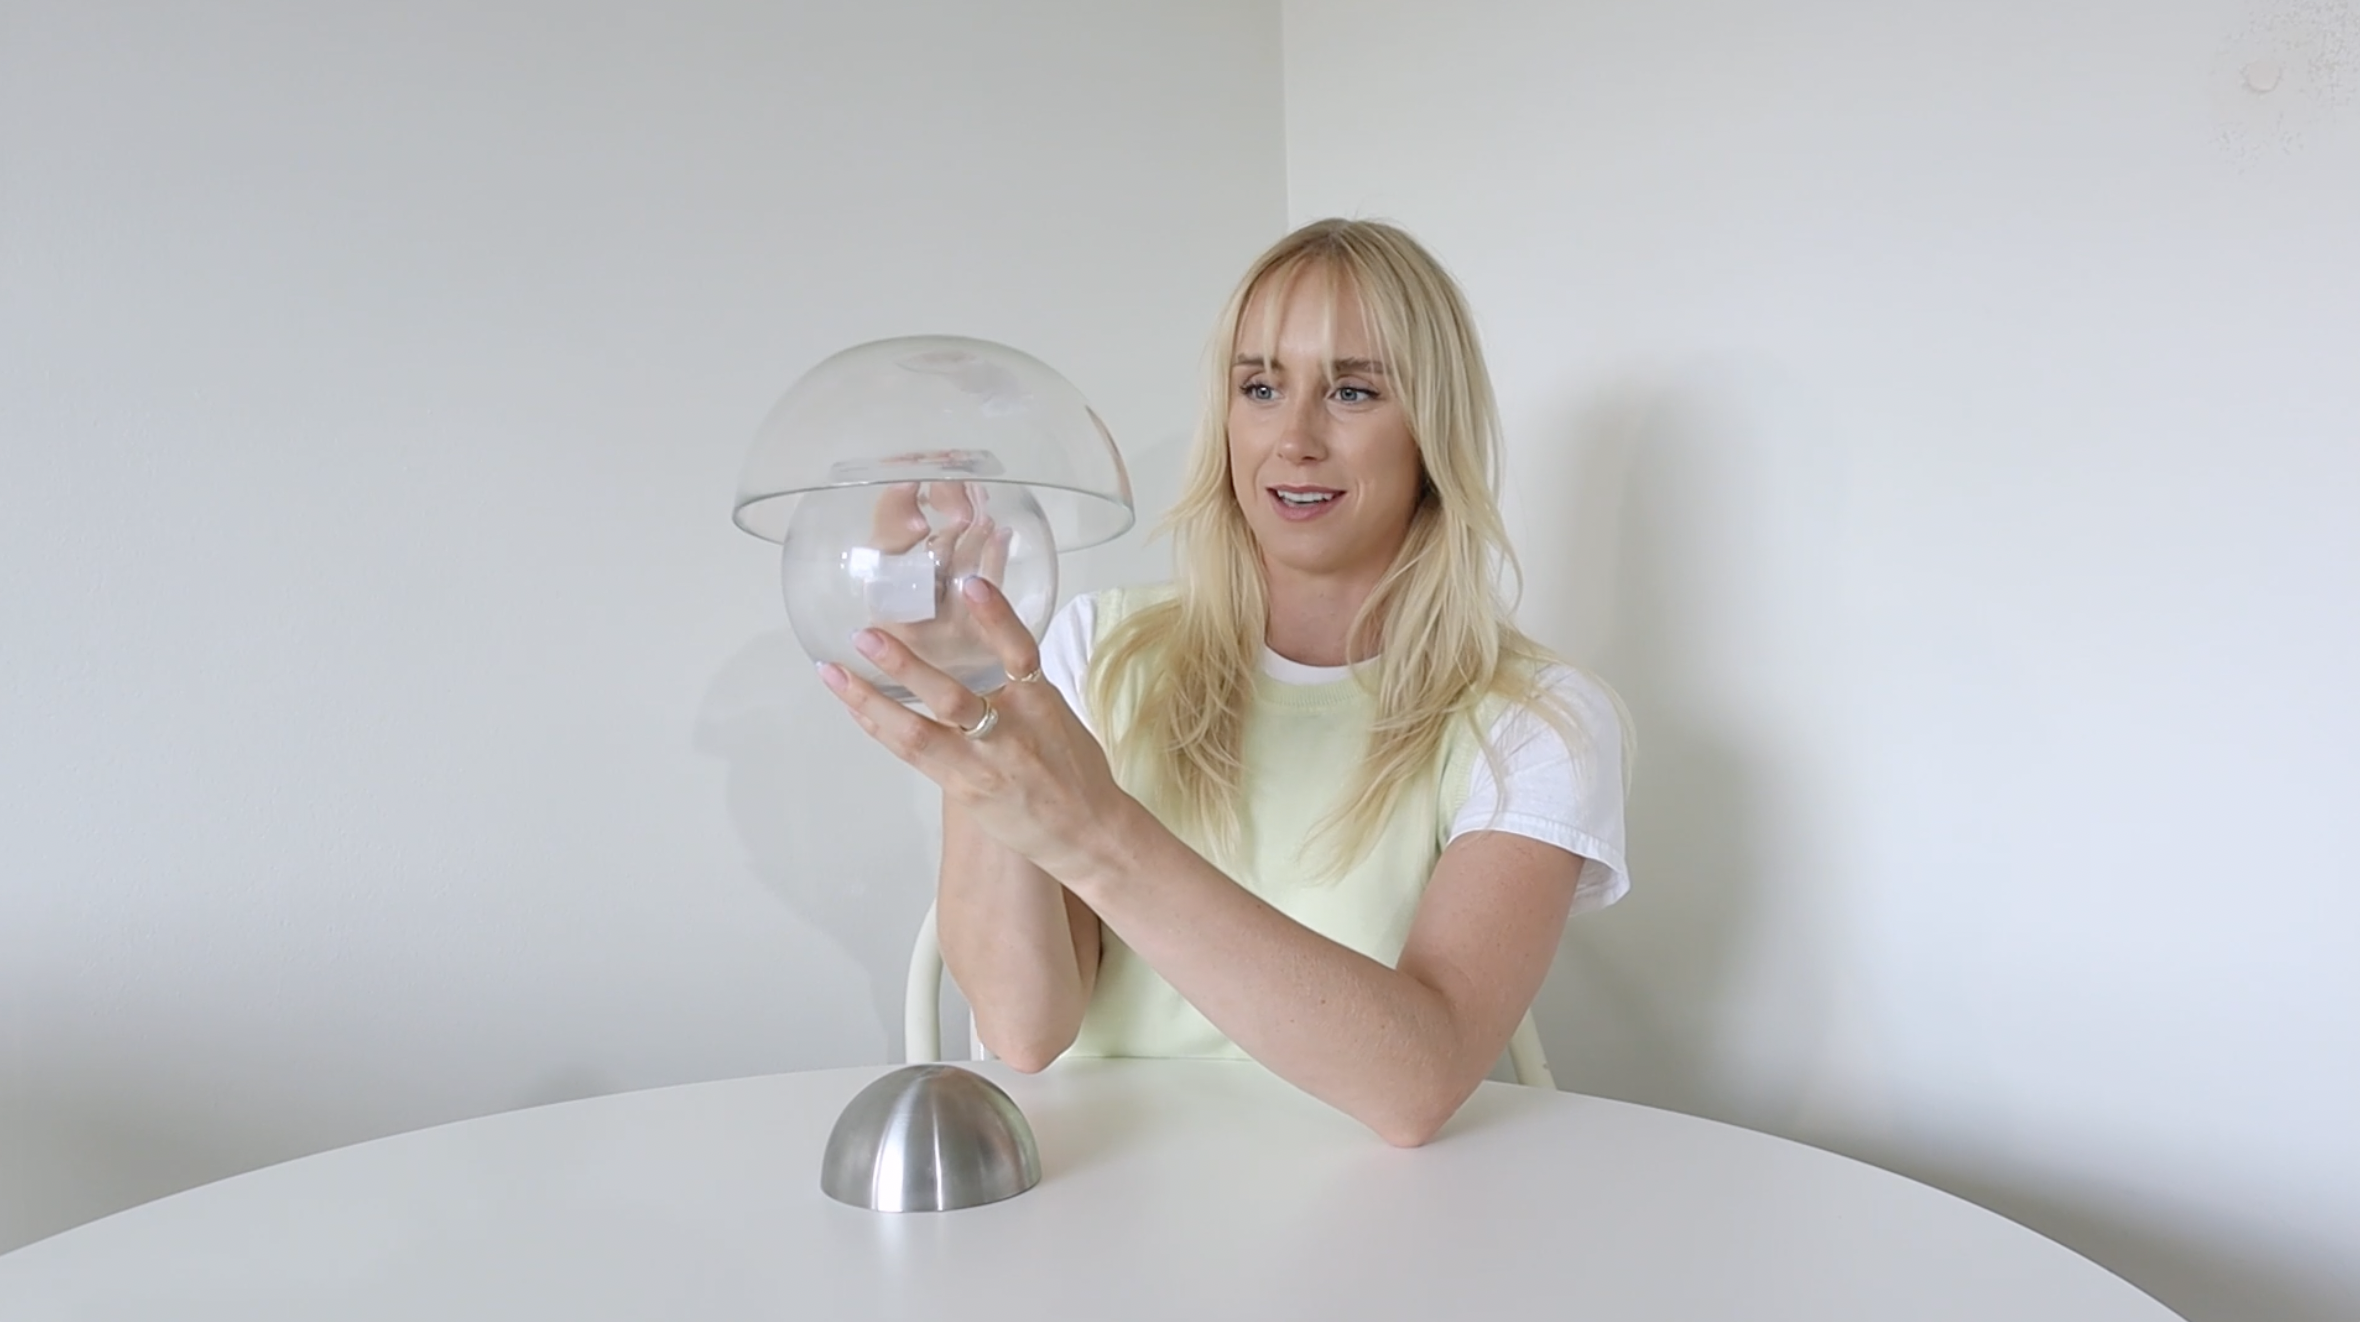
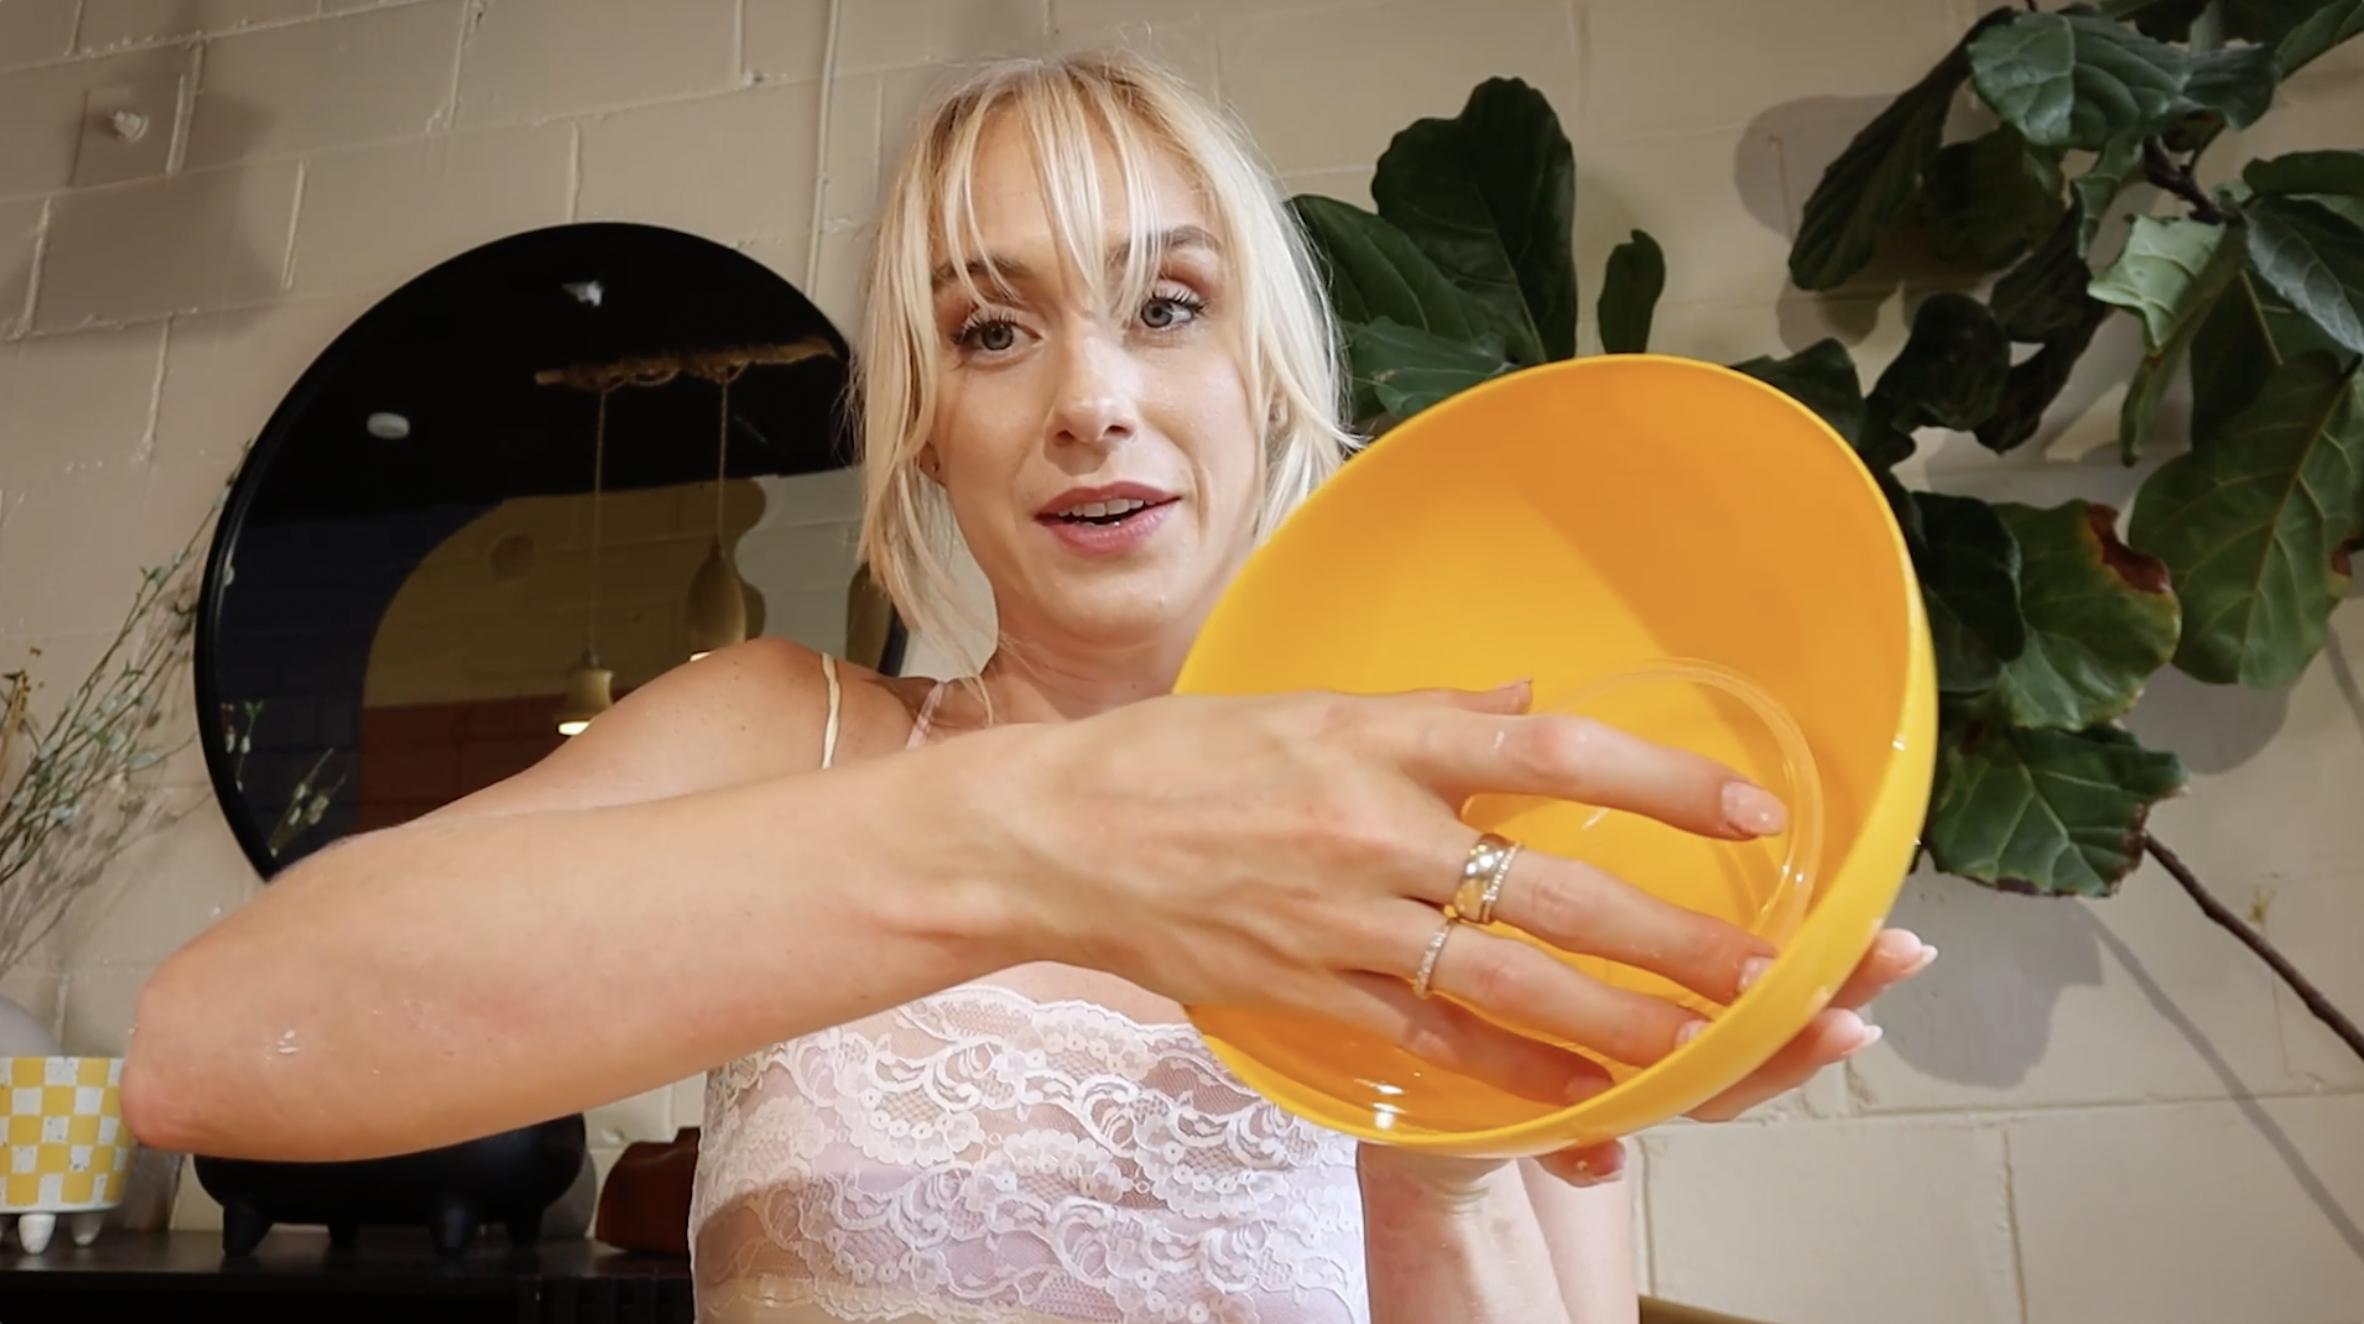
Starting with the flowerpot lamp, I took a trip to Ikea and got some dome-shaped bowls in different sizes to act as the top and the base of the lamp. I also picked up some lamp components from the hardware store because I don’t want to make lamps that just look good, I want them to function too!

STEP #1: CUTTING HOLES FOR WIRING
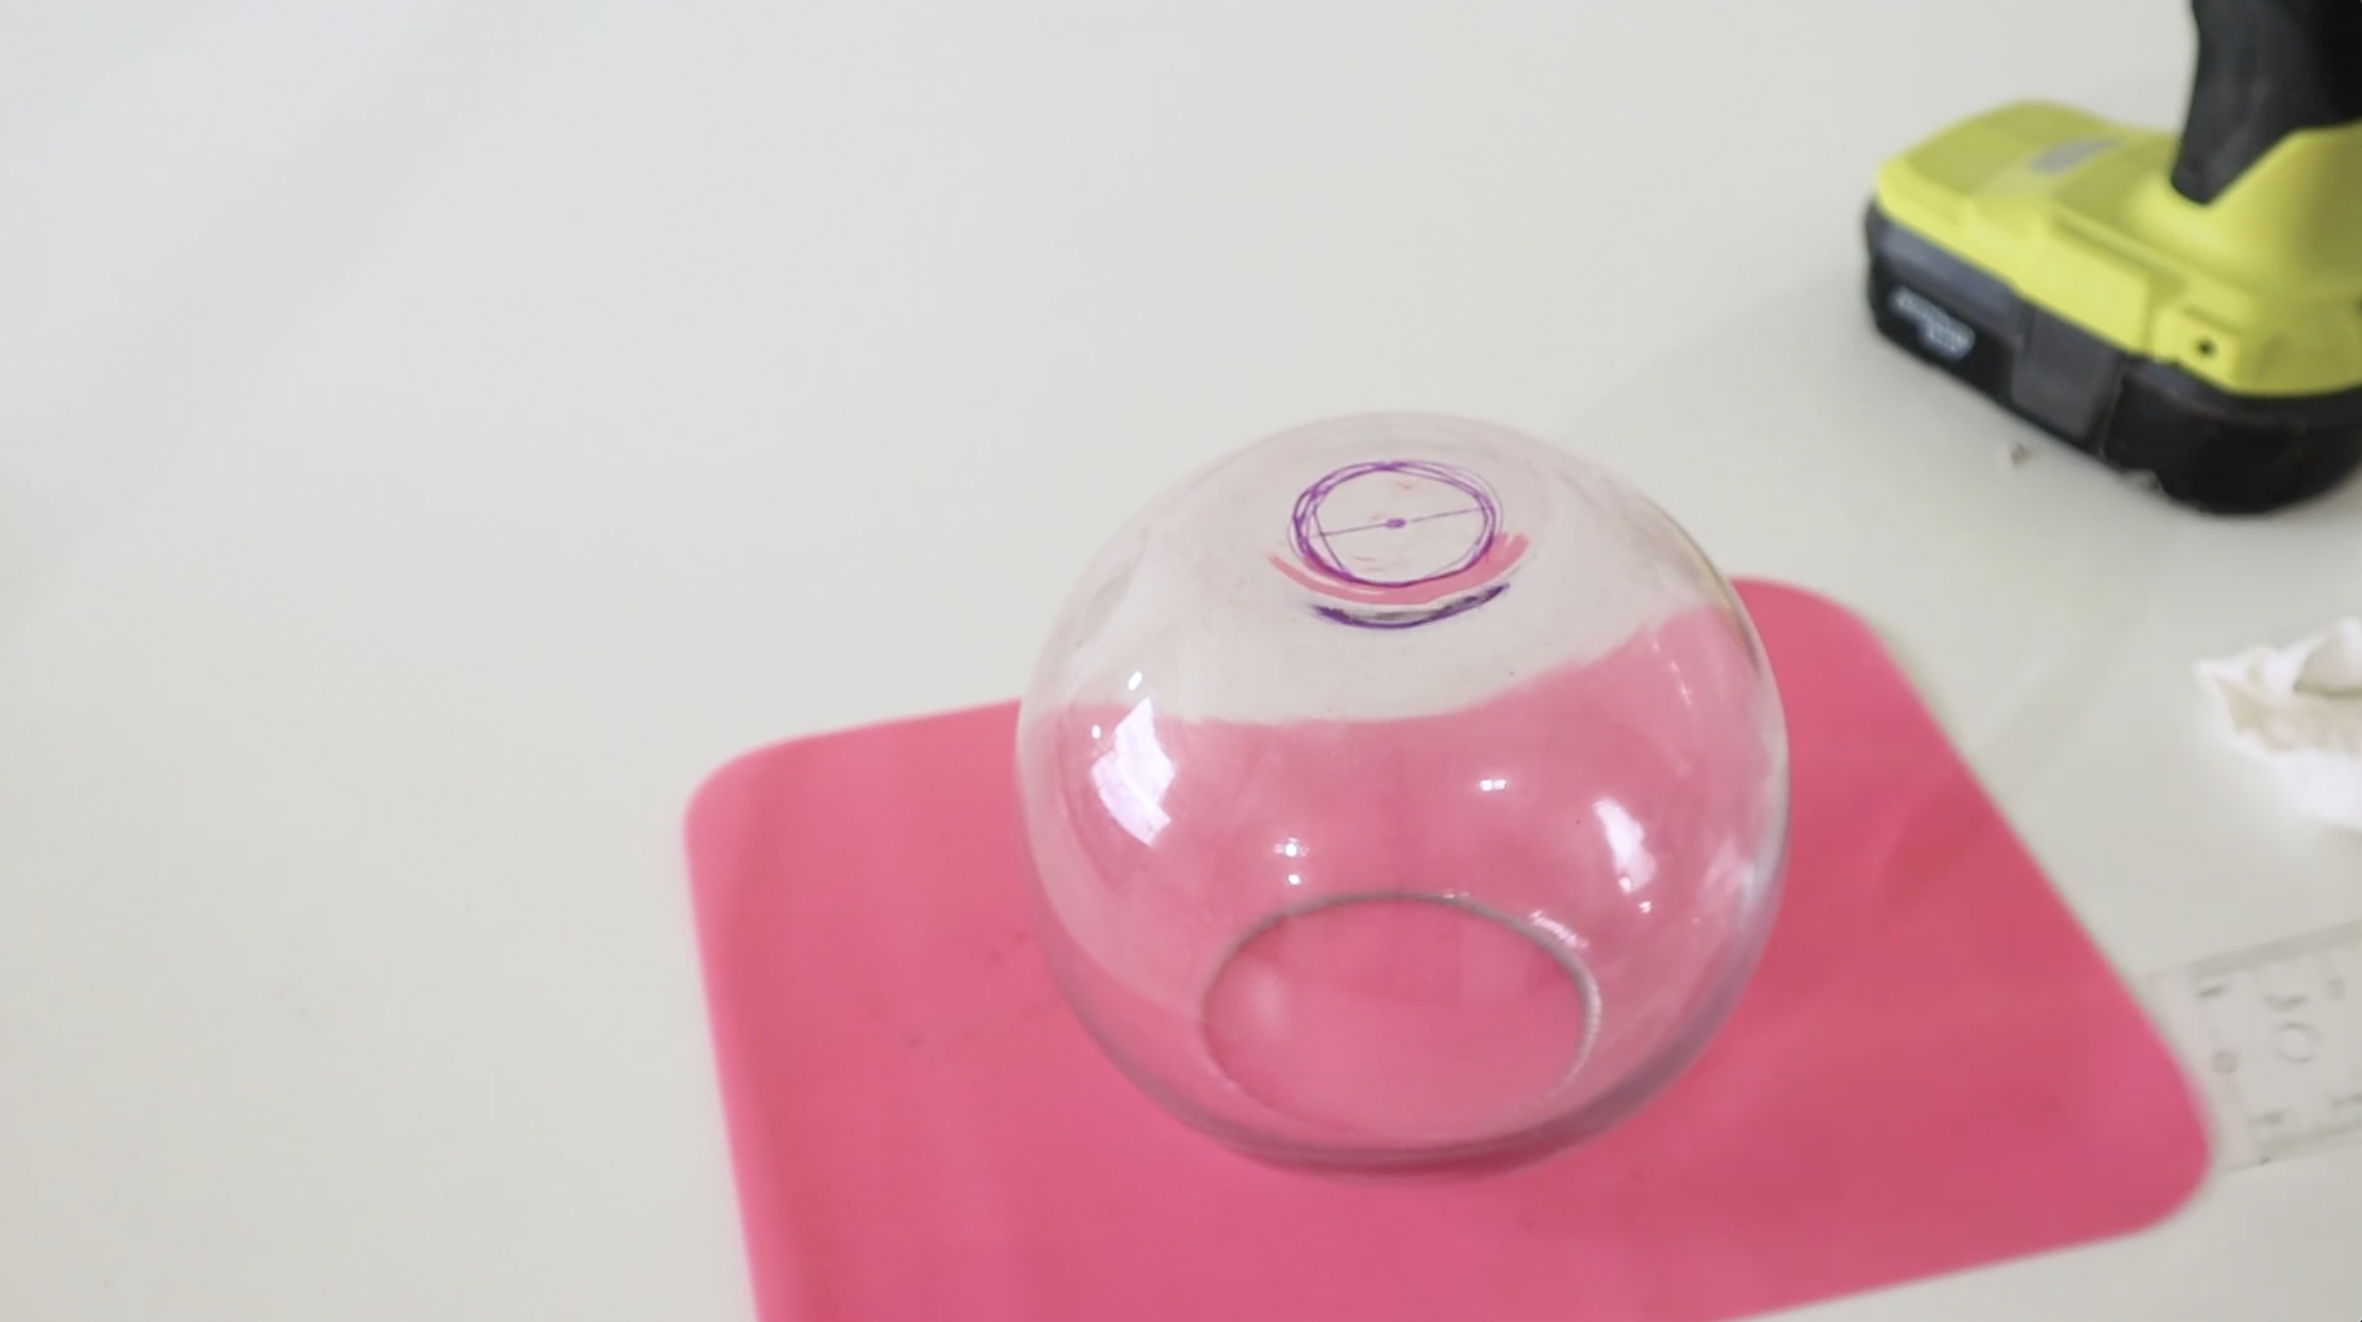
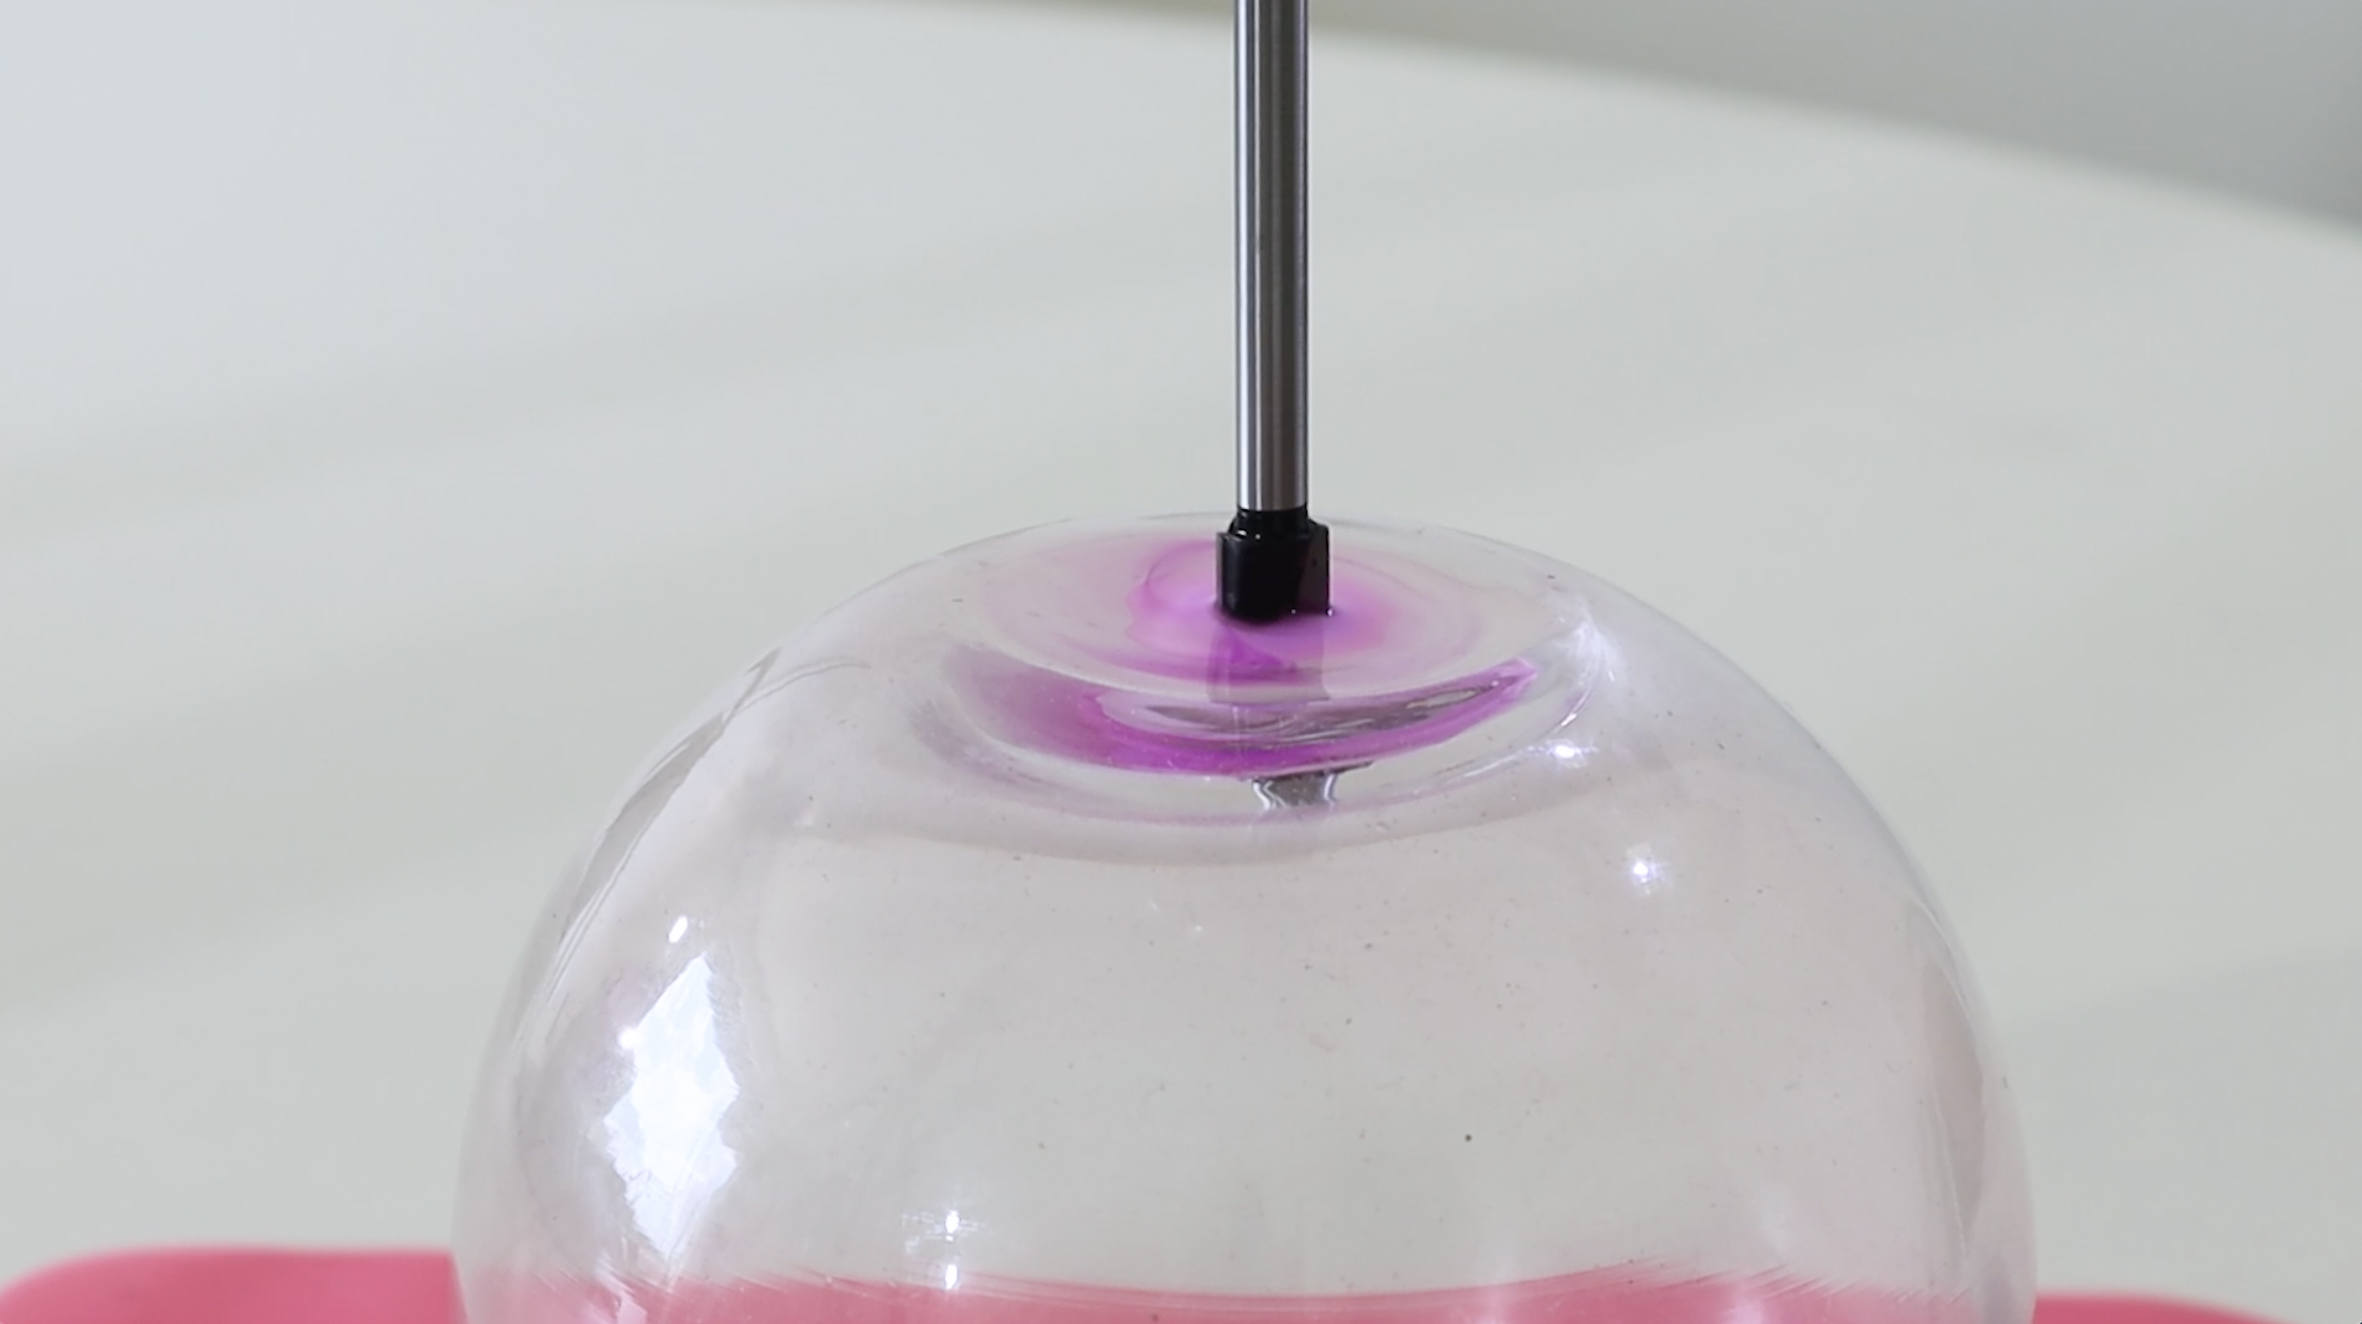
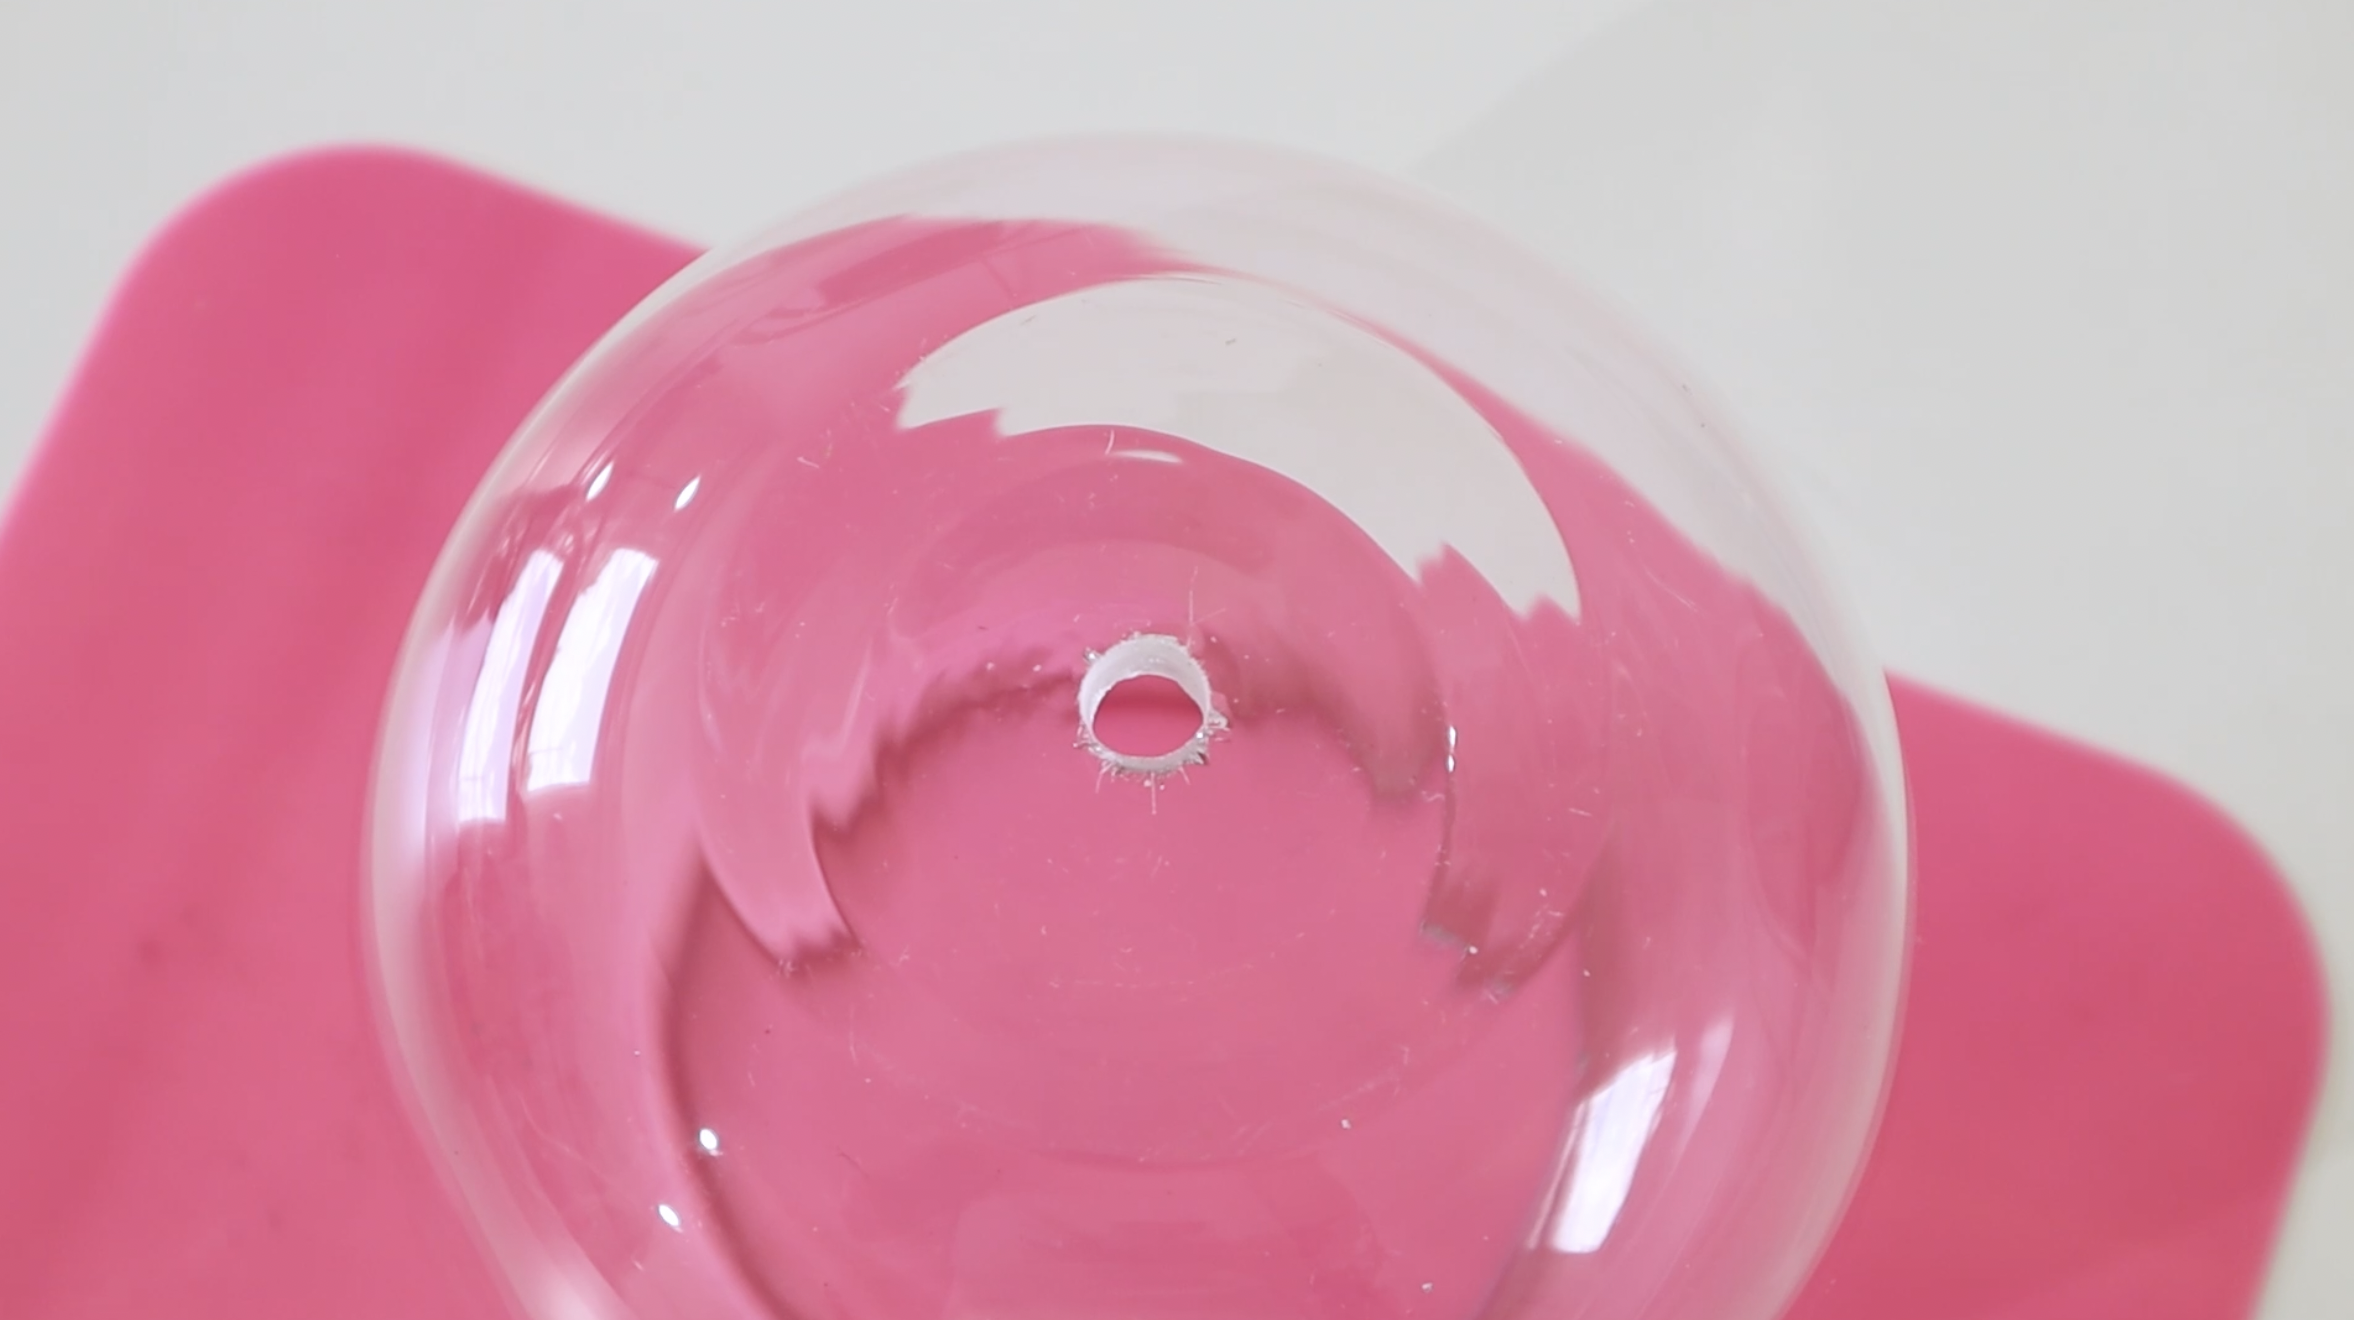
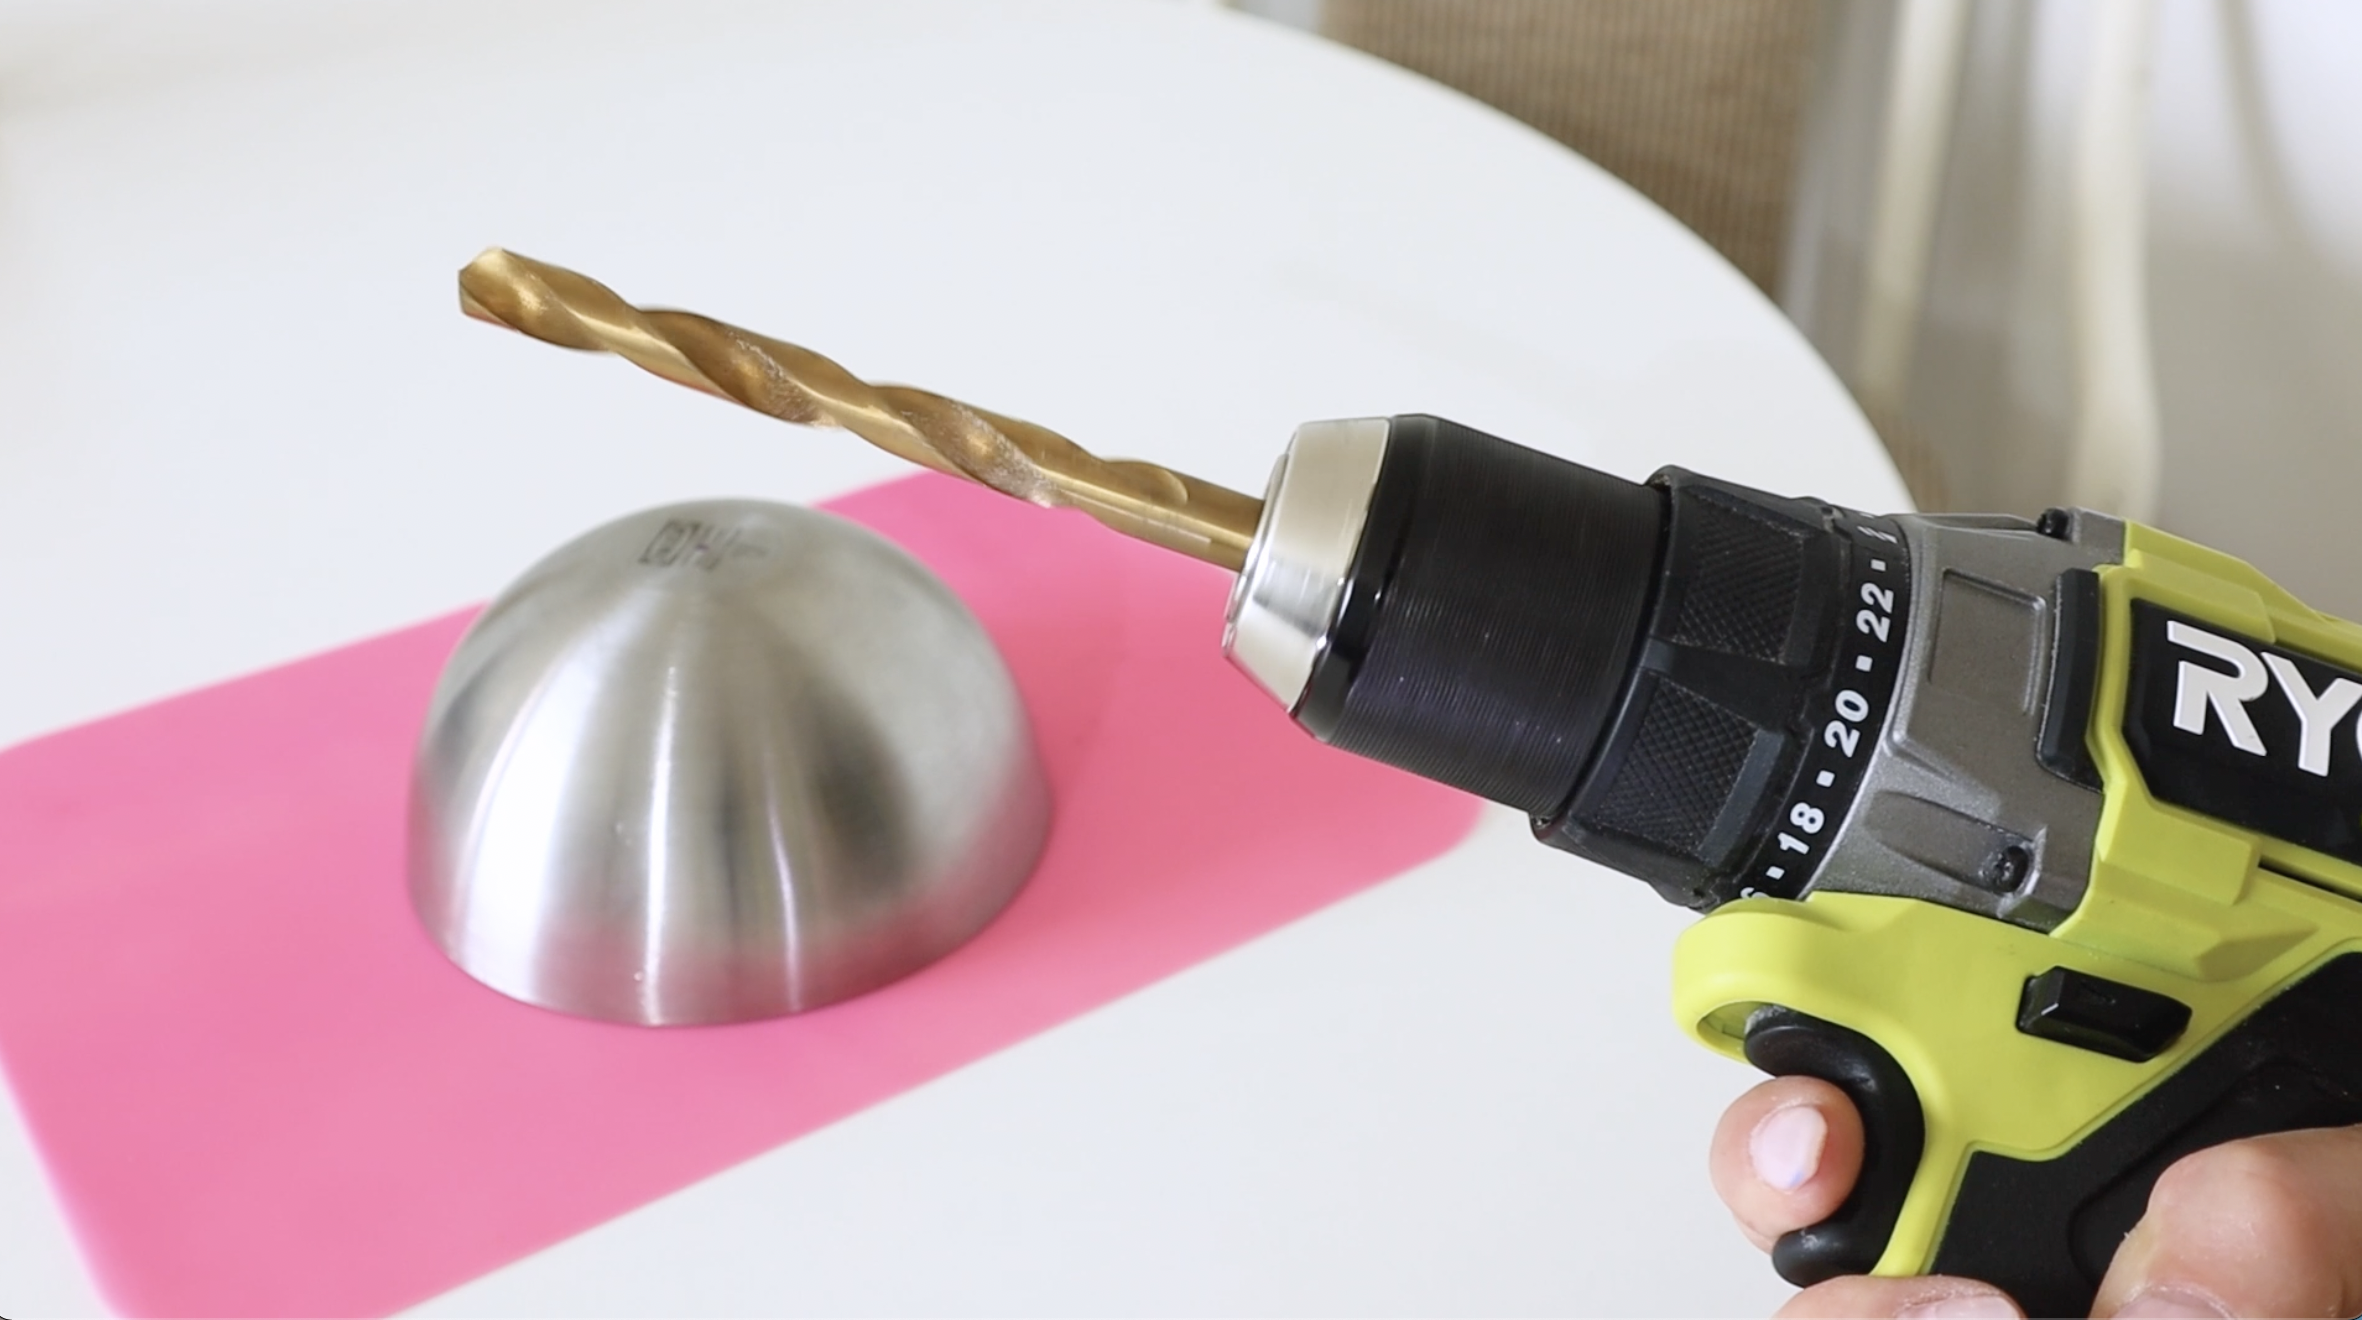
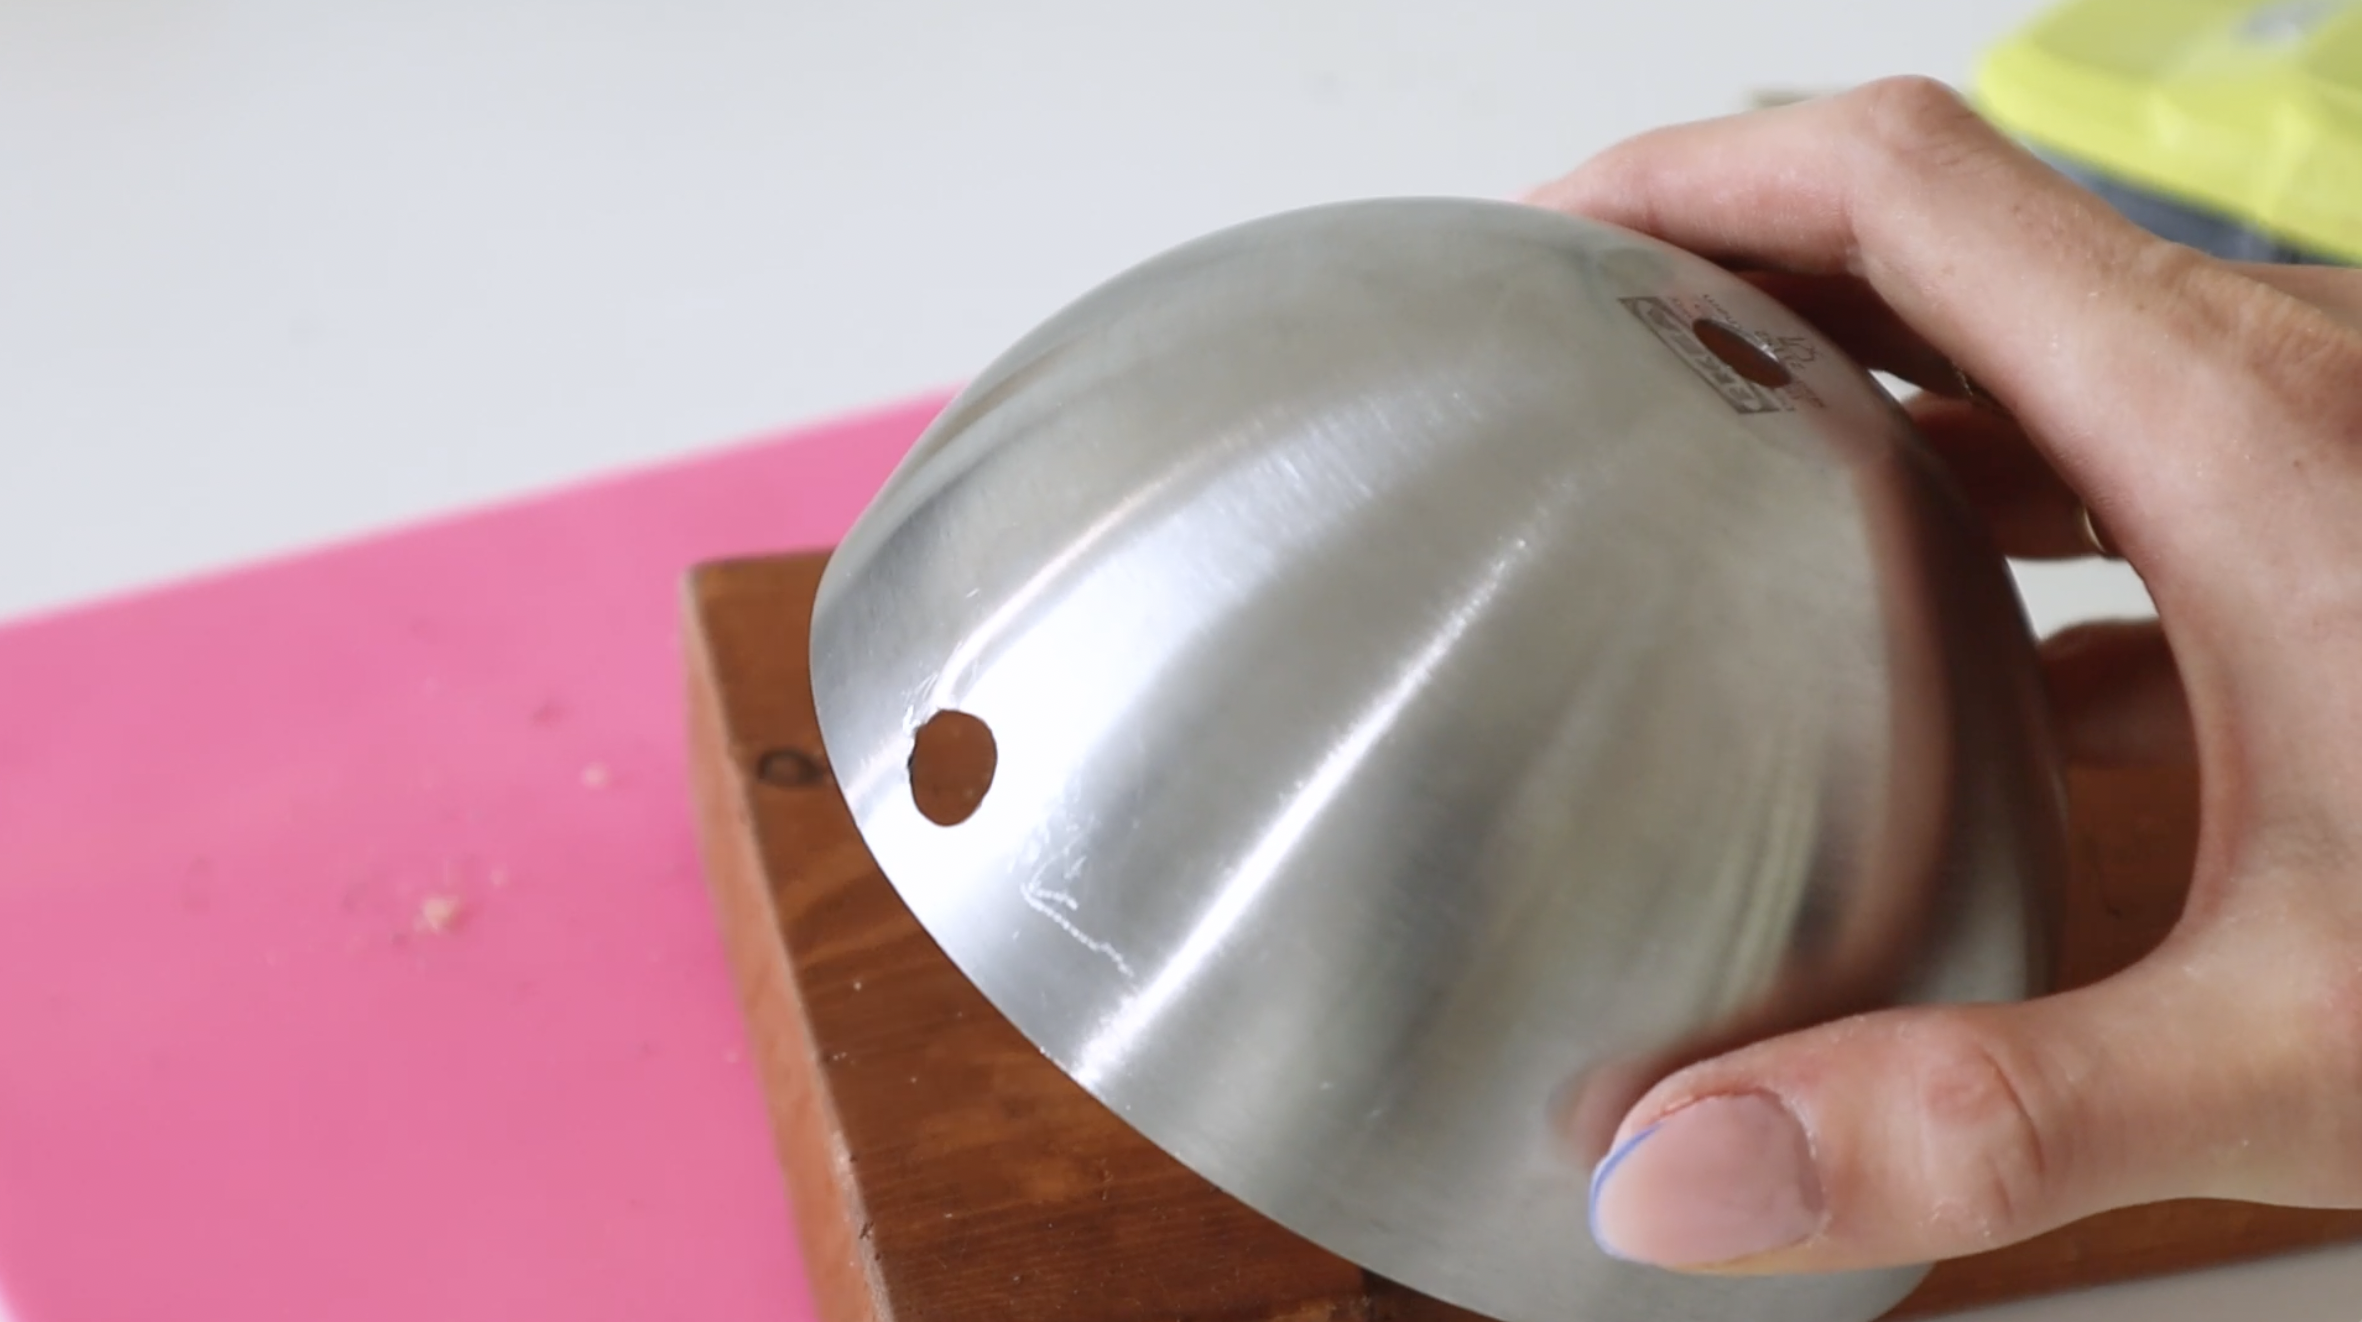
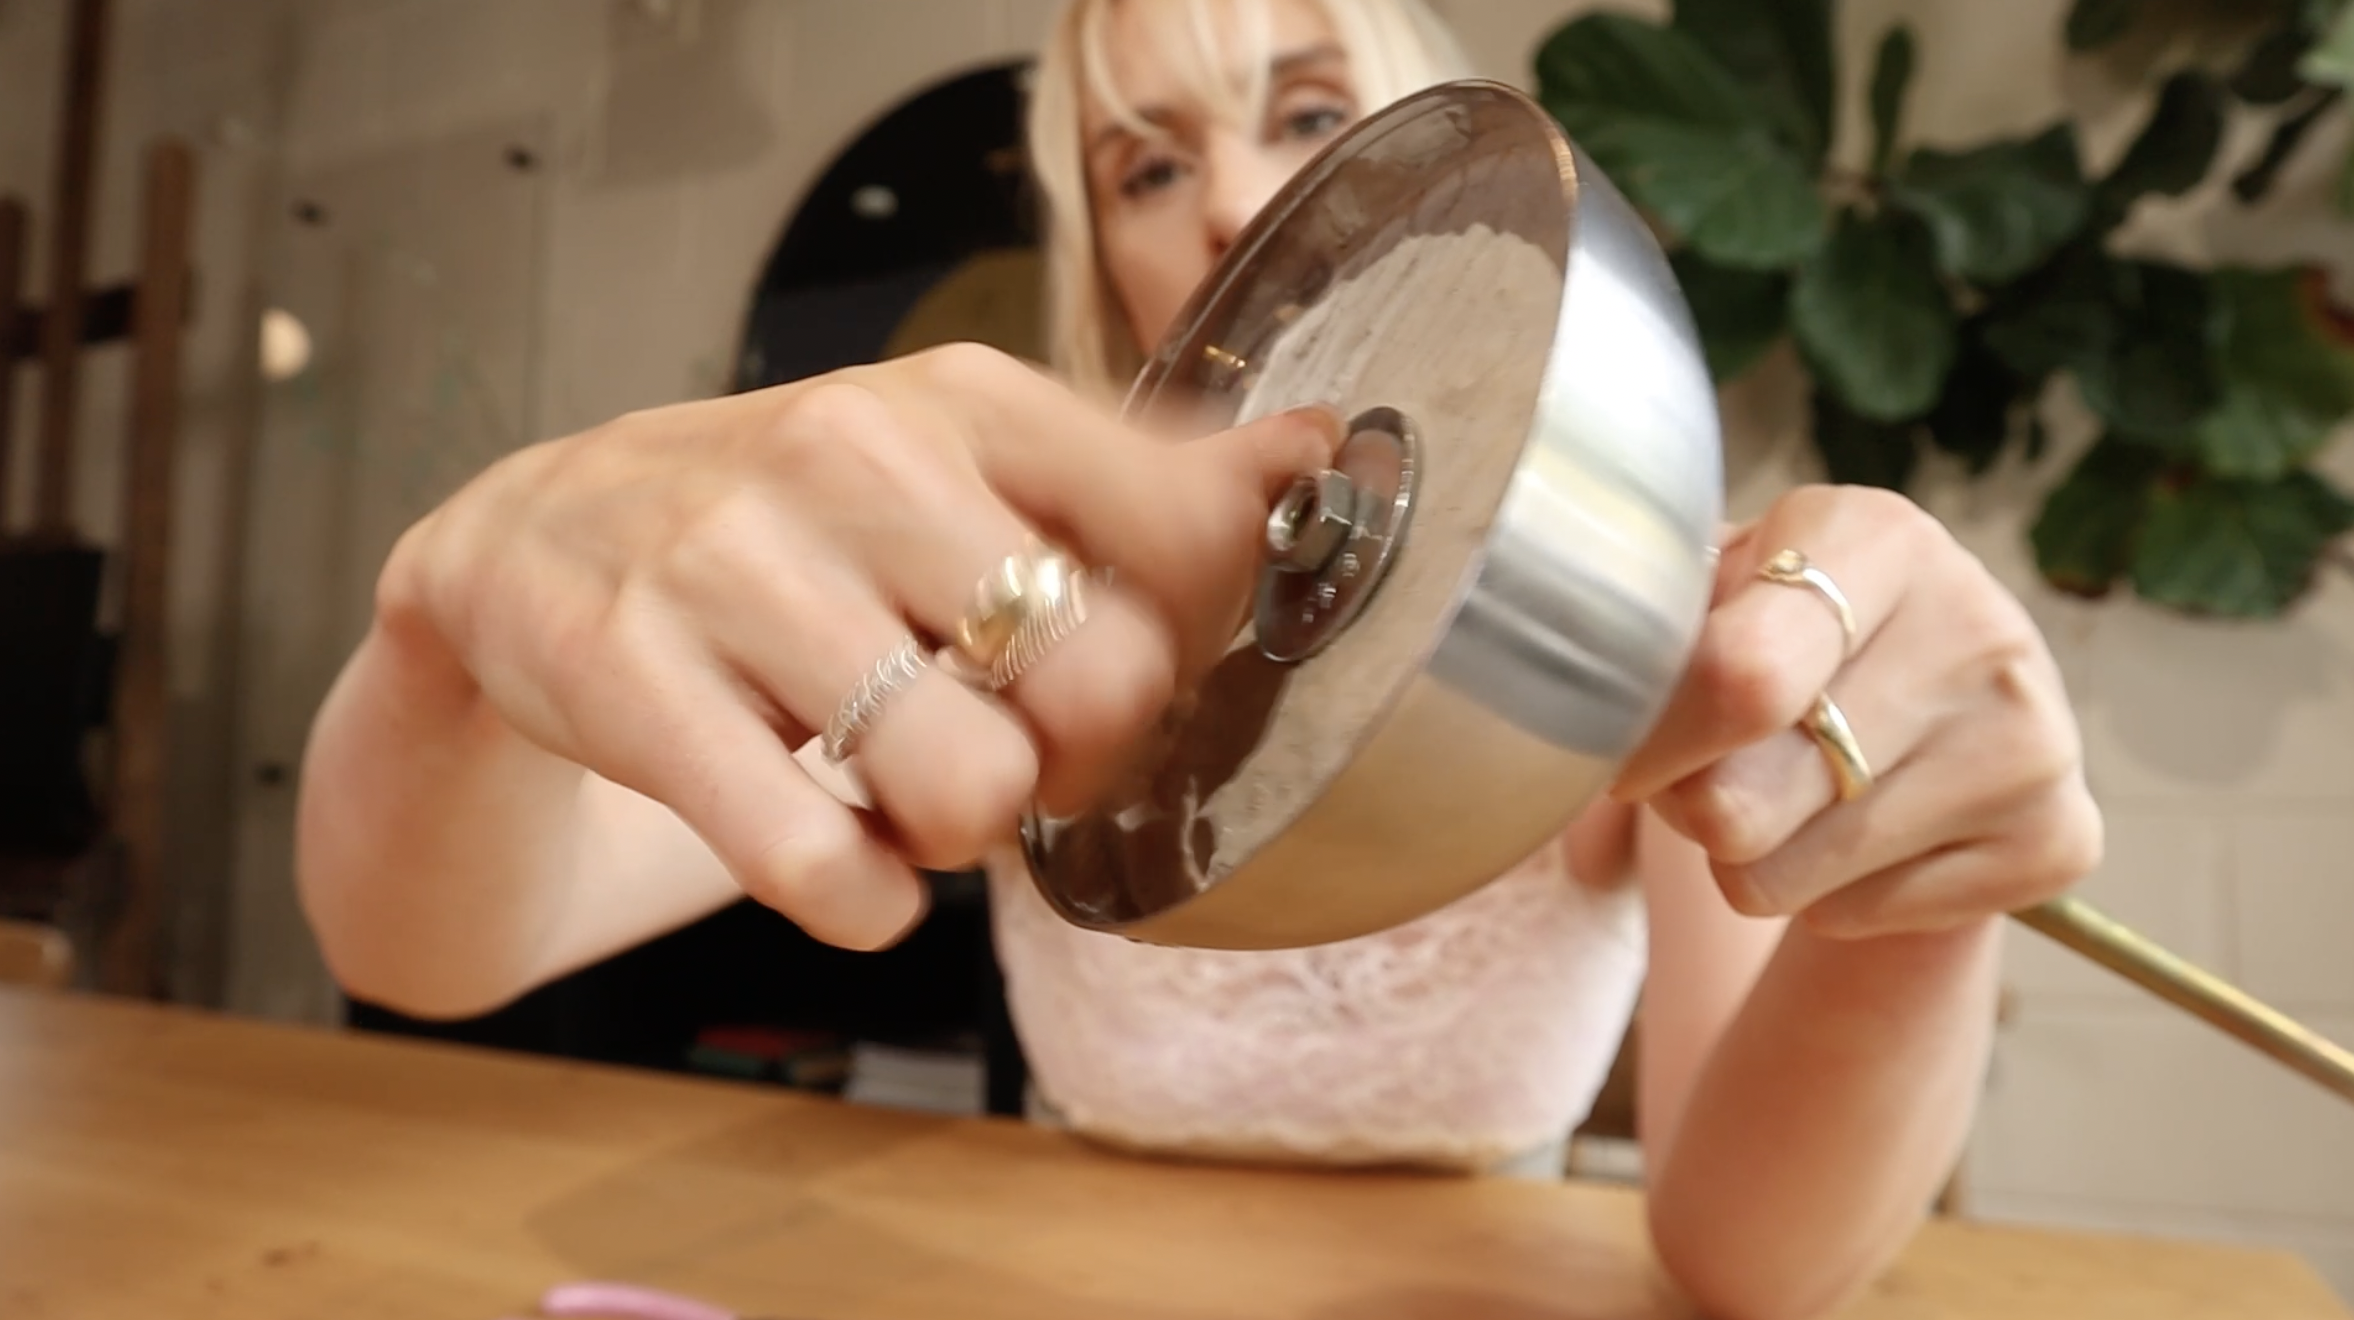
First things first, I need to be able to thread my rod into the bottom of the glass globe and also the aluminum bowl that will be acting as a base for my lamp. To cut through the glass globe safely I used a carbide drill bit and slowly let it chip away at the glass. I held my drill perpendicular to the bowl making sure to drill in the centre of the glass. The drill bit I used is three-eighths of an inch thick, which is the same thickness as my threaded rod. I also poured some water on the bowl to keep the surface cool and to collect the glass dust as the drill bit works its magic.
I encourage you to go really slowly with this step and keep a consistent light pressure on your drill as it slowly grinds away at your glass until you make it all the way through. I did the same process on the bottom of my aluminum bowl using a regular twist bit this time, and I also drilled a small hole on the side of this bowl to help with cable management.
STEP #2 : PREPARING THE BASE
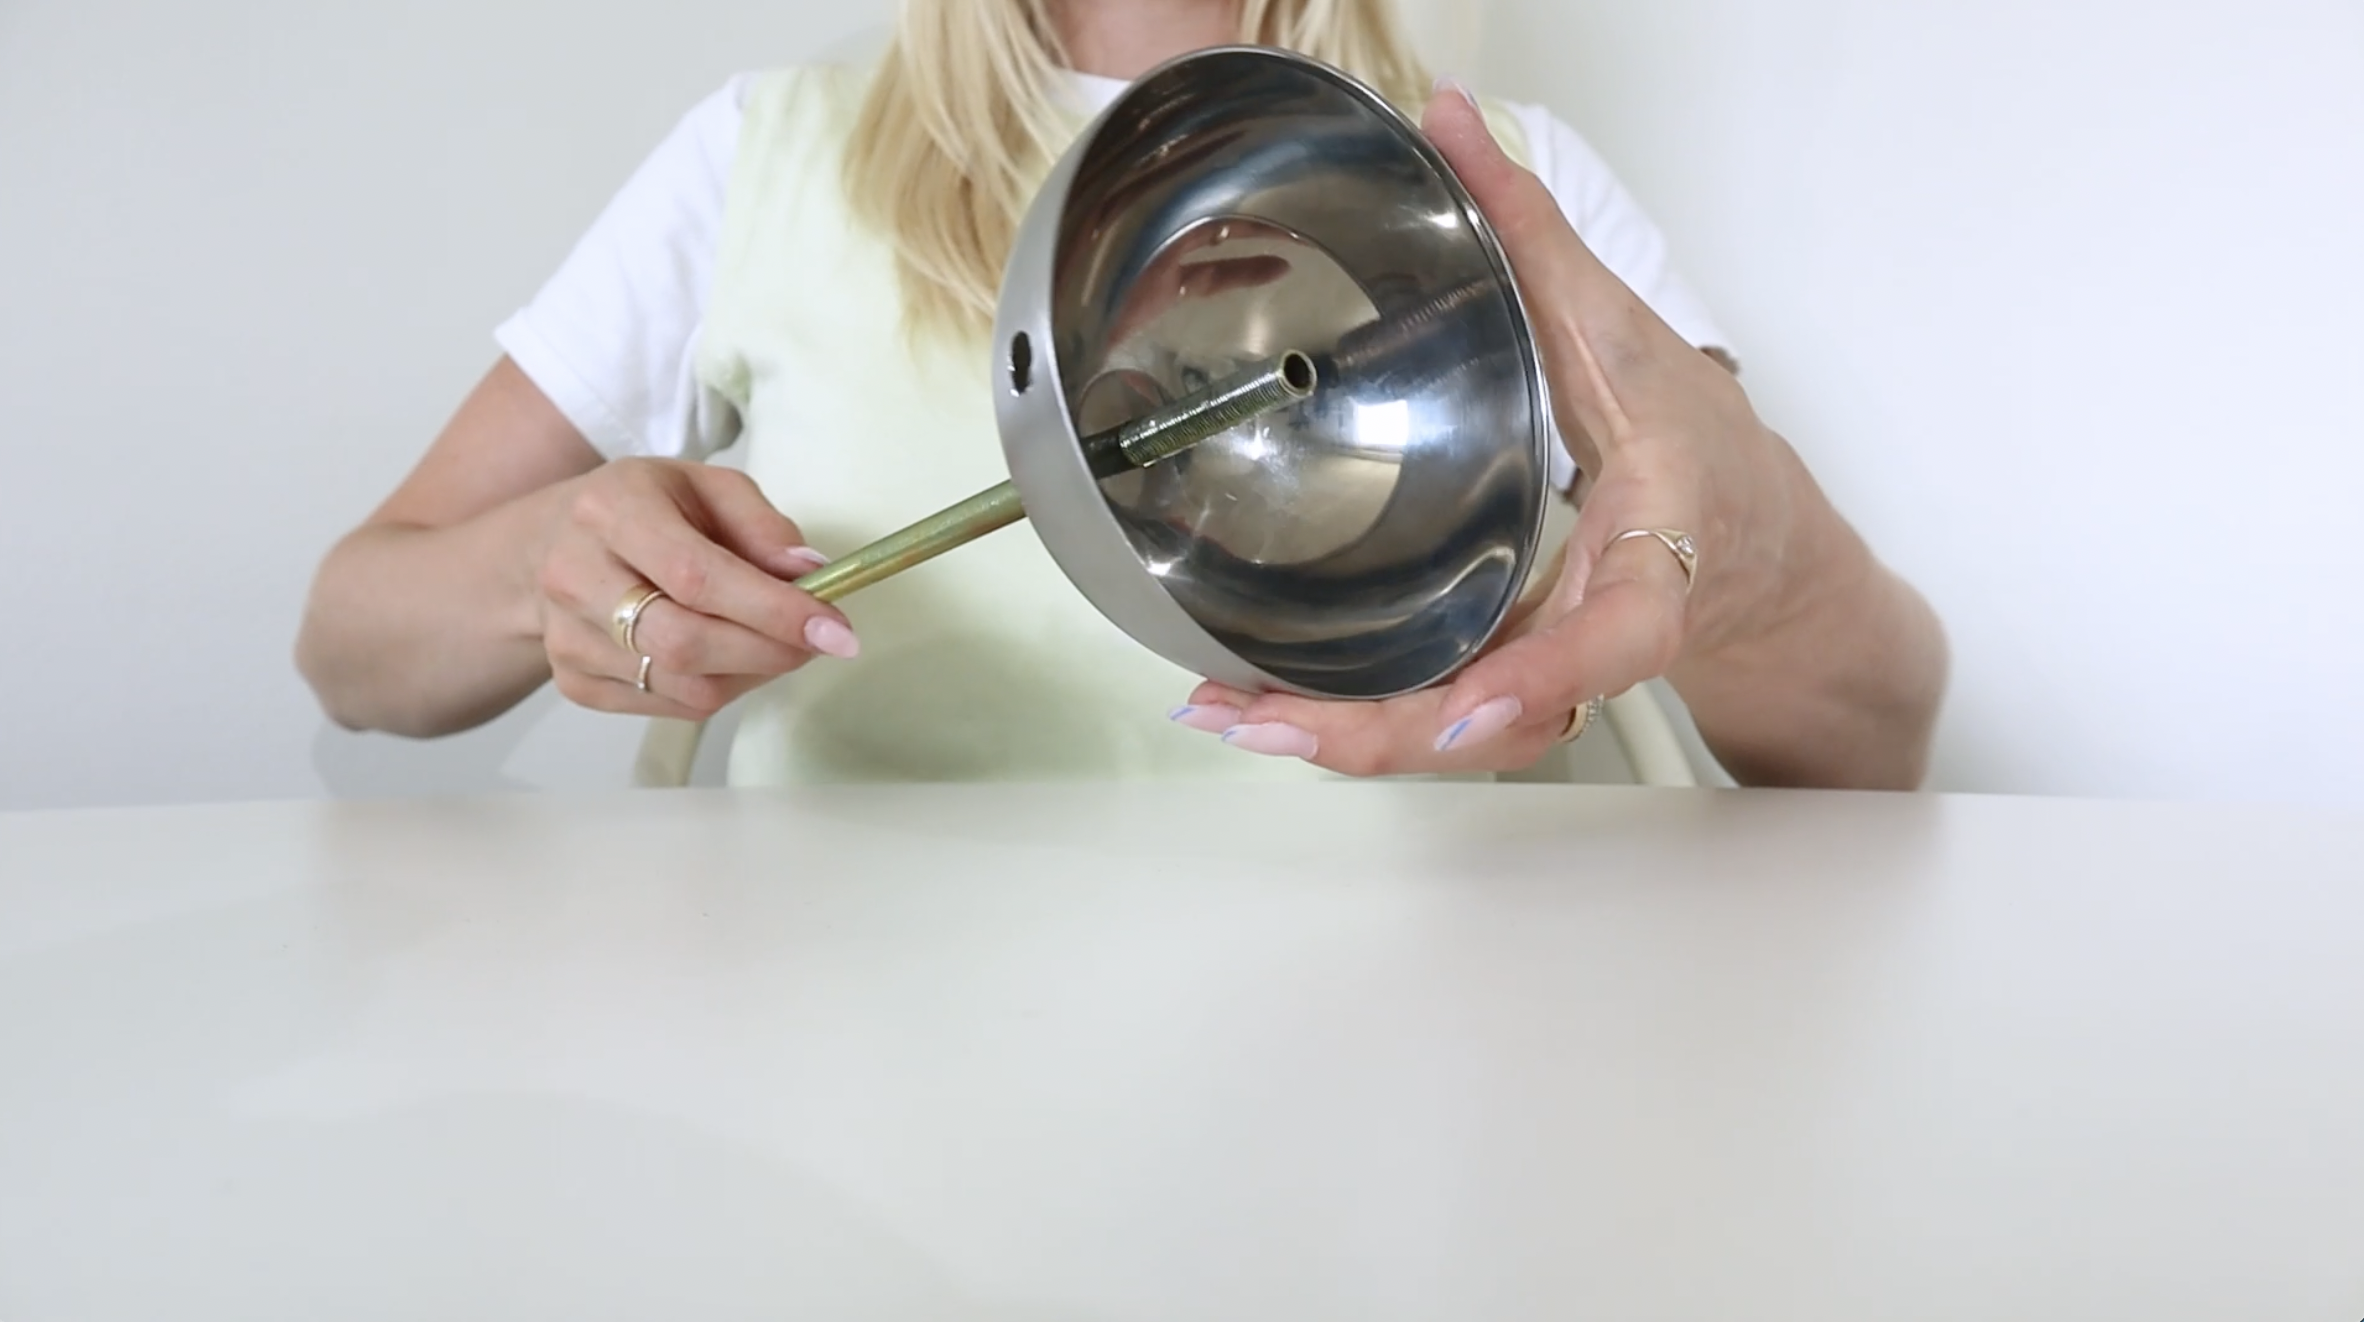
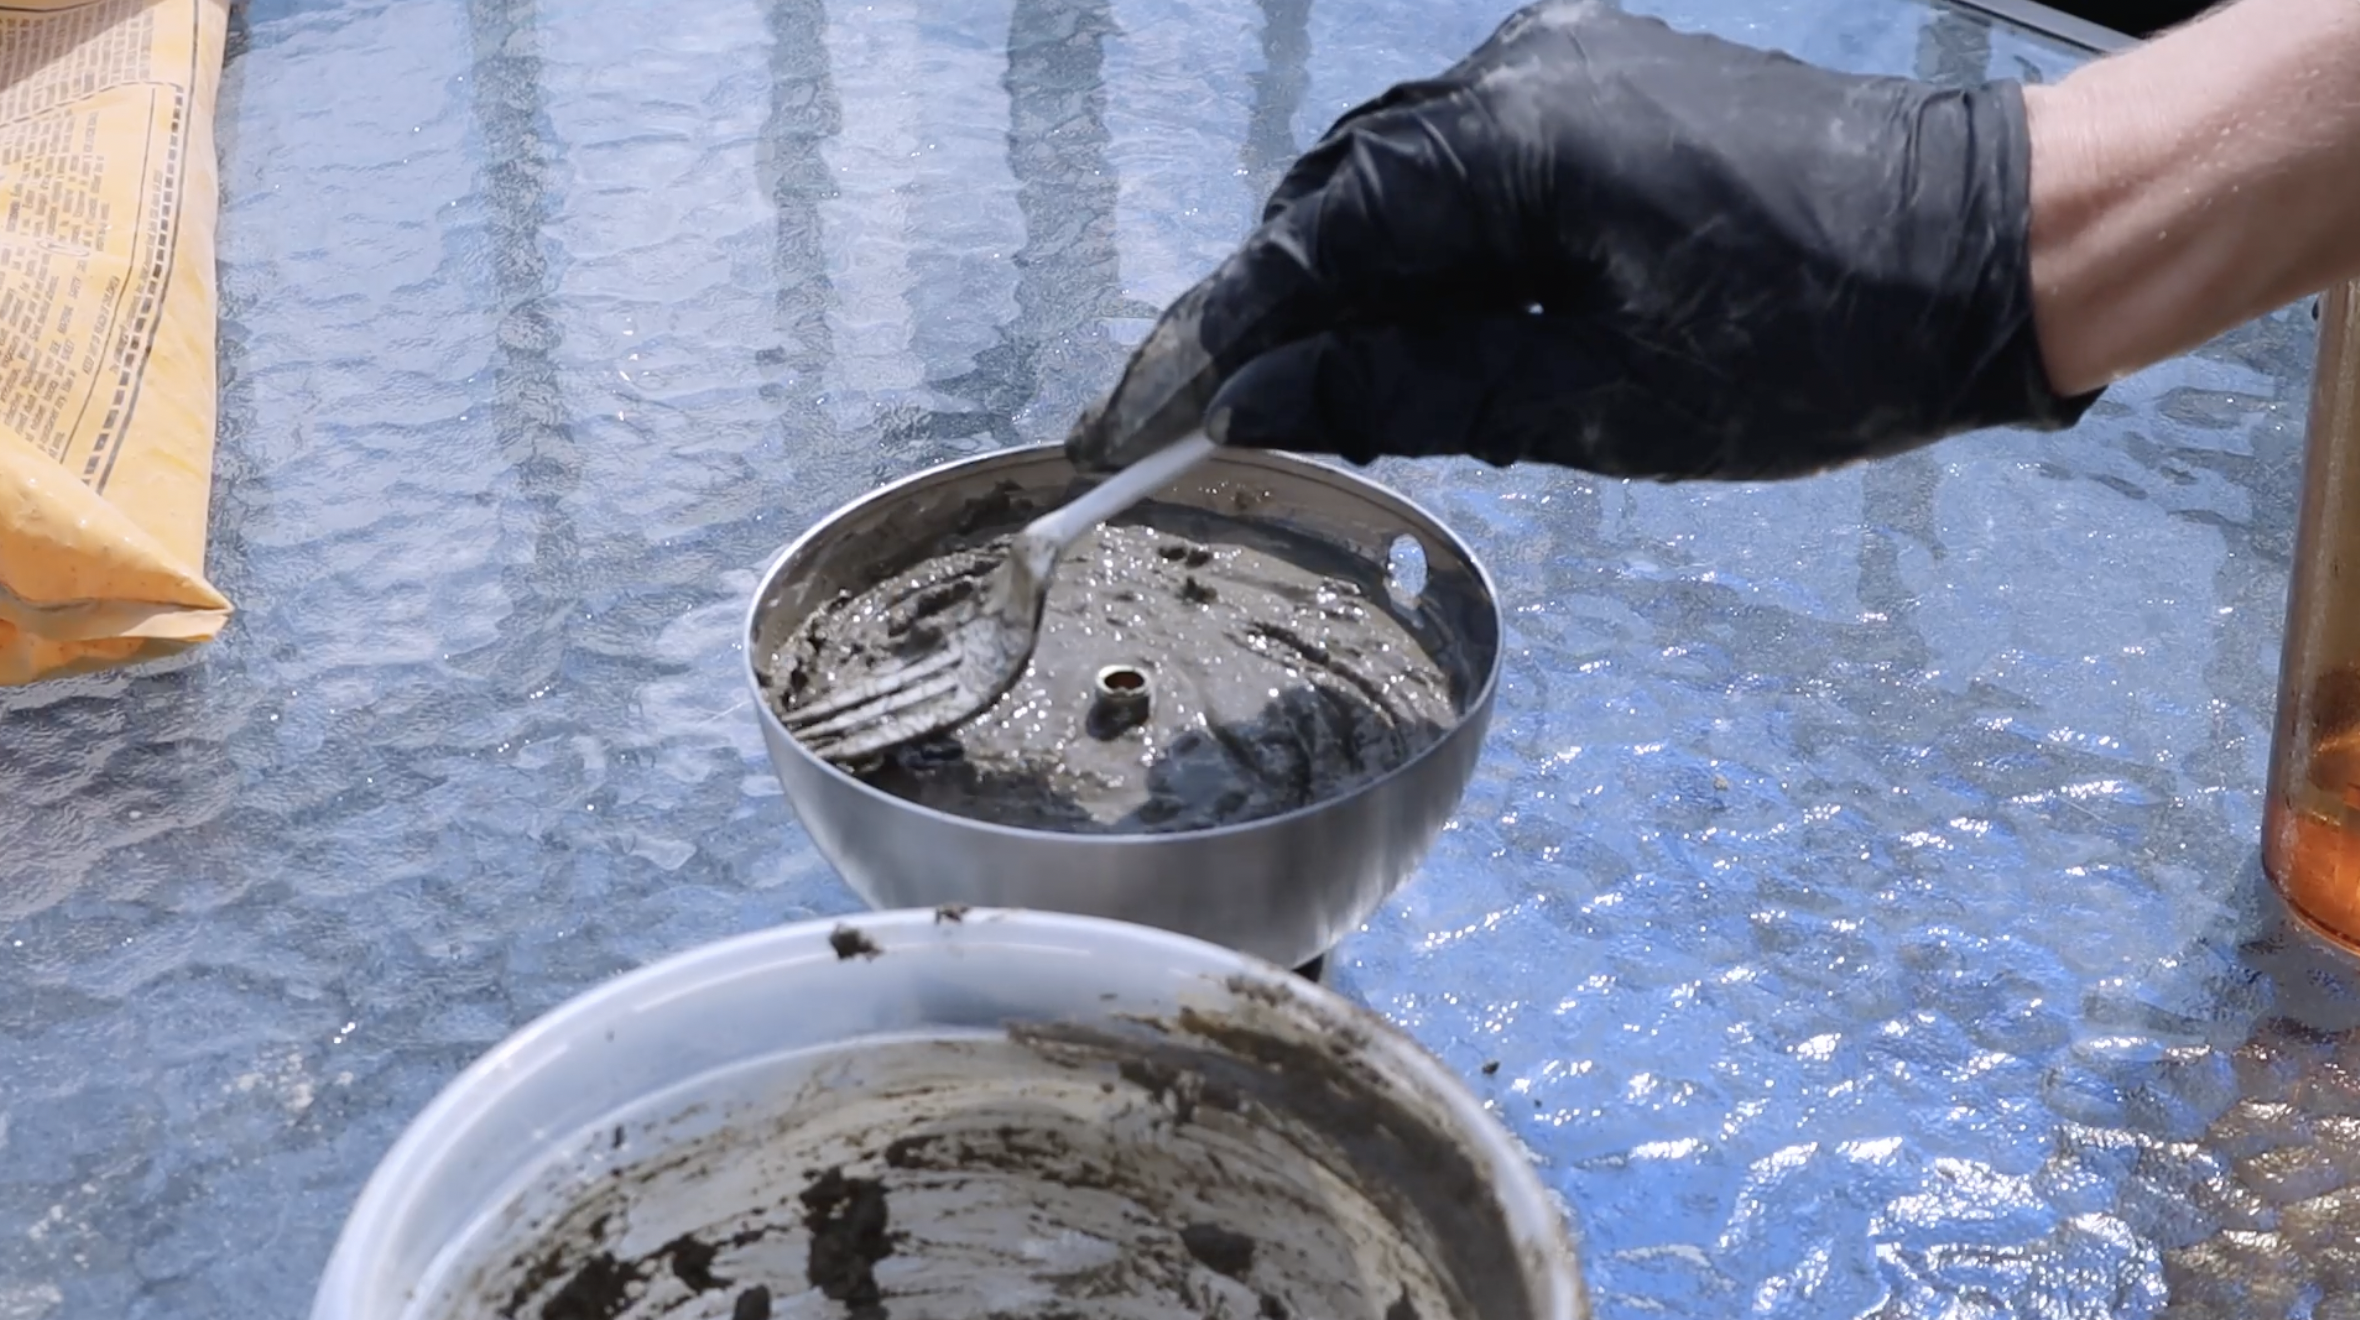
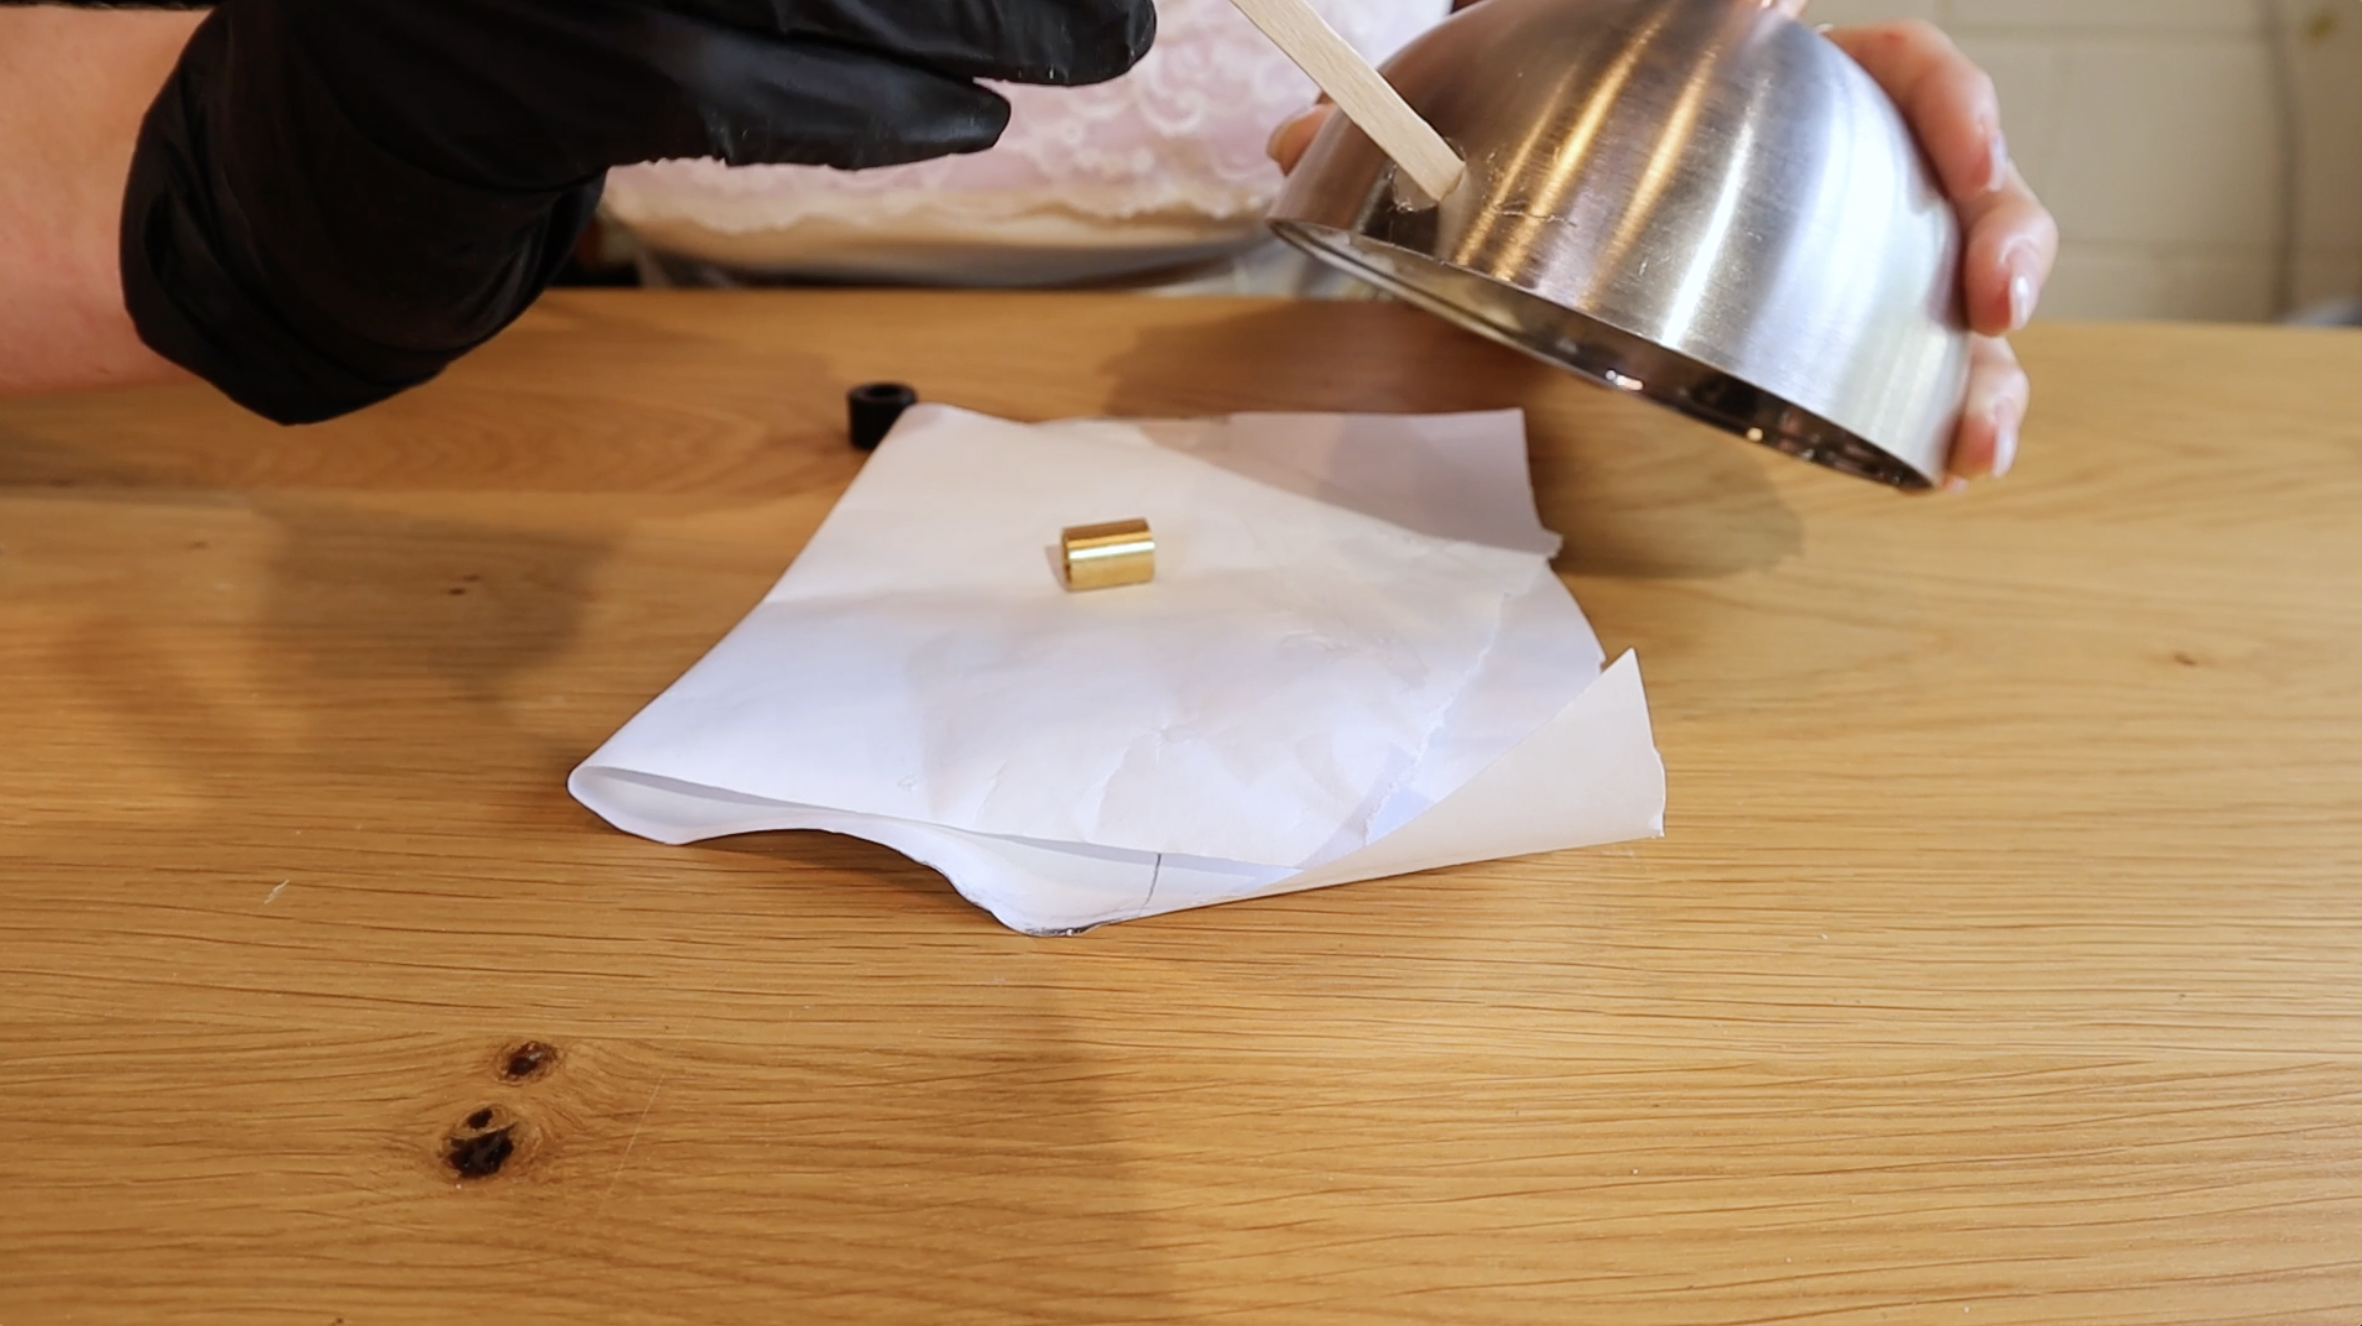
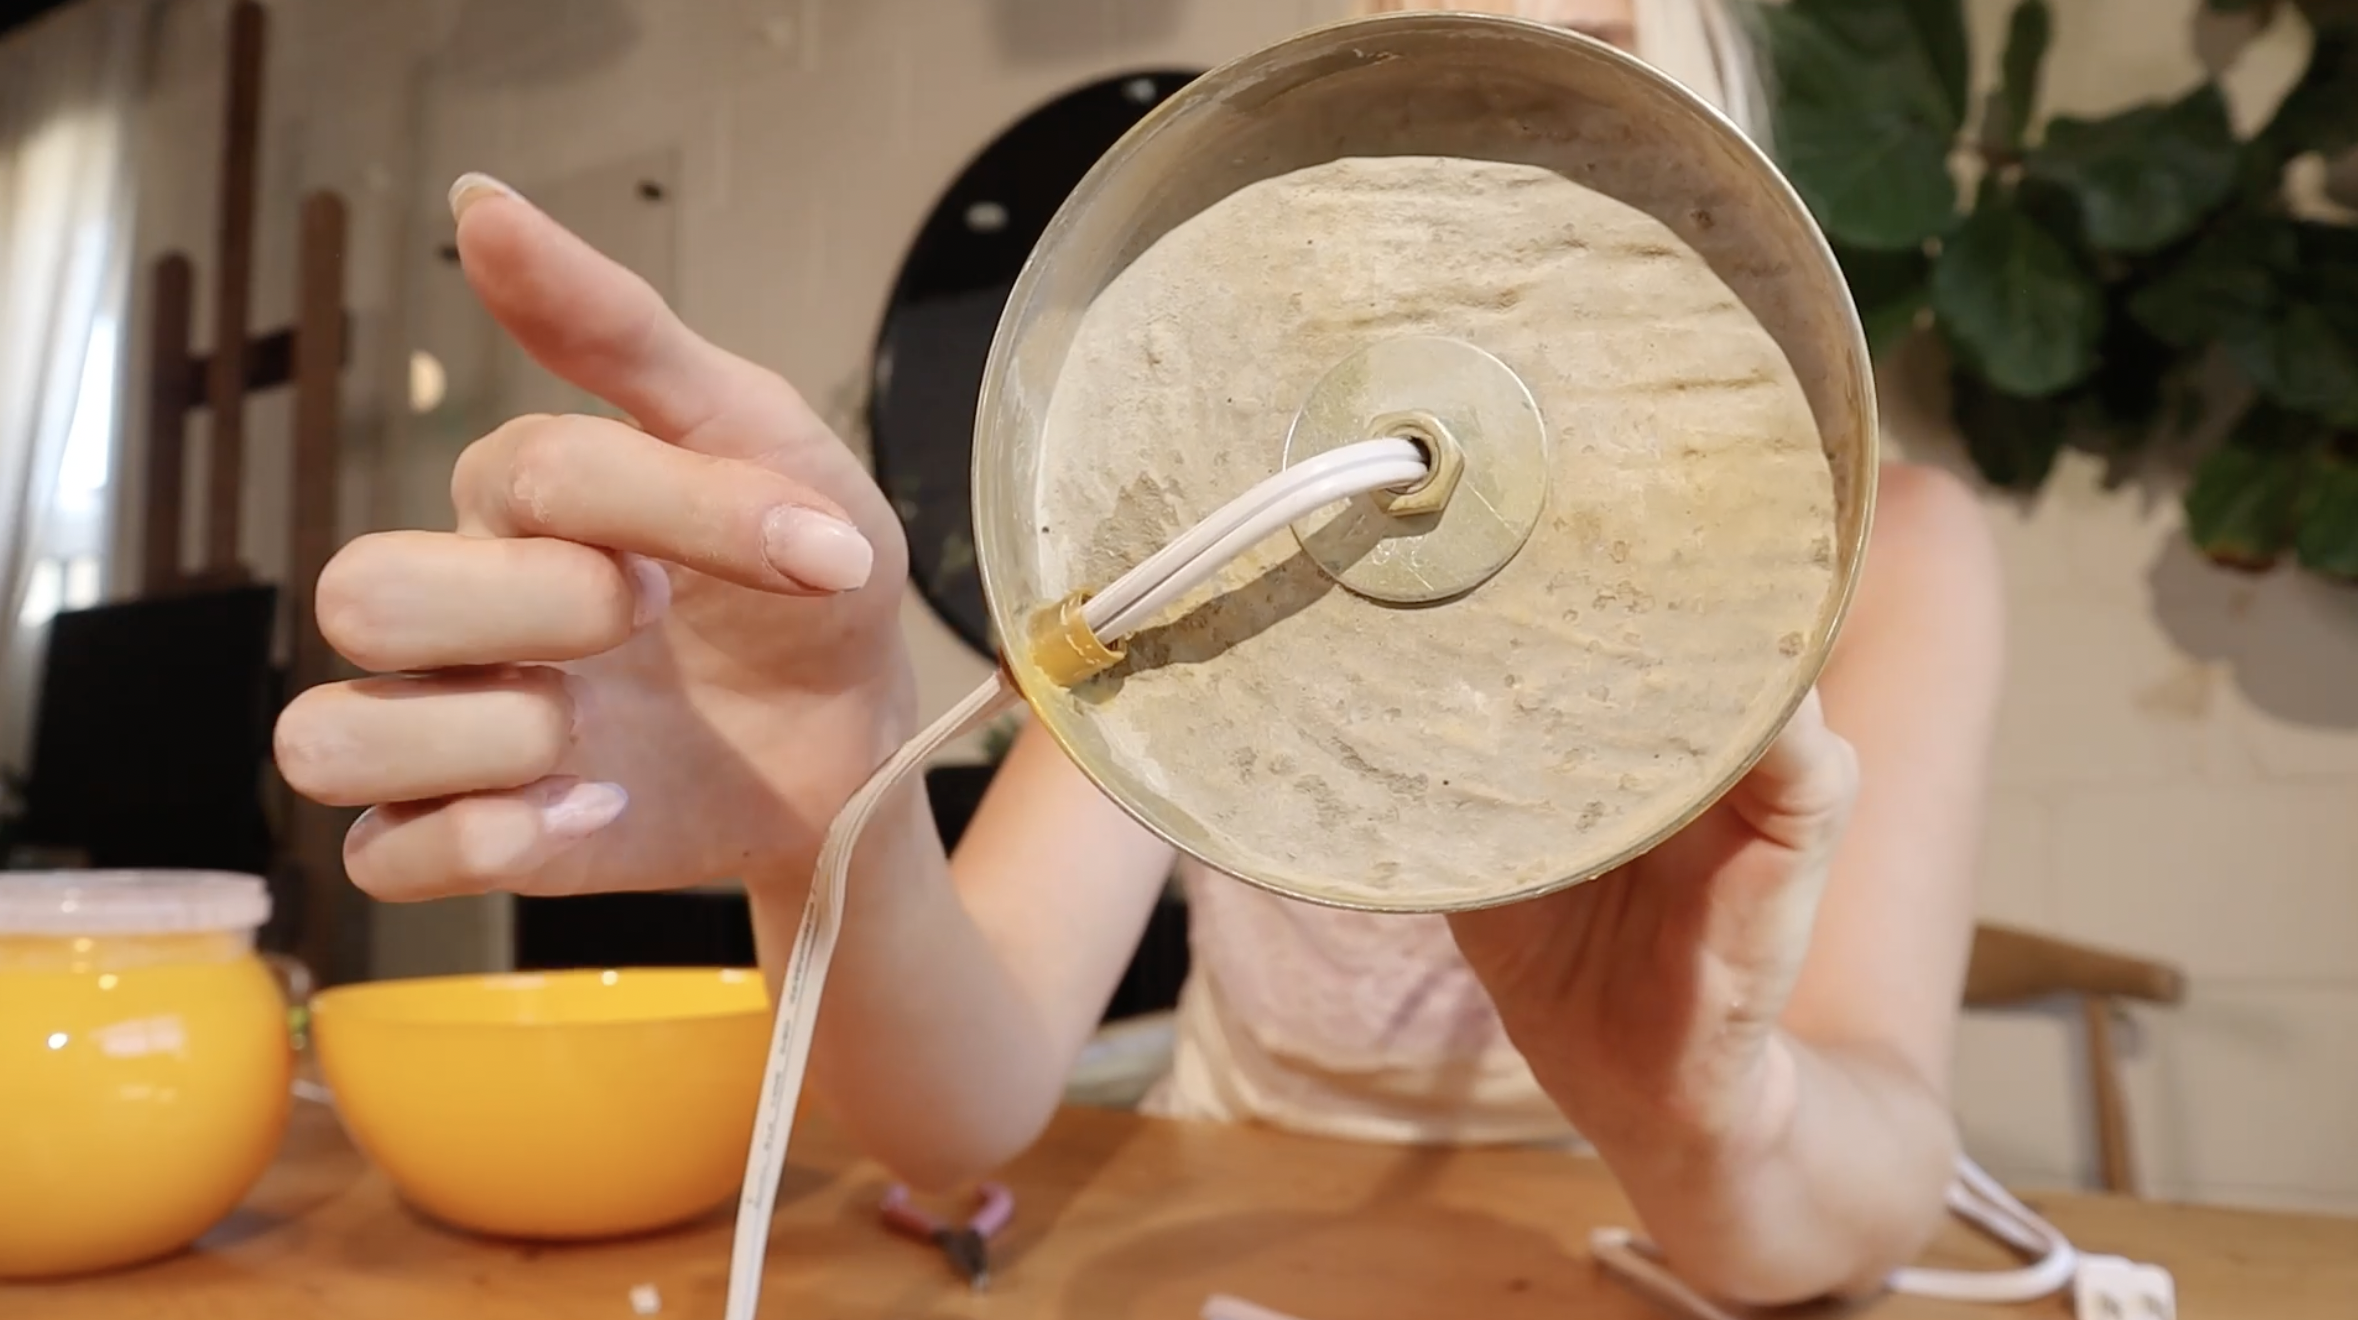
At this point I can see how the lamp will come together so I took my threaded rod and put it through the hole I just made in the centre of the aluminum bowl. I also put some washers on the top and bottom of the rod to hold it in place temporarily.
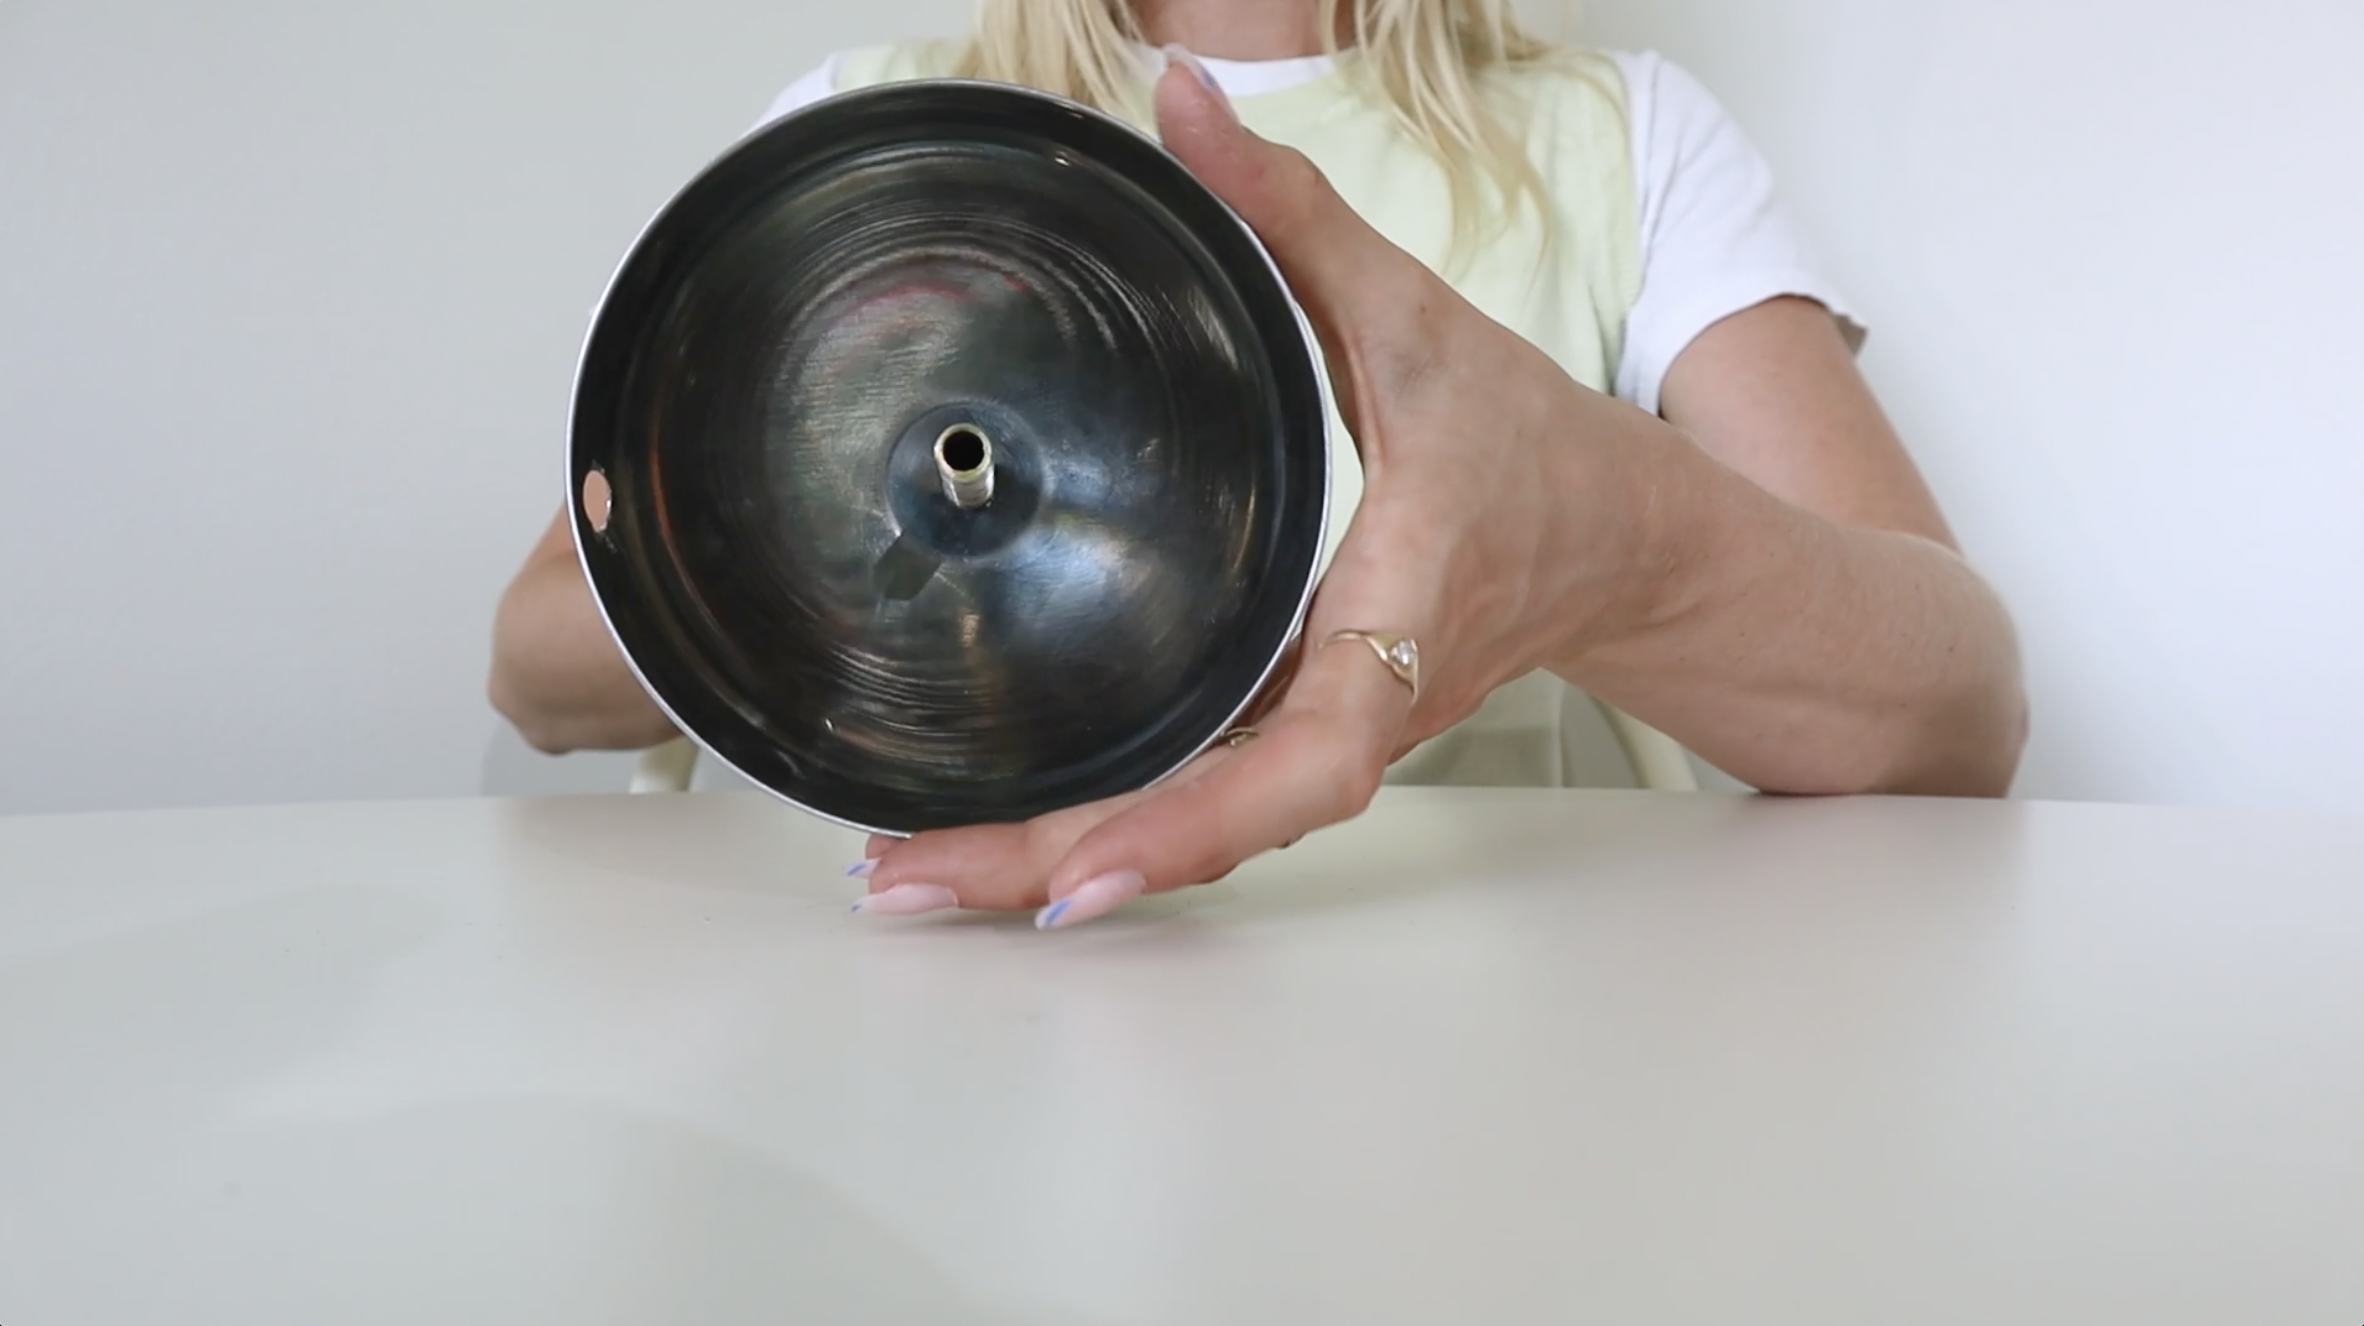
I had a bag of Quikrete laying around so using a ratio of two parts mix and just under one part water, I mixed them together to get an oatmeal consistency and poured that into the aluminum bowl. I let a little bit of the threaded rod peek out of the concrete mix because once it hardens I will be adding in a washer and a nut on the end to keep it all together. I then let my mix sit overnight to totally cure and harden.
STEP #3: PAINTING THE GLASS PIECES
For a seamless finish, I decided to paint the inside of my glass pieces and not the outside. I taped the outsides to prevent staining and then began painting using some spray paint. I worked in very light layers to get an even coat, letting each layer dry in between.

STEP #4 : FINISHING THE BASE OF THE LAMP
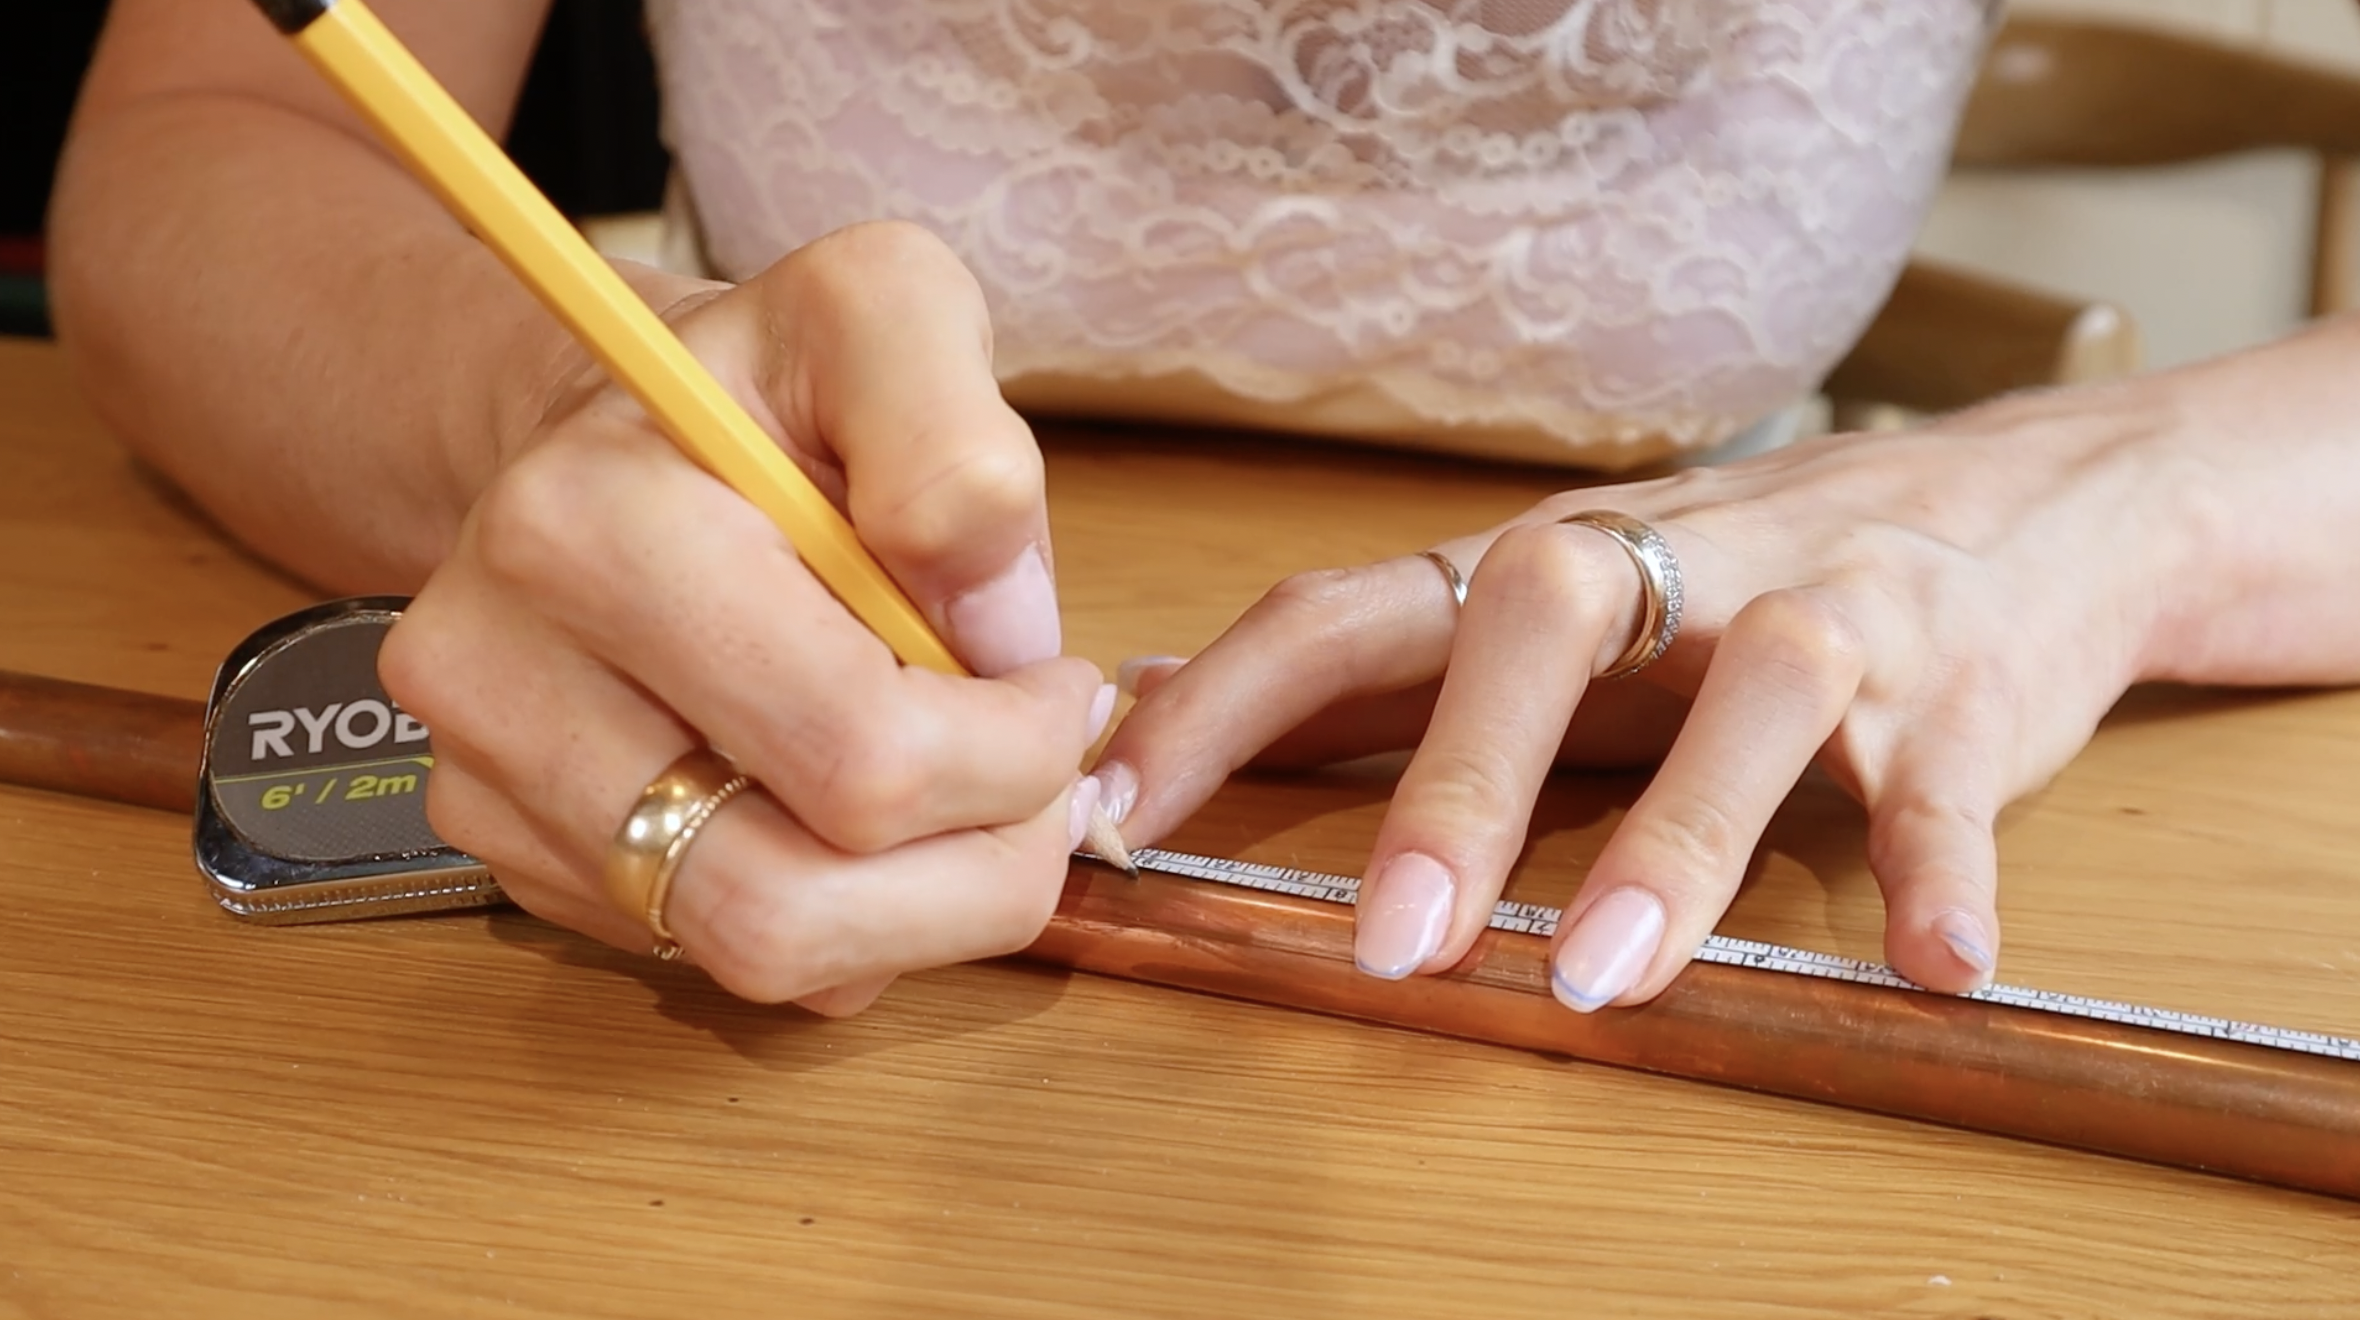
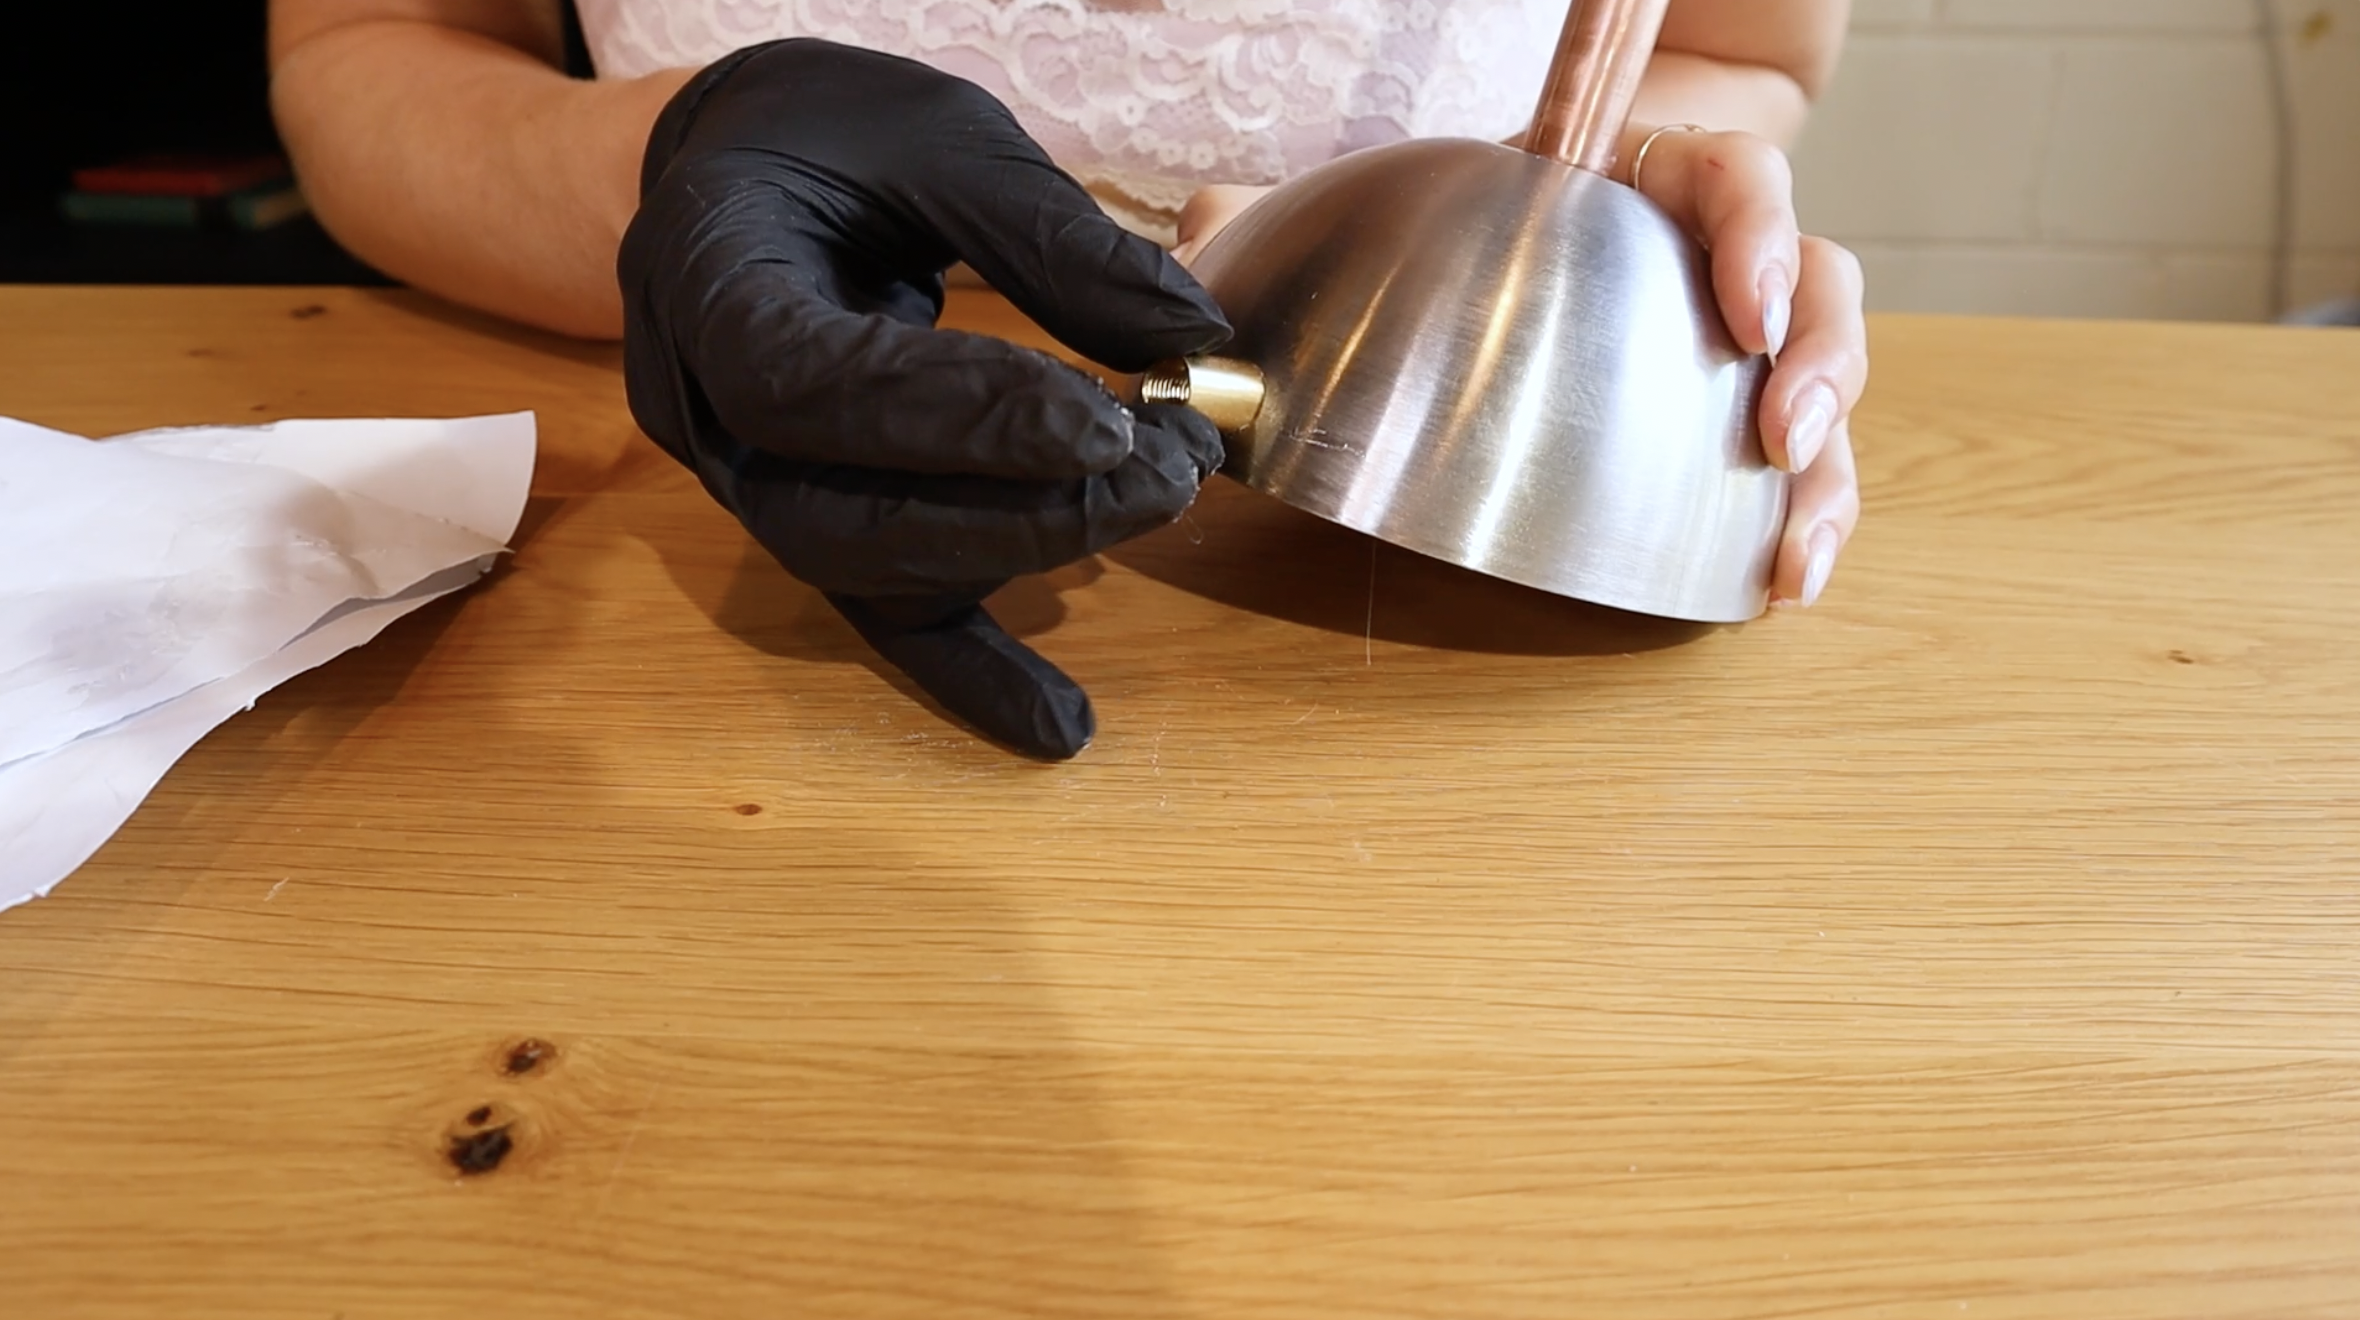
I measured the length of my threaded rod because I will be putting a piece of copper tubing over it which needs to be the right length for the lamp. This copper tube will be great to take some of the weight off the threaded rod once the glass pieces are placed on top. To figure out how long I want my piece of copper tubing to be, I first took off the nut I put in previously. The threaded rod was just under ten inches so I made my copper tubing nine inches long to leave some of the rod showing at the very top. I then used a pipe cutter to cut my copper tubing to size, then gave the copper tube and the aluminum base some light sanding to prepare for painting later.

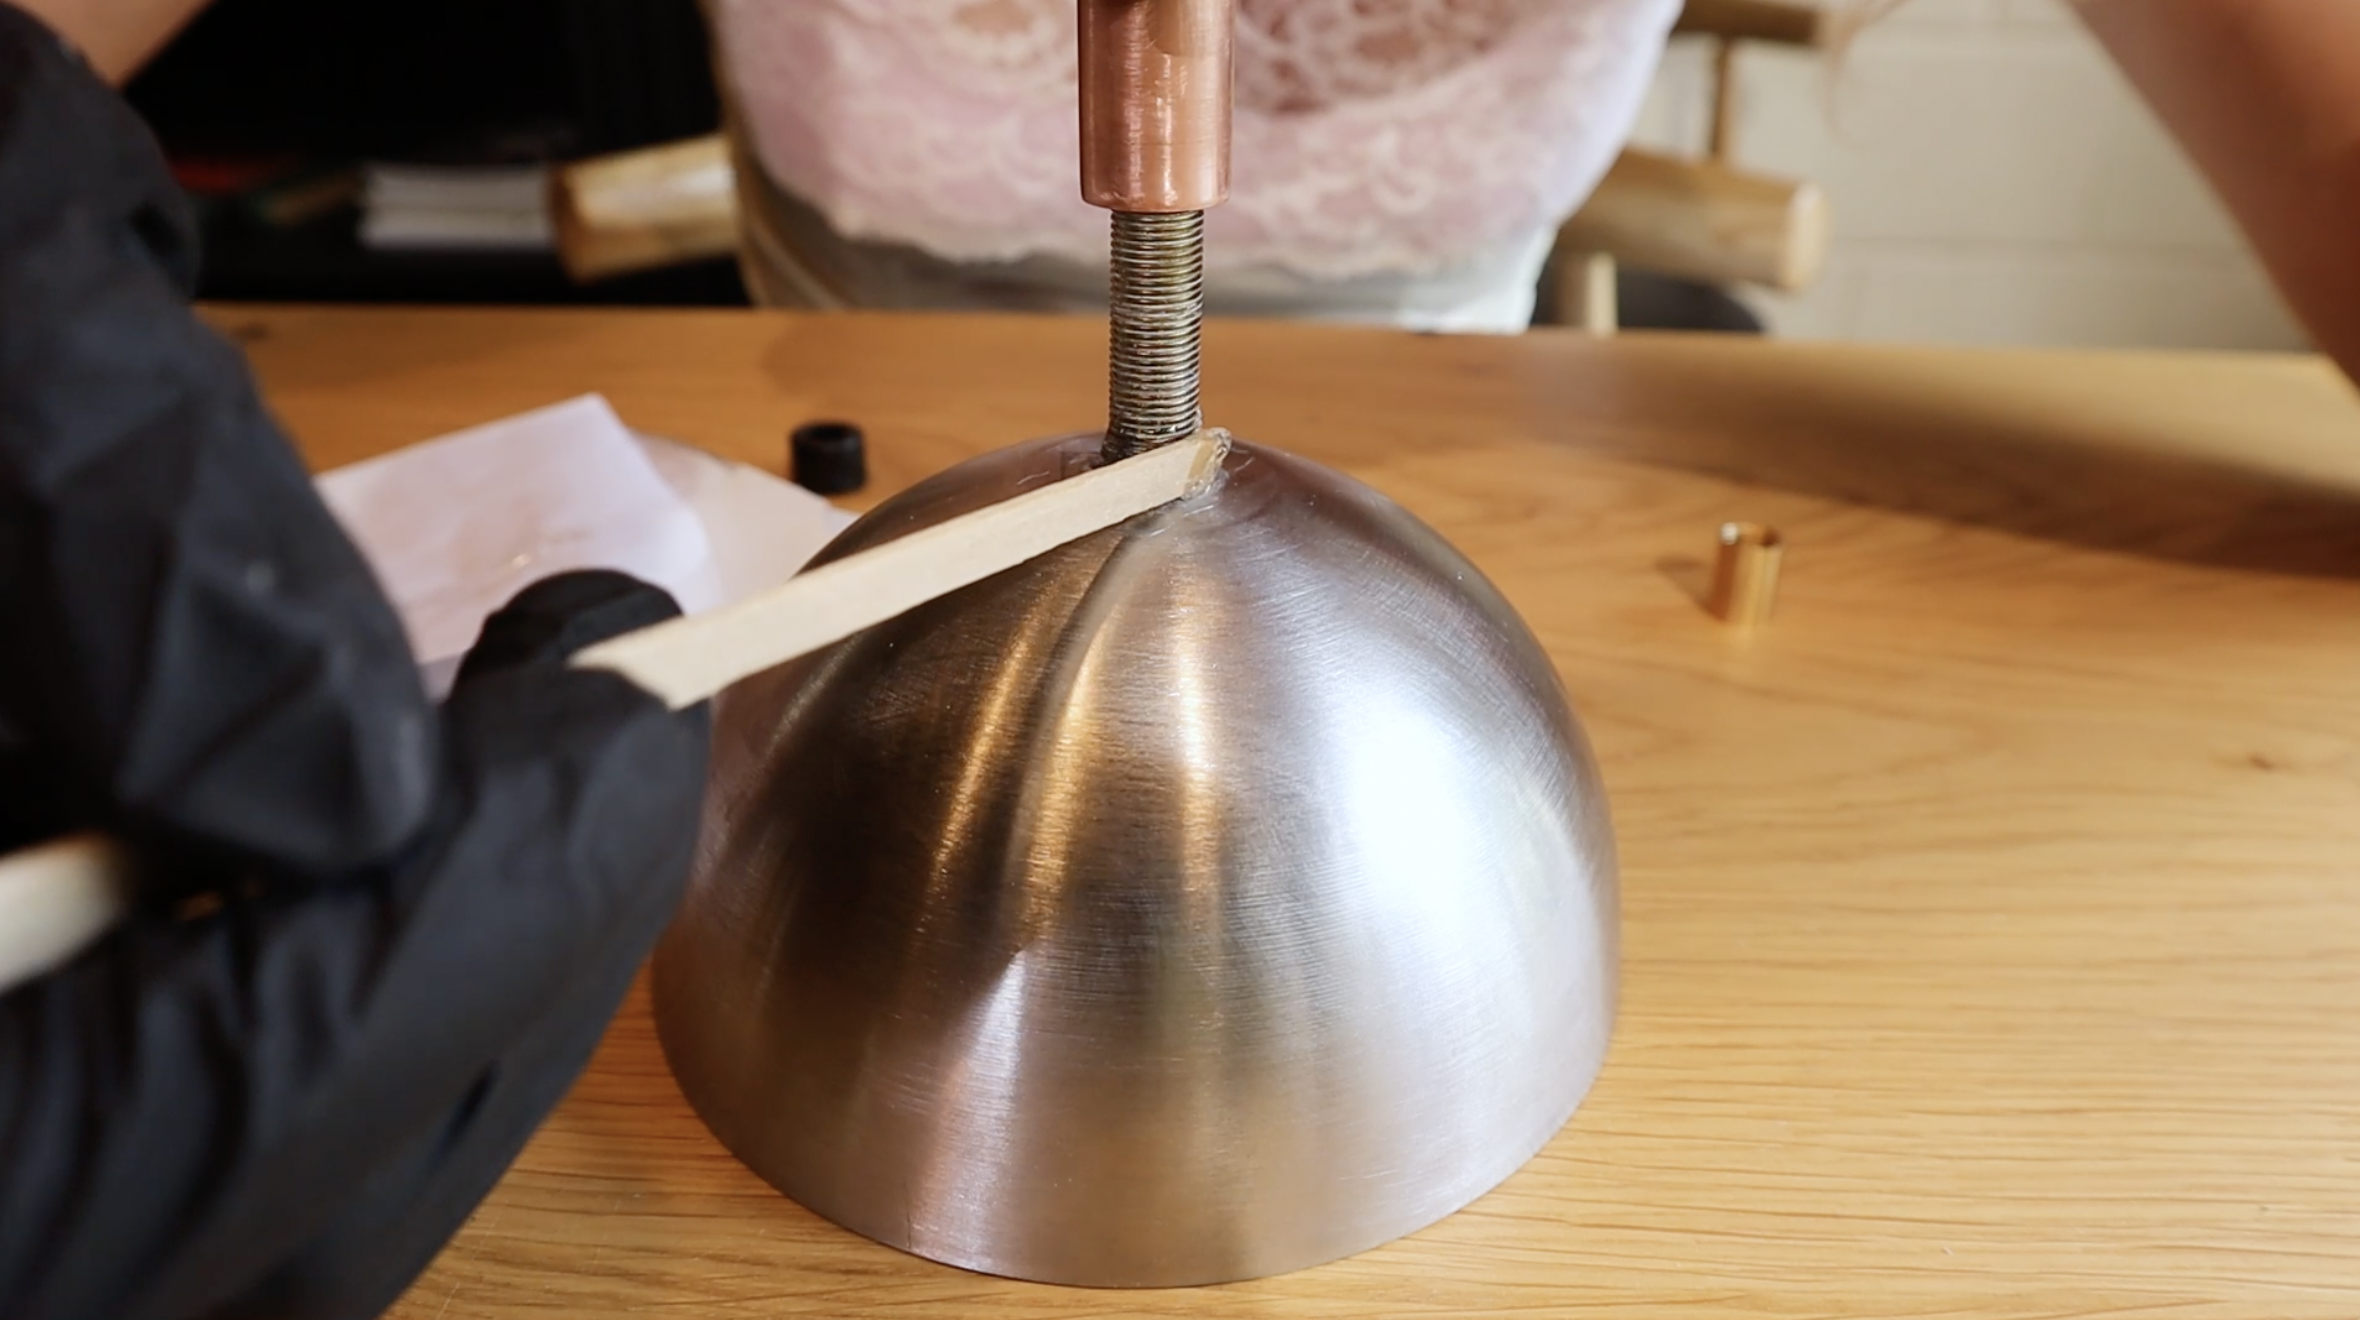
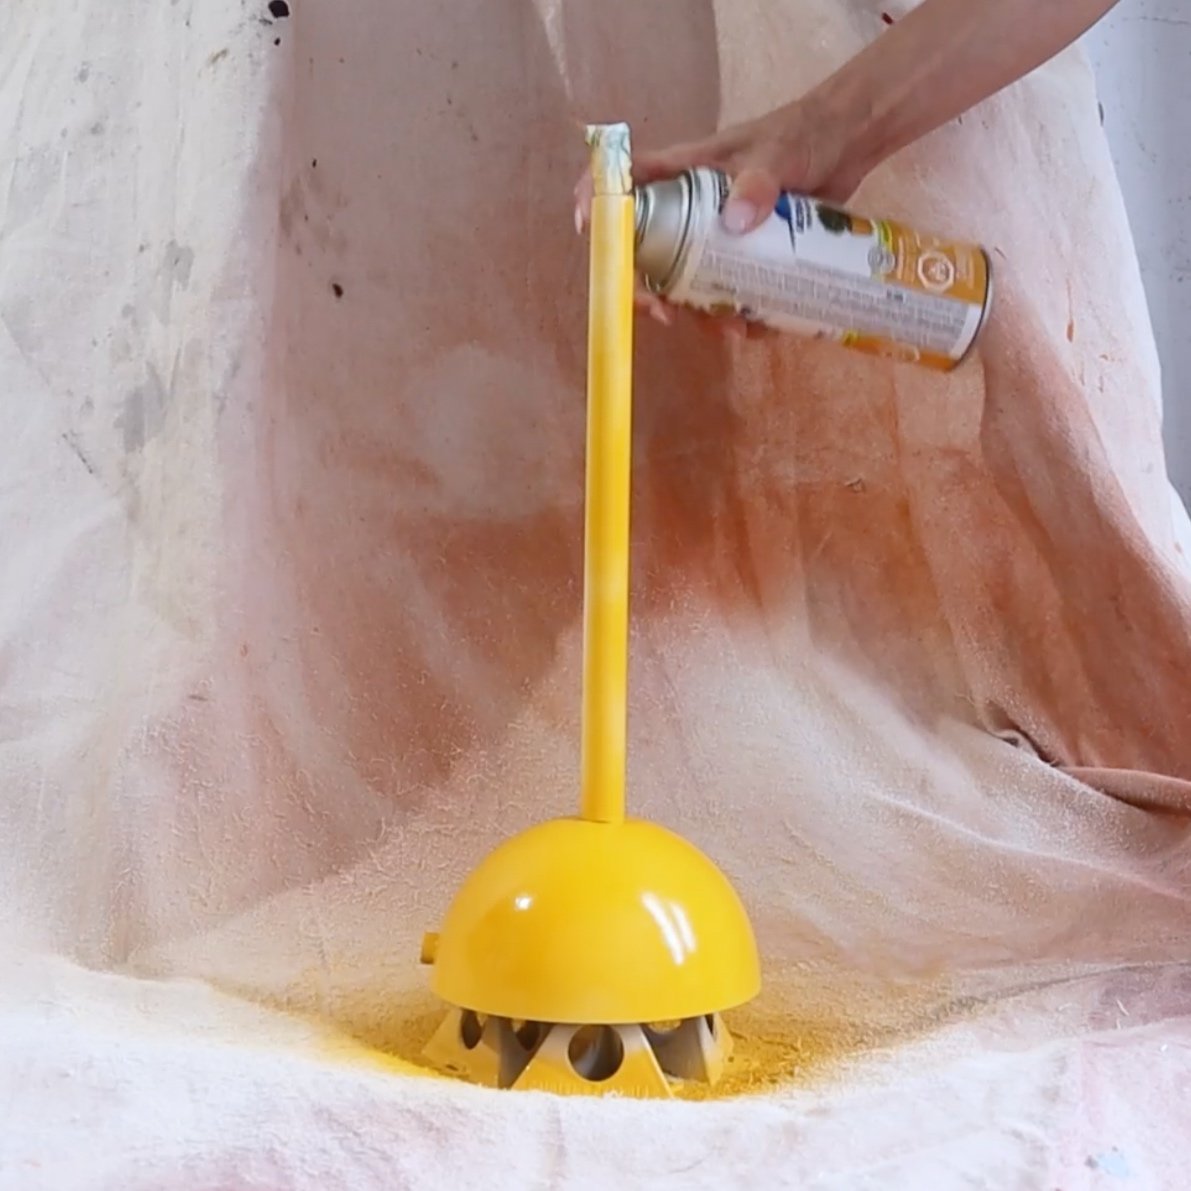
Taking an industrial strength adhesive, I put it on the inside where the threaded rod and copper tube meet at the base of the lamp. Once the glue dried, I went in with some white primer spray paint on the entire base as well as the copper tube before topping it off with a nice glossy yellow paint.

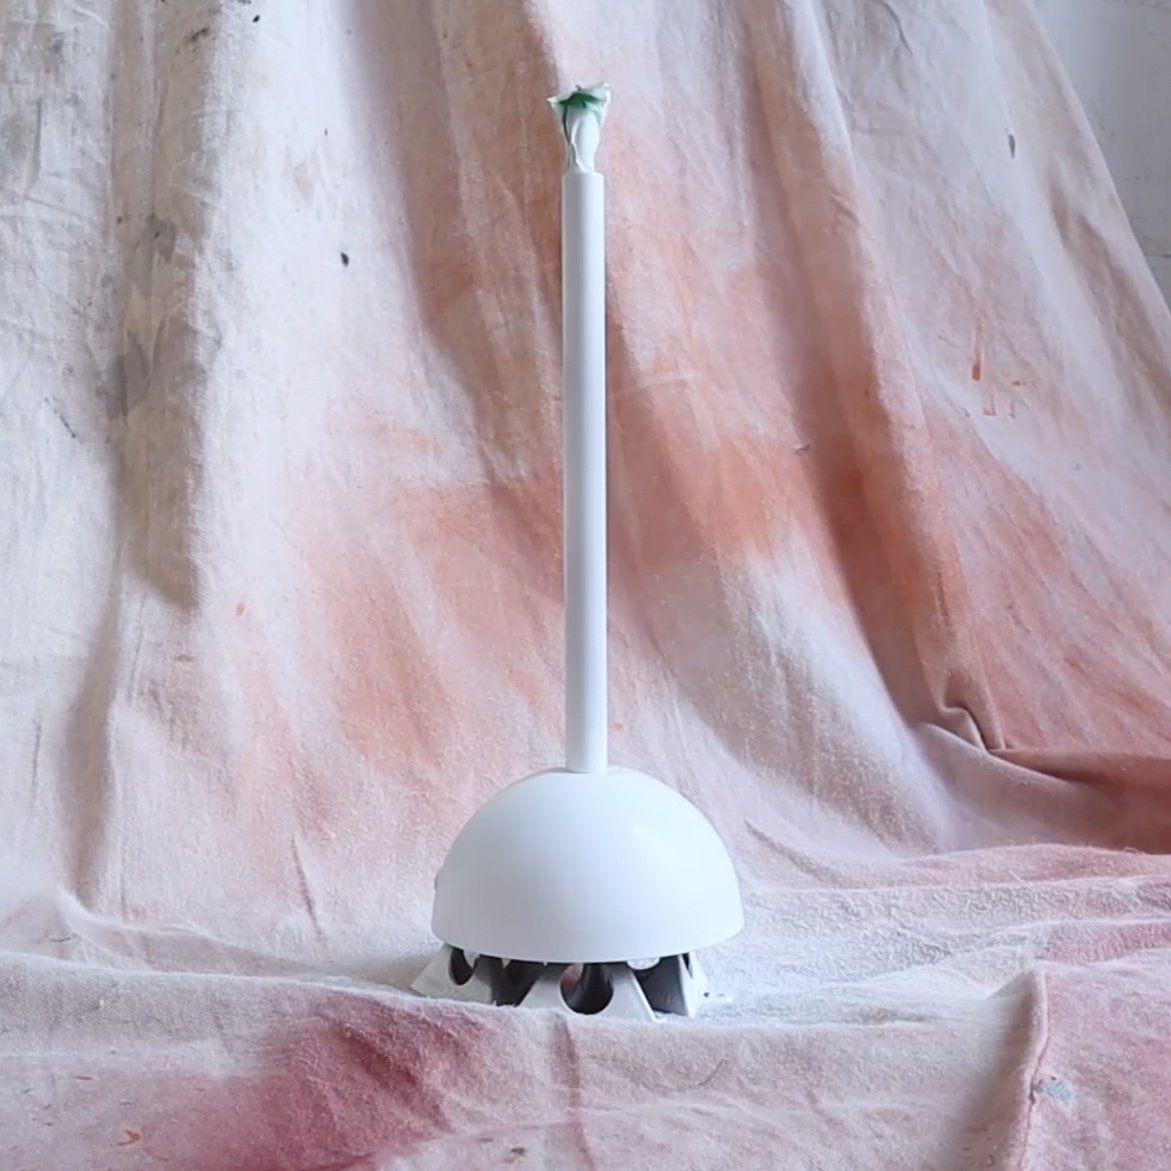
STEP #5 : FINISHING THE LAMP SHADE
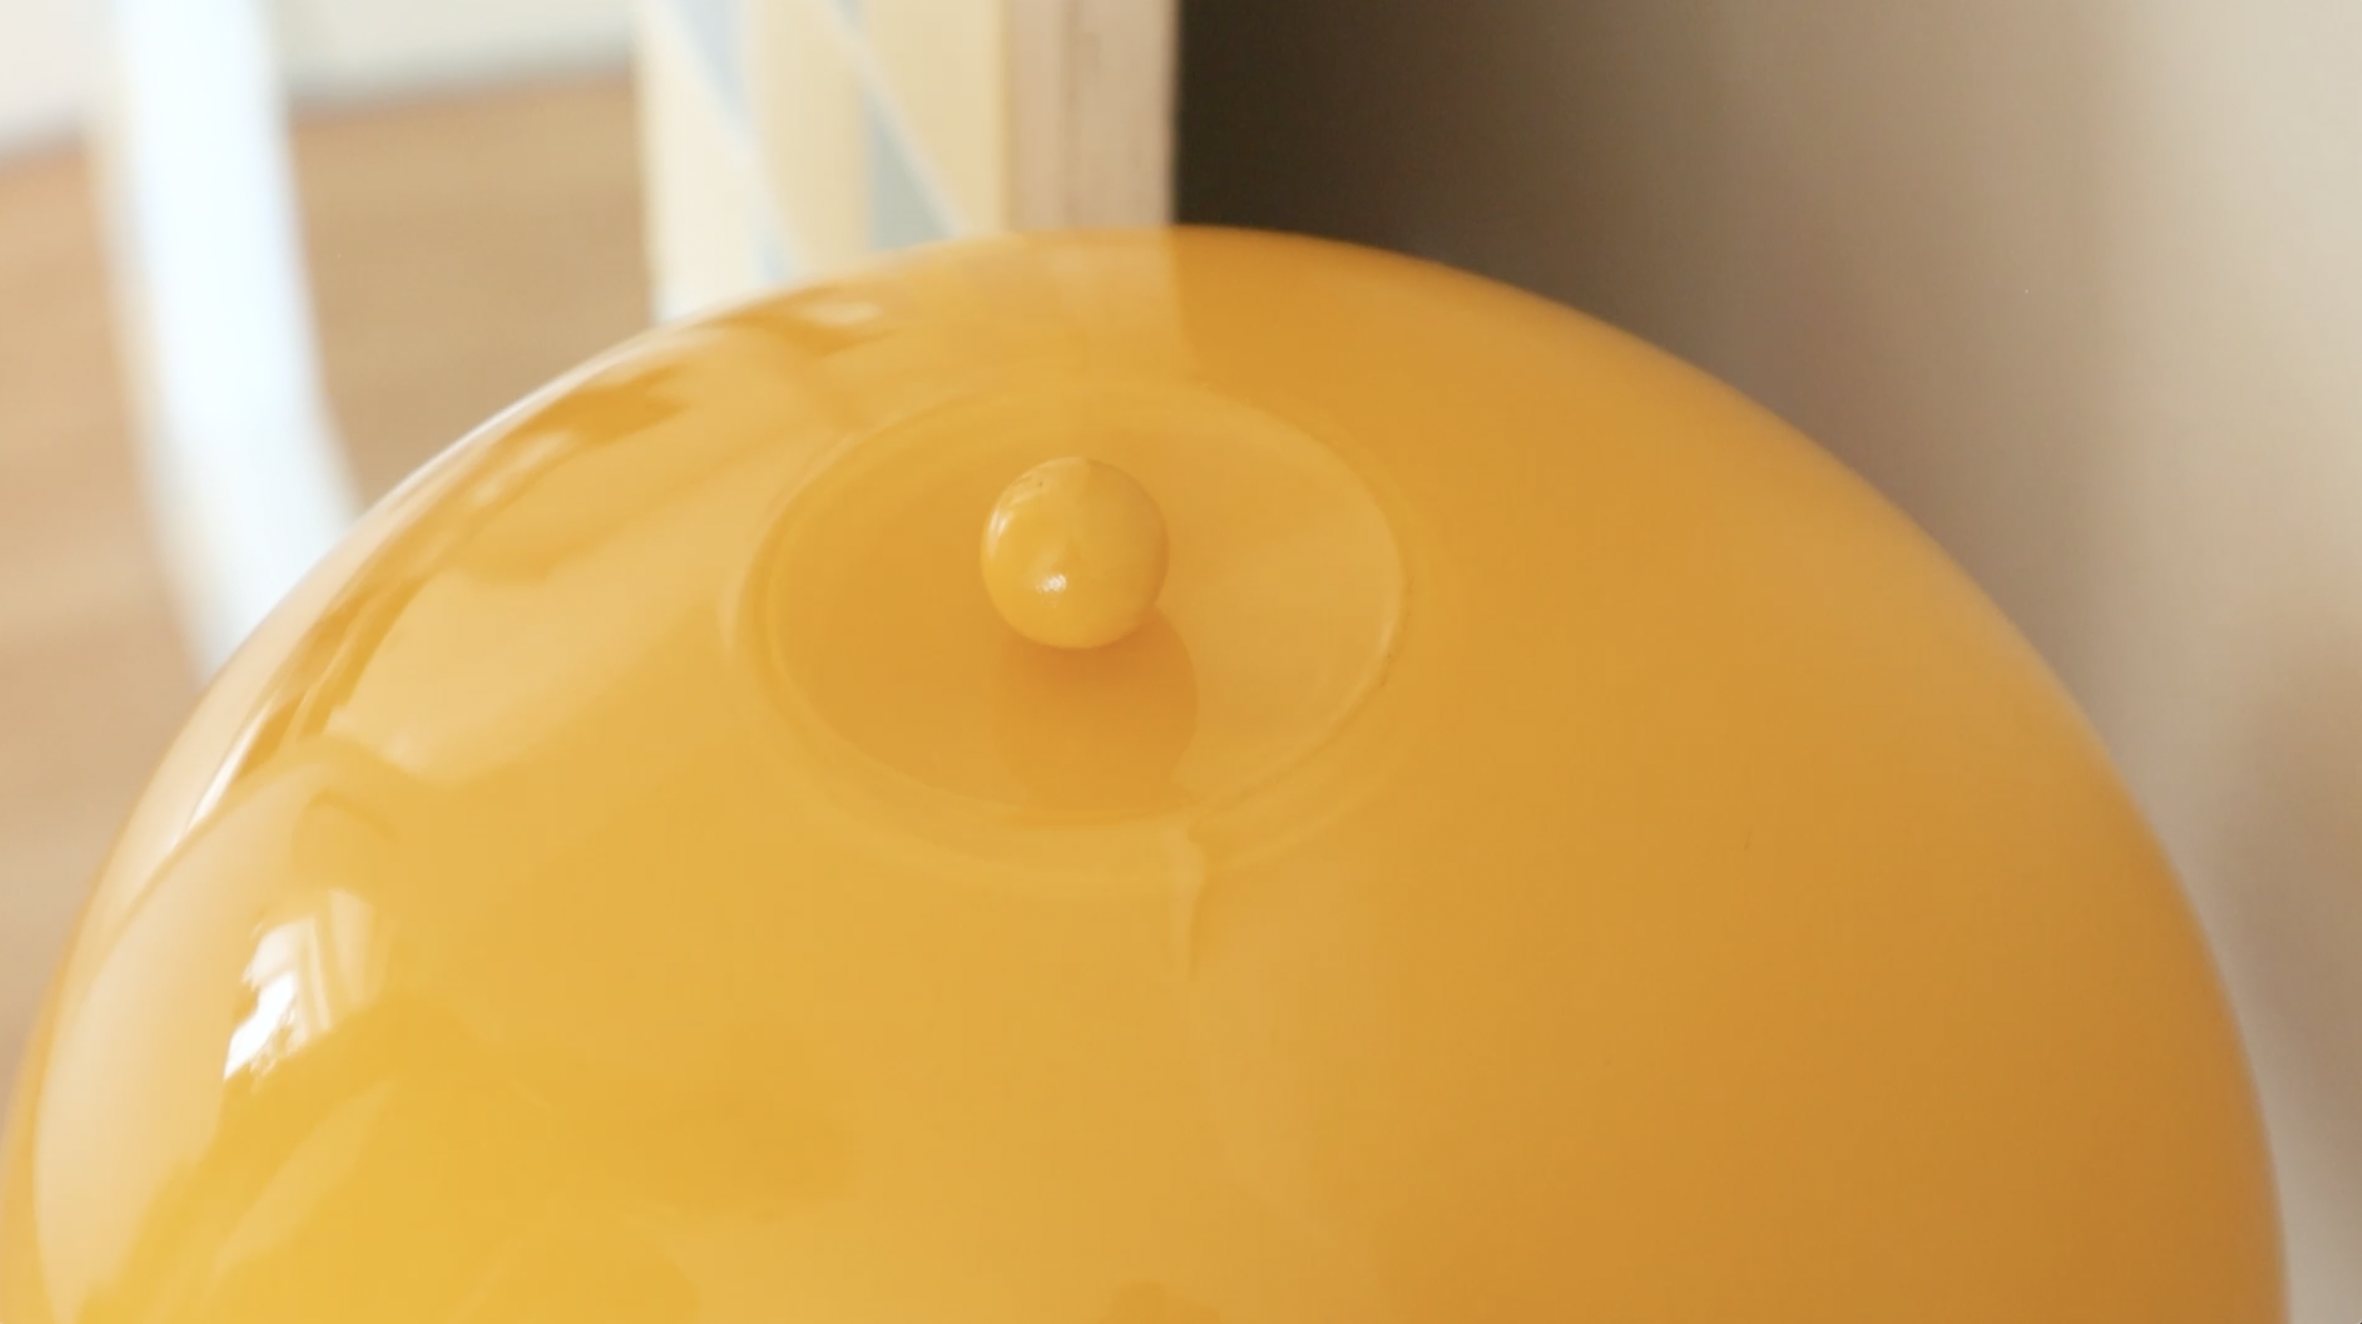
I wanted the glass top to be able to stand off the glass globe a little bit so they appear a bit more spaced out, so I cut out a ring of clear plastic from an old circular takeout container and hot glued it to the glass globe. Next I glued the lid of the same takeout container inside the glass top piece and also added a bead of glue inside the crevice on the lid so it sits and holds nicely when both pieces are put together.

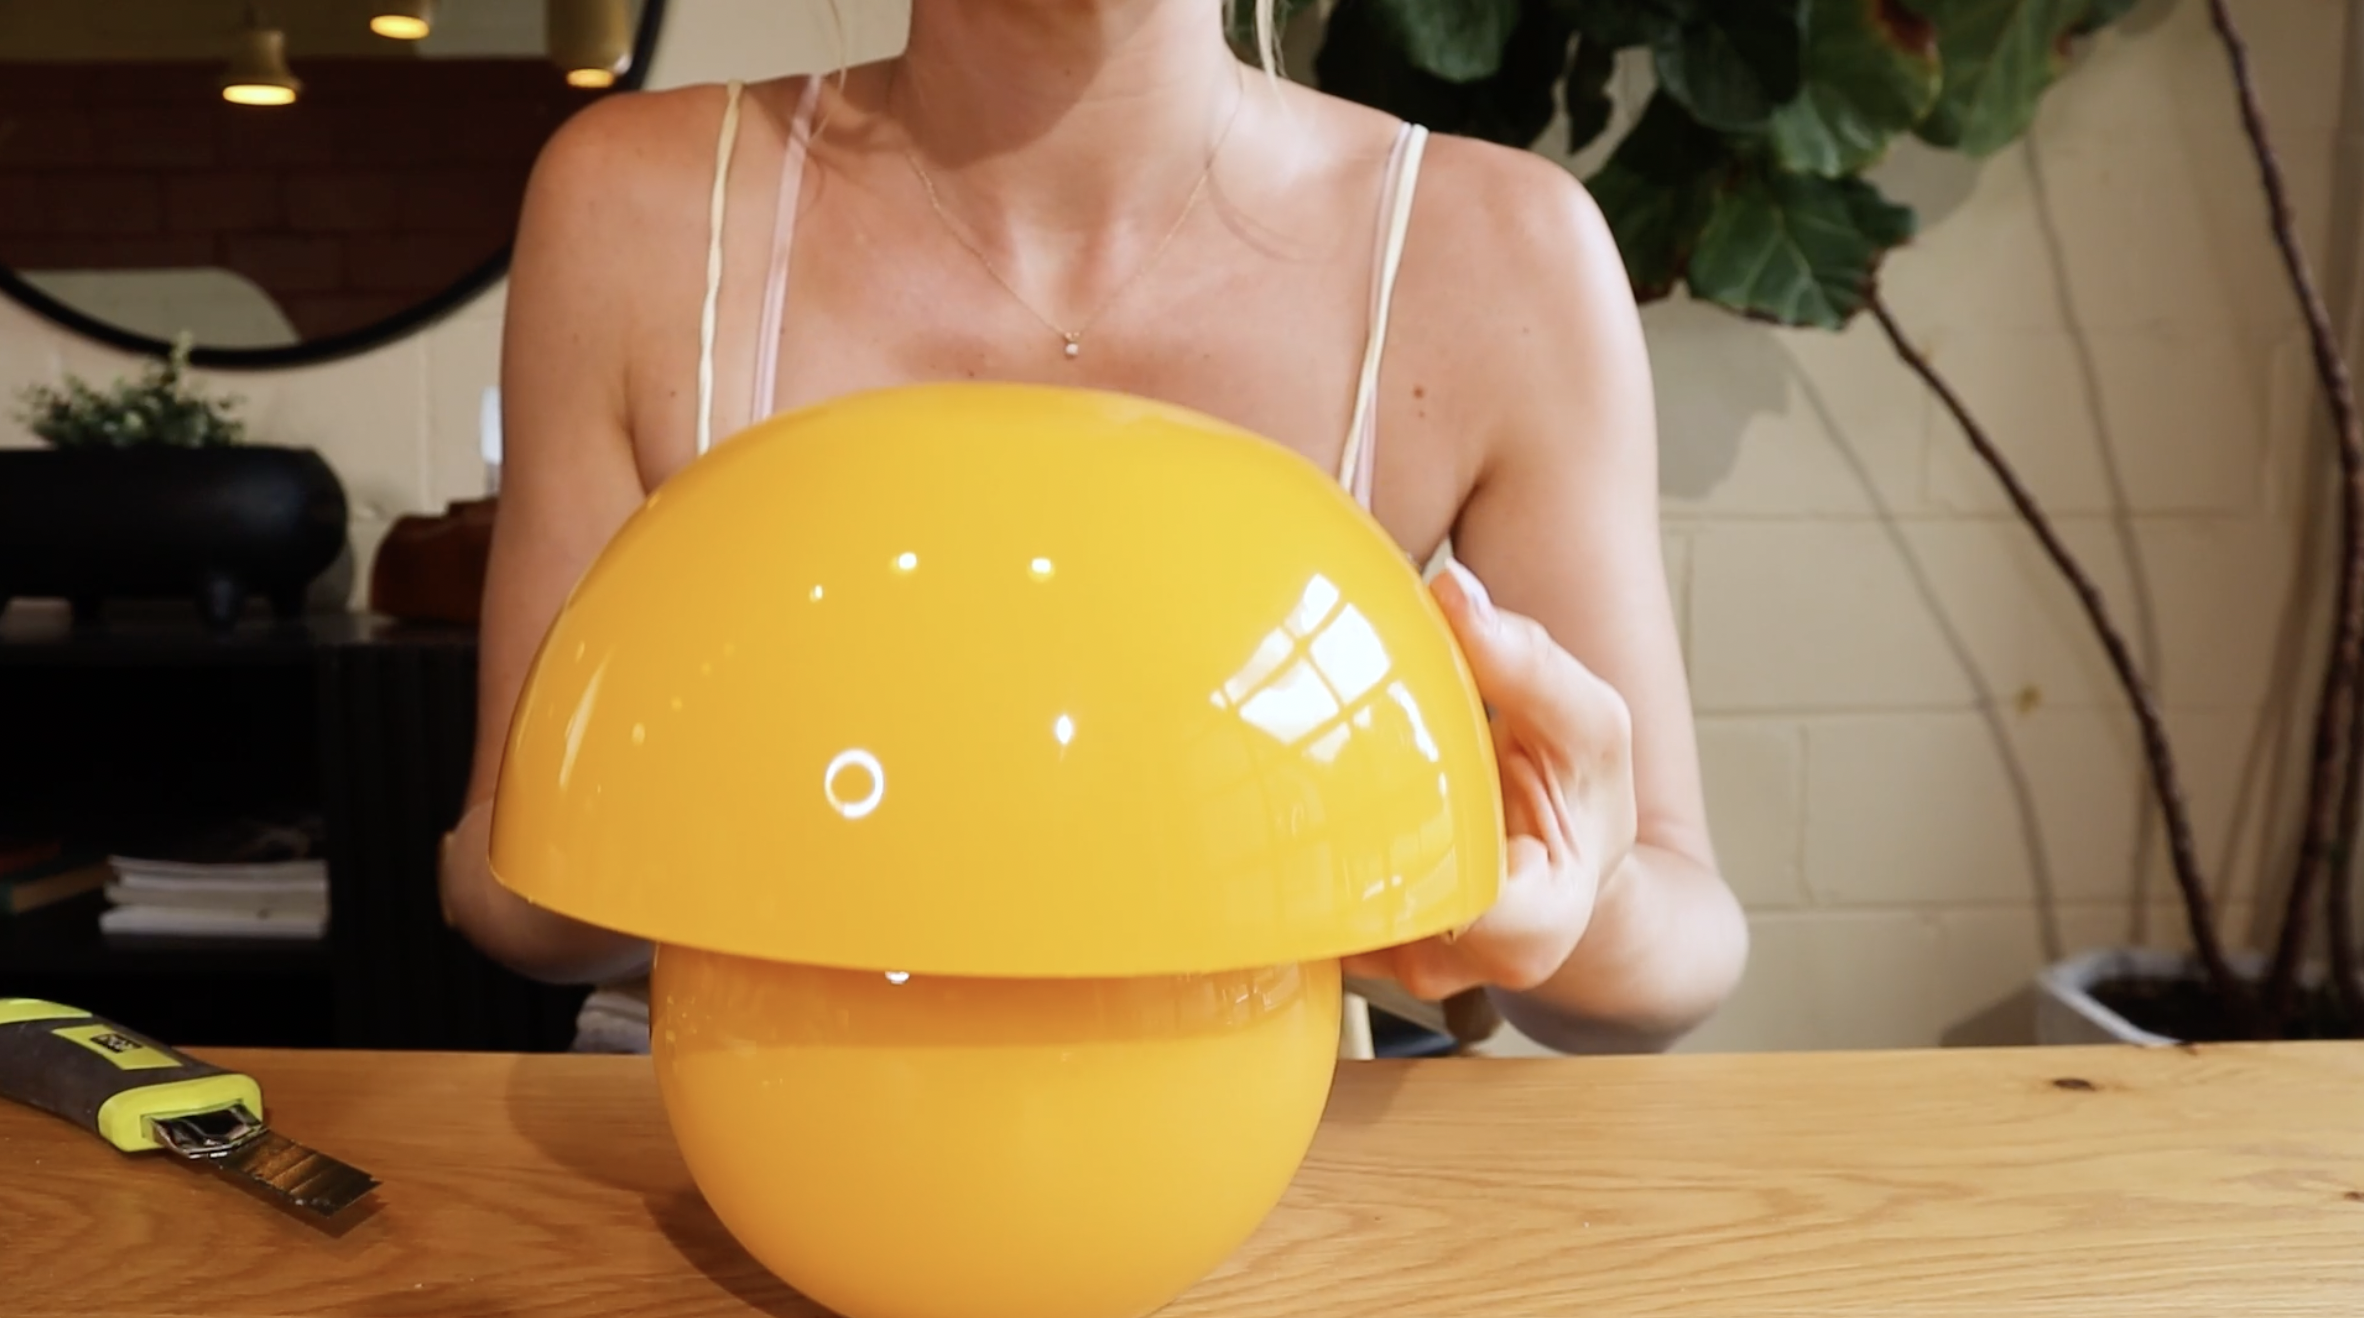
STEP #5 : ASSEMBLING THE LAMP
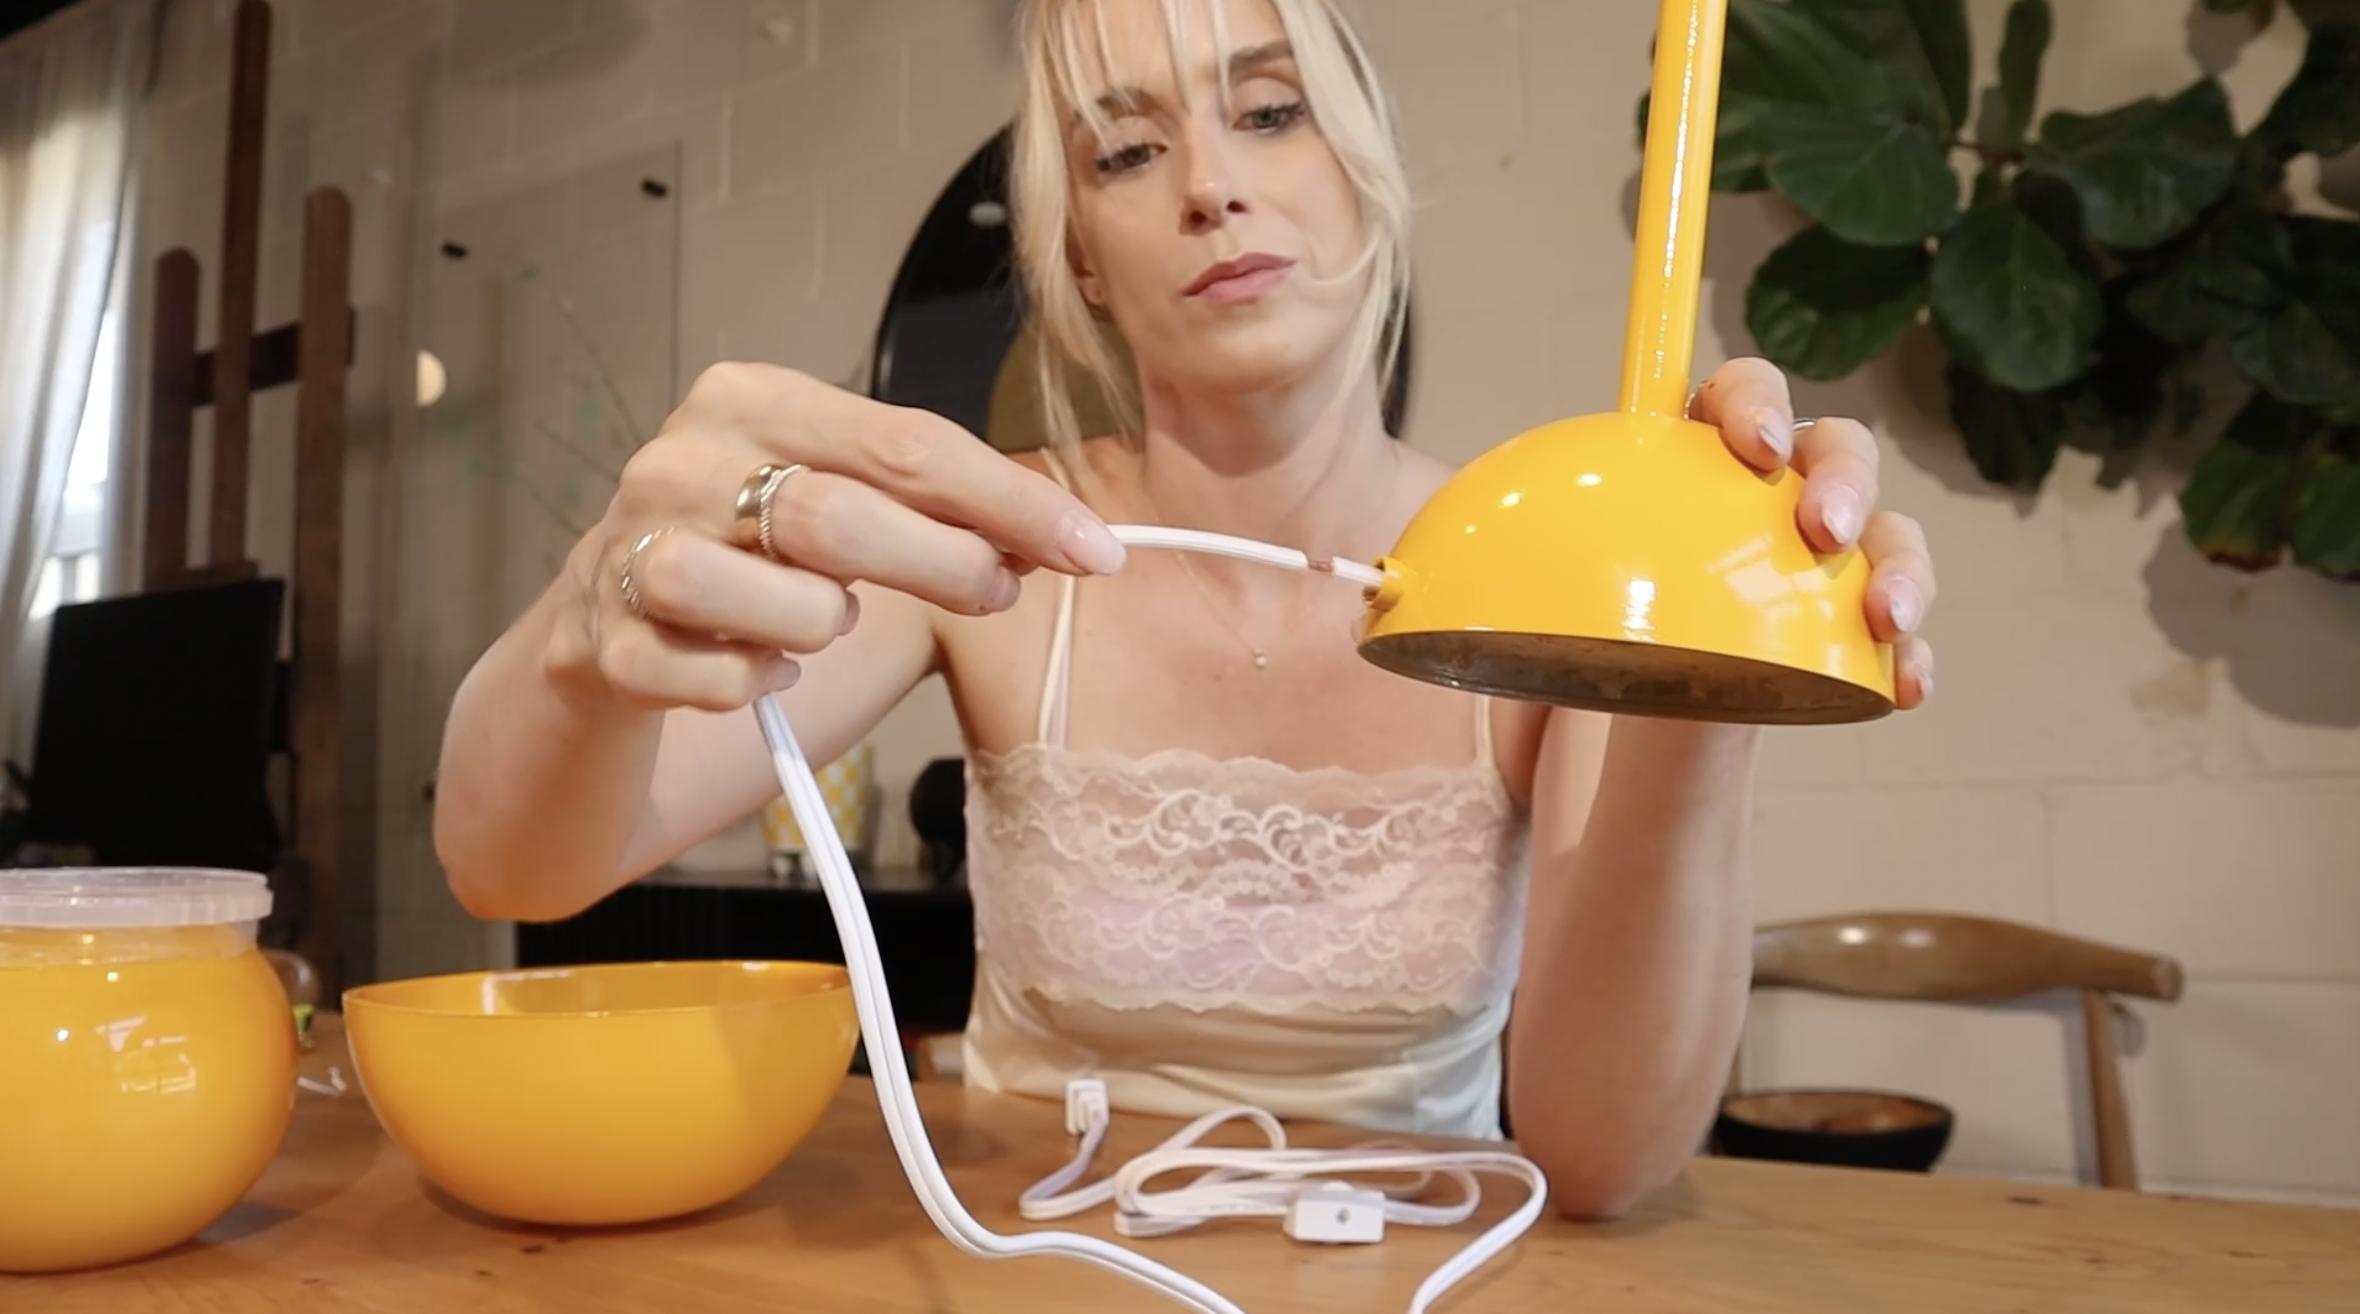
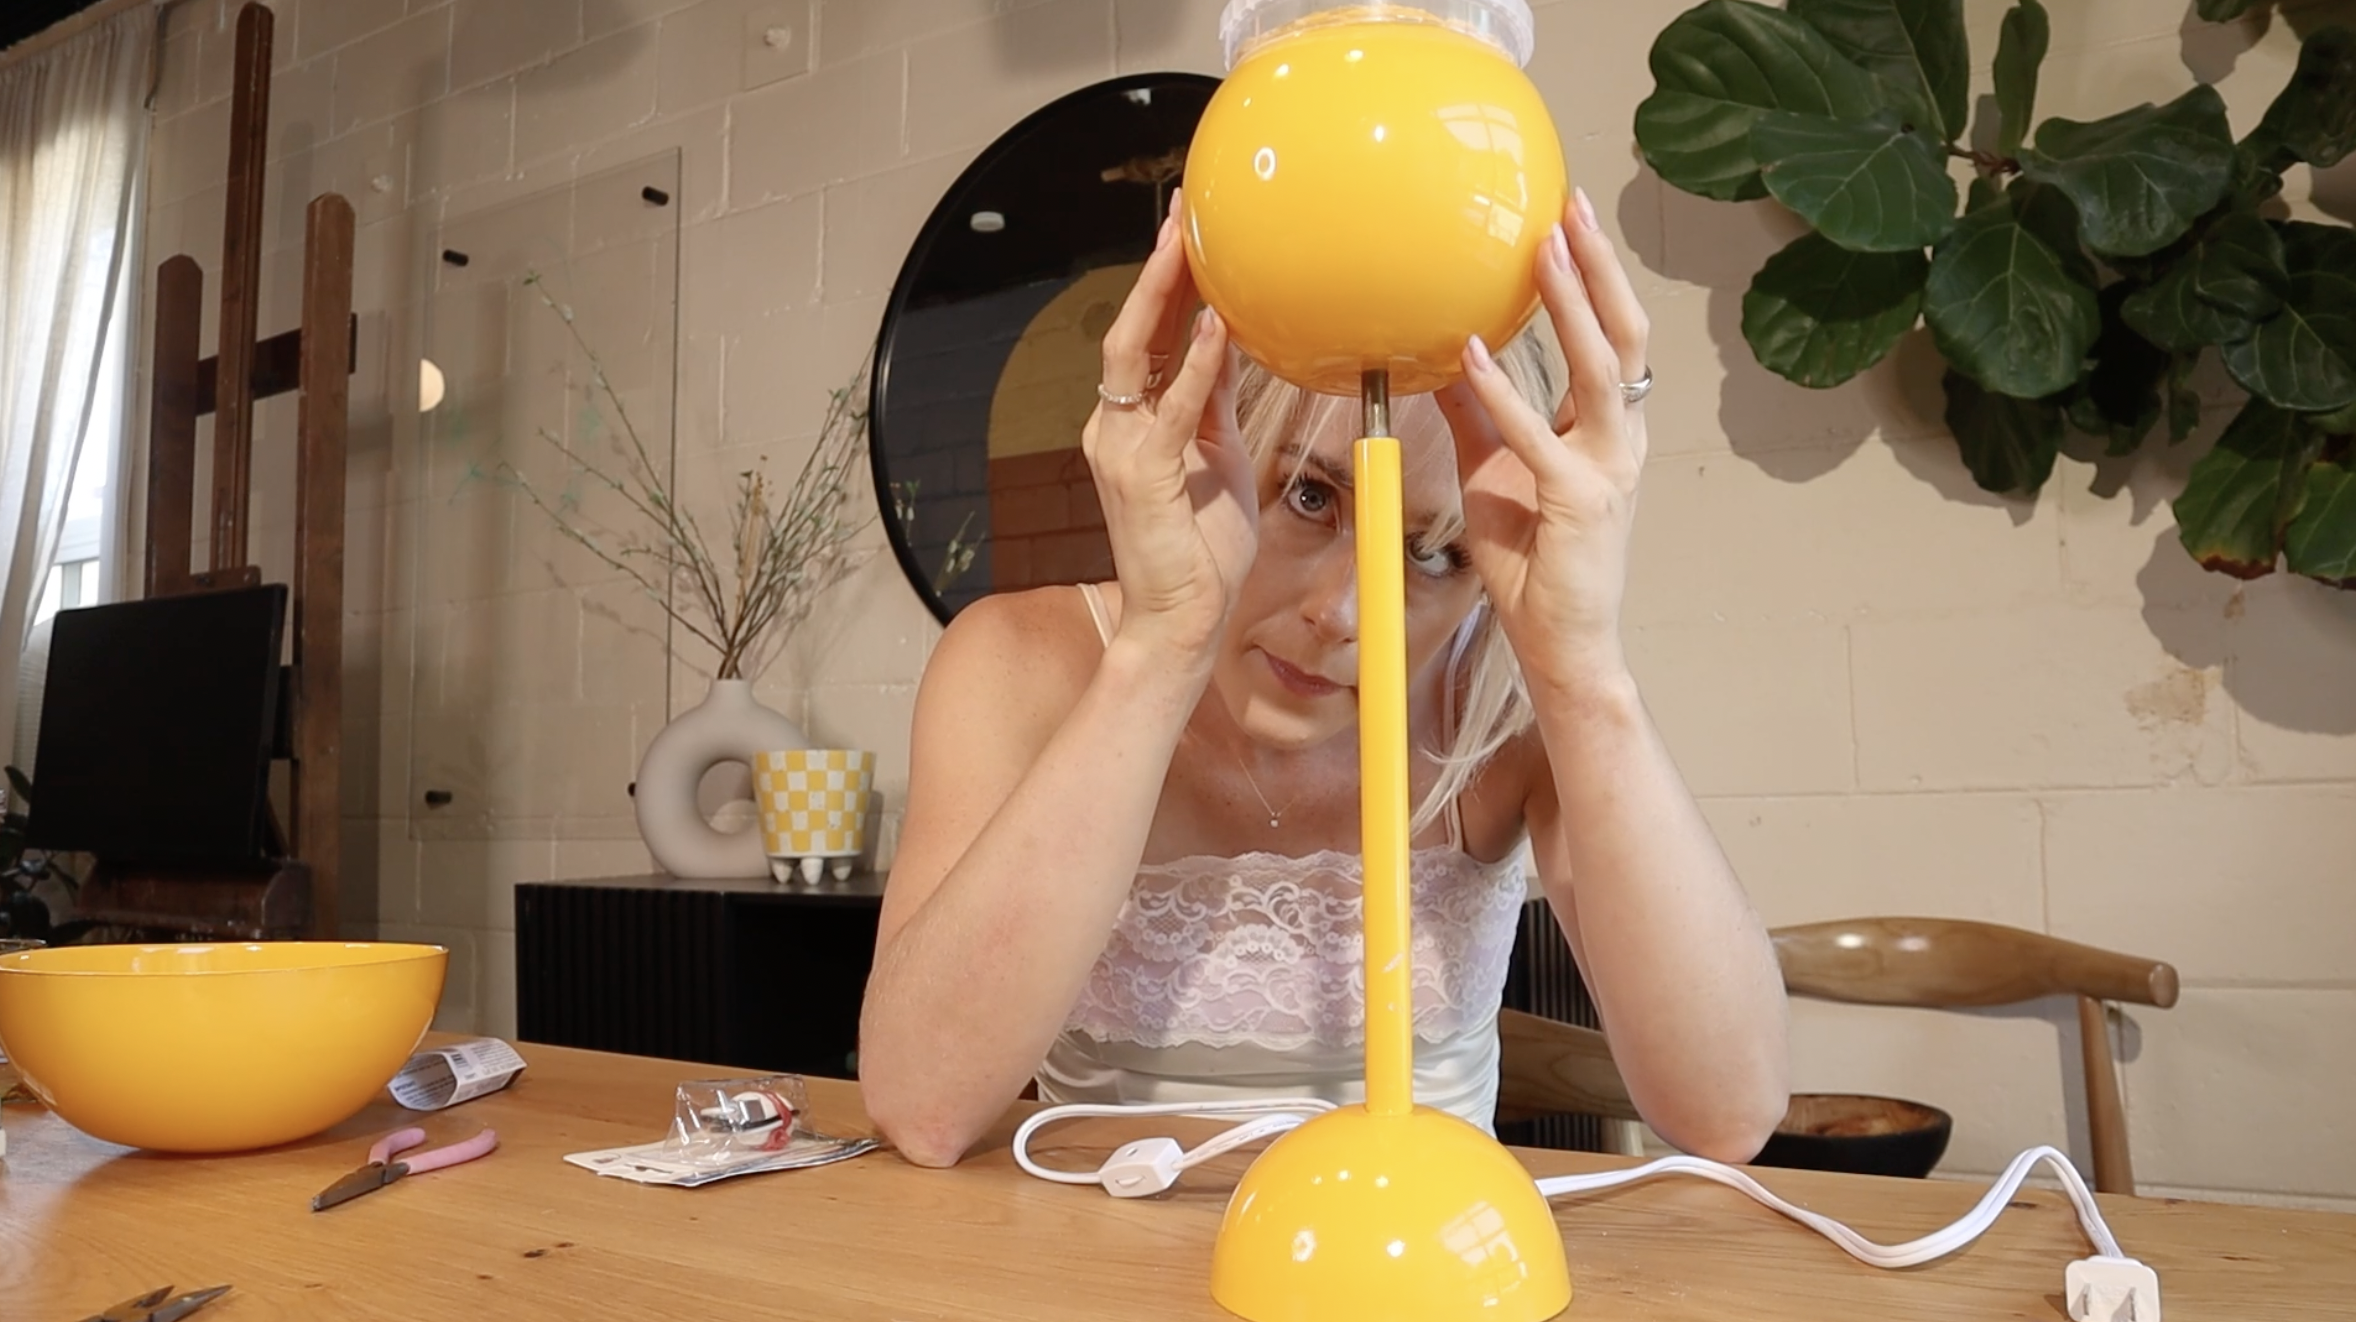
I went ahead to wire the lamp with a lighting cord and fixture. For this I chose a chandelier bulb-sized light fixture because I thought it would fit better inside the glass. I wired the lamp through the hole in the base and fed the wire through the rod until it came out on the other side. Then I put the glass globe on top, added my fixture and finished it off with the top of the lamp. Make sure to use an LED bulb for this lamp because there’s a lot of glass and paint involved and you don’t want the bulb to get hot.
As a final step I took a little wooden bead, sanded it until smooth then gave it a coat of yellow paint and glued it to the top of my lamp.


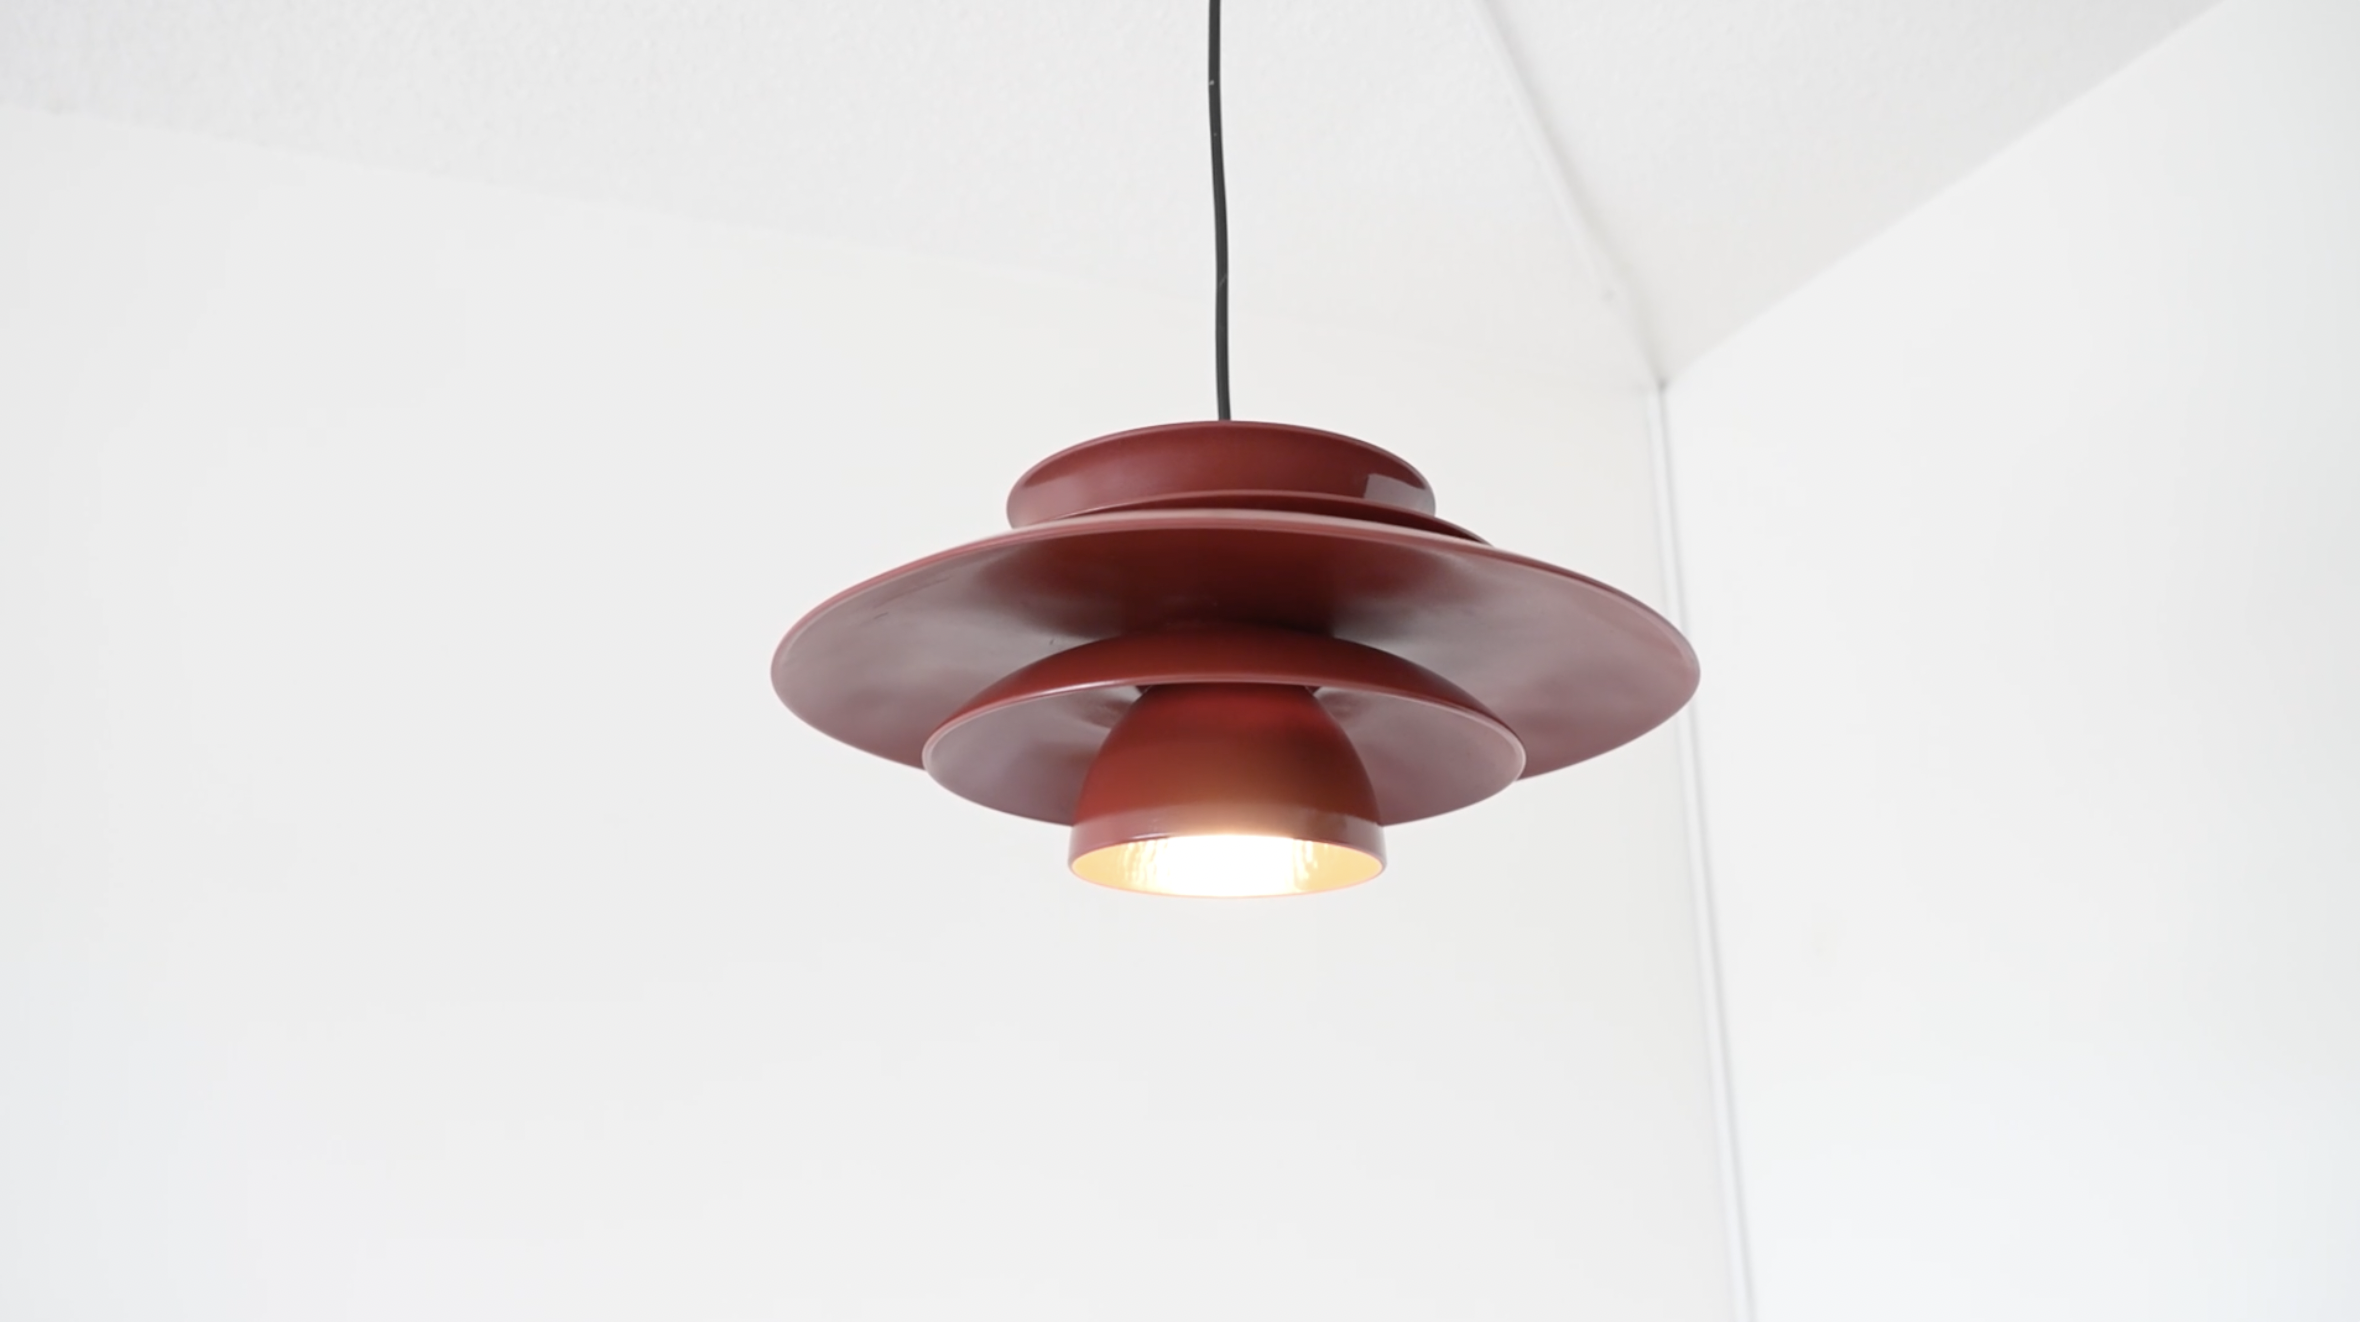
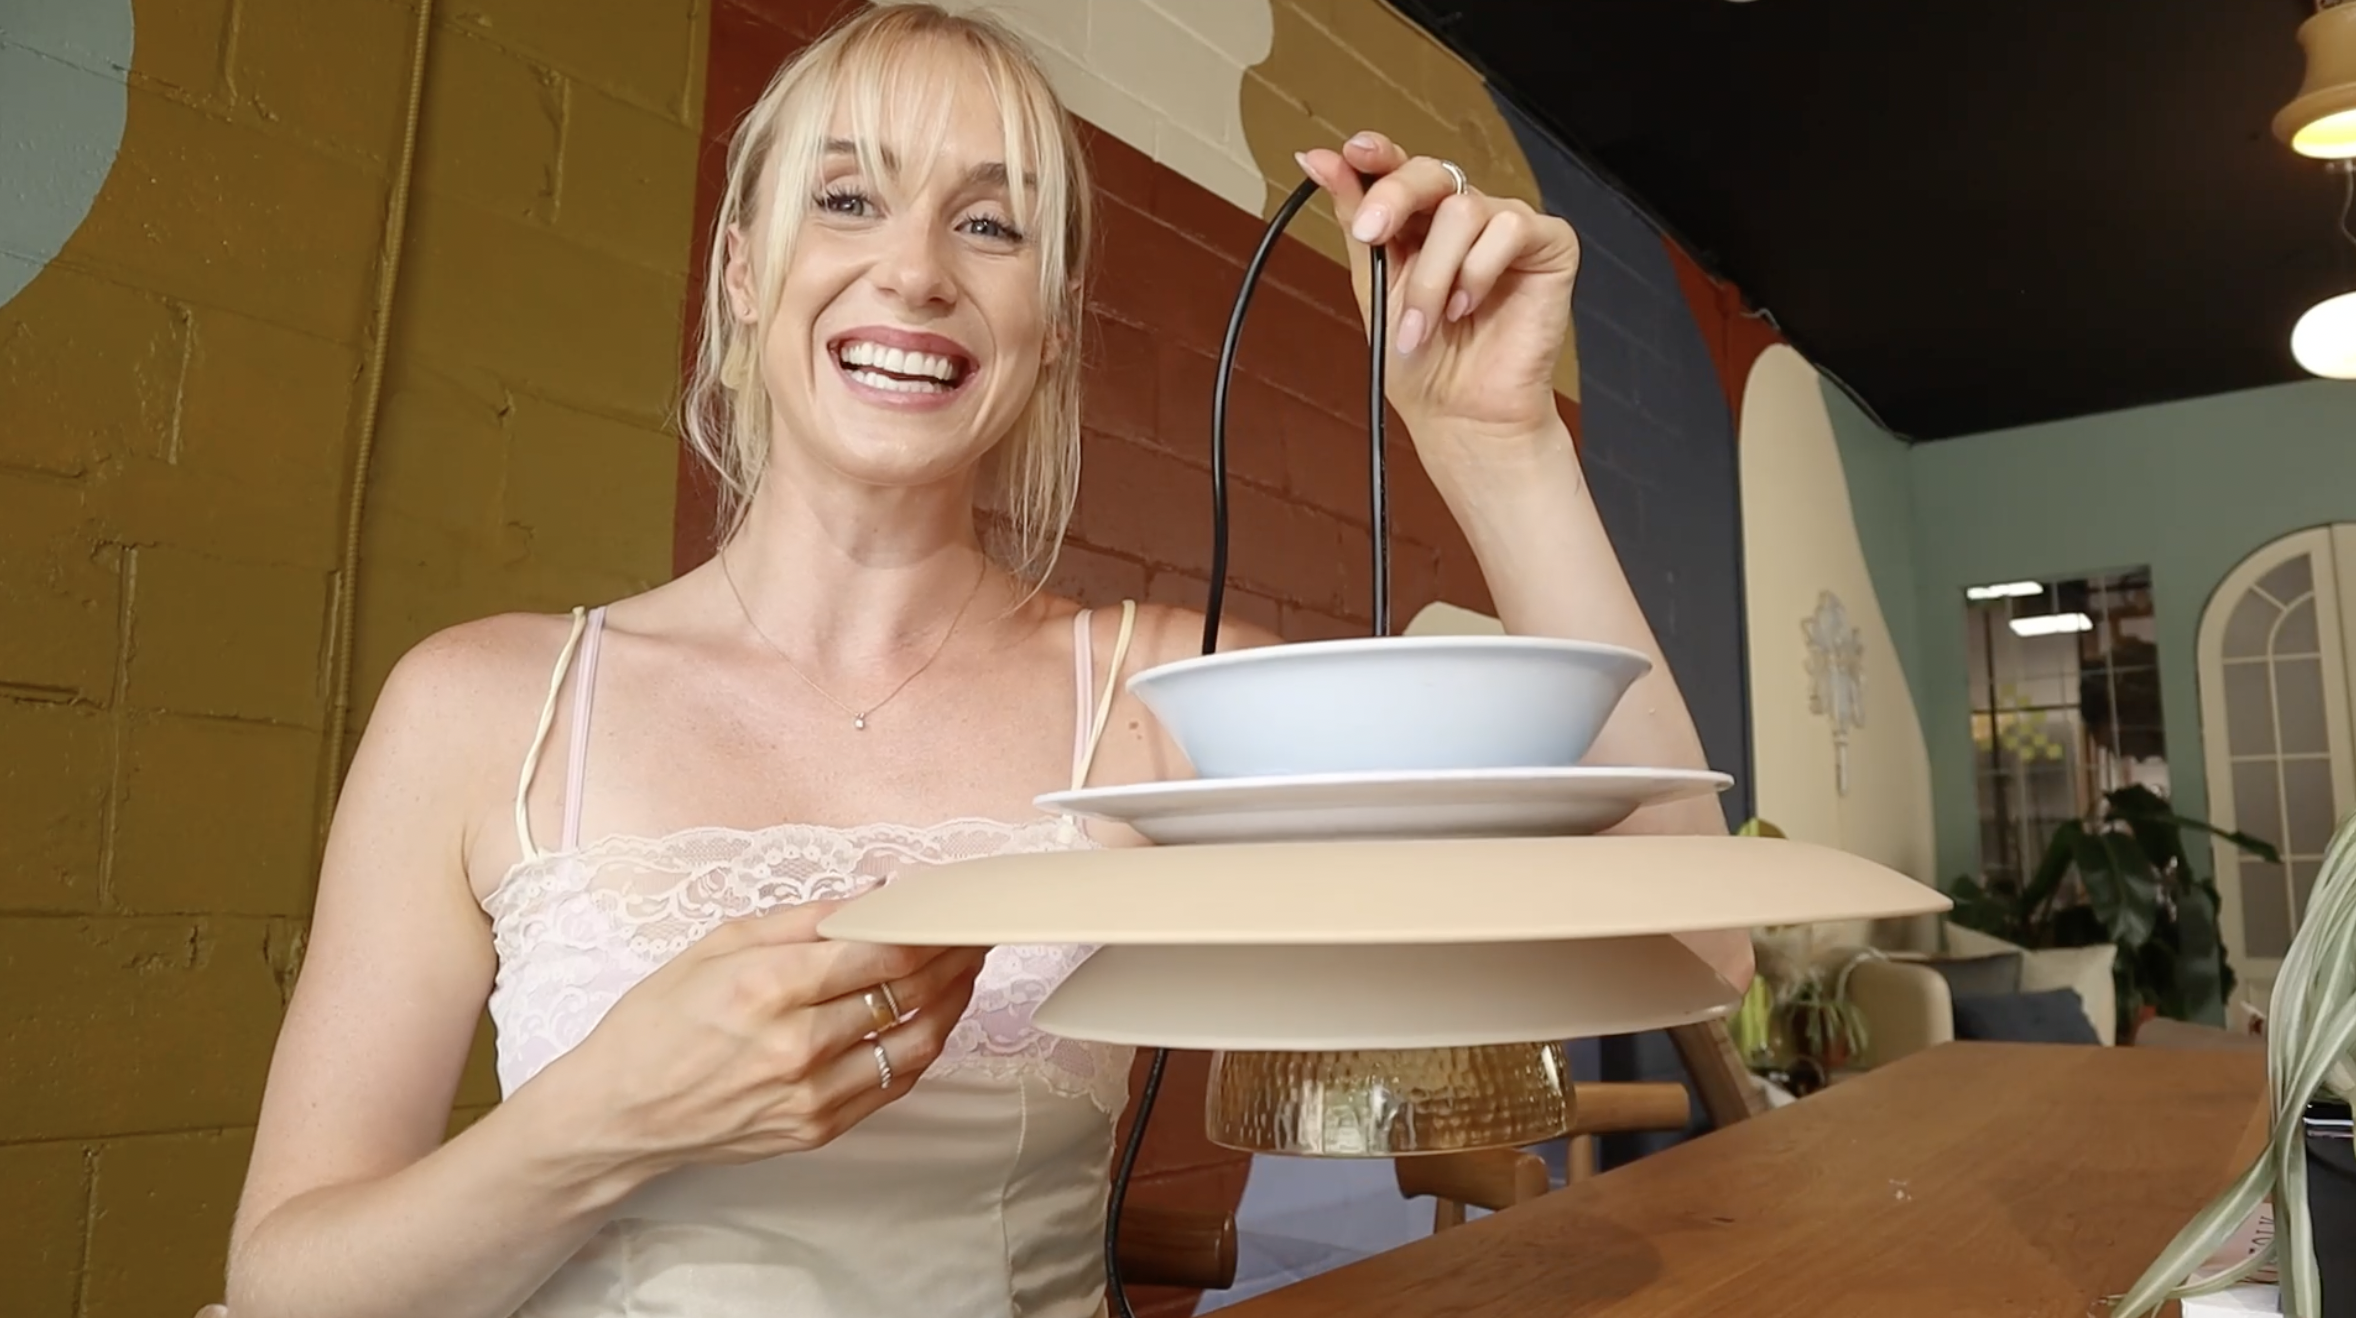
PENDANT LIGHT
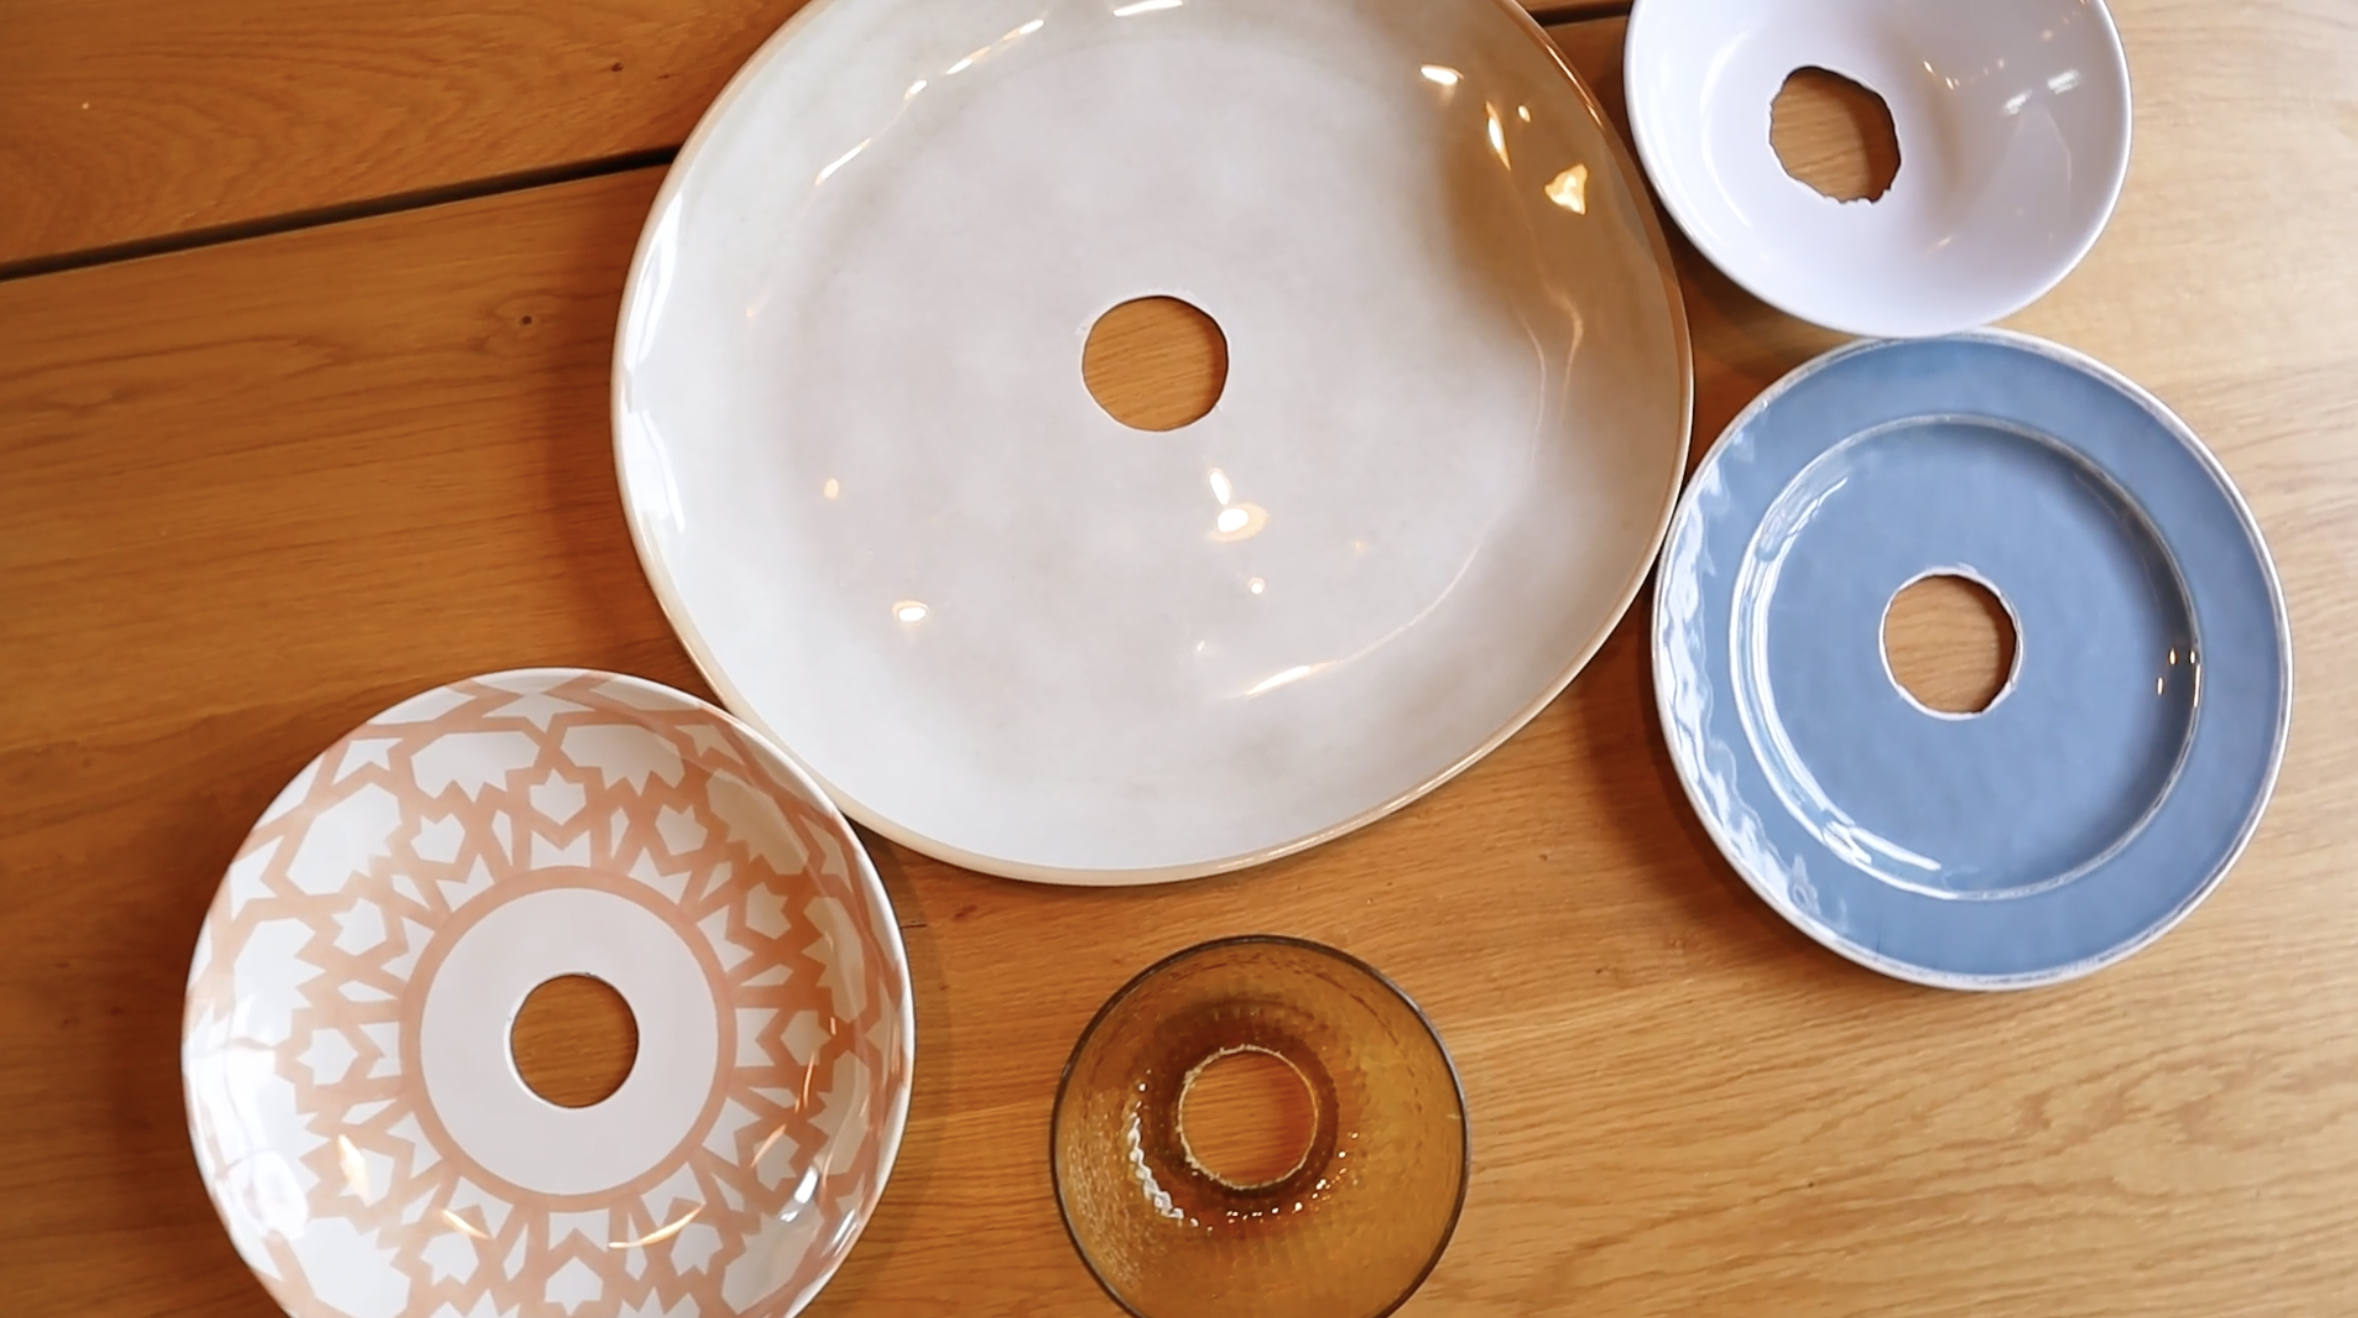
For this light I used a large serving platter and a bunch of plastic bowls in different sizes. I also got a plugin light fixture from Ikea which I will be building the bowls around. One important thing to keep in mind with your selection of bowls and plates is that you want to look out for things like scale, ratio, as well as the slope of each plate and bowl.
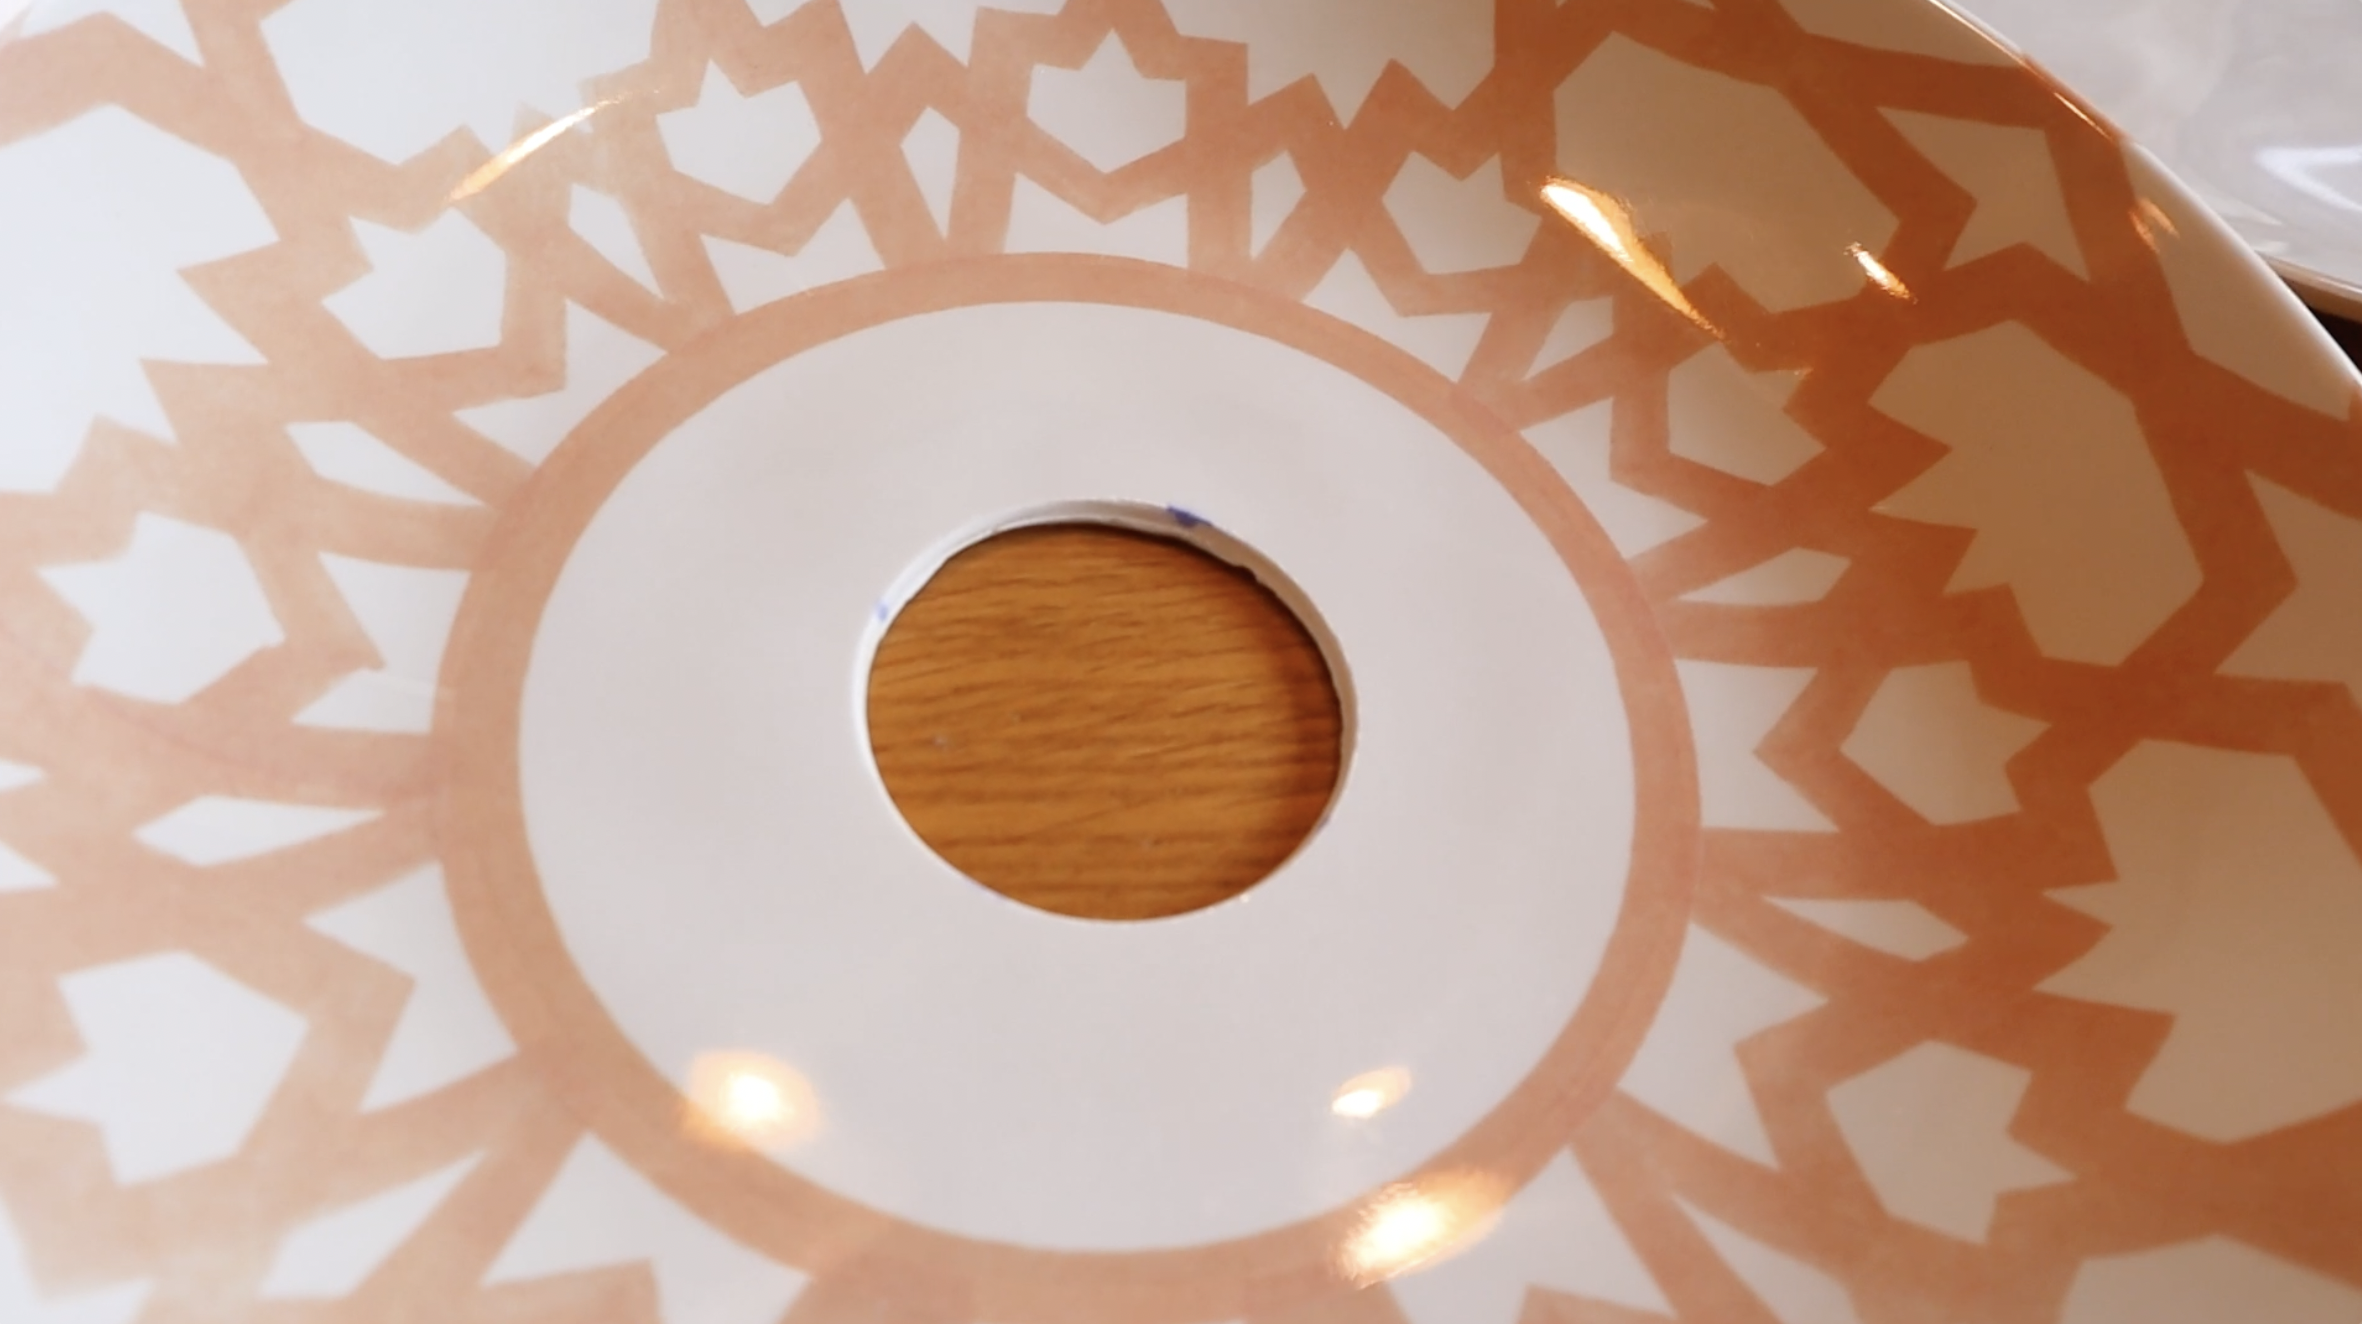
STEP #1: CUTTING HOLES IN EACH PIECE
In order for all my bowls to fit around the light fixture I bought, I used a hole saw in two different sizes pictured below. I marked out the centre on each plate and carefully went in to cut my holes.
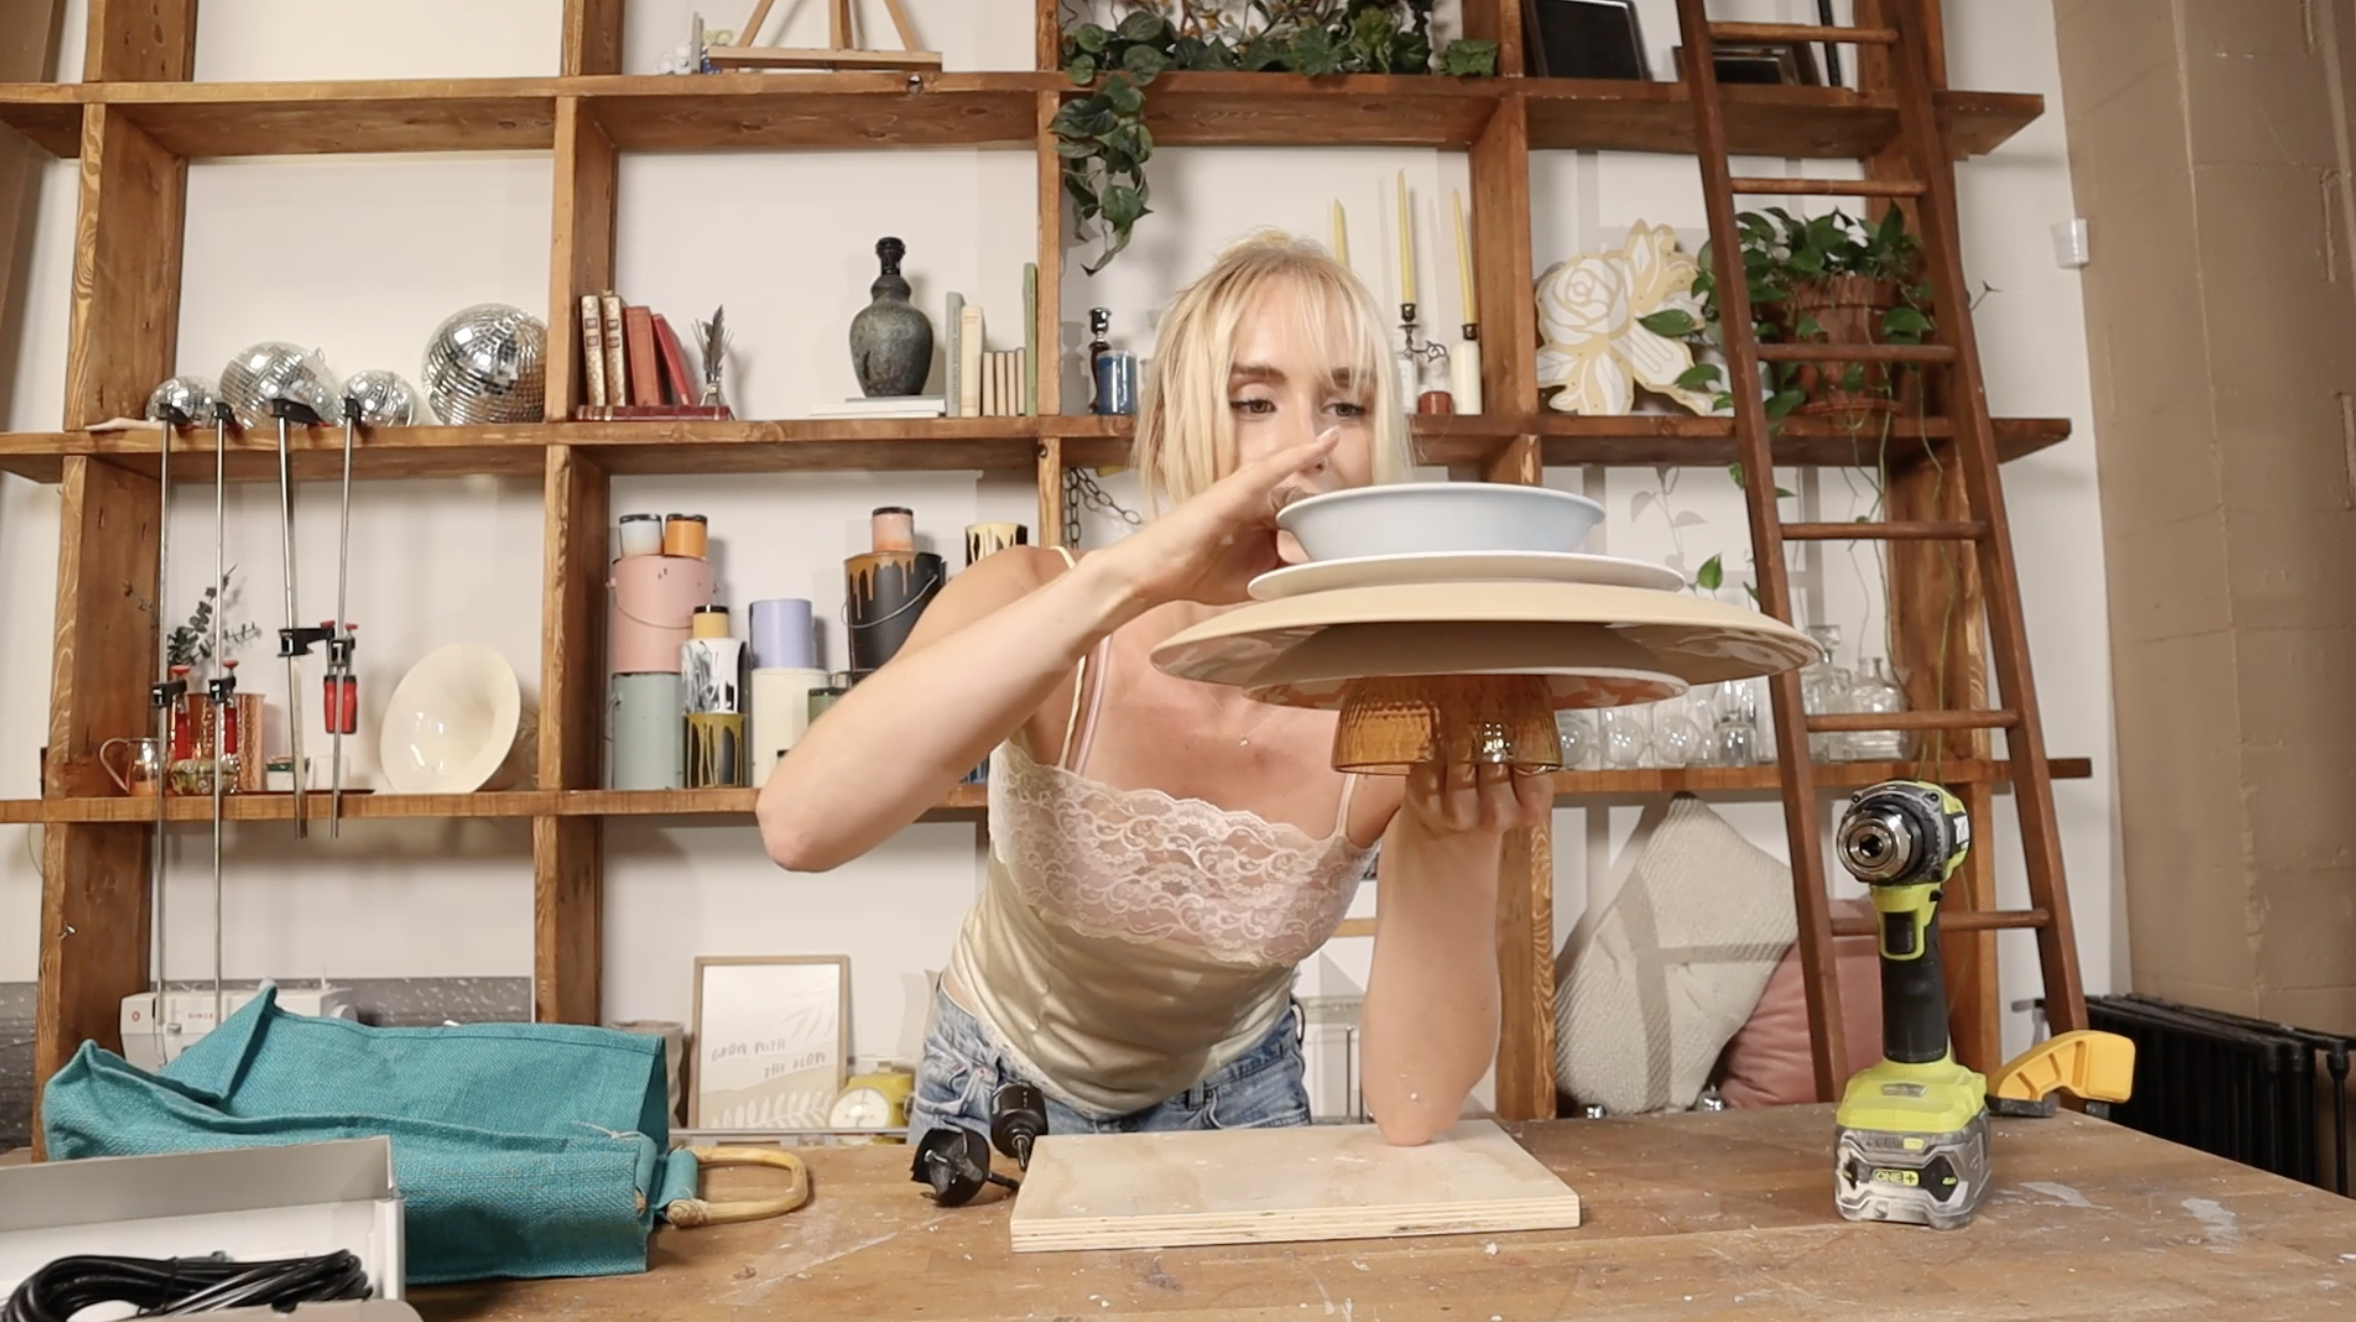
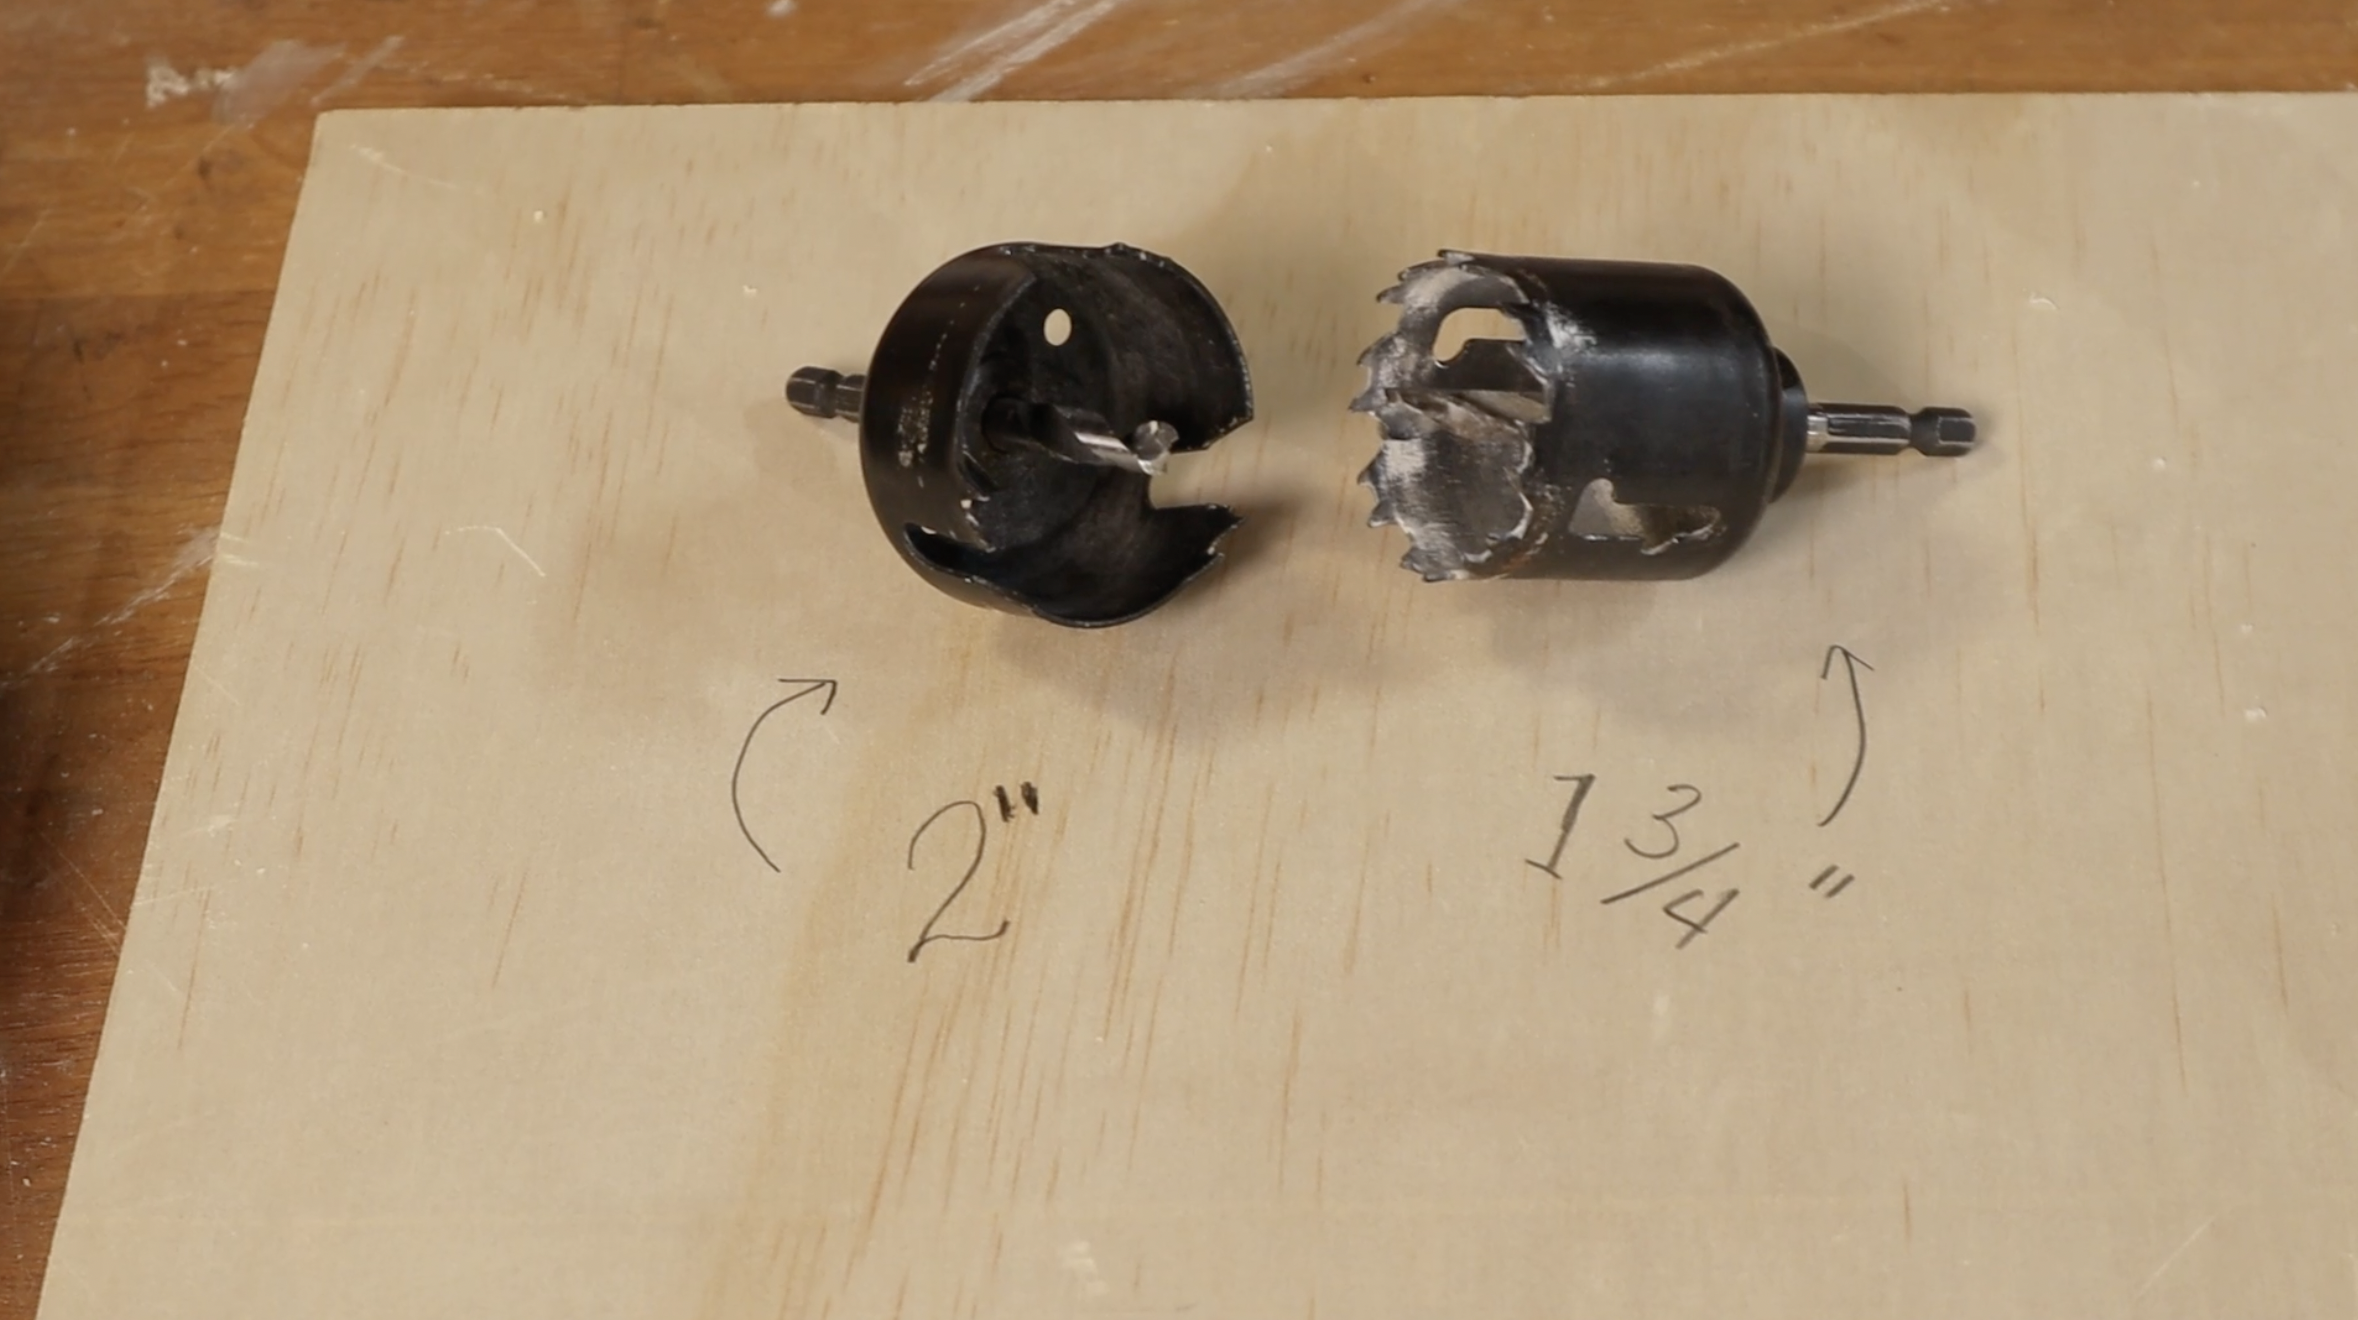
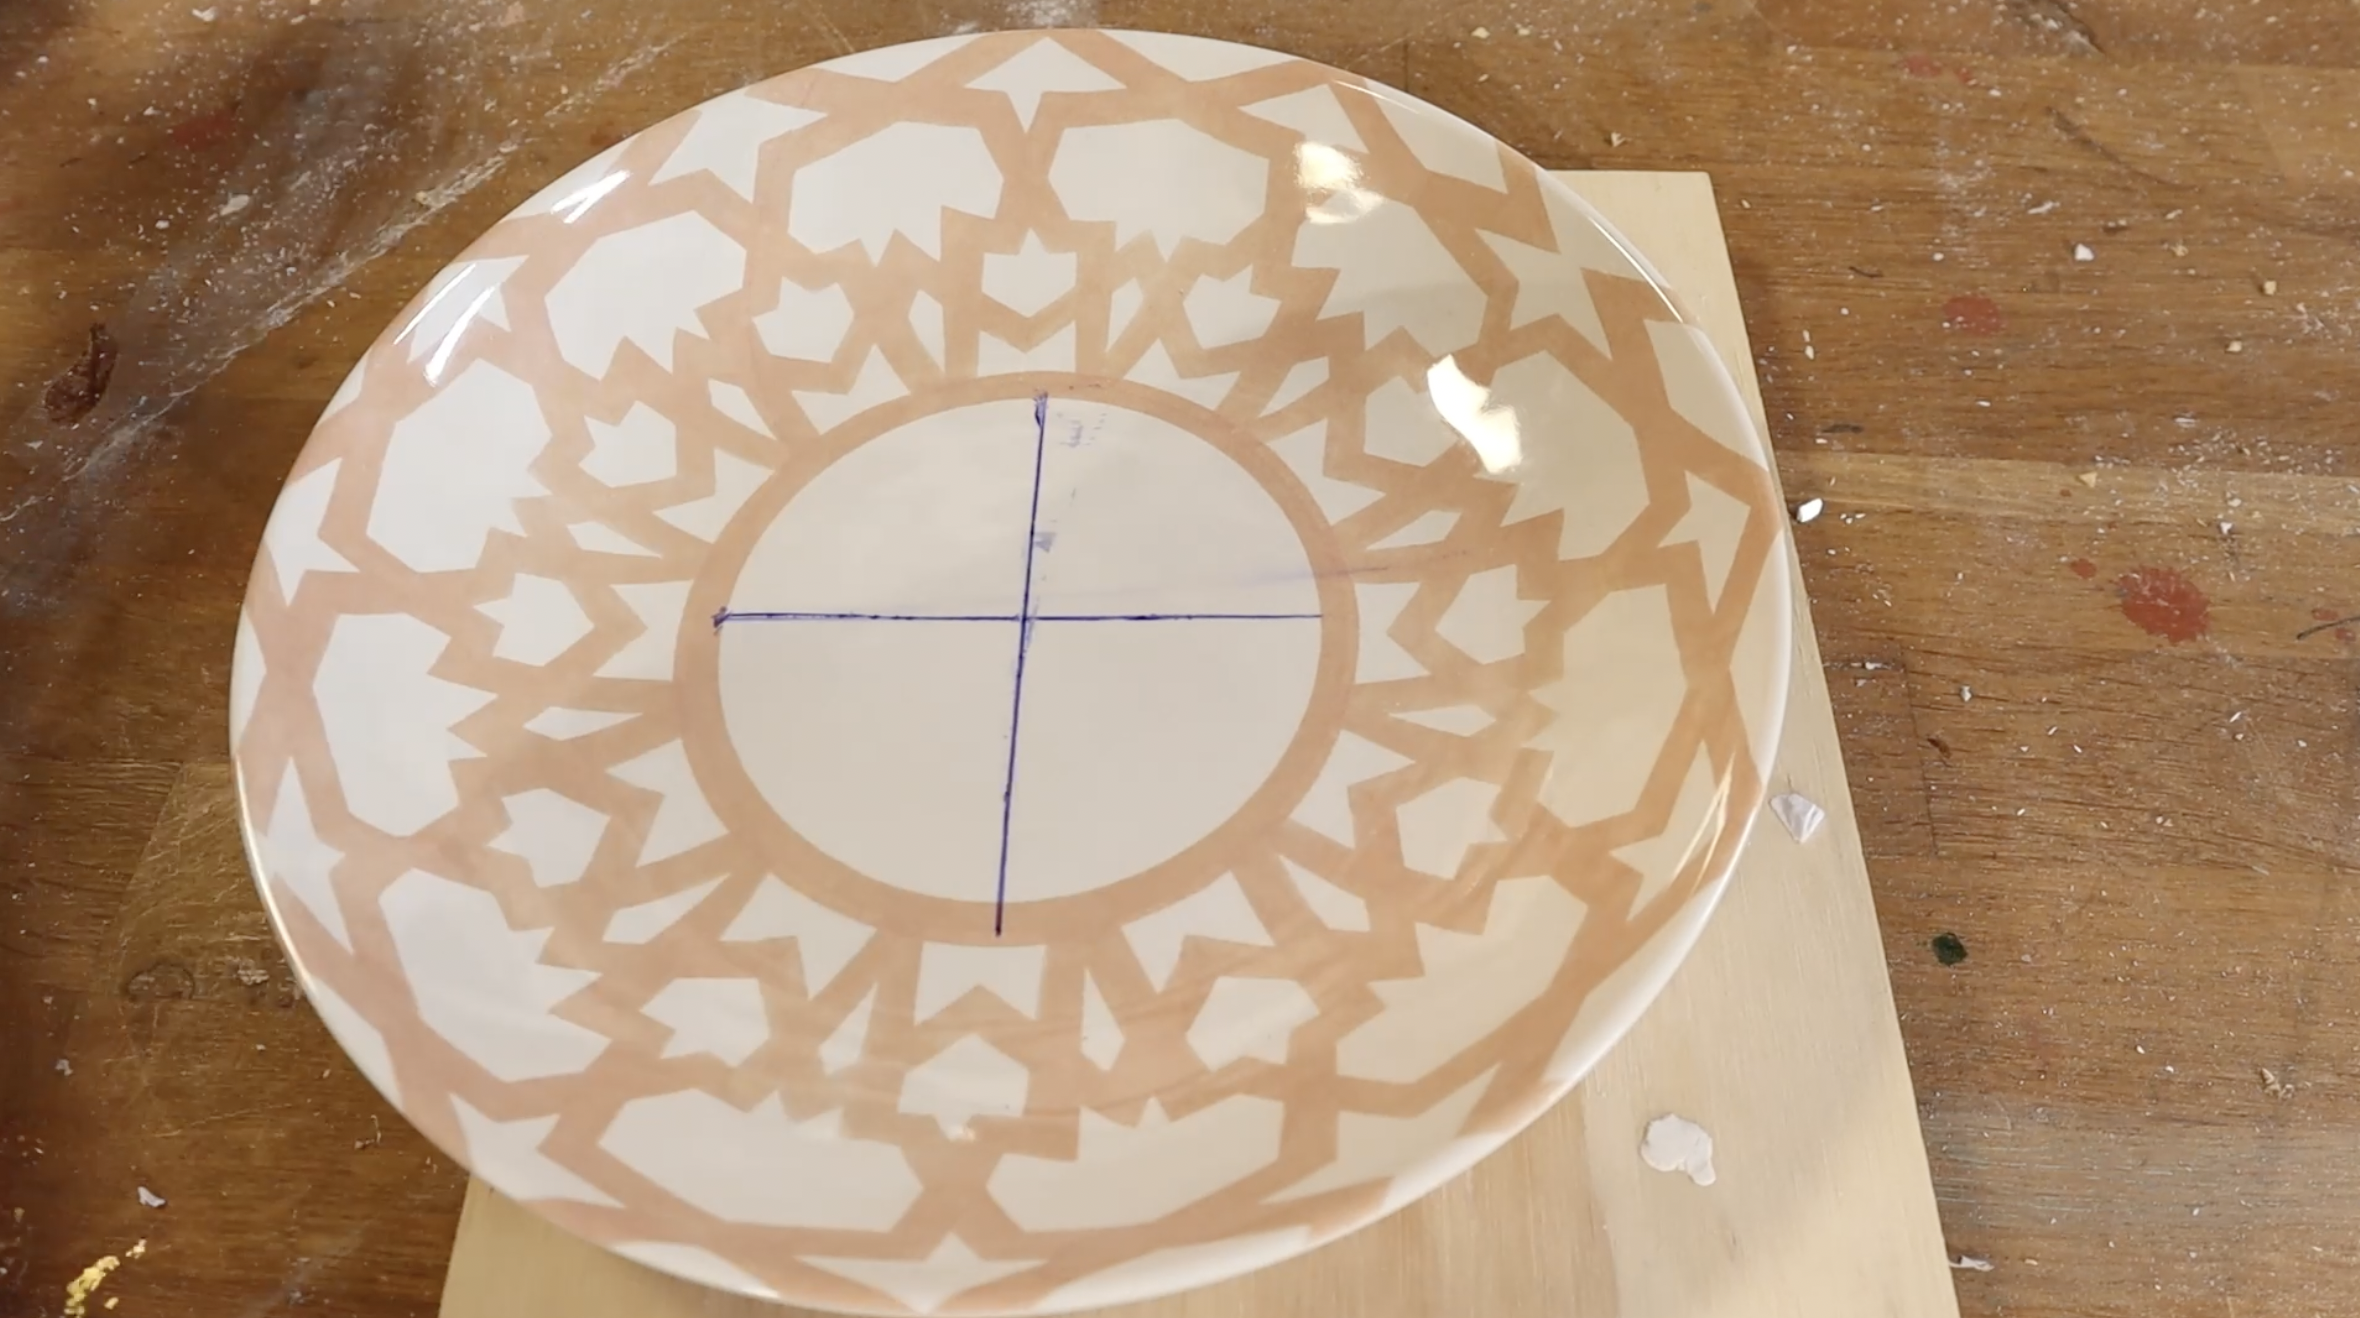

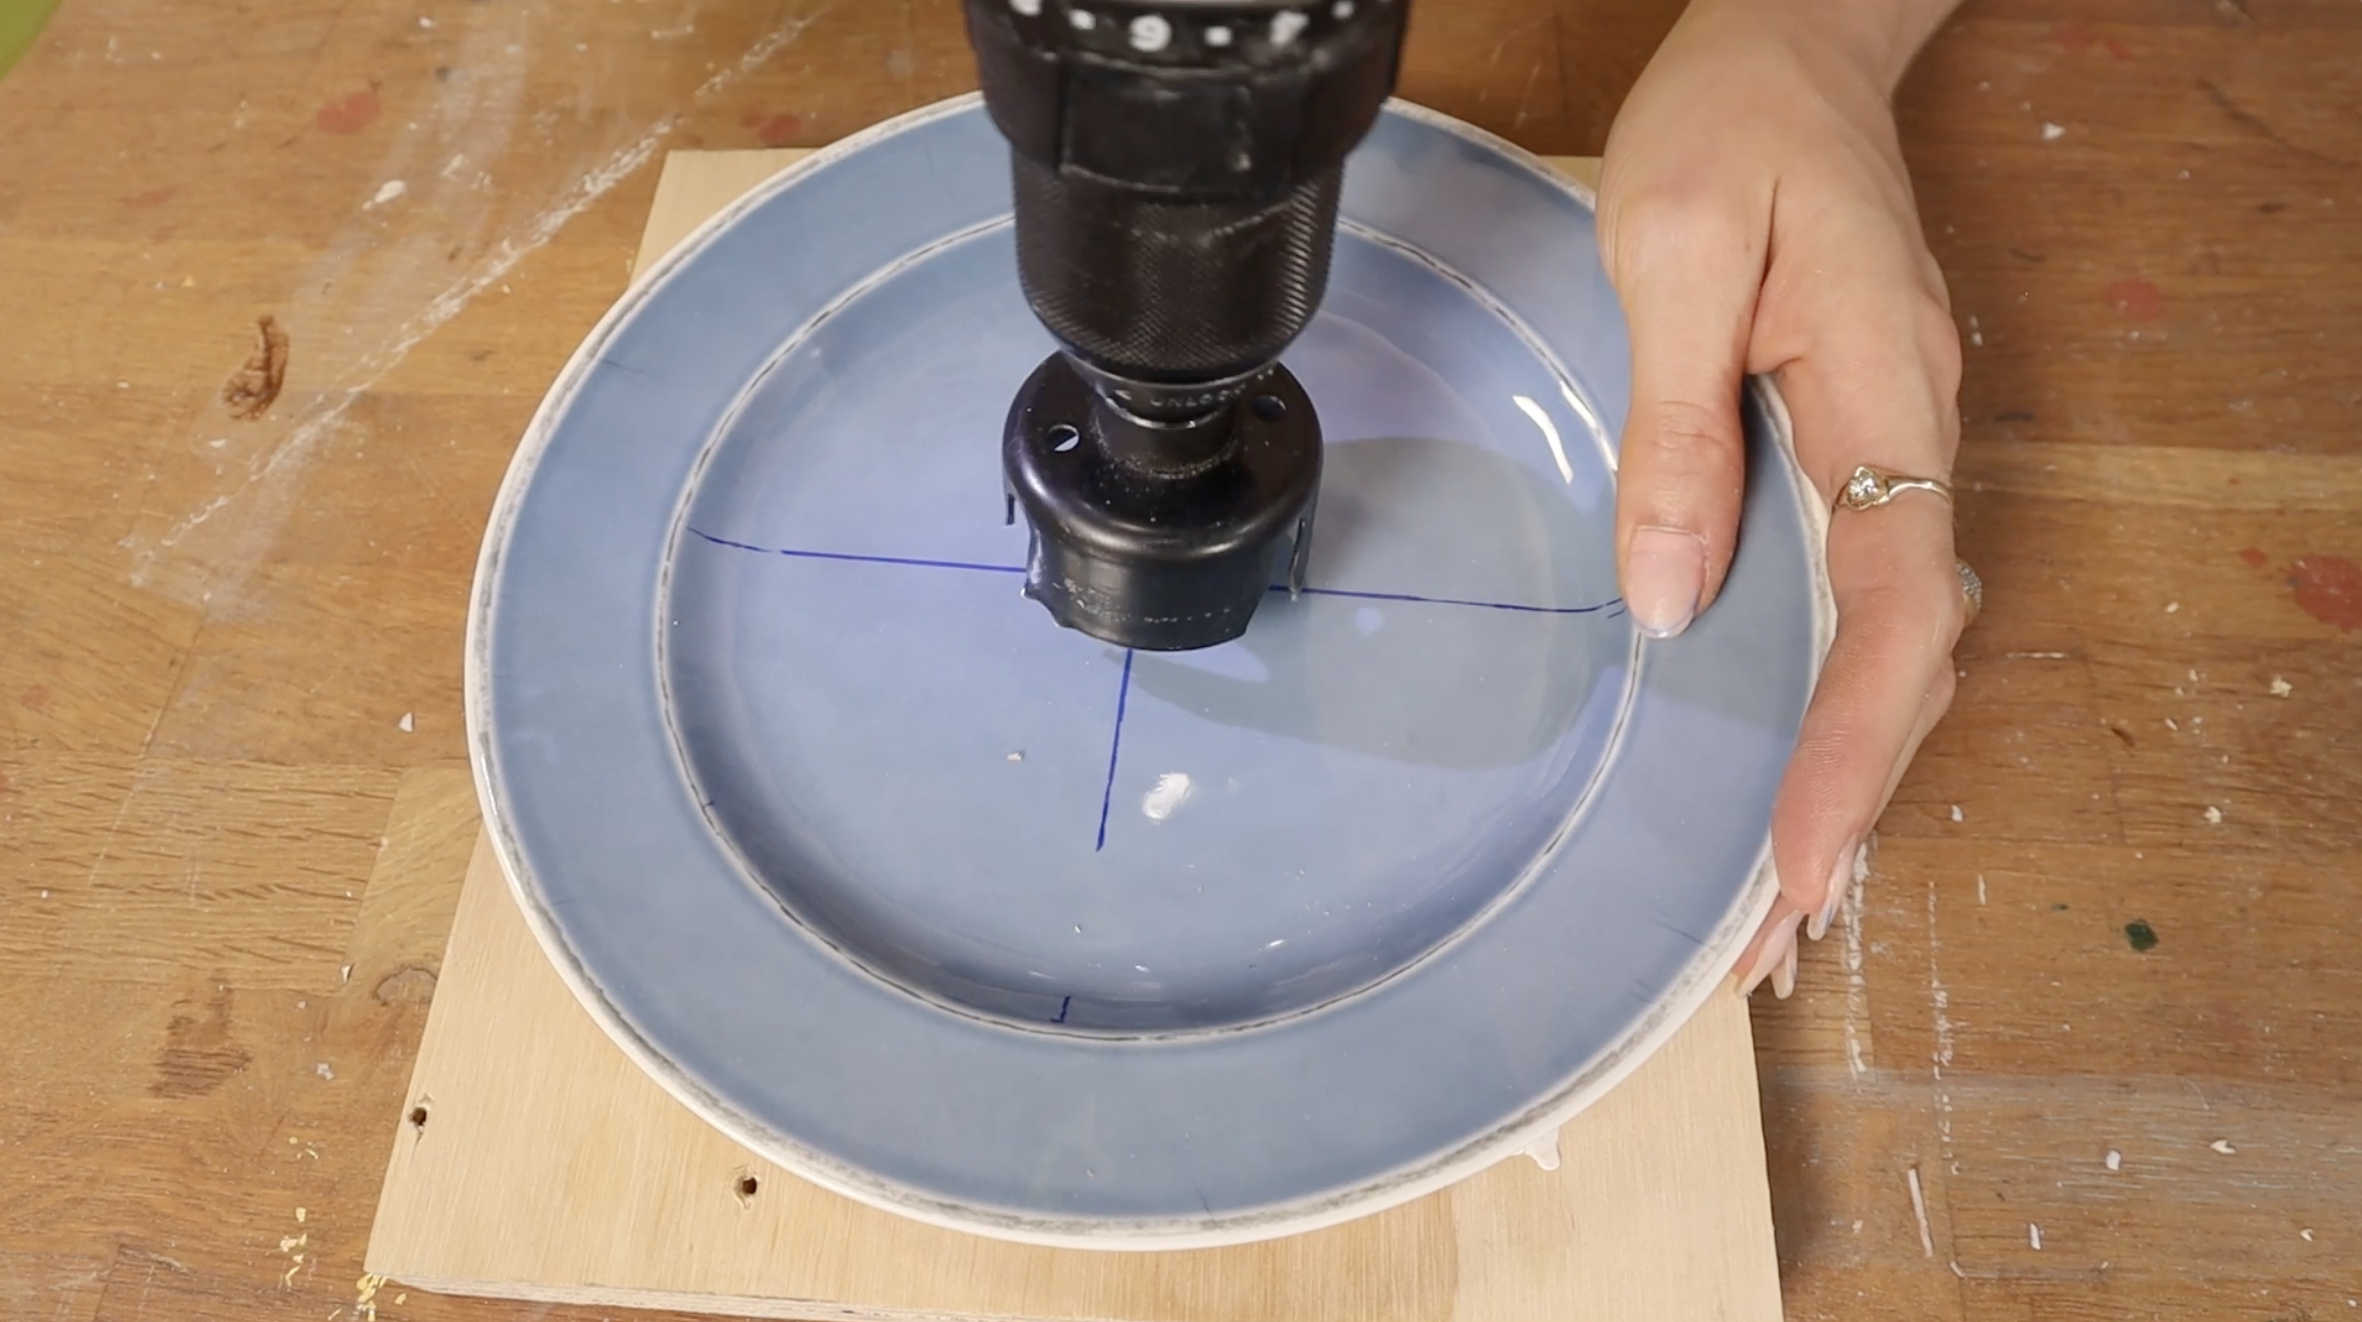
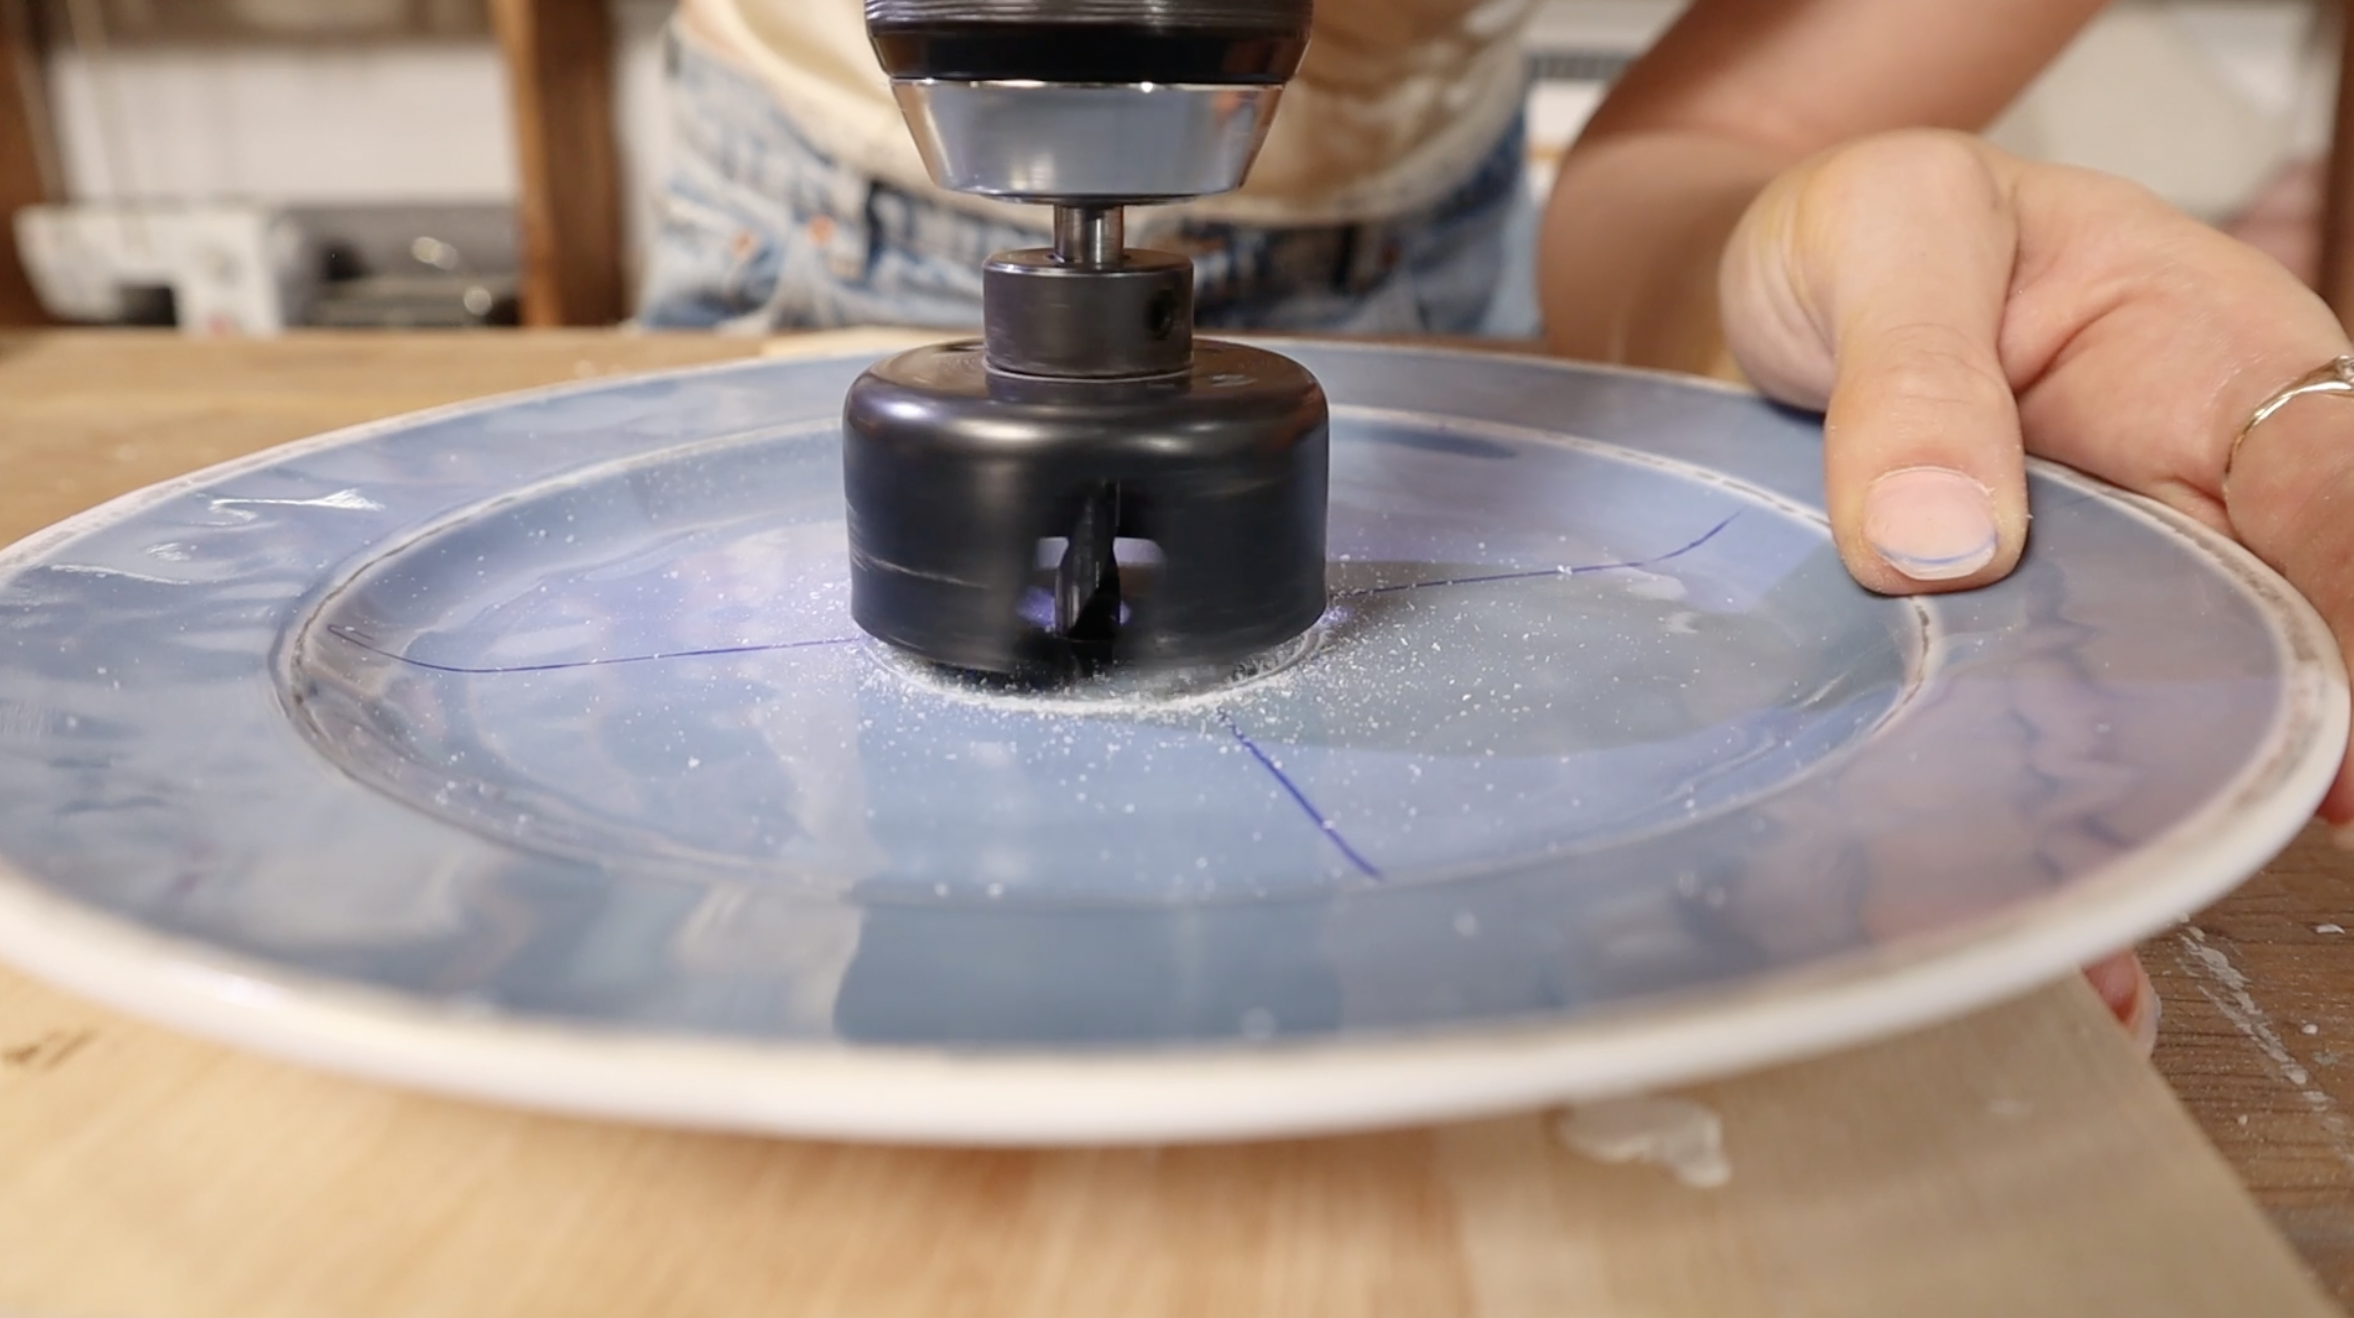
Before using a hole saw, I propped up my plate or bowl on a piece of scrap wood so the drill bit in the middle of the hole saw had something to catch on to. Similar to using a carbide drill bit, I went slowly with the drill while applying a consistent firm pressure. I let the bit take its time to grind away the plastic and repeated this step for all the plates and bowls. Then I placed all the plates on the light fixture one by one. To reinforce the whole piece, I added a little bit of hot glue between each plate to help them all stay in place. Now it’s time to paint!
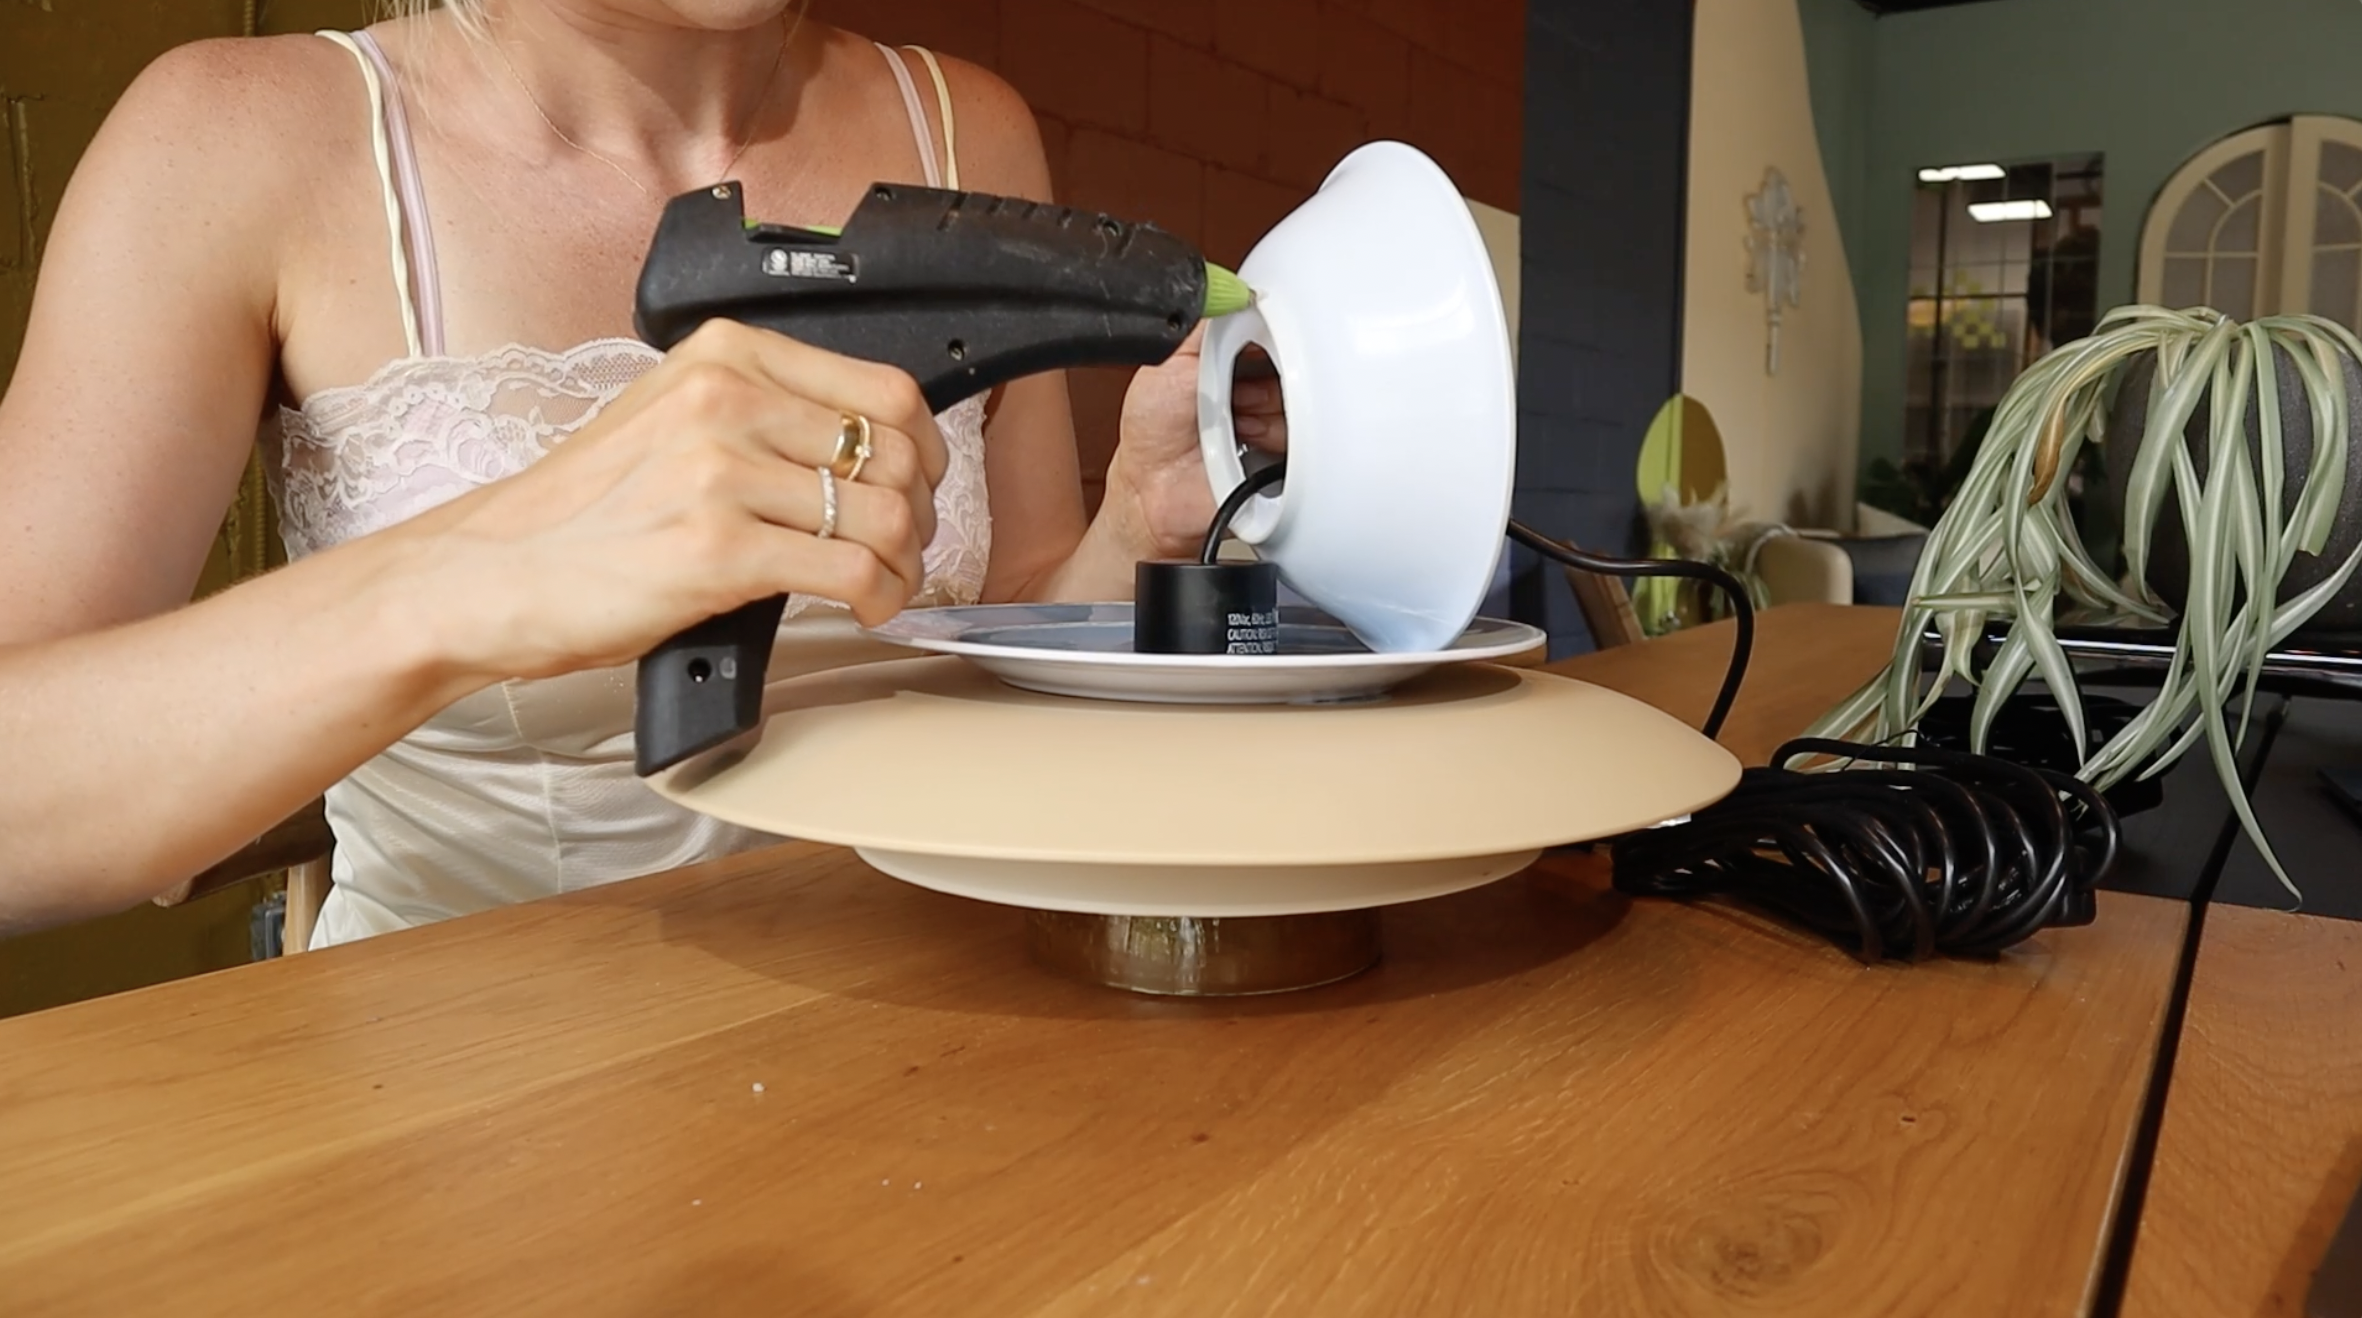
STEP #2 : ADDING A TOUCH OF PAINT
I decided to go with a deep cherry red colour because I thought it would look so cute on this pendant light. Using some spray paint, I coated the entire piece layer by layer until I got a nice opaque colour. Once the paint was fully dry, I reattached the piece back to the light fixture and now I have a gorgeous pendant light!
