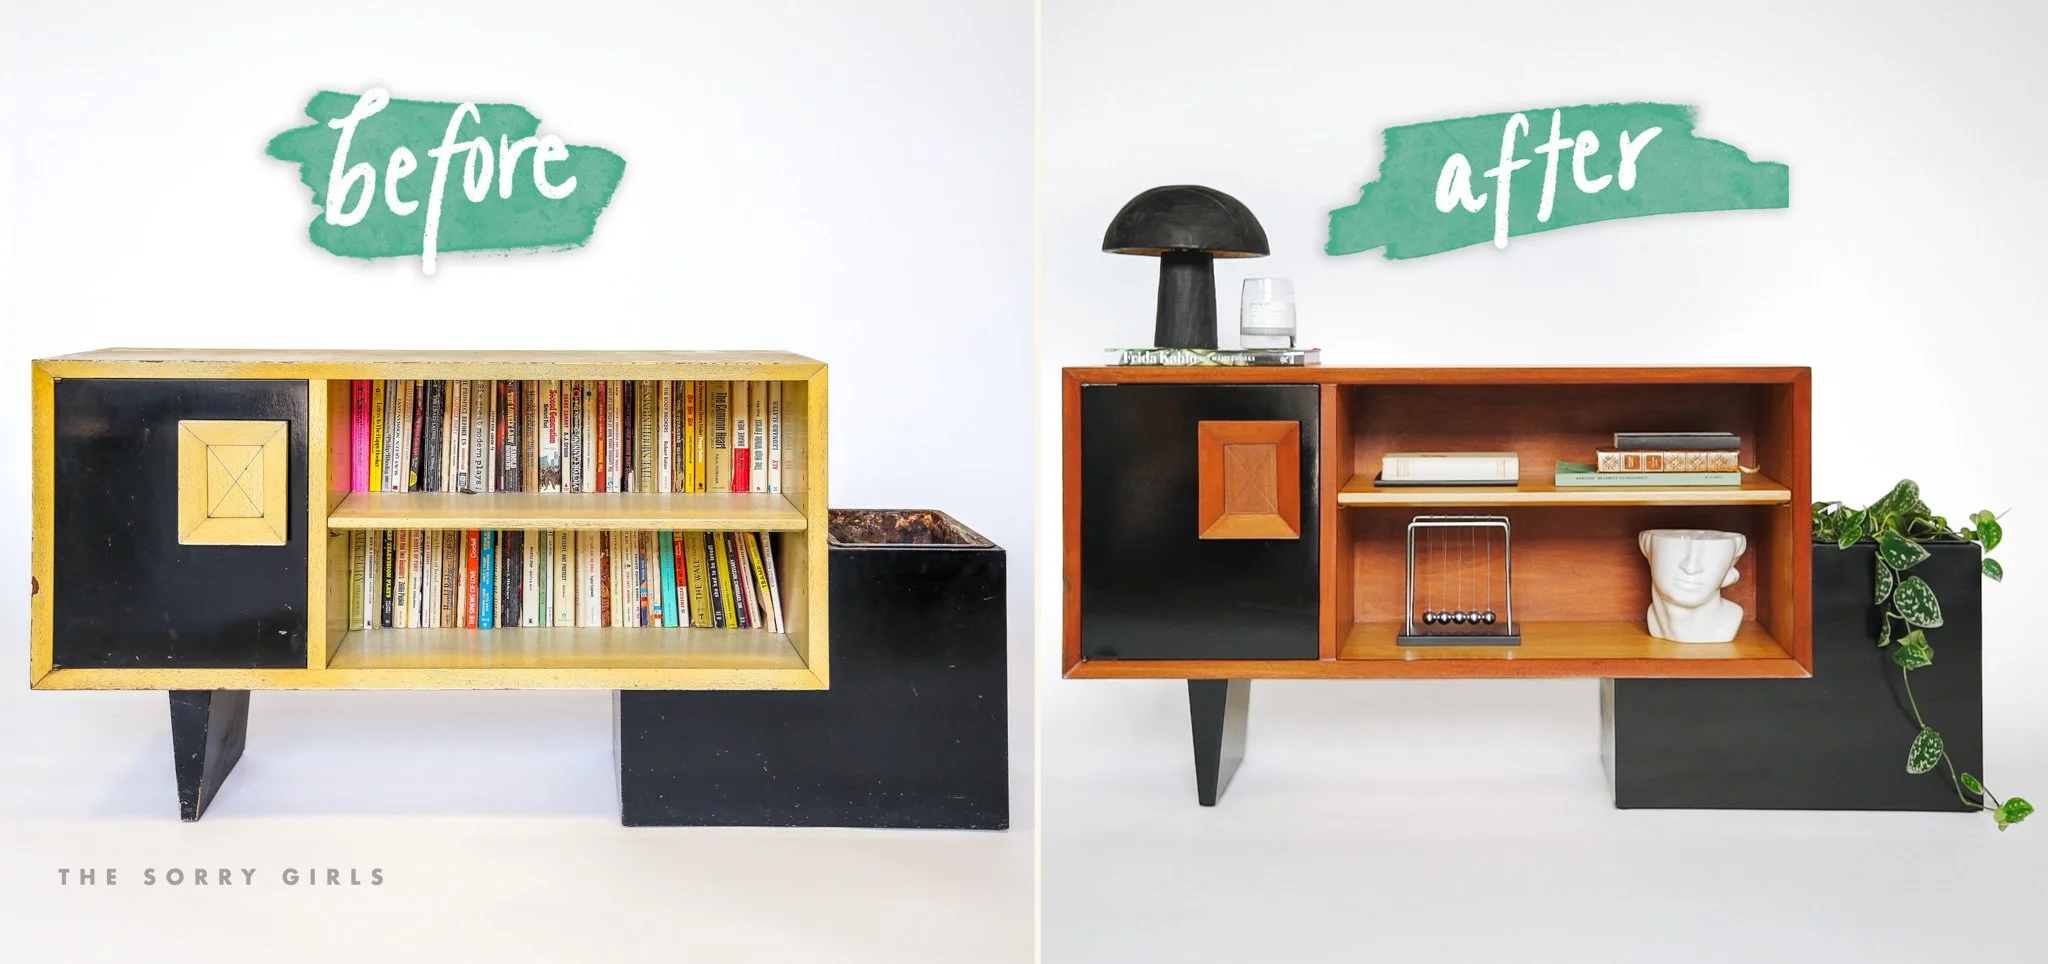
Art Deco Era Credenza Restoration
Welcome back to Project Profit, the series where I transform used items into profits for non-profit organizations. In this blog post, I’m reviving a stunning Art Deco-era credenza generously gifted from our landlord, Sheldon. This beautiful piece came with great storage space and a unique planter bucket, a testament to the trends of its time. However, years had taken their toll, leaving behind faded paint, minor dents, and a rusty planter bucket.
Before


Stripping the paint
One of the most critical stages in restoring the credenza was stripping away layers of worn-out paint. It was definitely a labor of love — to preserve the original wood and achieve a clean finish it takes a lot of steps. First (and most importantly), I made sure to check the paint for lead, and it passed. You can never be too careful when working with vintage furniture! I also made sure to be working outdoors and wear appropriate safety gear, including gloves and a mask, to protect us from fumes and dust.
Once everything was set up, I coated the surface in paint stripper — this only really works when it is wet and when letting it sit on the surface for at least 30 minutes. Covering the coated areas in plastic bags helped to keep it wet while working so I could just work away at the existing paint with a scraper.


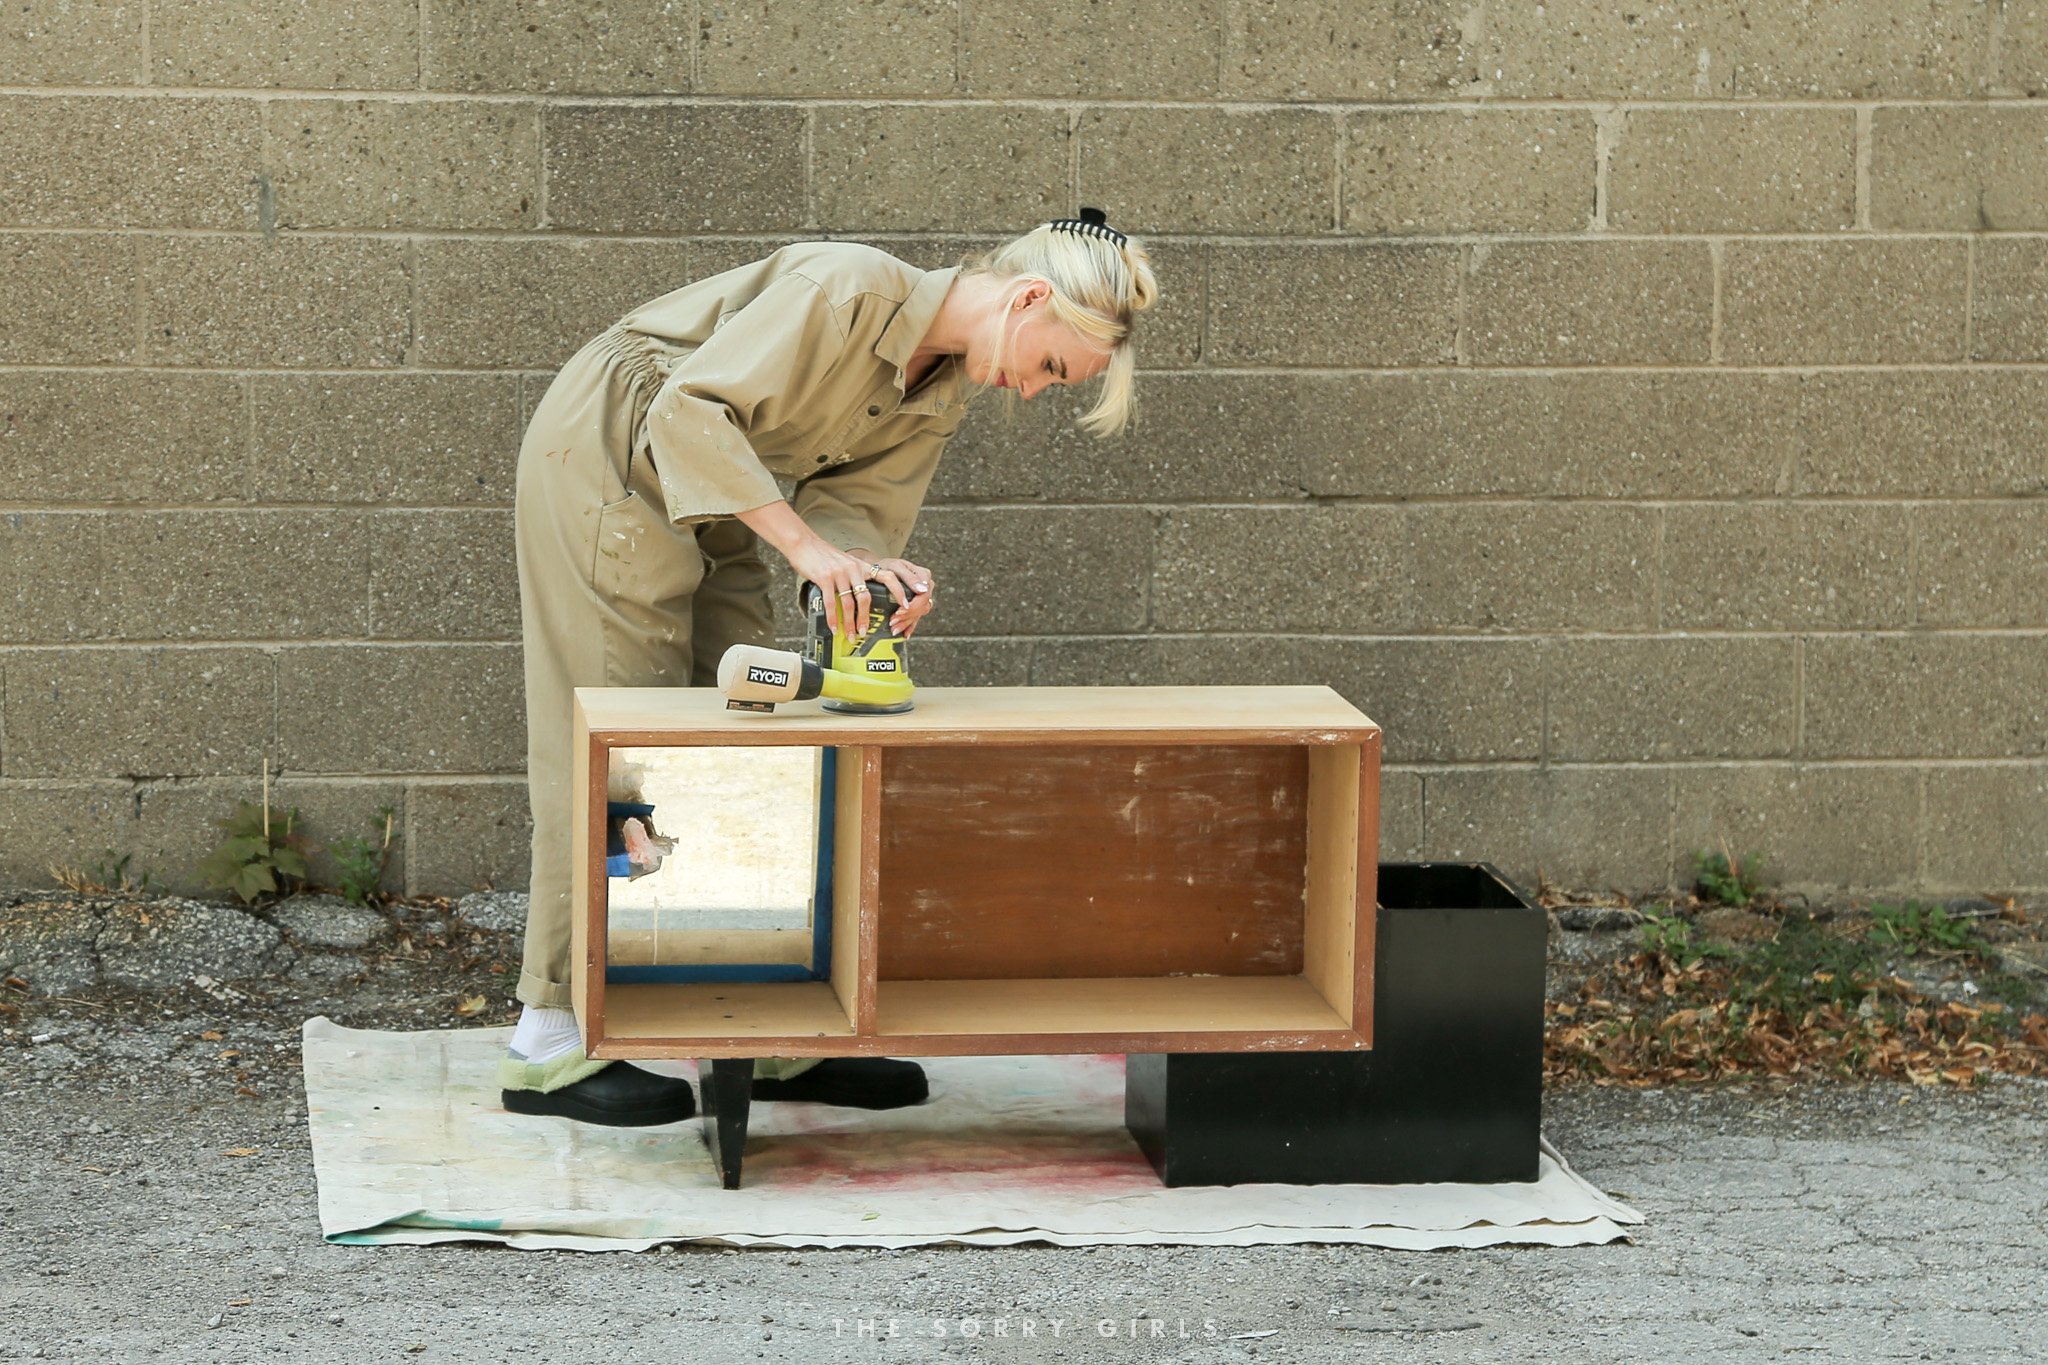
Sanding The Surface
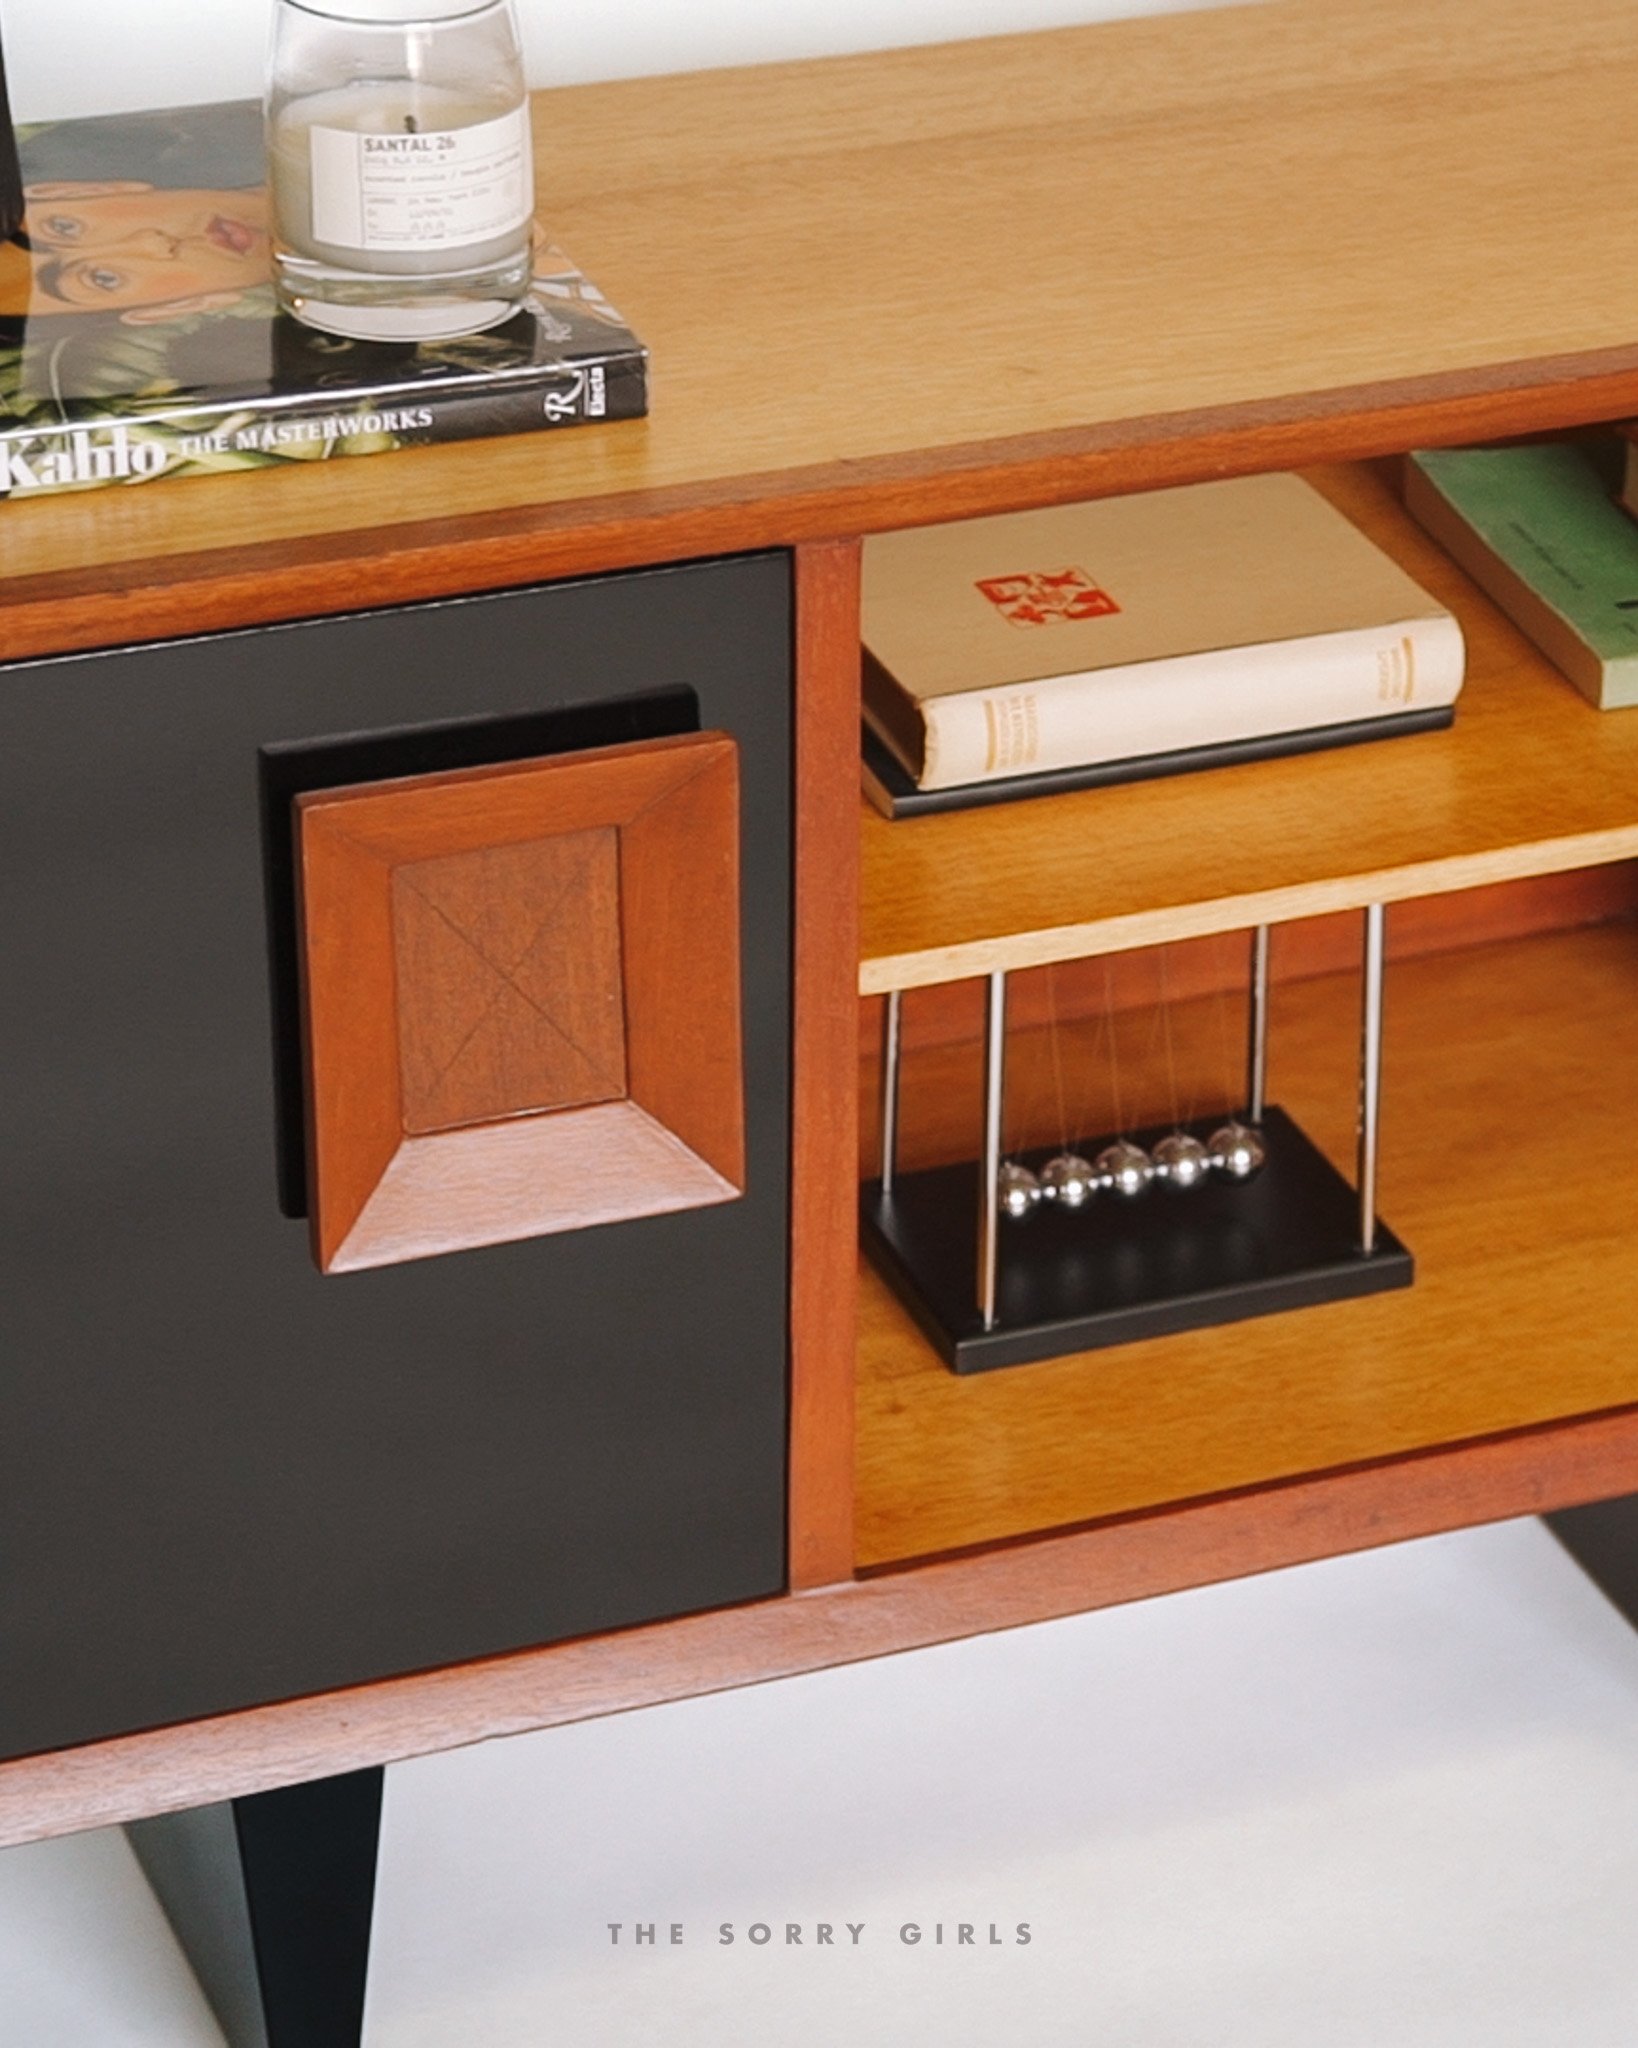
After scraping away all the wood, a BEAUTIFUL two toned wood finish was revealed. The next step was just sanding every single surface of the piece to give the wood the best finish POSSIBLE. That said, there was one big ding in the piece that needed to be filled in, so instead of using commercial wood filler that wouldn’t match perfectly, I decided to make my own by collecting some of the sawdust from sanding the surface and mix it with some wood glue. It ended up being a perfect match.

Condition & Staining
Once the whole surface was fully smooth and ready for a new finish, I went in with a deep wood conditioner, let that sit and then covered it with my desired finish! I was SO happy with how it was looking, but there was still one more thing to address.

Restoring the Corroded Planter
One of the most intriguing features of this vintage piece was the rusty planter bucket. After the LONG process of scraping away loose rust and soaking it in various solutions to tackle stubborn corrosion, the transformation was truly remarkable. I then used a metal spray paint primer and paint to make sure it doesn’t corrode again as it did previously.


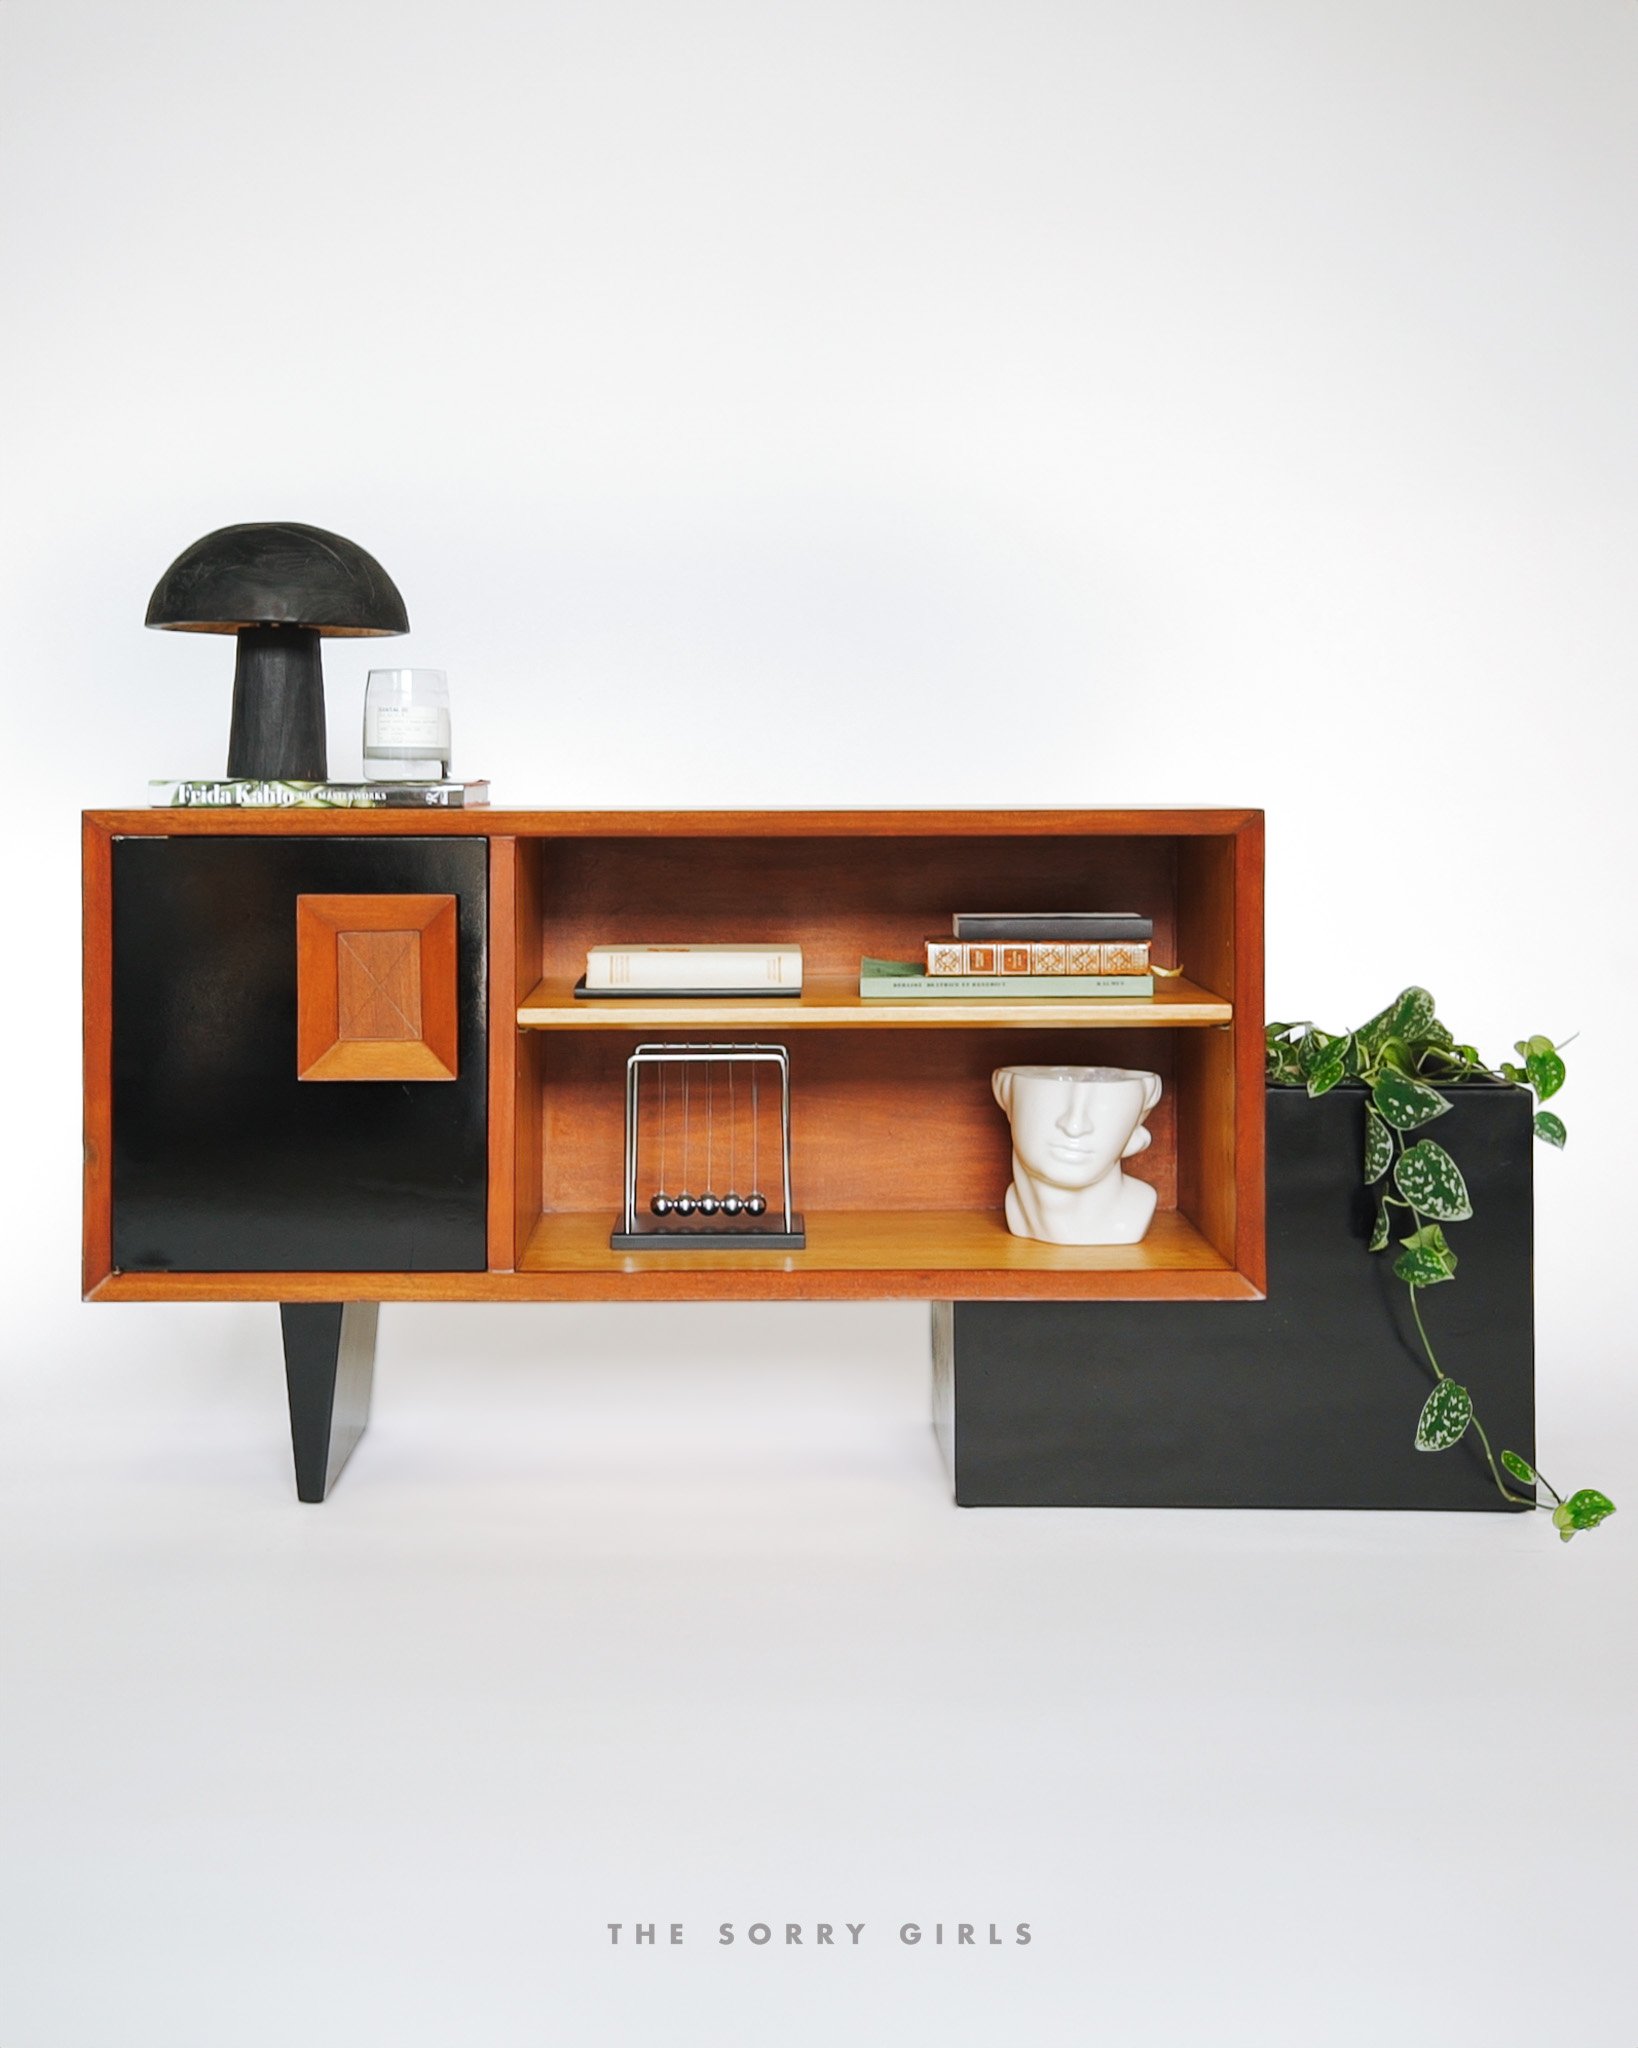
The Final Result
After some styling, this vintage piece had been given a new lease on life. It was time to sell! With the help of local vintage expert Rob, it sold for $300! This made us reach the series goal of $1,000 in total profits, all of which will be directed toward a non-profit organization.

Next Steps
With our initial goal achieved, we're looking ahead to the next steps in our charitable journey. Your suggestions for non-profit organizations are invaluable, so please leave them in the comments on the YouTube video. We're grateful for your continued support and excited to continue making a difference together.