Ikea Bathroom Vanity Hack
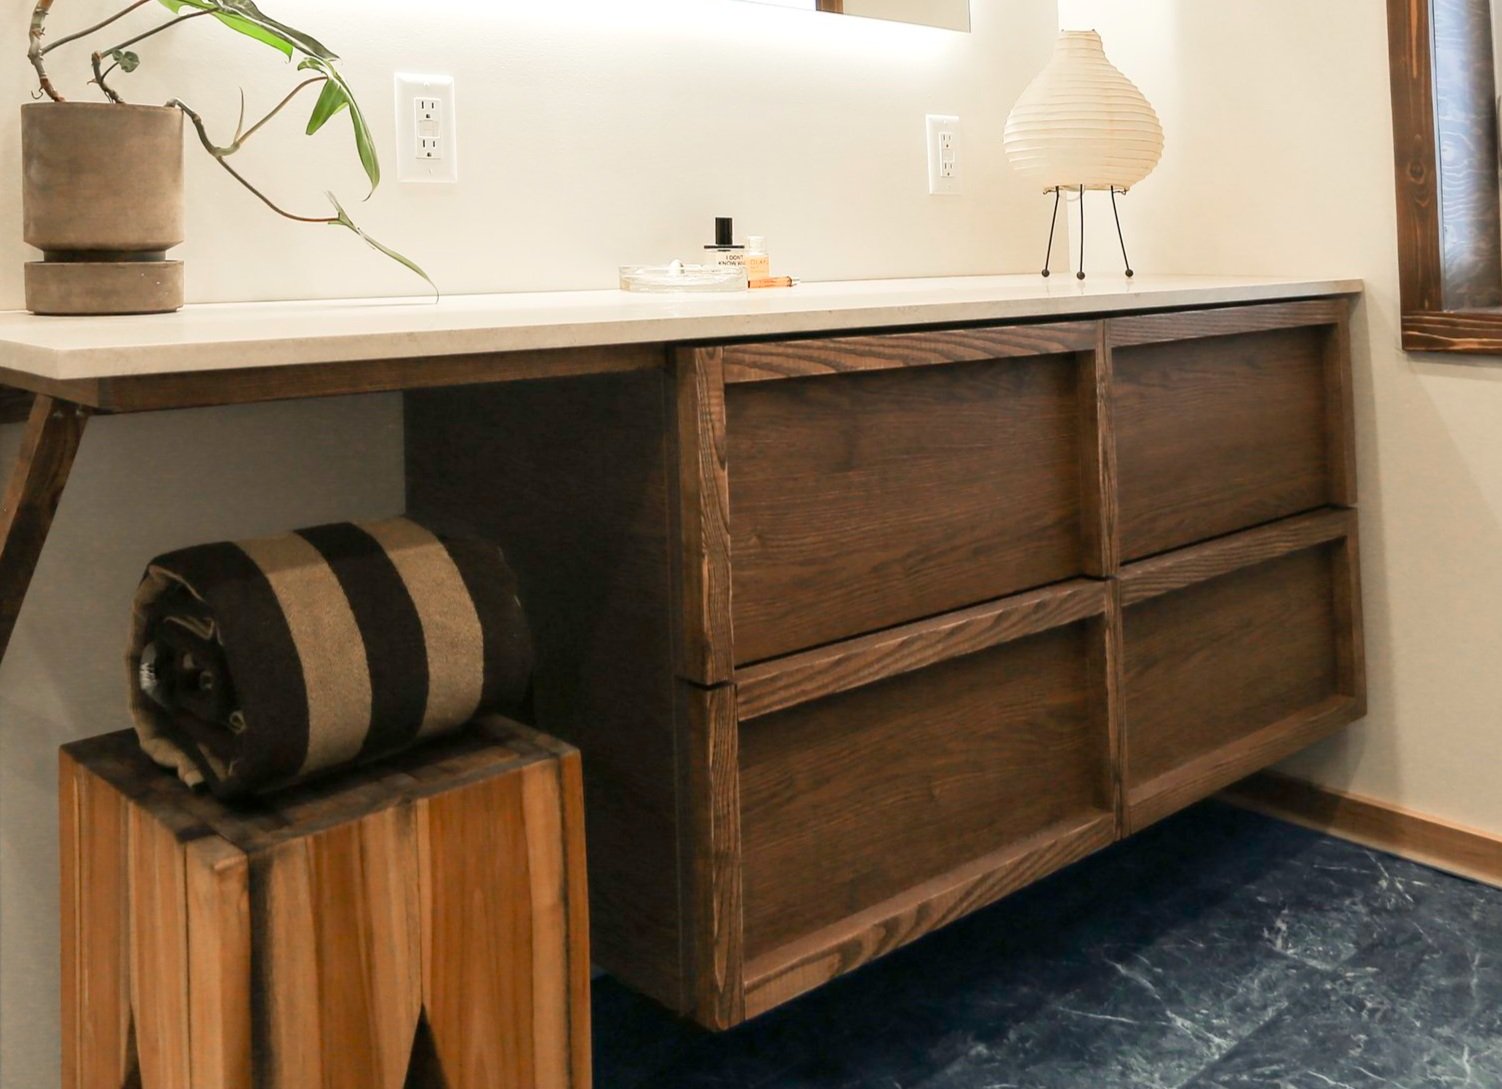
Hi all, Rochelle here! If you have been following us recently, you know that Becky has been undergoing the long long process of completely renovating her ensuite bathroom. She had a piece of furniture in mind for this project that needed a bit of an upgrade and she asked for my help (I said yes, ovi). In this tutorial, I’ll be showing you how I upgraded a basic thrifted Ikea Godmorgon vanity to a piece that looks custom made. We were originally aiming to replicate a mid century modern vibe but ended up with a beautiful mix of styles like Japanese and Scandinavian. We really had to get creative considering we weren’t starting from scratch.
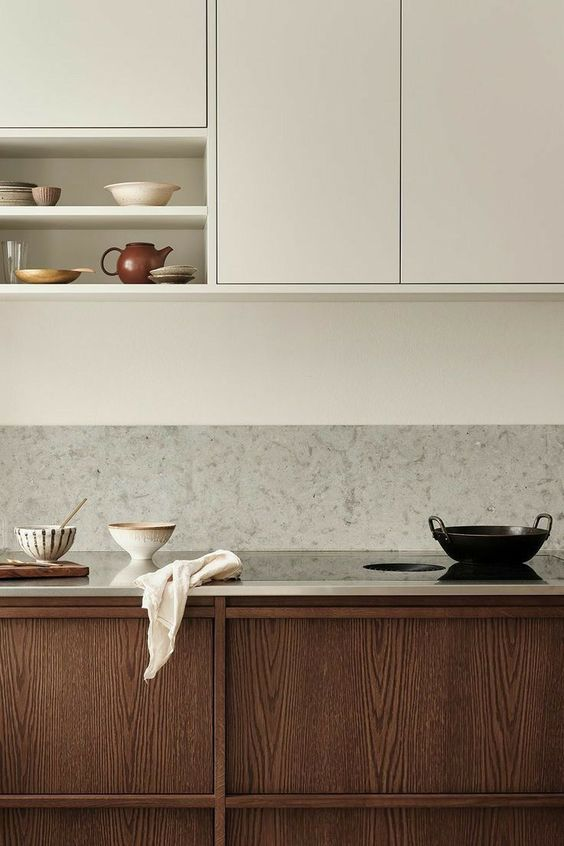
THE INSPO
Materials
Ikea Godmorgon vanity
ash wood lumber
stone for countertop (travertine in this case)
measuring tape
table, circular and mitre saw
diamond blade (for stone cutting)
wood planer
sanding block
drill and screws
wood glue
wood stain
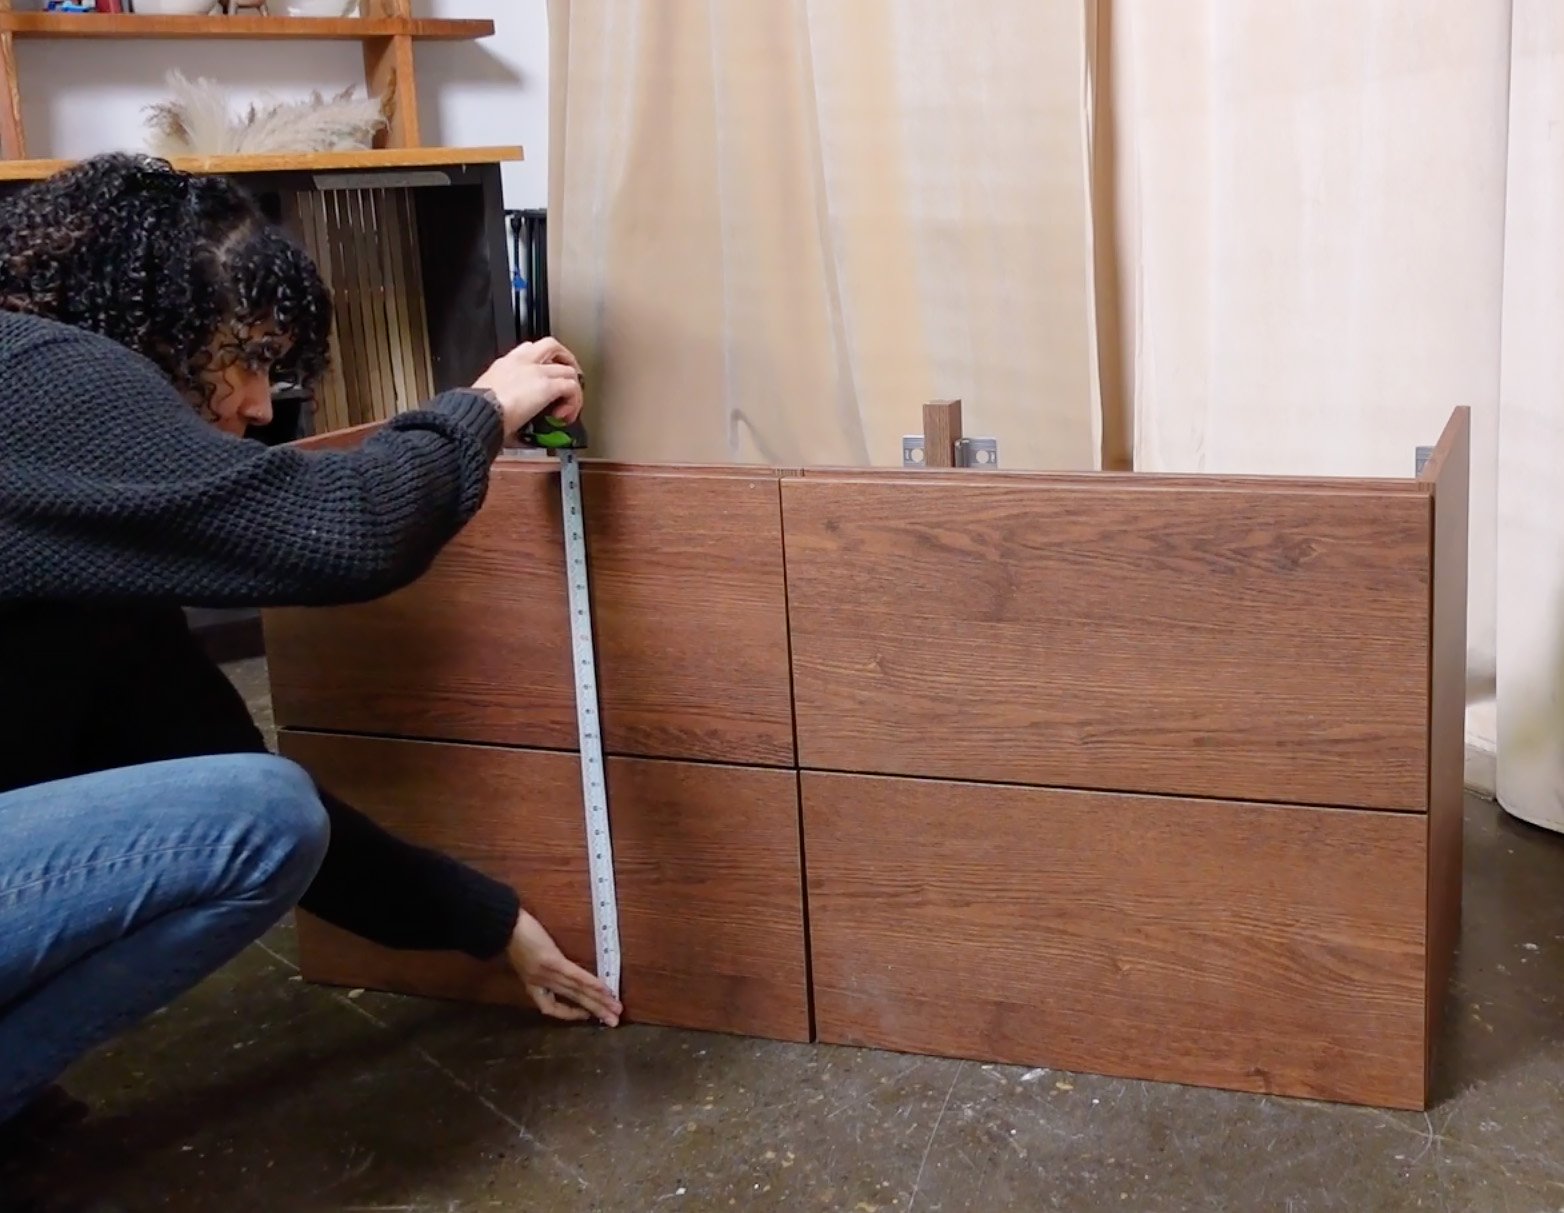
Step 1: take measurements
Measure out all pieces of the cabinet that you want to reface or change, and record the results so you don’t forget! It always helps me to draw out the piece I'm working on and record measurements right on the drawing for an accurate visual reference. **TIP** Make sure to use the same measuring tape for the duration of your project in case there are small differences between tape measures.

Step 2: plan out your customizations
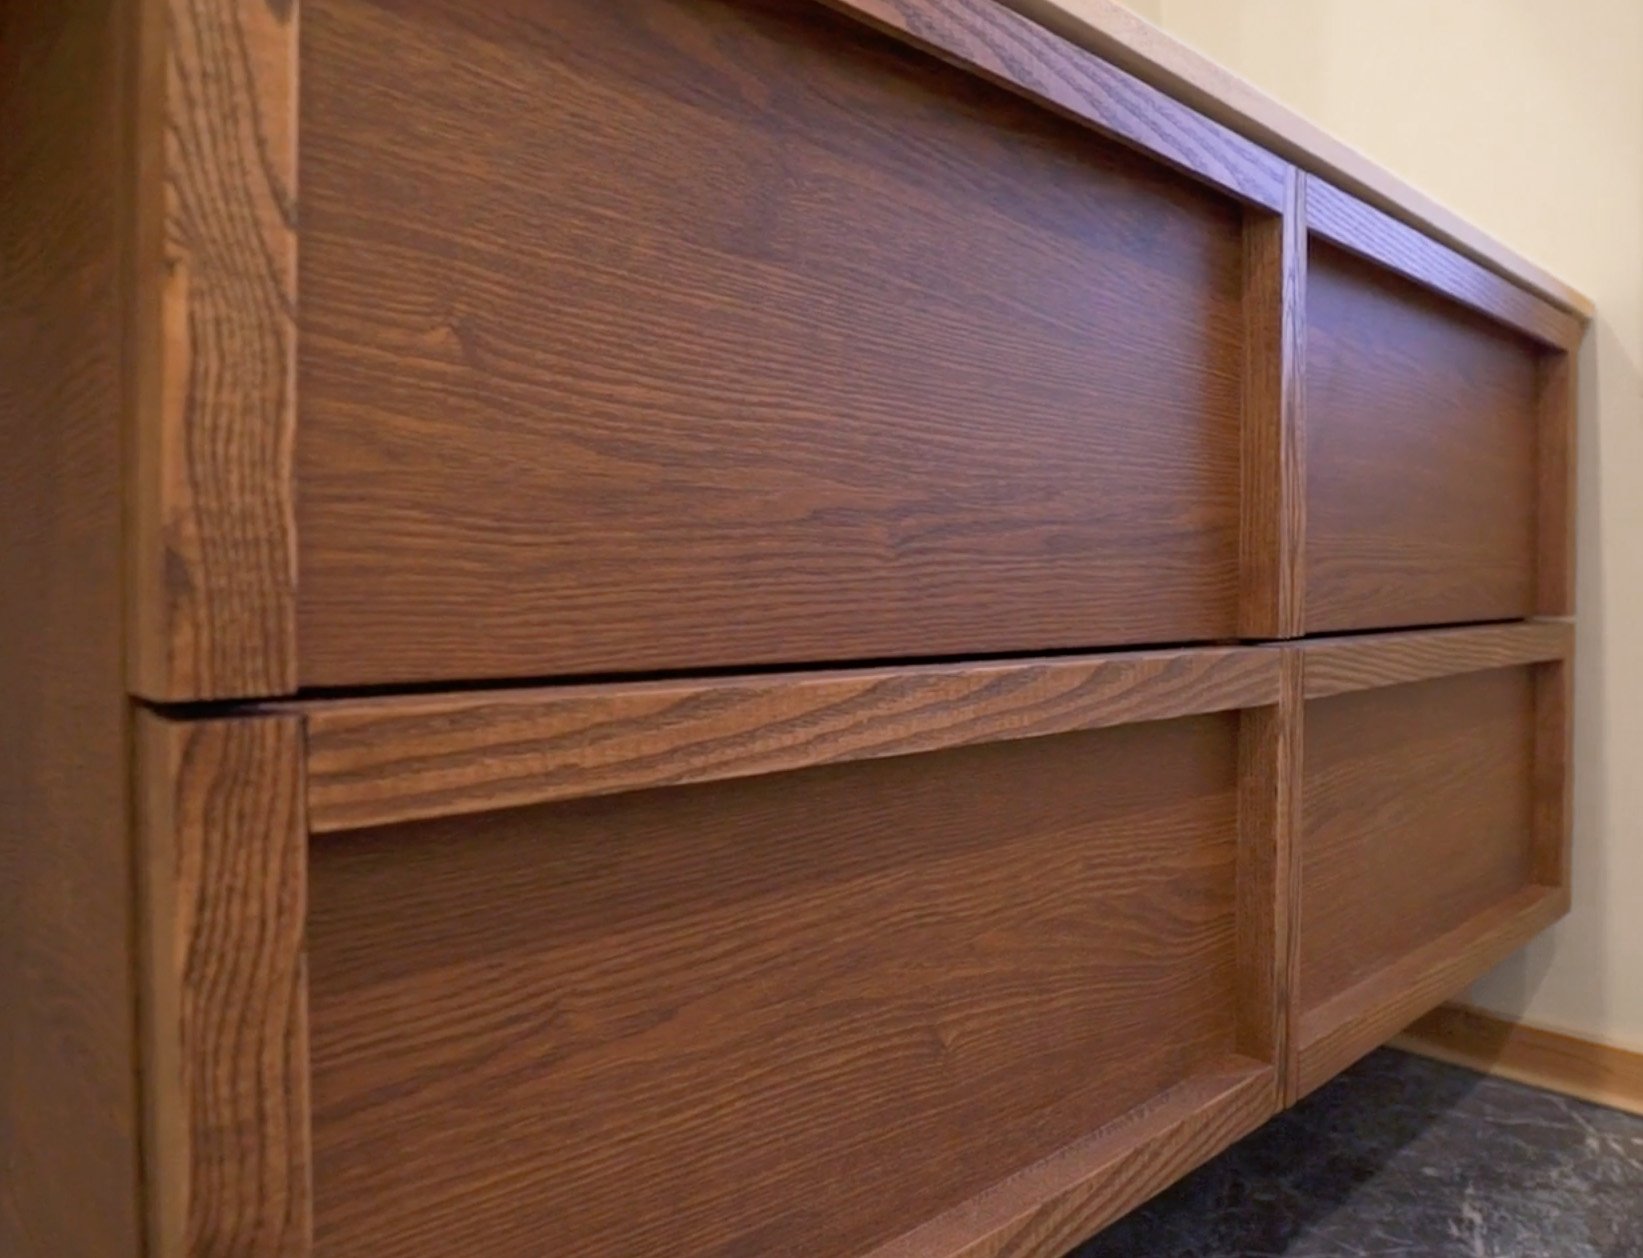
This specific Ikea piece came with silver handles and other finishes that didn’t fit the vibe Becky was going for, so we opted to make our own custom pulls out of matching wood and a stone countertop. I was going for a pretty basic handle with sleek and modern lines; One that you can easily just slide your fingers behind to pull, alongside simple trimmed out drawer fronts to create some depth.
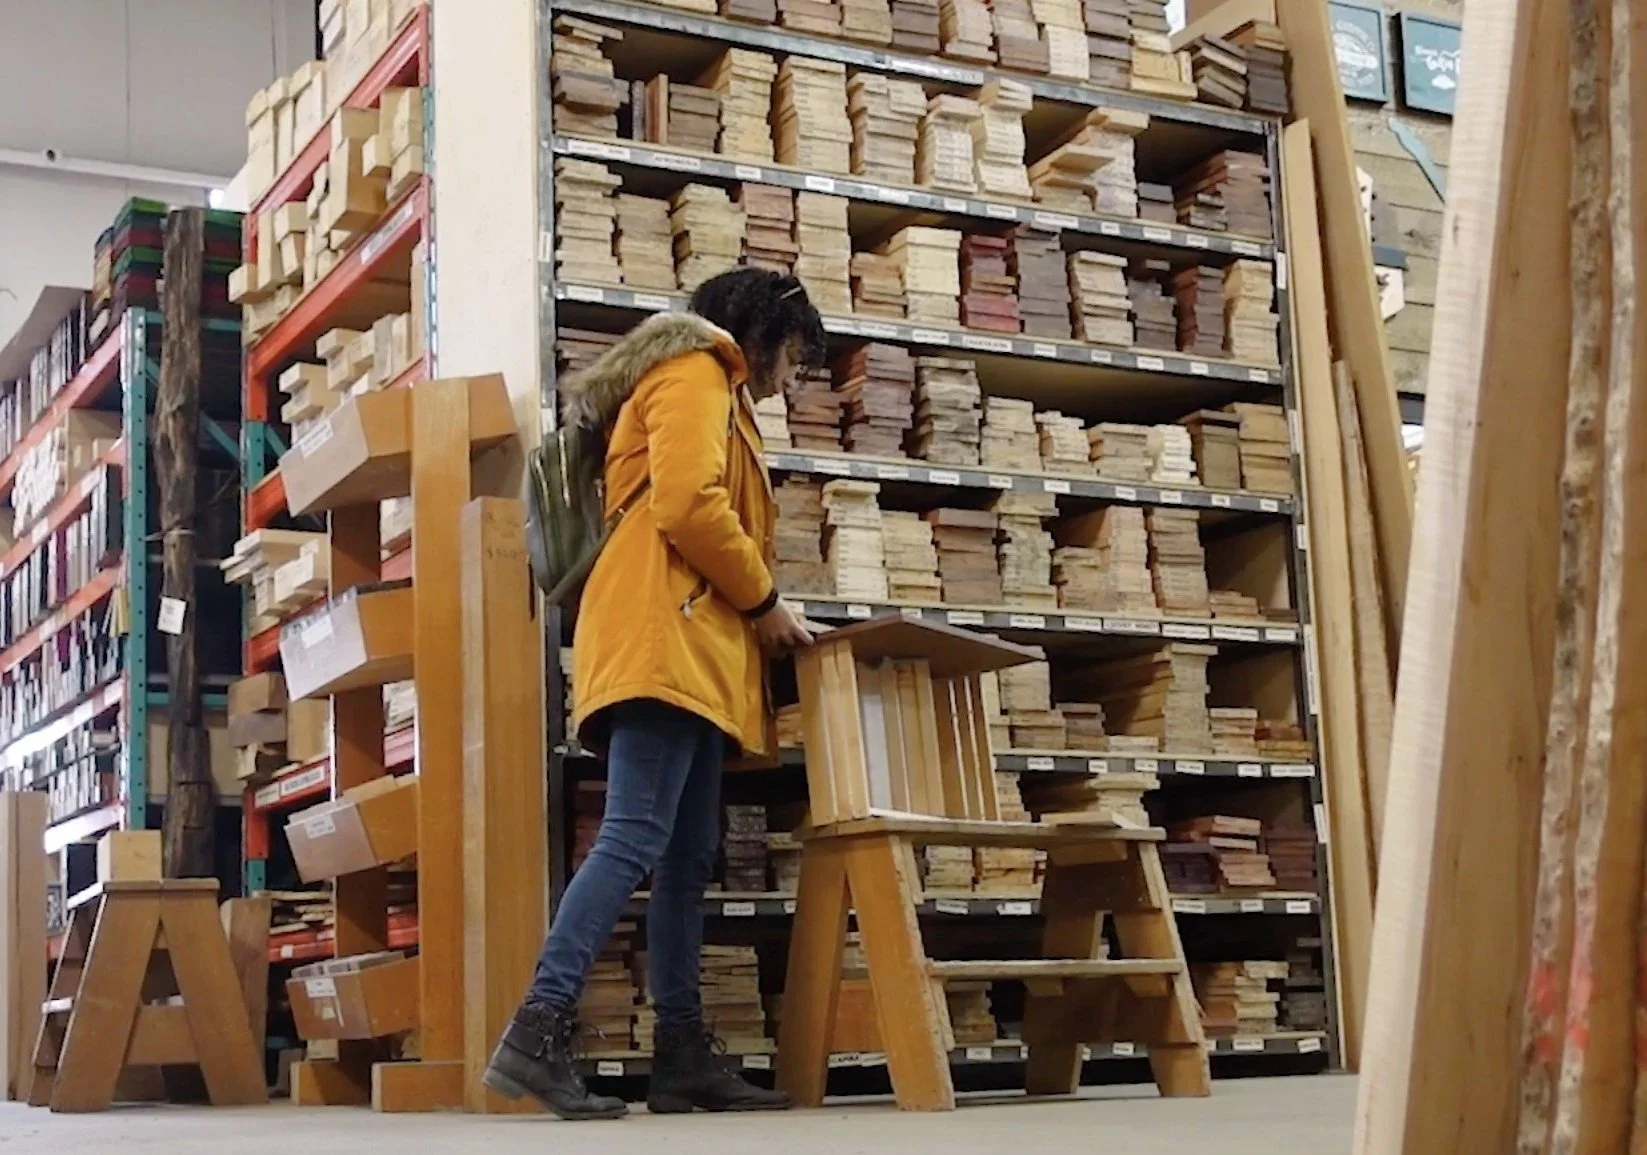
Step 3: source and purchase materials
I went to the hardware store to choose wood pieces for this DIY project. I opted for ash wood for its high stain absorbency and affordability (we looove that). I purchased pieces of 5/4 (1.25”) thick, rough ash lumber (rough meaning not dressed or ready to use).
For the countertop: I sent Becky to a stone manufacturer who had a ton of off-cut and excess pieces. I hoped that she would find something that fit the correct size and look that she wanted as well as something that was cost-effective. She ended up finding a beautiful travertine stone that worked out perfectly.
Step 4: Run wood pieces through the planer
I wanted to have 1” thick pieces for the final trim so I opted to send these through the wood planer.

To avoid losing some material due to snipe (deep cut in the lumber that occurs at the leading end of the board as it passes through a planer) I sent through a sacrificial wood board ahead of each of my ash pieces to take that snipe damage. This will allow for the good pieces to run through the planer smoothly.

Step 5: cut pieces to rough size
Cut down the freshly planed boards to the rough size of your pre-measured pulls and trim.
Step 6: refine rough edges
Now that we have beautifully smooth sides of our wood, we need the edges to match. On the table saw, safely and carefully cut off the rough edges to smooth them down.

Step 7: creating your wood accents
Pulls: Cut a chunk out of your piece (as if you were going to quarter it and get rid of one piece) to end up with an L-shaped pull in the end.

Trim: Cut pieces equal to the length and width of each side (that isn’t a pull) to trim out your drawers and repeat for each one.

Stain: Pick a stain that matches your drawer fronts as closely as possible. In my case, I ended up using Minwax oil based stain in the color Red Oak. Use a cloth or napkin to coat your pieces and then use your favorite sealant once this has dried.

Step 8: cutting your countertop
This wasn't nerve wracking… at all…(nervous laugh). I measured out the correct size and marked it on the countertop using painters tape to act as a guide for when I started cutting. Make sure to purchase a blade that will work for the hardness of the stone you have chosen, just to make it easier on yourself during this process. I had Anne create a constant stream of water on the stone with a watering can, alongside me as I made the cut, preventing dust particles becoming airborne and also allowing for a way cleaner cut! Lastly, sand the edges until they are smoothed down to your liking.

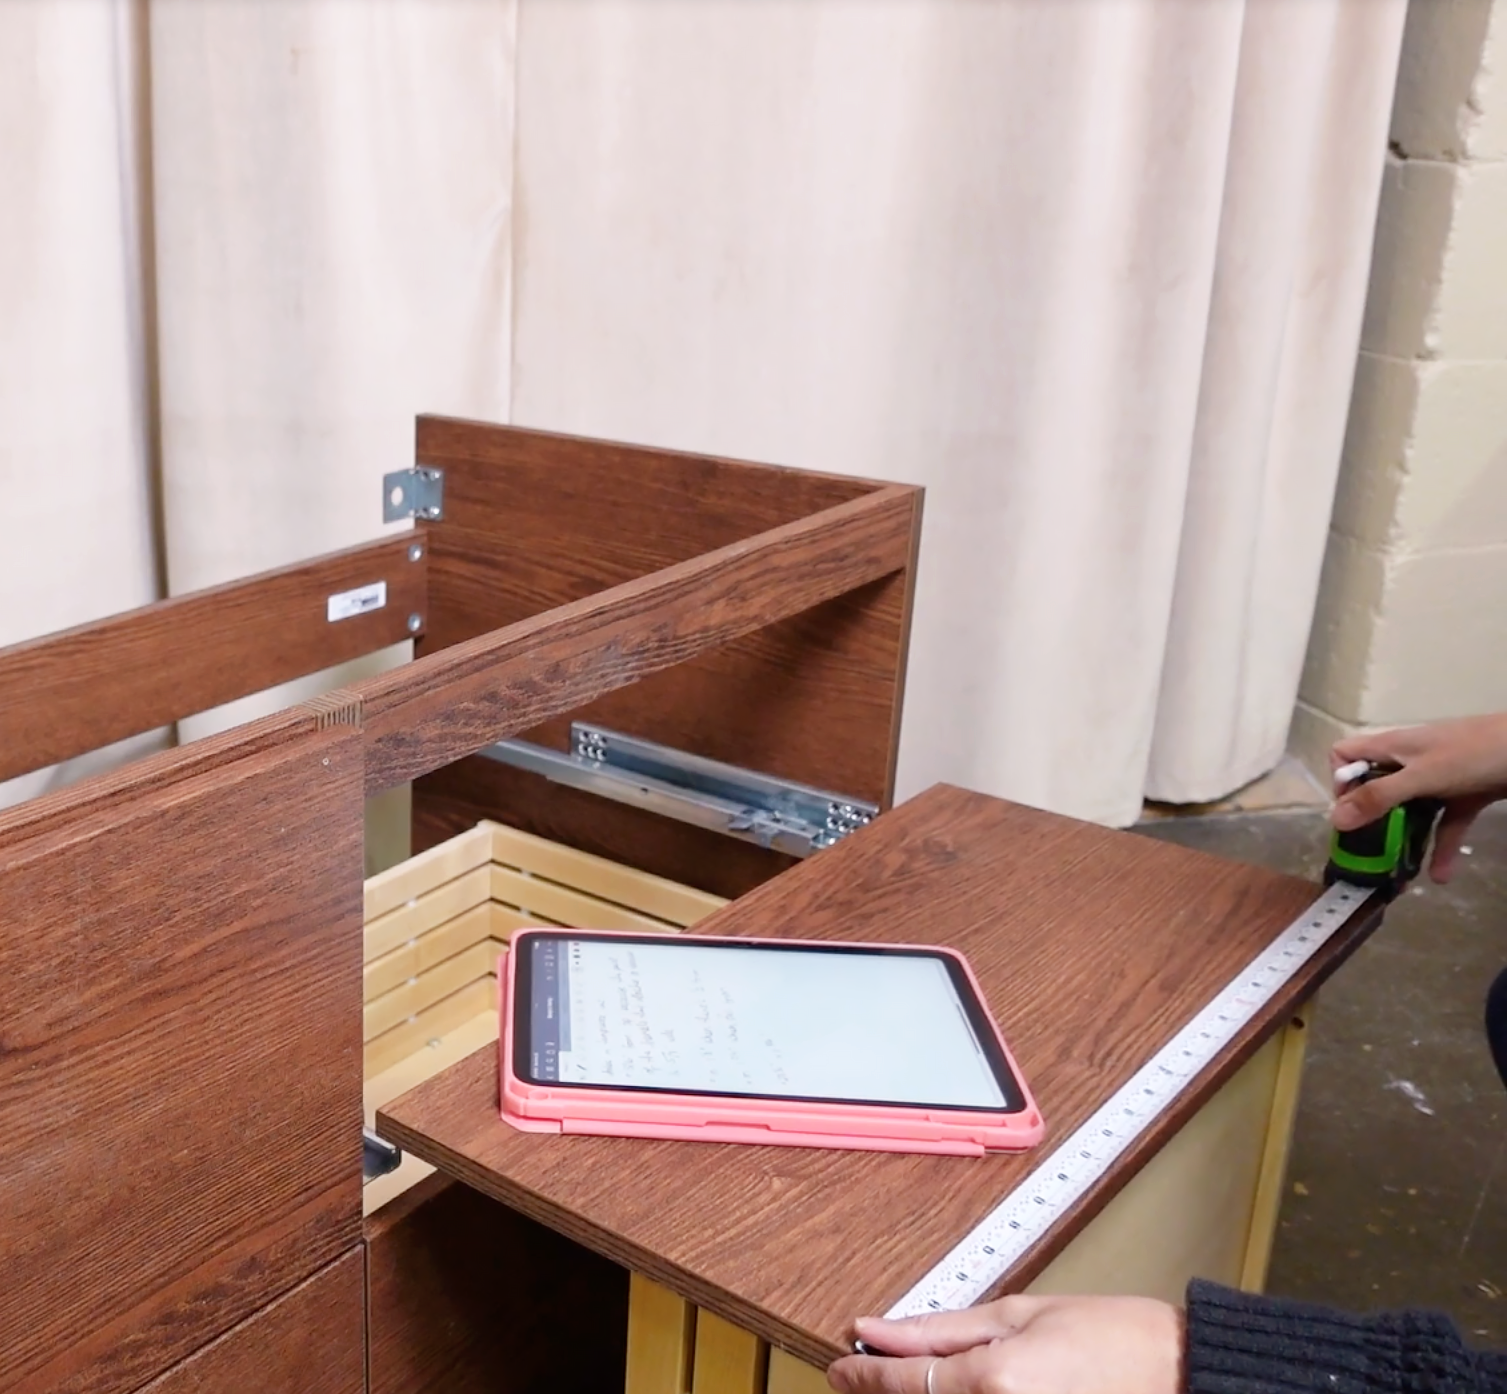
Step 9: the install
Vanity structure : I headed over to Becky’s place to start the vanity install! First, I mounted the vanity to the wall (as per the instructions for the ikea piece) and then attached an overhanging support piece for the length of the stone countertop to sit on comfortably (this is optional if you want the countertop to only span the length of your dresser). Make sure to find the studs in your wall for added support.
Trim and pulls: Once the vanity was secured to the wall I went in with melamine wood glue to attach all of the trim bits to the drawer fronts. I then secured each piece with a screw for extra support (from the back of the drawer front).
Countertop: Sit your stone countertop on top of the vanity and secure it if necessary.
Final results:

Watch the DIY video below!