DIY Hat Rack
Hey, Kelsey here! Everyone loves a good hat, but storing them can be a challenge. In this DIY blog post, we'll guide you through the process of creating a customized hat rack that not only provides convenient storage but also adds a touch of style to your space. We'll walk you through each step to create a functional and aesthetically pleasing solution.
Materials Needed:
2x3 lumber
Drill
1-inch spade bit or Forstner bit
Jigsaw
Sandpaper
Stain and sealant
Keyhole hangers
Screws
Template for slot placement
Step 1: Determine Hat Storage Capacity
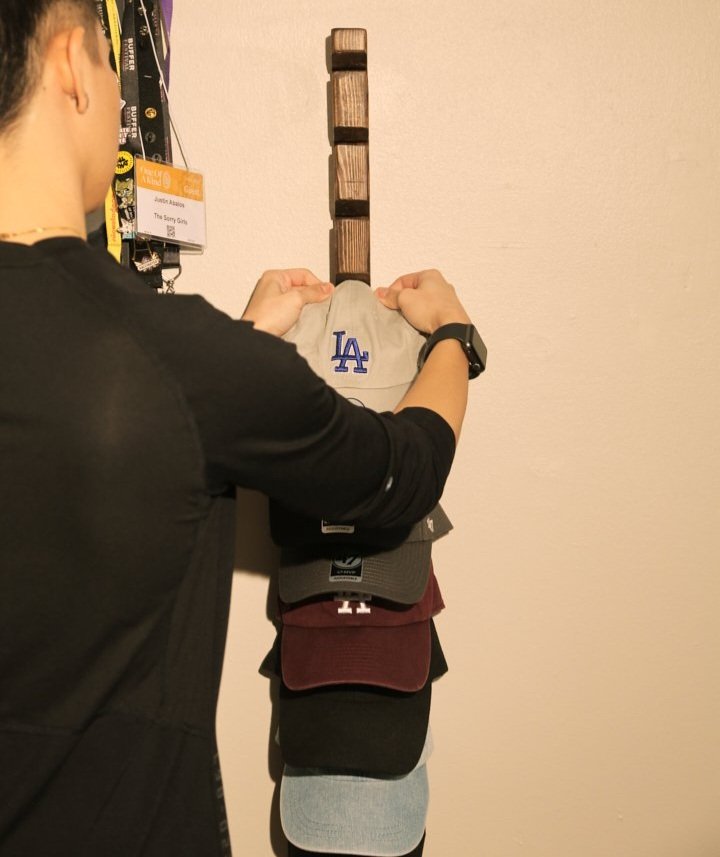
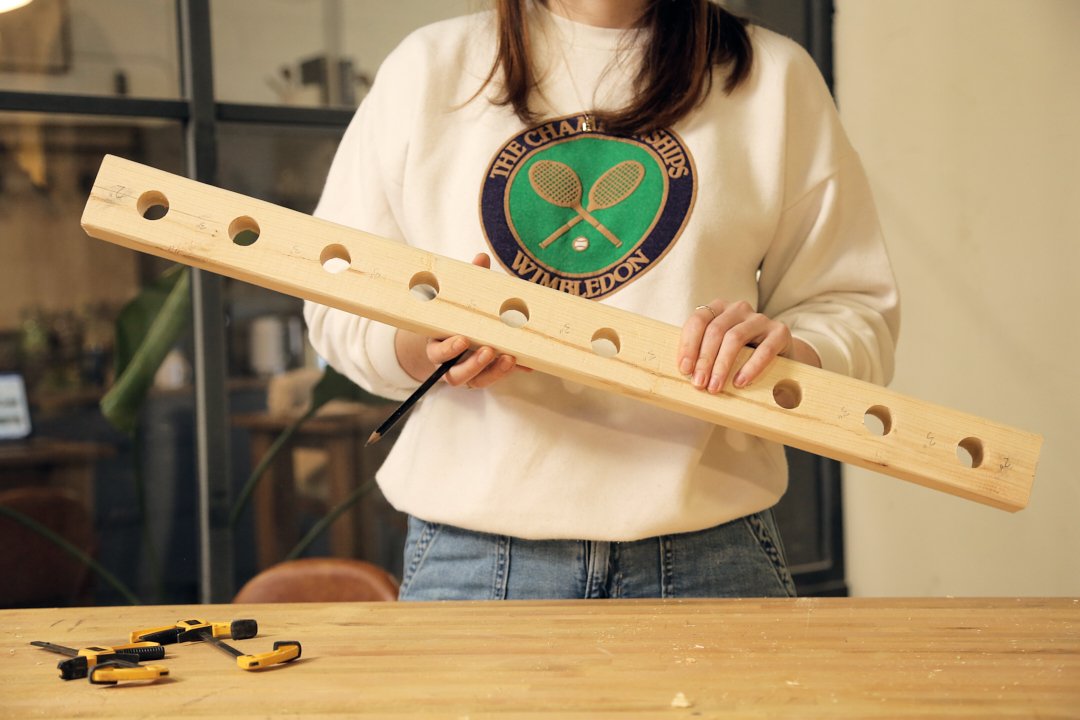
Consider how many hats you need to store. Based on our requirement of 8 to 10 hats, we'll create 10 slots on a 2x3 piece of lumber.
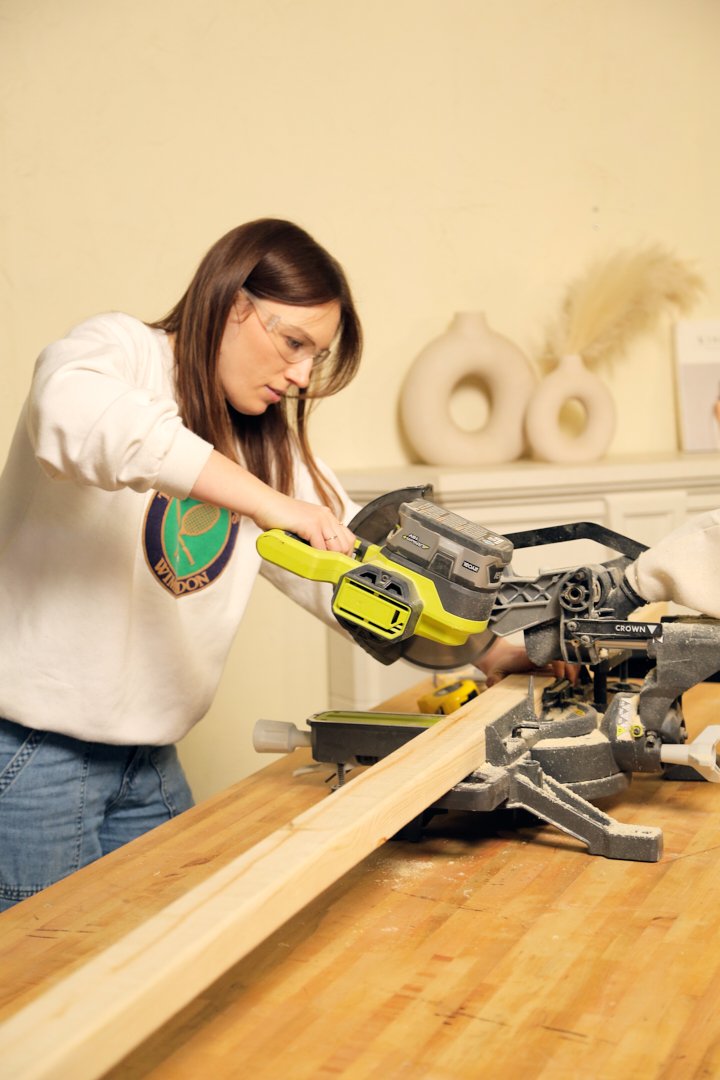
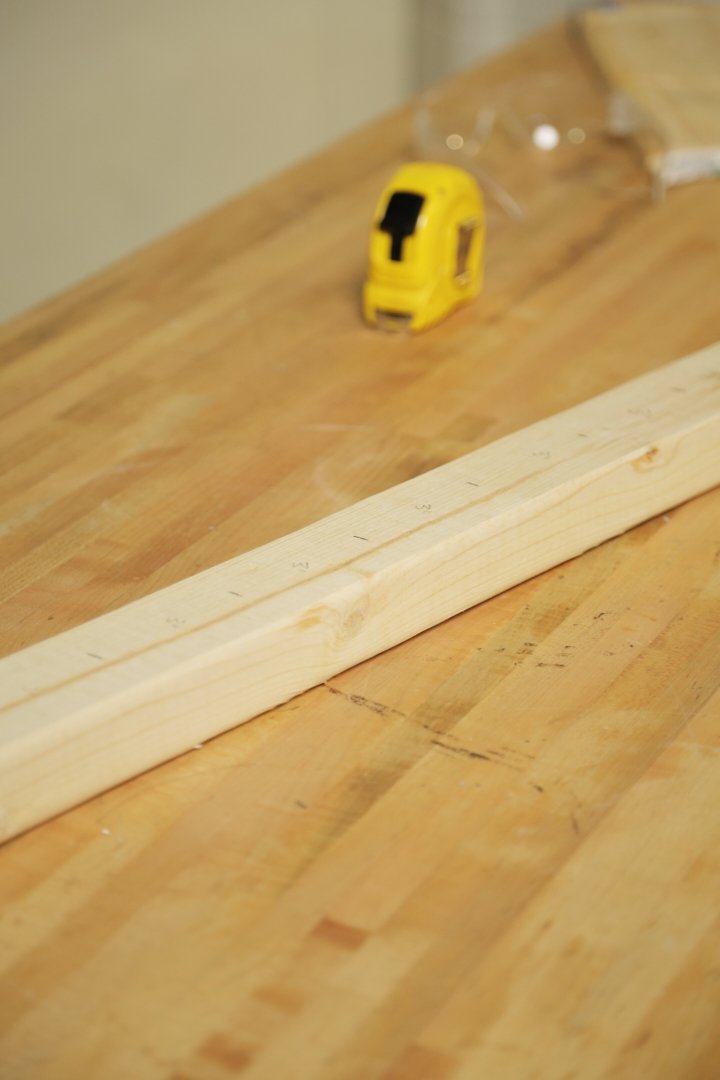
Step 2: Prepare the Lumber
Using a saw, cut the 2x3 lumber to the desired length. Then, measure and mark 3 inch spaces to determine where each slot will be made.
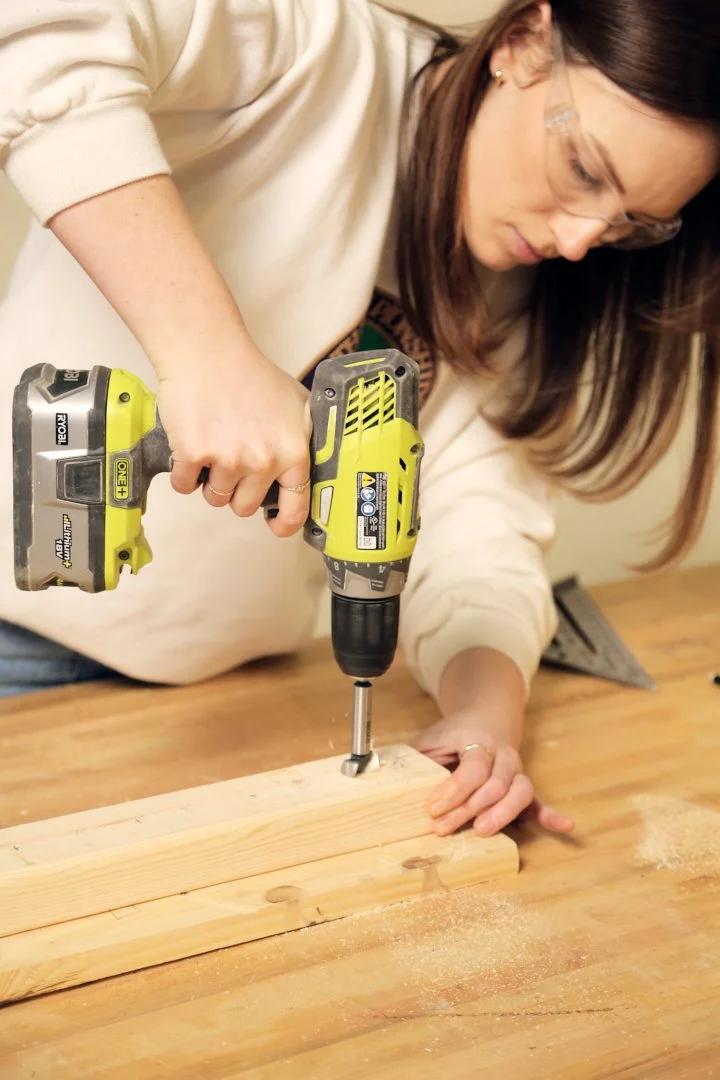
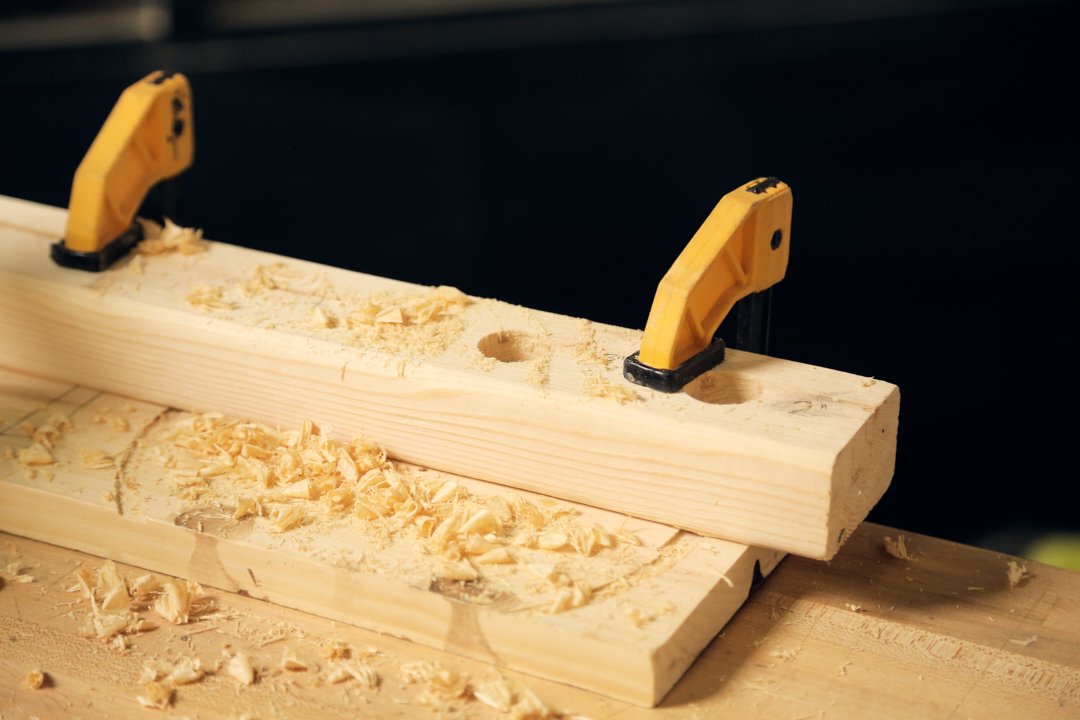
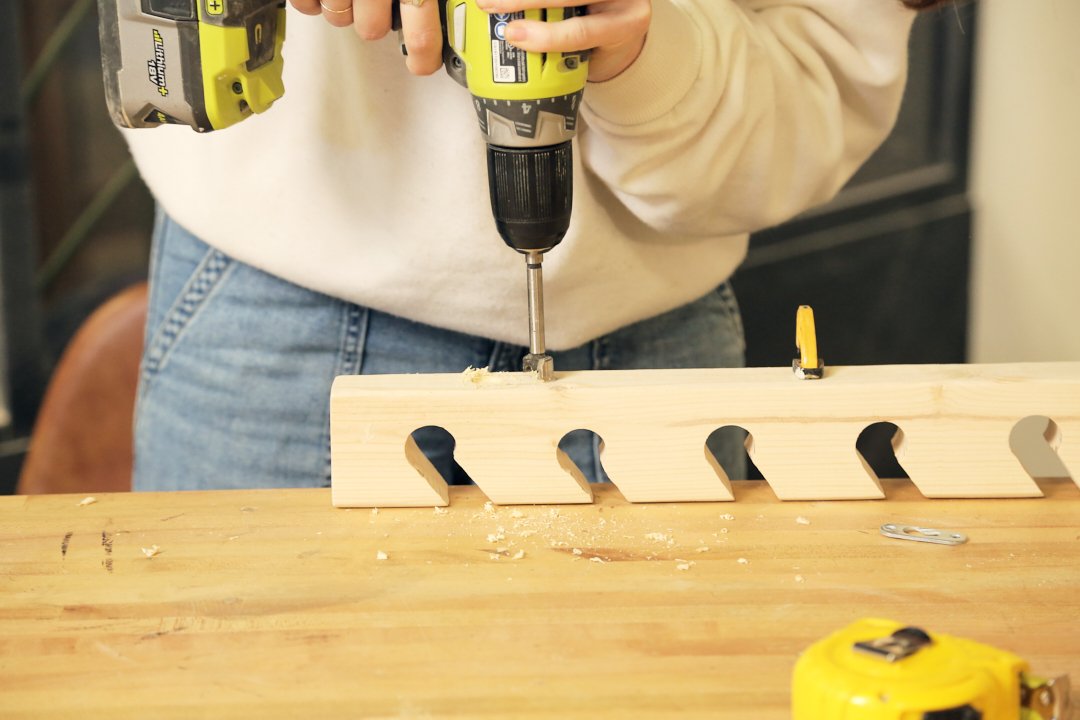
Step 3: Drill Holes for Slots
Using a 1-inch spade bit or Forstner bit, drill holes along the length of the 2x3 lumber where your marks were made. These holes will serve as the starting point for where the hats will hang.
Step 4: Create Slots
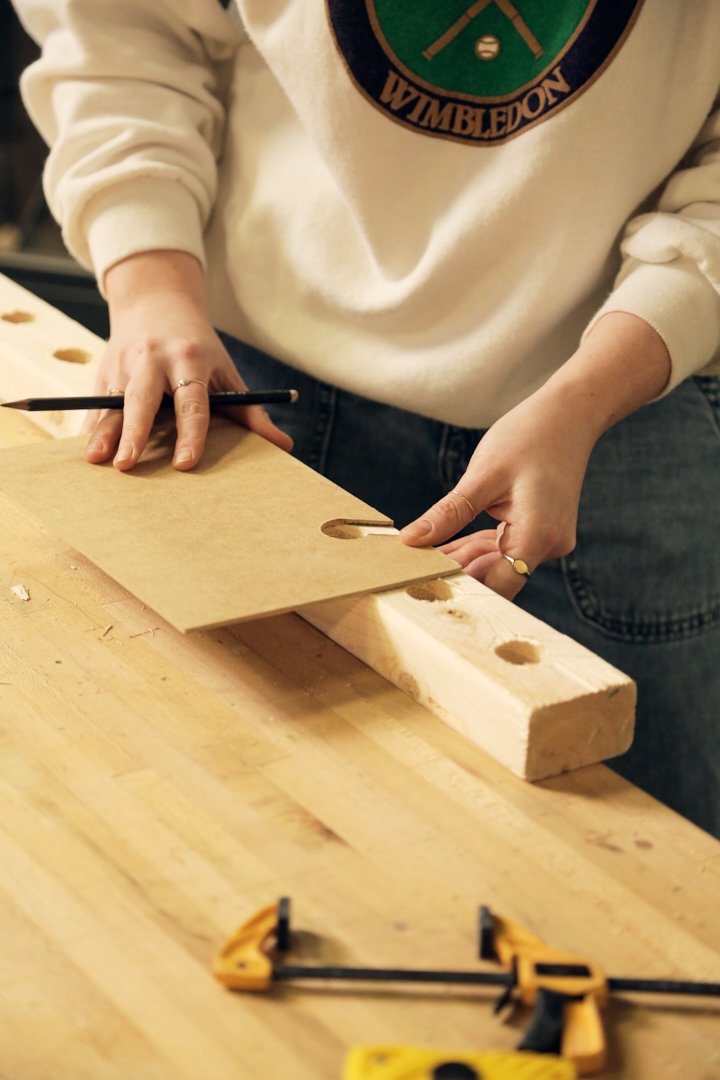
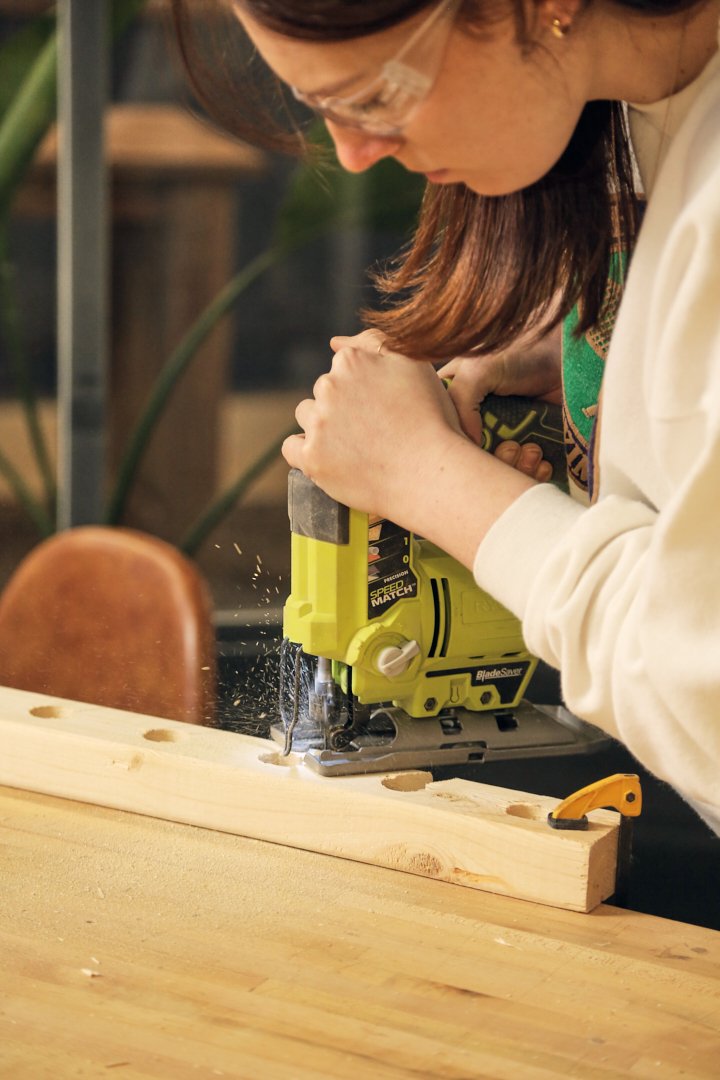
Make a template of the exact shape you would like for your slot. From the template, trace the shape on each 1 inch hole. Using a jigsaw, carefully cut along the traced lines to create slots for the hats. Take your time to ensure clean and straight cuts.

Step 5: Sand and Smooth
Once all the slots are cut, sand any rough edges to ensure a clean finish. This step will also prepare the wood for staining and sealing.
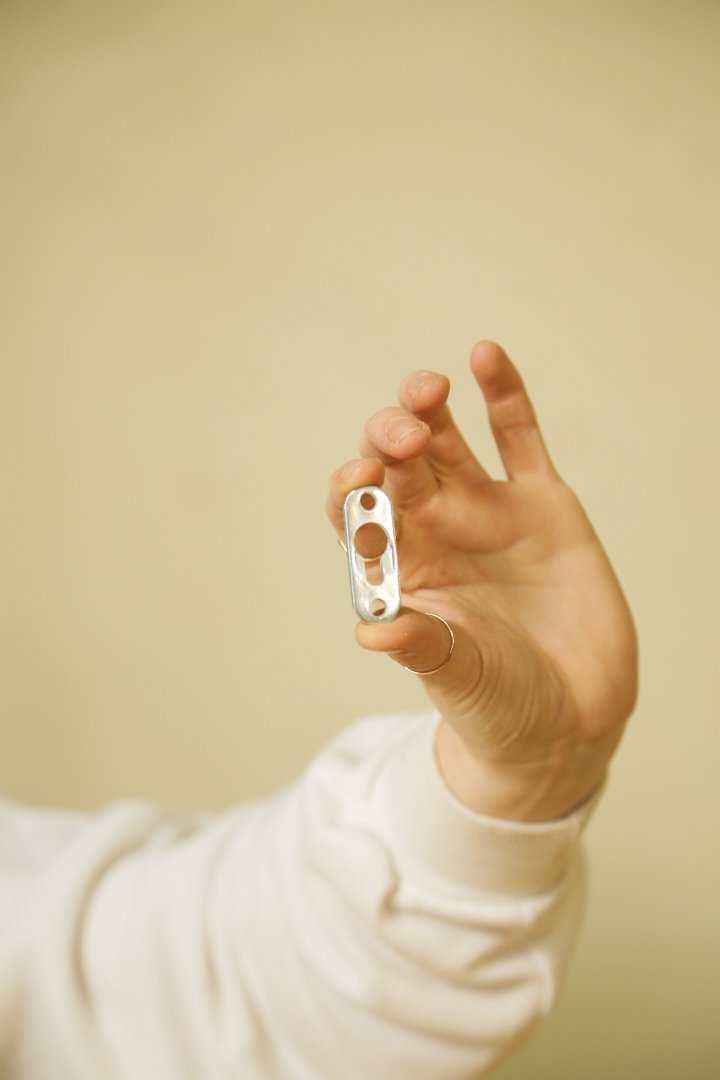
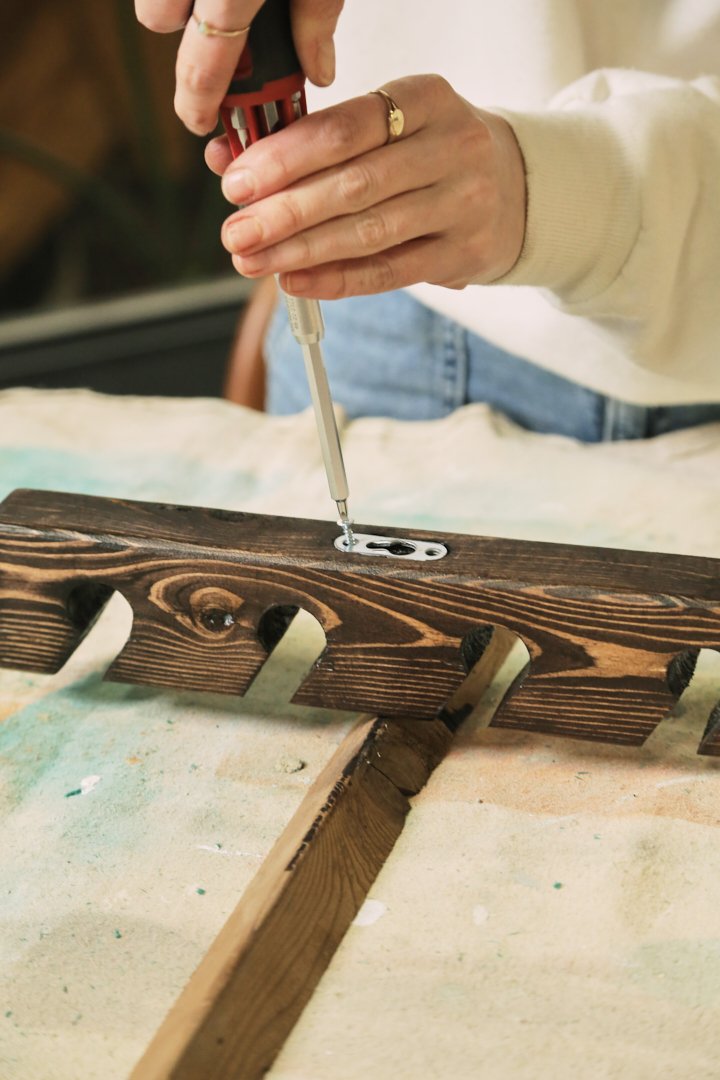
Step 6: Install Keyhole Hangers
On the back of the hat rack, drill and chisel out holes for the keyhole hangers. These will allow you to securely mount the hat rack to the wall. Use screws to attach the keyhole hangers after you have stained and sealed the hat rack.


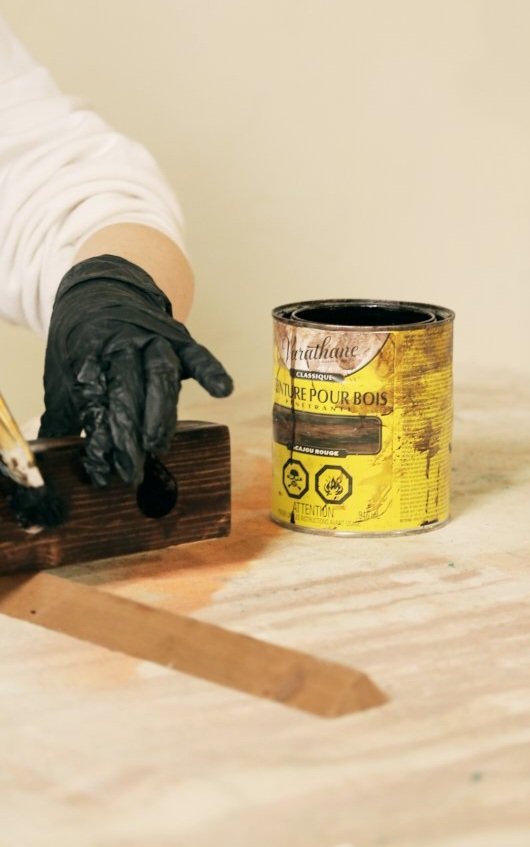
Step 7: Stain and Seal
Choose a stain color that complements your existing decor. Apply the stain evenly to the wood using a brush or cloth, following the manufacturer's instructions. Once dry, apply a coat of sealant to protect the wood and enhance its durability. Once dry, screw on your keyhole hangers.

Step 7: Wall Mounting
Once the keyhole hangers are in place, it's time to hang your hat rack on the wall. Measure and mark the keyhole positions to know where you need to drill pilot holes into the wall.
With just a few simple materials and some basic woodworking skills, you can create a customized hat rack that not only provides practical storage but also adds a decorative element to your space.
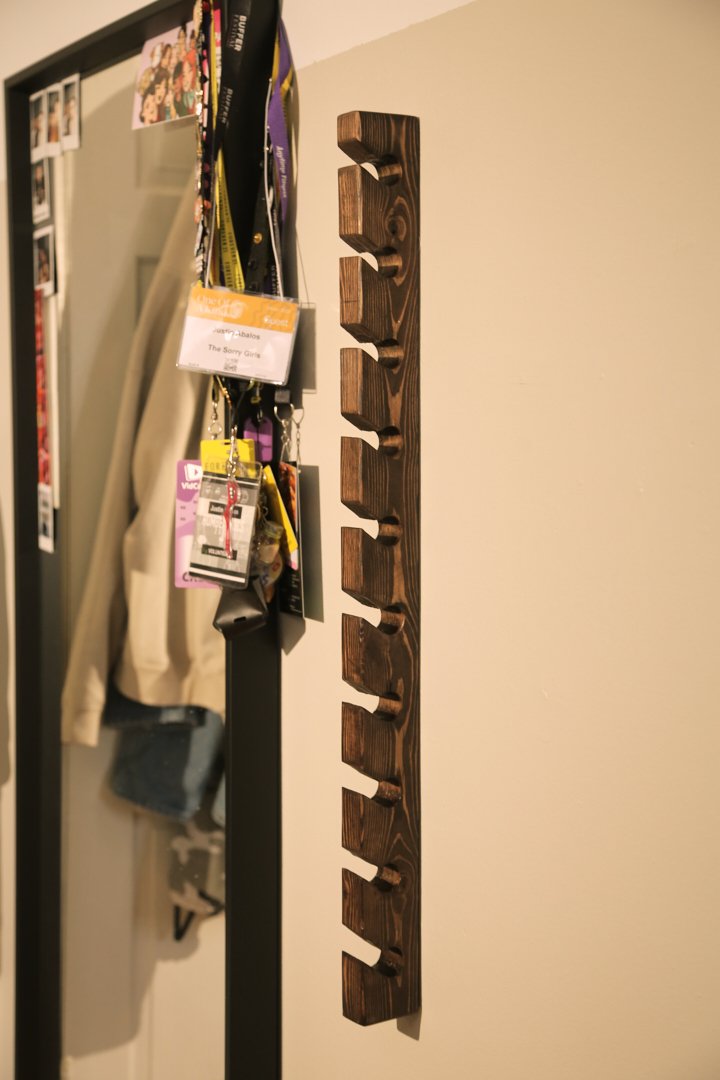
Final Results

Watch the DIY video below.