4 Designer Dupe DIYs to elevate your basic Bathroom

Want a unique, fun and luxe-feeling bathroom without the giant price tag? We've got you! These 4 DIY designer dupes are easy, cheap, and totally renter-friendly. From a bobble mirror to French shower doors, you can achieve a high-end look for a fraction of the cost. In this post, we show you how we transformed this basic minimal rental-bathroom into a grandma-chic, cottage-core dream. It’s also 100% reversible!
1. The Bobble Mirror

This mirror dupe is one of our faves, giving you the luxurious look of a high-end wood-turned mirror without the $230 price tag. We create this for only $26!
Materials:
Basic wooden rectangle mirror with rounded edges (we got ours off of Facebook marketplace)
Wooden half spheres (the number depends on the size of your mirror)
Painter’s tape
Paint or stains (to match the base of the mirror)
Slow-drying stronghold glue
Quick-drying super glue
Steps:
Find the base mirror – Start by picking up a basic mirror. We found a simple one for just $14 off of Facebook Marketplace, which works perfectly as the base for this project.
Prep the wooden half spheres – The half spheres will give the mirror that designer-studded look. Mark the spacing on the mirror by wrapping painter’s tape around the outside of the mirror’s edge and deciding how many spheres you’ll need. You want to space them evenly around the mirror.
Paint or stain the half spheres – Stain the wooden spheres to match the mirror base.
Attach the spheres – Start gluing the wooden half spheres to the front of the mirror. Use a combination of slow-drying stronghold glue (for a secure bond) and quick-drying superglue (for speed). Attach them in the pattern you marked earlier.


2. french shower doors
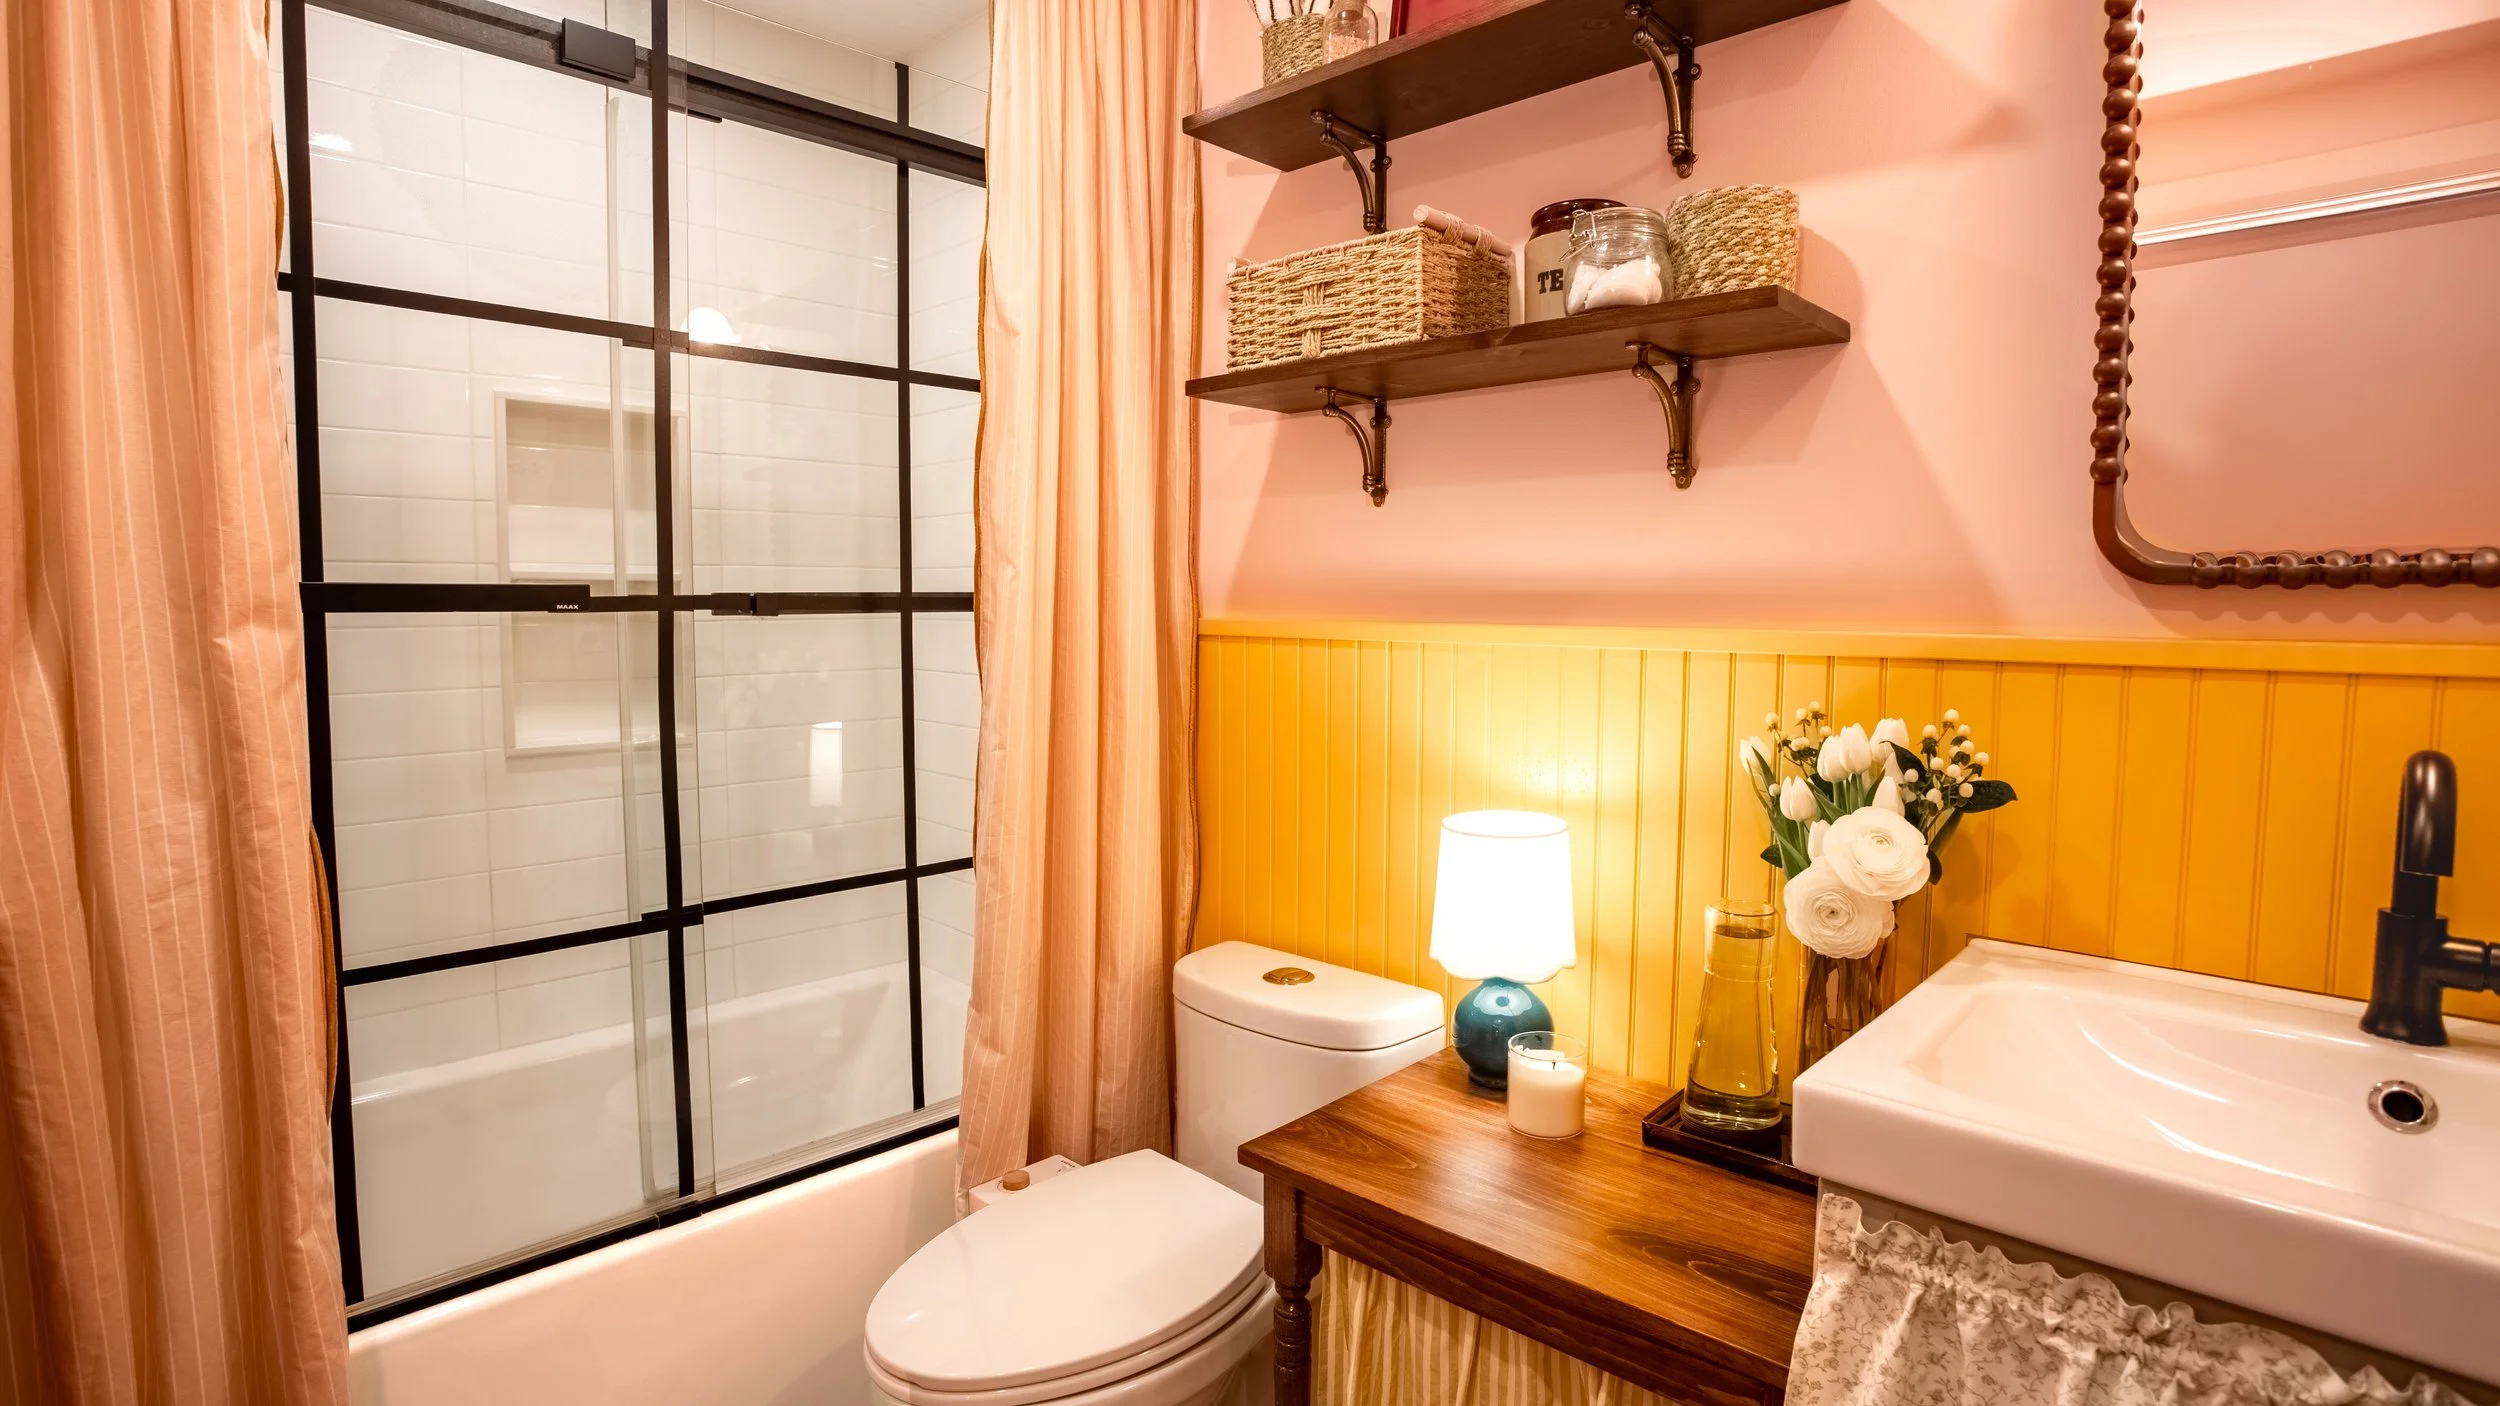
The look that costs upwards of $800, but you can get it for under $5.00!
Materials:
Electrical tape (black or another color of your choice)
Laser level (optional, but recommended for precision)
Regular level (if you don’t have a laser level)
Scissors
Steps:


Prep the glass – Start by cleaning your shower glass to remove any grime or residue. You want a smooth, clean surface for the tape to stick to.
Position the laser level – Set up your laser level (or use a regular level) to help you get straight lines. If you don’t have a laser level, you can eyeball the lines or use a traditional level for the same result.
Tape off the glass – Begin applying the electrical tape to the glass, following the lines you’ve created with the level. The beauty of electrical tape is that it’s waterproof and removable, making it ideal for this project. Plus, it sticks easily but won't leave a sticky residue when you take it down.
Cut and adjust – Once the tape is applied, use scissors to trim off any excess tape. Make sure all the lines are clean and straight, giving it that sleek, French-door-inspired look.
3. vintage inspired sconce

This easy DIY sconce takes an old thrift store find and transforms it into a chic, designer-inspired piece.
Materials:
Thrifted floral-inspired wall sconce (or any thrifted sconce with a similar shape)
Puff paint
Gold leaf paint or gold spray paint
Cleaning supplies (for the lampshade)
Steps:
Find a thrifted sconce – Head to your local thrift store and look for a wall sconce. We found two floral-inspired sconces, and we used one that was already in the perfect shape for our project.
Prep the sconce – Start by cleaning the sconce and the lampshade. Make sure the shade is free of any dirt or dust, and wipe down the rest of the fixture.
Add texture with puff paint – To give the sconce more texture and depth, use puff paint on the flower petals. This adds a raised, 3D effect to make the flowers pop, giving the sconce a designer-quality finish.
Paint with gold leaf – Once the puff paint has dried, apply gold leaf paint (or gold spray paint) over the entire sconce. The gold finish is what gives it that high-end look.


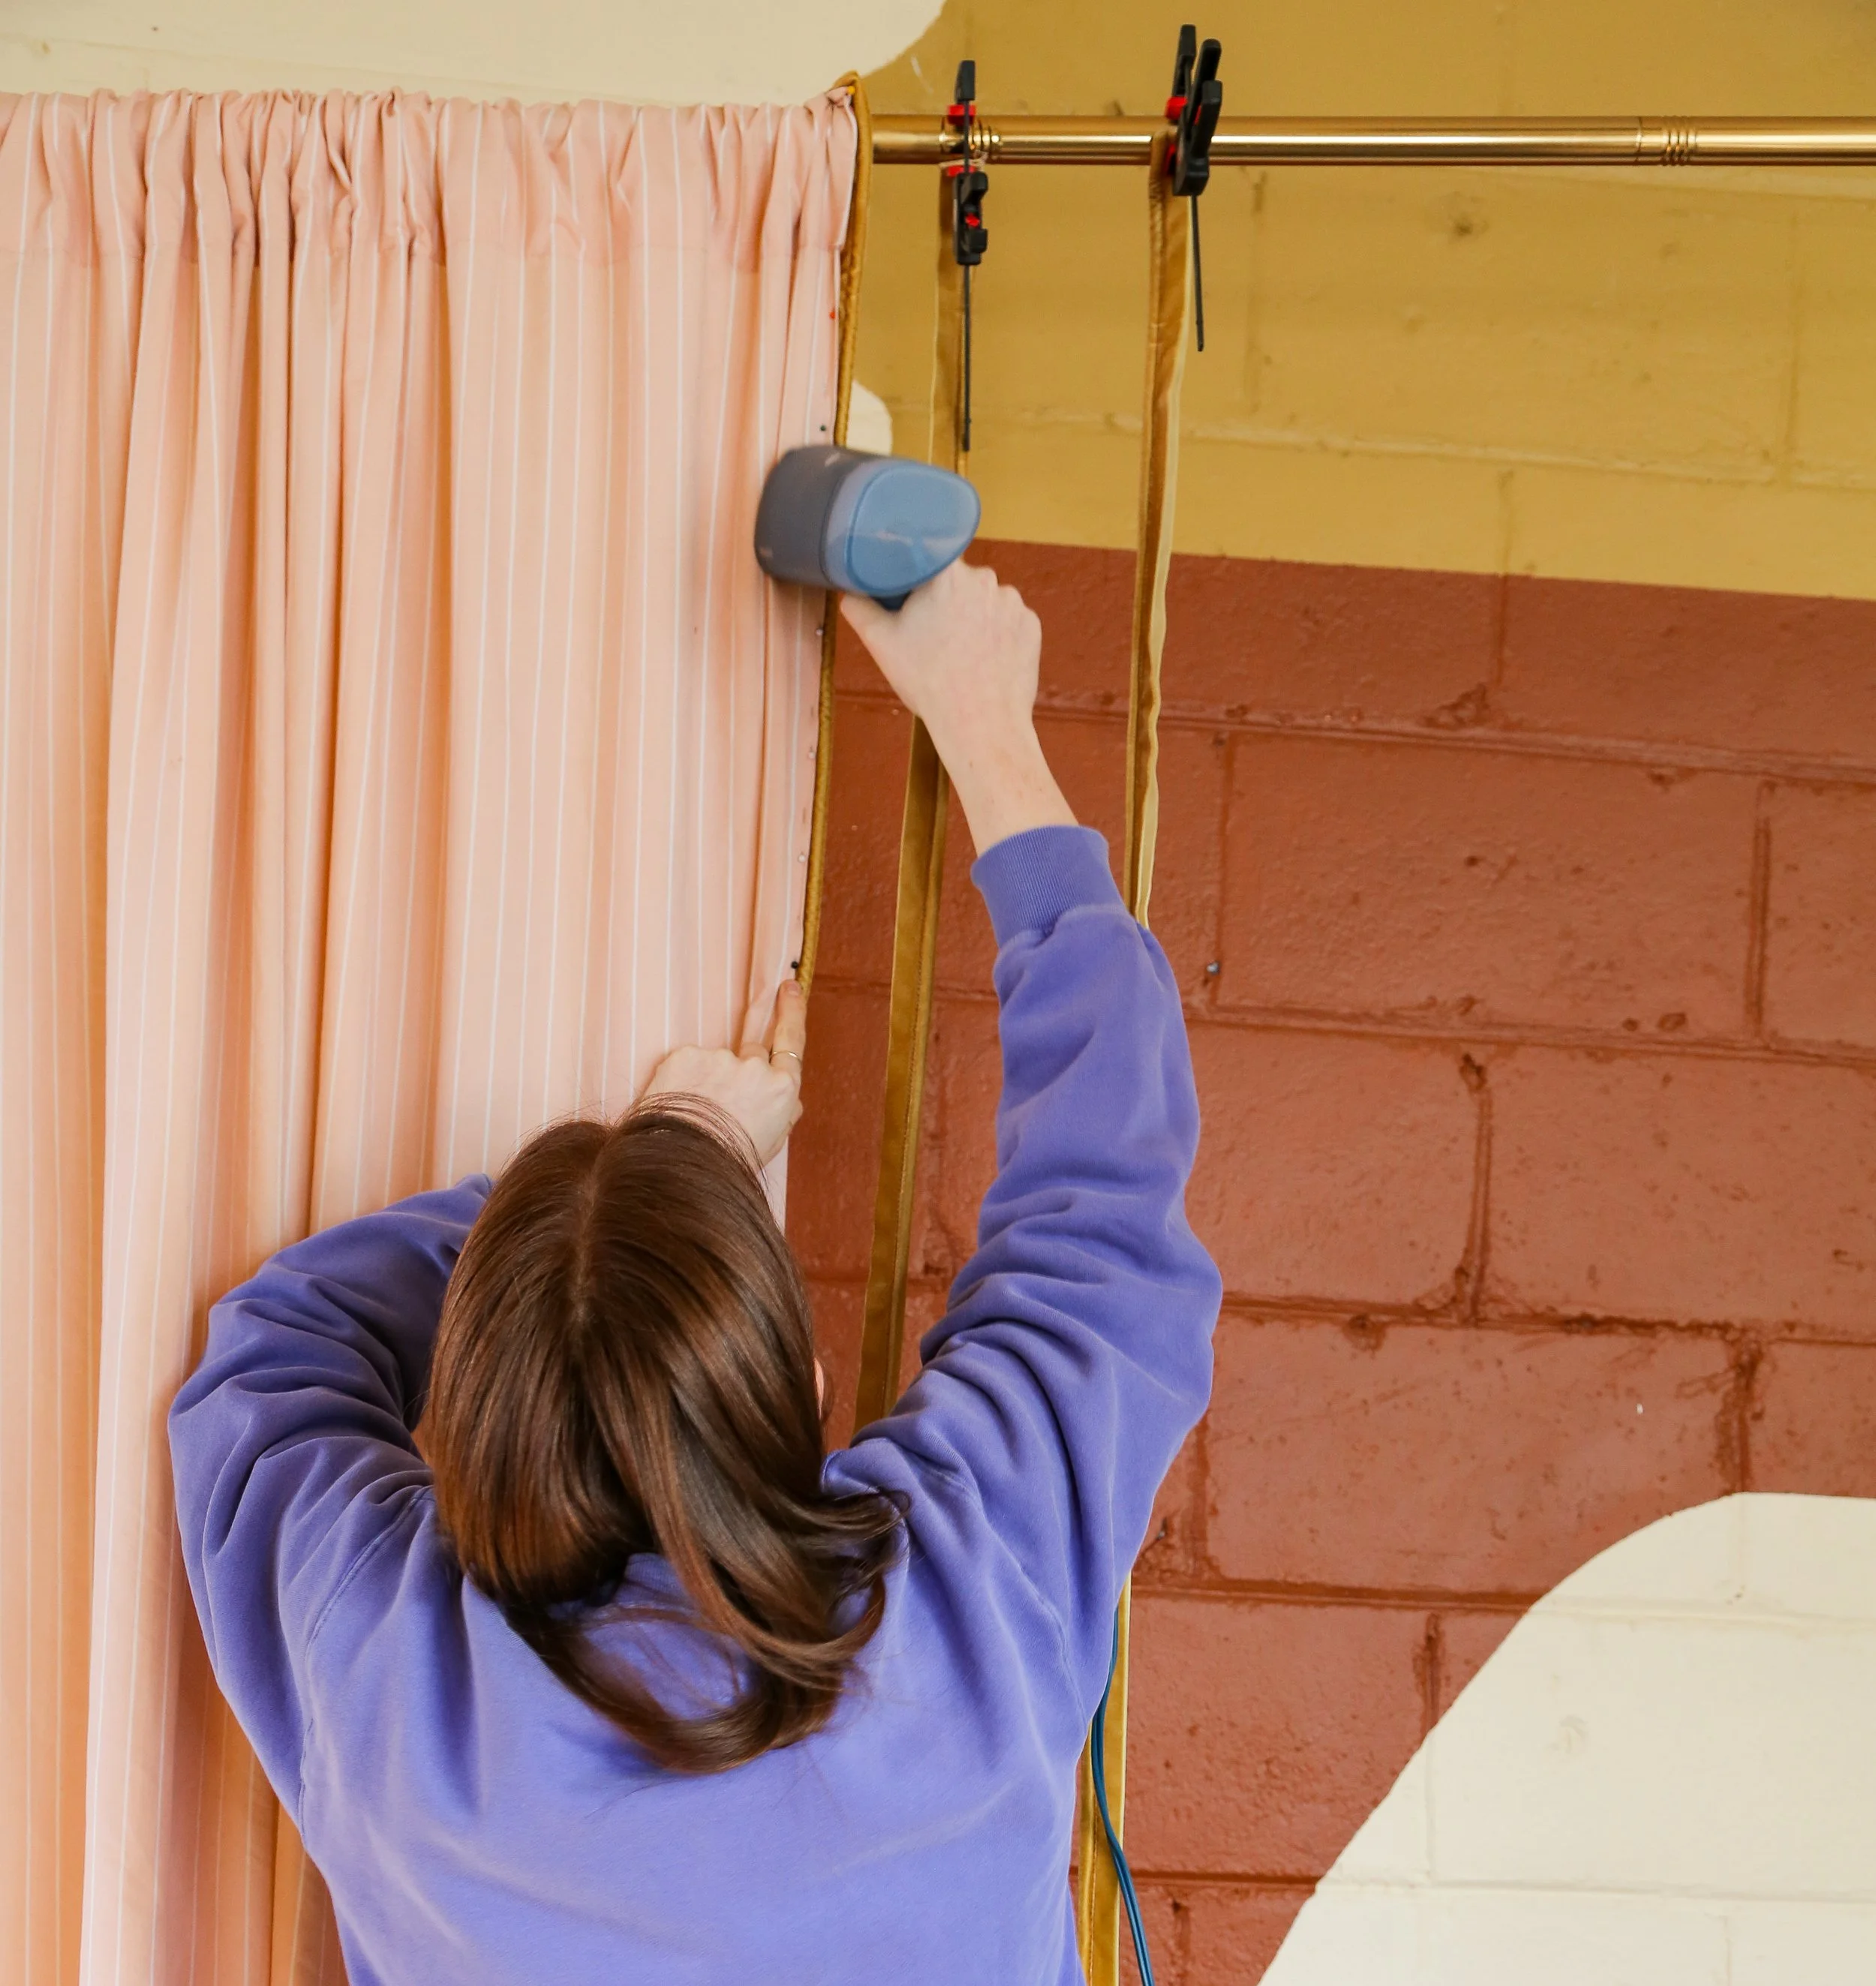
4. luxe & homey shower curtains
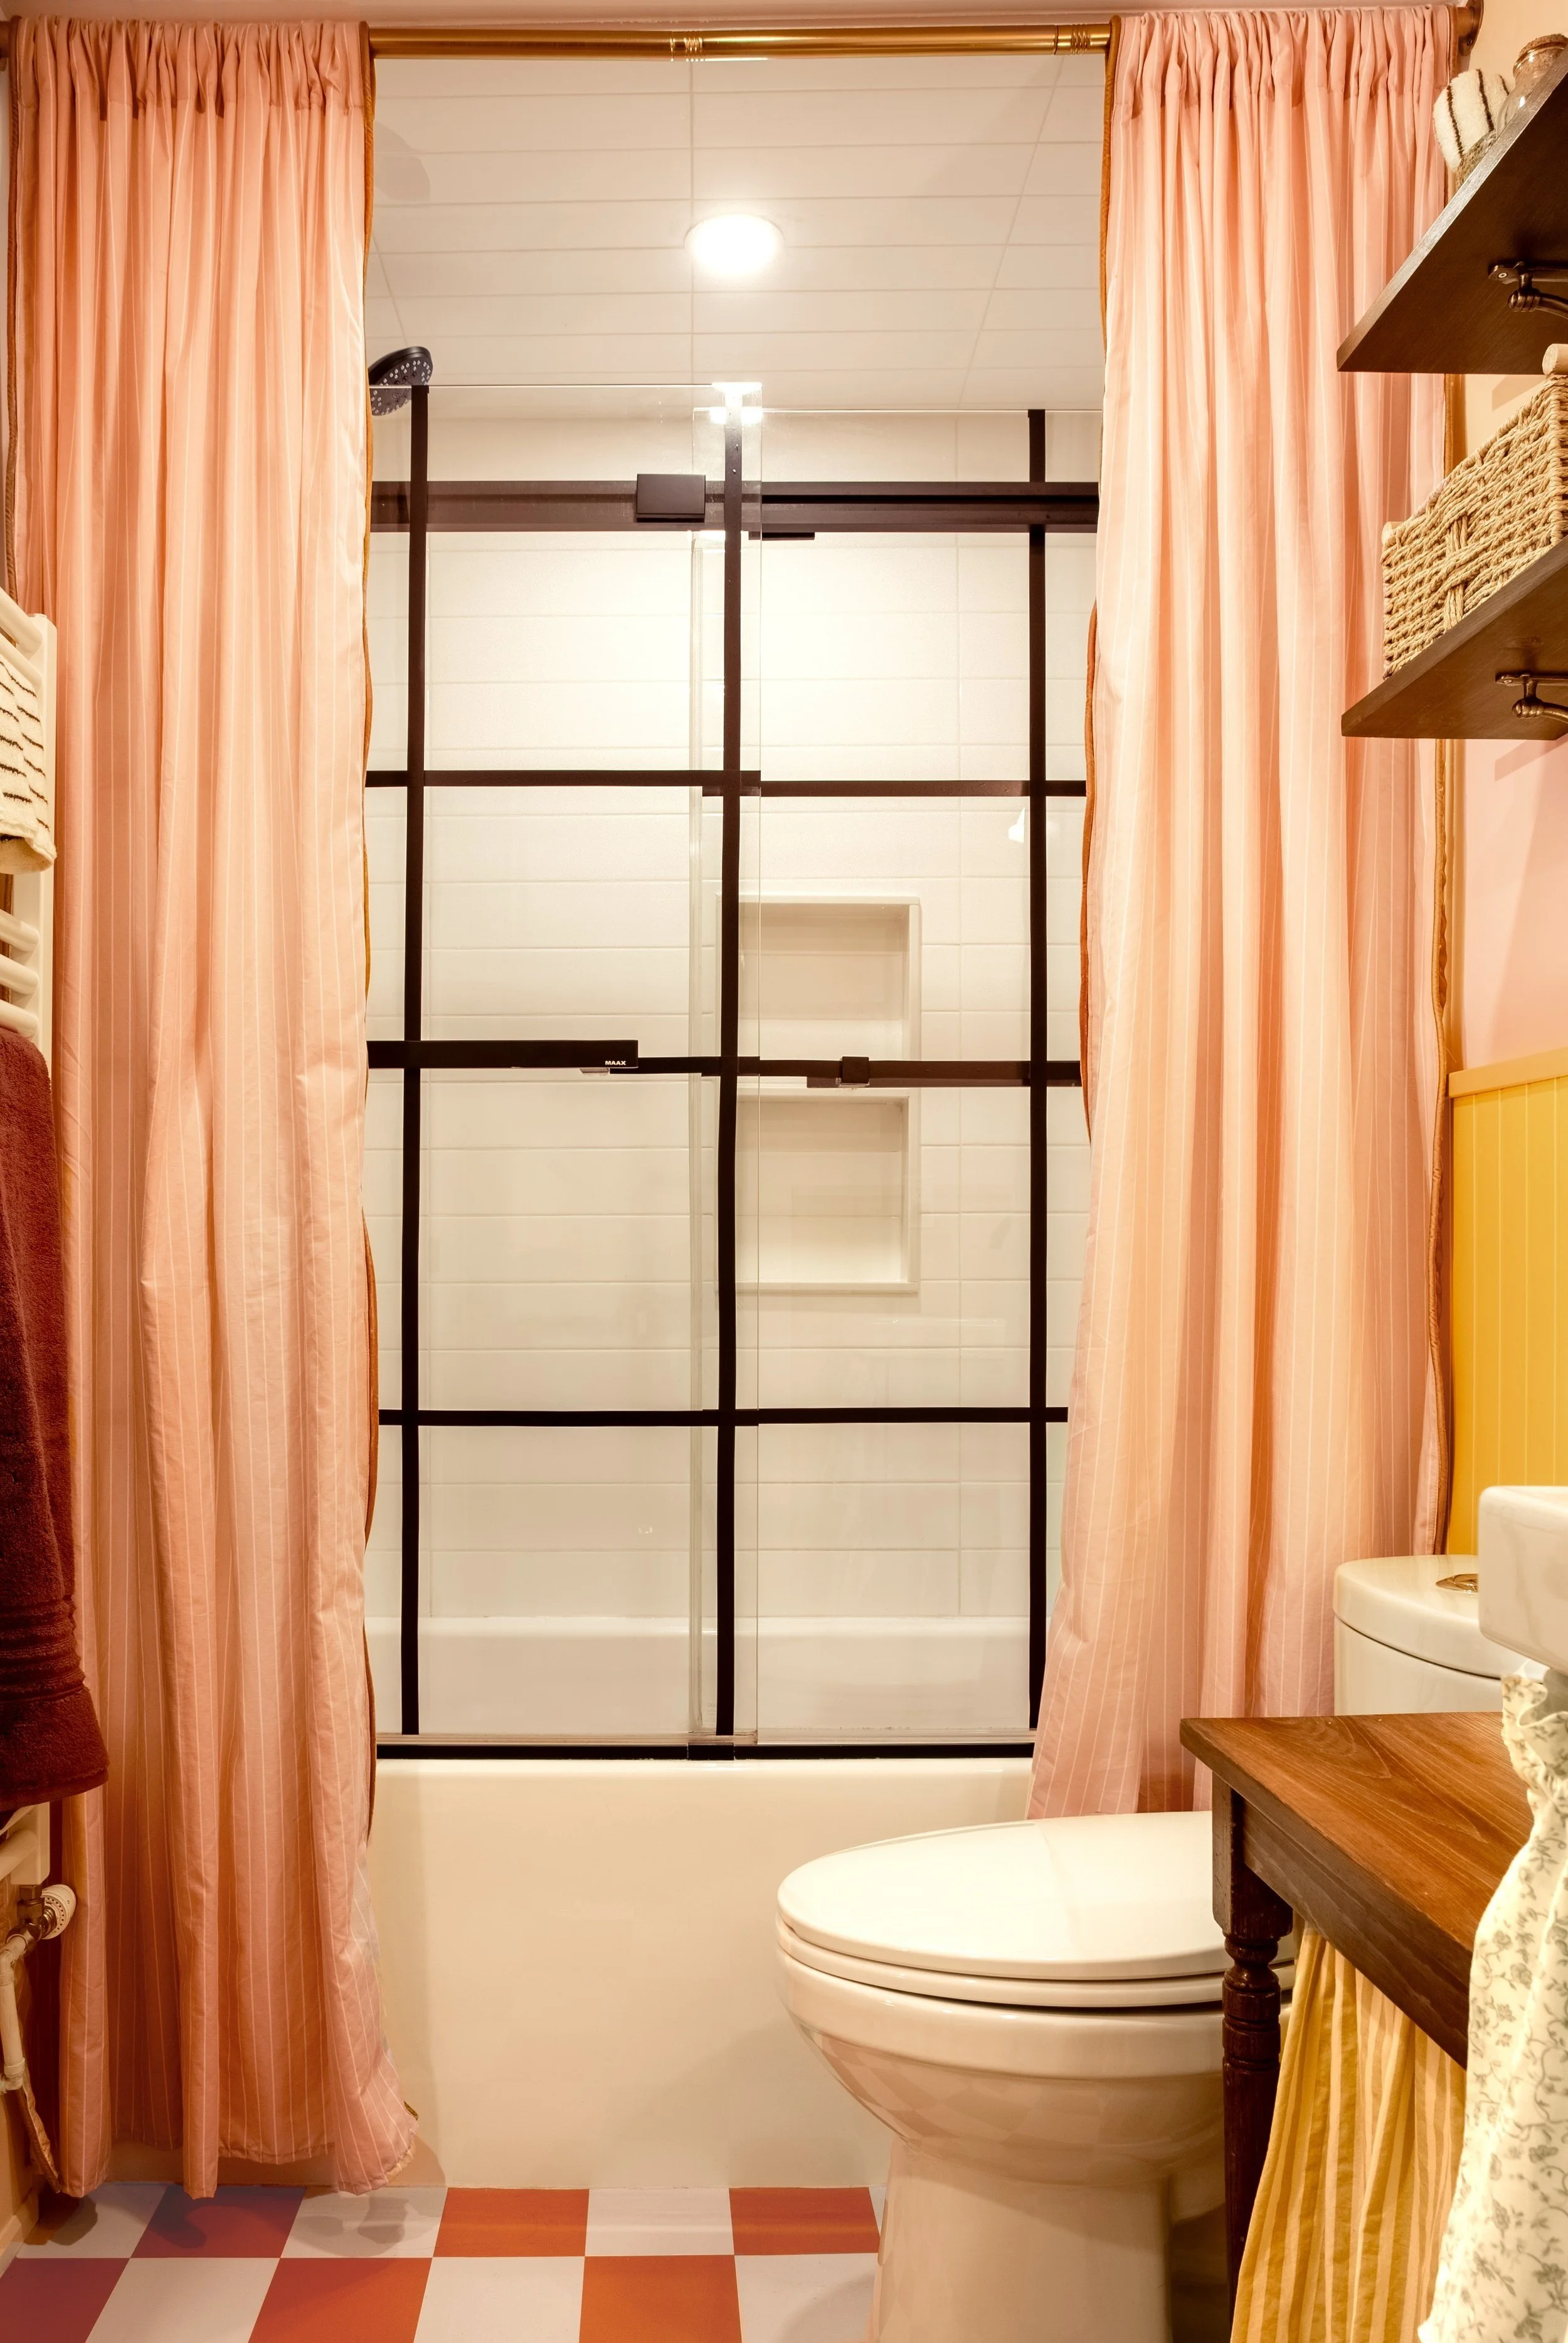
When a thrifted sheet, some velvet piping trim, and a few basic sewing skills can elevate your bathroom in no time.
Materials:
A bed sheet with a striped pattern (we thrifted ours)
Velvet ribbon (or velvet fabric)
Piping cord
Sewing machine
Piping foot for your sewing machine
Scissors
Steps:
Find the perfect sheet – Head to a thrift store and find a bed sheet with a striped pattern that matches your style. The stripes are a great way to add texture and height to your space.
Create a curtain rod pocket – Open up the hem on the top of the sheet and fold it over to create a pocket where the curtain rod will go. This will allow the curtain to hang from the rod seamlessly.
Cut to size – Measure the length you need and cut the sheet in half if needed. Use the built-in stripes as a guide to make sure your cut is perfectly straight.
Add piping trim for the designer touch – To get the high-end look, add your velvet piping trim along the edges (this part is KEY to creating the designer look). Fold the fabric over the piping cord like a sandwich, and sew it in place using the piping foot on your sewing machine.
Sew the piping to the edges – Carefully sew the piping along the edges of your curtain. Make sure the ends of the piping are neatly sealed up.


Tune into the video below to see the full bathroom makeover!