DIY Wooden Drying Rack for your laundry room

If you're tired of using up all your drying space or just want a more organized way to air-dry your clothes, a wall mounted wooden drying rack is the best solution! It's a simple, practical addition to your laundry room that doesn’t take much time to put together.
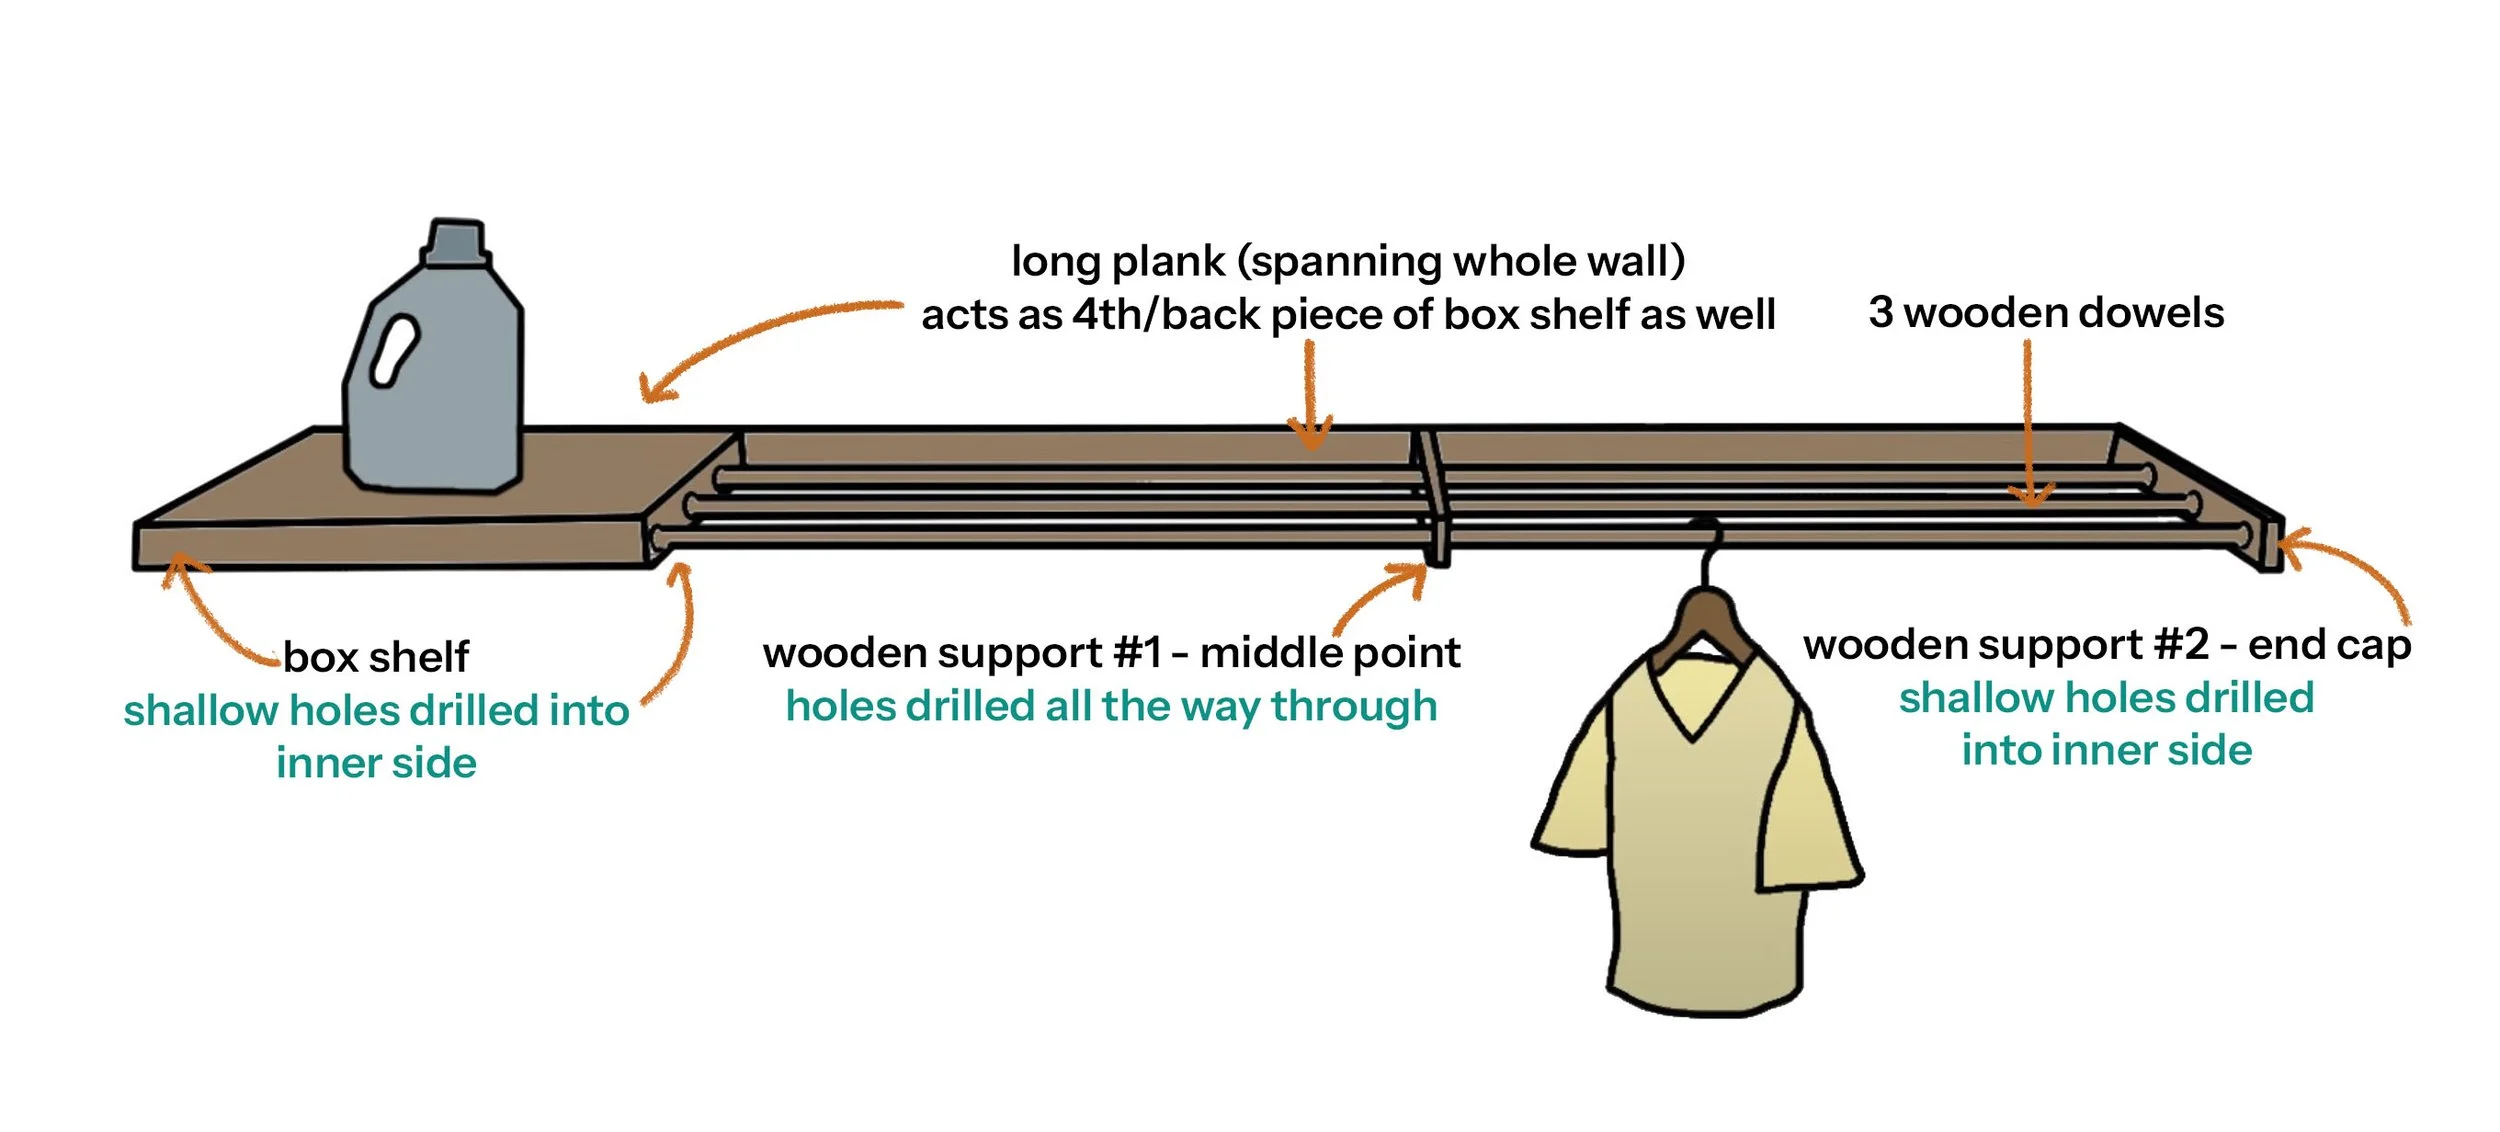
the design:
What You’ll Need & prep:
Measuring tape
Saw for cutting wood pieces:
Cut List (cut to your specific laundry room measurements)
1x long base plank that will span the whole length of your wall
4x wood pieces for creating a box shelf (3x sides and 1x top piece. The 4th/back piece that closes the box will be the long base plank you cut previously)
2x wooden support blocks at the same width as your wooden box shelf (to hold the dowels and stabilize the middle and end of rack)
Wooden dowels for hanging clothing (I used 3) cut to the length of your wall (minus the length of your box shelf)
Power drill & hole saw bit (for dowel holes)
Screws and wood glue
Wood stain
Top coat finish (to seal)


Measure your space
The measurements for this DIY will depend on the size of your laundry room, so start by measuring the space between the two walls where you want the drying rack to go.
Build your box Shelf
Start by building a basic box for the shelf on one side of your drying rack. You’ll need four pieces for the sides and base. Glue and screw them together to make a solid shelf where you can store things like detergent or dryer sheets. Then, attach the long base piece (the one that runs along the length of your wall) to finish off the box.


Drill Holes for the Dowels to sit in
Measure out and mark on your shelf and two support blocks where you would like the dowels to sit. Make sure the holes line up properly to keep the dowels stable.
Using your hole saw bits, drill three shallow holes into your shelf—just deep enough so the dowels sit snugly inside without going all the way through. Do the same with one of your wooden support blocks, which will serve as the end cap for your drying rack. You don’t want the dowels poking through that piece, so keep the holes shallow.


Using your hole saw bit, drill the same three holes in your remaining wooden support piece, but this time drill all the way through. This piece will act as the middle support, where the dowels will run between the shelf and the end cap.

attach your middle support block
Attach the middle support block to the long plank that spans your wall, placing it half way between where the inside of your shelf sits, and the end cap support on the opposite side. Use both wood glue and screws to secure it in place.


stain & seal before final assembly (something I should have done)
Stain your pieces then apply one or two coats of clear sealant to protect it from moisture and mold BEFORE you assemble. I made a mistake by assembling the entire drying rack first, only to take it apart later to stain and seal it, and then reassemble it. It ended up being more work than necessary! This is also why the instruction photos in the next step show the raw wood.


add your dowels & end cap
Once your pieces are dry, apply wood glue to the three shallow holes you drilled in the shelf, then slide the dowels through the middle support block. Push them down until they fit snugly into the holes in your shelf.
Take your remaining wooden support block, apply wood glue to the three shallow holes you drilled, and slide it onto the end of the dowels. Secure it to the long back plank with both glue and screws for extra stability.


wall mount your drying rack
Mount the shelf to your wall using a level, and secure it with screws and anchors that can support the weight, depending on the type of walls you have.
the finished piece


Watch the full extreme laundry room makeover below!