Harry Potter EXTREME Dorm Makeover!
Today we are SO excited to be making over Kayley’s dorm room! She’s a second year history student who LOVES Harry Potter and is hoping to become a lawyer! Since she’s a super huge Harry Potter fan (and a Slytherin) we’ve decided to make her dorm room super fun and themed!
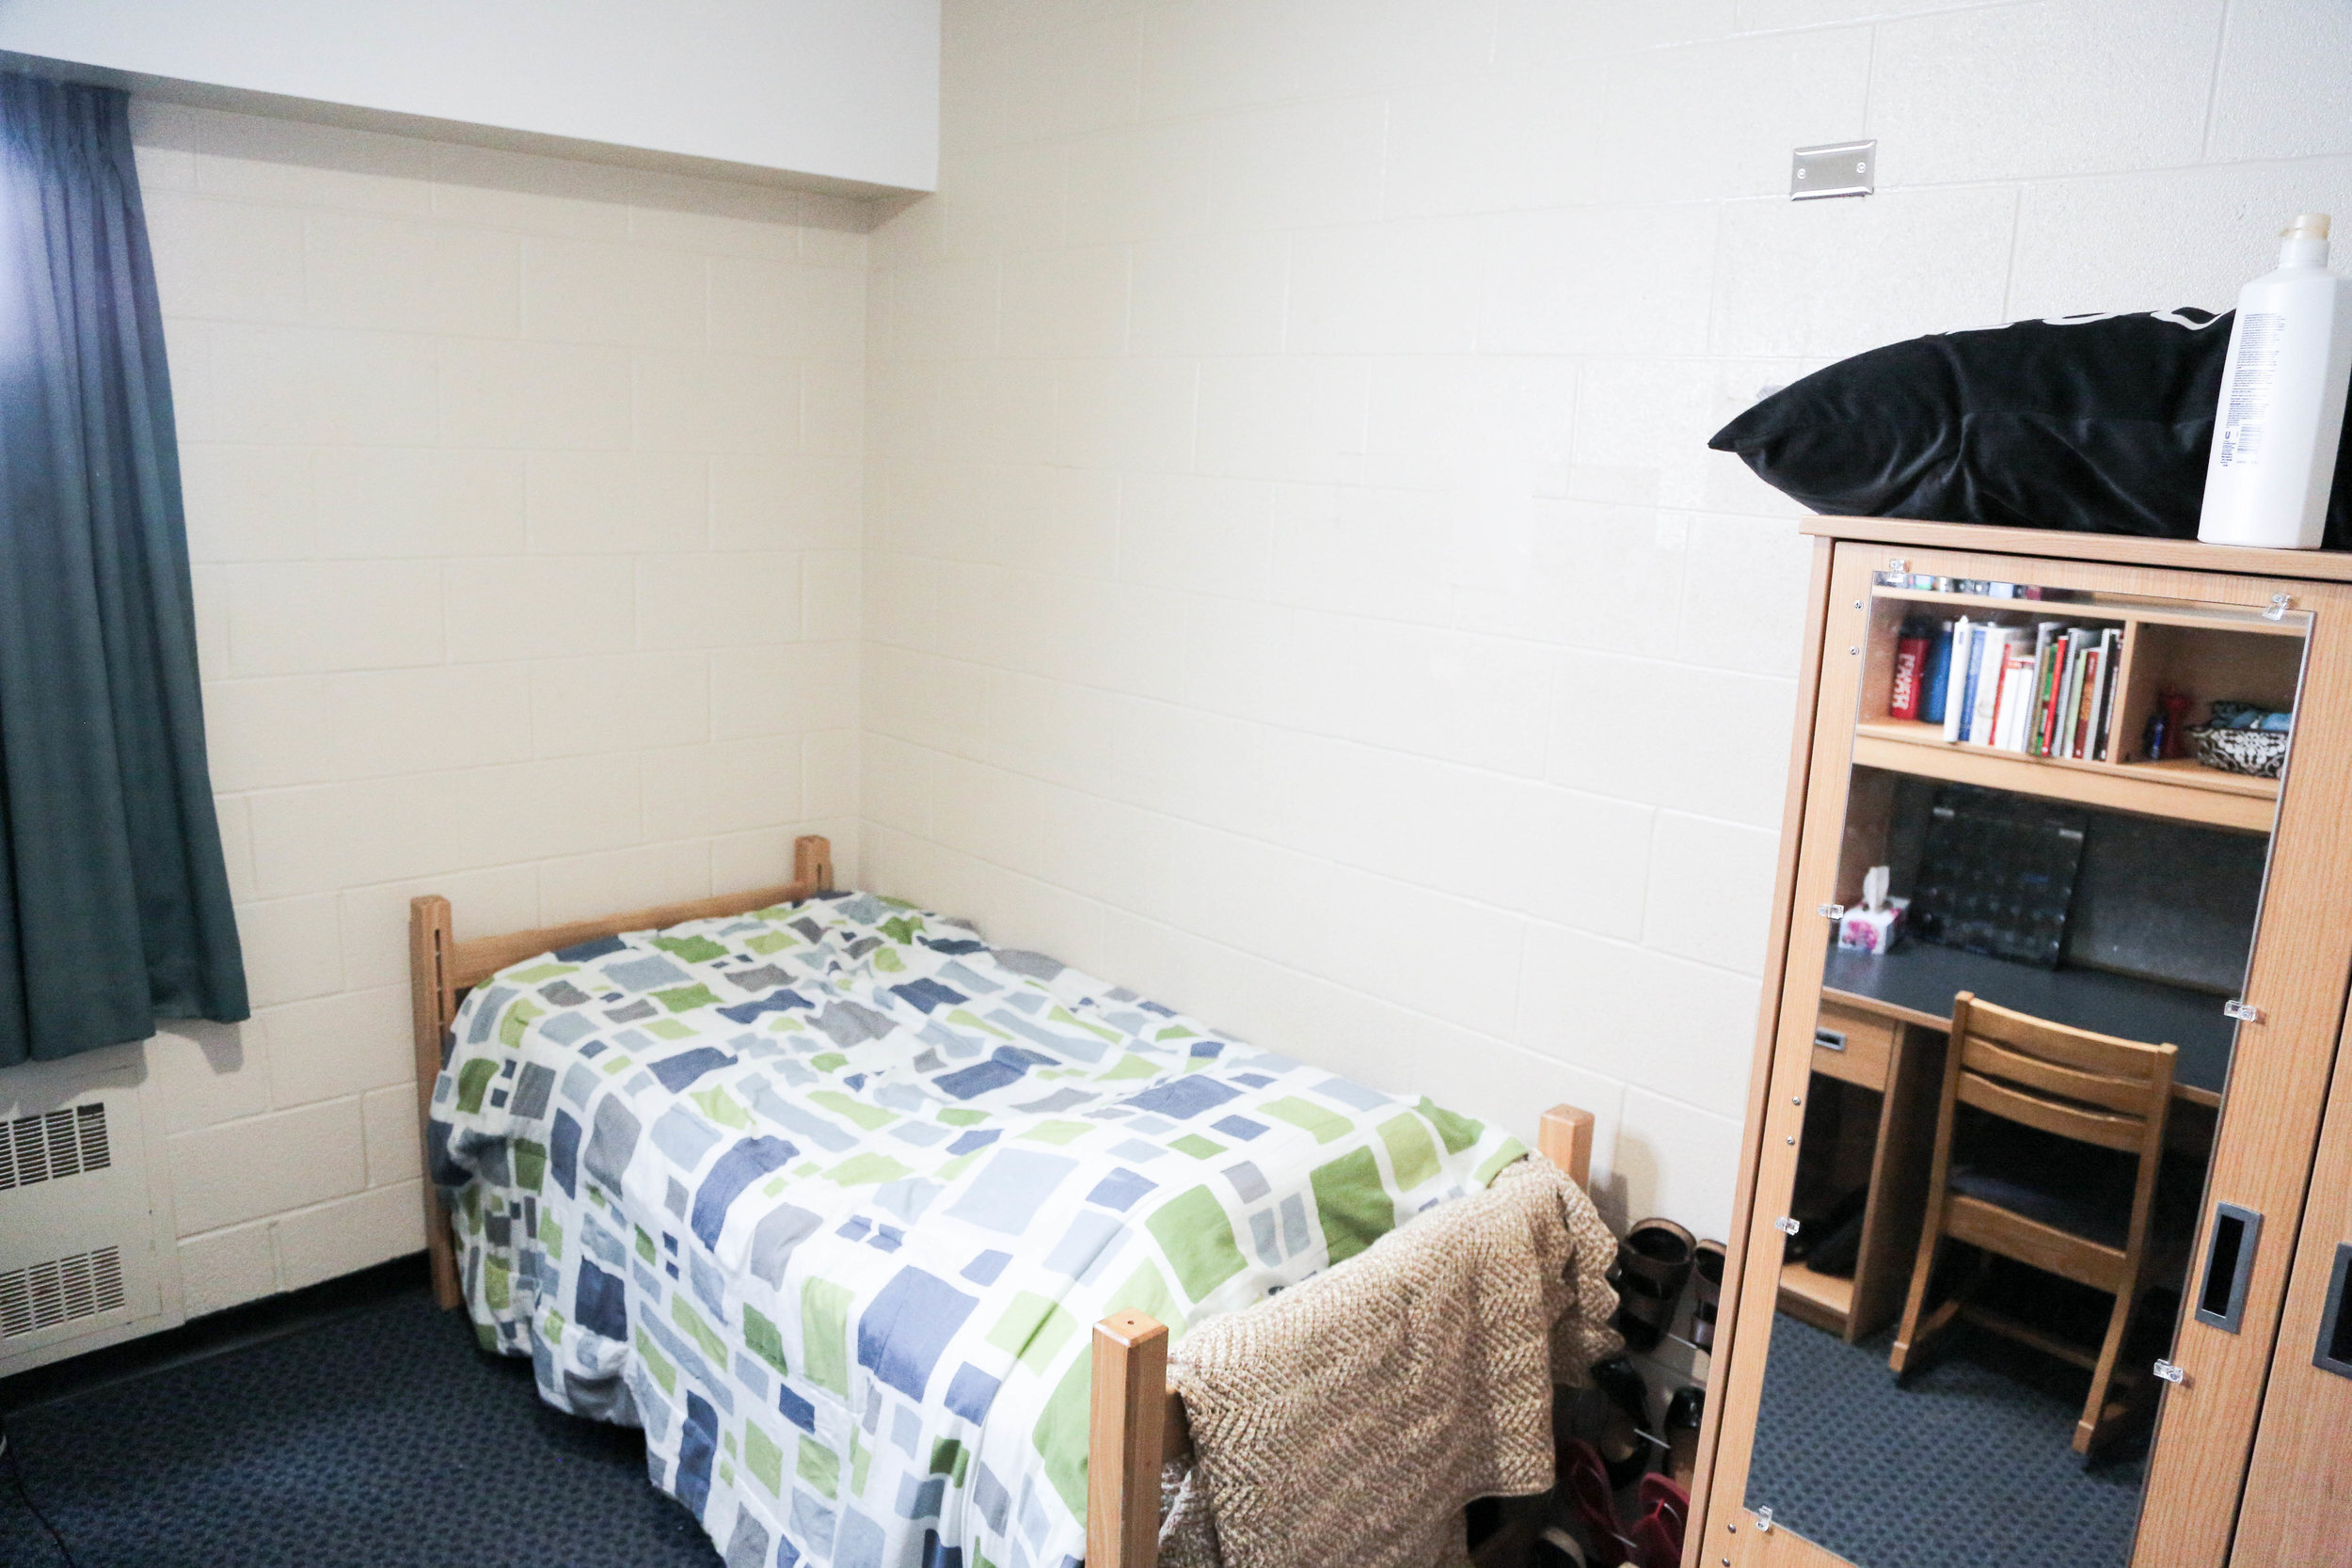
before


The first thing we did was add a piece of fabric above her bed to act as a canopy! Simply grab a piece of fabric in your desired shade and size. To hang this fabric to the ceiling, we grabbed some mini clothes pins from the dollar store and added some removable wall stickers to the back of them to attach them to the wall! We attached the clothes pins to the ceiling where we wanted the fabric to hang, and simply closed the clothes pins onto the fabric to secure it in place! This took us only five minutes to complete and totally transforms the room!

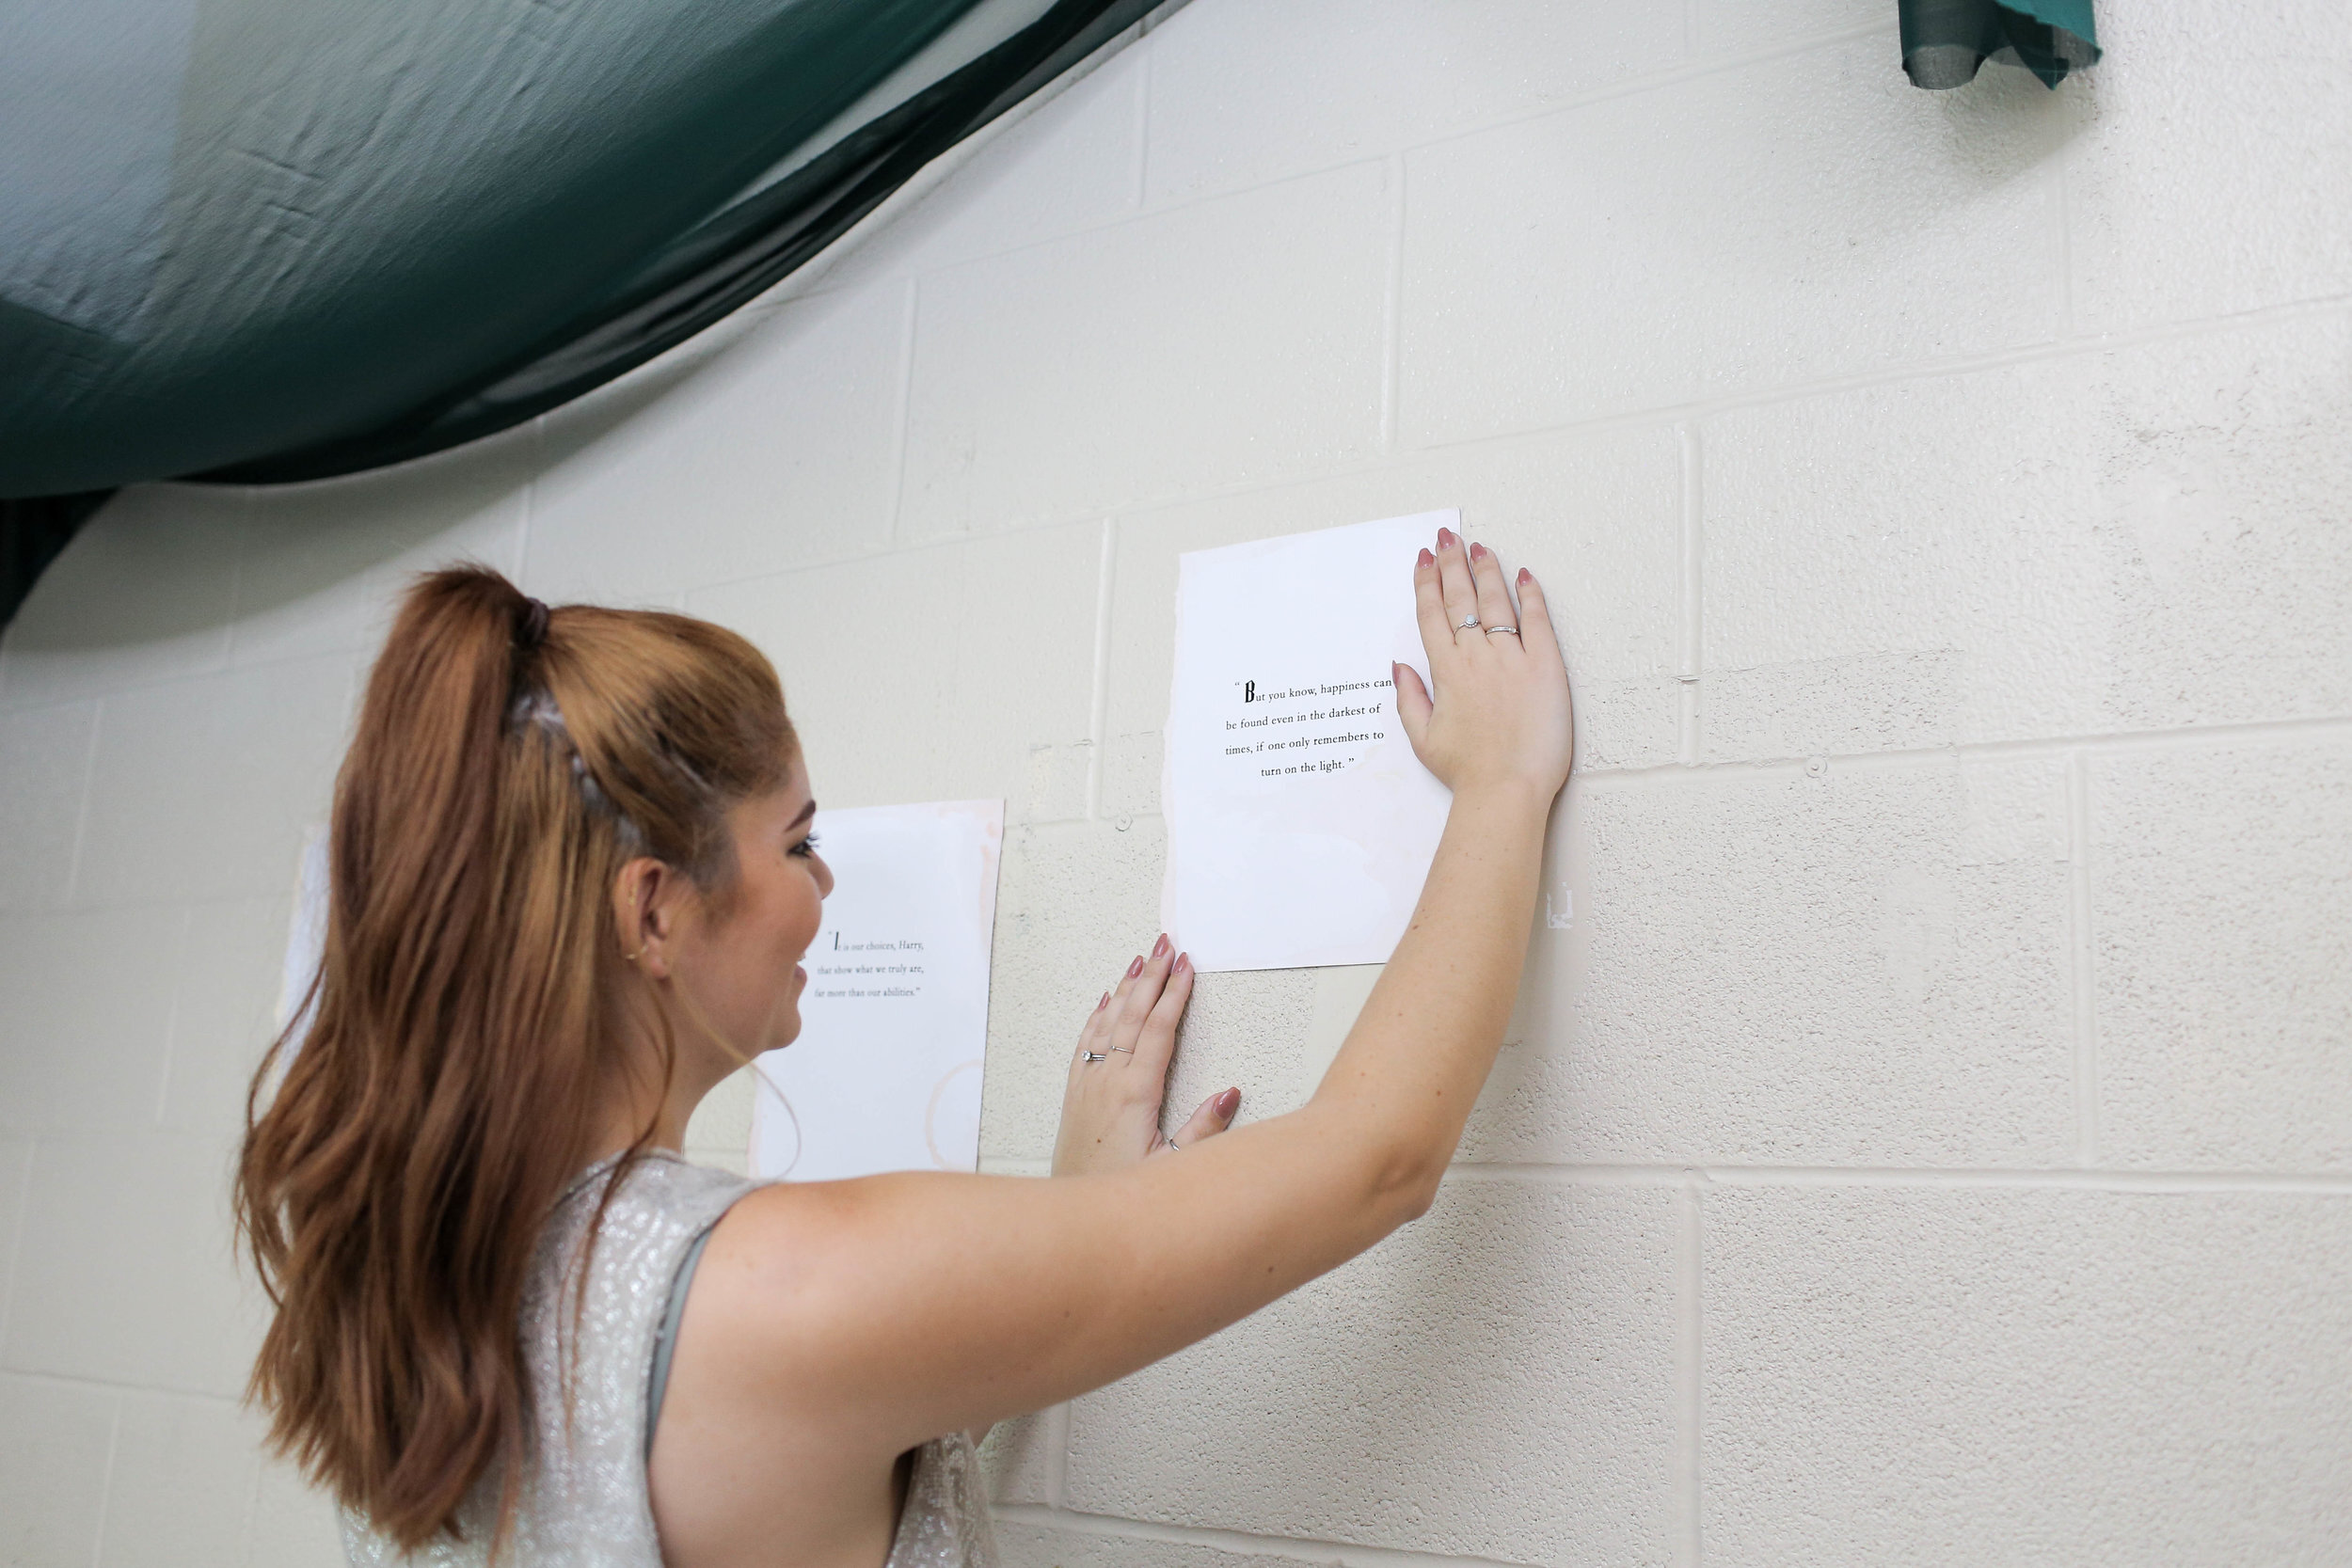
Next, we’re going to work on a decorative wall! We printed out some notable Harry Potter quotes onto some thicker paper, and distressed them to make them look like pages that were torn out of a book! We used highly diluted brown watercolour to look like tea or coffee stained the pages. We finished this off by hanging the pages on the wall with some wall safe tape!
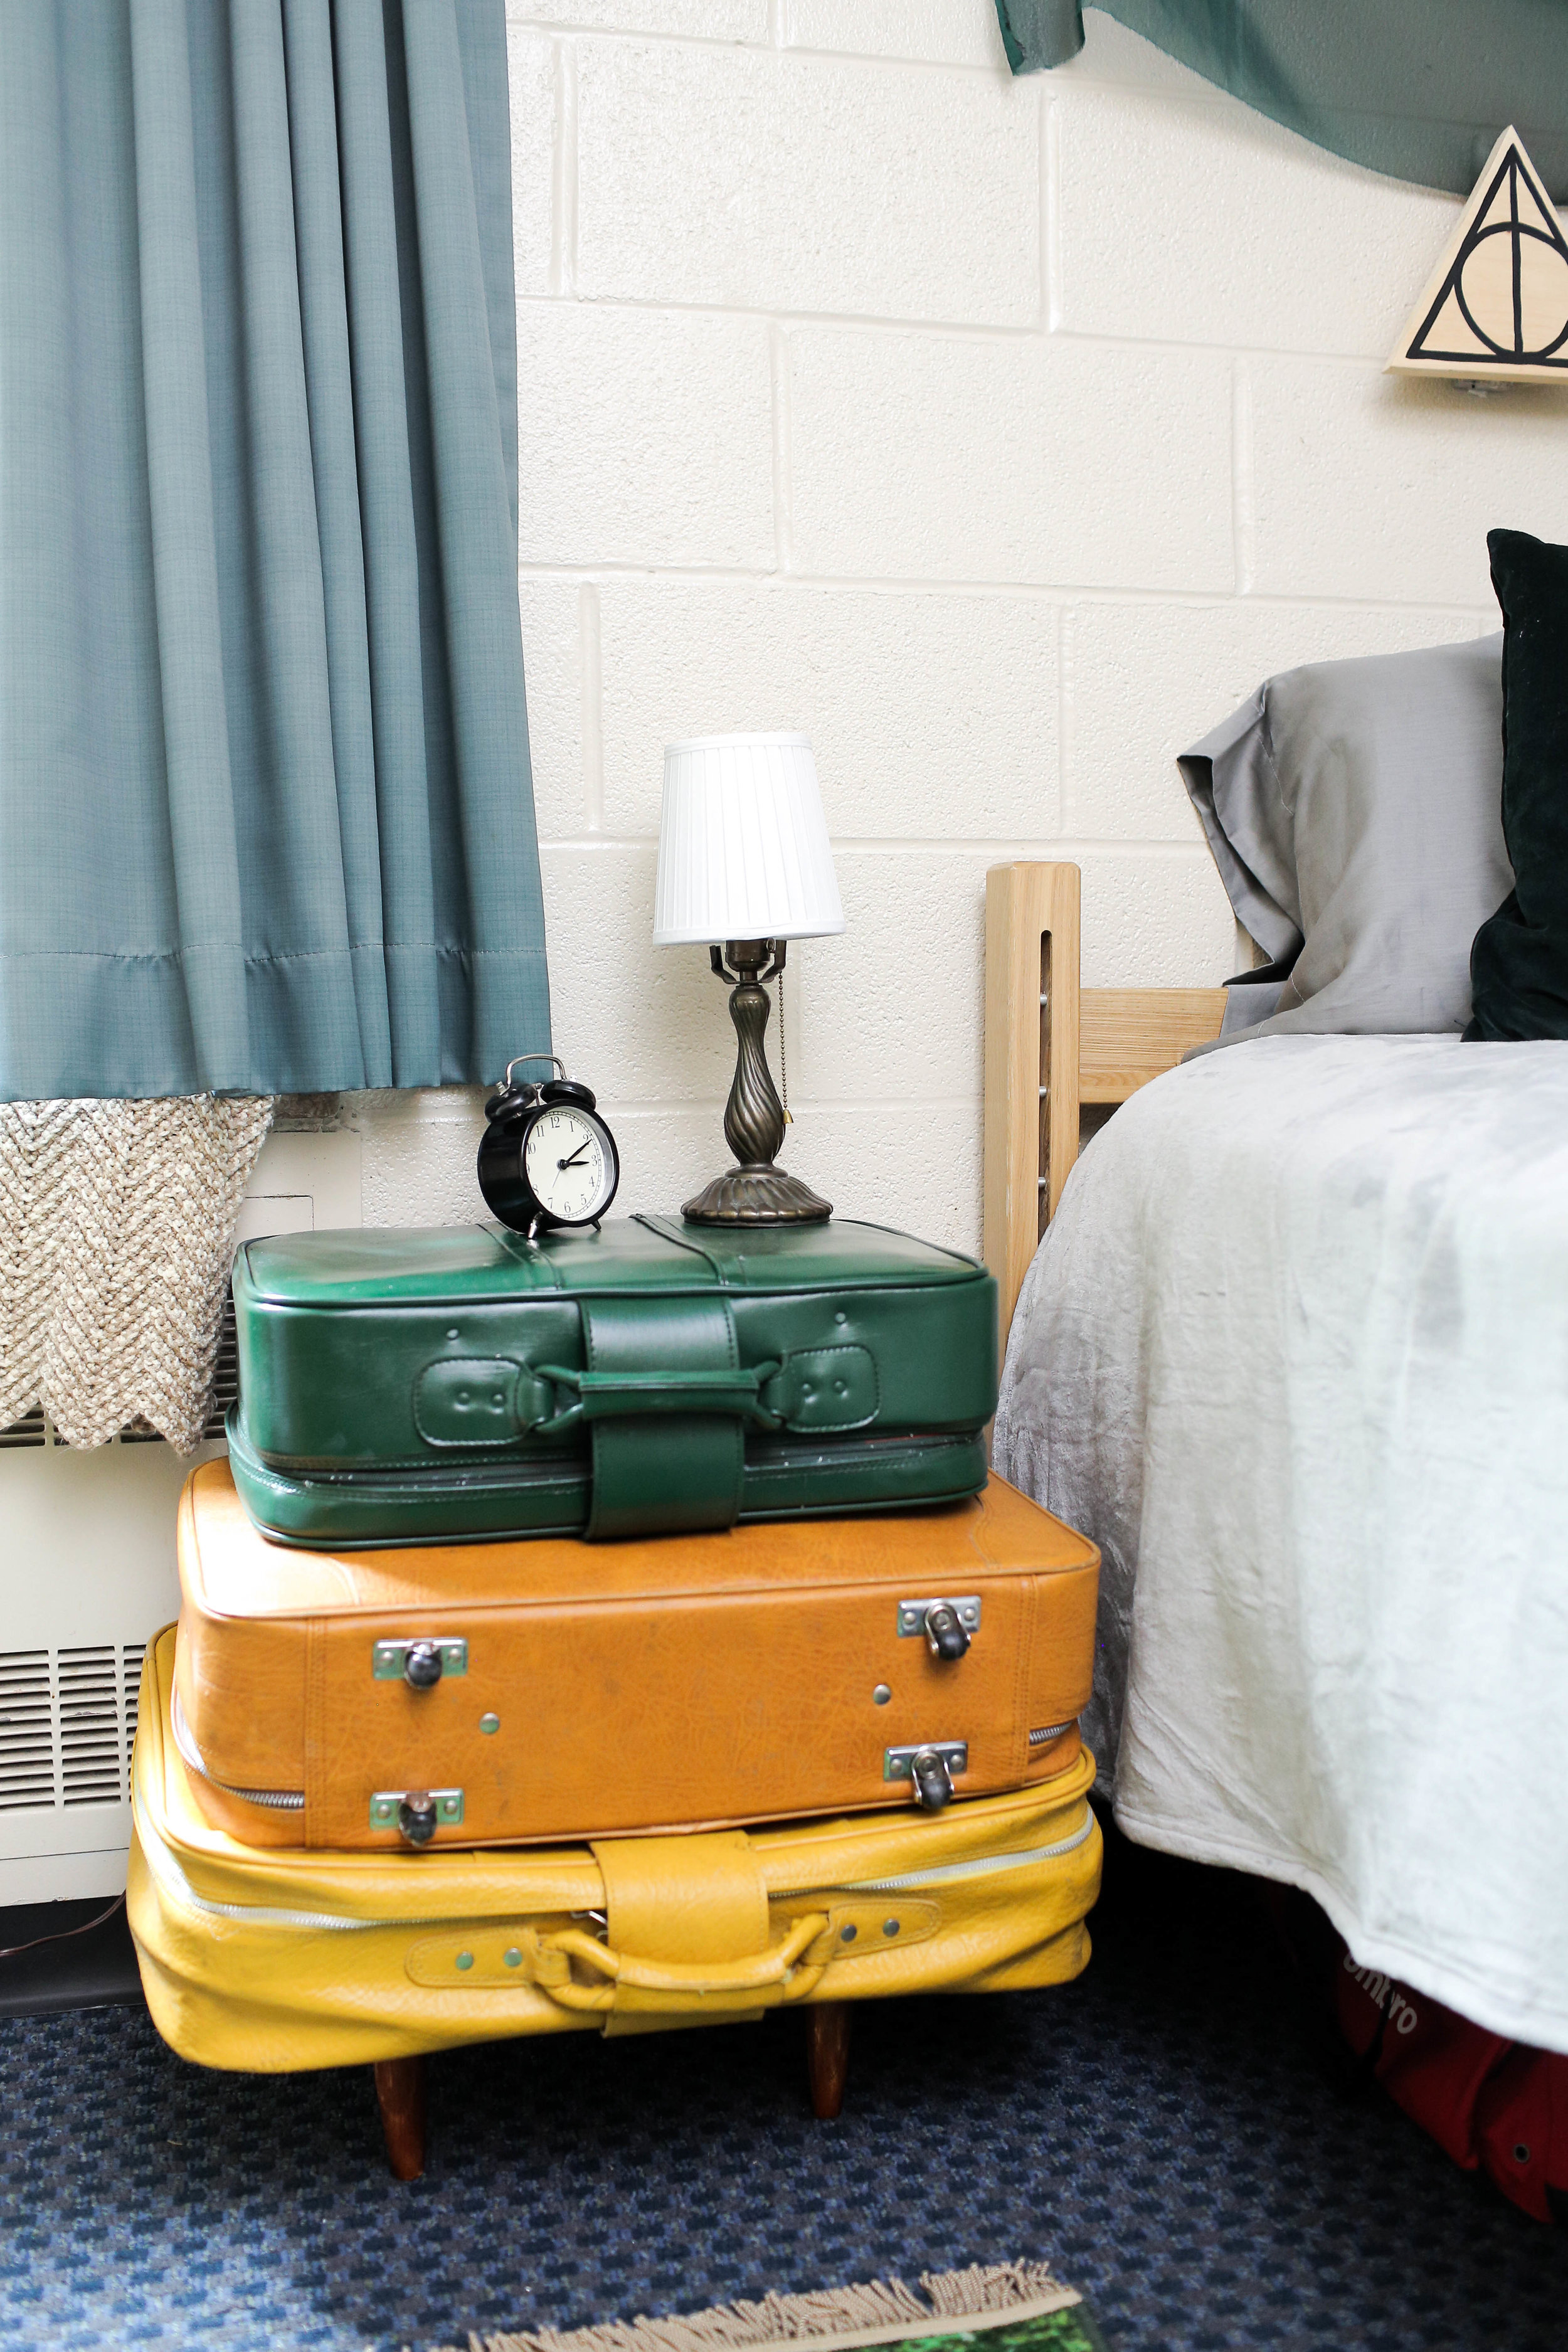
We ended up hacking a wall sconce that we’ve made previous (check it out here!), to look like the Deathly Hallows symbol. We simply added black paint to create the symbol! A super smart way to make a cheaper rug look expensive is to add fringe to the ends! We simply purchased some fringe from the fabric store and added it to the ends of the rug!
Finally, we DIYed this really cool suitcase nightstand! We headed to the thrift store and picked up three super retro suitcases. We then stuffed the suitcases with styrofoam to add stiffness. Finally, to complete the nightstand we created a base for the suitcases to sit on top of. We simply cut a piece of plywood a little smaller than the bottom suitcase, and attached three furniture legs to the plywood. To assemble, simply stack the suitcases largest to smallest on top of the plywood and you are finished!

Time to add the finishing touches!


