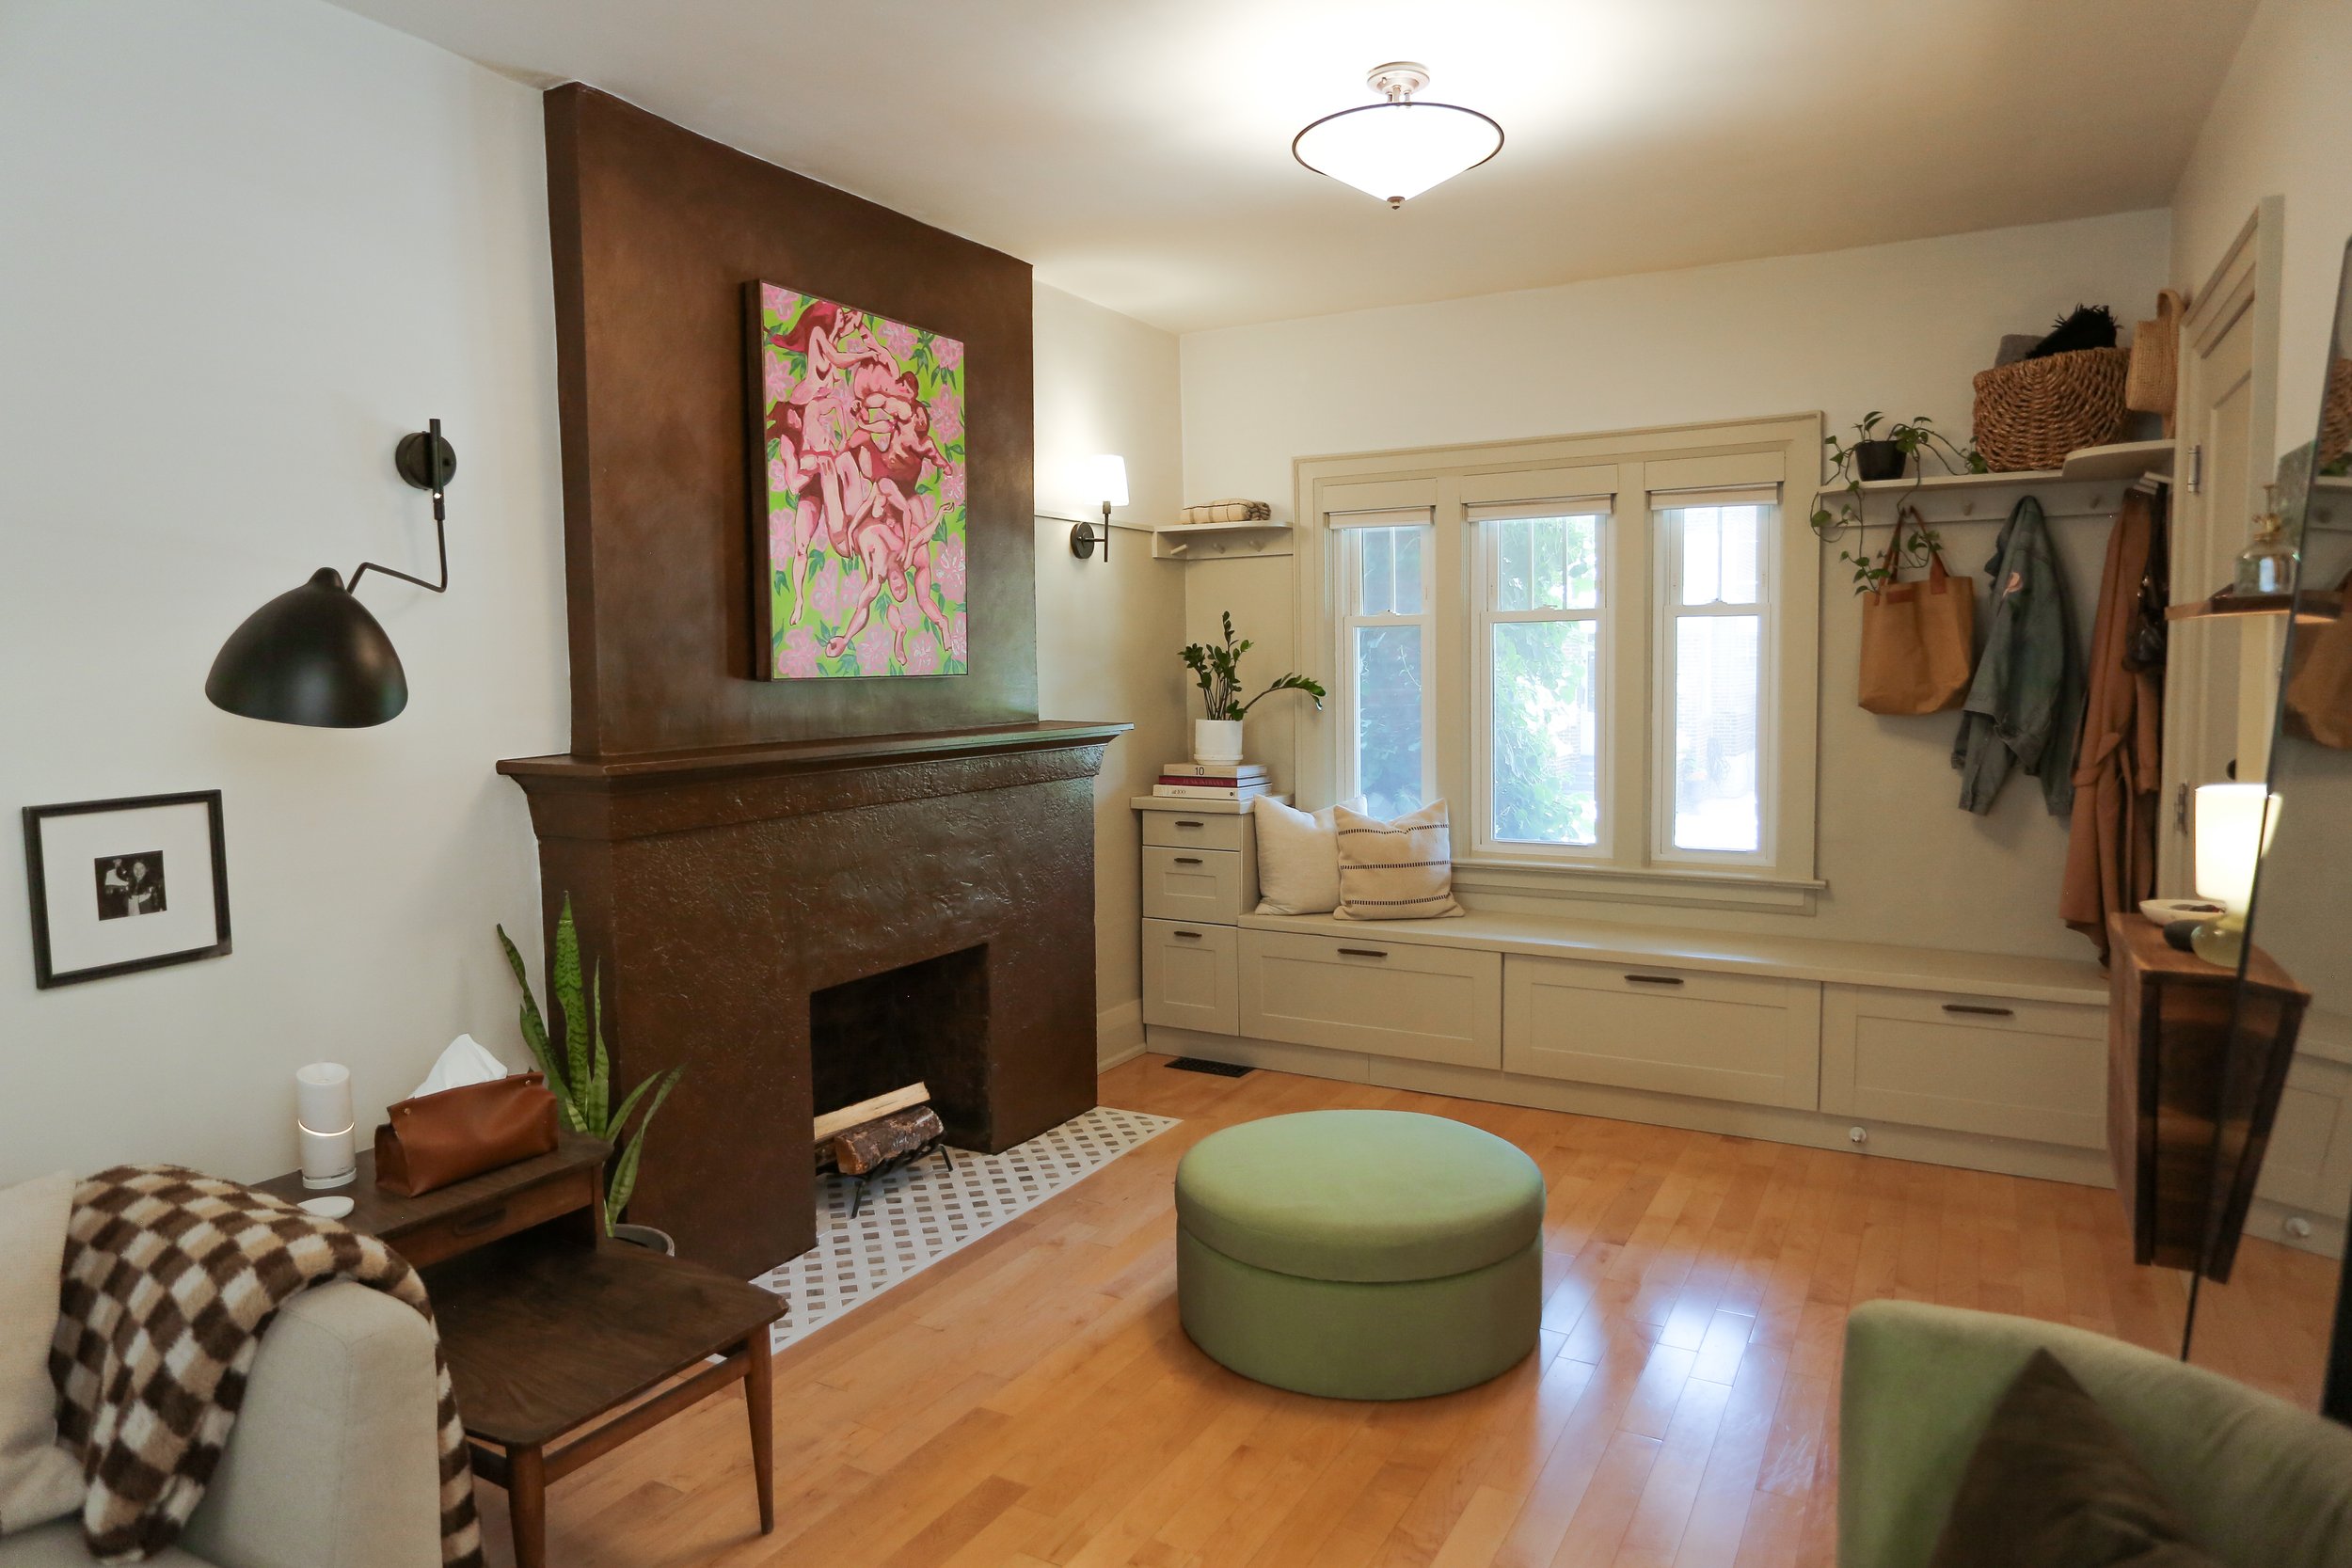
Fireplace & Living Room Makeover
I moved into my house over 3 years ago, and as I’ve lived here, the fireplace has gone through a couple transformations in her lifetime. But now that Elliott has moved in (as seen in this video), it is giving us the opportunity to refresh spots that aren't quite hitting the mark, and this was definitely one of them.
The stages of this makeover
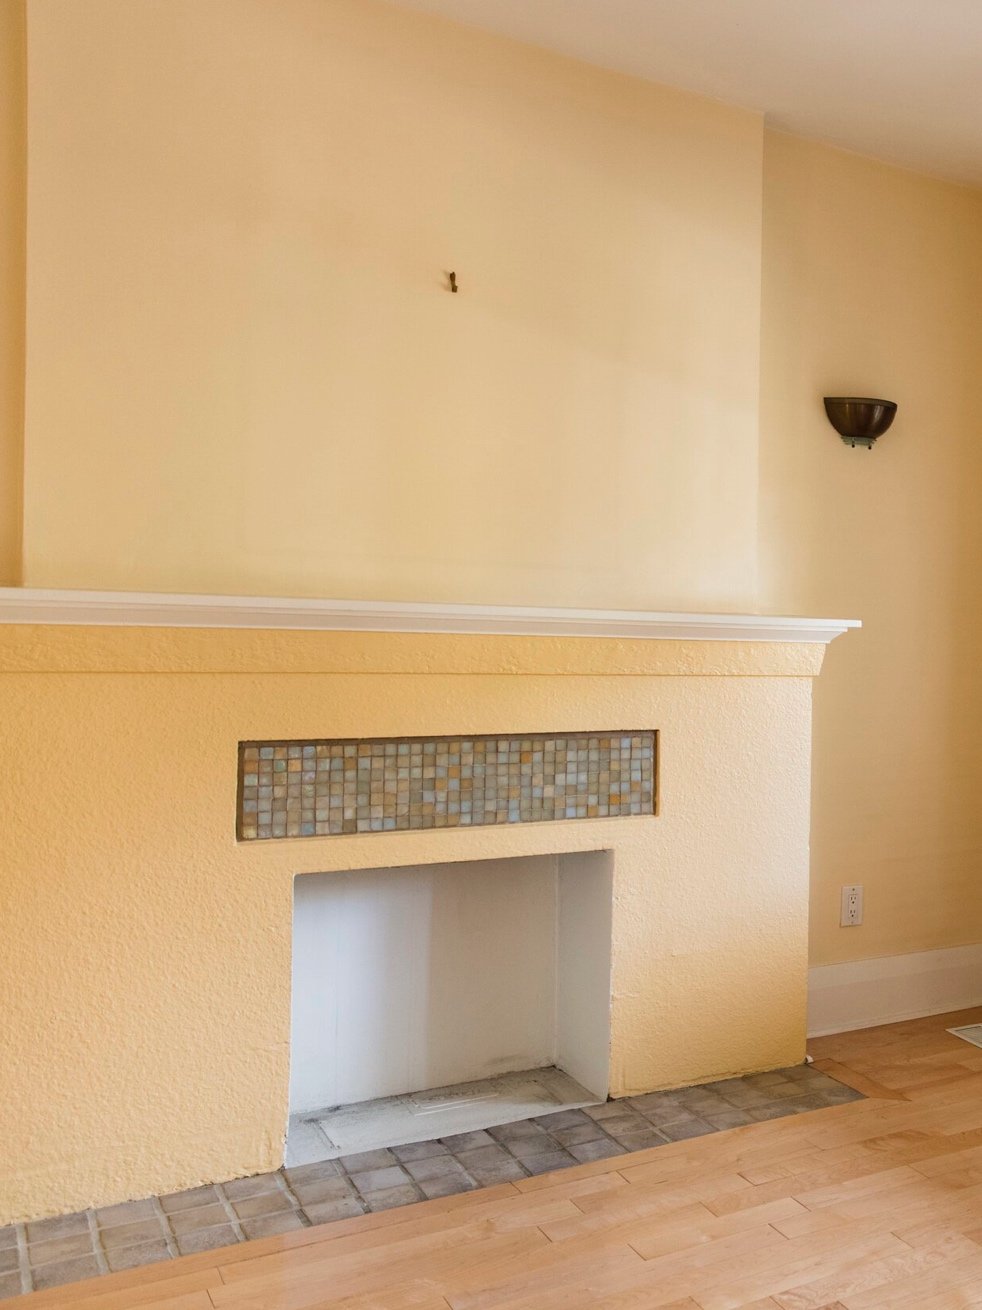


While there are some parts I love about this makeover, some of the aspects that needed to be addressed were the colour choice, the scale of some of the decor, and the pre-existing tile (it came with the house and it was very dated and brittle).
Tile & Brick
The main aspect of the room that had always bothered me was the tile. Because the house is so old, the pre-existing tile was really outdated and in rough shape, so I decided I would invest in retiling it myself. After a LOT of deliberation and tile shopping, I landed on this neutral mosaic pattern. My second option was the cute checkered tile, but I thought that might lean a bit too trendy, so I opted for a design that I knew would stand the test of time and accommodate future design changes.
When it was time to do the tile installation, I discovered brick underneath the pre-existing tiles and the drywall inside of the fireplace, so before putting the new tiles on the floor over the brick, I had to address the interior of the fireplace. I chose to tint the existing brick by using a dark black-brown-gray paint and mixed it with water. The goal was to enhance the grout and brick tones while keeping in neutral to not overpower the tile. The result was exactly what I had envisioned!


With the interior brick tinted, it was finally time to tackle the tile installation. Mosaic tiles, while gorgeous, require SO much precision. It took a while, but the effort was well worth it.


Colour
After the tile was installed and the brick was tinted, I could finally move onto addressing the exterior colour of the fireplace. After much contemplation and some swatches, I settled on painting the fireplace copper. To give the copper the warm undertone I wanted, I first painted the whole surface area with some old yellow paint I had, then covered it by painting a hatch mark motion overtop with the copper paint to give it more texture.
This was very much a *trust the process* vibe ahaha, the colour in between coats was not looking so cute but I love how the final results turned out!


Decor & Final Touches
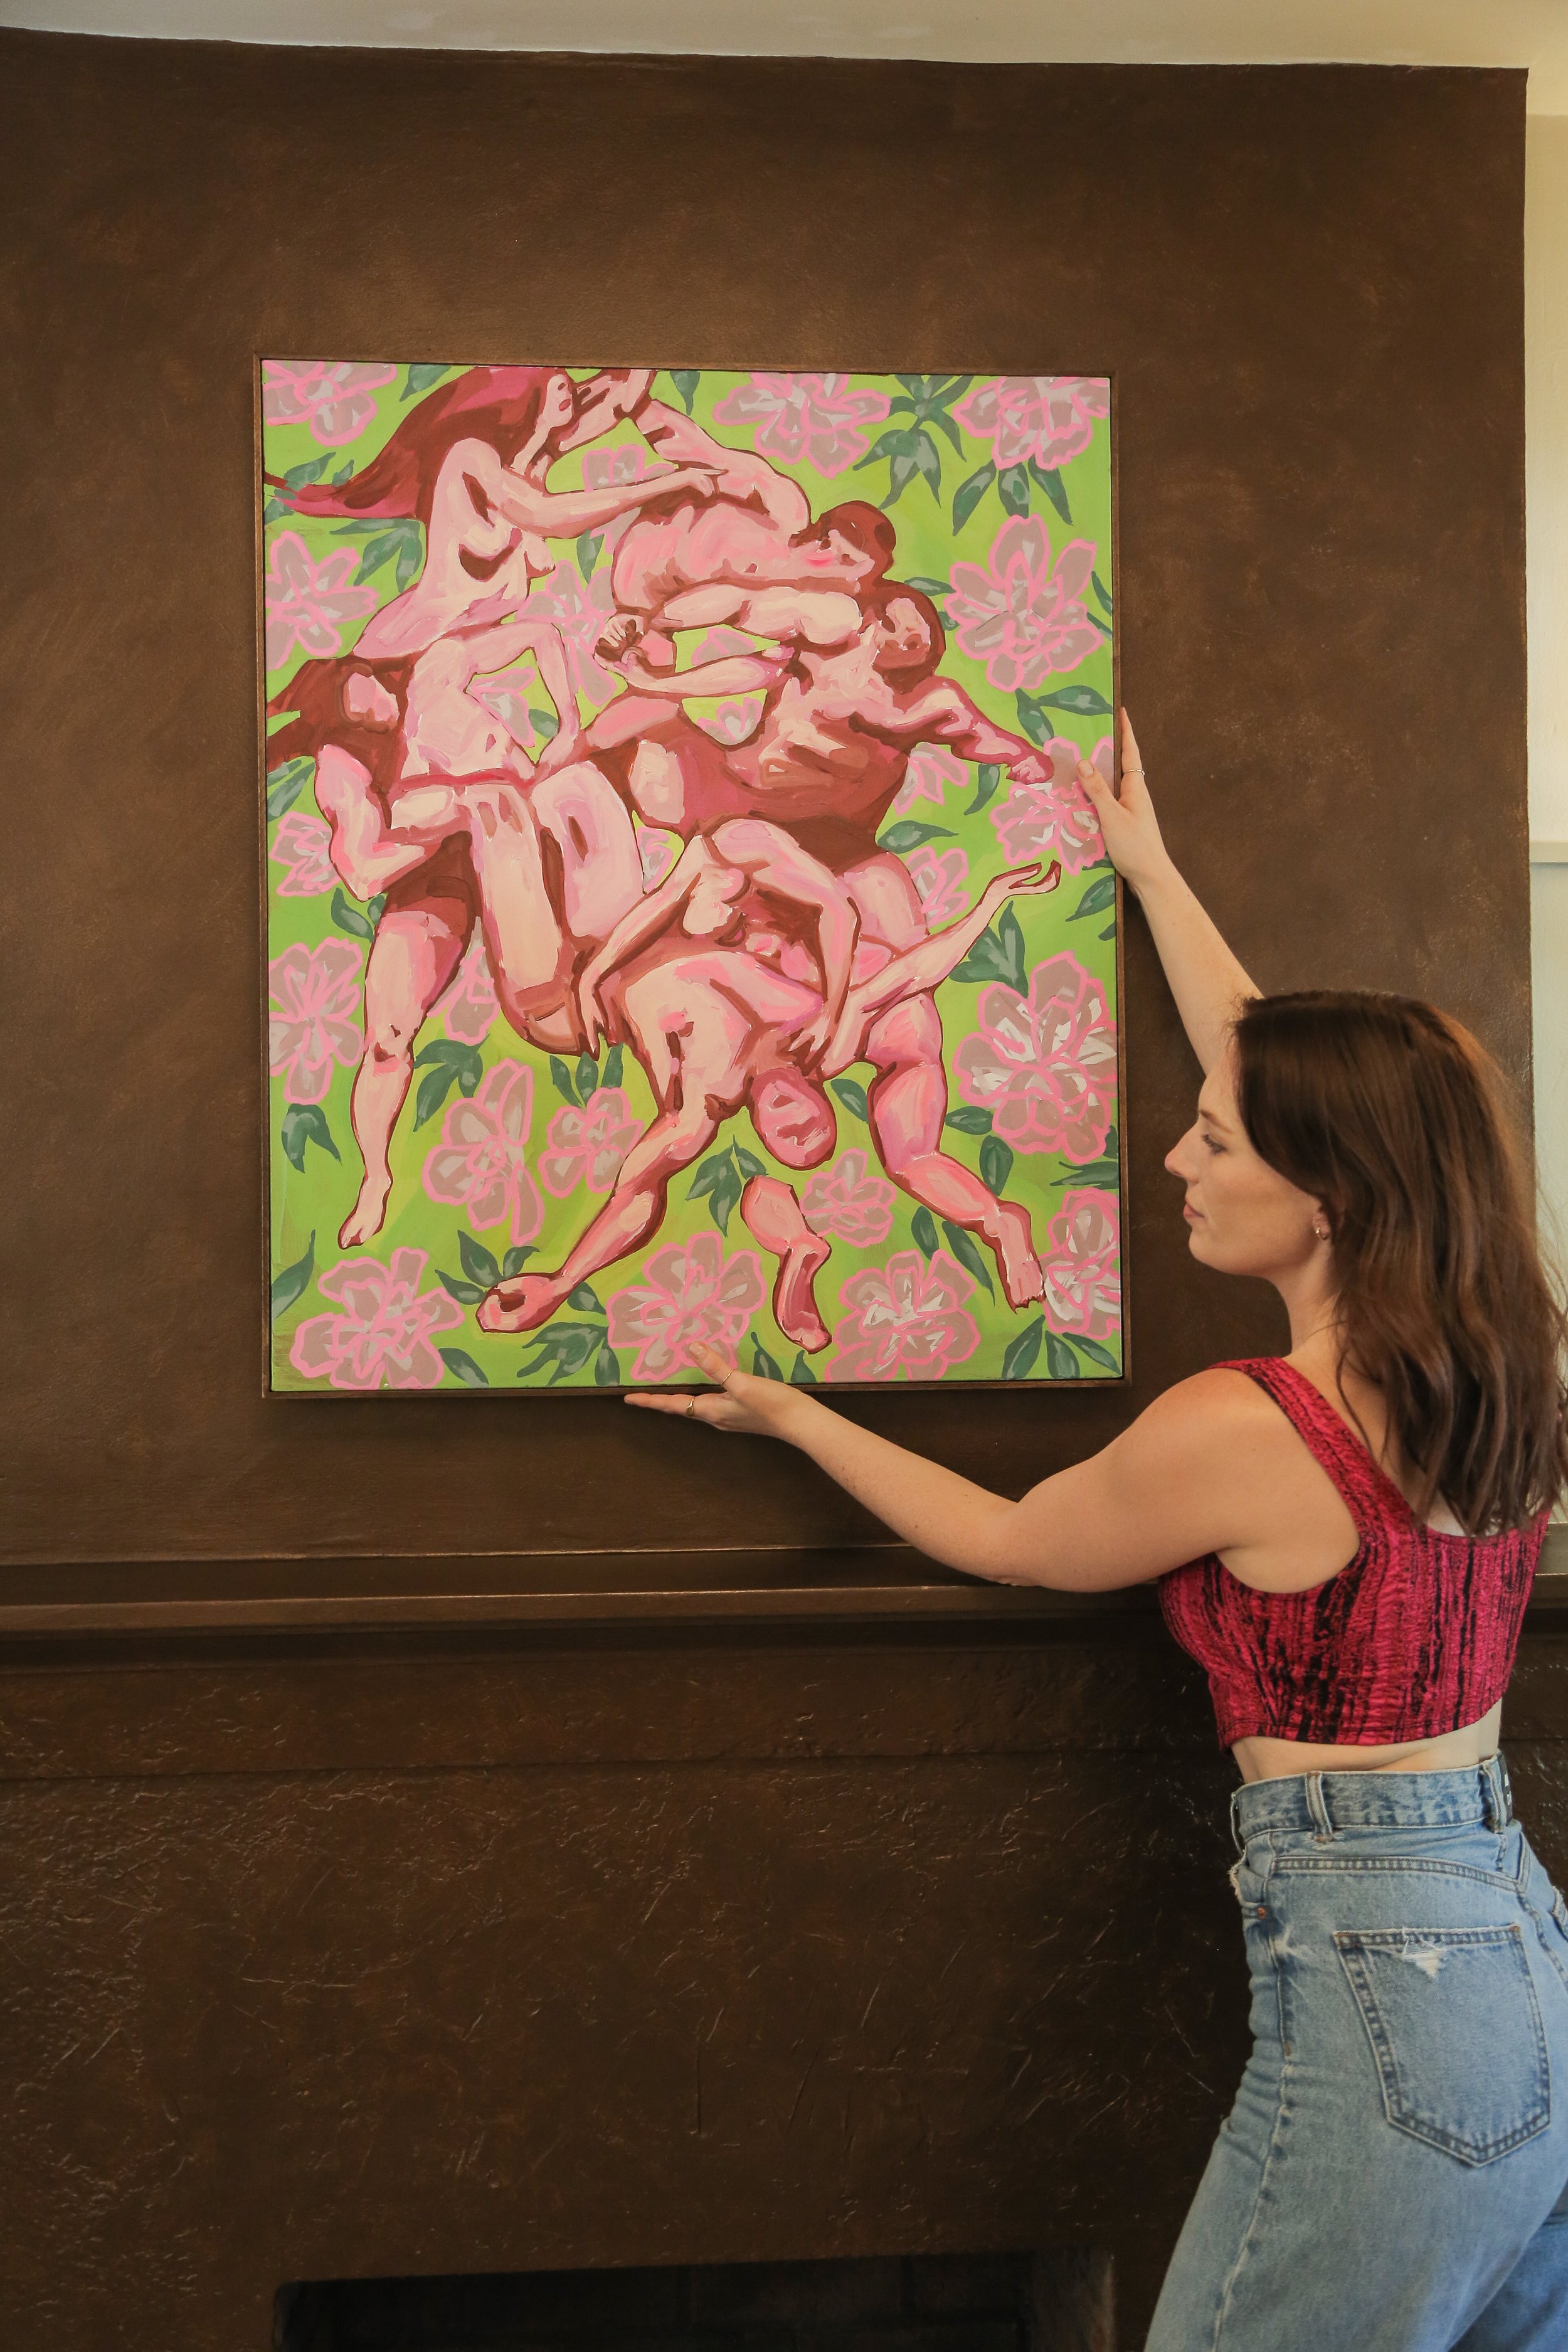
After all the renovations of the fireplace were done, I pulled the space together with some personalized decor elements. For example, Elliott and I found an art piece that we both loved that really combined both of our styles. This piece replaced the oversized mirror that was on top of the fireplace which fits the scale a lot better and brings in a pop of colour! I also DIY’d a custom picture frame for it that blended perfectly into the new wall colour!

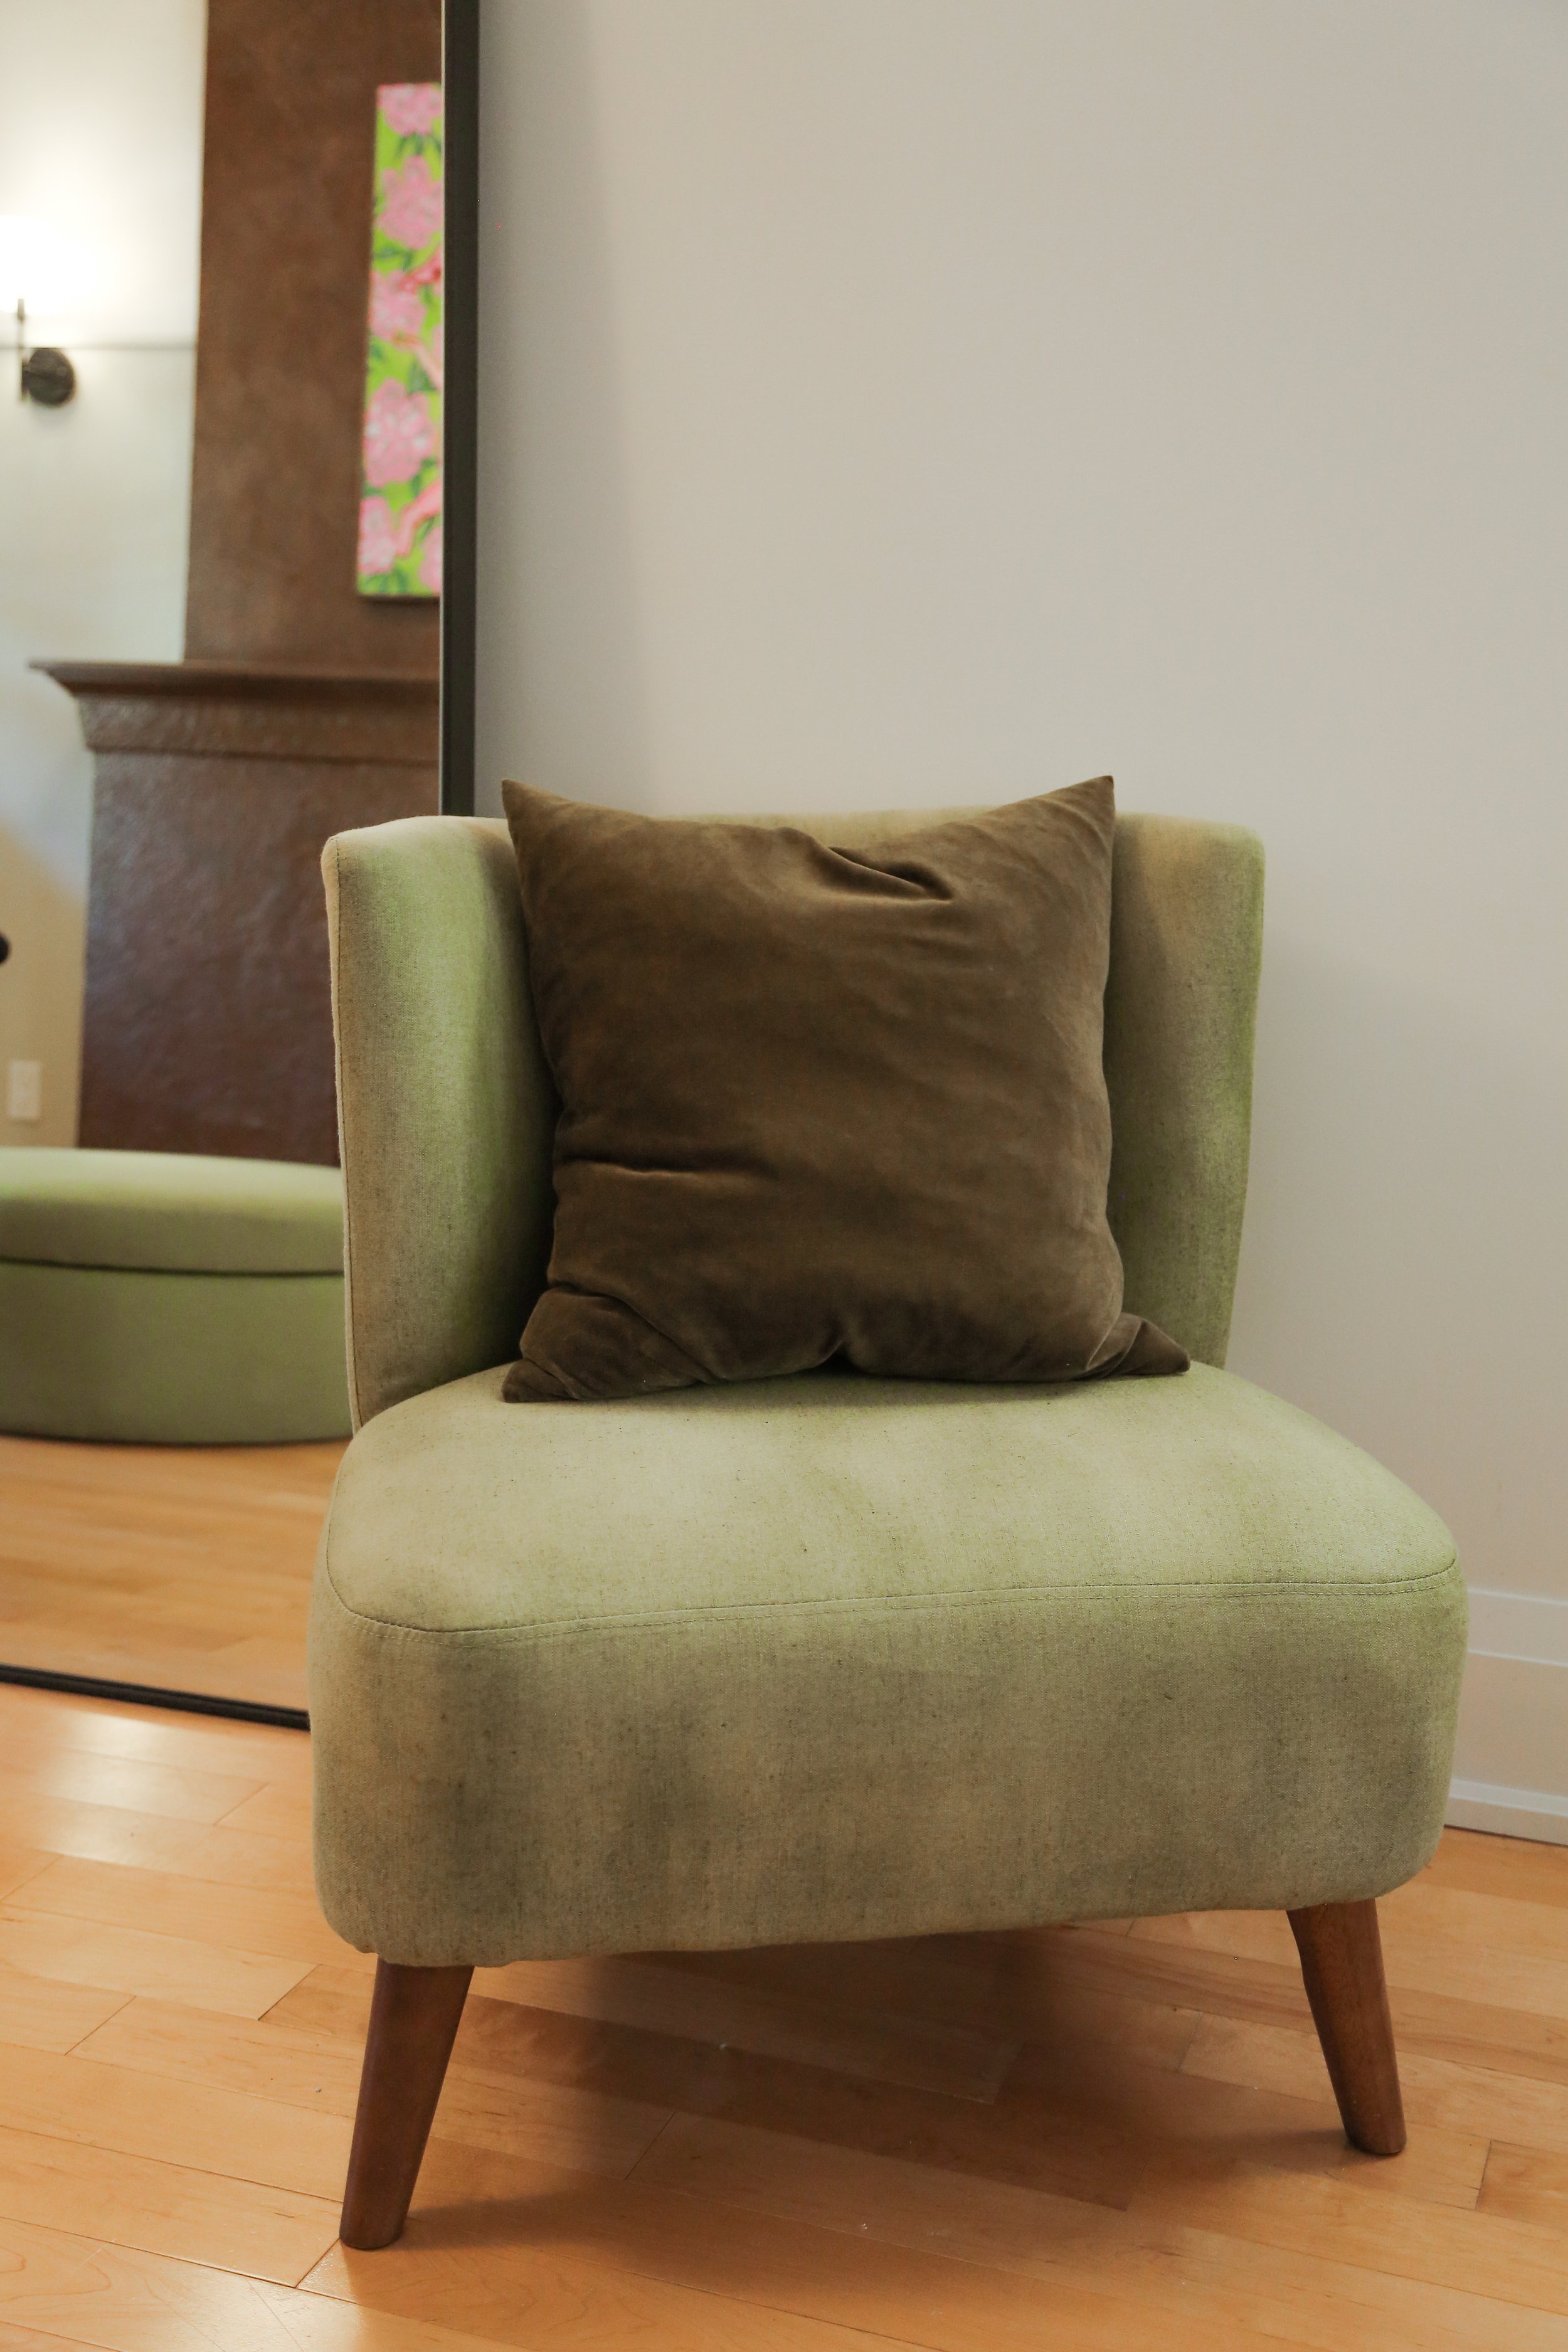
I also decided to dye my beige arm chair that I had in the space to match a green ottoman I found second hand. The process was a lot more difficult than anticipated but I followed a couple different tutorials on YouTube and am happy with the final results.


Then I brought in some more decor I already had, like a tissue box holder, throw blanket, some coffee table books, plants, etc. and it was done! What do you think of the final results?