EASY GIANT LAWN GAMES

Today we are embracing this lovely weather and showing you guys how to make three summer party lawn games! Let’s start with the first one!
CLASSIC WITH A TWIST…..ER

MATERIALS:
Bed sheet of your choice
Cardboard
Foam sheet
Giant popsicle stick
Post screw
Candy
TOOLS:
The first DIY is going to be a good ol’ classic game of twister, but with a candy twist! We started this DIY by picking up a twin bed sheet from the thrift store. Because of the size of our sheet, we decided that we wanted our Twister dots to be about 8 inches large. We grabbed a scrap piece of cardboard, and found the center of where our circle would be. We then used a ruler to mark off 8 inches out from the center all the way around to create a circle. We cut this out to create a template!
Next, we are going to mark on our sheet where the center of each circle will go. The template below will tell you exactly where to mark where each circle will go.


With our twin bed sheet, we placed our first four outside corner dots 17 inches away from the shorter edges of the sheet and 13.5 inches away from the longer sides of the bed sheet. After these four dots are placed, mark the next dots 13 inches away from each other to create an even grid.
If your bed sheet is bigger or smaller than ours, simply adjust the 17 inch and 13.5 inch measurements to better centre your grid of dots where you want them to be on your bed sheet.
Once your dots are marked, go ahead and place your template centred over your previous marks, and paint using a sponge and some fabric paint!
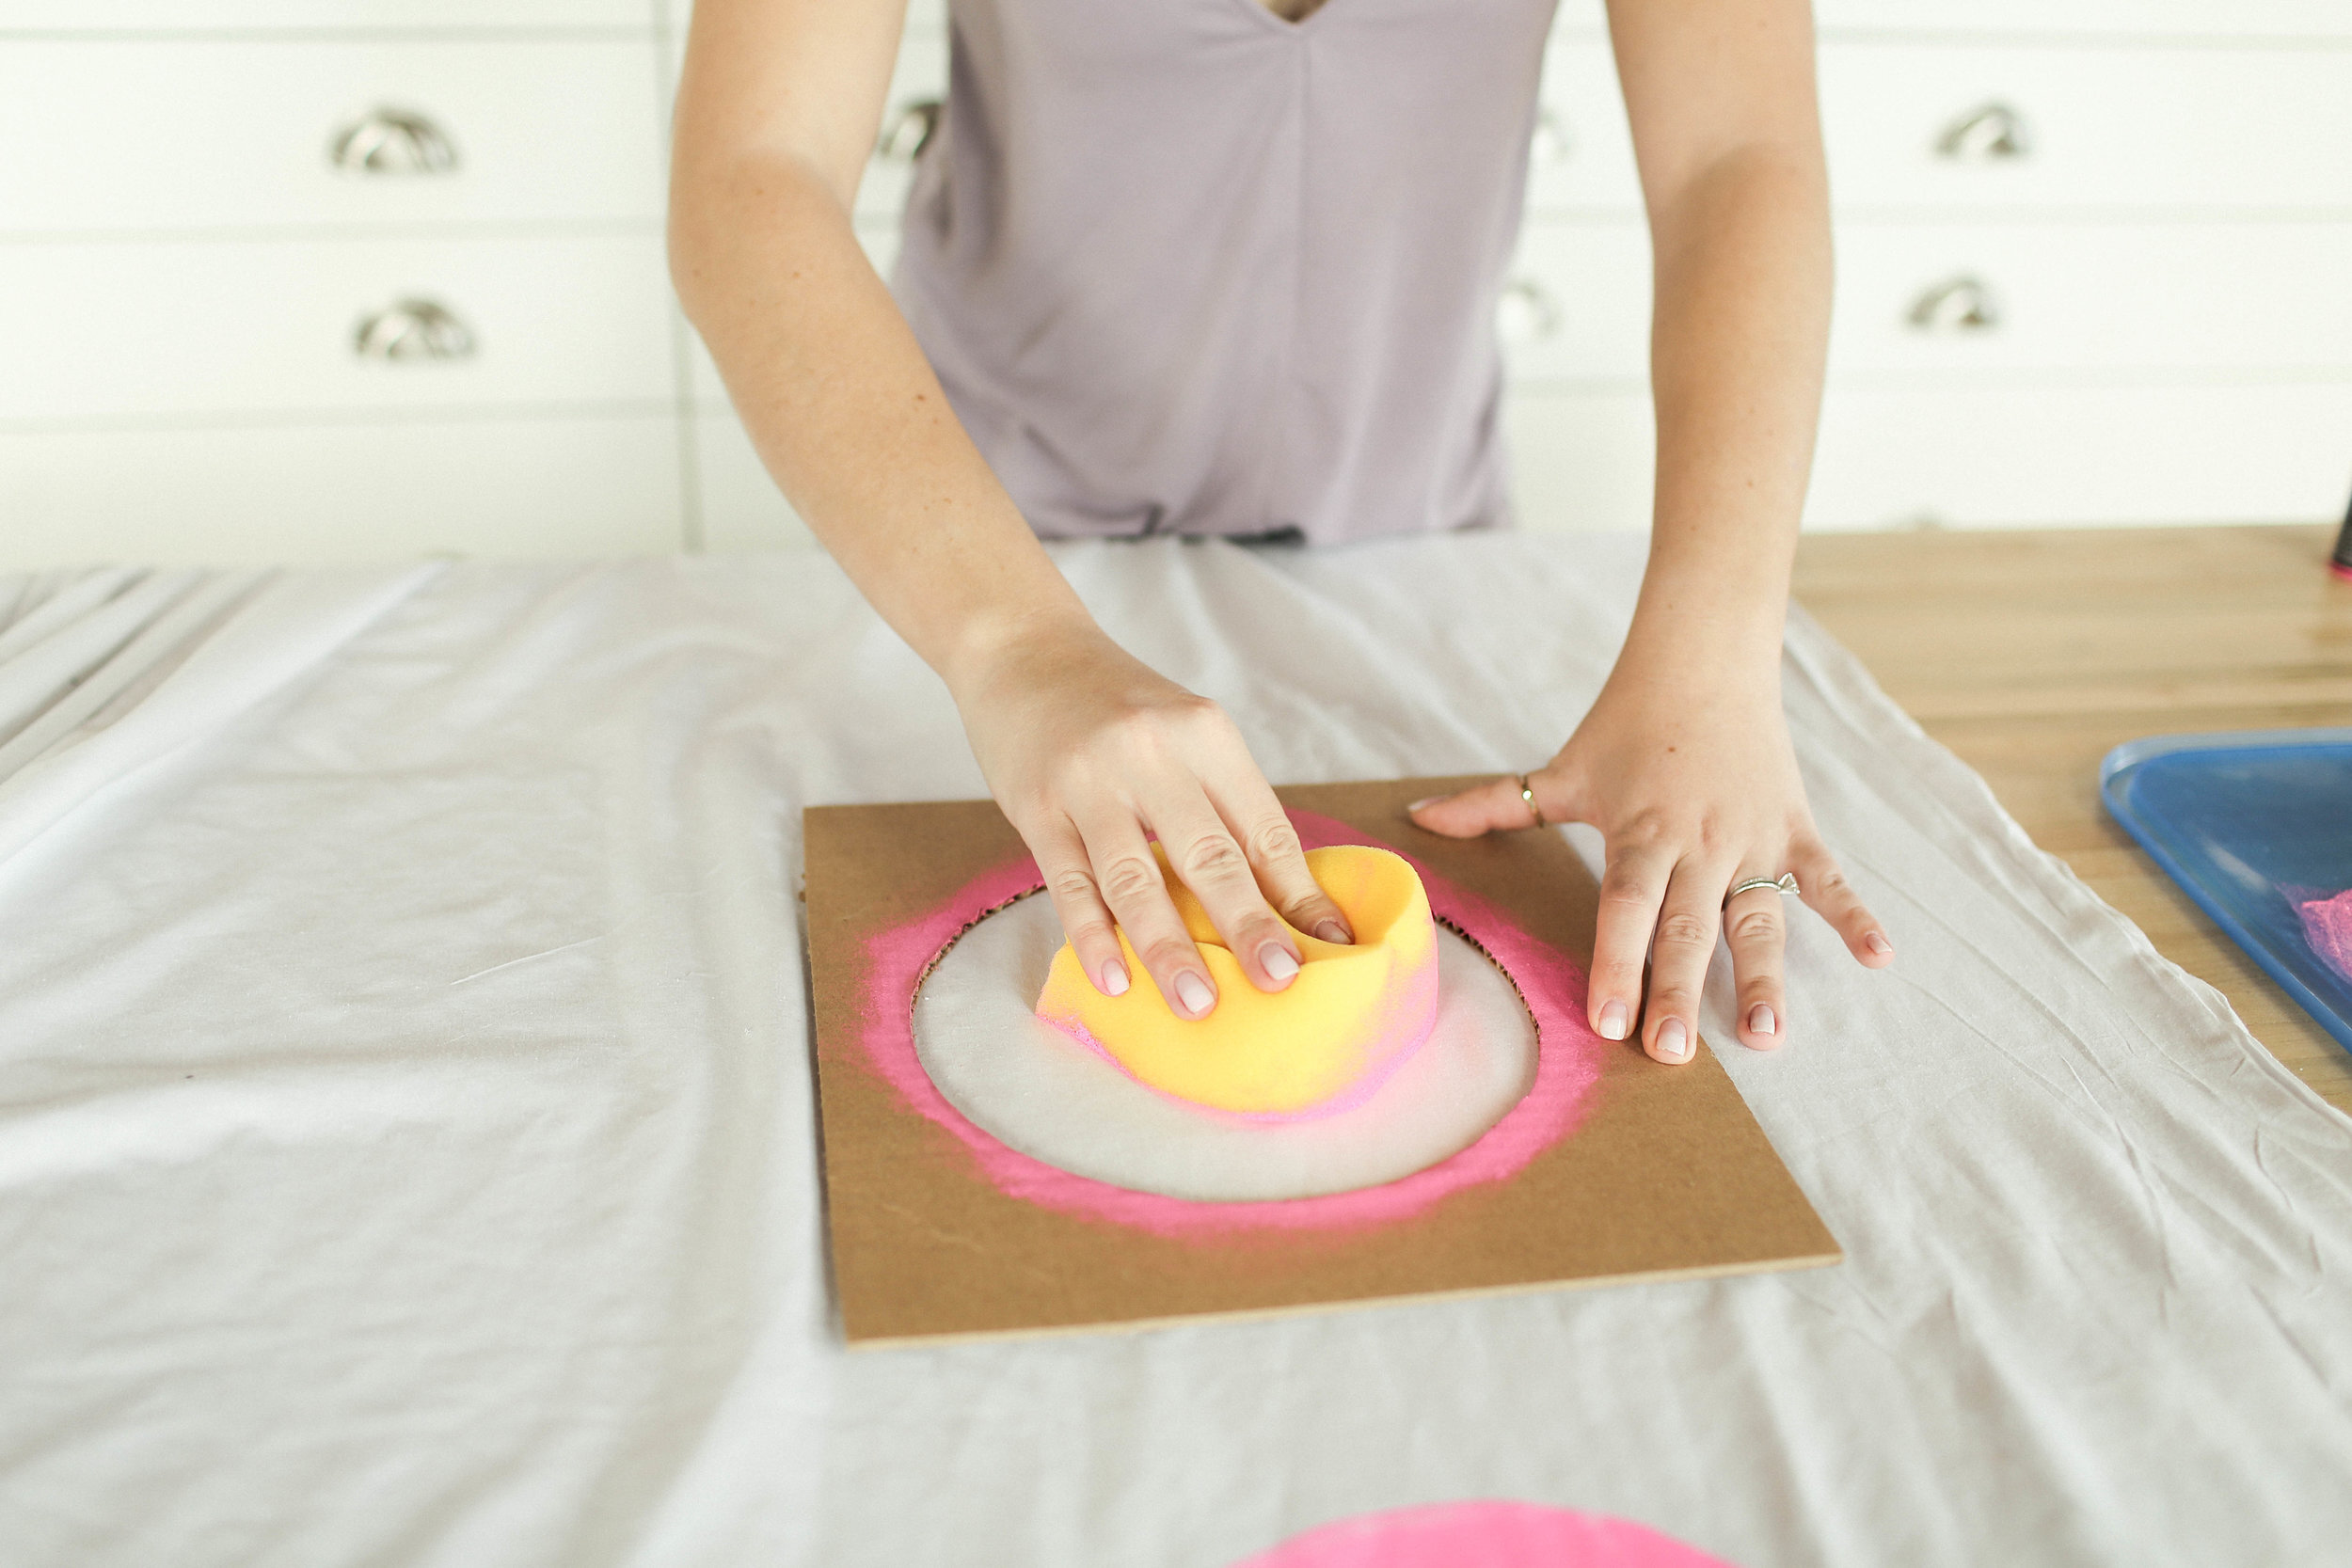

Once your twister board is all painted and dry, be sure to give it a good iron to seal in the paint! This will allow you to wash it once it gets all grass stained!
Alright! Now to make the spinner! We started by cutting a piece of foam that is 16 inches by 16 inches. We found the center of the foam and poked a hole in the foam using an awl. Next, we used a giant popsicle stick to create a pointed arrow shape.


To allow our spinner to actually spin, we are going to use a post screw that we grabbed from the hardware store. We drilled a hole into the center of the popsicle stick that was slightly bigger than our post screw. We finished off our arrow by giving it a coat of pink paint.

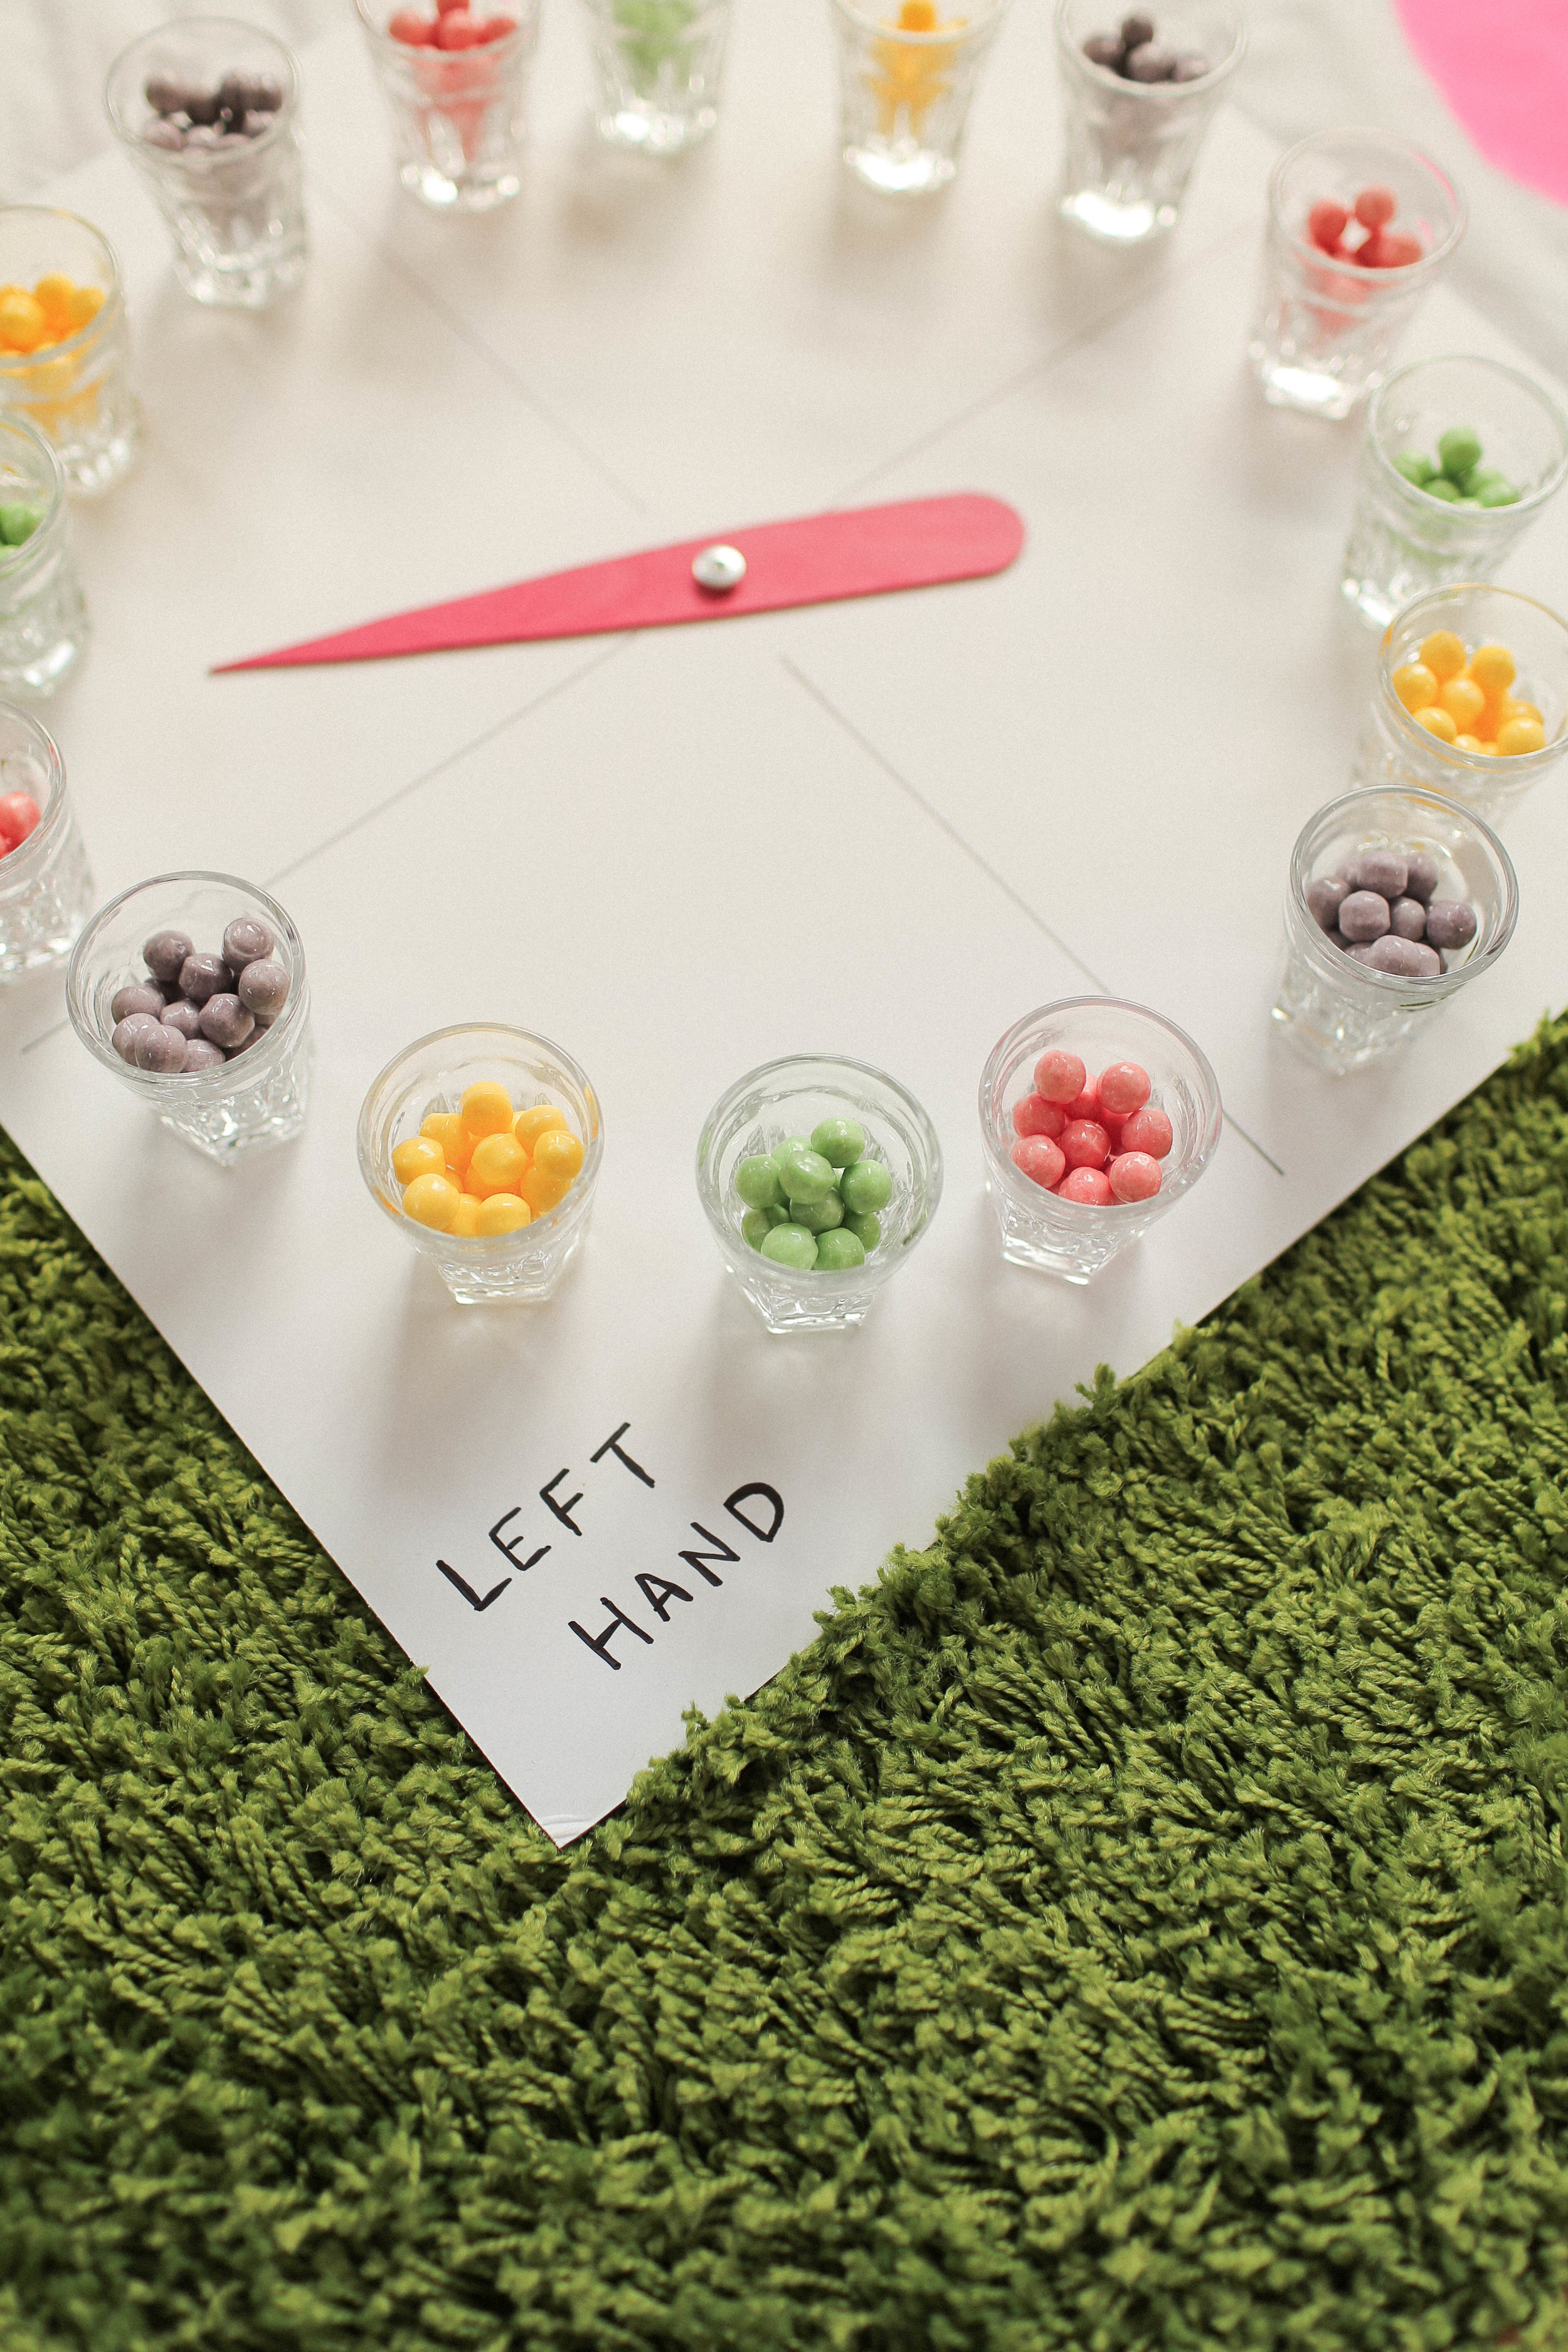
We then placed the bottom of the post screw into the bottom of the hole in our foam, placed the spinner on top, and screwed the other half of the post screw in the top to secure. We then divided our spinner into four sections. Next, you could simply draw four circles into each of the four corners, BUT to add a super fun snack element we decided to use candy to act as our spinner circles!

Simply place four shot glasses into each corner and fill with different colours of candy that correspond with the colours on your twister mat! And that’s it! Just make sure to not eat all of the candy, then you won’t know which colours you are playing with.


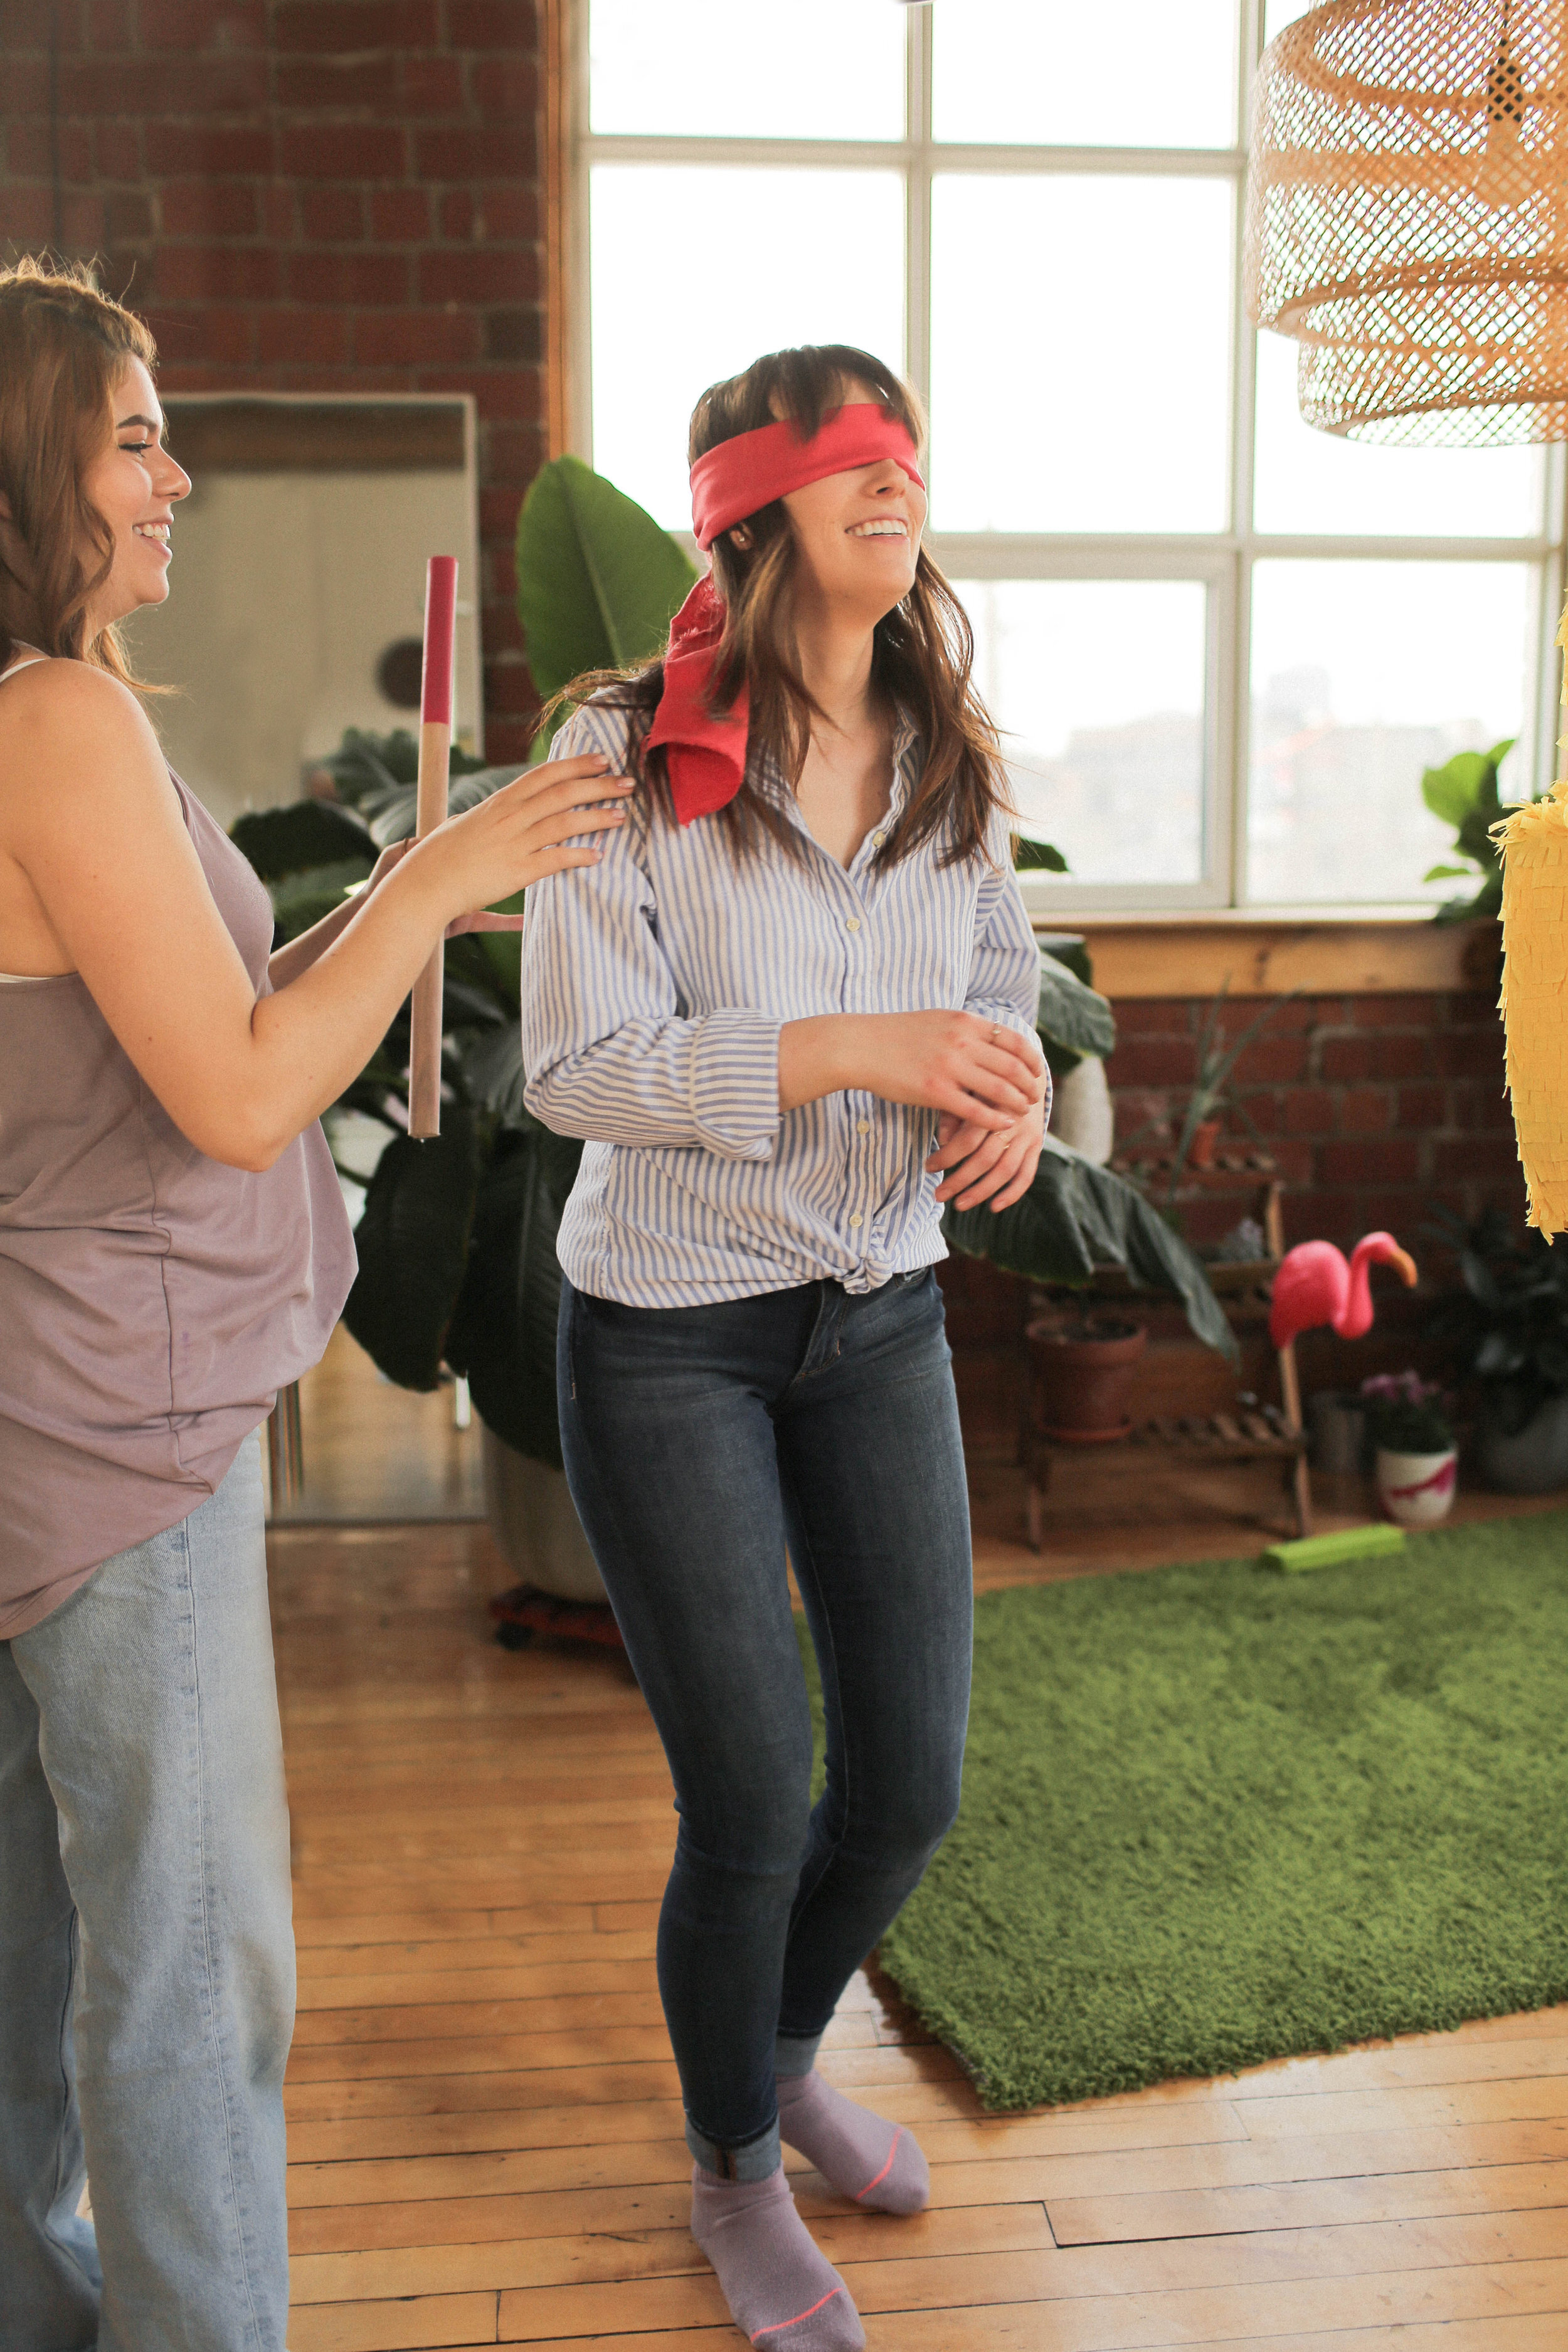
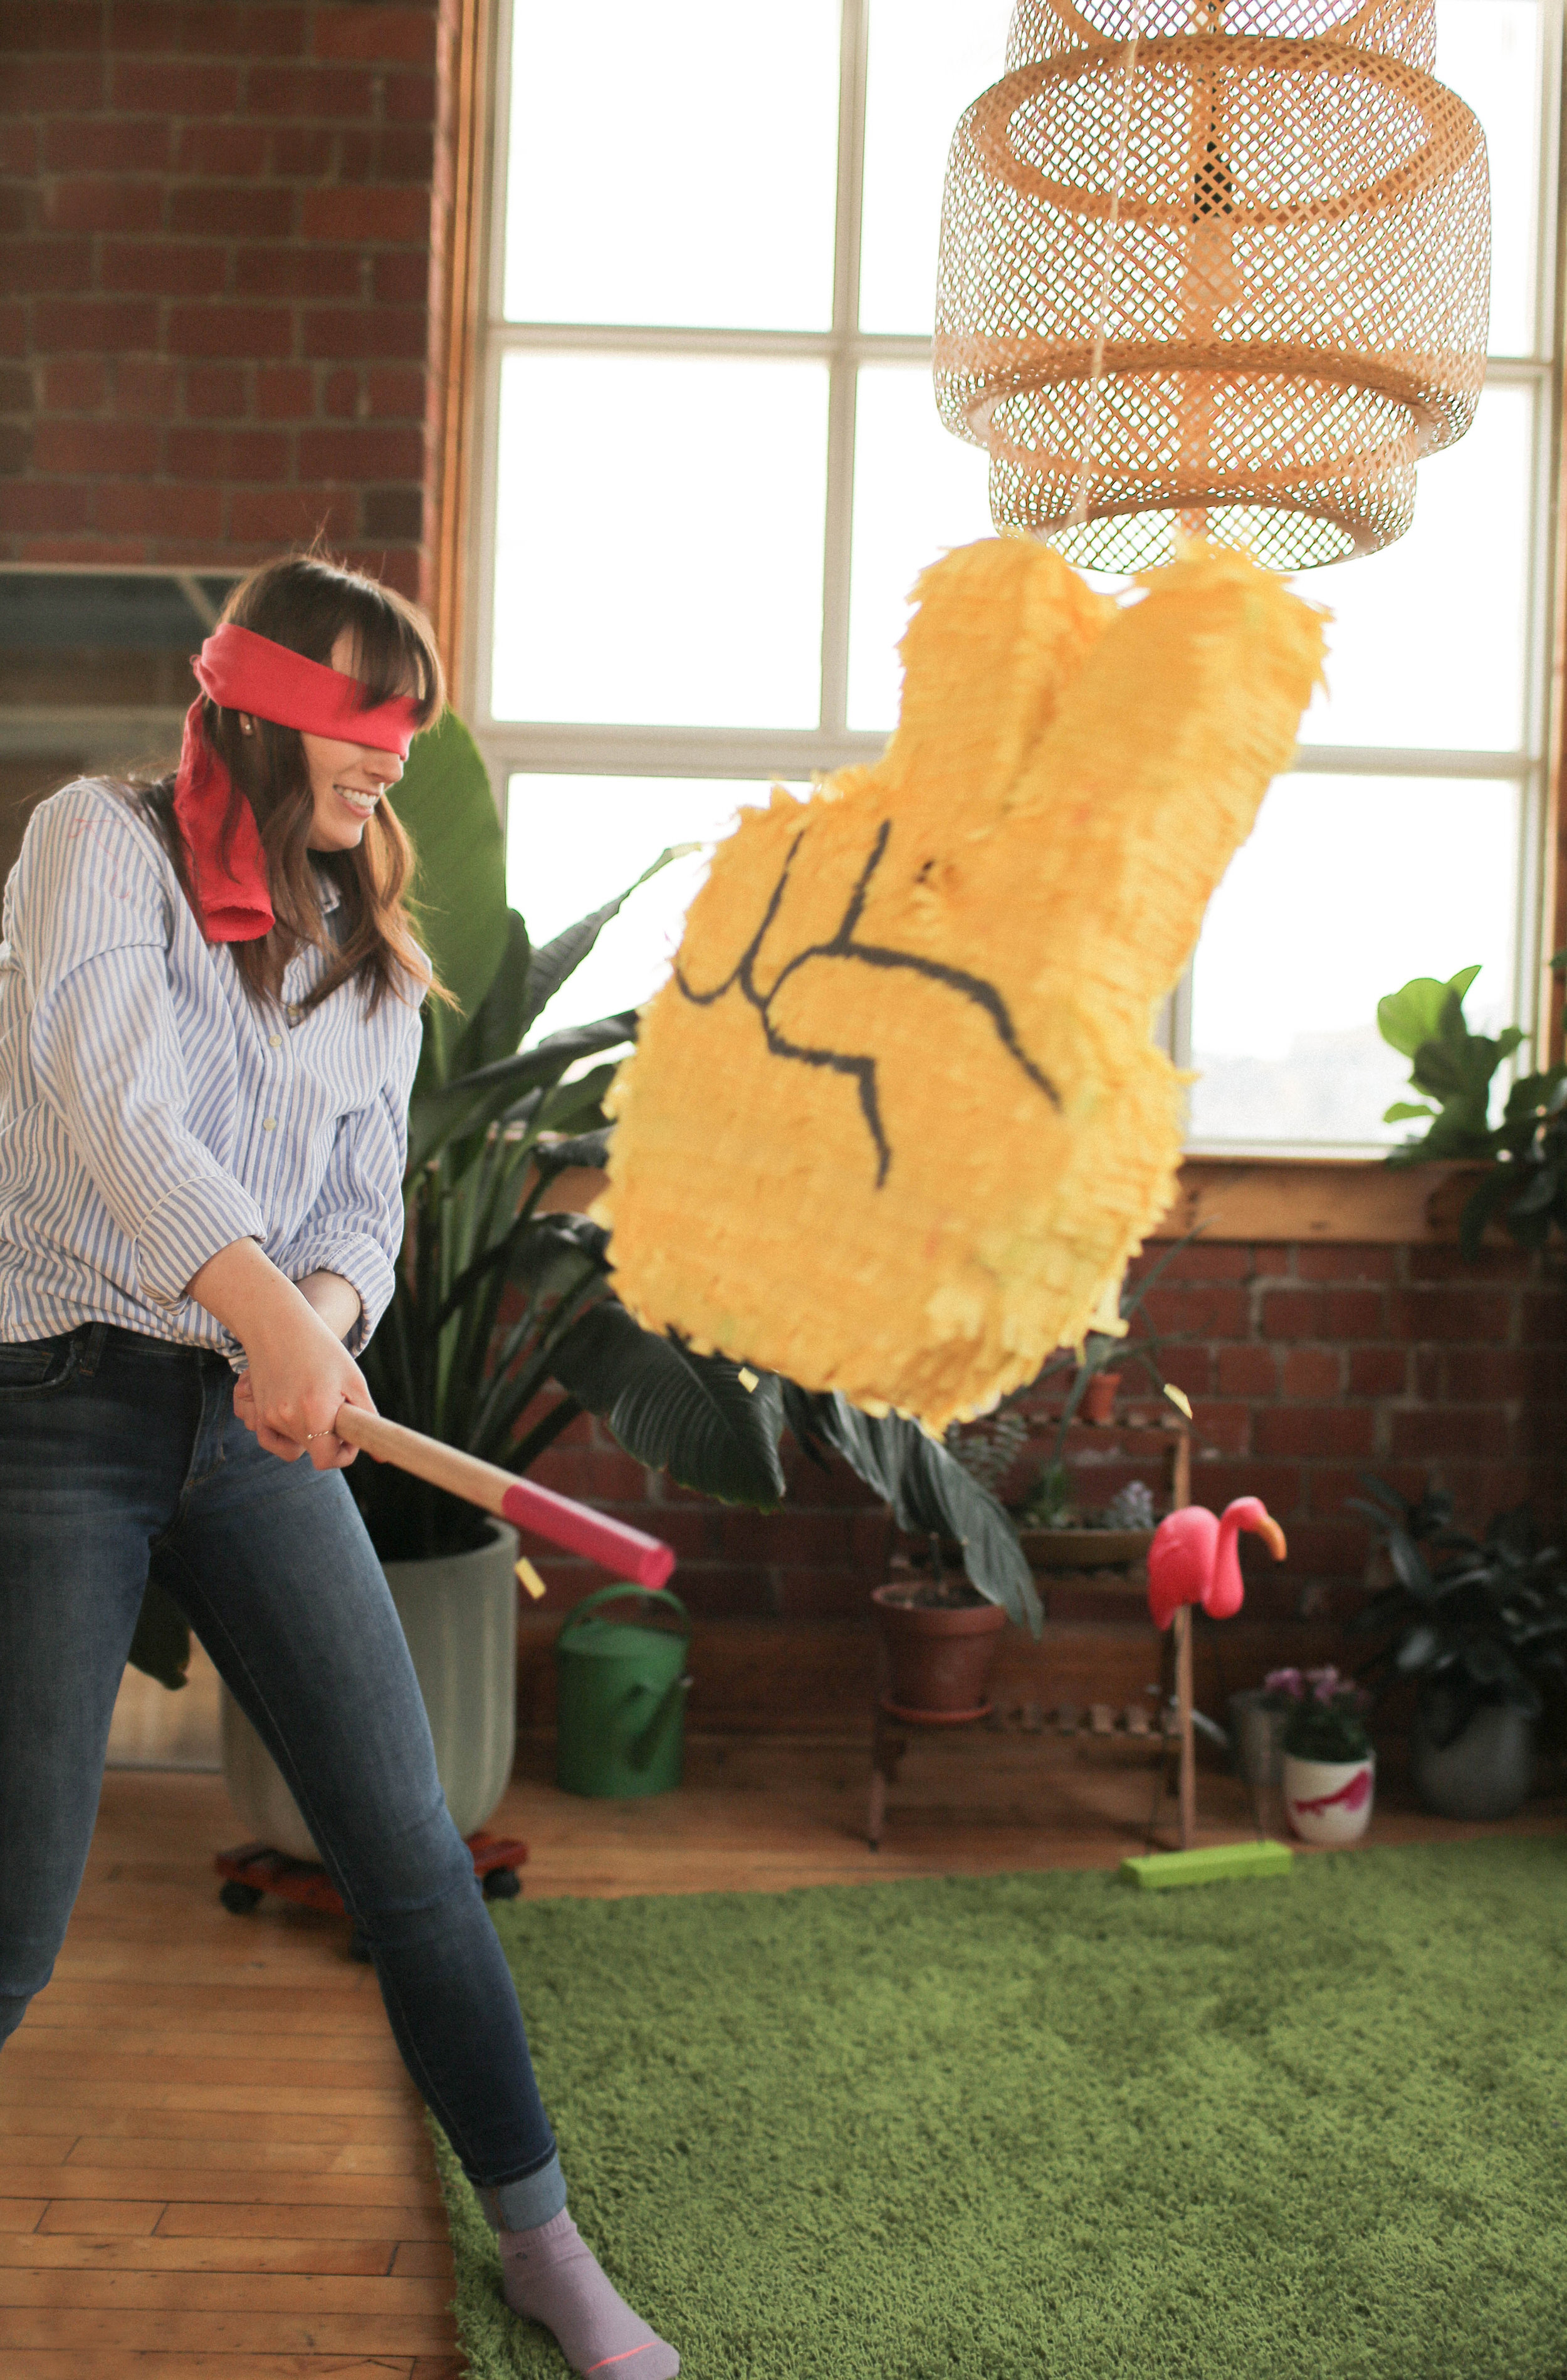
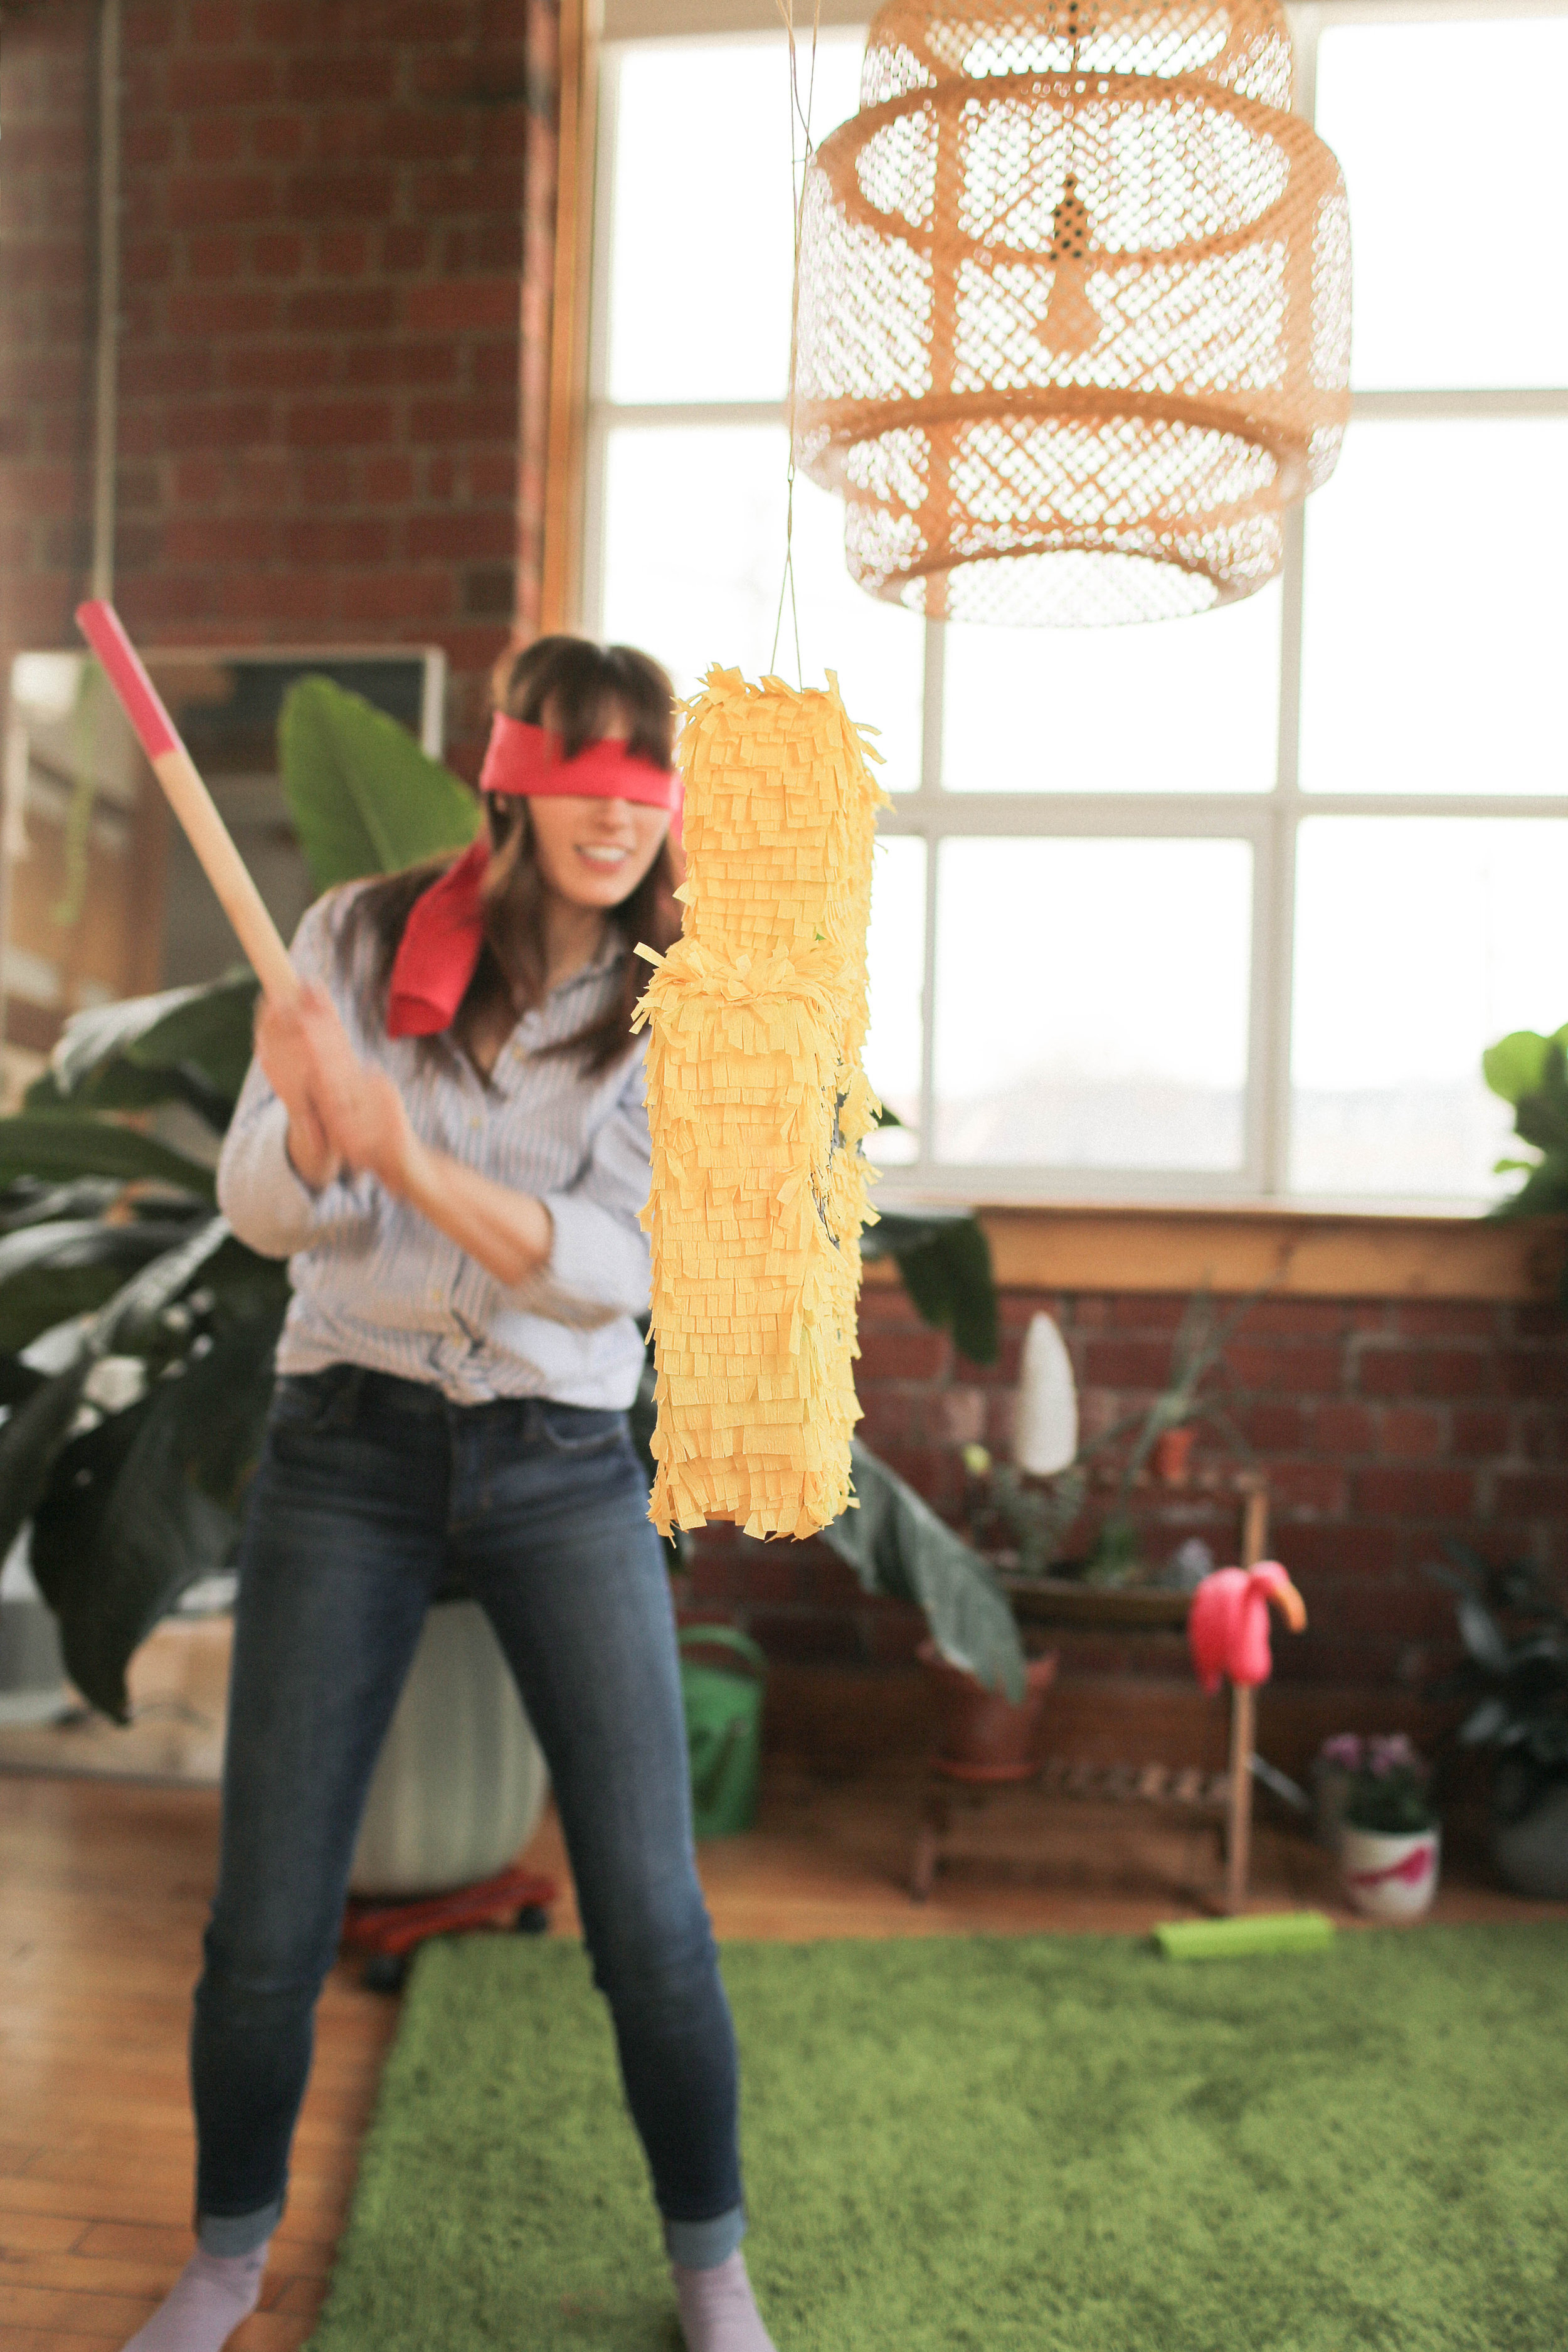
EMOJI INSPIRED PINATA

MATERIALS:
Cardboard
Paper/painter’s tape
Streamer
School glue
Packaged candy
String
Duct tape
Dark grey paint
TOOLS:
Sharpie
Exacto knife
Self-healing mat
Scissors
This next DIY is this adorable peace sign emoji inspired Pinata! Start out by downloading our peace sign template (check it out here!). Next, grab a piece of cardboard that has little to no creases or folds in it. Next, cut out your template and trace it onto the cardboard. If you’re brave and artistically inclined, you can totally free-hand this as well. Trace this shape twice! To cut out the shape we used a box cutter and a self-healing cutting mat.


Next, go ahead and cut out long strips to act as the sides of your pinata that are about 3 inches wide. Make sure to cut parallel to where the corrugated cardboard folds so that it is easier to bend and fold around the shape of your pinata.
Next, fold your 3 inch cardboard around the shape, and tape in place with some painter’s/paper tape to hold everything together!


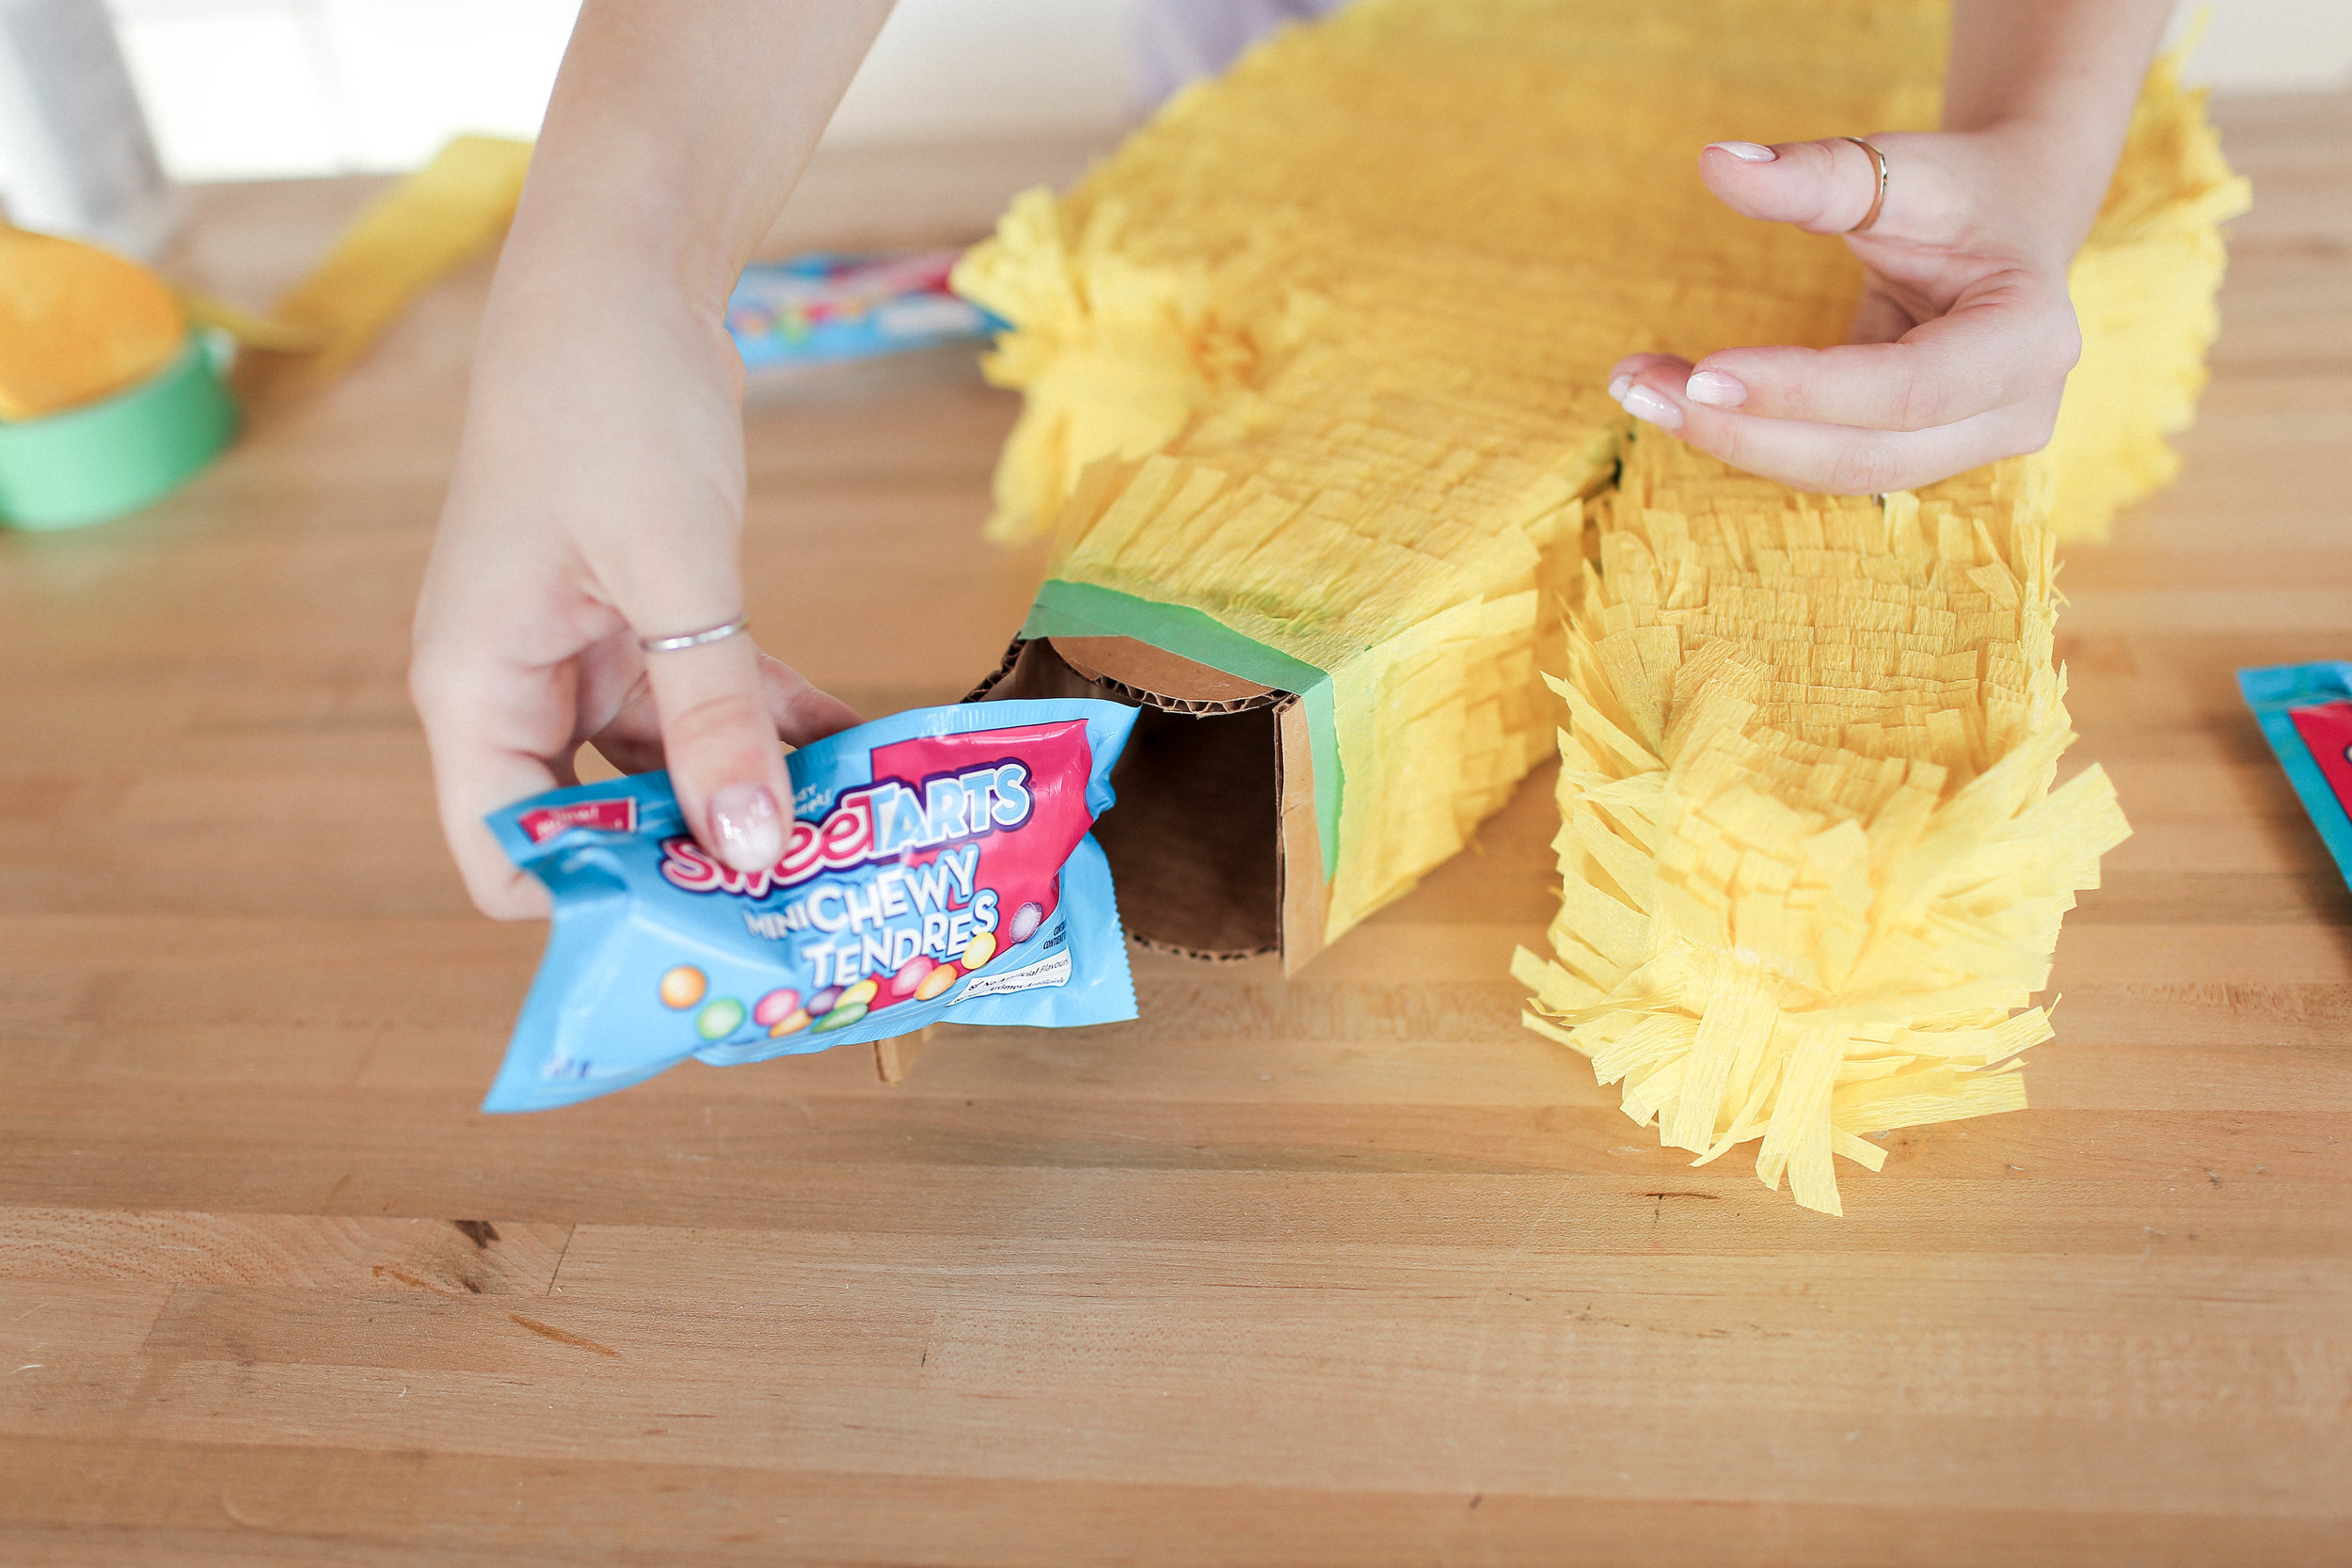
Add the back side of the peace sign, leaving a spot open at the top to fill your pinata with candy!
Time to make the pinata fringe! Grab some streamers in the colour of your choice, and fold them up a few times. Once folded, go ahead and cut fringes into the streamer. To attach to the pinata, all you need to do is apply a small amount of school glue to the pinata, and place the streamer in the spot that you want it. Keep doing this, layering the streamer from top to bottom, until you reach the flap you left open for the candy.


Once your pinata is full of candy, we used an awl to poke two holes in the top flap and added a piece of string to hang the finished pinata from. We then added duct tape to close up the flap, and added our remaining fringe to cover the seam!


Our last step was to grab a darker coloured paint, and draw out a little bit of detail to make this pinata look more like a hand.

Time to break it open!
GIANT JENGA

MATERIALS:
7 2x4x8 ft pieces of wood
Paint/stain/gloss of your choice
TOOLS:
Circular saw OR hand saw
Power sander OR sand paper
Our last DIY is this super easy and super fun giant Jenga!
To make this, start with 7 2x4 pieces of wood that are 8 ft long. Since the game works by stacking three blocks at a time to create a tall rectangle with an even square at the top, we laid out three of 2x4s, and measured how long this was. This measurement ended up being 10 and ¾ inches long, so that’s how long we are going to cut our blocks. Go ahead and cut out 54 10 and ¾ pieces of wood.

Once you have all of your pieces cut, give them all a really good sand so that it’s easier to play the game and the pieces slide against each other nicely.

This next step is totally optional, but we went ahead and painted the ends of our blocks some fun summer colours! You can go ahead and stain, seal, or paint your blocks with whatever you want! Let it dry, and you’re ready to play!


And that’s it! Time to have literally the best summer party of your LIFE.
If you loved reading this, check out the video below! If you make any of these DIYs, share it with us using the hashtag #SorryGirlsSquad!