How To Make Vertical Blinds Look Cute In 4 Steps

If you've ever rented a place, you're probably familiar with those infamous vertical blinds, commonly found in rental homes. Over the years, we've embarked on numerous home makeovers that have preexisting vertical blinds, often resorting to either replacing these blinds entirely or finding creative ways to conceal them in order to enhance the overall aesthetic of the room.
However, when I recently moved into my new house, something unexpected happened…I think I get it. They're extremely easy to open and close with a pole of a cord or a rod depending on which one you have. They do a great job blocking out the light and the added bonus is you get to change the angle of the individual blinds, which totally lets you customize how much light you want to have or not have.
I get it. Now, I don't know if I'm ready to go as far as to say if I was doing a new build, would I choose to have them installed? I don't know. What I am saying is I'm choosing not to remove mine. I also know that this style of blind is commonly found in rental spaces and therefore you might not even have the choice to remove them. So today, we are going to brainstorm and DIY our way through a variety of solutions so we can learn to love our vertical blinds again.
Step 1 : Height

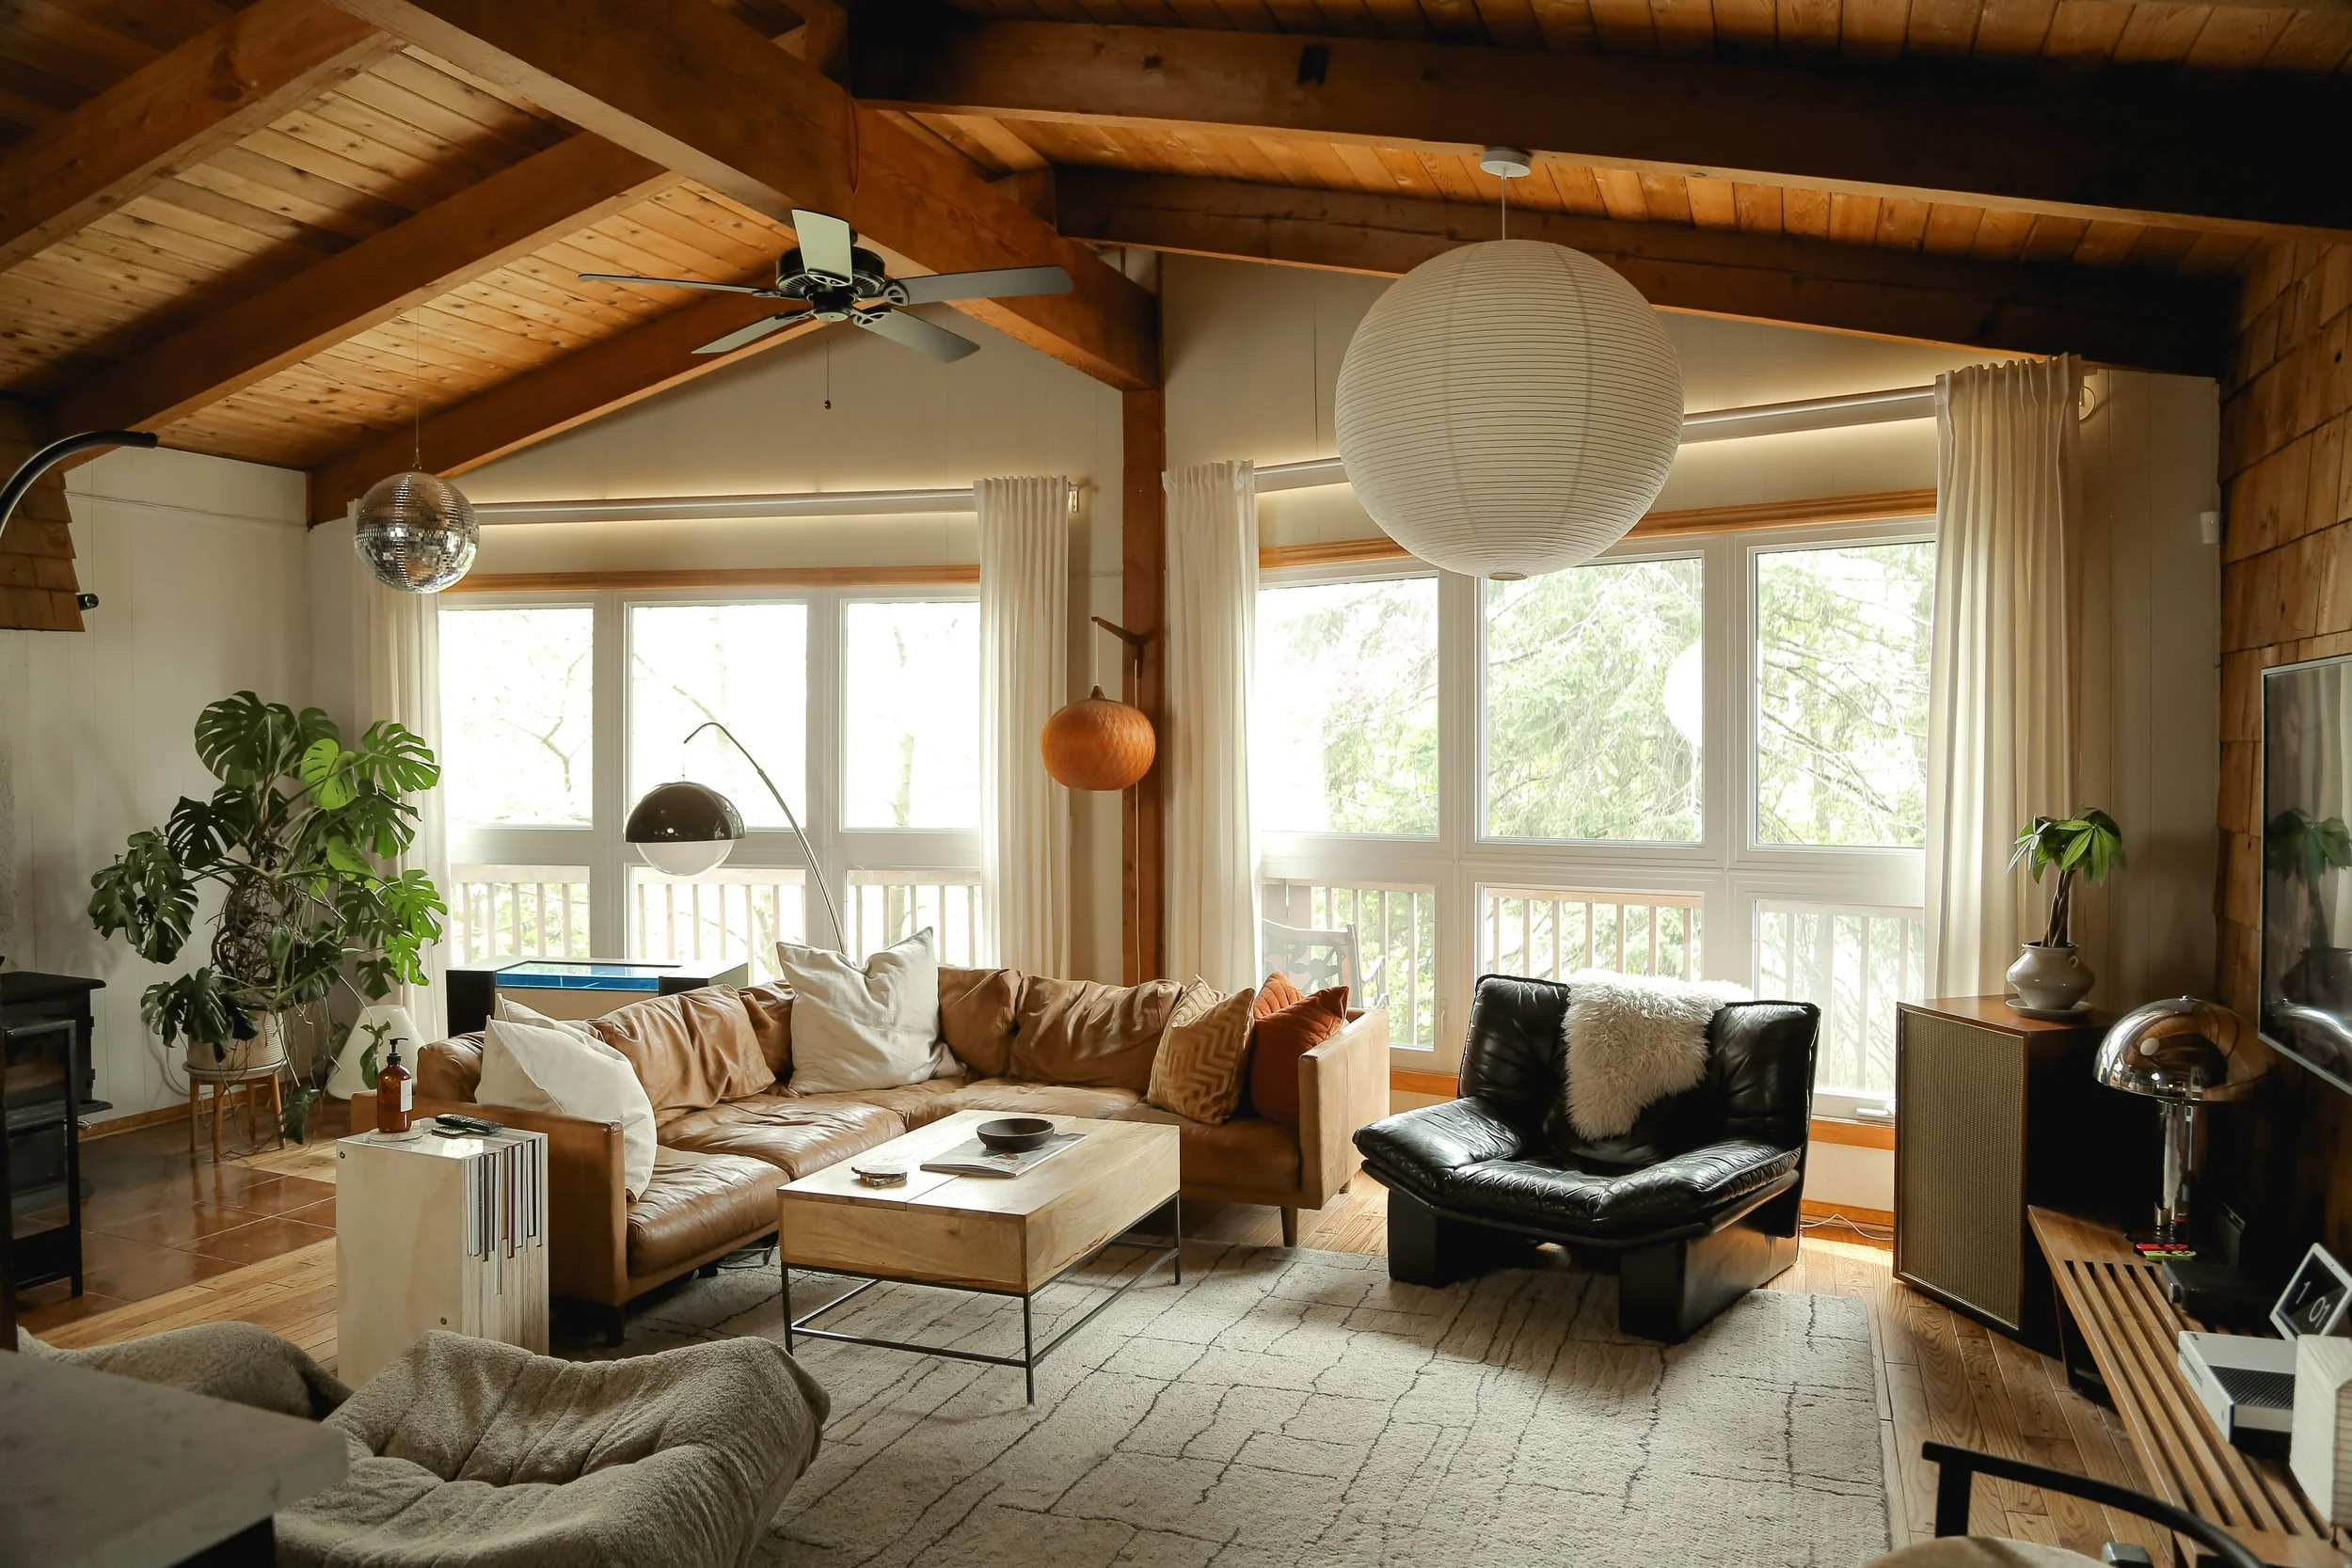
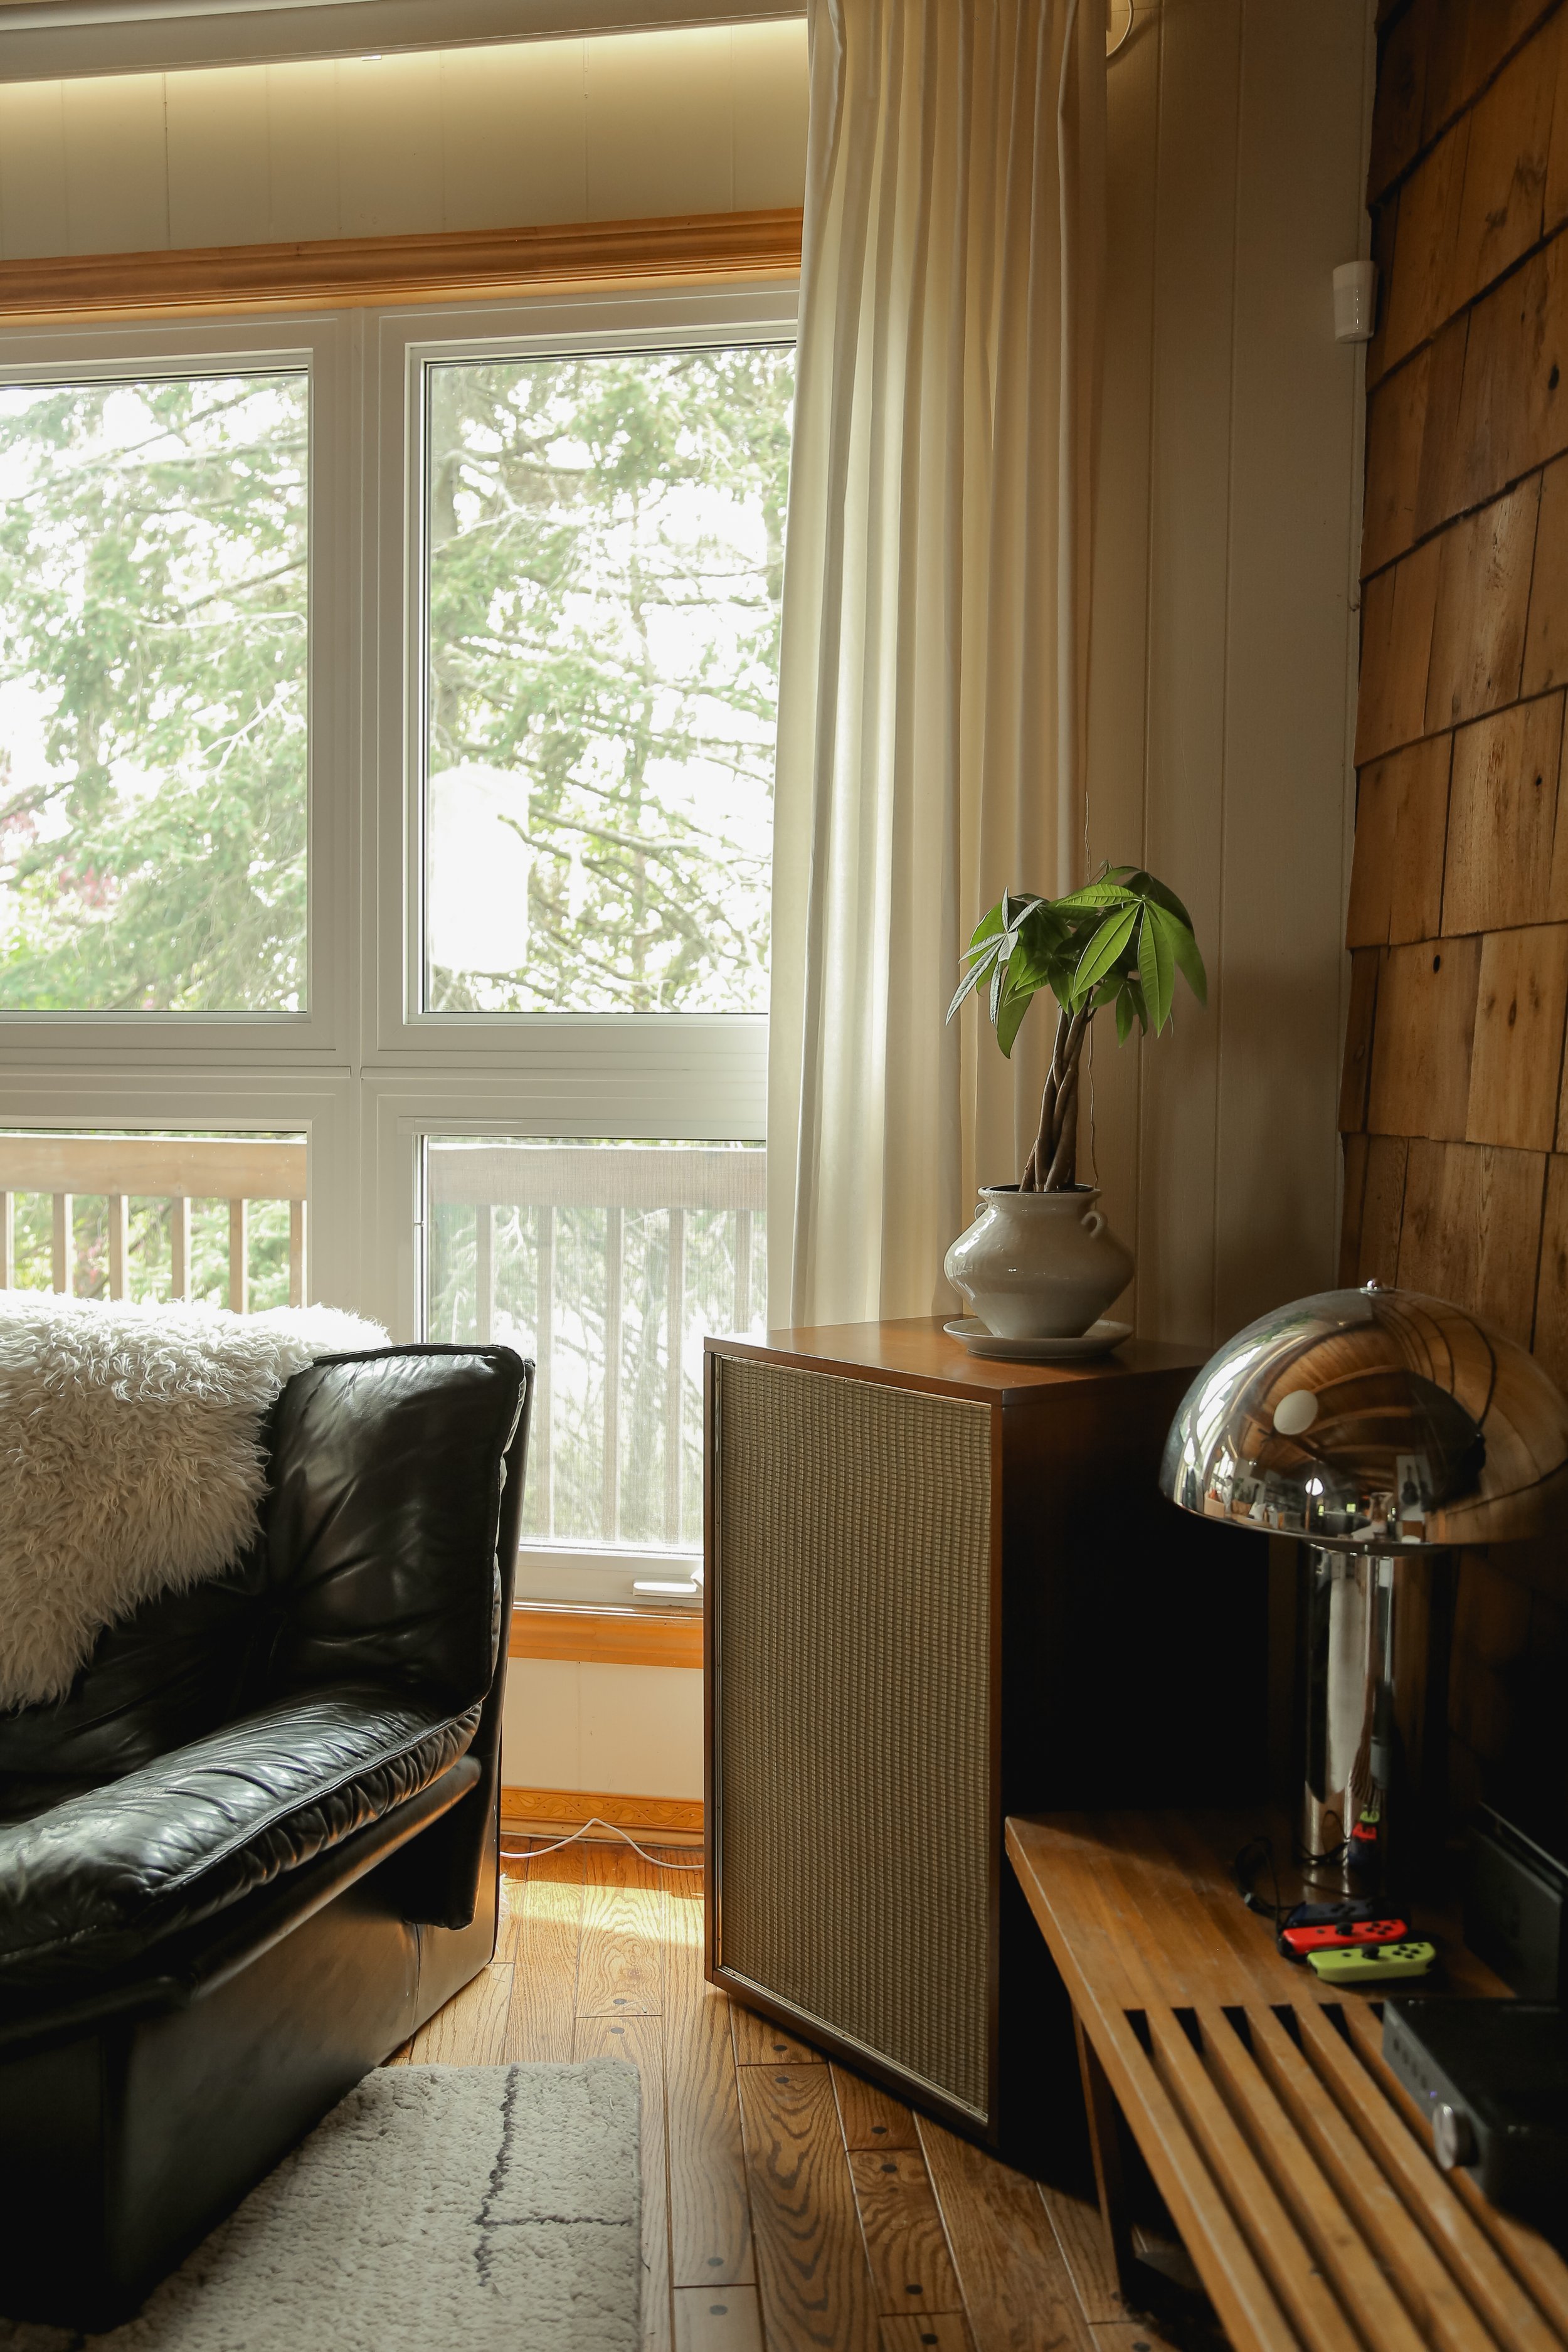
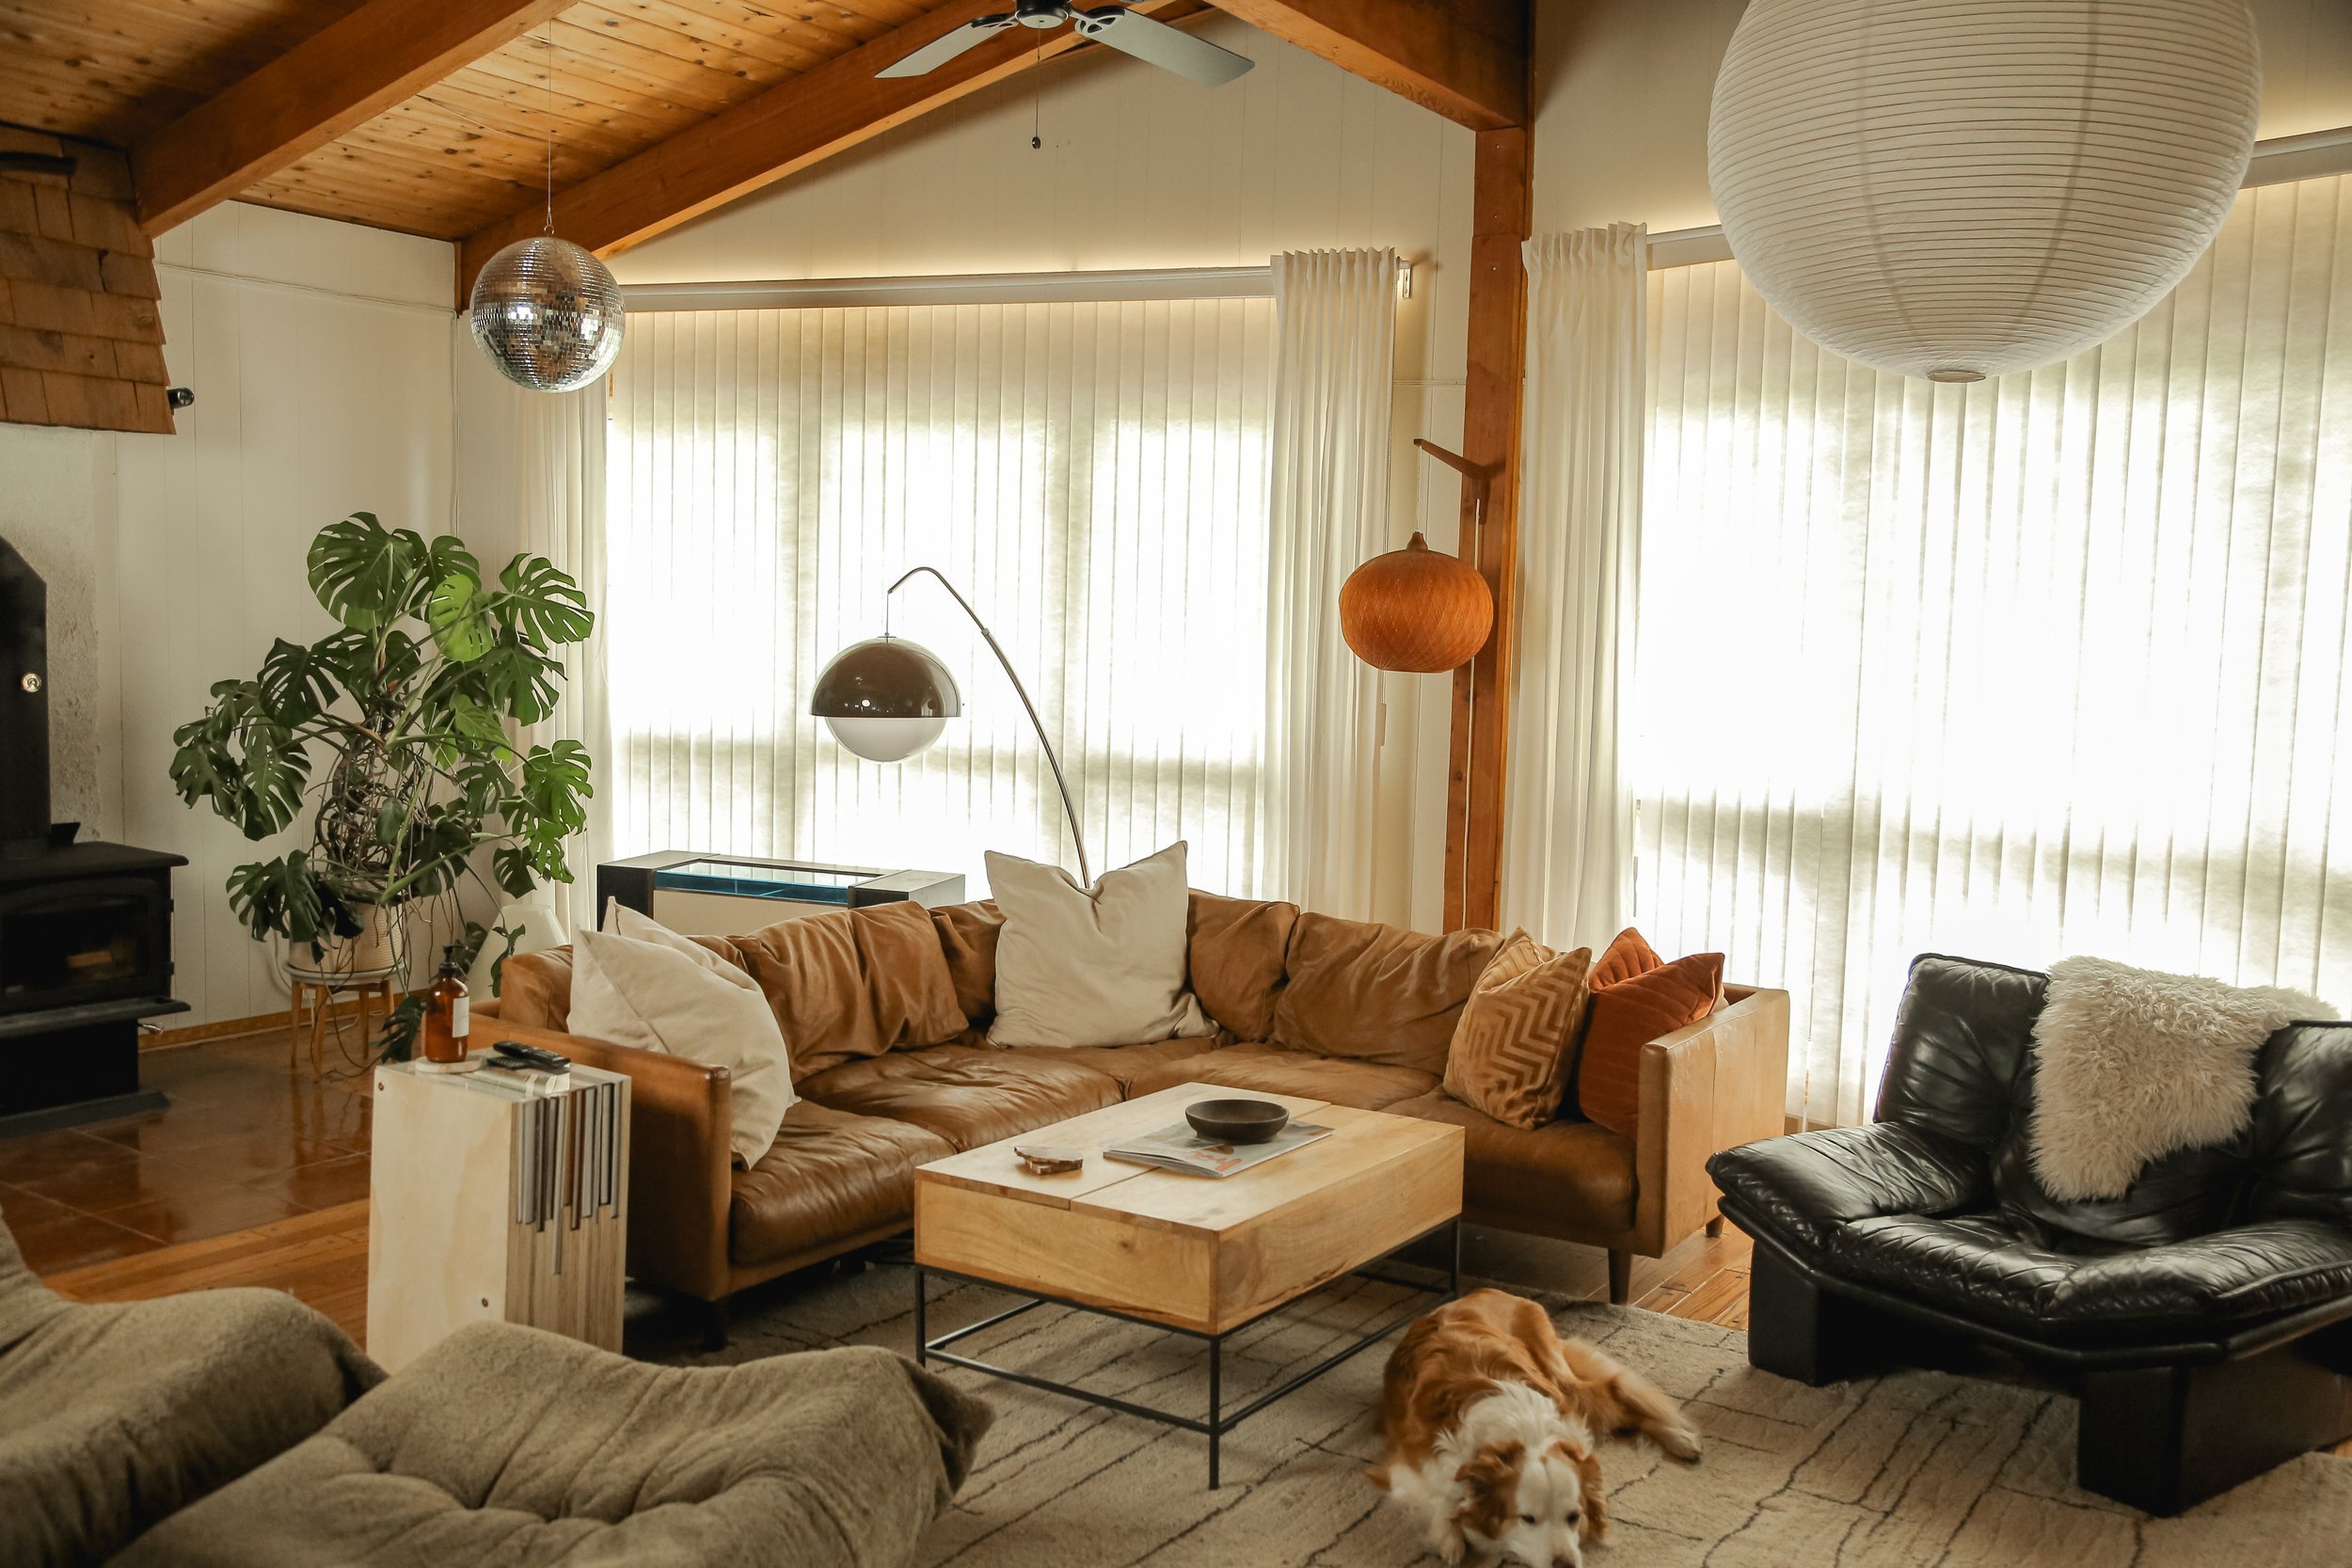
You may have heard this before, but putting blinds and/or curtains higher generally elevates a space because it makes your ceilings feel taller and the room feel grander. If you're renting and you're not able to move the blinds, don't worry about this step, it's still going to look great. That said, since I own my own space and I have a good amount of room above them, I raised mine! I measured the height I wanted to raise them to and took note of the number of vertical blinds I had in my pre-existing hardware, so that I could order the right height/amount for my new ones that would fit into the track I already had!
SIDE NOTE : Curtain height and spacing relative to your windows and walls and rooms is a really important concept that we talk a lot about in our room design course, which you can check out right here!
Step 2 : Colour & Texture
My next step was switching out the current stained and old green blinds I already had. Having never stepped foot into a blinds specialty store before, I had no idea what to expect. I brought in my measurements and then we looked at a bunch of different samples. There are so many options of different colours and textures, but in the end I decided to go with one of the more affordable options which was only about $5 a panel. So this price includes the full piece, the weight on the bottom and the little clip on the top which should fit into the existing hardware that I already have.
Step 3 : Layering

So with new blinds clipped in, I thought a pretty addition to the window would be curtains because I just love the warmth and coziness that fabric curtains bring to a space. I found a curtain rod mounting system that is designed to clip right onto the top hardware of your vertical blinds, which allows you to layer both blinds and curtains. With this, you can disguise your blinds with the look of curtains, while not having to drill a single hole in your wall (which means it's super renter friendly).
Step 4 : Lighting
Recessed lighting is a feature I’ve seen in a lot of mid-century modern homes and it just seems like such a cool way to make your windows feel custom and more expensive. To bring in this feature, I just got LED strip lights, which was so easy to install. I just removed the paper to reveal the sticky back of the strip light and then stuck it to the back side of the metal track on the vertical blinds. I was then able to conceal the little connector bit up at the top of the end of the curtain rod and had the cord for it just fall down the side and because the curtains are there it completely hides any of the cords.
Final Result
And this is the final result! The vertical blinds are just as practical and functional as ever but definitely less distracting and more elegant in my opinion. Sometimes all you need is a new creative approach. Maybe you take all this advice or just implement some of the tips that would be useful for you, either way, head to our video and let us know if this was helpful!