DIY IKEA Billy Bookcase Upcycle
I’m sure you’ve seen the famous BILLY bookcase from IKEA. Many people across the internet have done their take on upcycling this to make it their own style. It is a classic and simple bookcase that really can work in any space and is super accessible all across the world.
It is estimated that every five seconds, one BILLY bookcase is sold somewhere in the world. Pretty impressive considering we launched BILLY in 1979. It’s the booklovers choice that never goes out of style.
- IKEA Website
The bookcase is made out of particleboard, paper foil, plastic edging, melamine foil, fibreboard and paint. I opted for the smaller size (dimensions shown below).
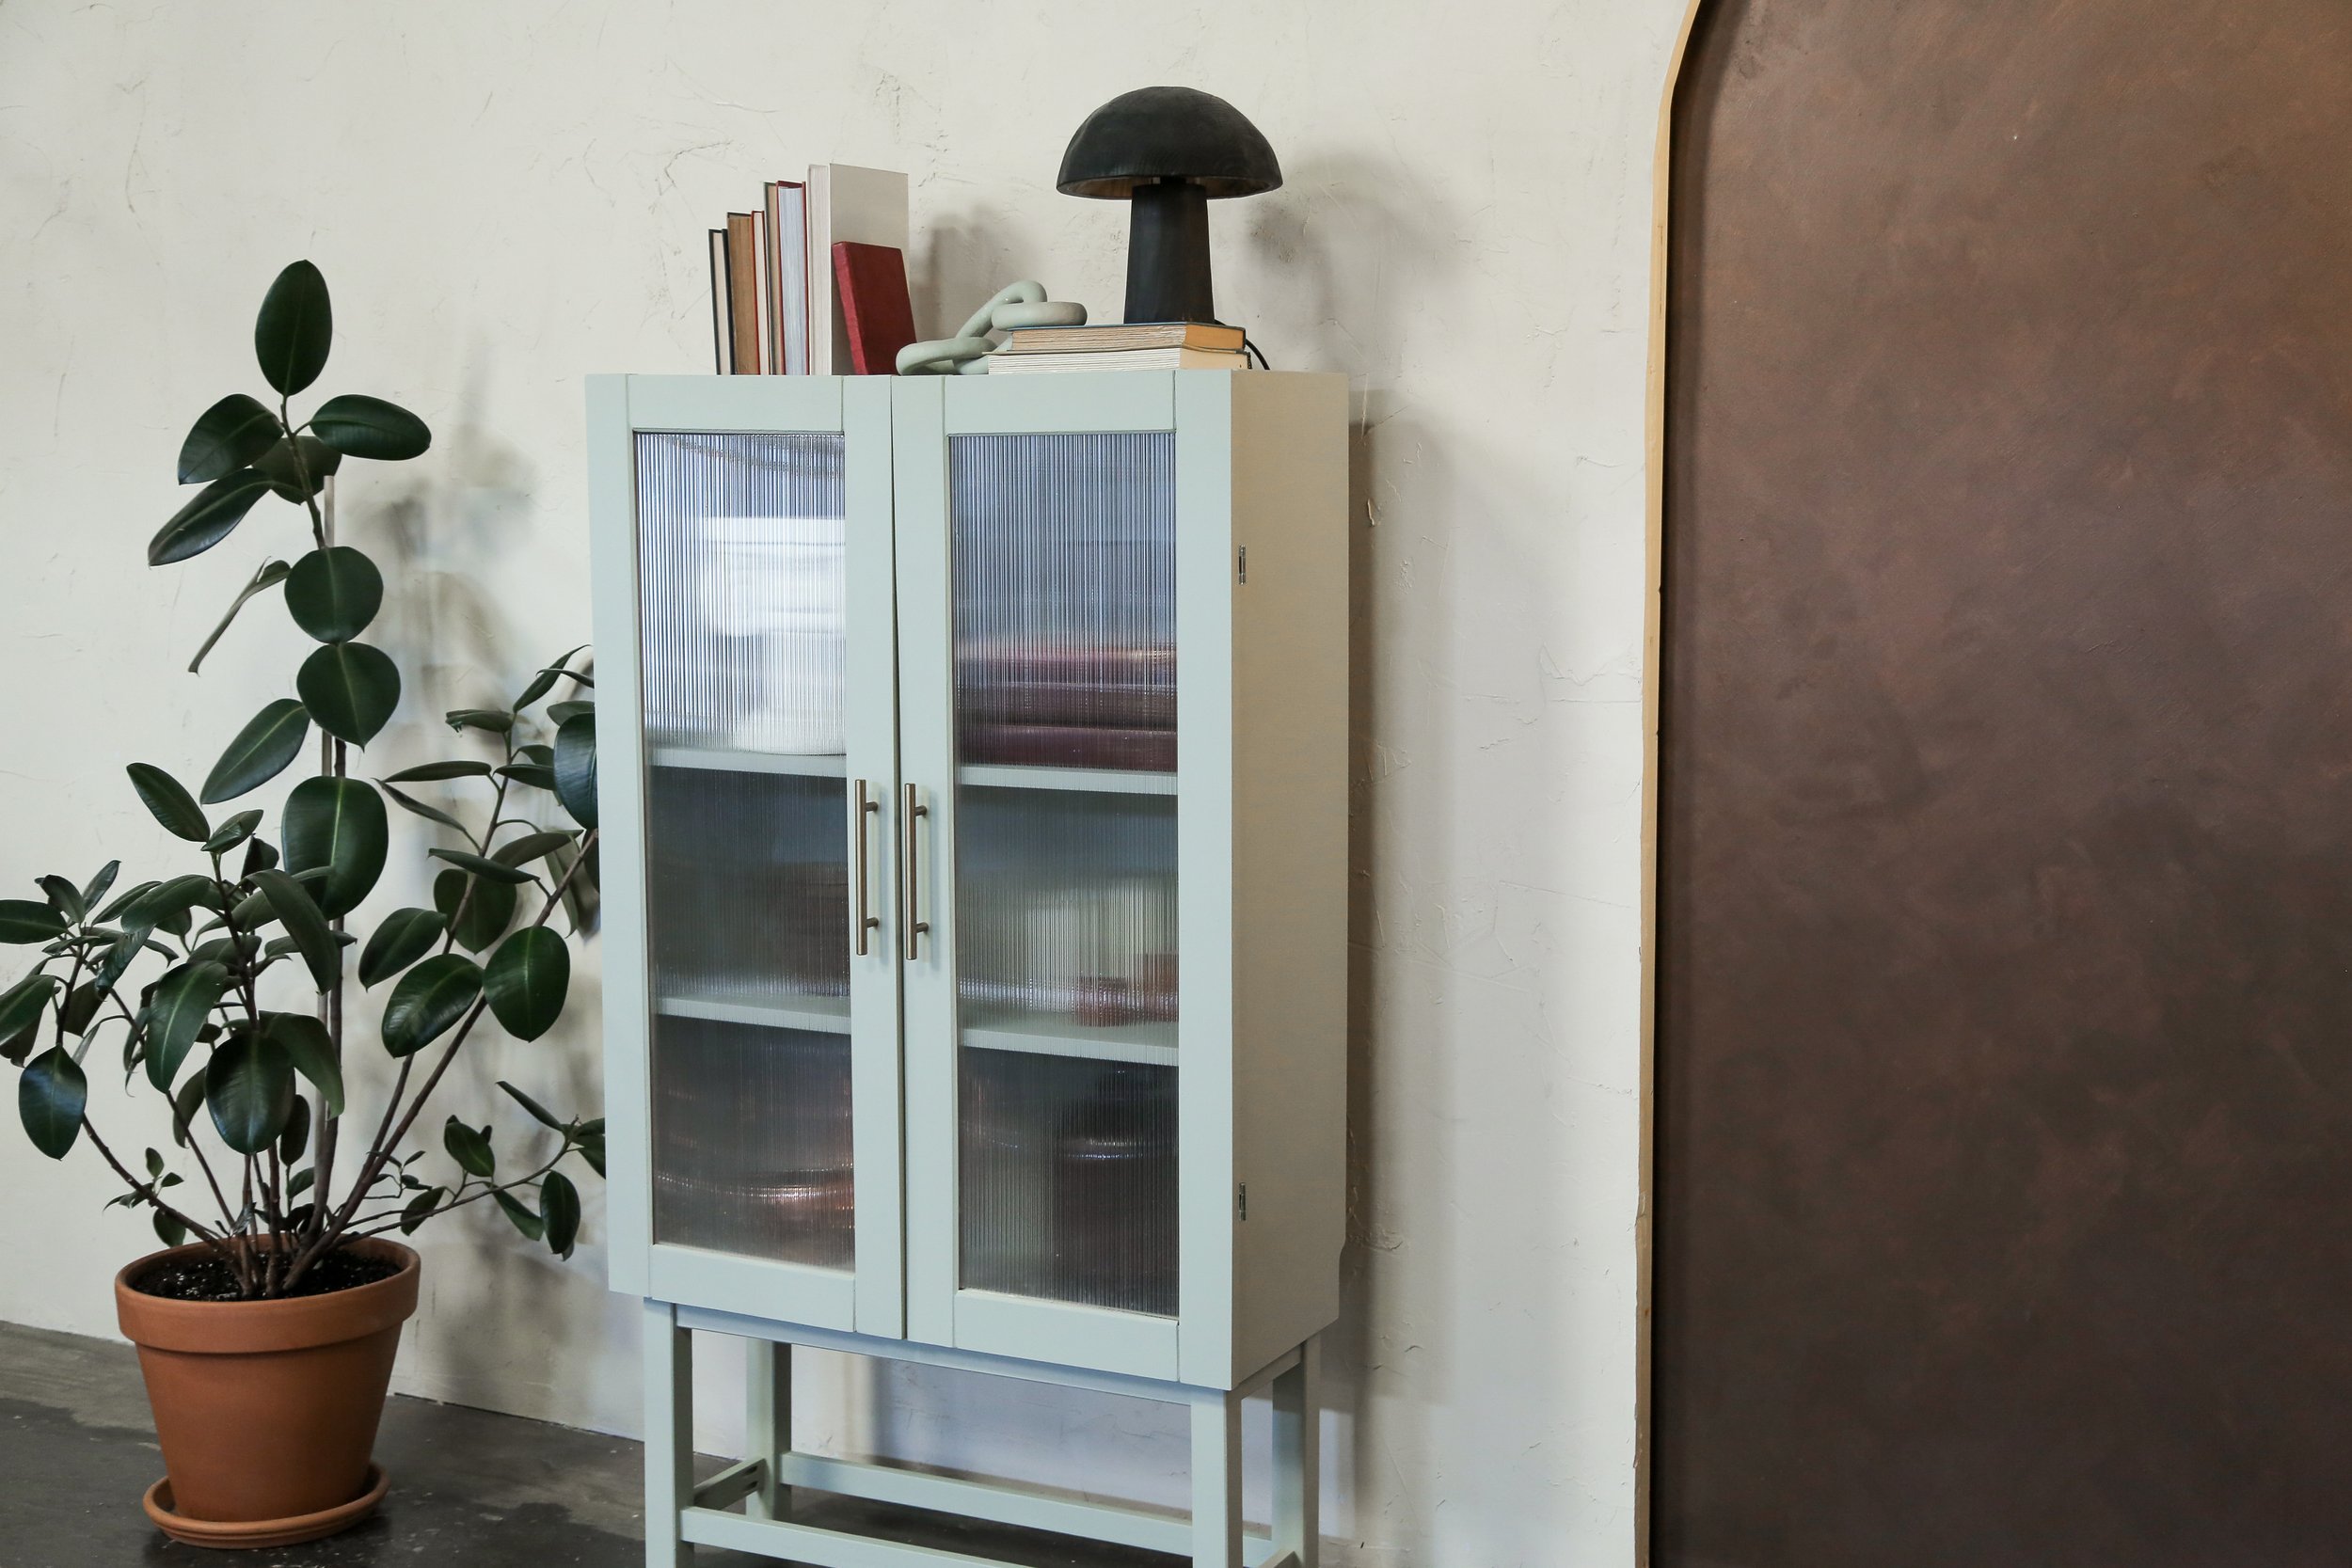
My plan for the shelf is to make some cabinet doors as well as install a faux fluted glass in the doors. We're also going to add some new legs, brand new hardware and give it a fresh coat of paint to finish it off.


To get the “fluted glass look” without breaking the bank, I am using a product called Twinwall Polycarbonate Corrugated Panels. This stuff is extremely lightweight yet durable and it has advanced thermal insulation. So you actually see this typically used in something like greenhouses. I was able to get the size I needed for about $30.
Doors
For the wood doors, instead of using basic one-dimensional wood here, I decided to go with 4 tongue and groove panels. These pieces are a 1x4x6 foot pine panels and I got these from Home Depot for about $7 a piece. The grooves in the side will be used to insert the glass into.
First, I measured the tongue and groove panel to 2.5 inches from the groove edge and trimmed off the tongue edges (repeating for all panels). I then measured & cut the panels to 41 3/4" x 4 and 10 13/16" x 4.
These 8 pieces will create the frame for the doors. Using a pocket hole jig, I pre drilled 2 pocket holes into each end of the 4 10 13/16” panel pieces.
For the “glass”, I trimmed the Corrugated sheet to 11 1/4" x 37 1/4" x 2.
Please note: these dimensions are specific to the Billy Bookcase in the smallest size and will change depending on the version.

Legs
Using a 2x2 piece of pine lumber, I cut it to 14” x 4, these acted as the main legs.
Next, using a 1x2 piece of pine lumber, I cut this to 26 1/2” x 4 and 6 1/2” x4. These will act as the apron and stretcher pieces to support the legs. I then added 2 more pocket holes to either end of the 1x2 pine pieces and used wood glue on the ends of the 1x2 cuts, and clamped together the apron to the (top) of the legs. Then I drilled in 1.5” pocket hole screws into the pocket holes to secure all together.

I repeated gluing, screwing and clamping all the stretcher pieces, this time placing them 4” from the opposite end (bottom) of the legs.
Before painting, I made sure to sand all wood pieces & Billy Bookcase Shelf unit to prep for primer paint. Using a primer paint, I coated all pieces of the cabinet using a foam roller.
Note: Make sure you don’t add paint to the areas where wood glue is being applied for proper adhesion

Attaching the legs to the cabinet
To attach the legs to the Billy Bookcase, once it was flipped upside down both the cabinet and the leg structure upside down, I used a countersink drill bit - drilling 6 evenly spaced holes from the under side of the apron pieces.
I then made sure to centre the legs on the under side of the cabinet and attach the legs to the base using 2” screws.

Door Finishing & Attaching
To finish and attach the doors, I first added wood glue to the ends of the 10 13/16"door pieces (pieces with pocket holes) and clamped them to the adjacent 41 3/4" panel piece andmade sure to wipe away any excess glue with a damp cloth.
Note: Make sure all groove edges are facing inside
After, I drilled in 1.5” pocket screws to secure and slid in one of the cut panels of corrugated panels into the groove of the panels. Repeating the process, I added the bottom piece the same way I did the top - ensuring twin wall panel is secured in the groove edge. Glue, clamp & screw. *werk*
I then repeated for the 2nd cabinet door and let the glue wood dry for at least 30 mins before moving on.
Using 1.5 inch brass hinges, I marked the hinges 7” from the top and bottom of bookcase shelfs outer edges, drilled pilot holes where I marked and attached hinges using the provided screws (repeating this, lining up the new doors, and attach doors to cabinet).

Final Steps
To give it a finished look, I made sure to fill in outward facing gaps of the groove in the doors using a silicone caulking.
Note: Let silicone caulking dry for at least 1h before painting.
I pre drilled pilot holes for my door handle hardware to go into.
Optional: add door magnets to inside of cabinet to help keep doors closed.
Finally, the whole thing was ready for its final coat of paint and attaching the handles! I used “October Mist” by Benjamin More.