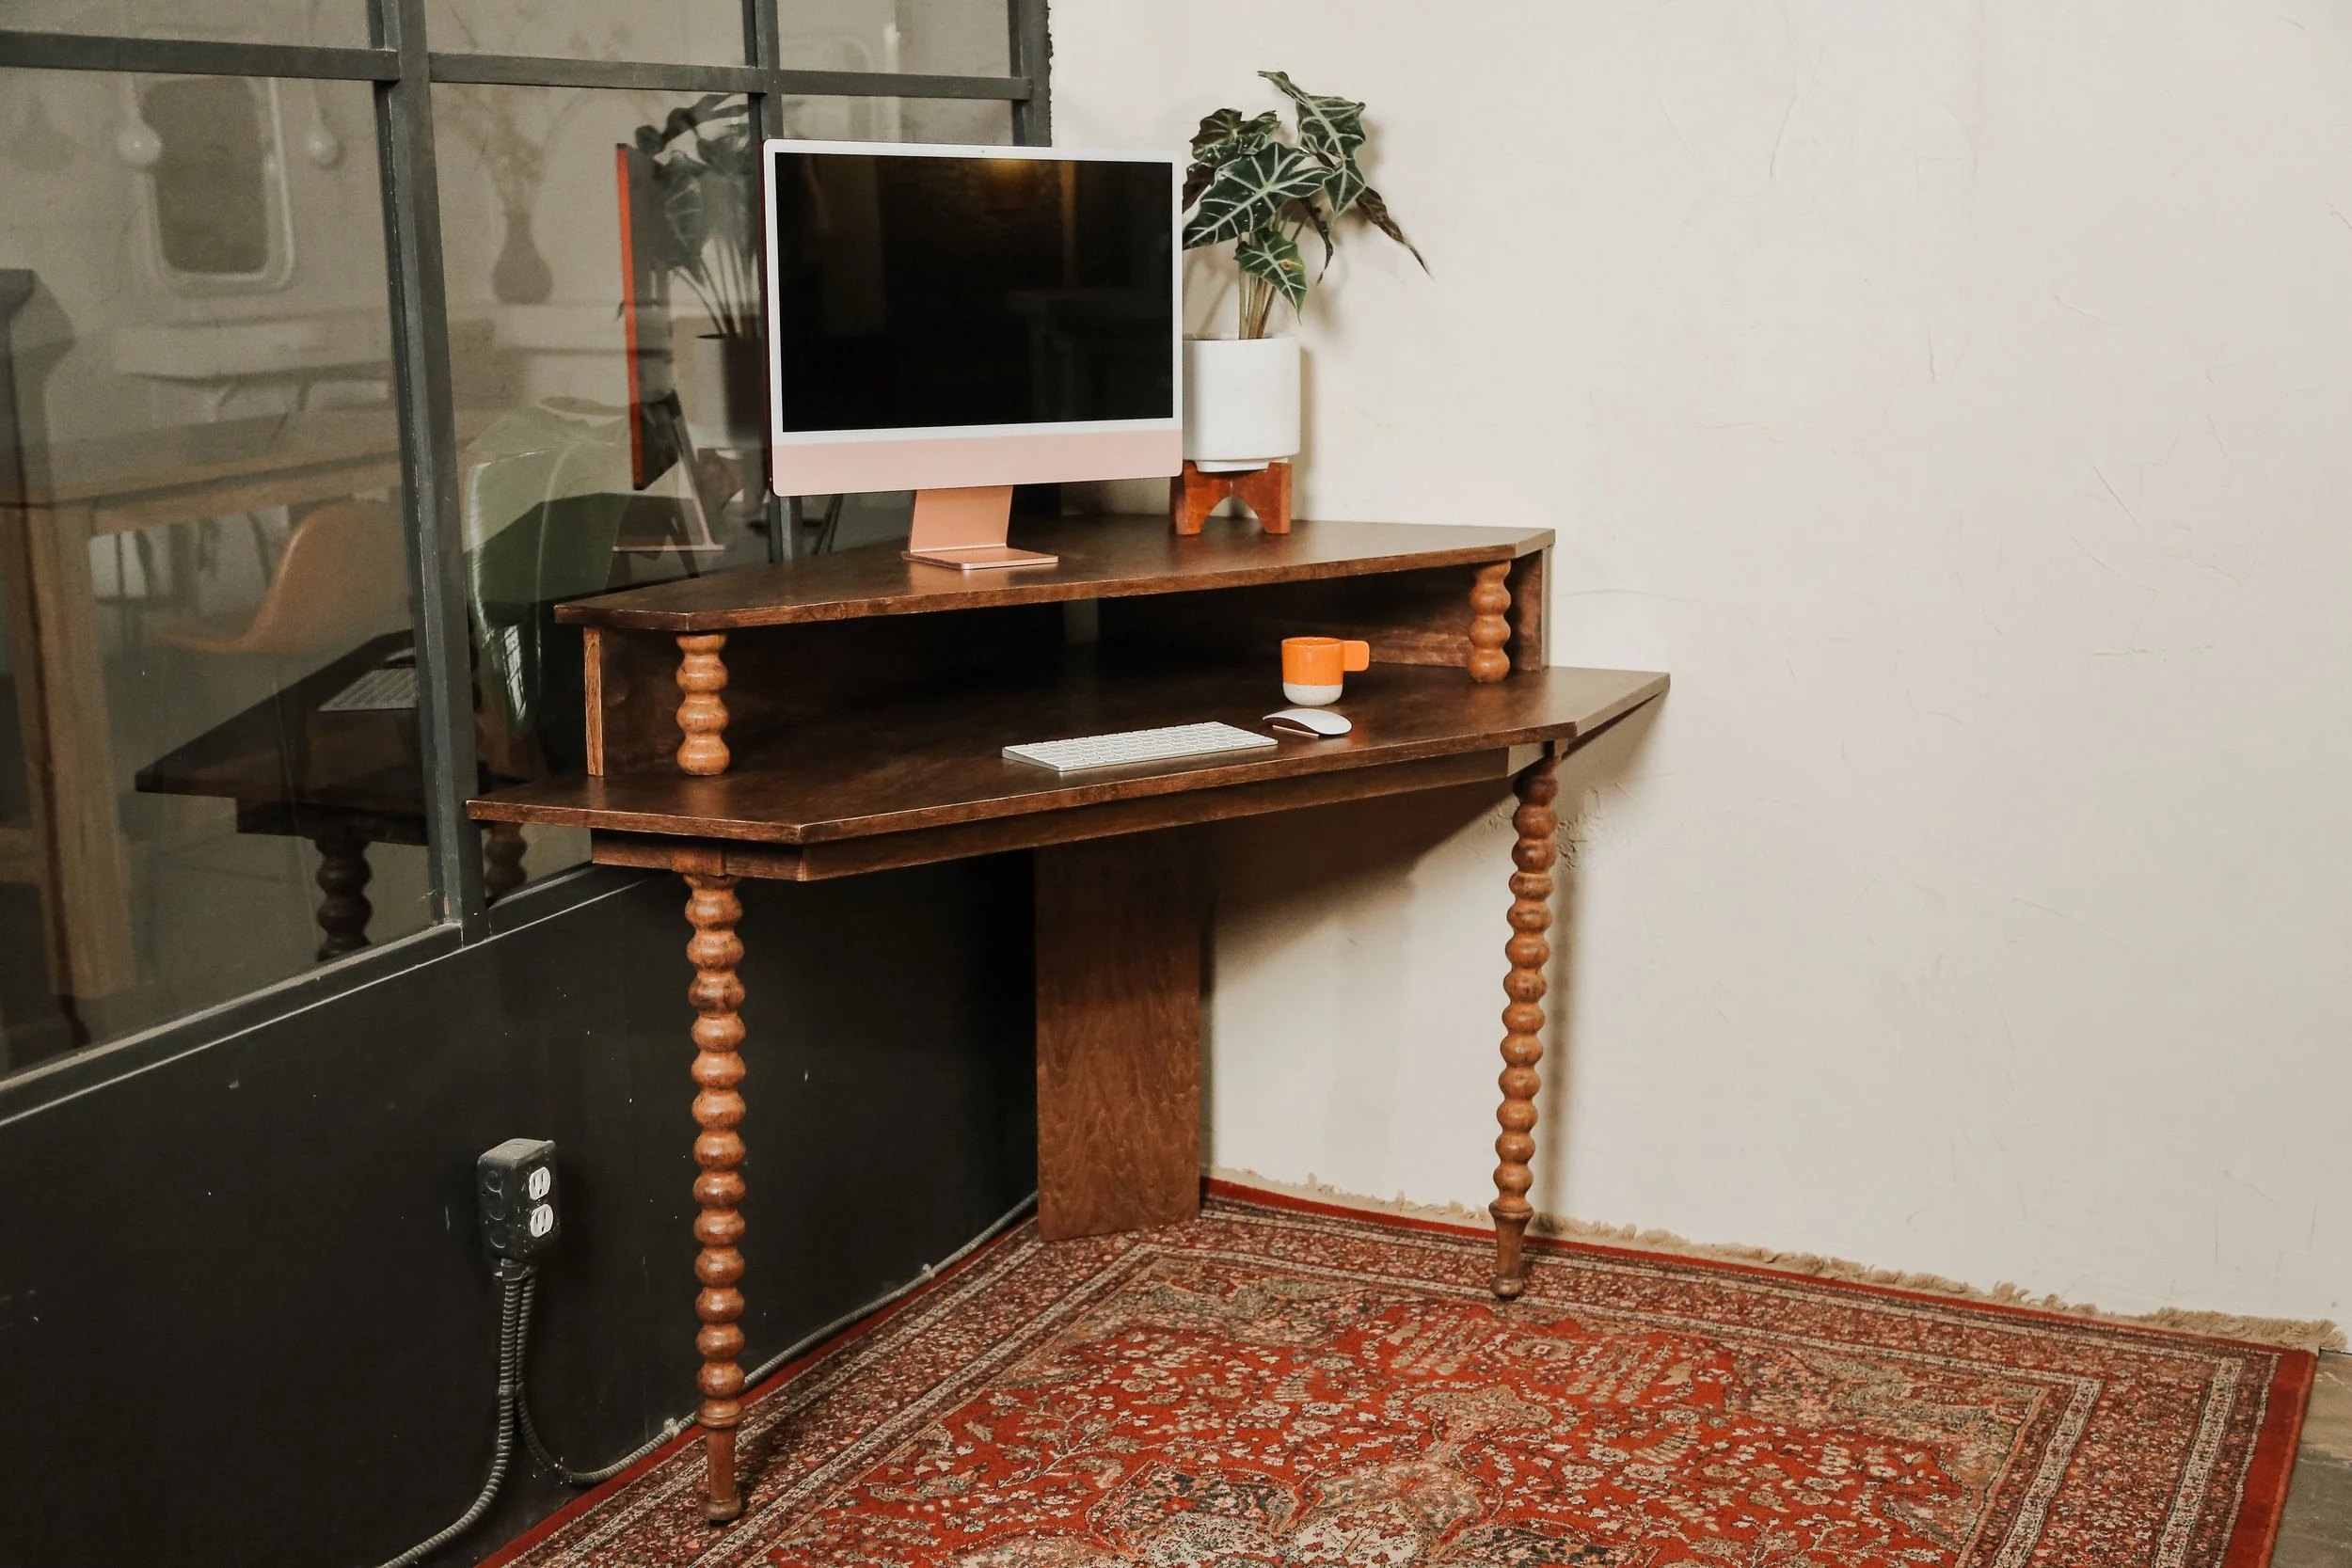
How To Build A Corner Desk
Hey guys, Rochelle here!! So Kelsey has been planning a sweet surprise office makeover for Elliott while he's out of town and she asked if I would be interested in trying my hand at constructing a custom corner desk for his office space and I said... - well first I was like "you're nuts if you think I've got the skills for that", but then I was like "maybe I could, it would be a really fun challenge" and then finally I said "heck yeah, I'd love to, thank you for believing in me".
Video tutorial here :


Starting The Project
So Kelsey and I talked over a bit about what she had in mind for the desk and we took some sneaky measurements of the space while Elliott was out.
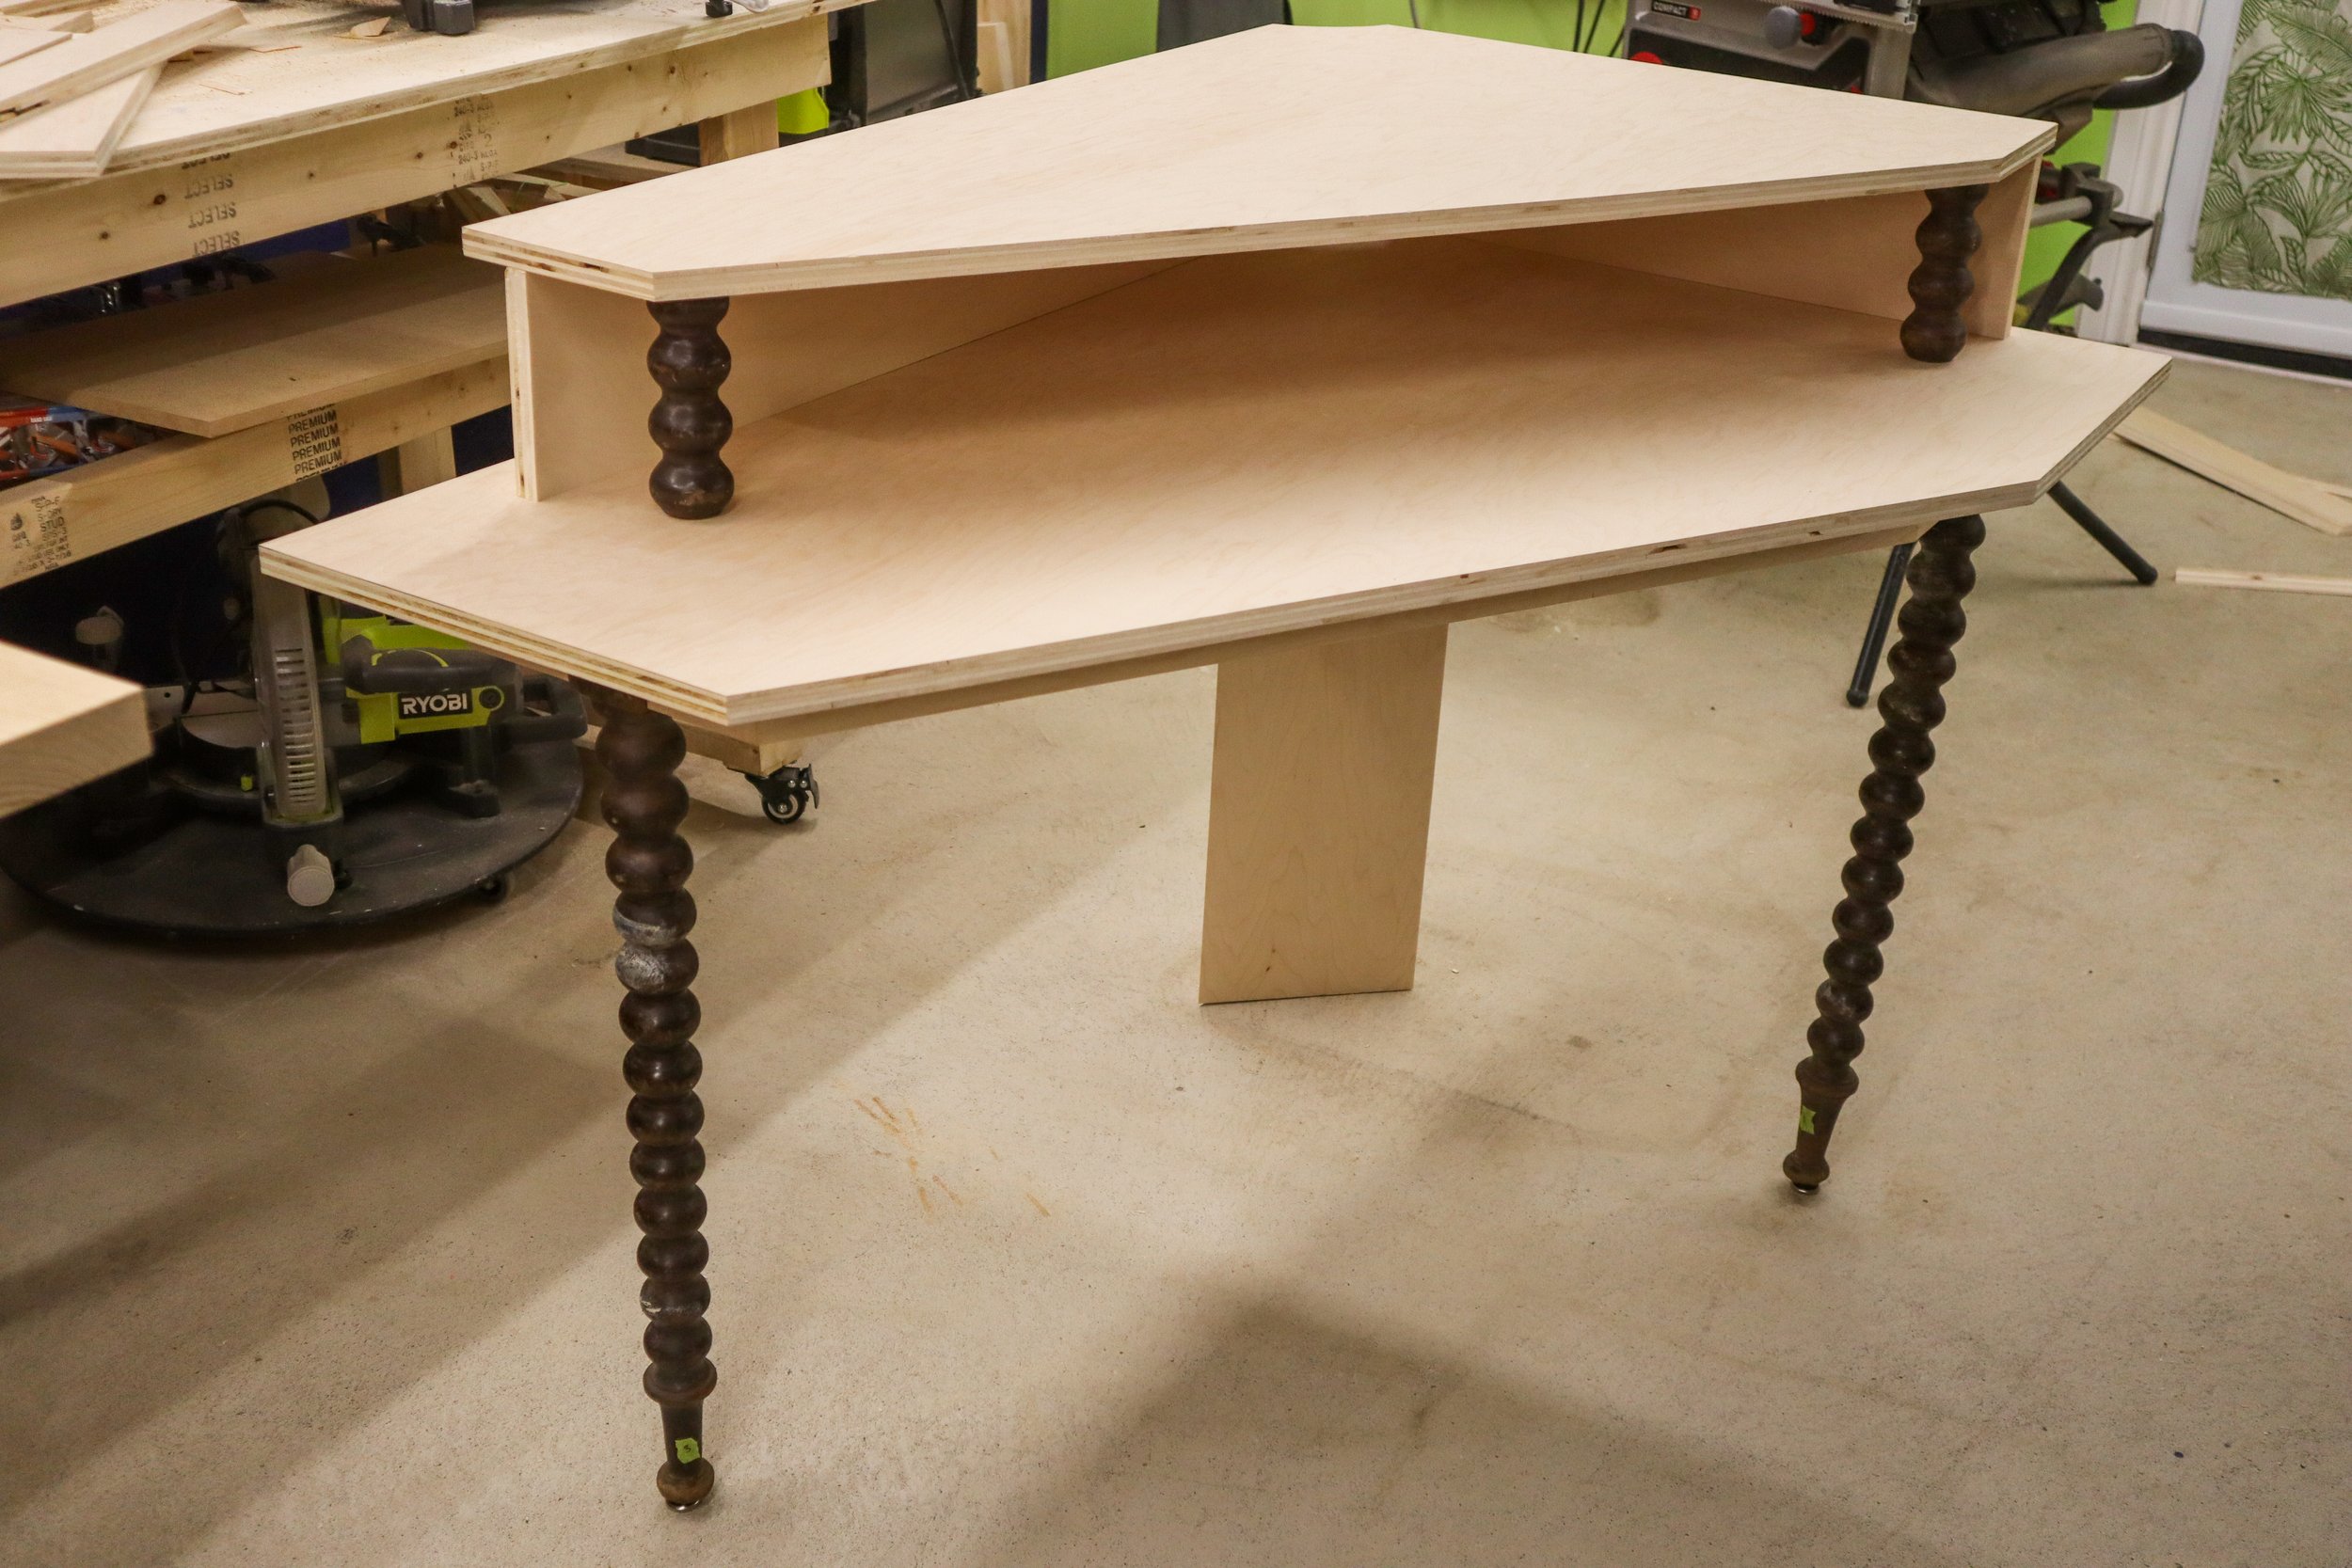
My Measurements (dimensions will vary based on your specific measurements)
30" high desk
35 ⅜" high monitor stand
27 ¹³⁄₁₆" from wall to window divider
43 ¼" long on back wall
27 ⅞" window wall
6 ⅜" out from wall on each side
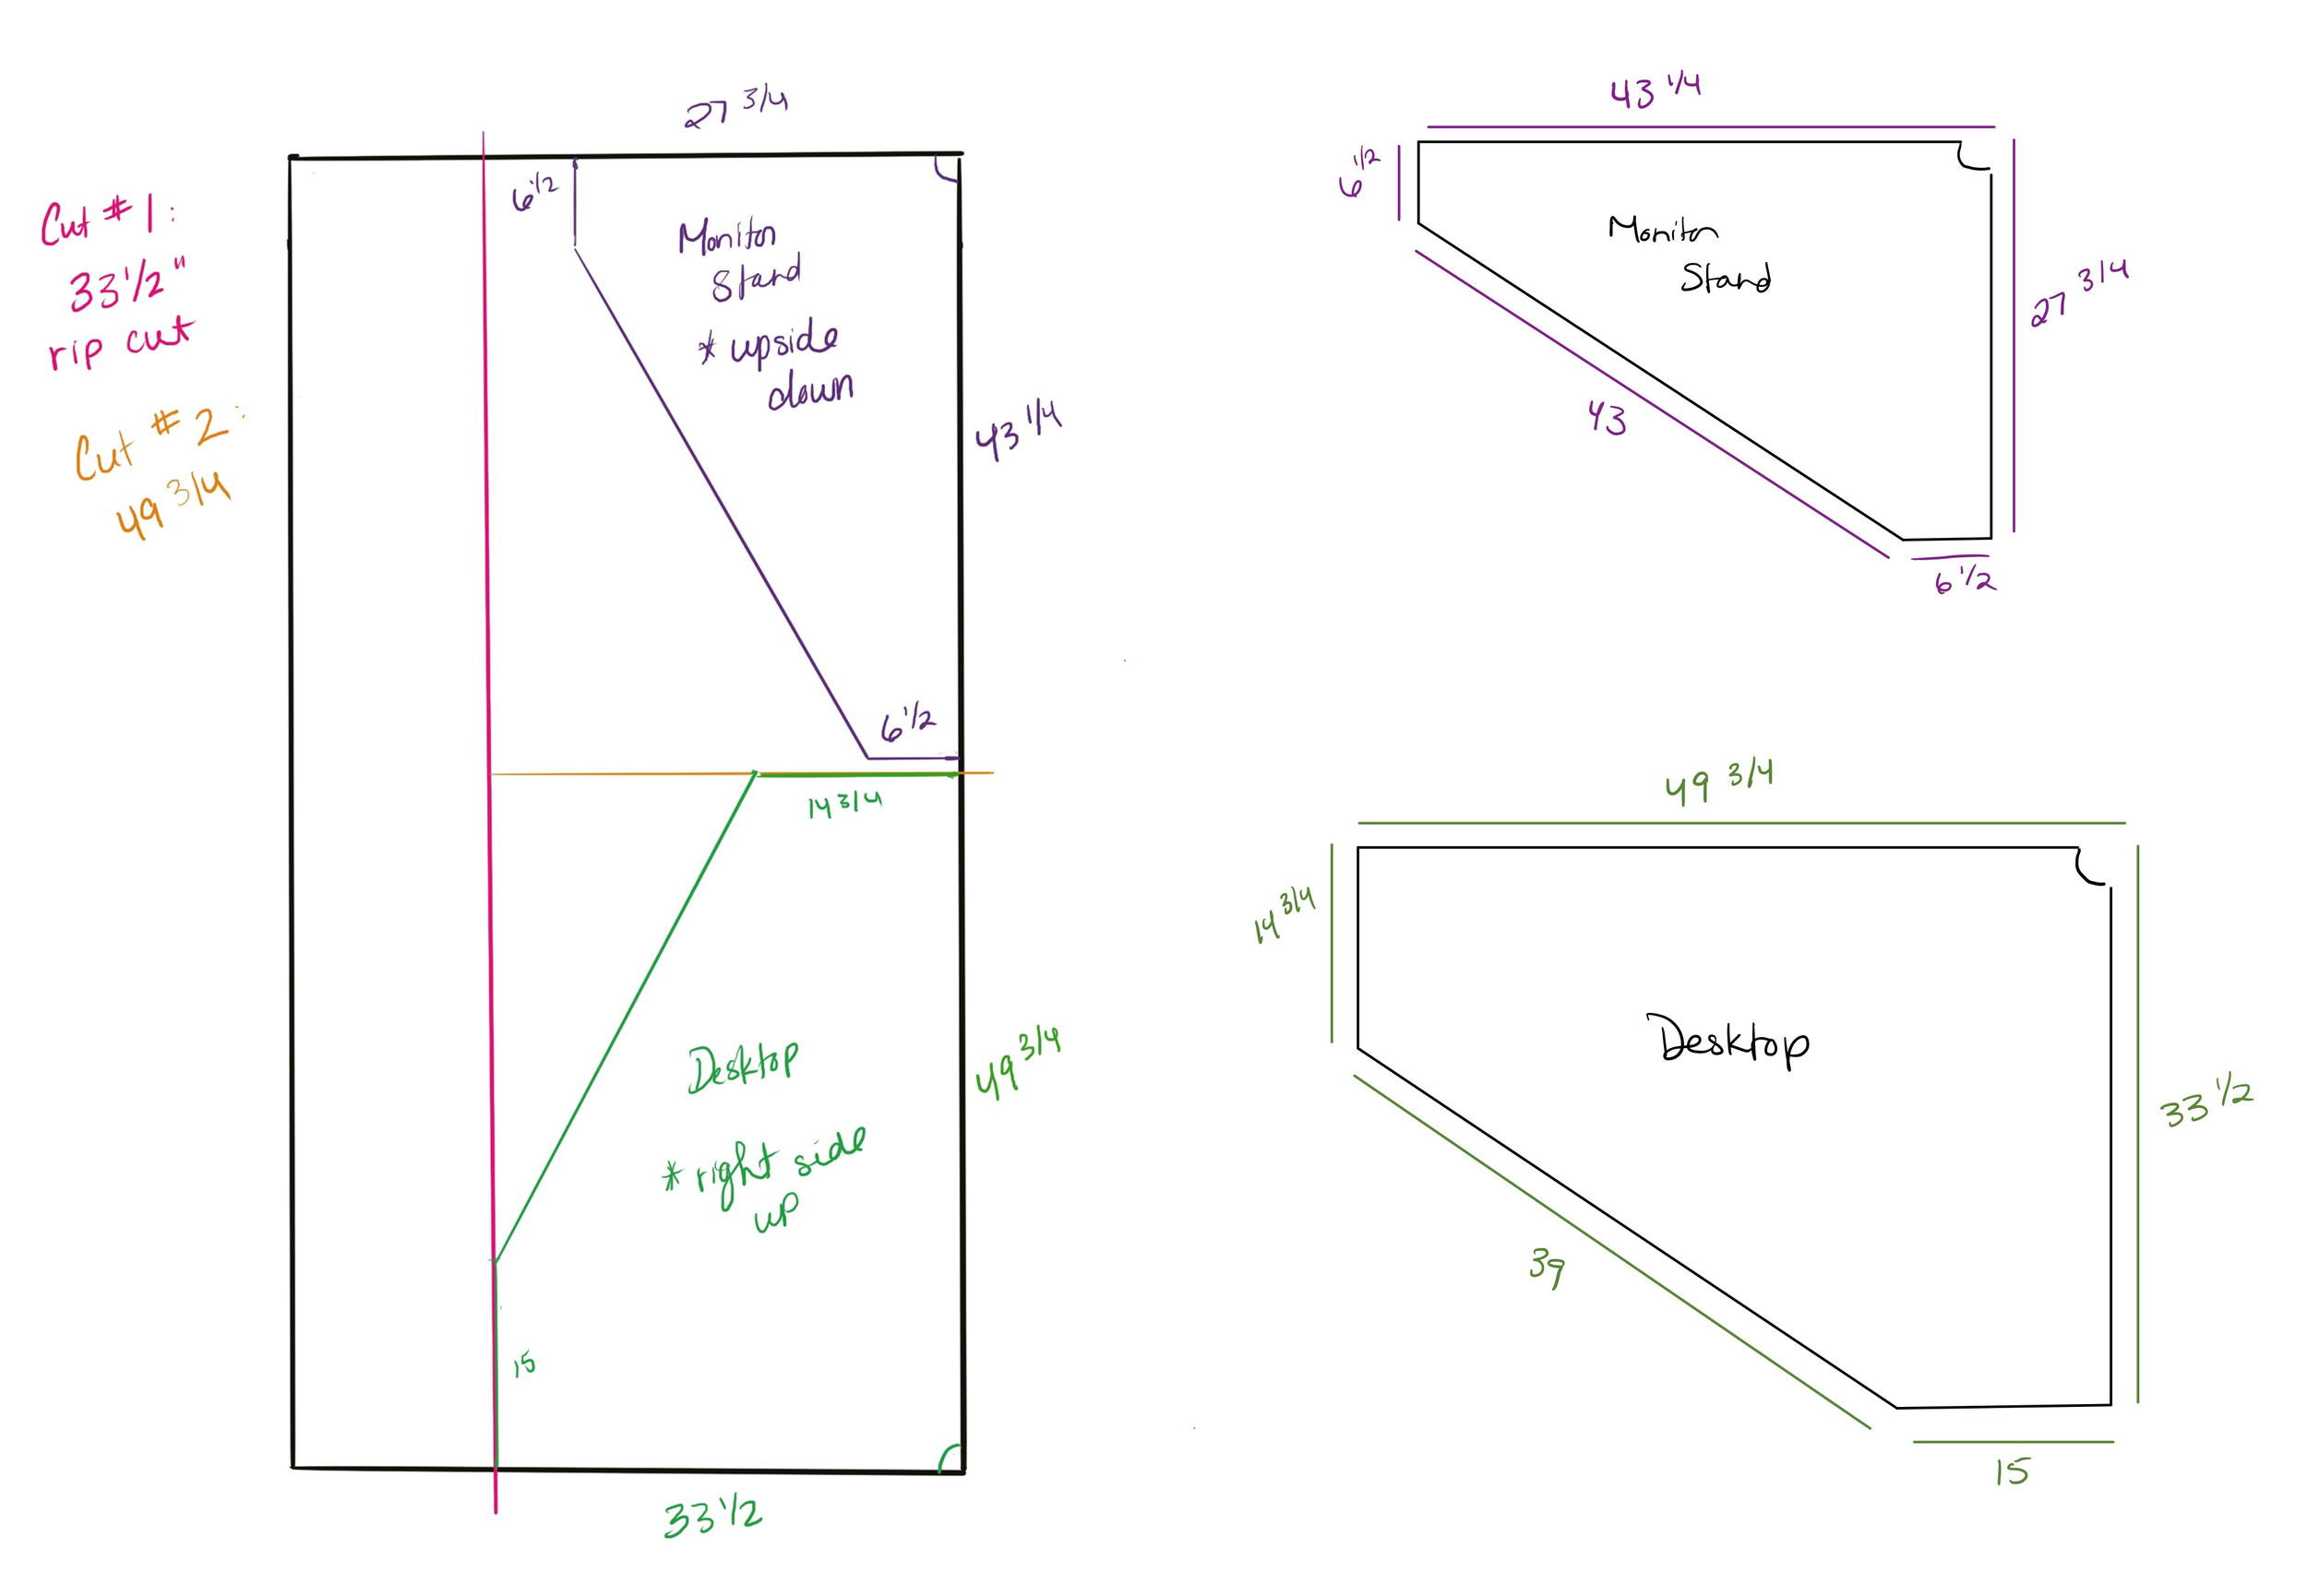
Measurements + Plan:
Preparing the Legs
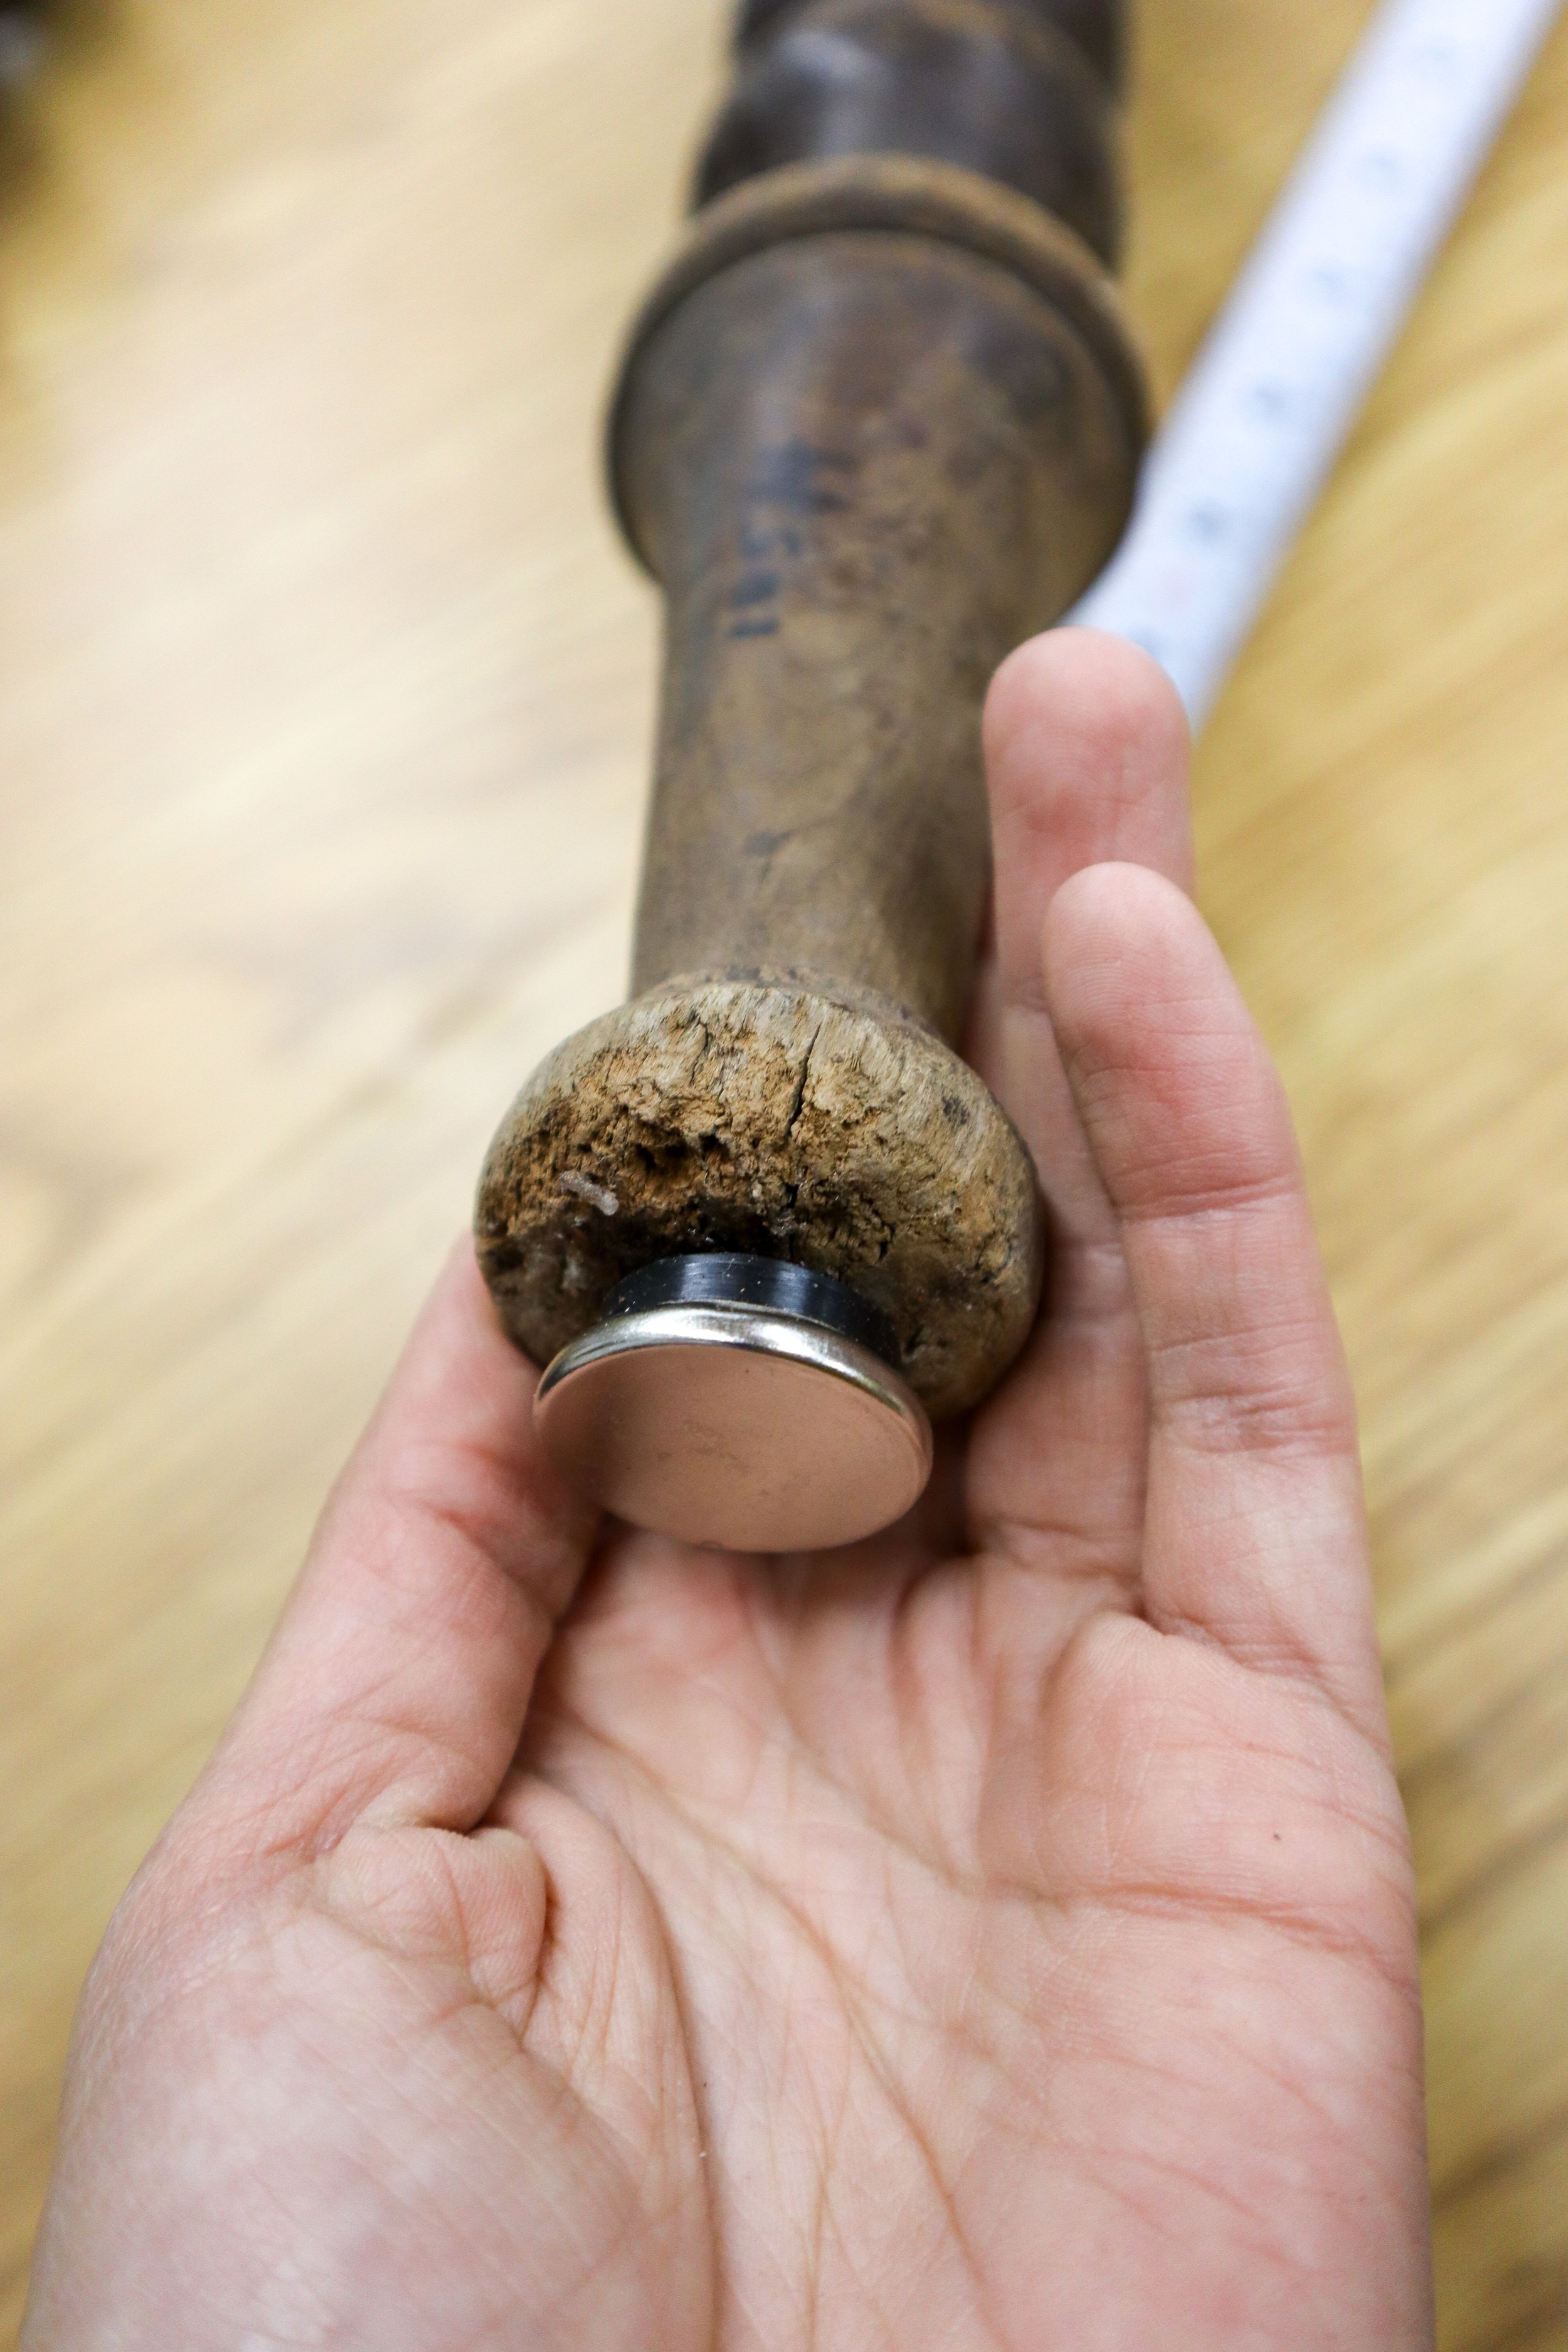
Kelsey found 4 really cool vintage, hand-turned legs to work with, but they were way too short - I needed to extend them to be desk height. To do that, I cut the bottoms off of 2 of them, the tops off of the other 2 and glued them together to create 2 longer legs.


I also attached cushioned glides/levelling feet to the bottom of each leg for stability, which also allowed me to make adjustments on uneven surfaces.

For the third leg in the corner, I glued together two pieces of 2x4 and cut it down to the same dimensions as the decorative legs.


Cutting and Preparing the Desk Components
When I went to measure out the space, I created cardboard cutouts of the desired size and shape for the table top and the monitor stand. I traced those templates onto the plywood and cut them out using a circular saw. I cut the cord pass-through at the back with the jigsaw and cut all my apron pieces, support pieces and a panel to disguise the back leg, on the table saw.

Assembling the Desk
Adding an apron to the underside of the desktop allowed me to attach the legs in a removable fashion (perfect for transport and tight stairways). I secured the apron to the desktop using pocket screws and attached all the legs to the apron using hanger bolts and nuts.
The plywood support pieces for the monitor stand were also attached with pocket screws and the front support spindles were added with hanger bolts and threaded inserts.

FINISH
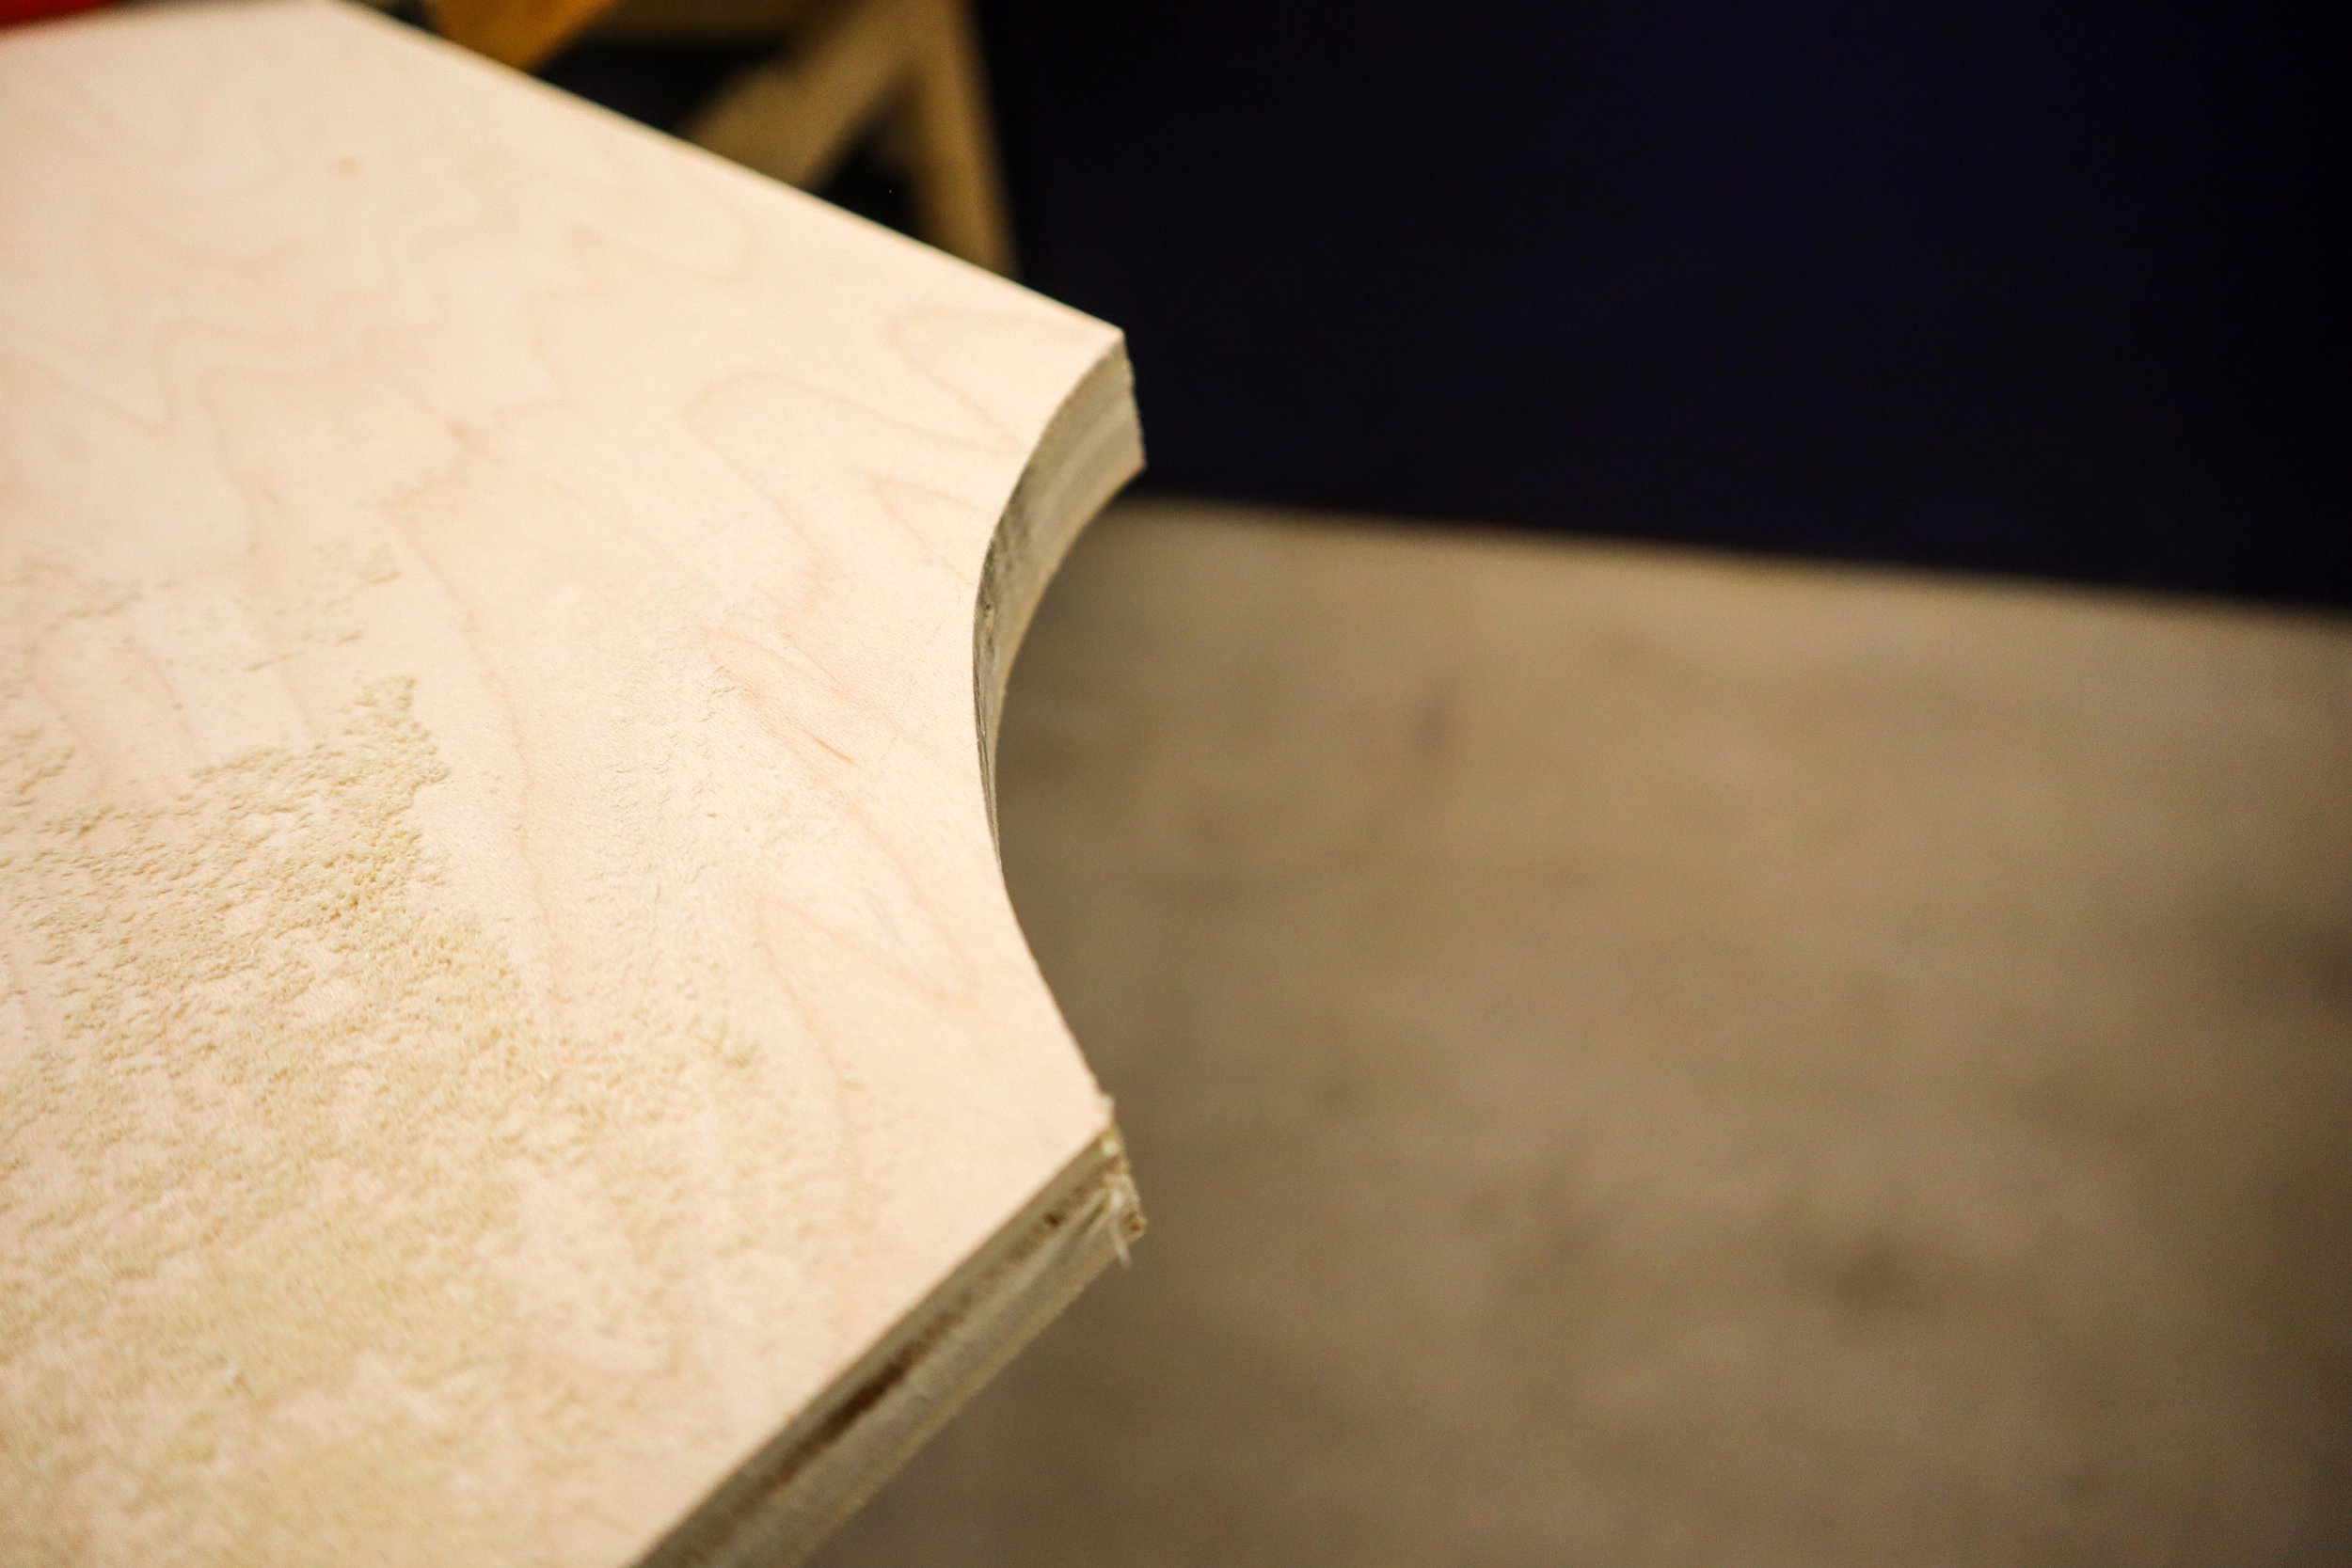
To give the desk the look of solid wood, I used edge banding to cover all the visible raw edges of the plywood.
I stripped and sanded the turned legs back to their natural reddish colour and chose to use a Red Mahogany wood stain on the rest of the desk pieces to match.
Everything got a couple coats of water-based satin polyurethane for protection and shine!


Remember, you can adapt the steps and measurements based on your specific desk design and space requirements. Happy building!