How To Make A Wabi Sabi INSPIRED Pendant Light
Welcome back to our series, That Cost How Much?!?! where we recreate overpriced decor items with affordable materials and a touch of DIY. In this episode, I tackle this viral organic modern, wabi sabi, stone-like pendant light that left me genuinely questioning how it could be so expensive, the “Wabi Sabi Pendant Light” from Vakker lighting, priced at $1091 USD.

Materials
Punching balloon
Bubble wrap
Tape
Newspaper
Glue
Water
Cellu-clay
Spray paint
Cord kit
Metal bracket cord grip
Lightbulb
Step 1: Create the mold
Start by inflating a punching balloon to serve as the mold for your pendant light. Inflate to the internal diameter that you would like your pendant to be. Warning: do not overinflate. Your balloon will pop.
Step 2: Start shaping your pendant
To start shaping the organic pendant, roll up bubble wrap and tape it around the balloon. Disclaimer: be careful to not pull off tape, the balloon will pop if you do this.


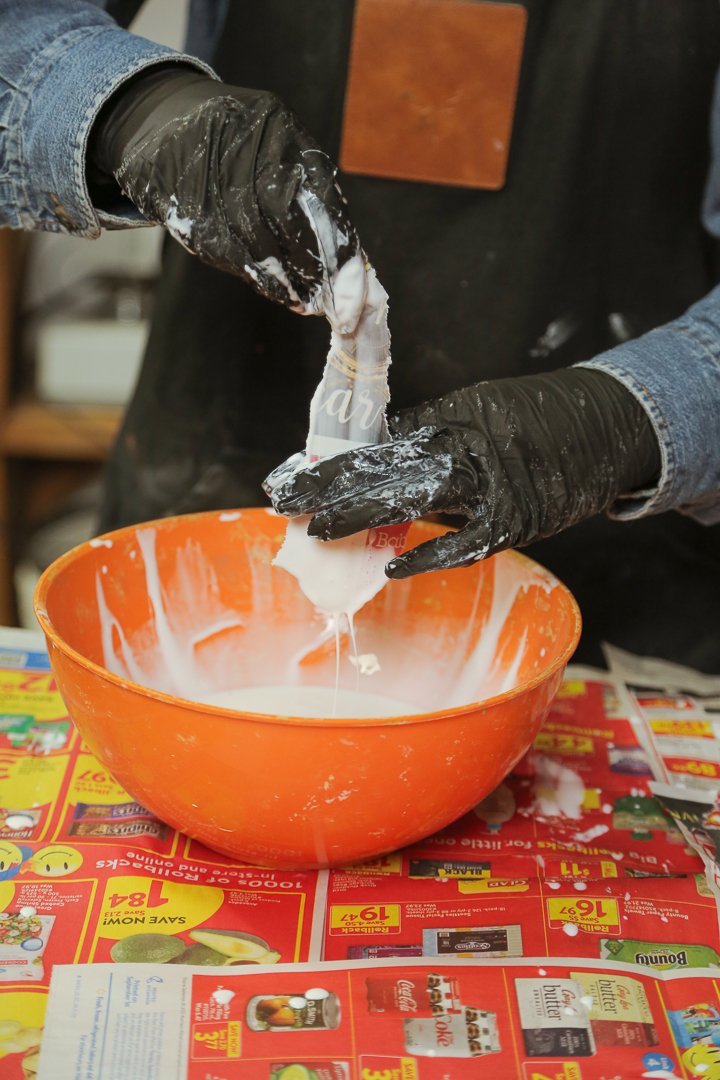
Step 3: First layer of paper mache
Apply the first layer of basic paper mache by dipping strips of newspaper into a mixture of 2 parts water and 1 part school glue($4.50). Completely cover the surface of your balloon and bubble wrap structure, in an even layer. Allow it to dry completely.


Step 4: Access the shape
Once the first layer is dry, assess the shape. If adjustments are needed, crumple some paper and tape it to areas that require rounding out. Apply another layer of paper mache on top of this and let it dry.


Step 5: Cellu-Clay for Stone-Like Effect
For a stone-like finish, use cellu-clay ($37) for the final layer. Follow the instructions on the packaging and apply a solid coat of cellu-clay over the structure. Let dry completely, then carefully pop the balloon and remove it from your paper-mache structure. Once removed, you can continue to cover the inside of the structure with cellu-clay.


Step 6: Spray paint
Optionally, you can give your pendant light a coat of spray paint ($14.75) in the color of your choice. Allow the paint to dry thoroughly.
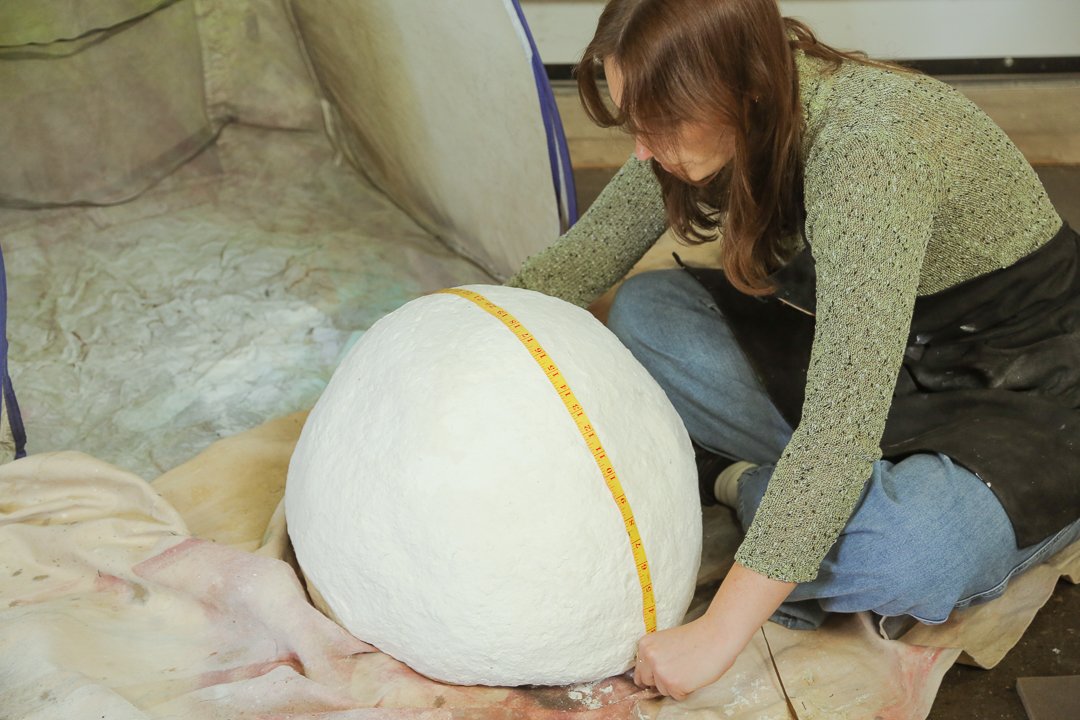
Step 7: Find the centre and drill a hole
Find the center of your pendant light with a measuring tape. Then drill a hole the width of the cord kit you will be using.
Step 7: Install Cord Kit and Metal Bracket Cord Grip
Feed a cord kit ($5.20) through the top of your pendant light, ensuring it hangs evenly. Optionally, you can add a metal bracket cord grip, which allows the lightbulb to hang lower within the pendant.


Cost comparison
Install your pendant and you’re done! This pendant is achieving the EXACT effect I wanted, and it only cost me $64.45 USD.
Original: $1091 USD
DIY: $64.45 USD


