FALL DIYS FOR YOUR HOME

You guys asked for it, and we are so excited about doing it. Today’s DIY is all about fall! Most of us love switching seasons and getting cozy, and we’re here to help with that transition.
BOHO HANGING RING DECOR

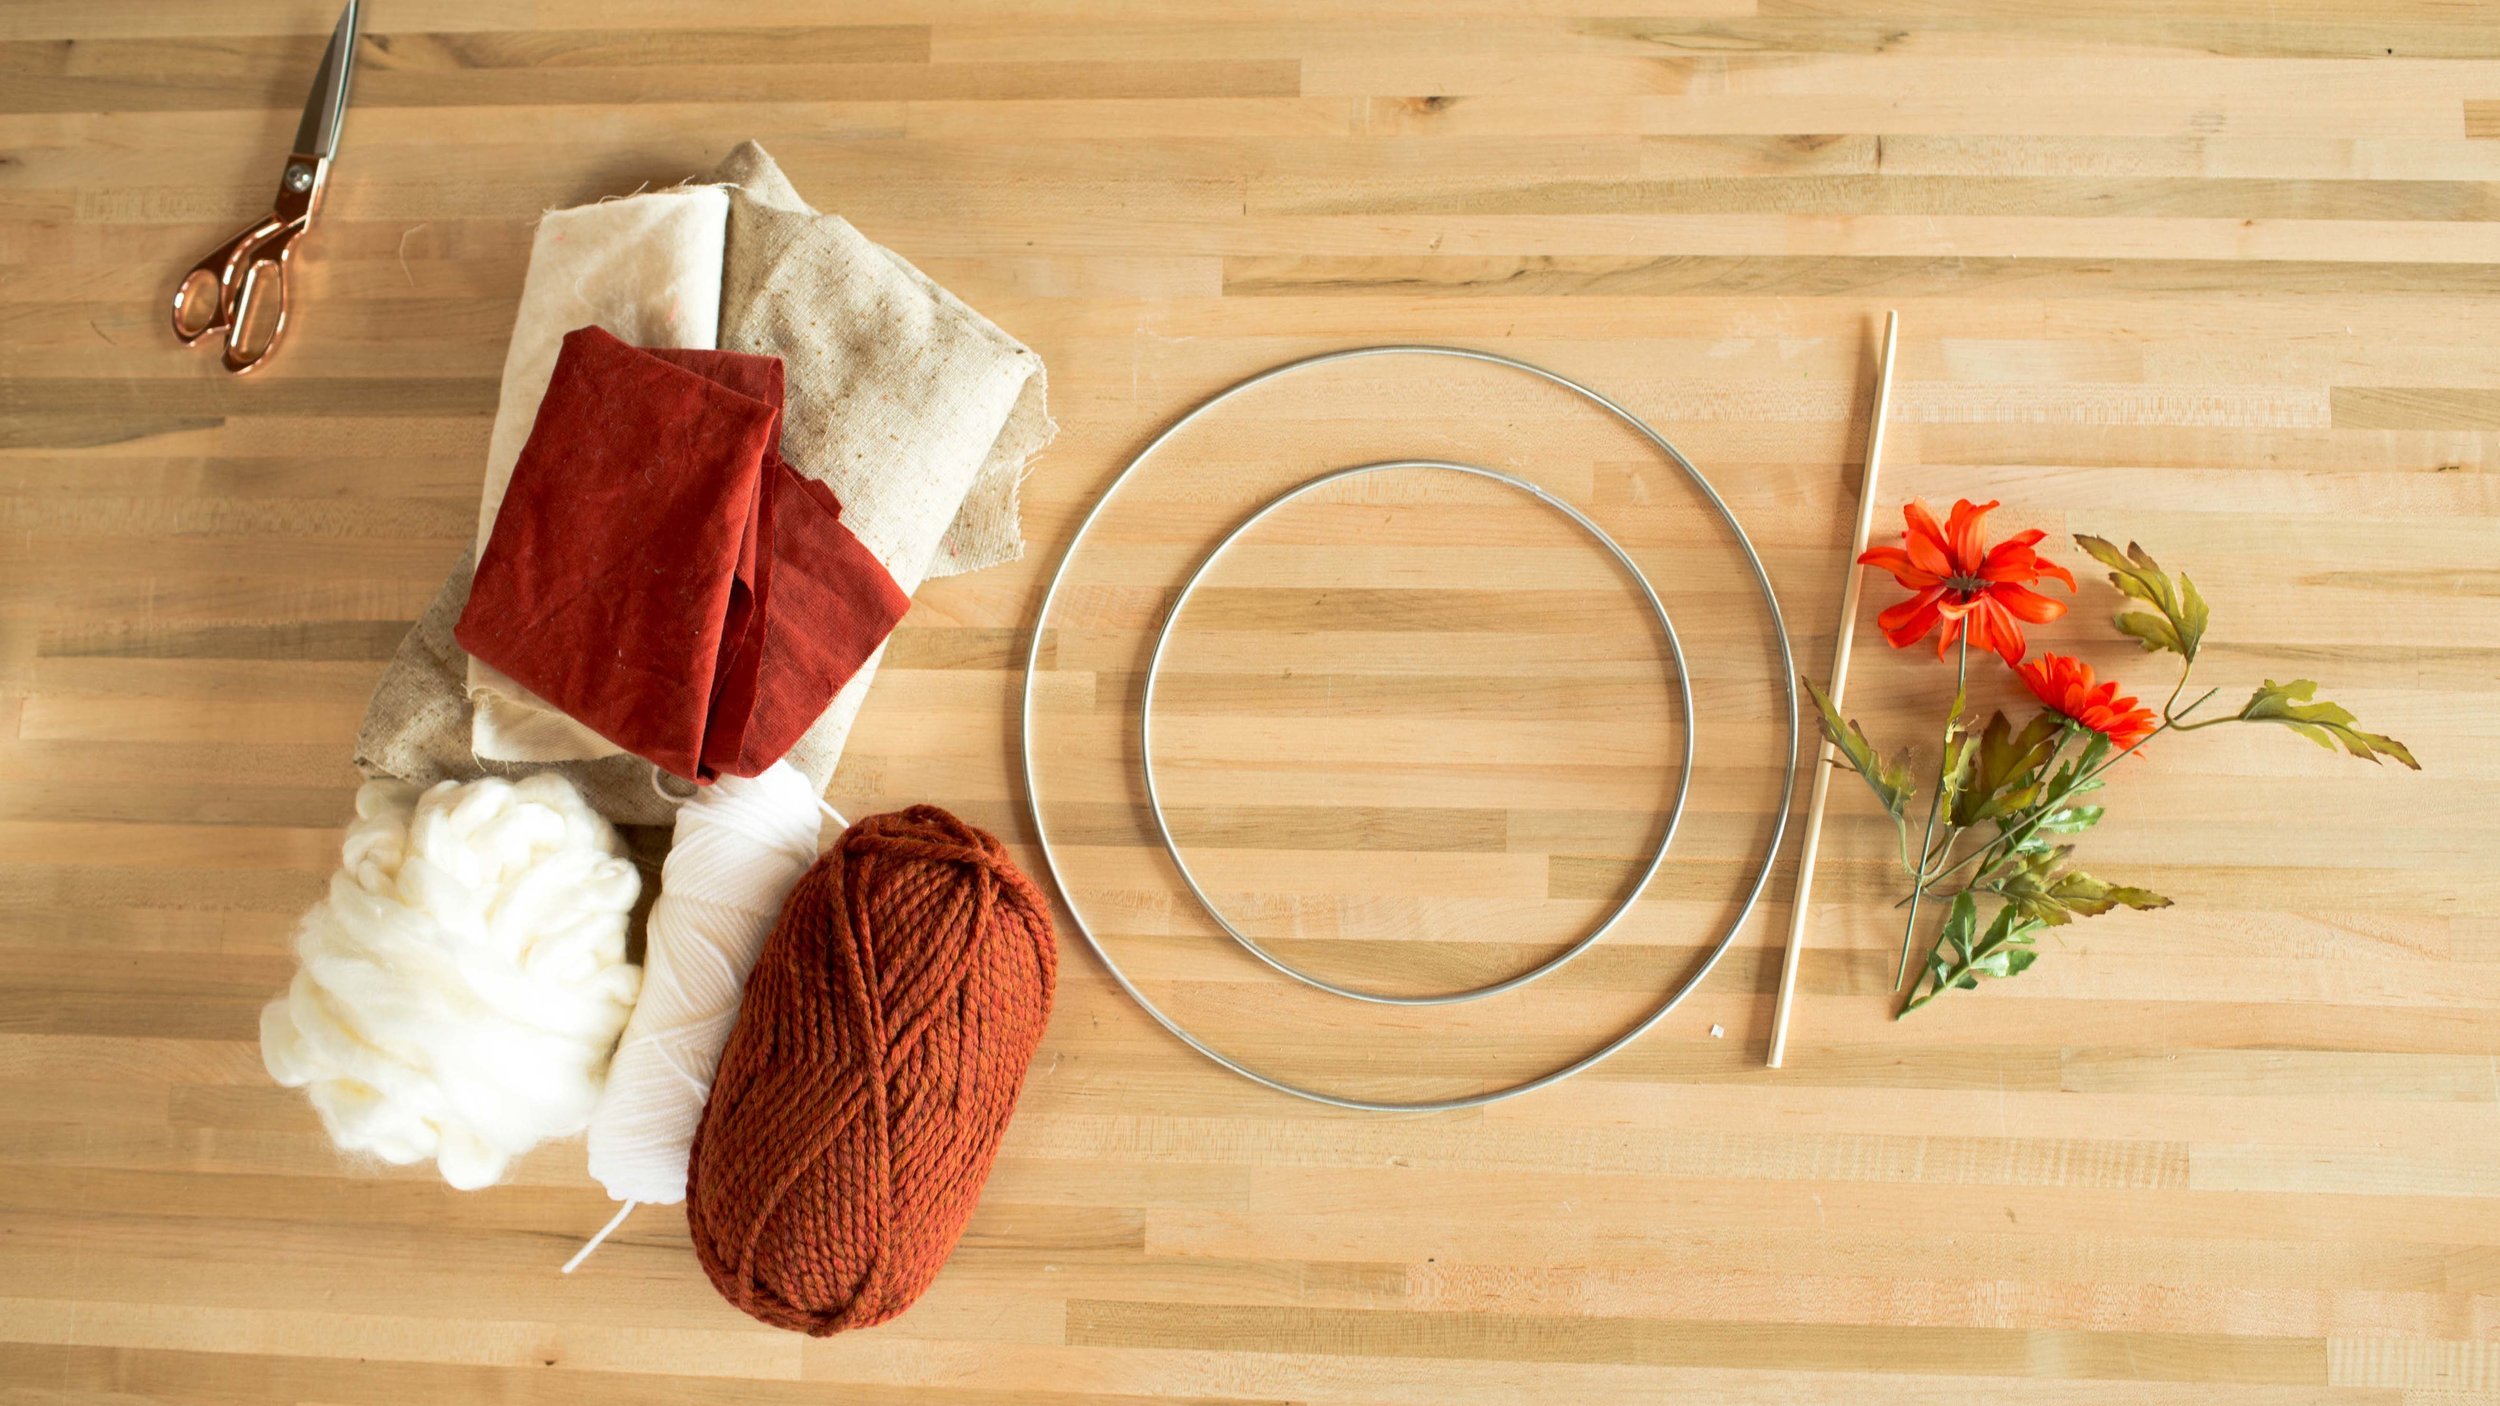
MATERIALS:
- Metal hoops
- Red yarn
- Thick white yarn
- Faux leaves
- Wooden dowel
- Other scrap fabrics
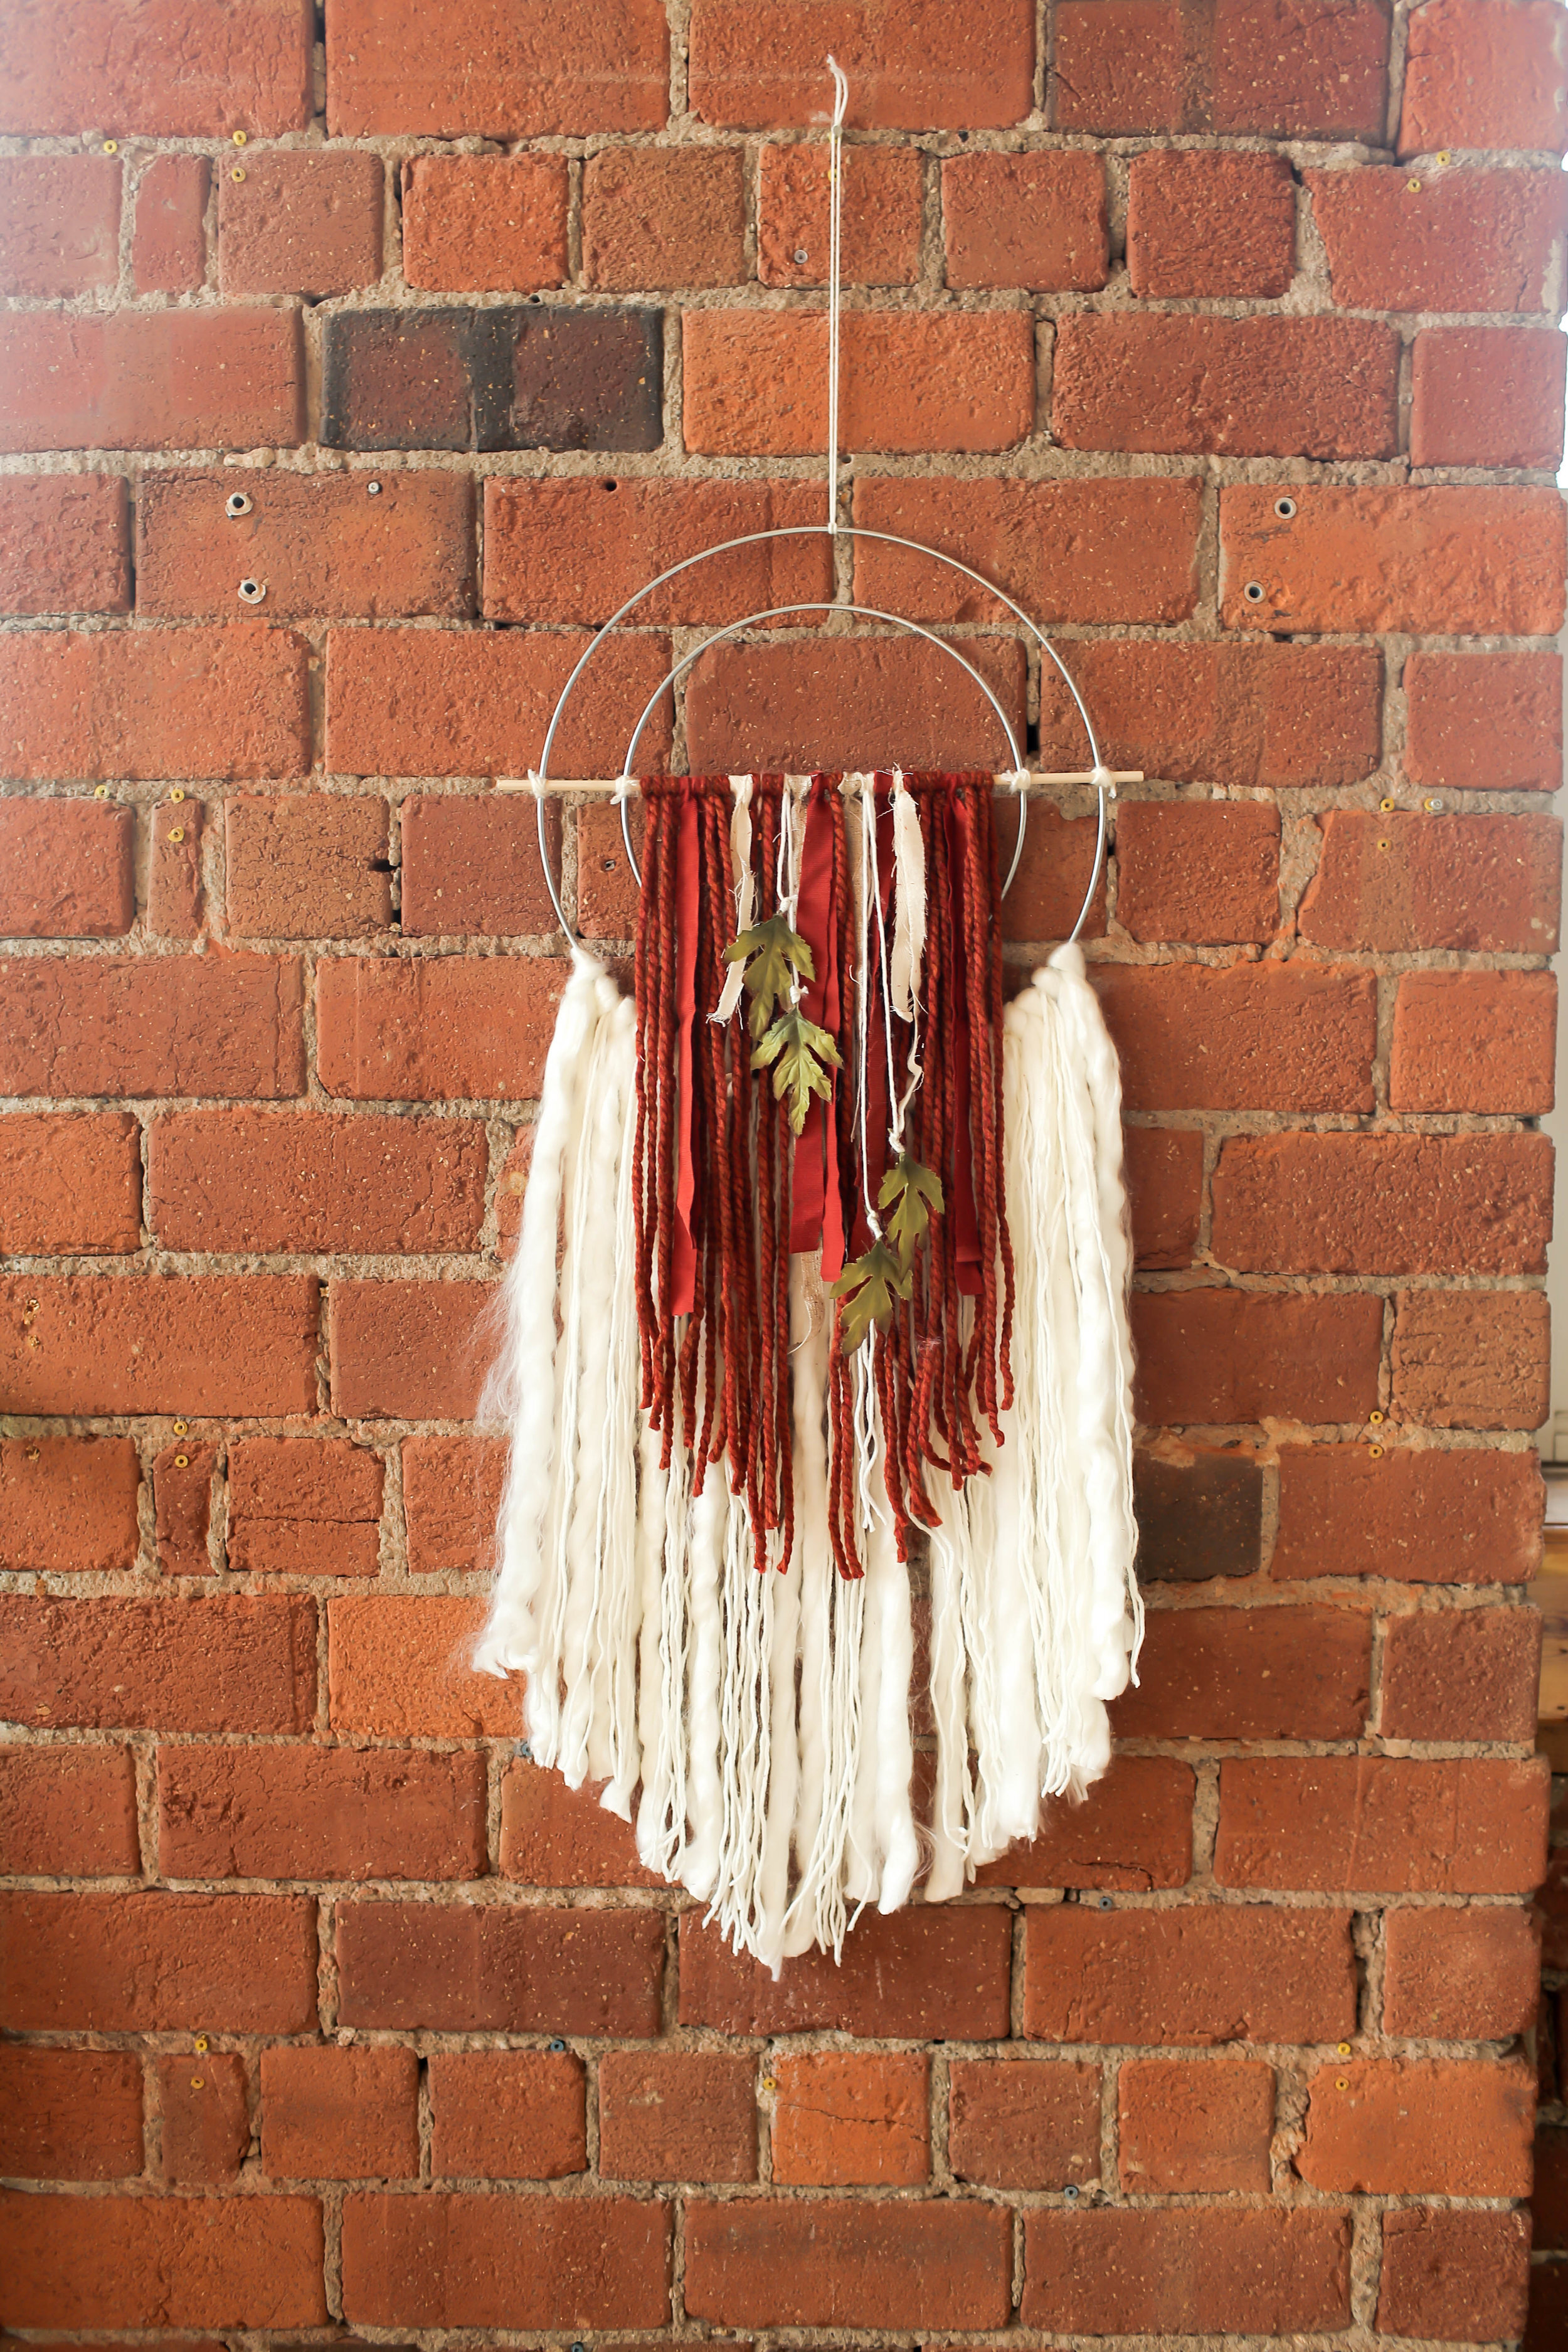
The first project we are working on is this amazing boho hanging wall art. The colours in it totally scream autumn while also being easy to incorporate into your existing decor. For this circular wall art we are using different colours of yarn and fabric, and the base of our art are two metal hoops in two different sizes and a small piece of wooden dowel.
We took a small piece of yarn and wrapped that diagonally in 4 spots to secure the wood to the wire hoops.

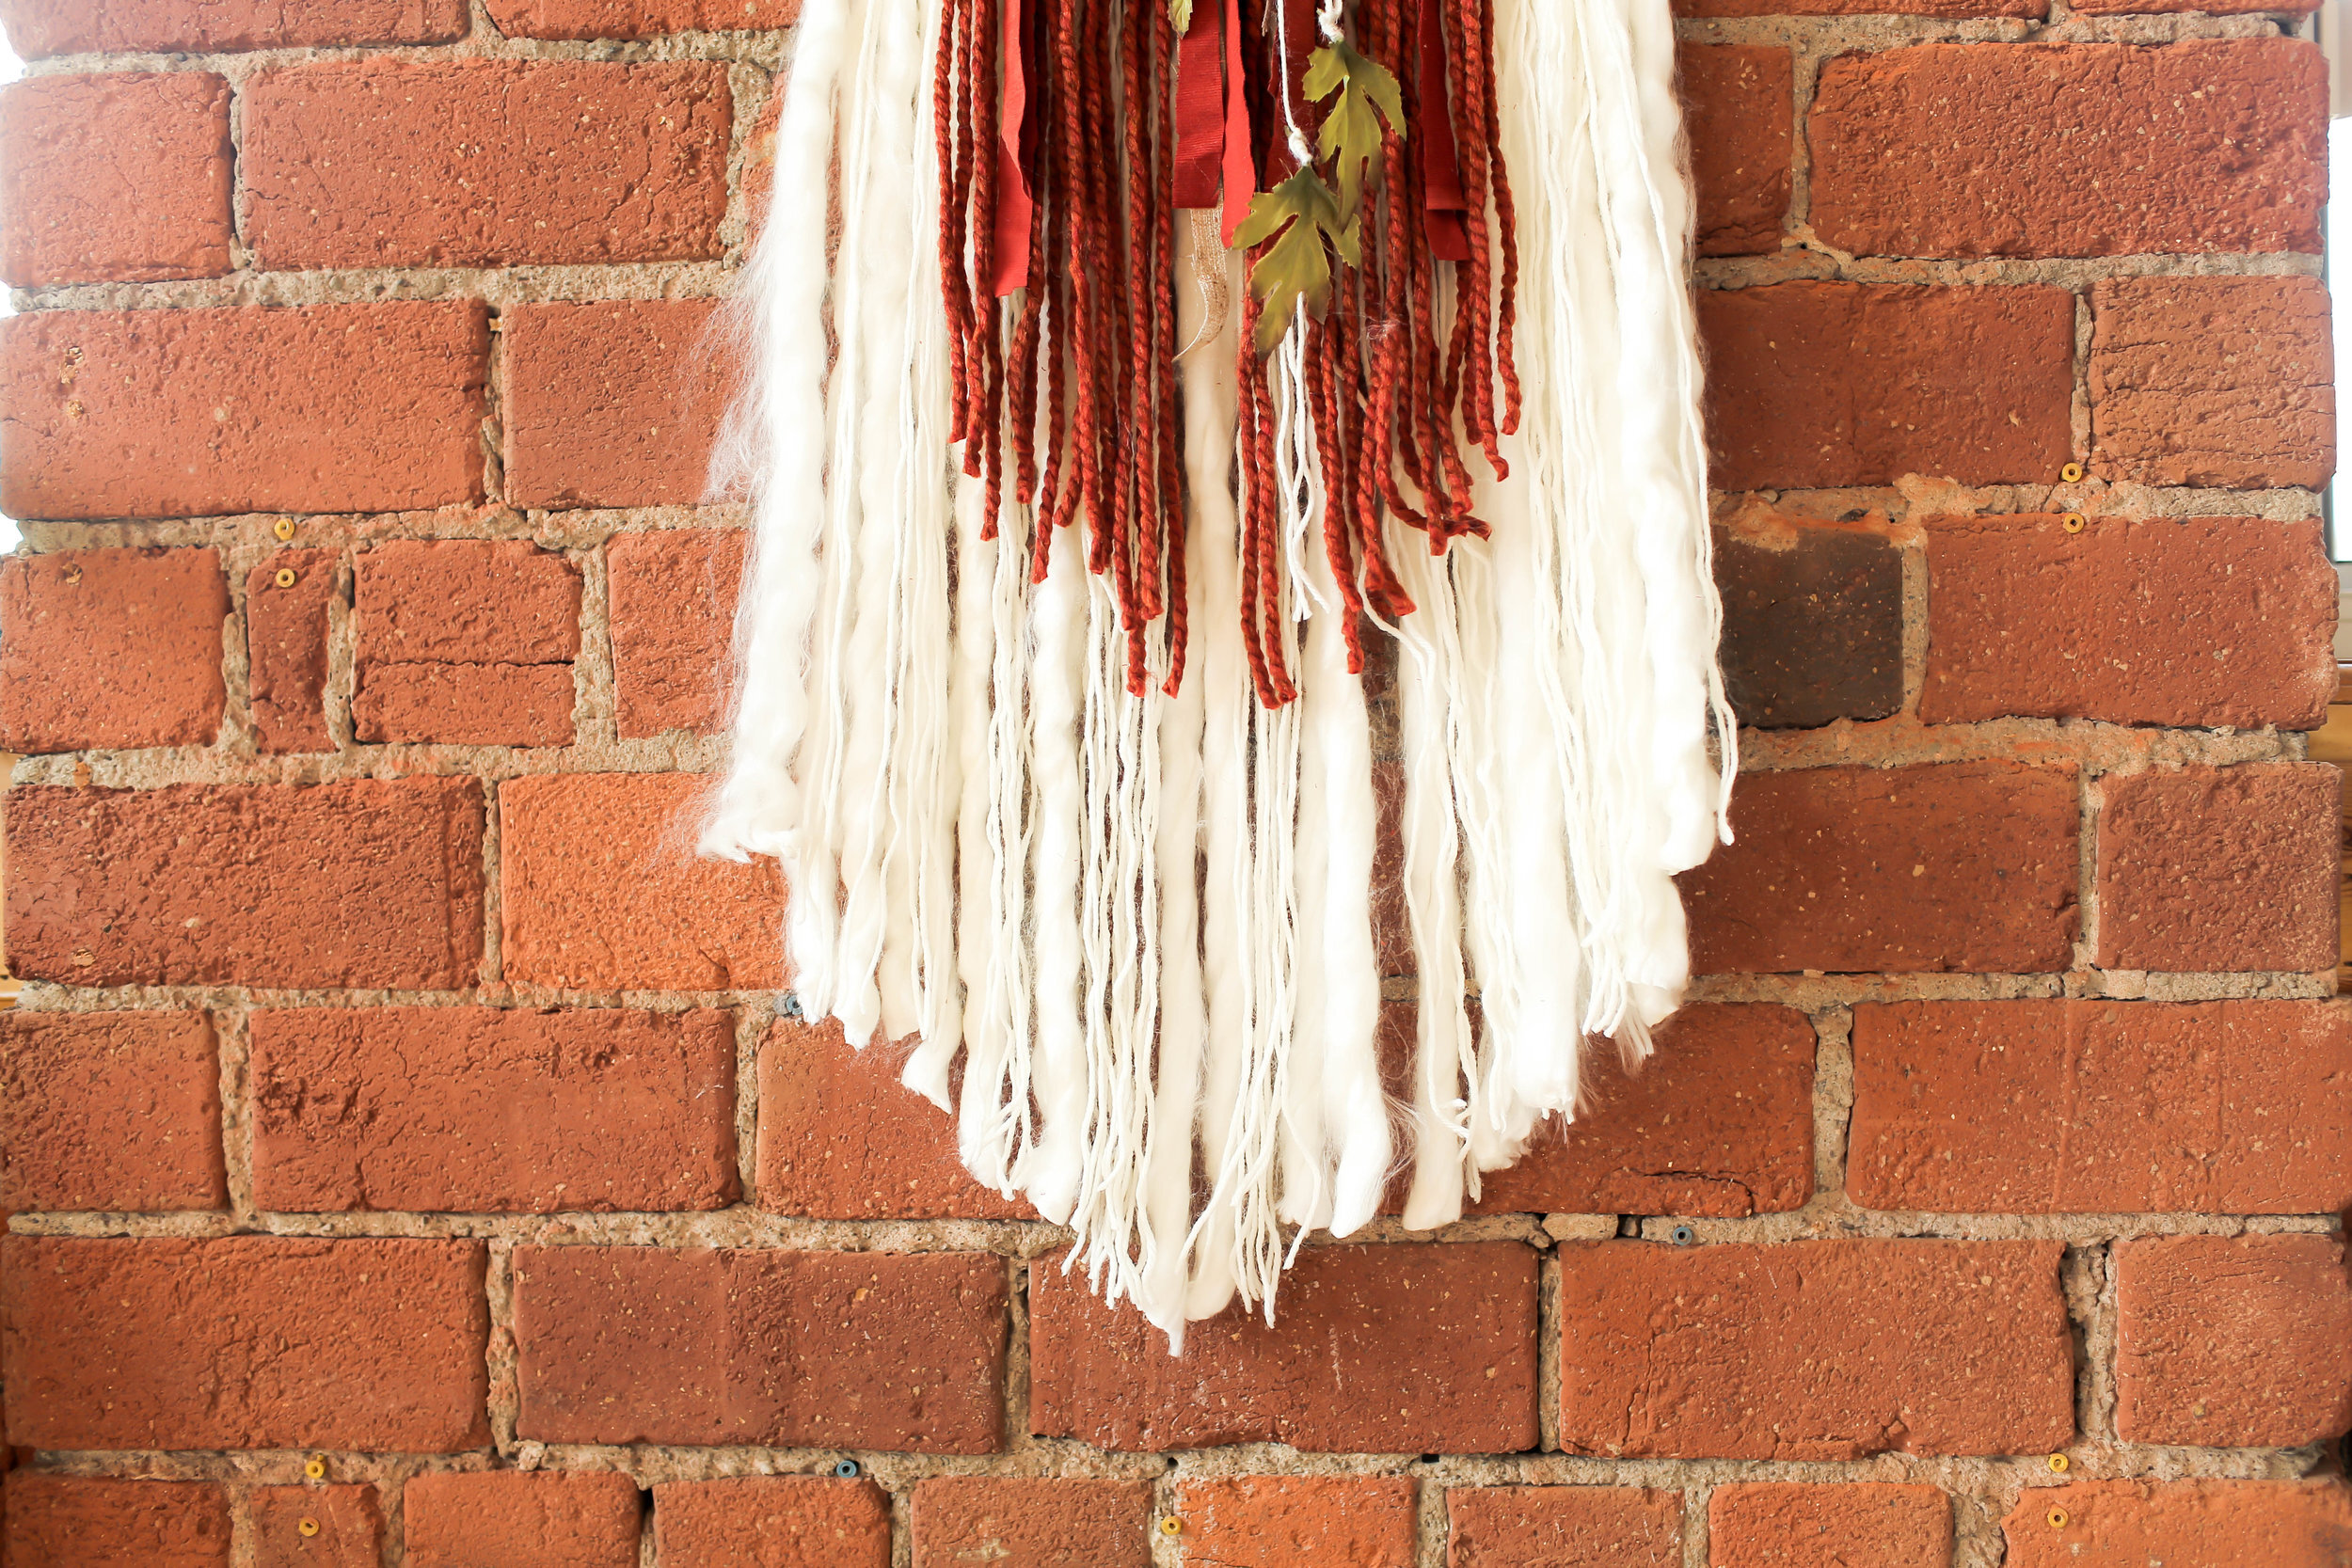
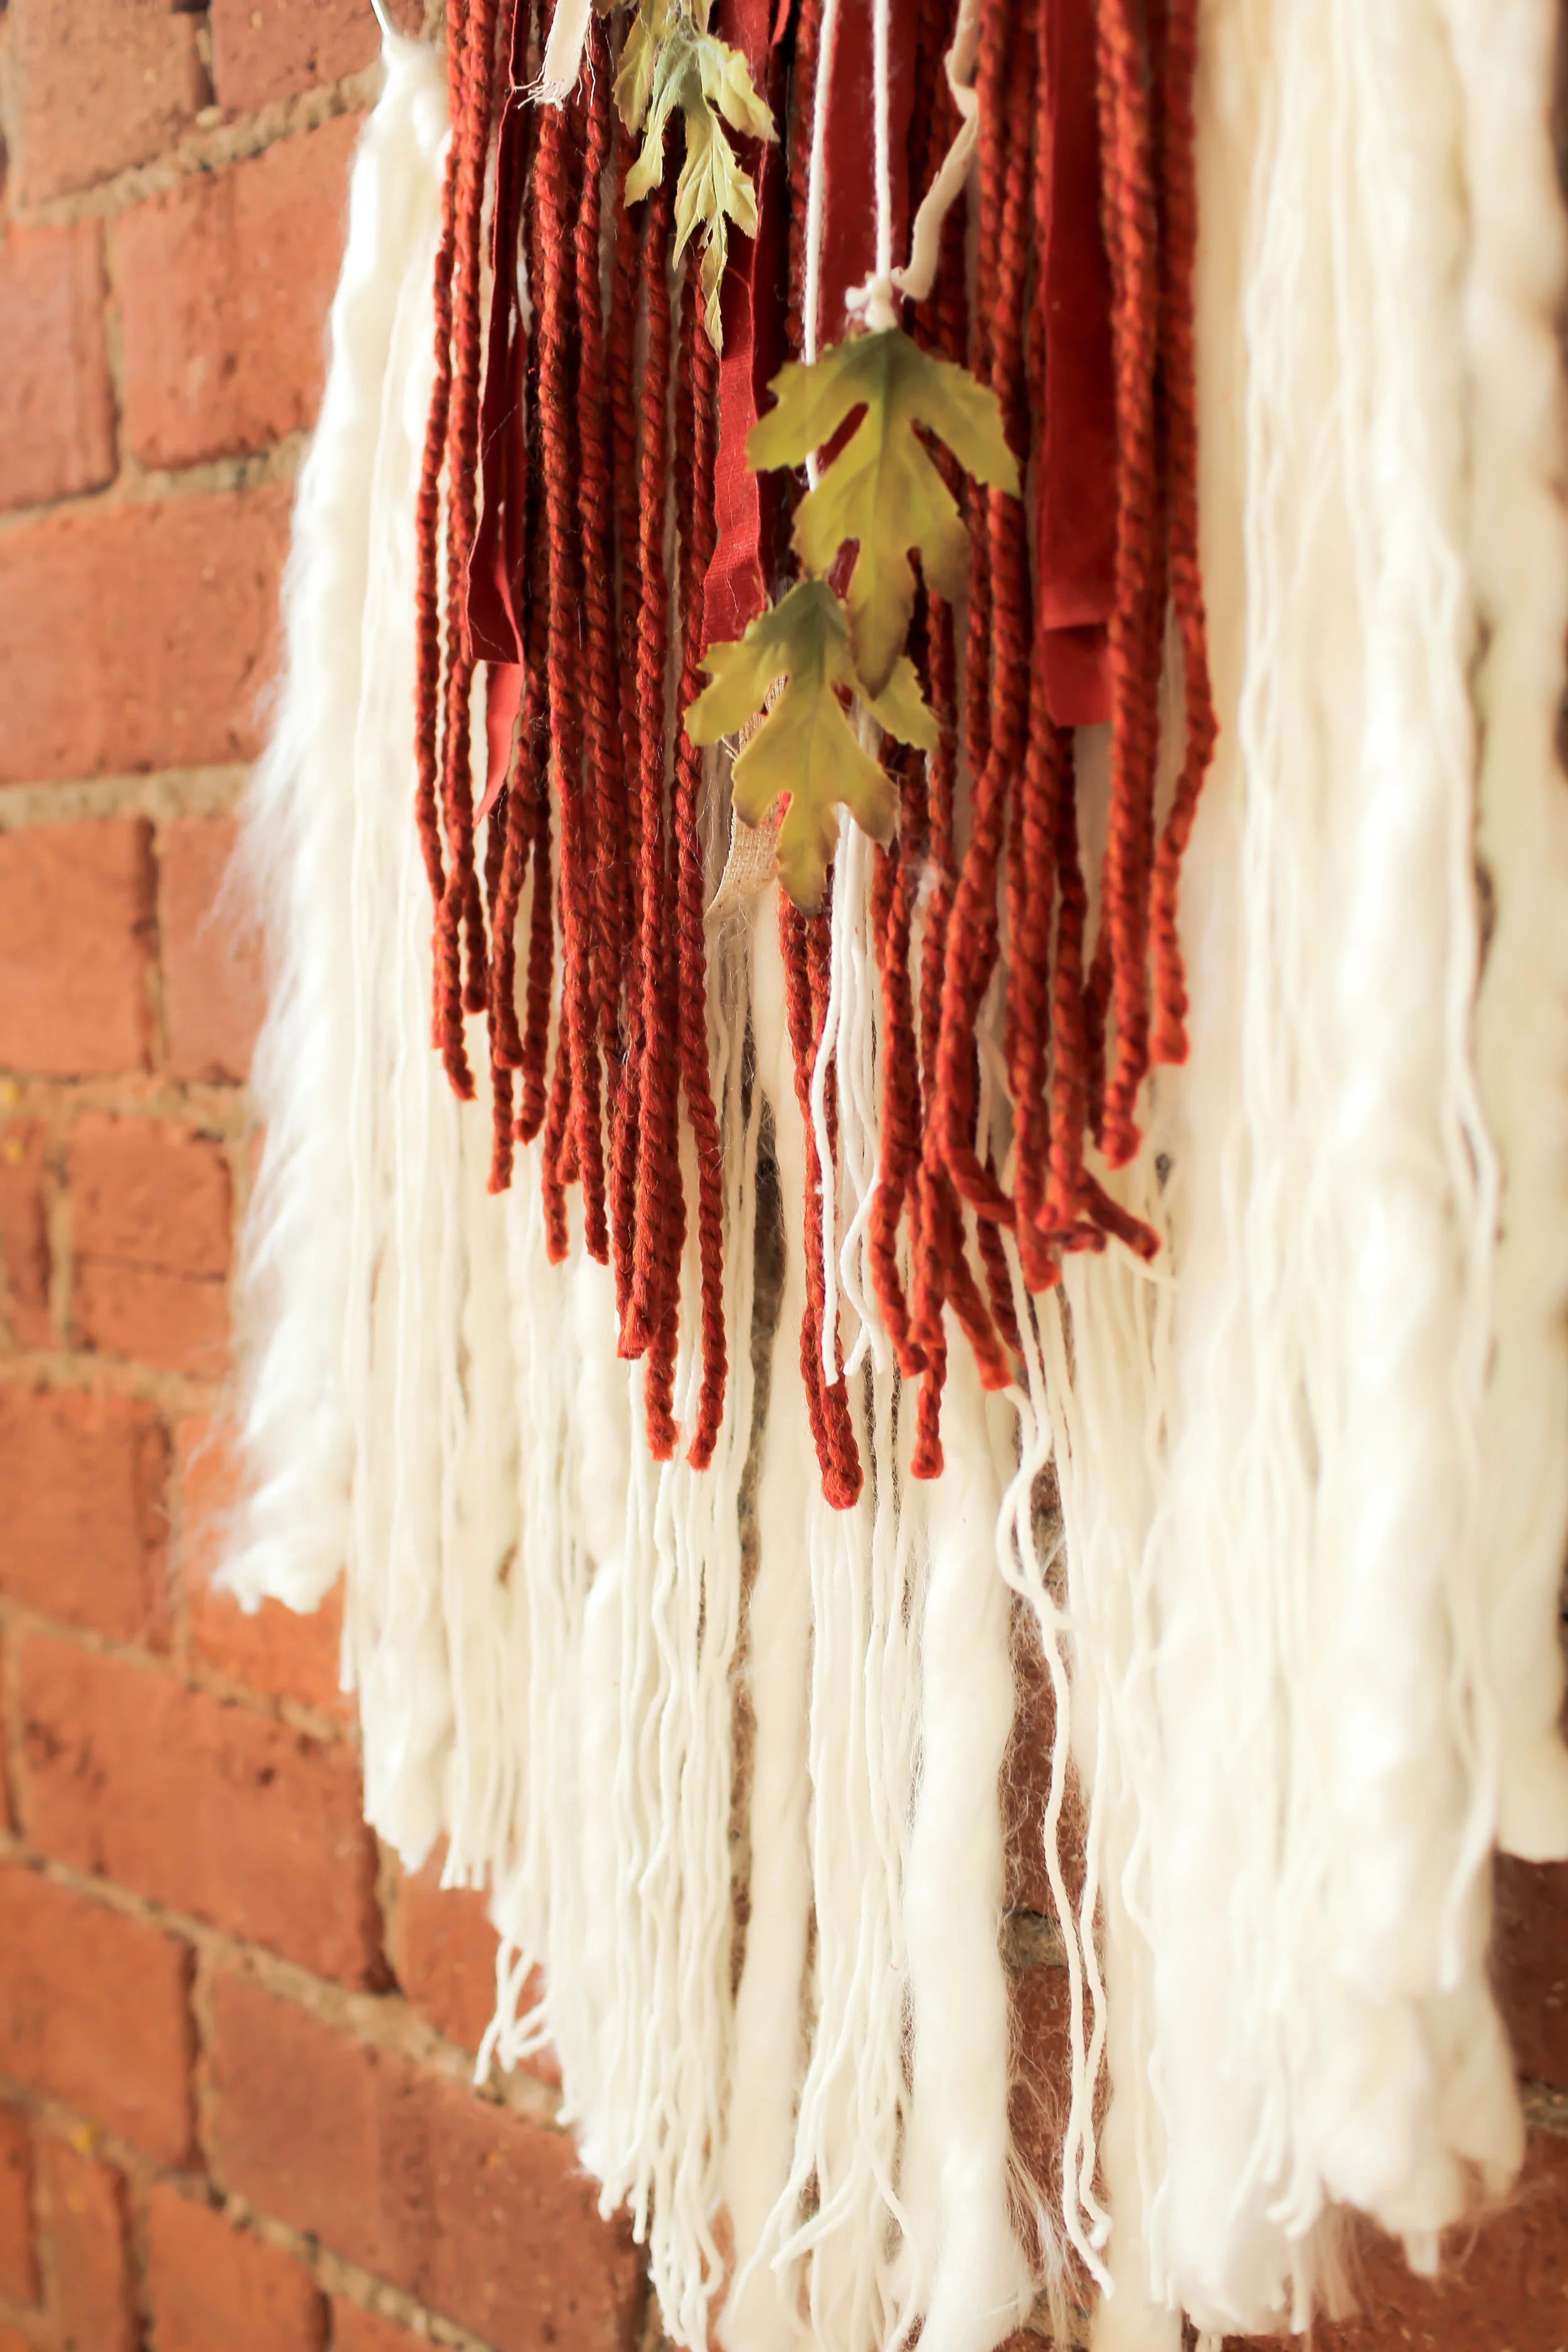
Next we cut various pieces of yarn and looped it through itself and let it hang. Don’t worry too much about the length, we’ll trim it later. Keep adding yarn until the bottom portion is full. Once that’s complete we have this gorgeous burnt orange yarn that we’re tying on the wooden dowel. We’re also tying on a strip of natural fibre in a similar fashion, and a piece of burnt orange fabric we had lying around. This is a good way to use up some scrap materials! We also had these faux leaves (real would be awesome too!) that we tied to yard and looped on the same way.


Next we decided to hang our boho ring décor so that we can easily trim the yarn, we hung it by another looped piece of yarn knotted to the top center of the ring. You could leave it as is, cut straight or any design you’d like- but we chose to do two V’s.
DIFFUSER AUTUMN SCENTS
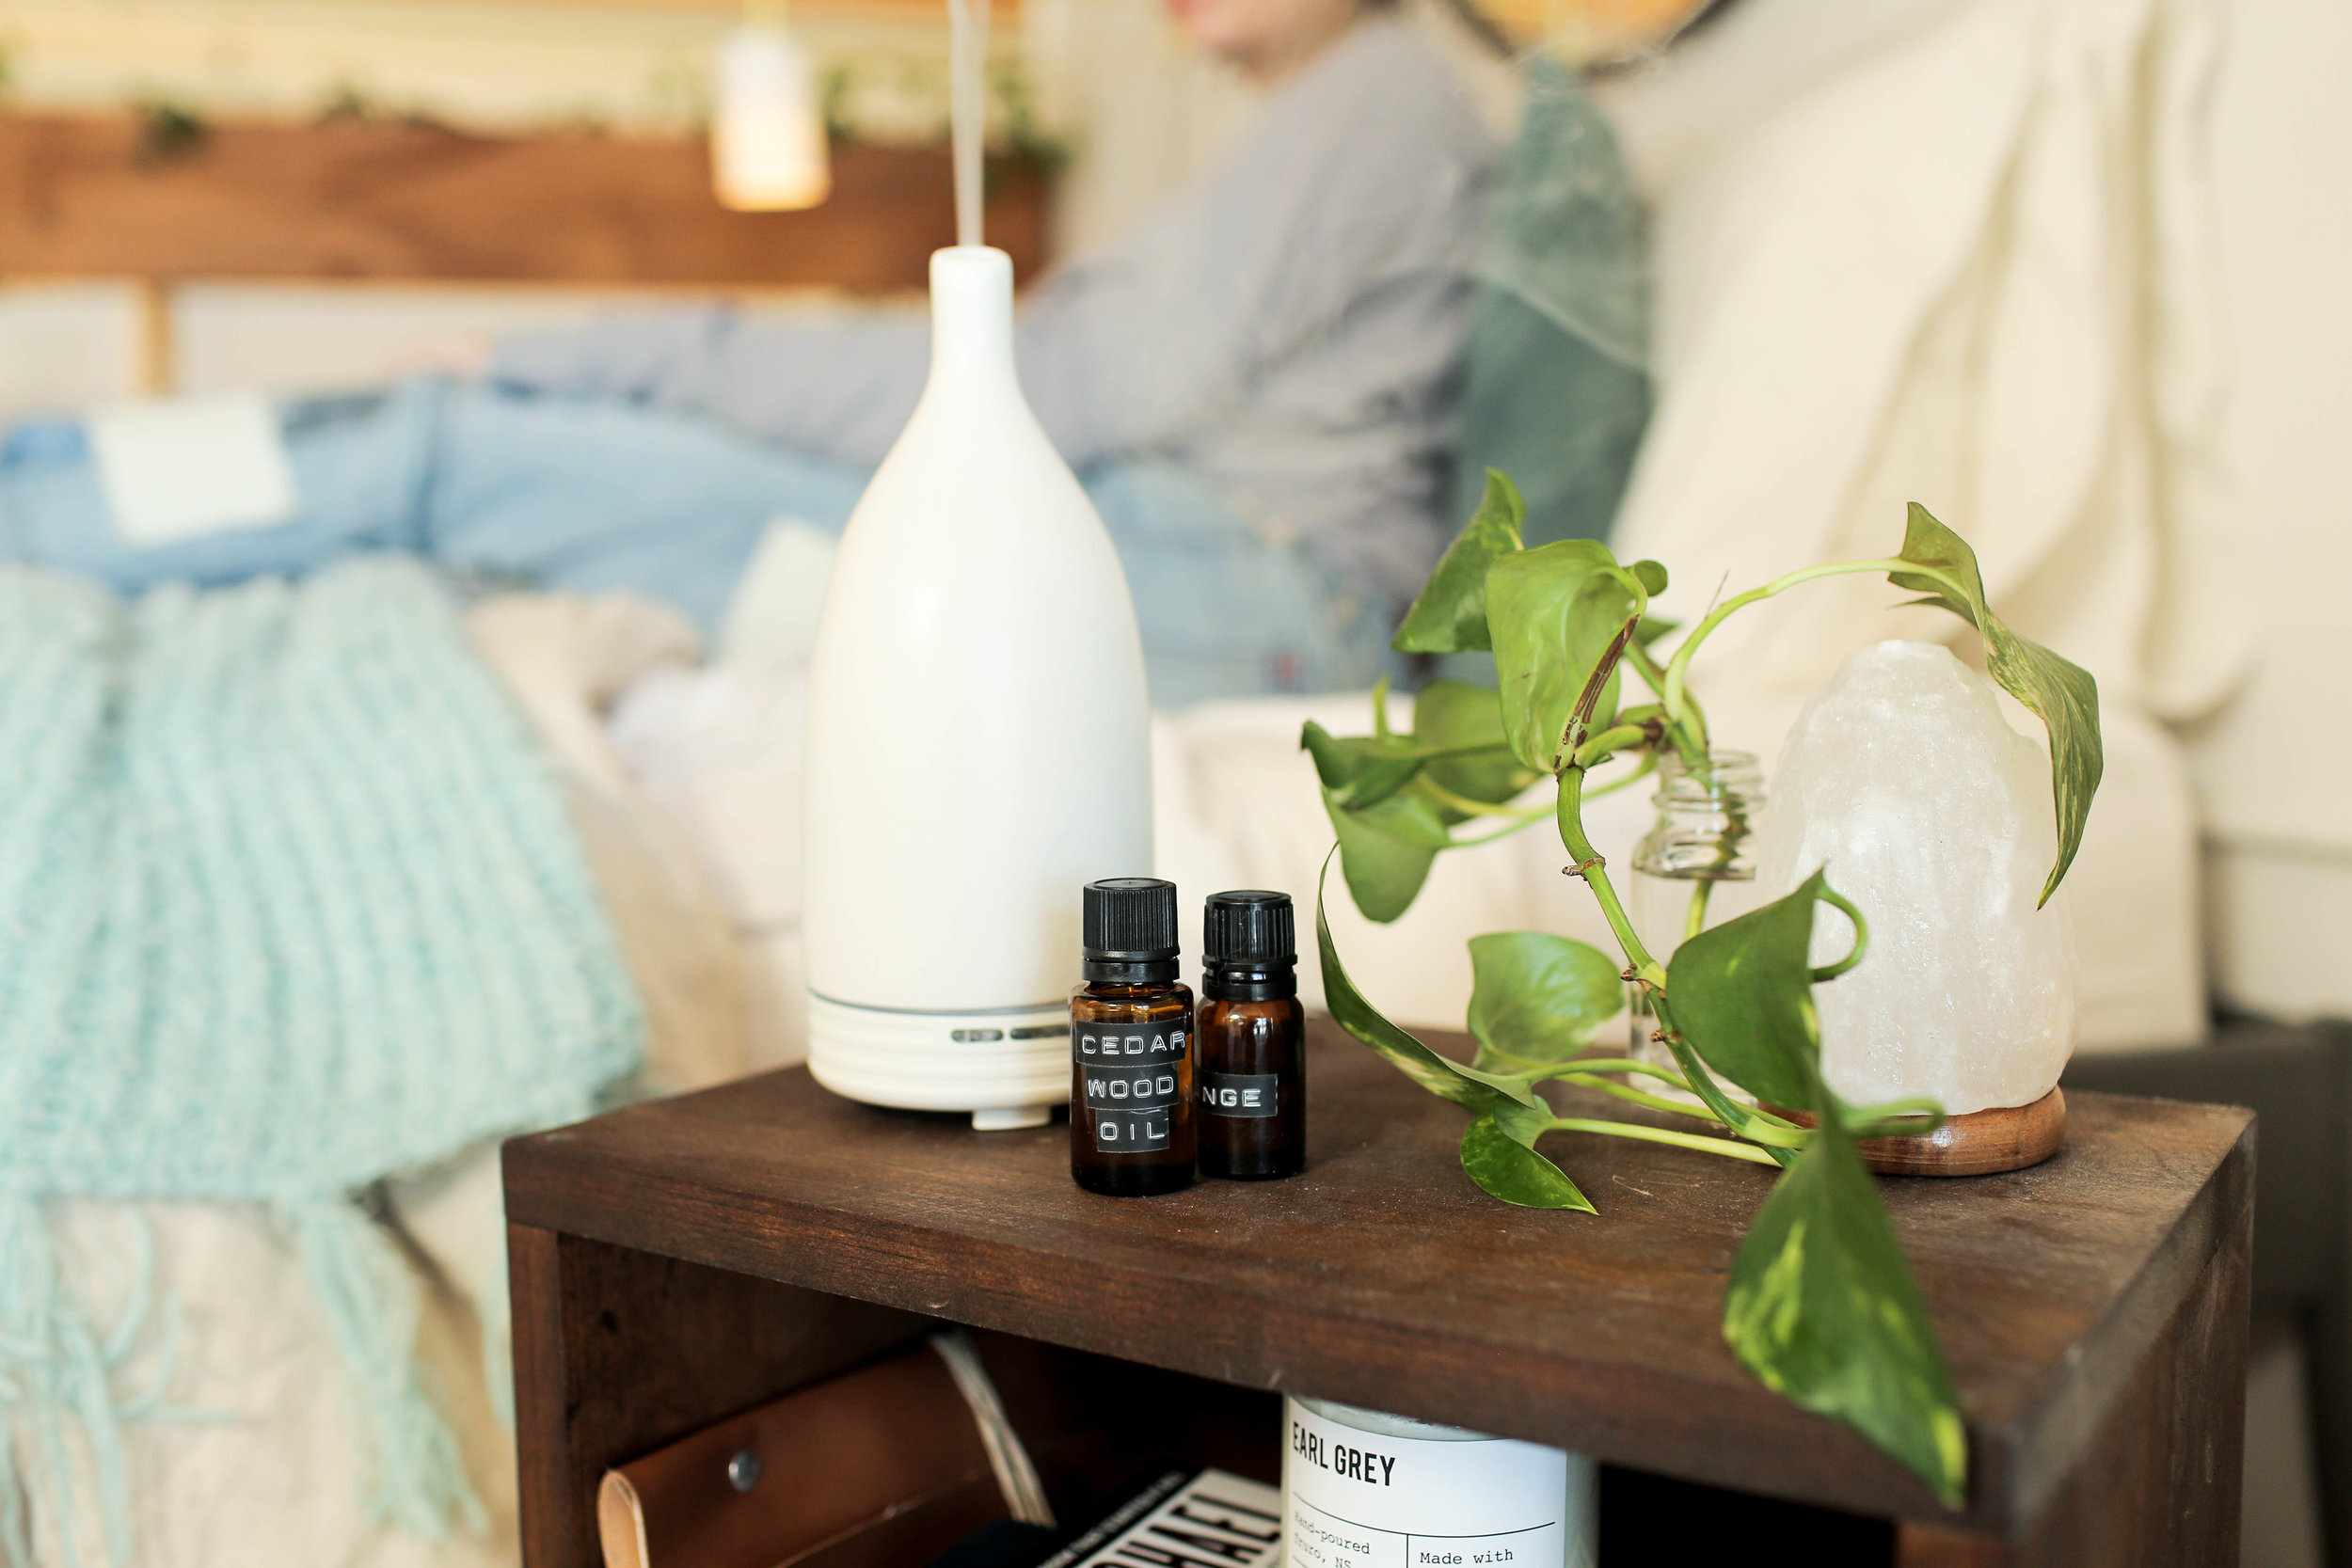
MATERIALS:
- Diffuser
- Orange Essential Oil
- Peppermint Essential Oil
- Cedarwood Essential Oil
- Vanilla Essential Oil
- Clove Essential Oil
- Cinnamon Cassia Essential Oil
Next, we have some incredible suggestions for essential oil combos that you can add into your diffuser.
Our first scent is a combination of orange, peppermint, and cedarwood scents. We used three drops of orange, three drops of peppermint, and one drop of cedarwood essential oils. We’re using 3 drops of orange, 3 drops of peppermint, and 1 drop of cedarwood. This created a lovely fresh woodsy scent.
Our second autumnal combination uses Vanilla, clove and cinnamon cassia essential oils. This scent uses six drops of vanilla, two drops of clove, and one drop of cinnamon/ cassia. This creates a nice spicy and warm scent.
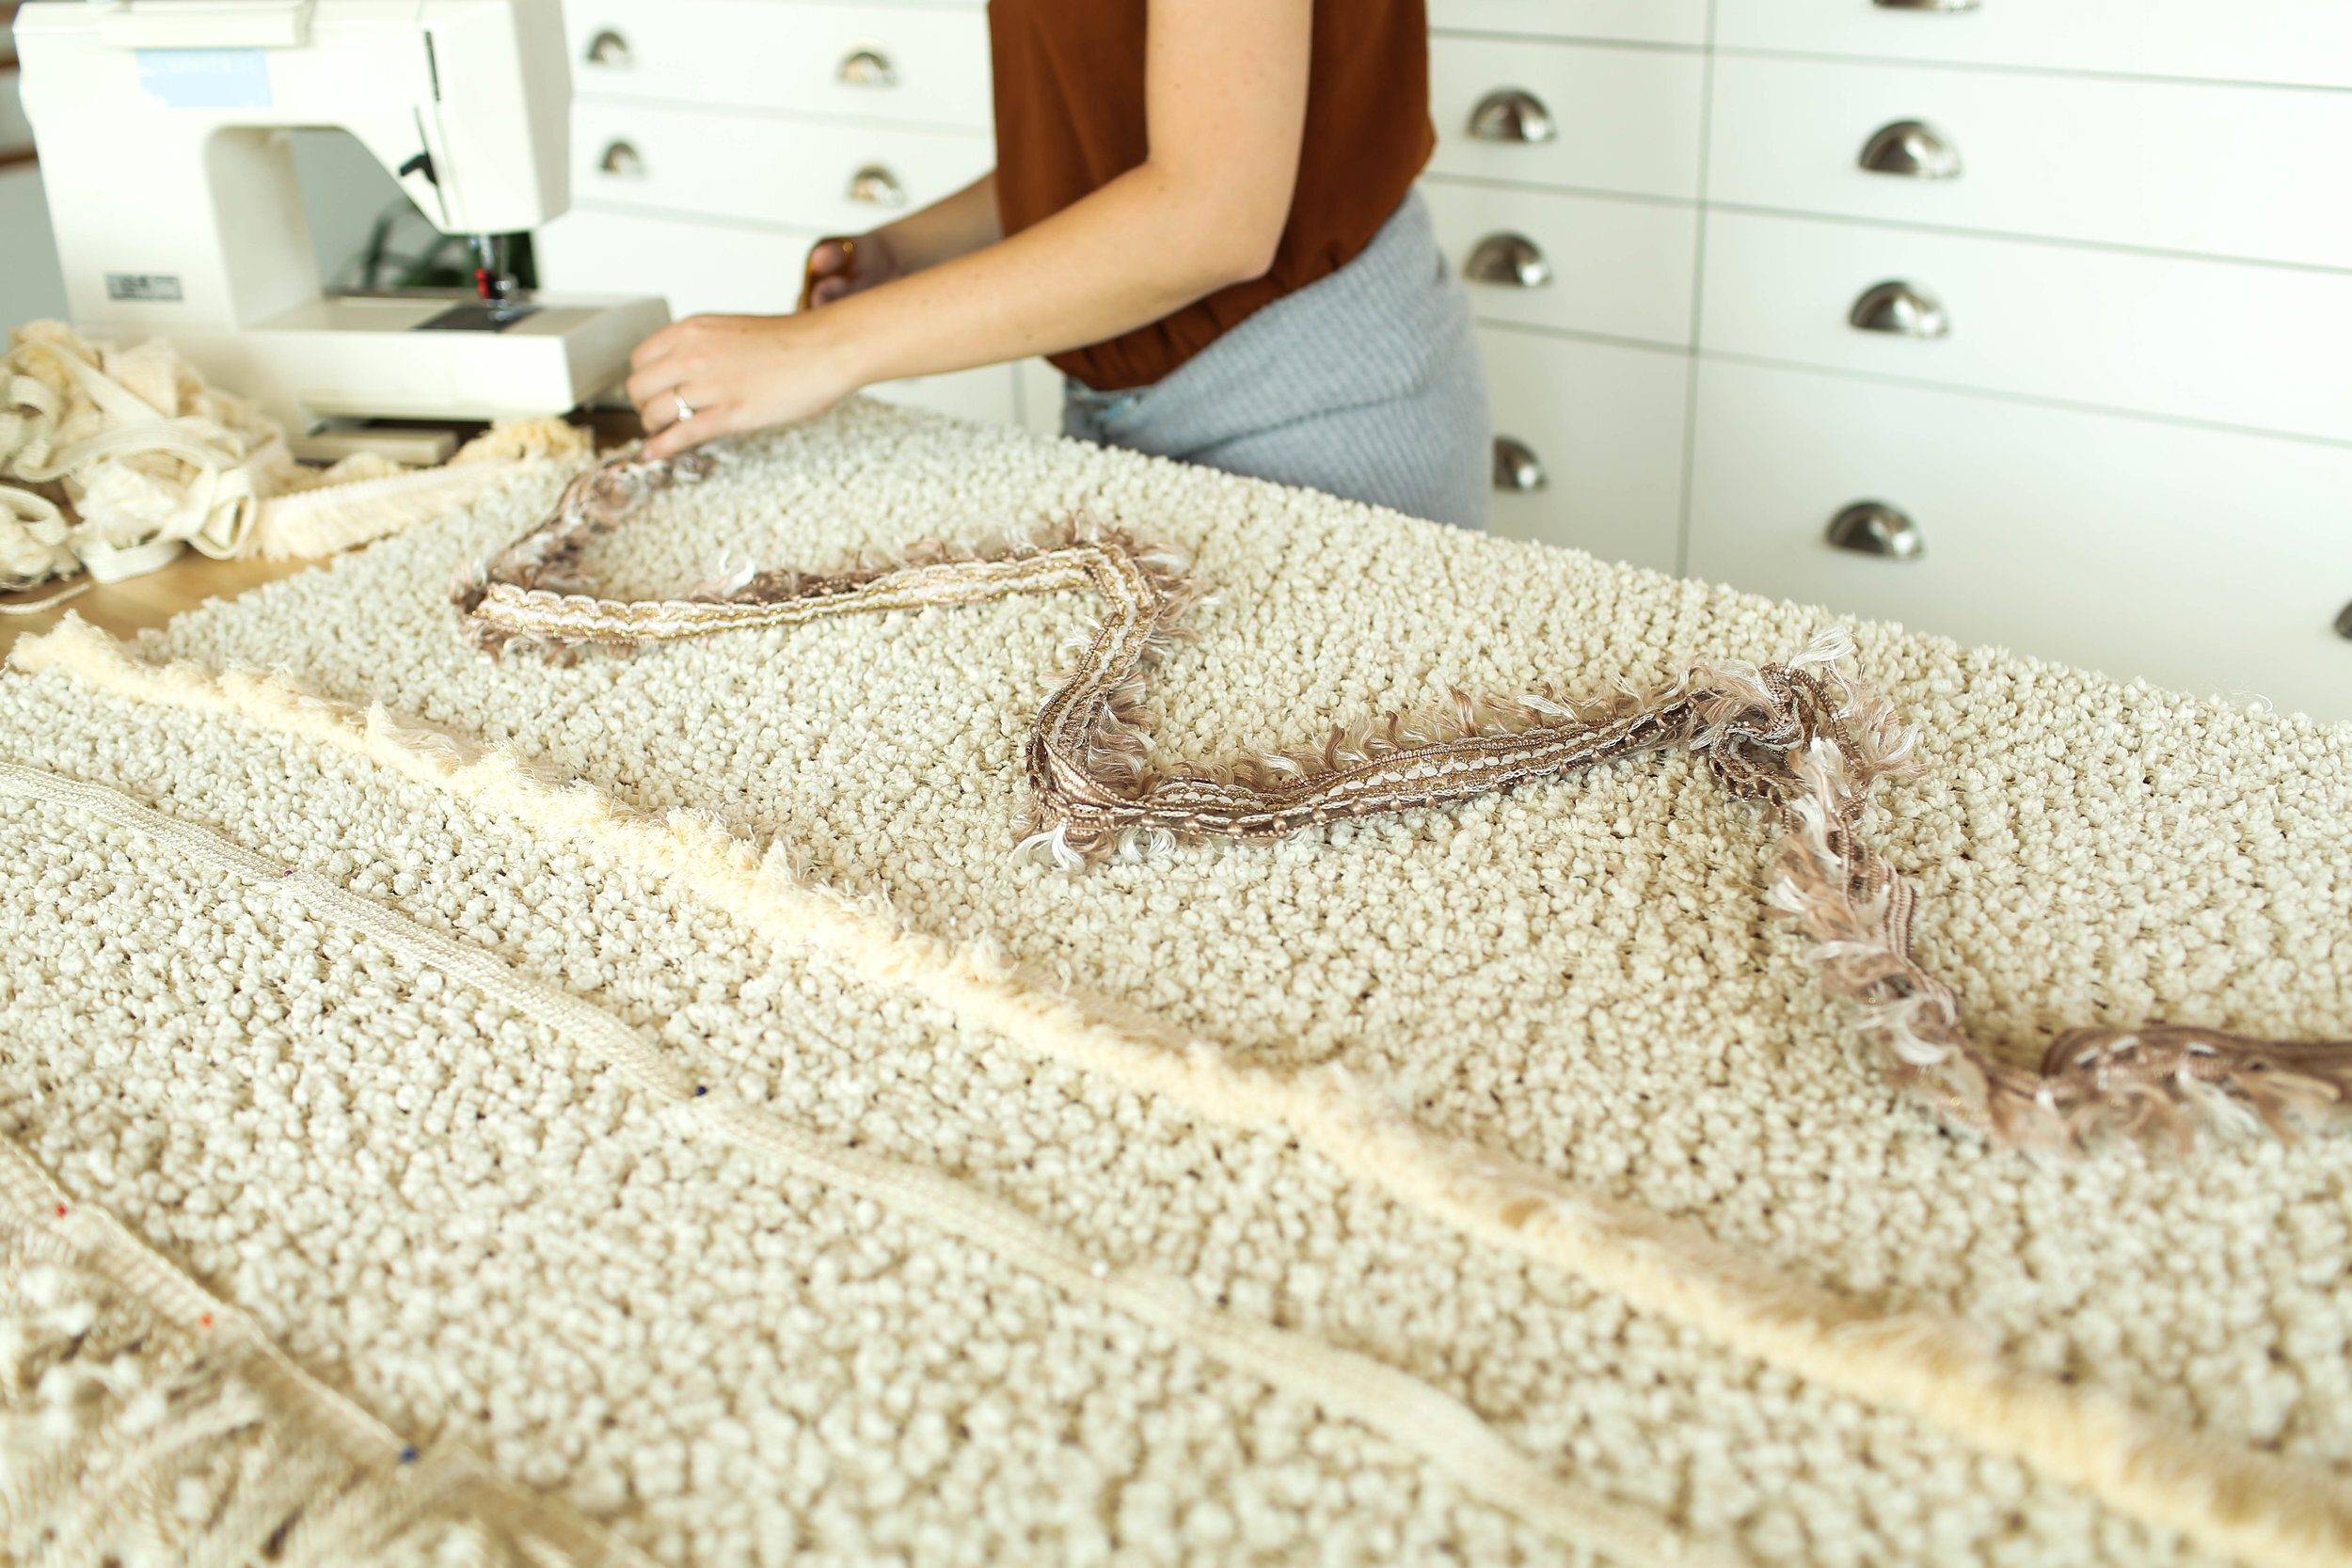
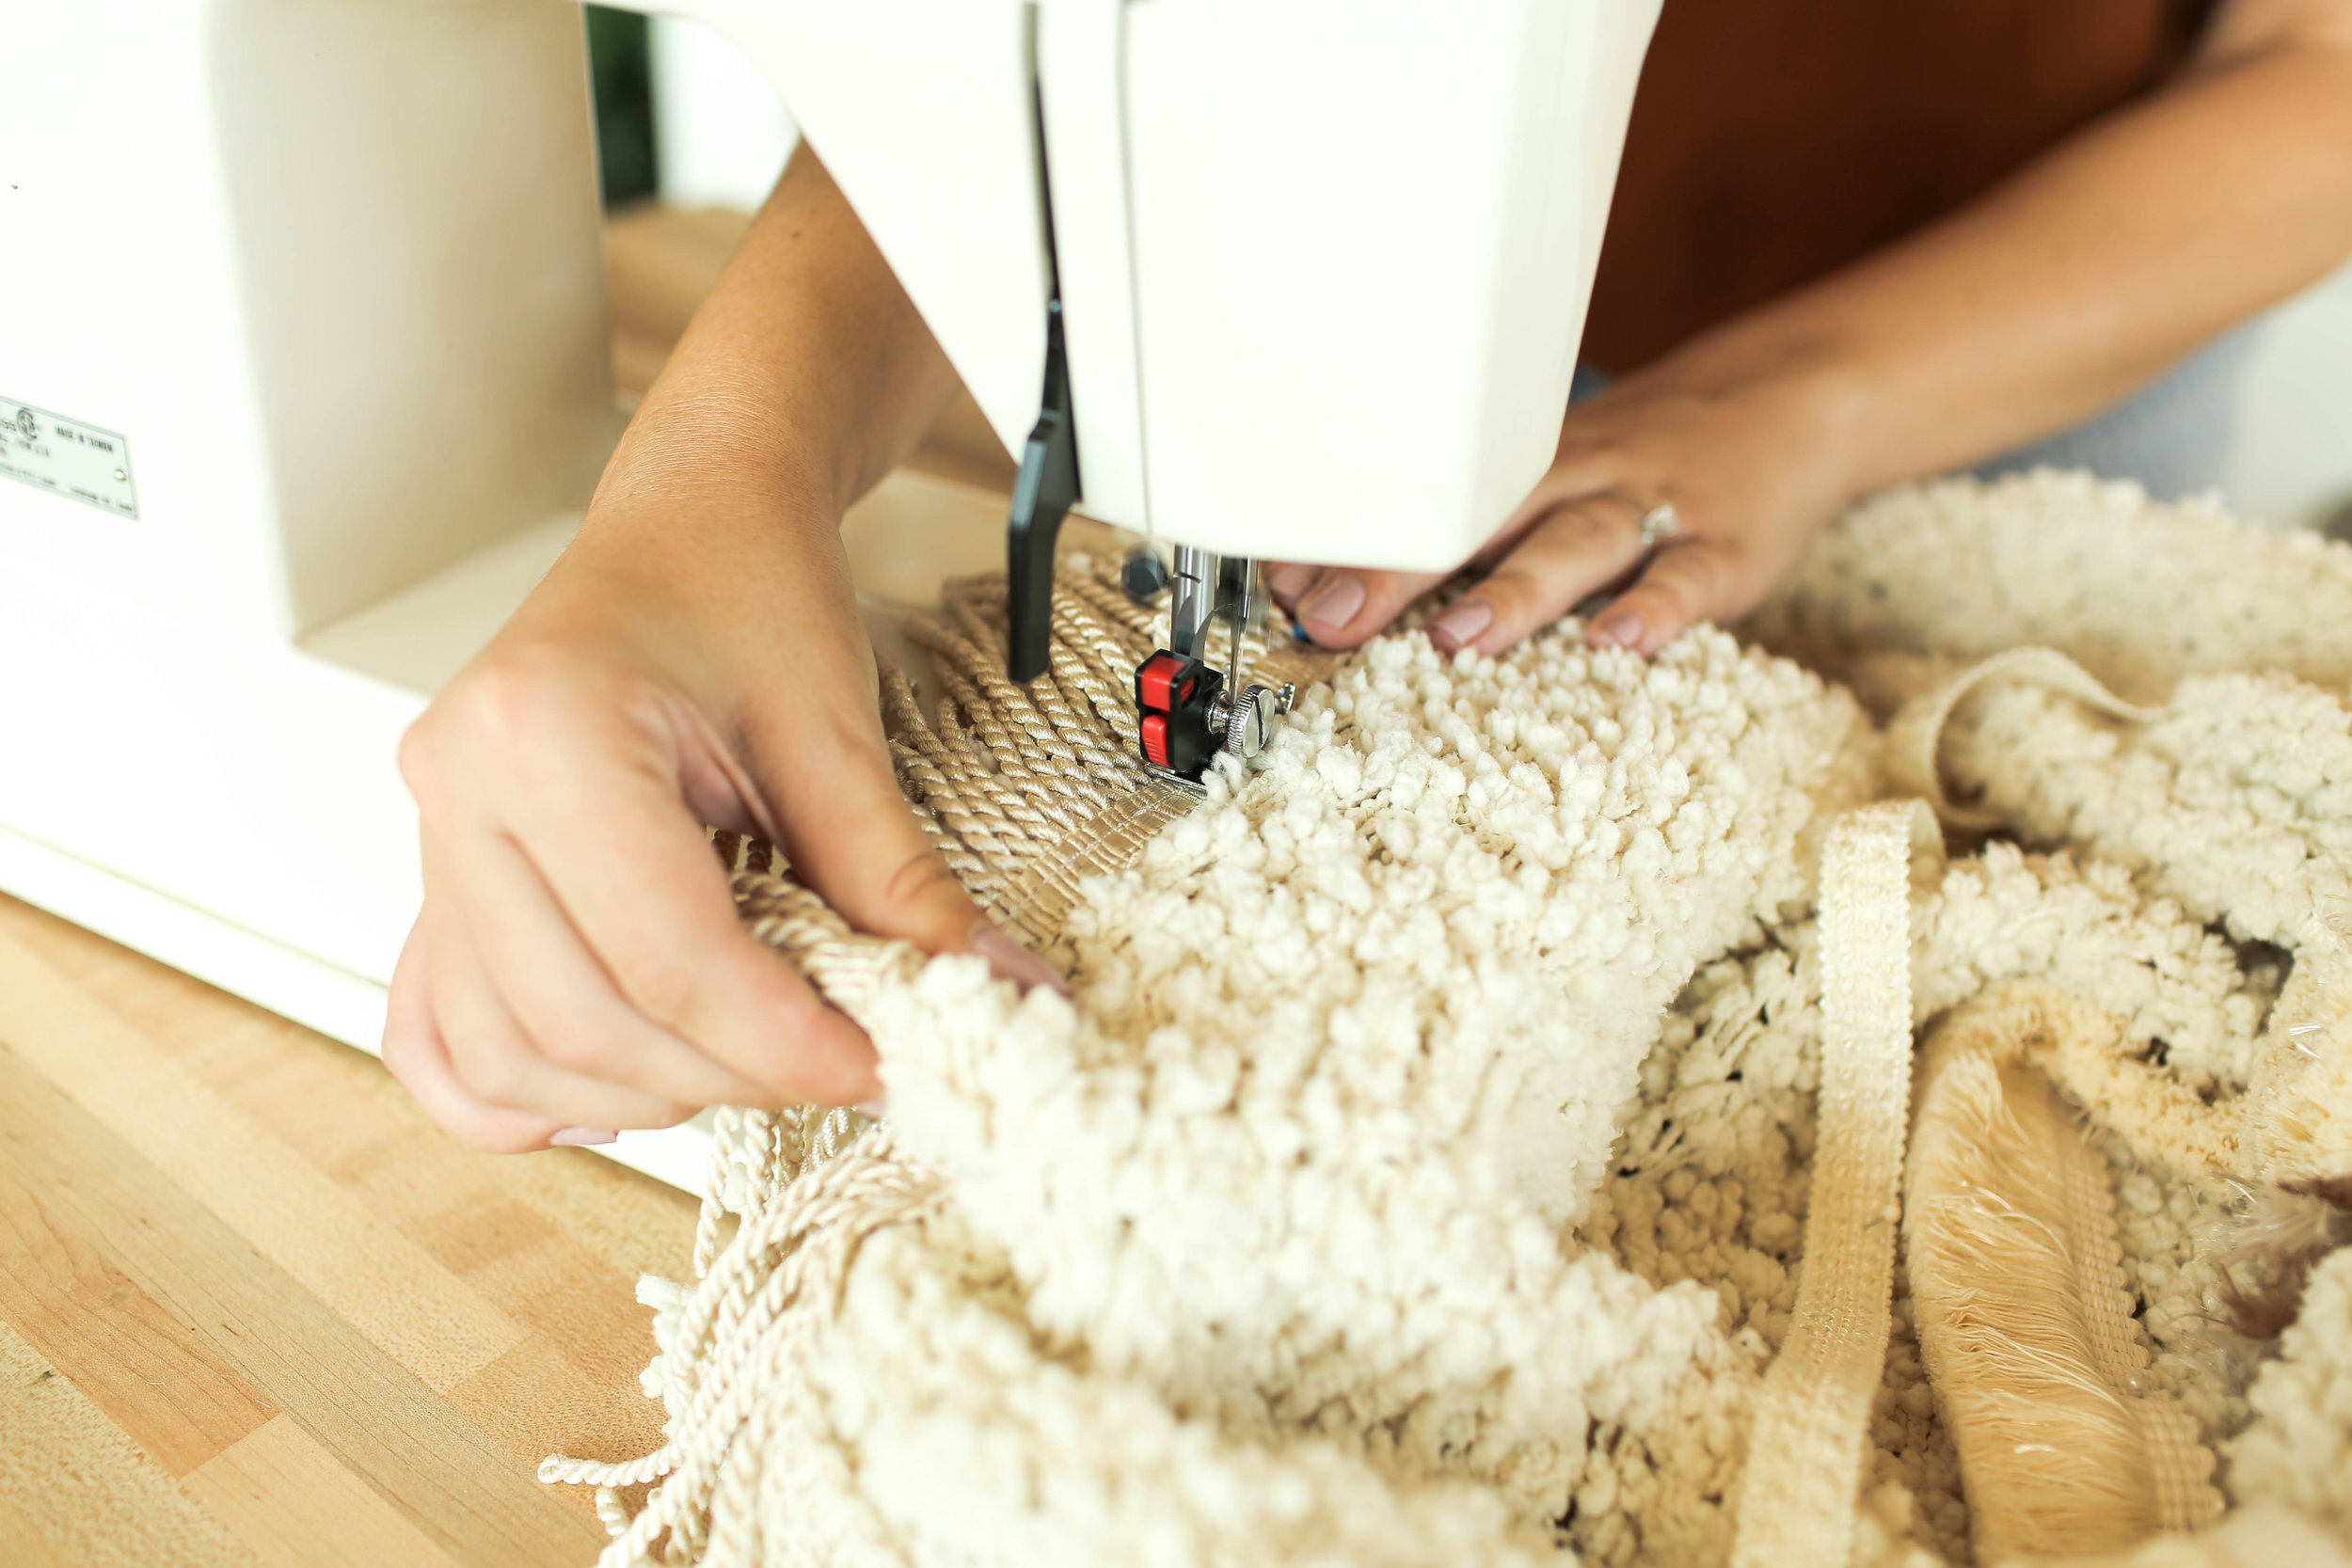
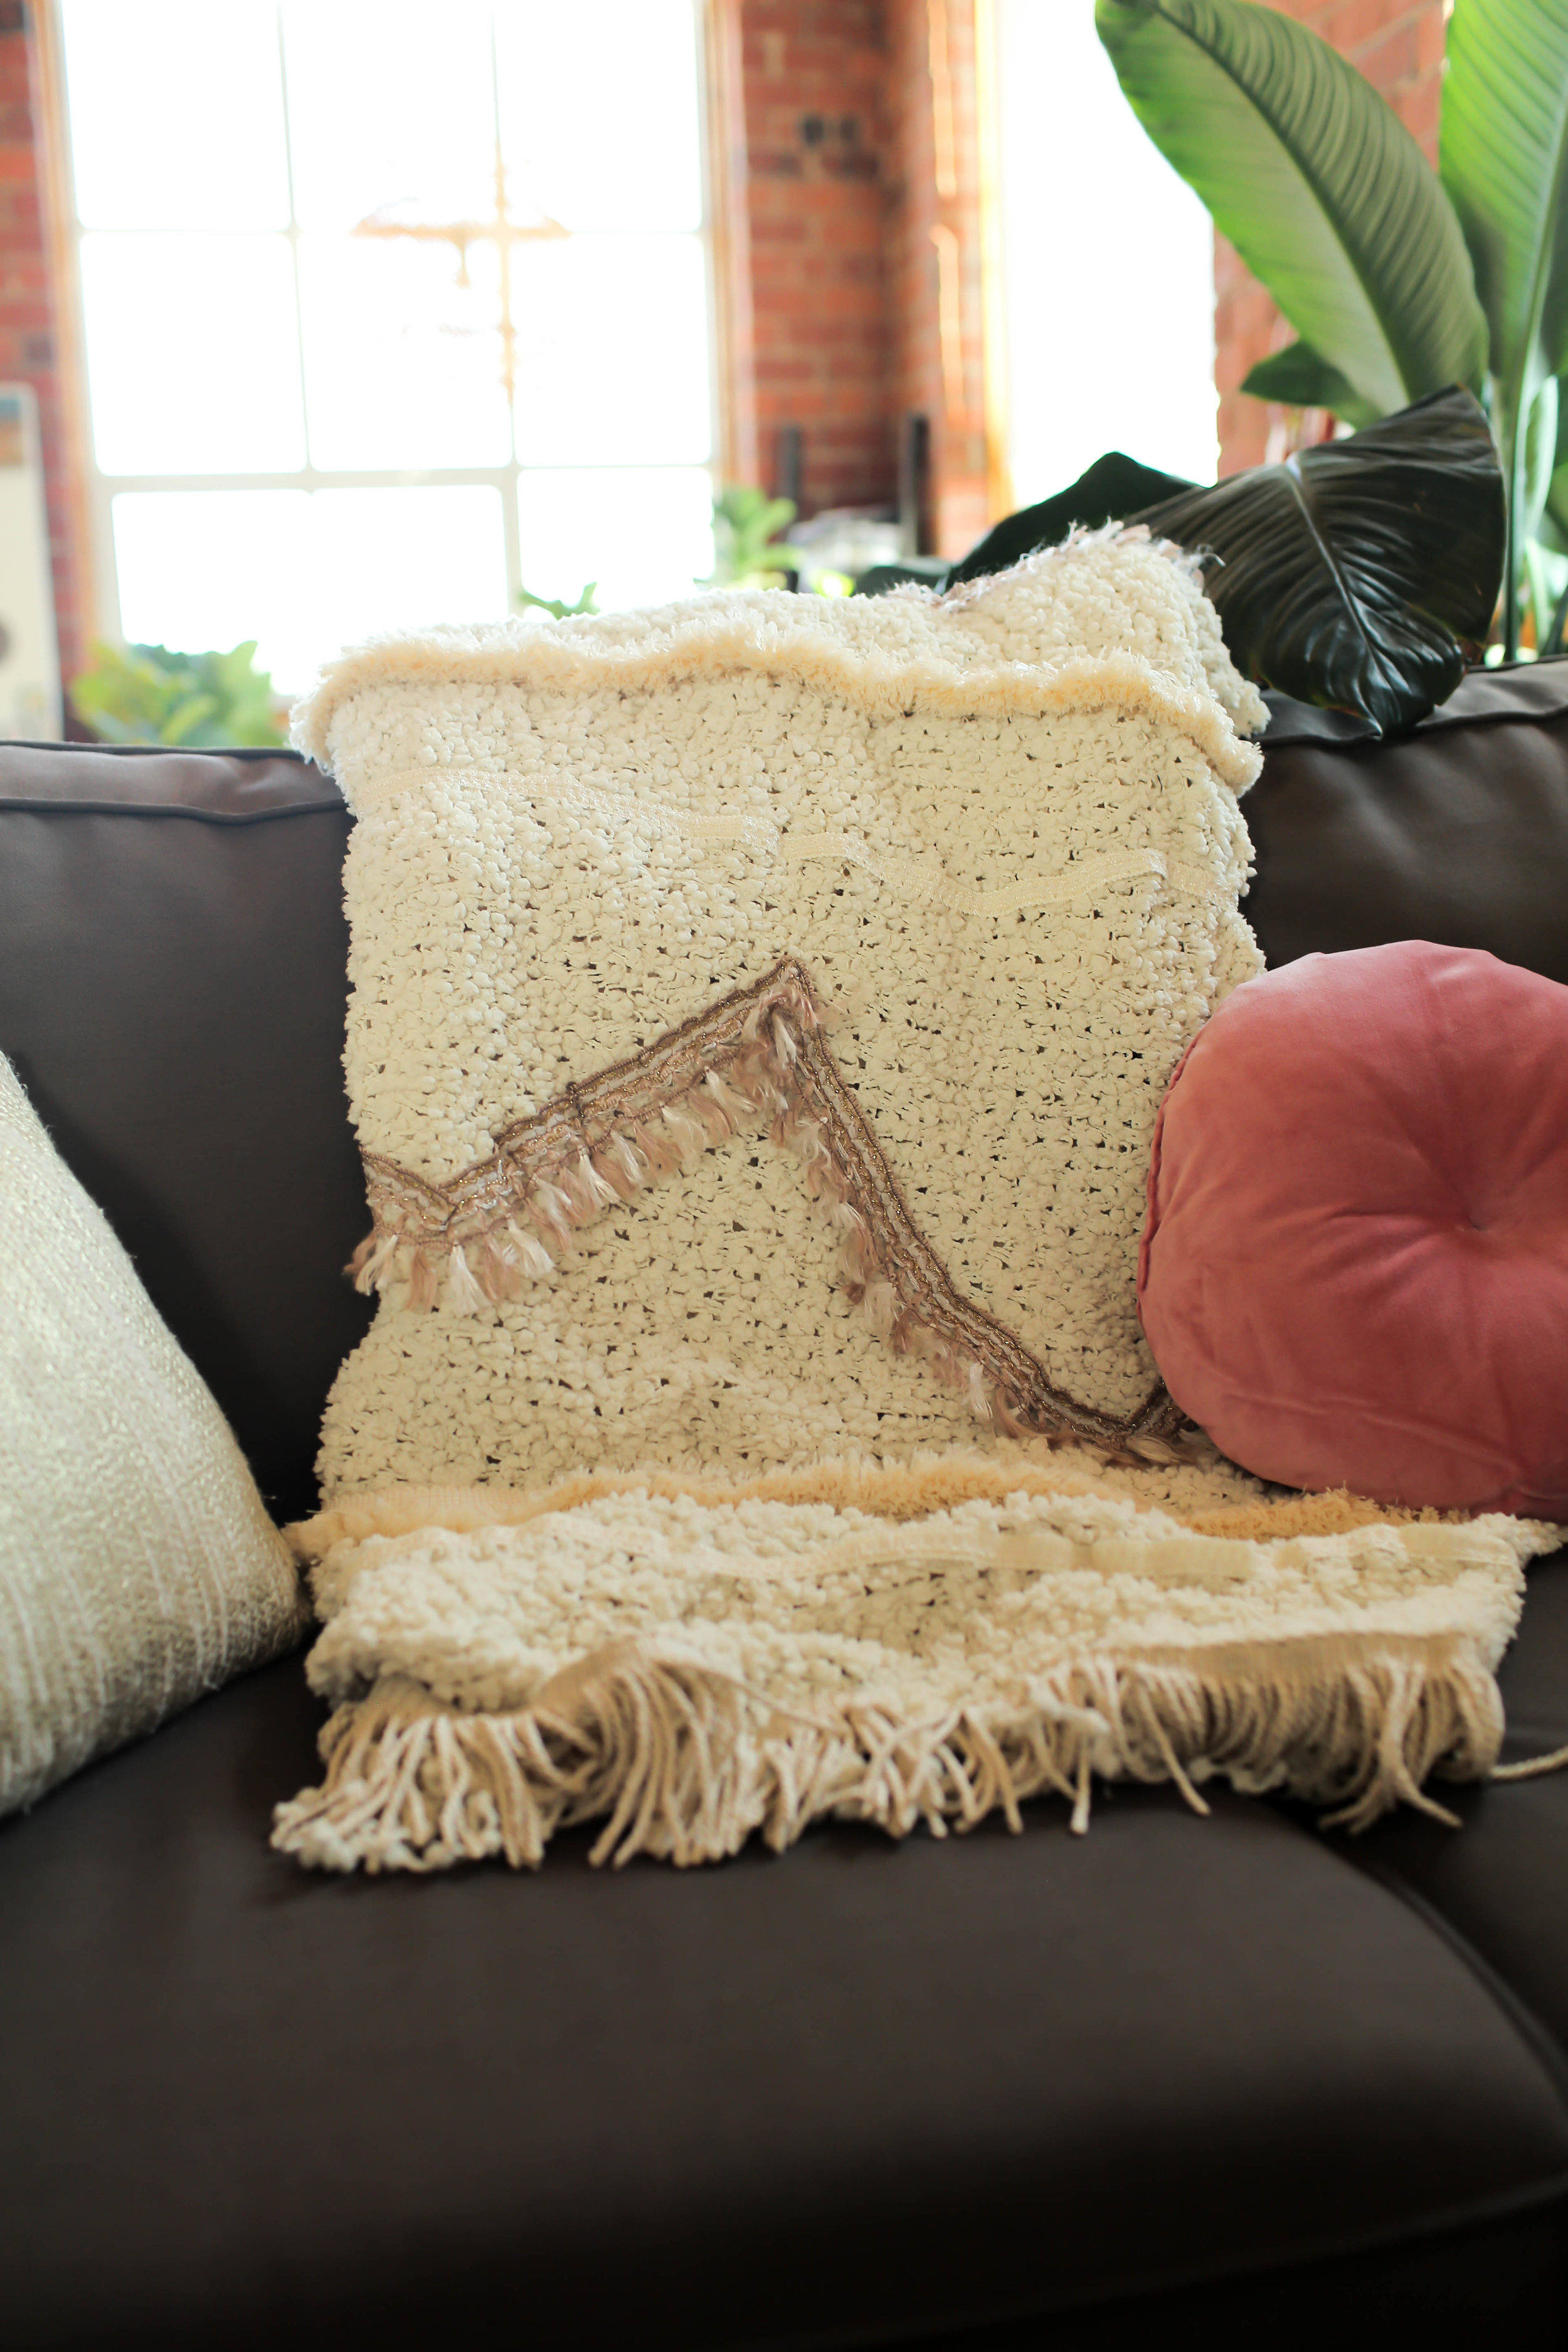
COZY FALL BLANKET UPCYCLE

This next DIY is an amazing way to upcycle a blanket that you already have, and make it way more chic and cozy. This one is definitely anthropology inspired and totally adorable.
MATERIALS:
- Old, new, or thrifted blanket
- Various trim

For this DIY you can use an old, new, or thrifted blanket. We picked up varying type of fringe and trim from our local fabric store. Next you can just start pinning the fringe and trim where you would like it to go. We alternated types of trim and the distance apart they were from each other – and used a ruler to make sure they were even all the way across. For this next trim we’re doing a zig-zag pattern across the blanket.

When you’re done roughing in some or all of the trim, take it to the sewing machine and sew one or two lines along the trim (depending on how wide it is).

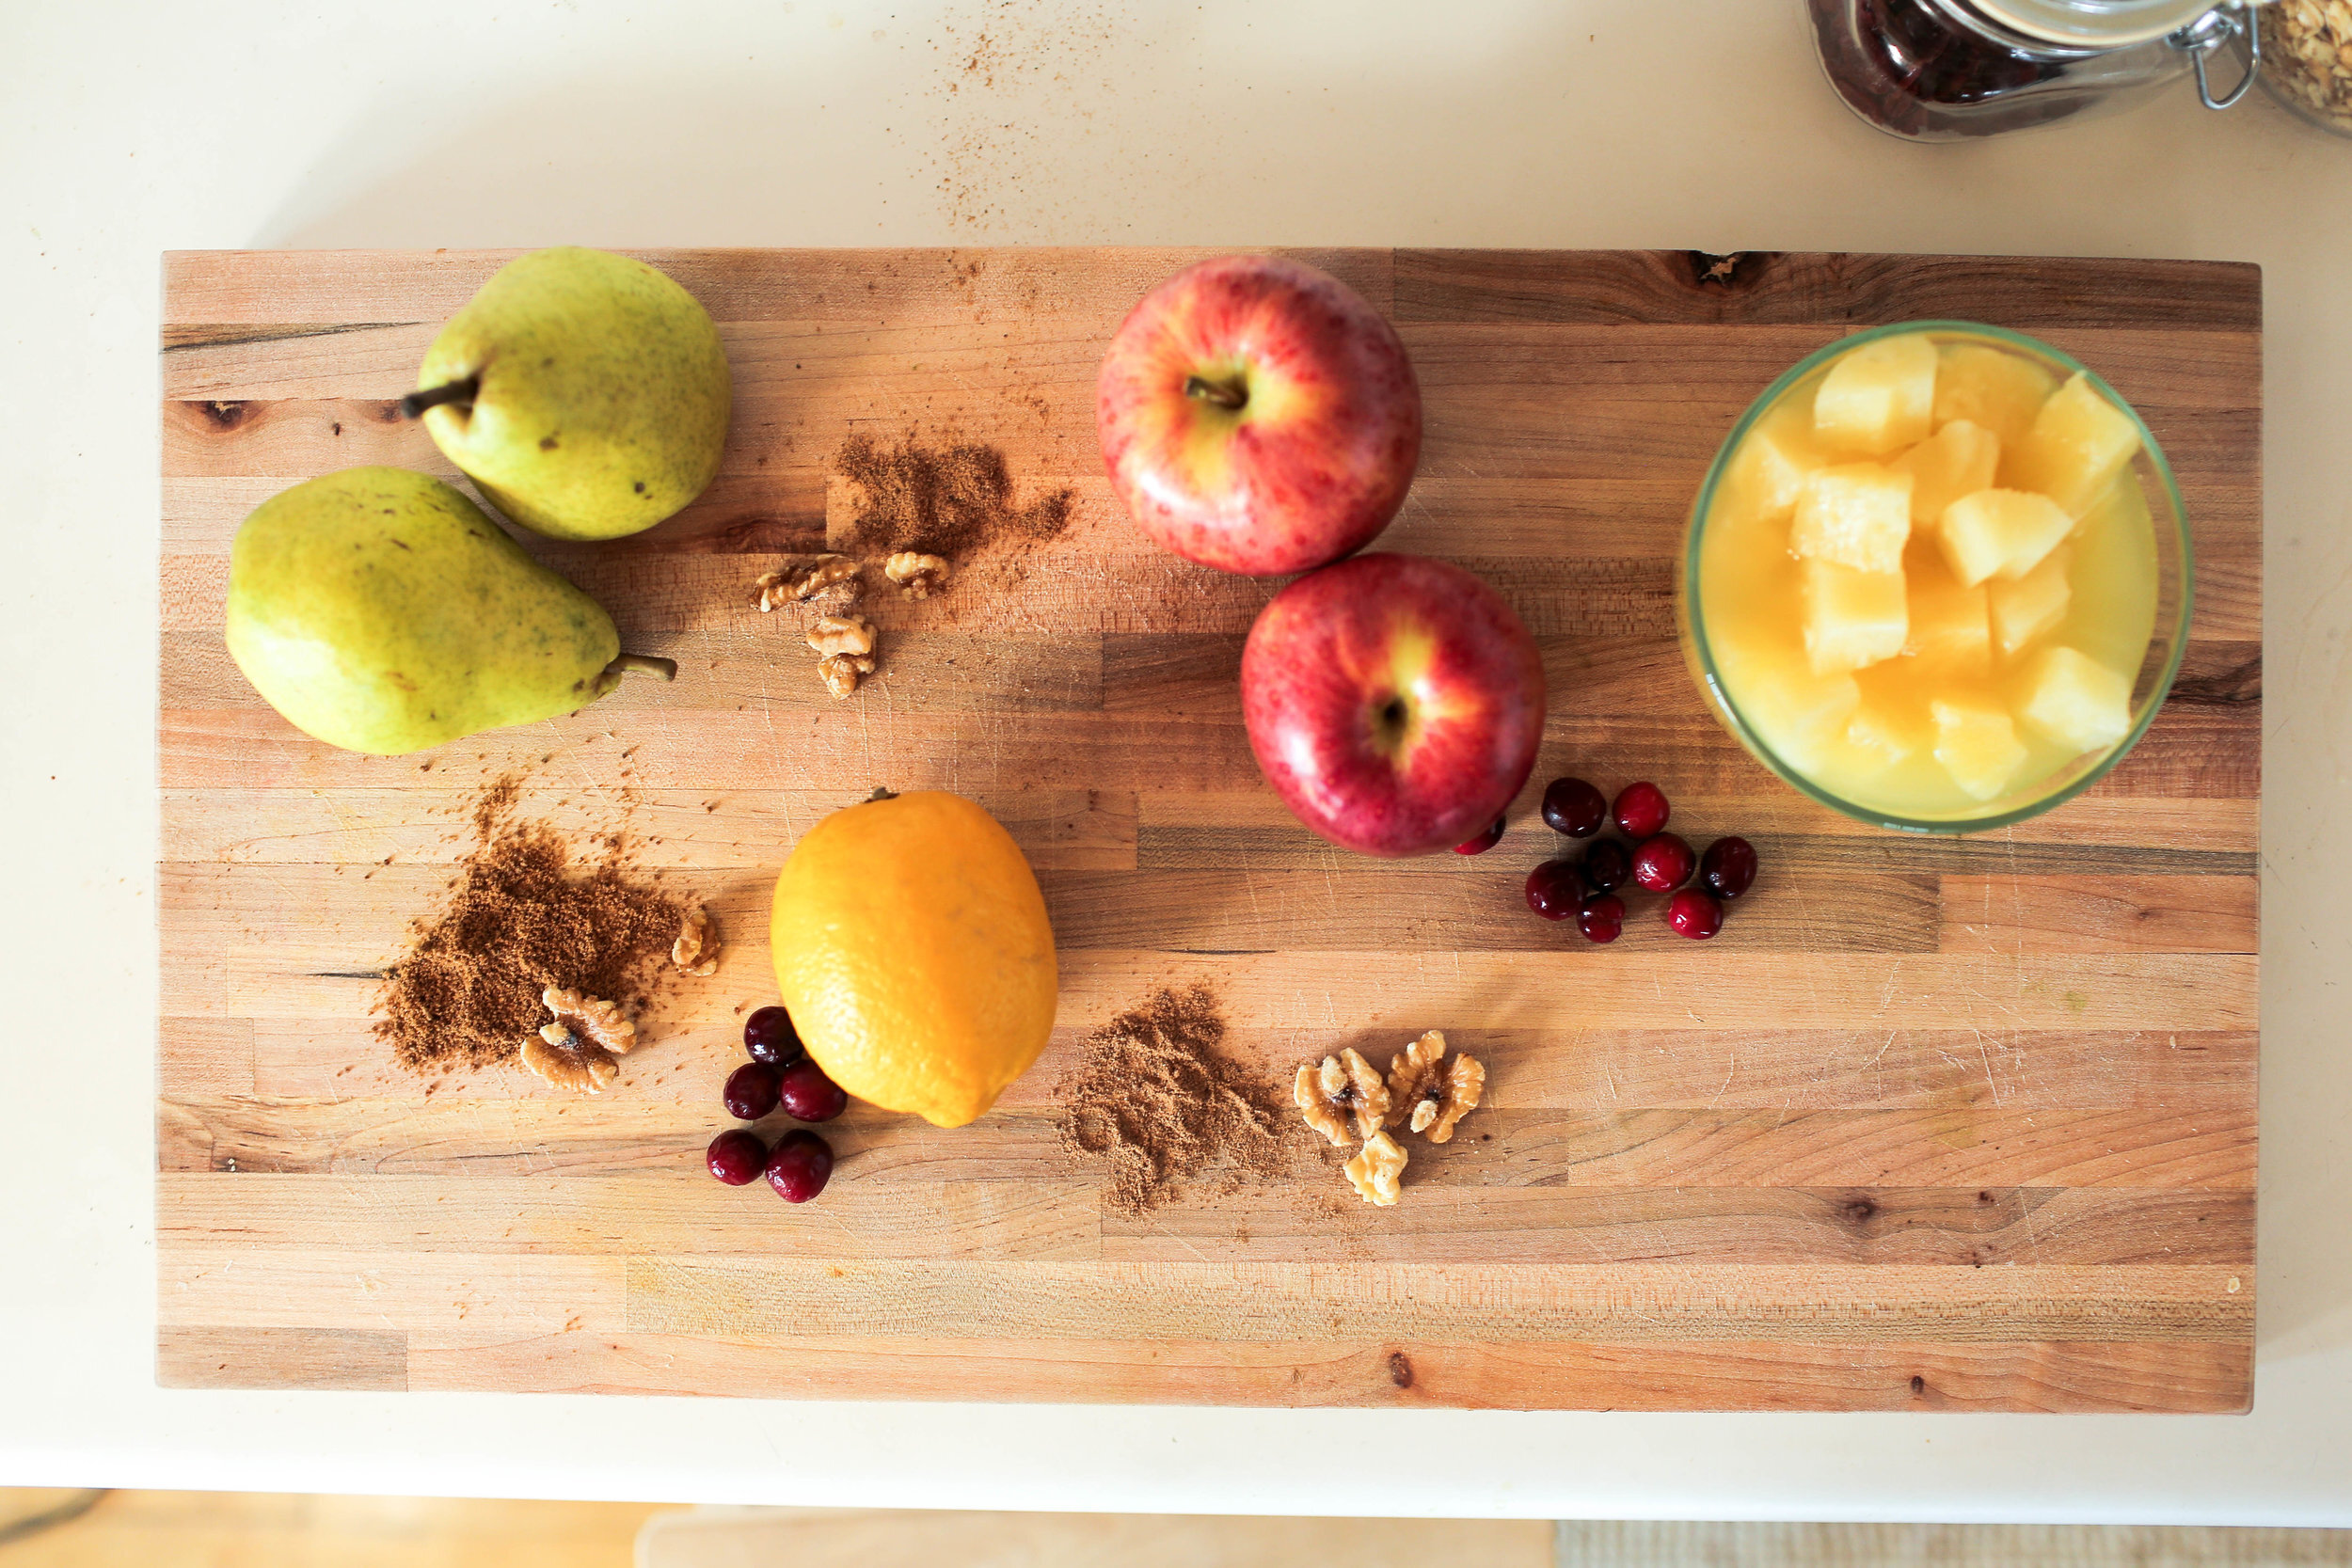
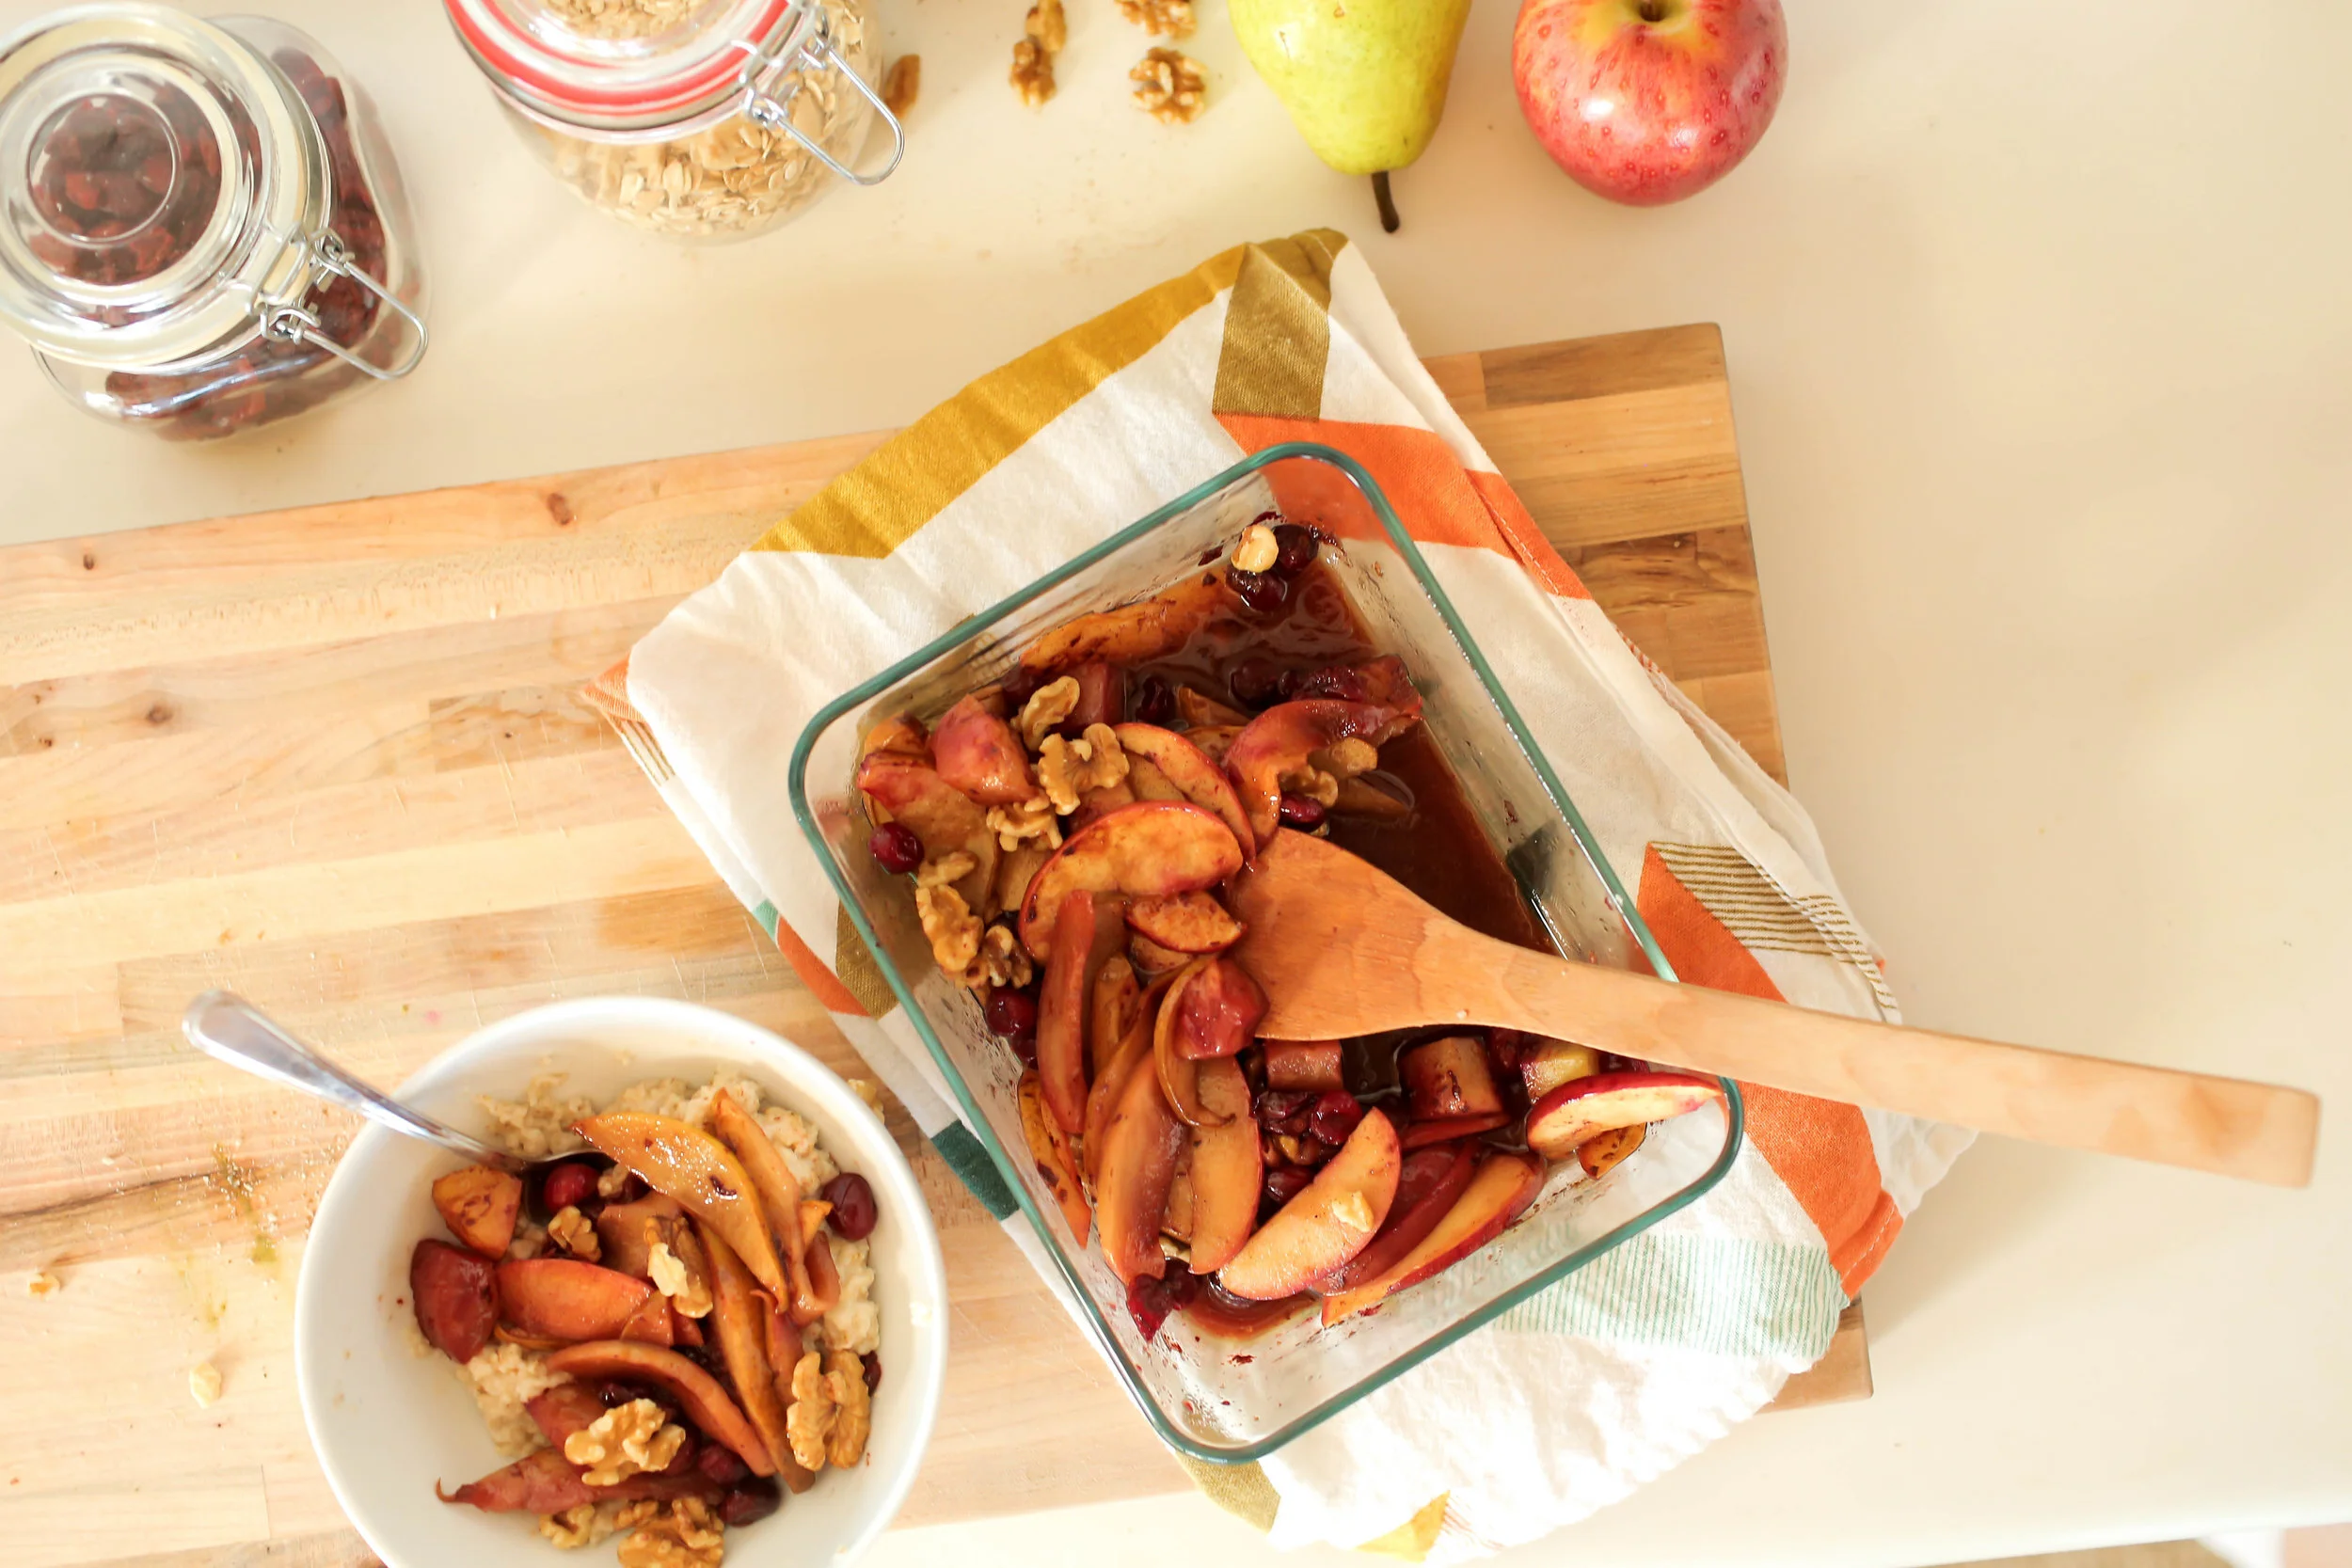
WARM FRUIT TOPPING
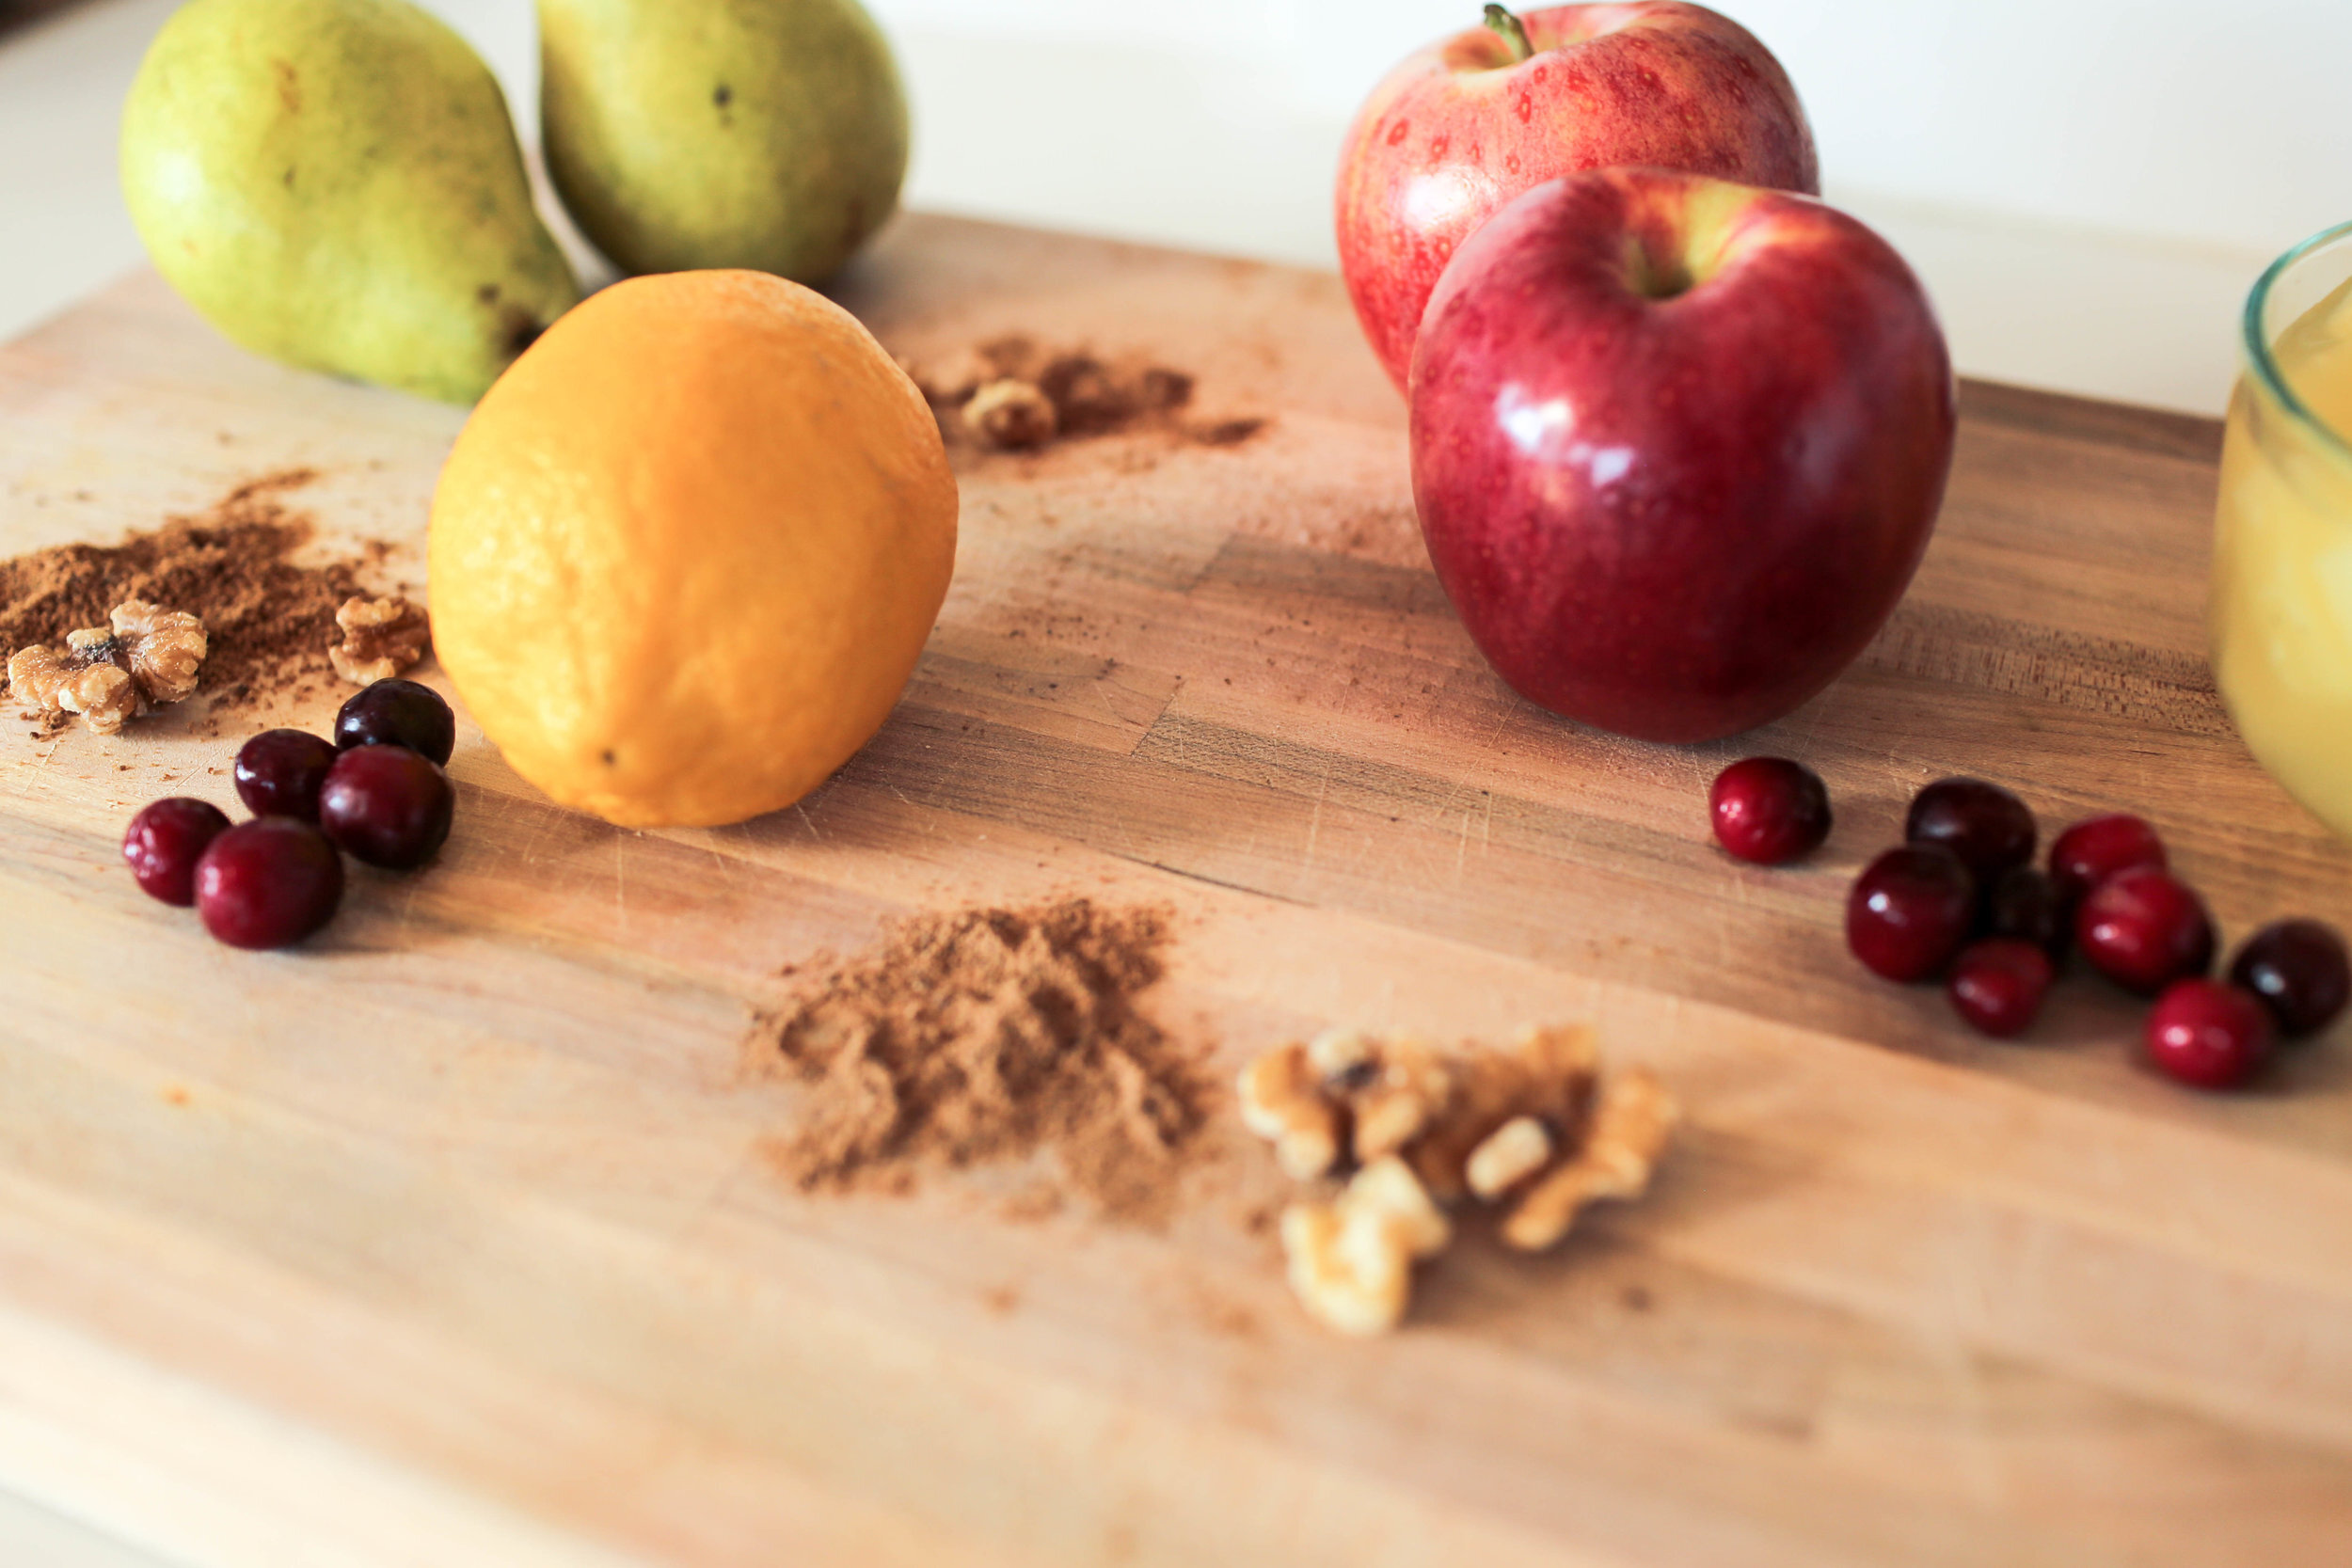
Next we have something that you can eat, because we feel like autumn is all about eating as well. This amazing fruit topping can be used to top anything from oatmeal to ice cream.

RECYCLED SWEATER SLIPPERS

MATERIALS:
- Thrifted or old sweater
- Faux leather
- Yarn
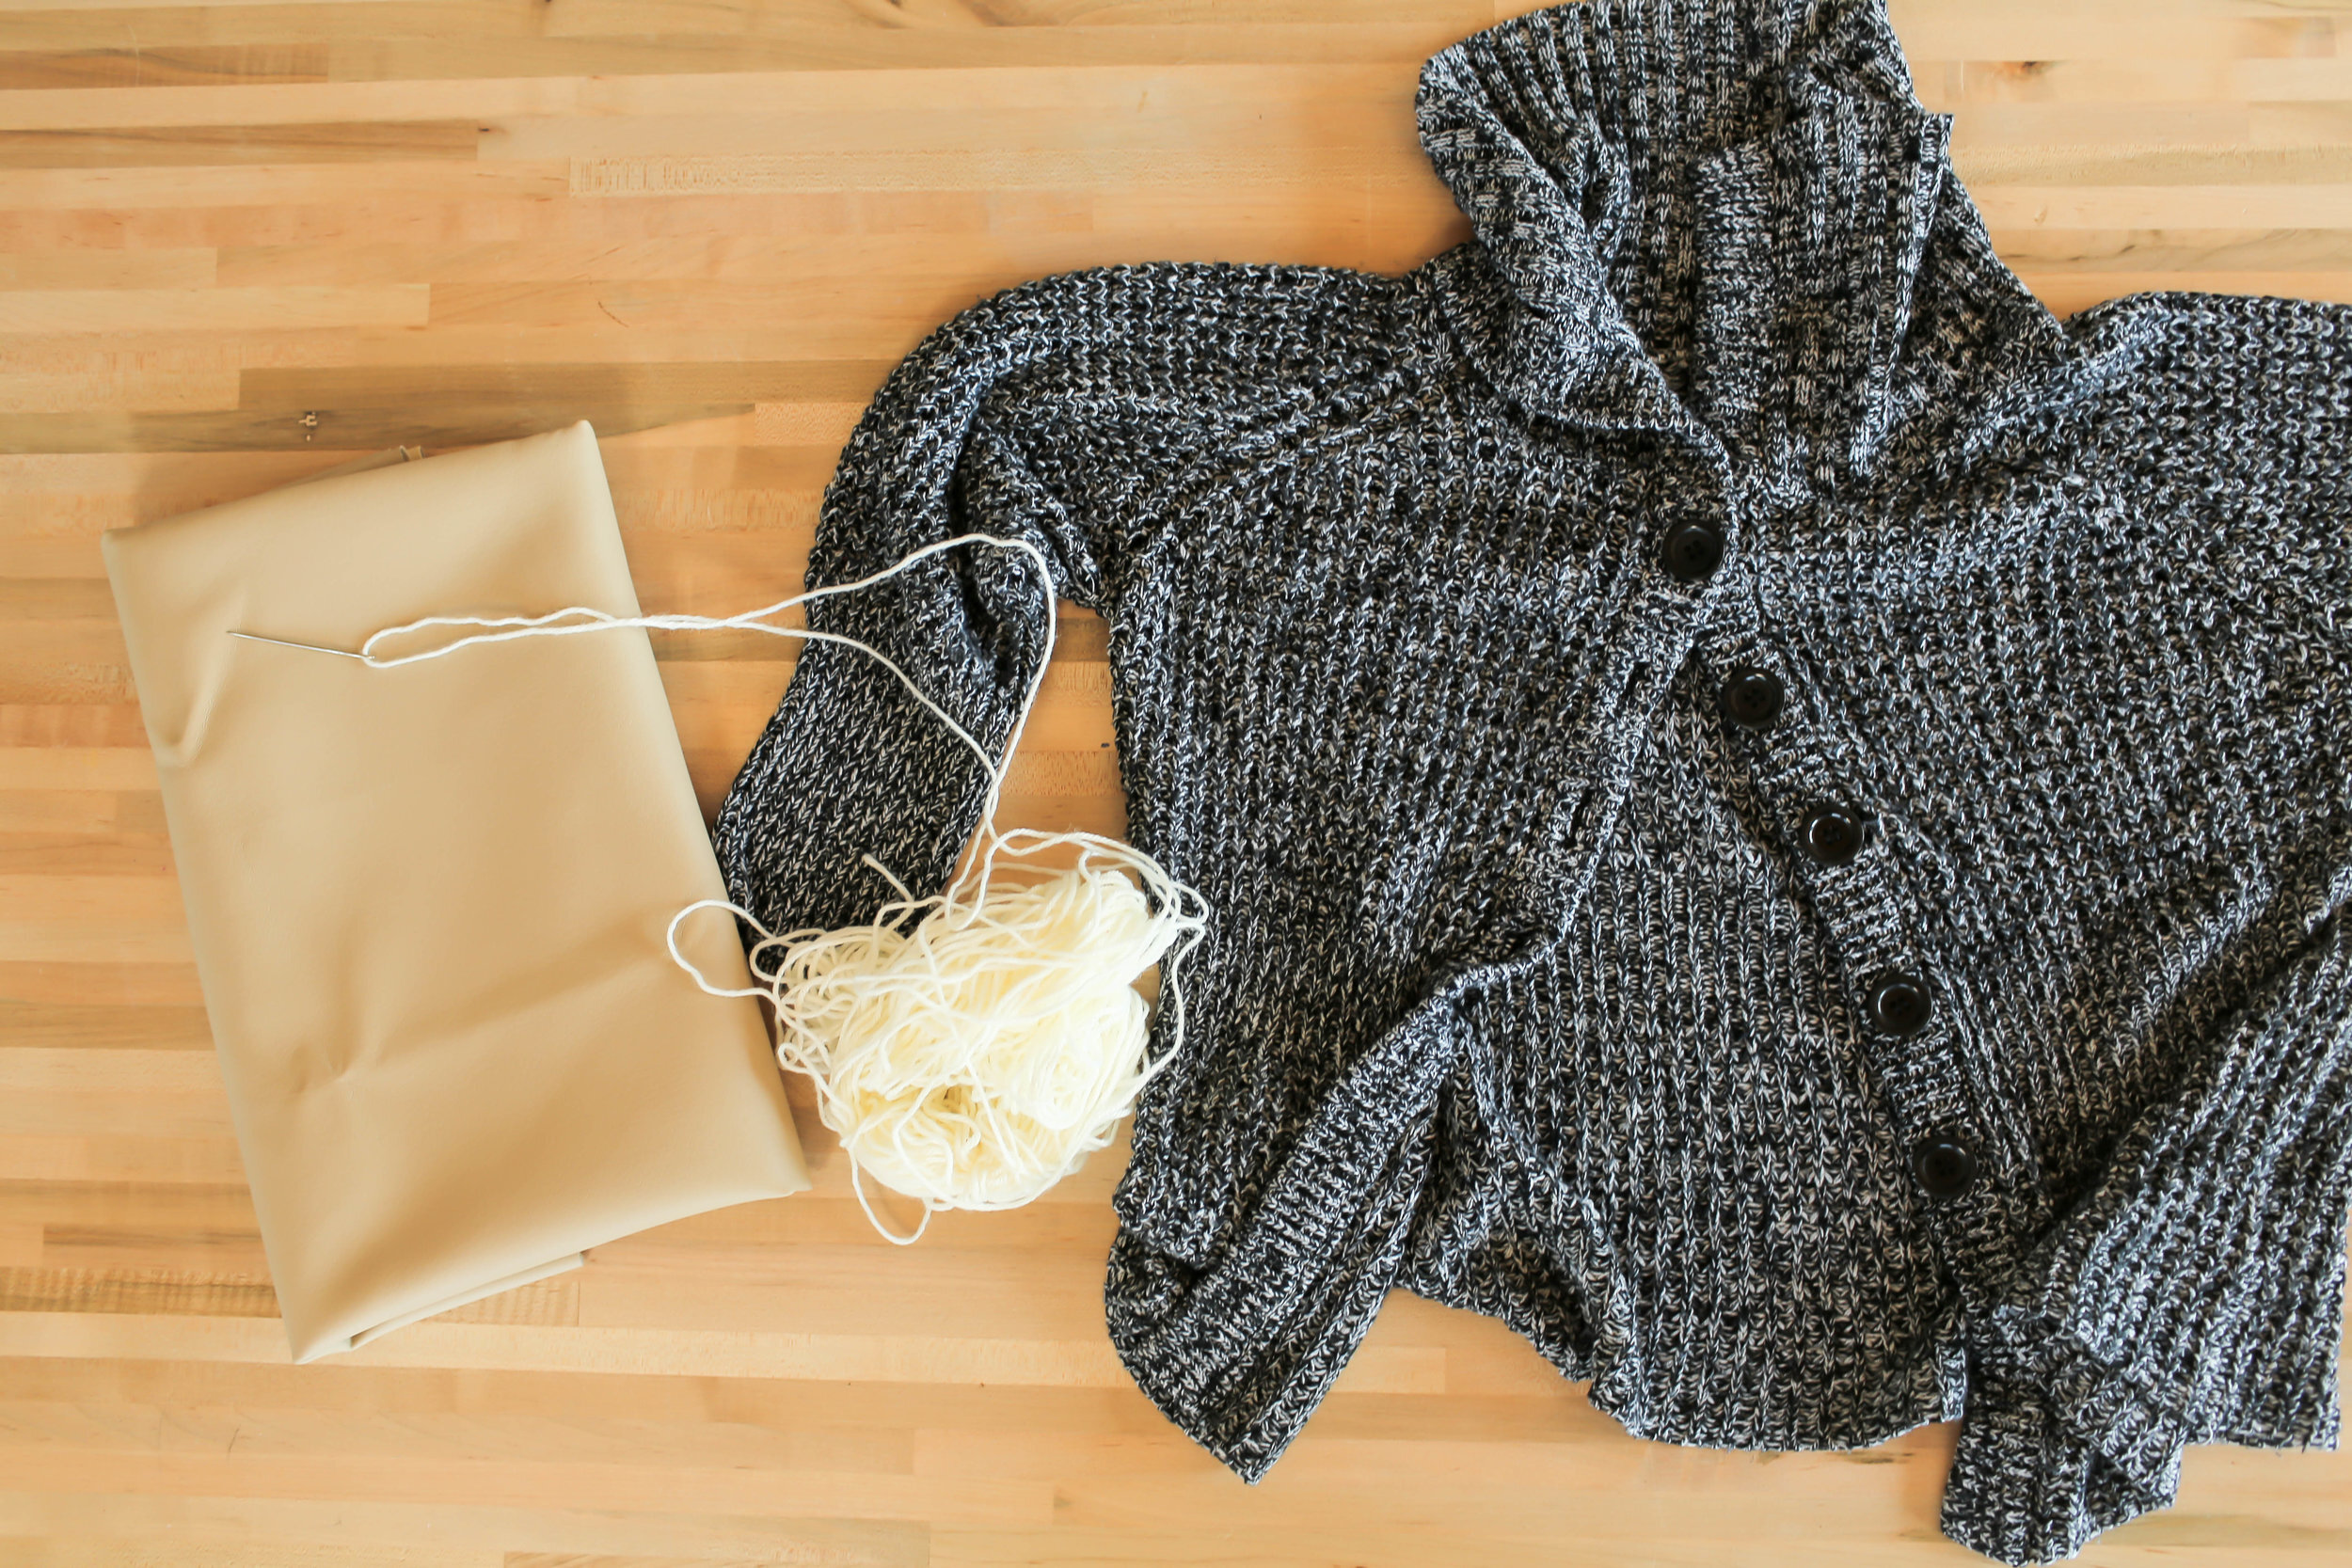
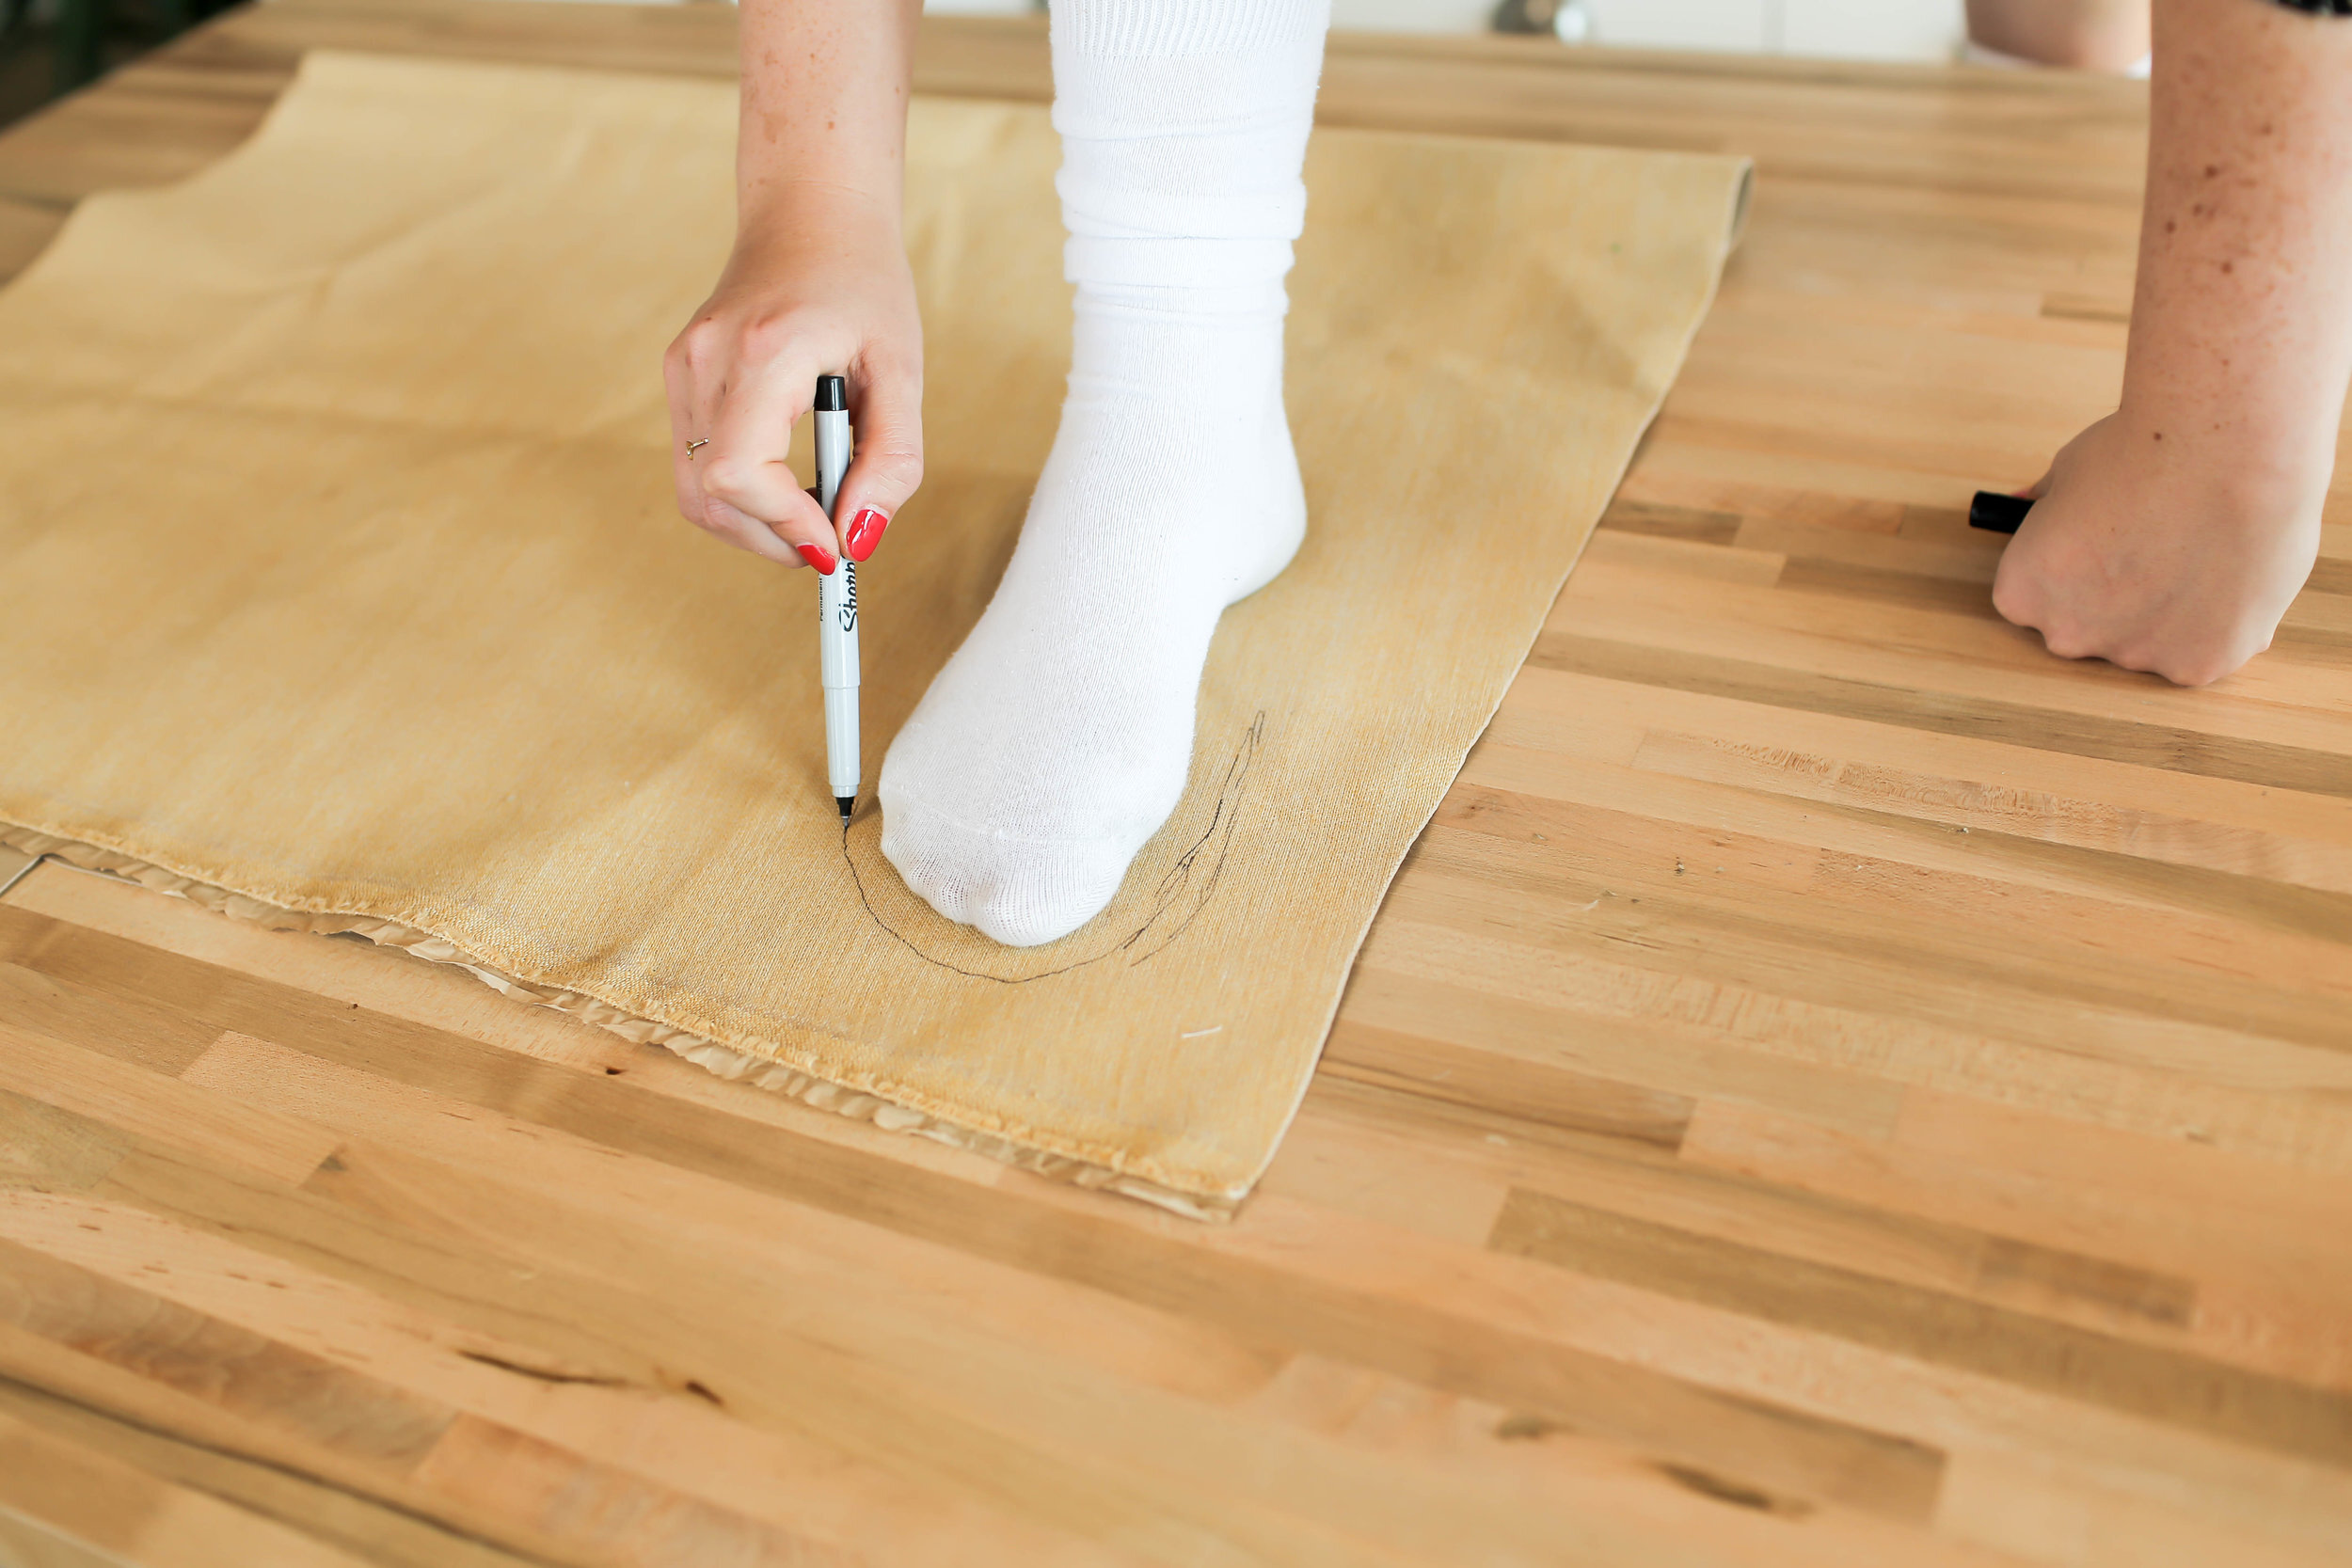
We’re next going to make these cozy slippers out of this thrifted sweater. For the sole of the slipper we are going to use some faux leather in a tan colour. We first folded the tan material with the bad sides facing out, traced our foot, and cut out that shape.

Next, cut off the sleeves of a sweater (make sure the sweater is more form fitting than baggy). Line up the the tip of the cut sleeve with the tip of the sole, and fold under that tip of the sweaters edge against the sole so that it doesn’t fray. To attach the sleeve, we are going to be using a blanket stitch.

Start threading your thick white yarn once through just the sole, we’re doing this to hide the knot. Next, create a stitch threading through both fabrics. Before pulling the stitch tight, thread your needle through the loop created by the yarn and pull tight to create a knot. Continue this all the way around the sole. If you need some extra help, check out this super helpful tutorial here!

If you put your slippers on and find that they’re a bit baggy, here’s a final step. Start by flipping the slippers inside out and putting them on. Start pinning any areas that you want to be tighter. Run this area through a sewing machine, and cut off any extra material.


Thank you so much for reading!! If you end up making any of these fall DIYs, please show us using the hashtag #SorryGirlsSquad. Also make sure to check out the video below and subscribe for more DIY!