PINTEREST CANDLE DIYS + HACKS

Today we are bringing you some candle themed DIYs! This is super exciting because we don’t really do candle DIYs, and we know everyone loves a good candle. You guys have sent in one of the candle DIYs in this post today, and we also solved a candle problem that we have on the regular!
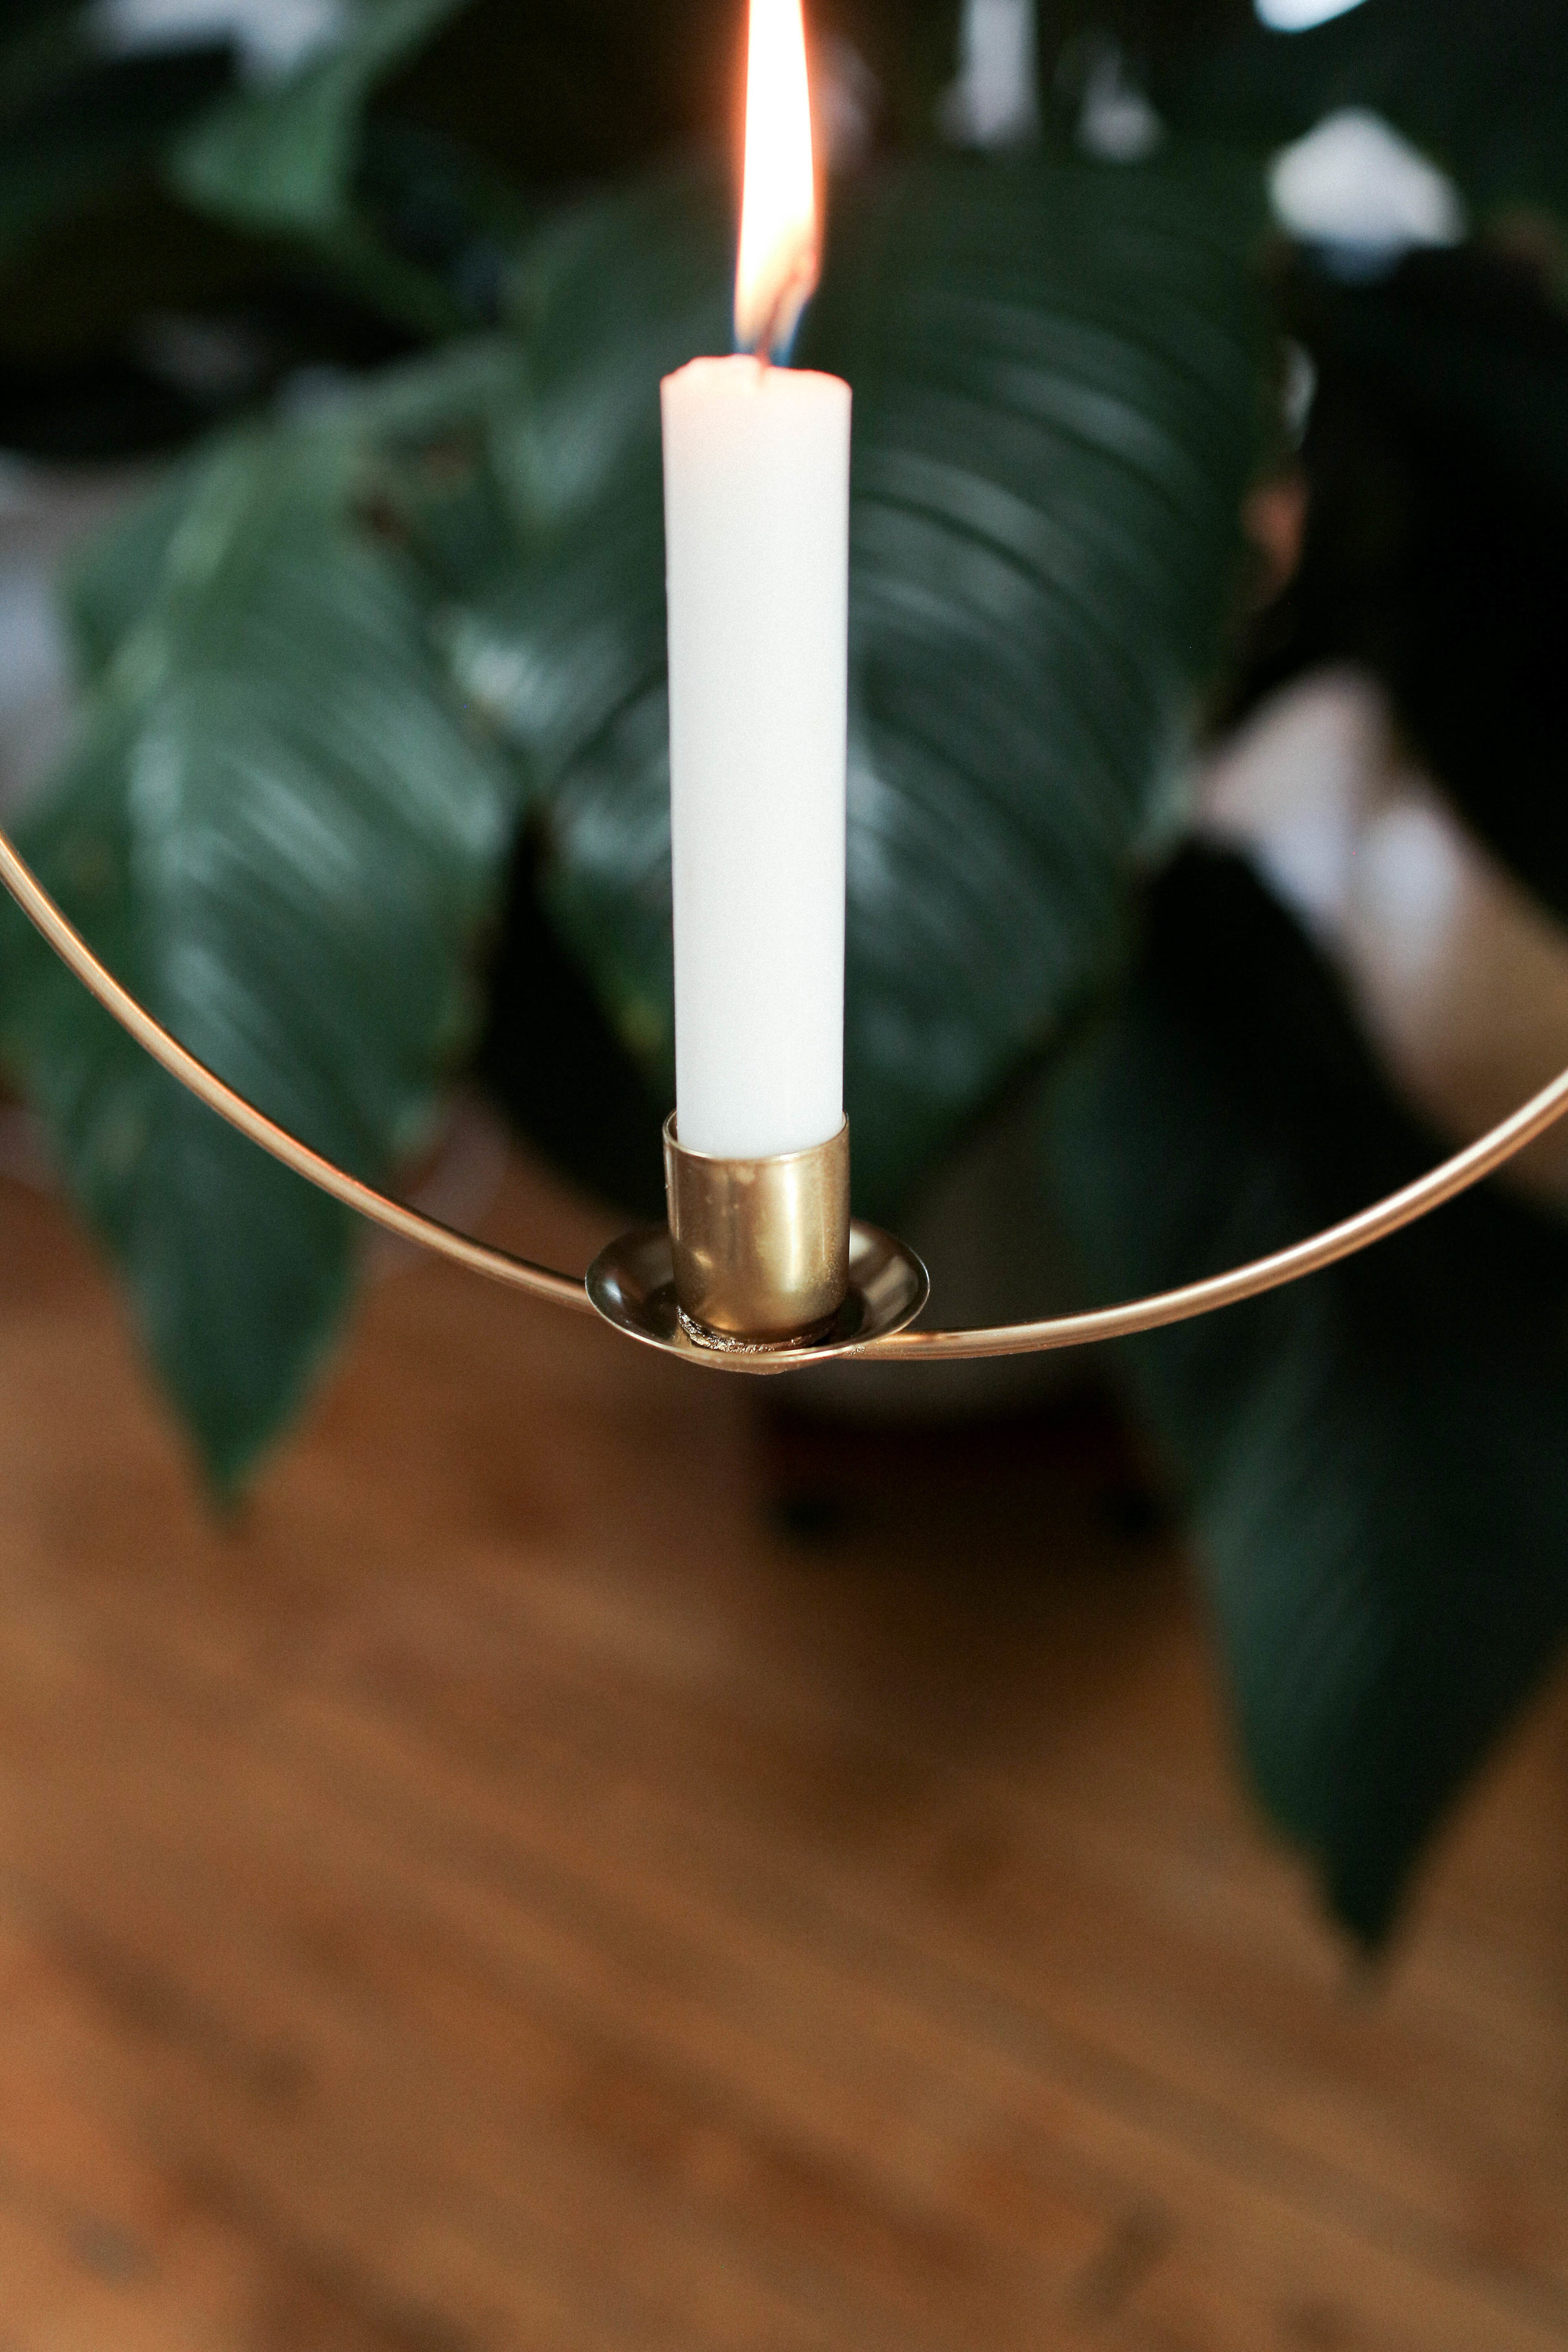
RING CANDLE HOLDER

This DIY was a direct request from one of our viewers!
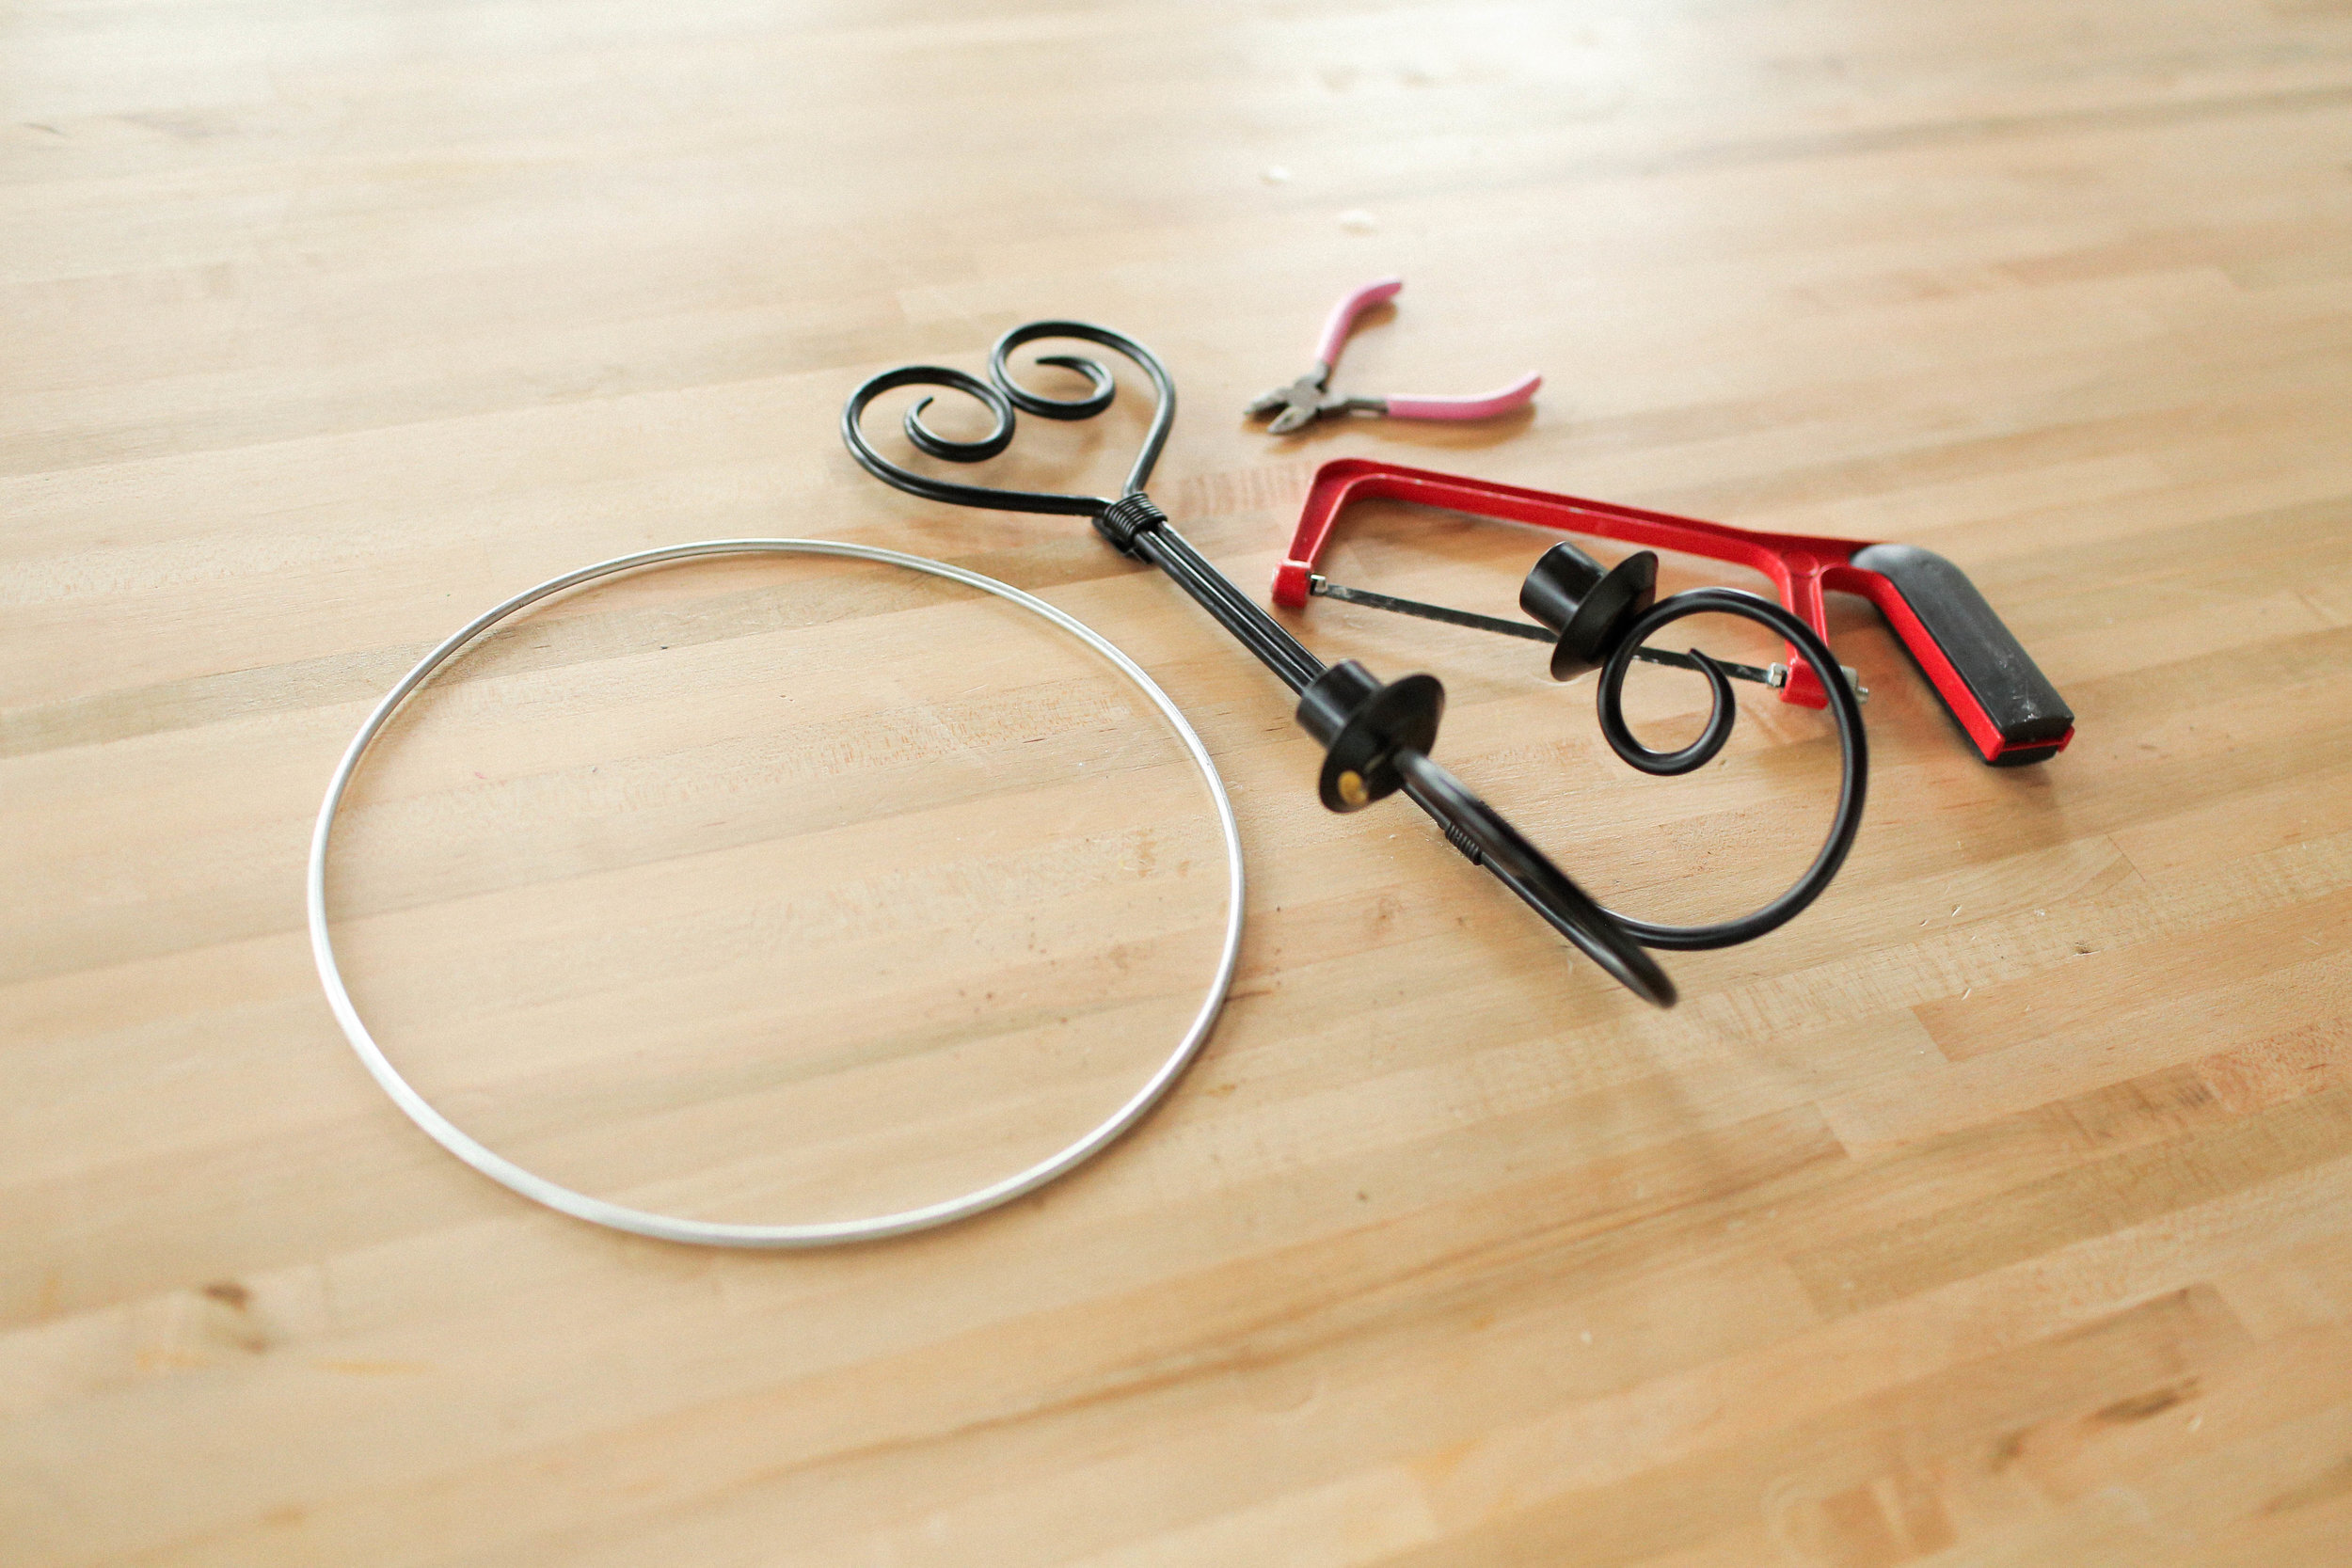
Materials:
Floral metal ring
Candle holder
Primer spray paint
Gold spray paint
Gold wire
Tools:
Hack saw
Chisel
Pliers
Starting with the candle holder, we used a hack saw to saw off the candle holder and wax collecting dish off of the bigger candle holder. We also used a chisel and some pliers to try and speed up this process a bit. Whatever you do, be safe! To stick the candle holder to the base of the ring, we used a putty epoxy called SteelStik. This stuff is great for bonding metal to metal!

This stuff is great for bonding metal to metal! Follow package directions on the putty, and attach the candle holder to the ring! Be sure to wrap the putty around the bottom of the ring for a stronger hold. Let the putty fully harden.

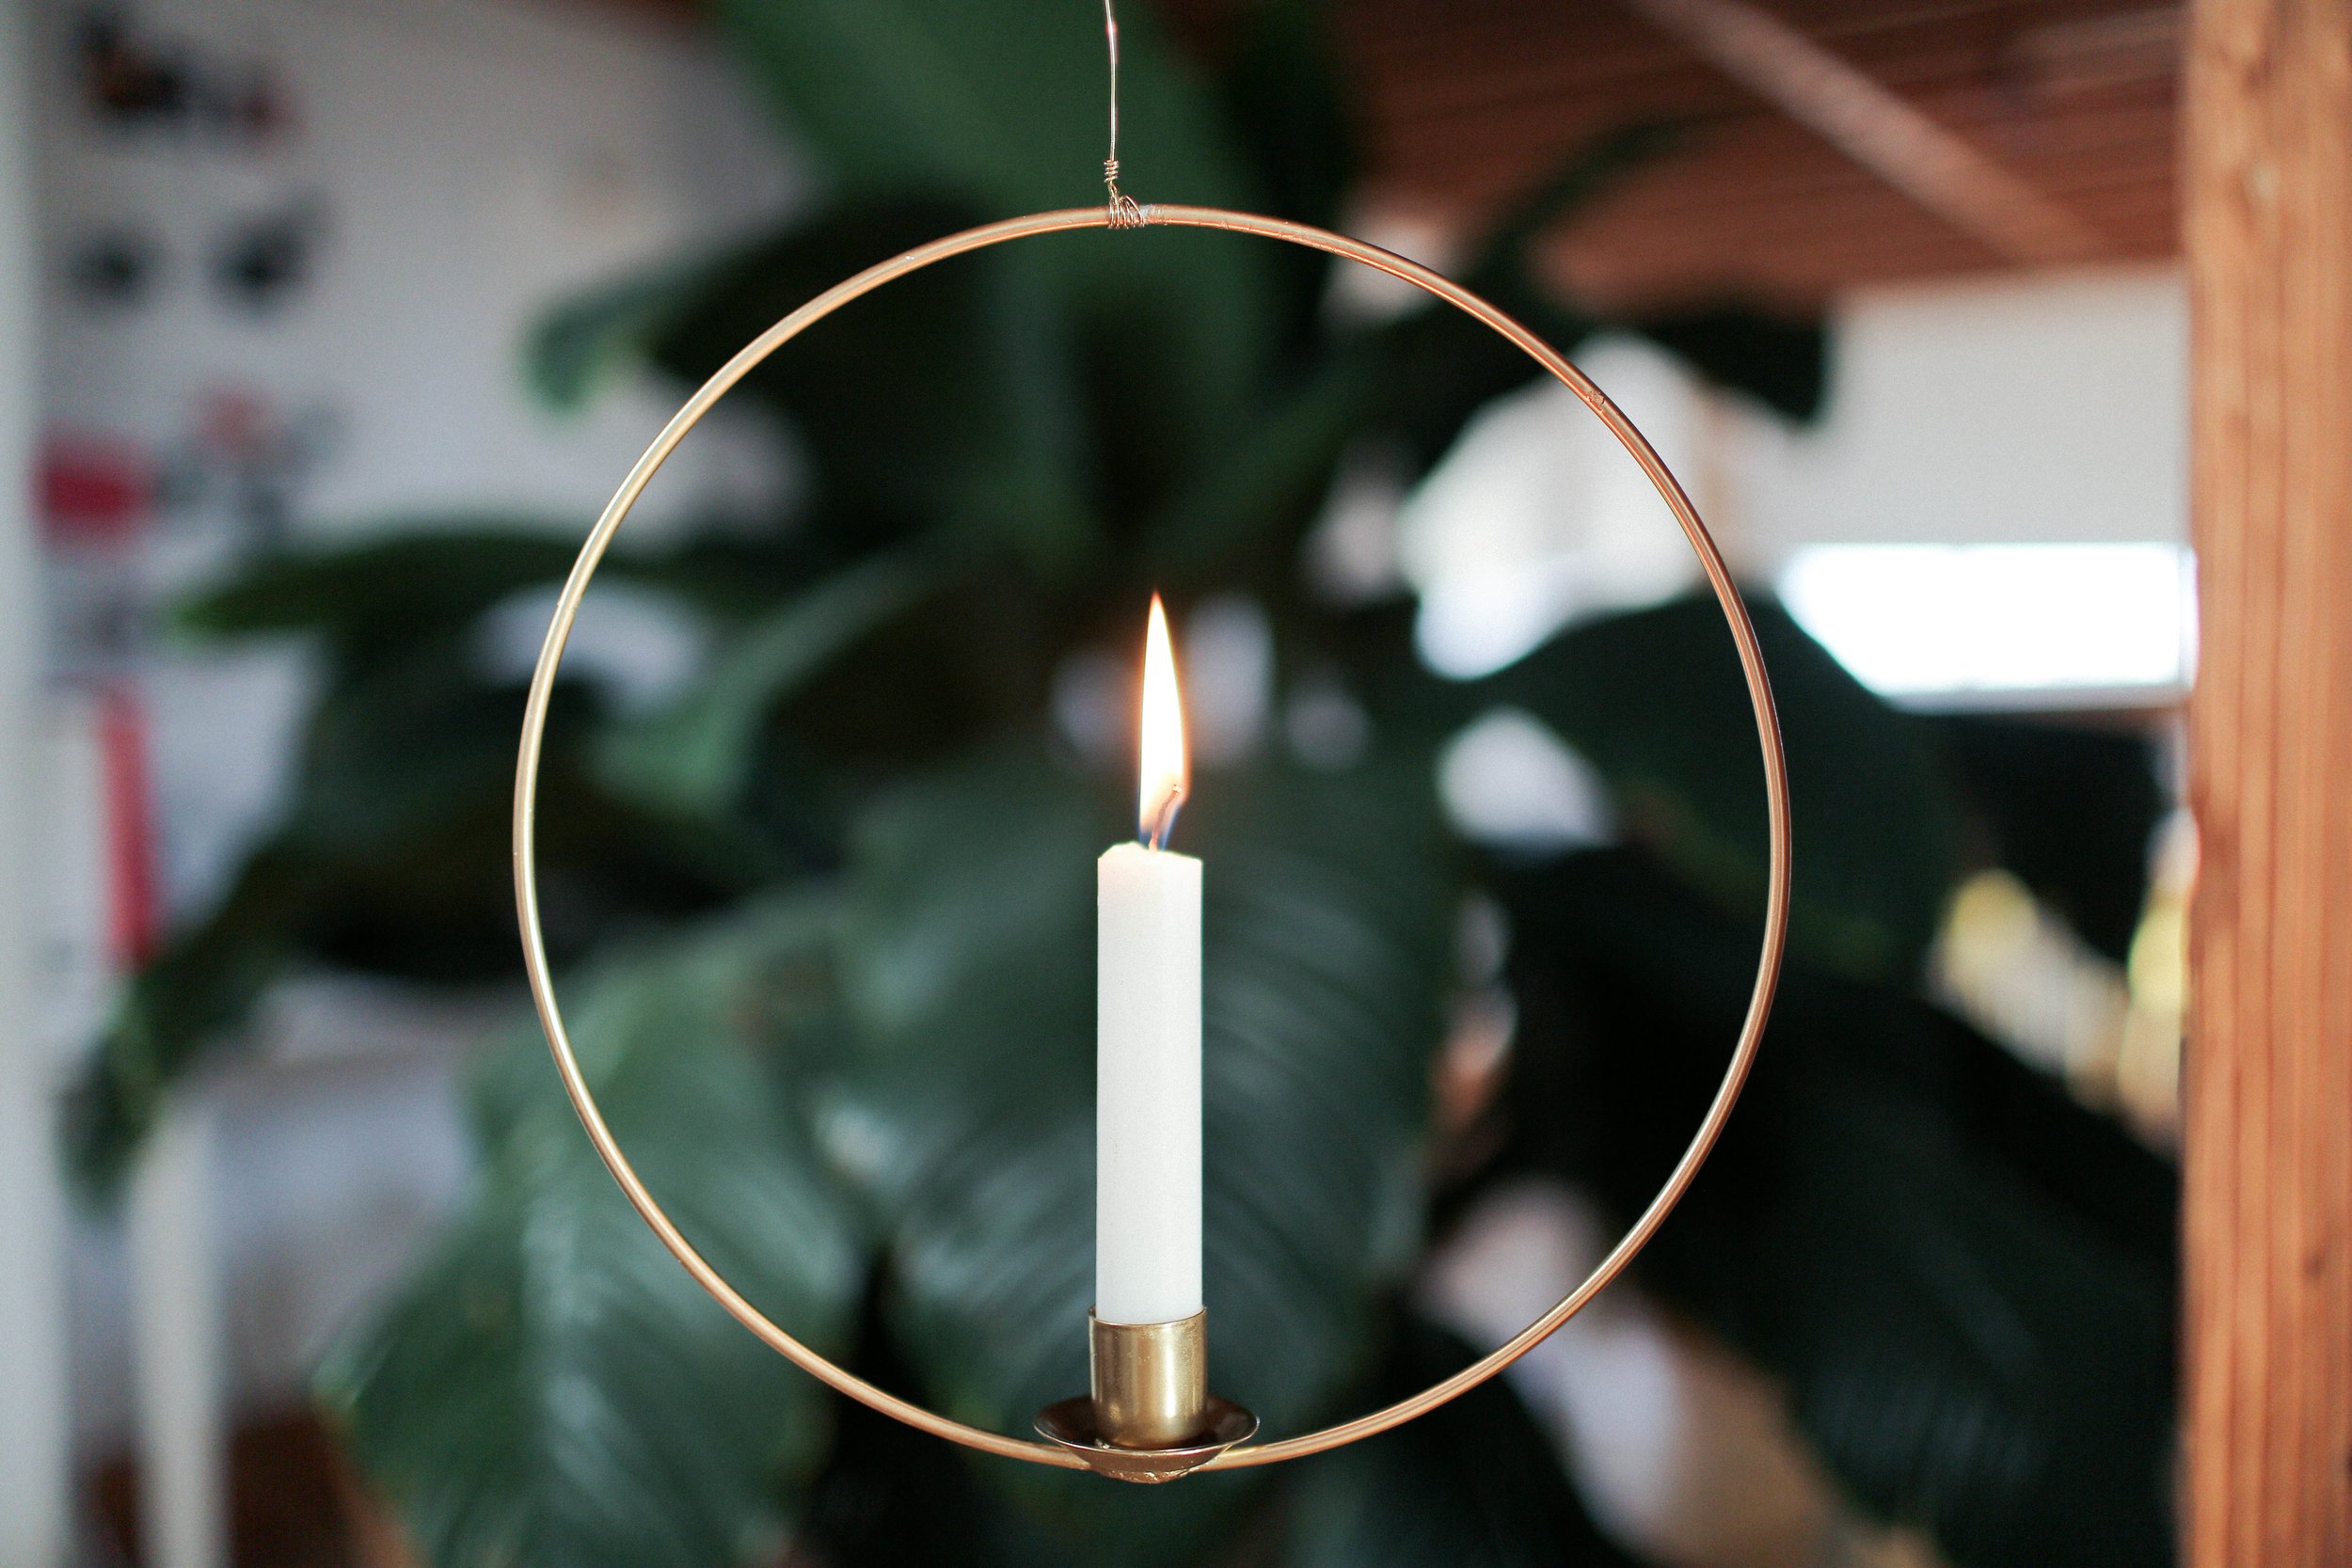
Now let’s get to painting! We hung our ring inside of our spray paint tent (you can go outside for this though!), and started by painting the whole project with white primer. We then painted it again with a gold spray paint.

Once the whole thing was try, we wrapped the top with some gold wire so that we could hang it! Make sure you don’t use rope or anything flammable for this bit, because the candle below can get hot!
Next, go ahead and melt a little bit of wax into the bottom of the candle holder and insert your candle. The melted wax will help the candle stay positioned inside of the holder.
We are sooo proud of how this one turned out, and of how cheap we could make it for!
Disclaimer: Guys, treat this as you would any other candle, and don’t leave it unattended and don’t place it close to anything that is flammable. Be safe!
mega candle

Soo, our next DIY is something that we thought would be this gorgeous/amazing DIY that would cost us nothing. It did look good, and didn’t cost a lot, but it kind of didn’t work. But we decided to show it to you anyways, because we know you love seeing our DIY fails.
We started by cutting the handle off of a mug. If you can find a bowl that is a good size, go for that instead.

We sanded down the rough edges from the handle, and spray painted it gold.

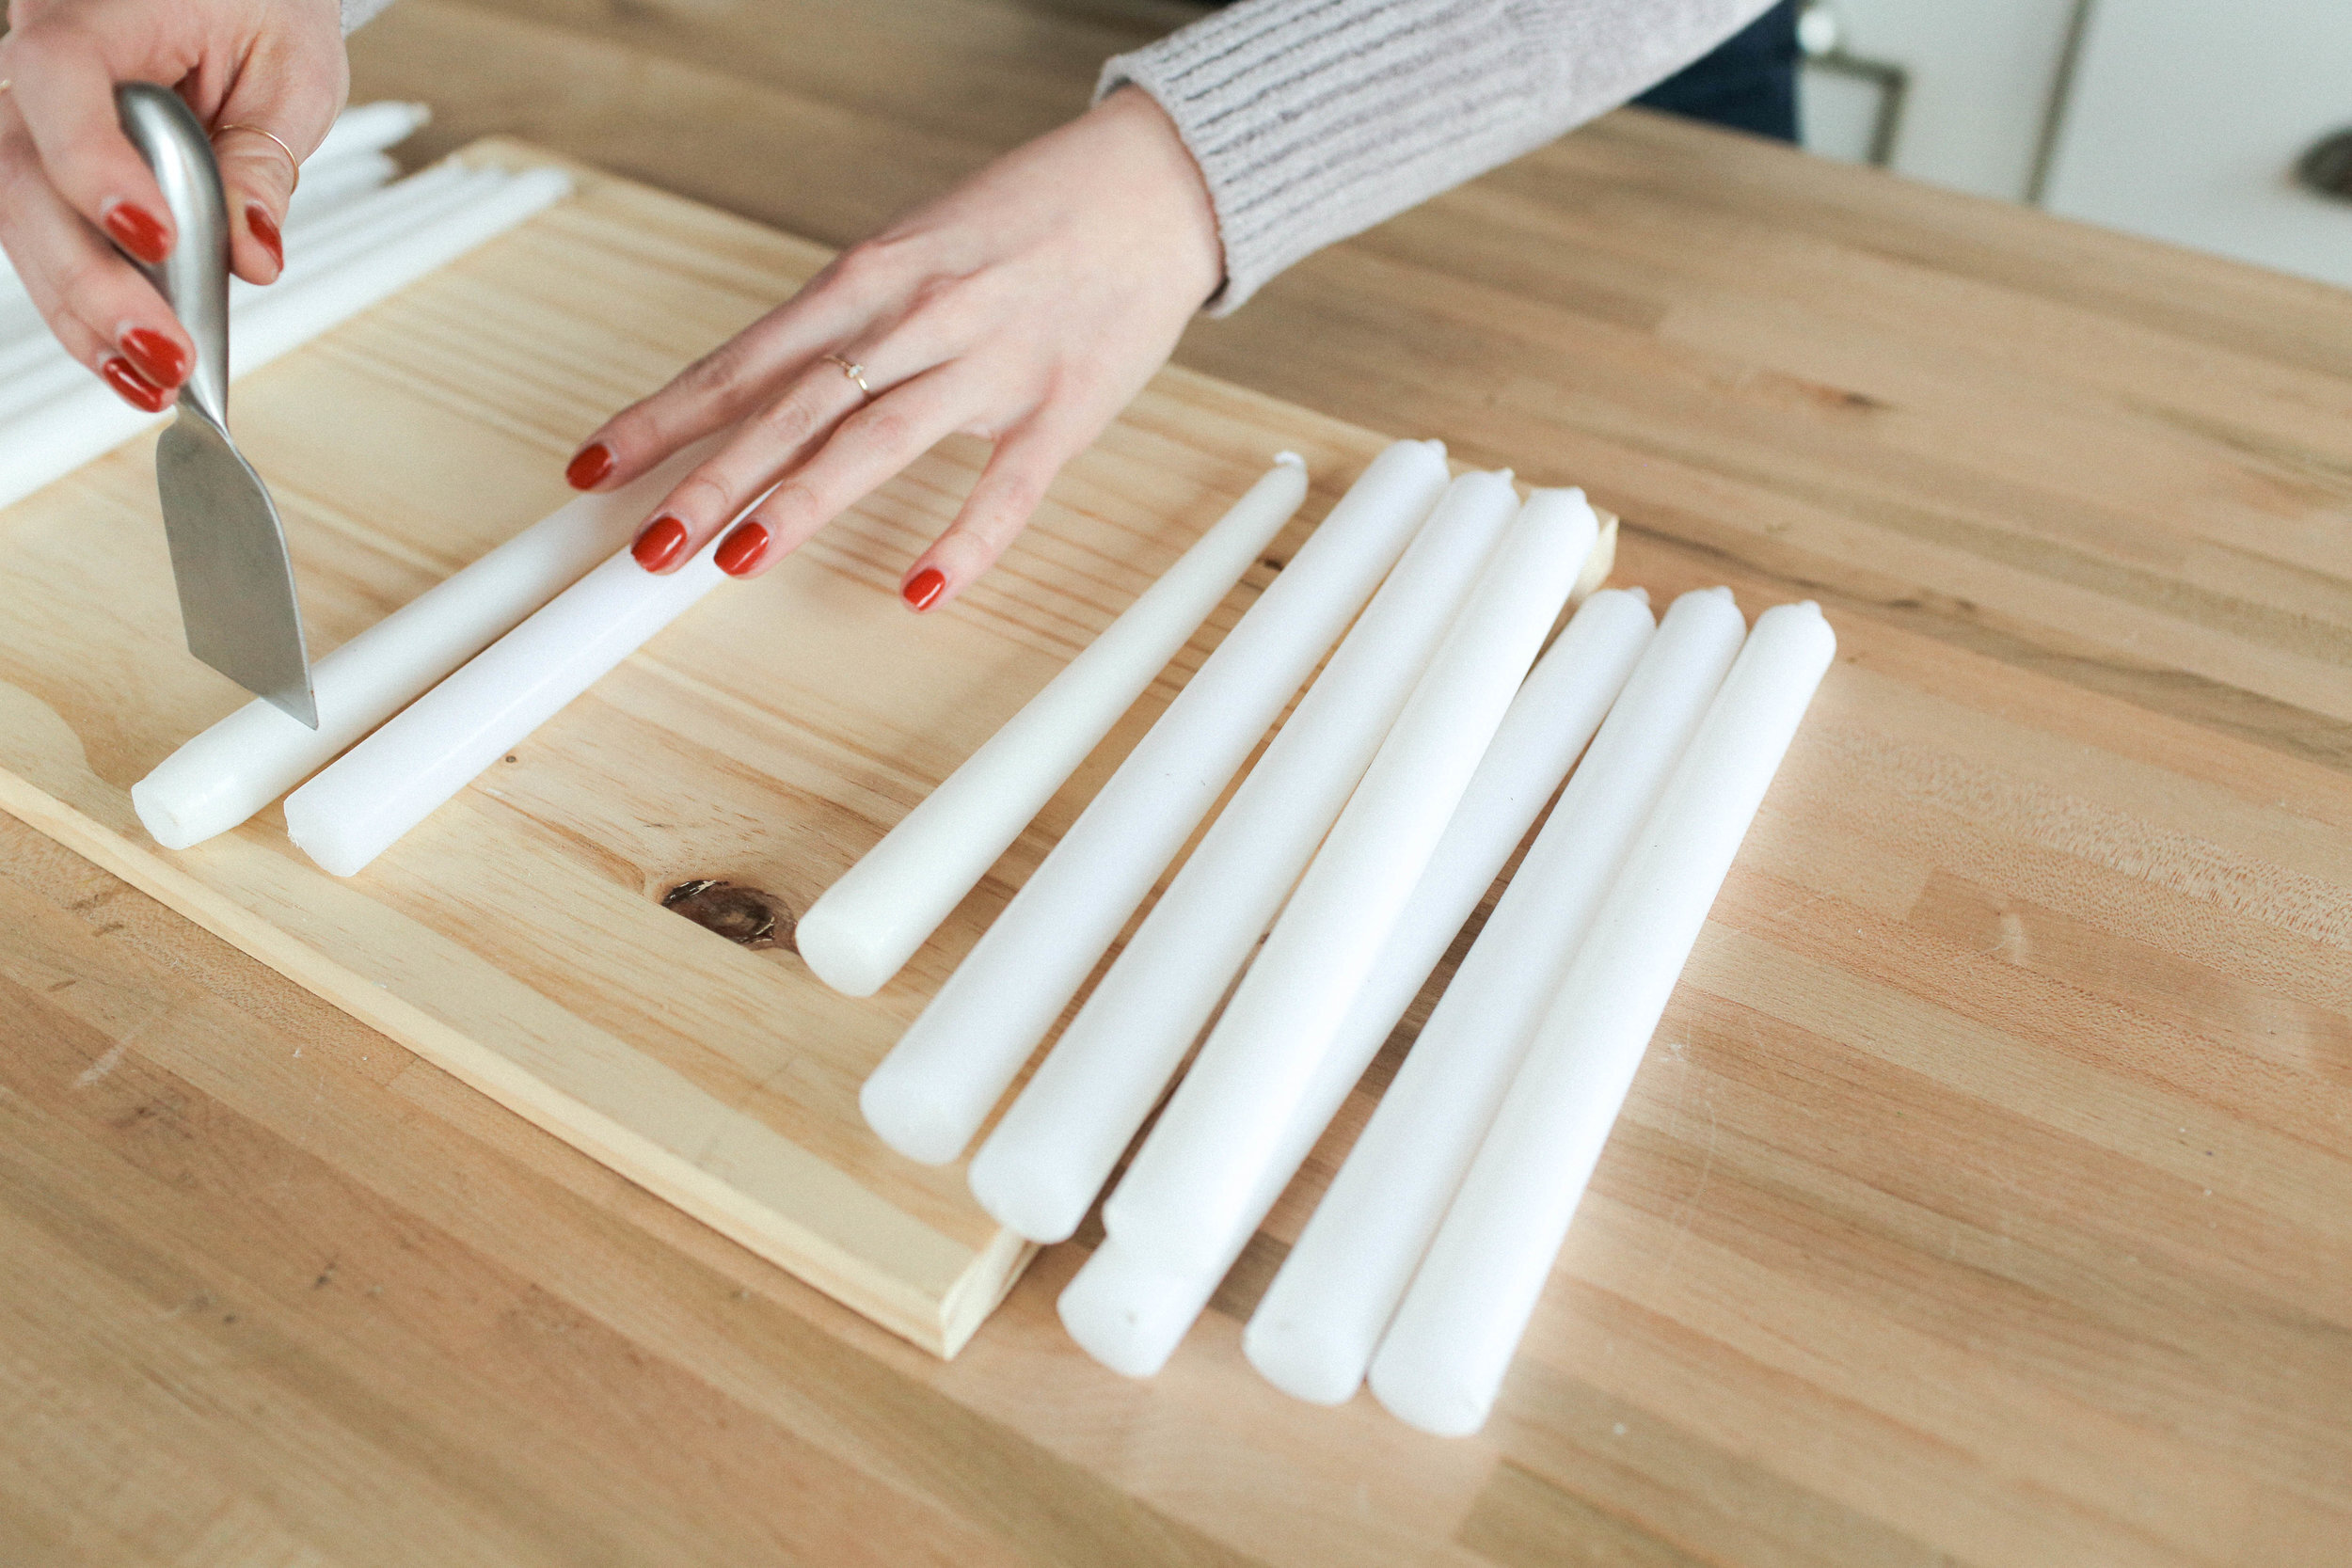
We next grabbed a bunch of white pillar candles and cut them to various heights (this is maybe where we went wrong). We then went ahead and placed the candle sticks into the mug and melted some wax. We poured the melted wax into the bottom of the mug to hold the candles in place.


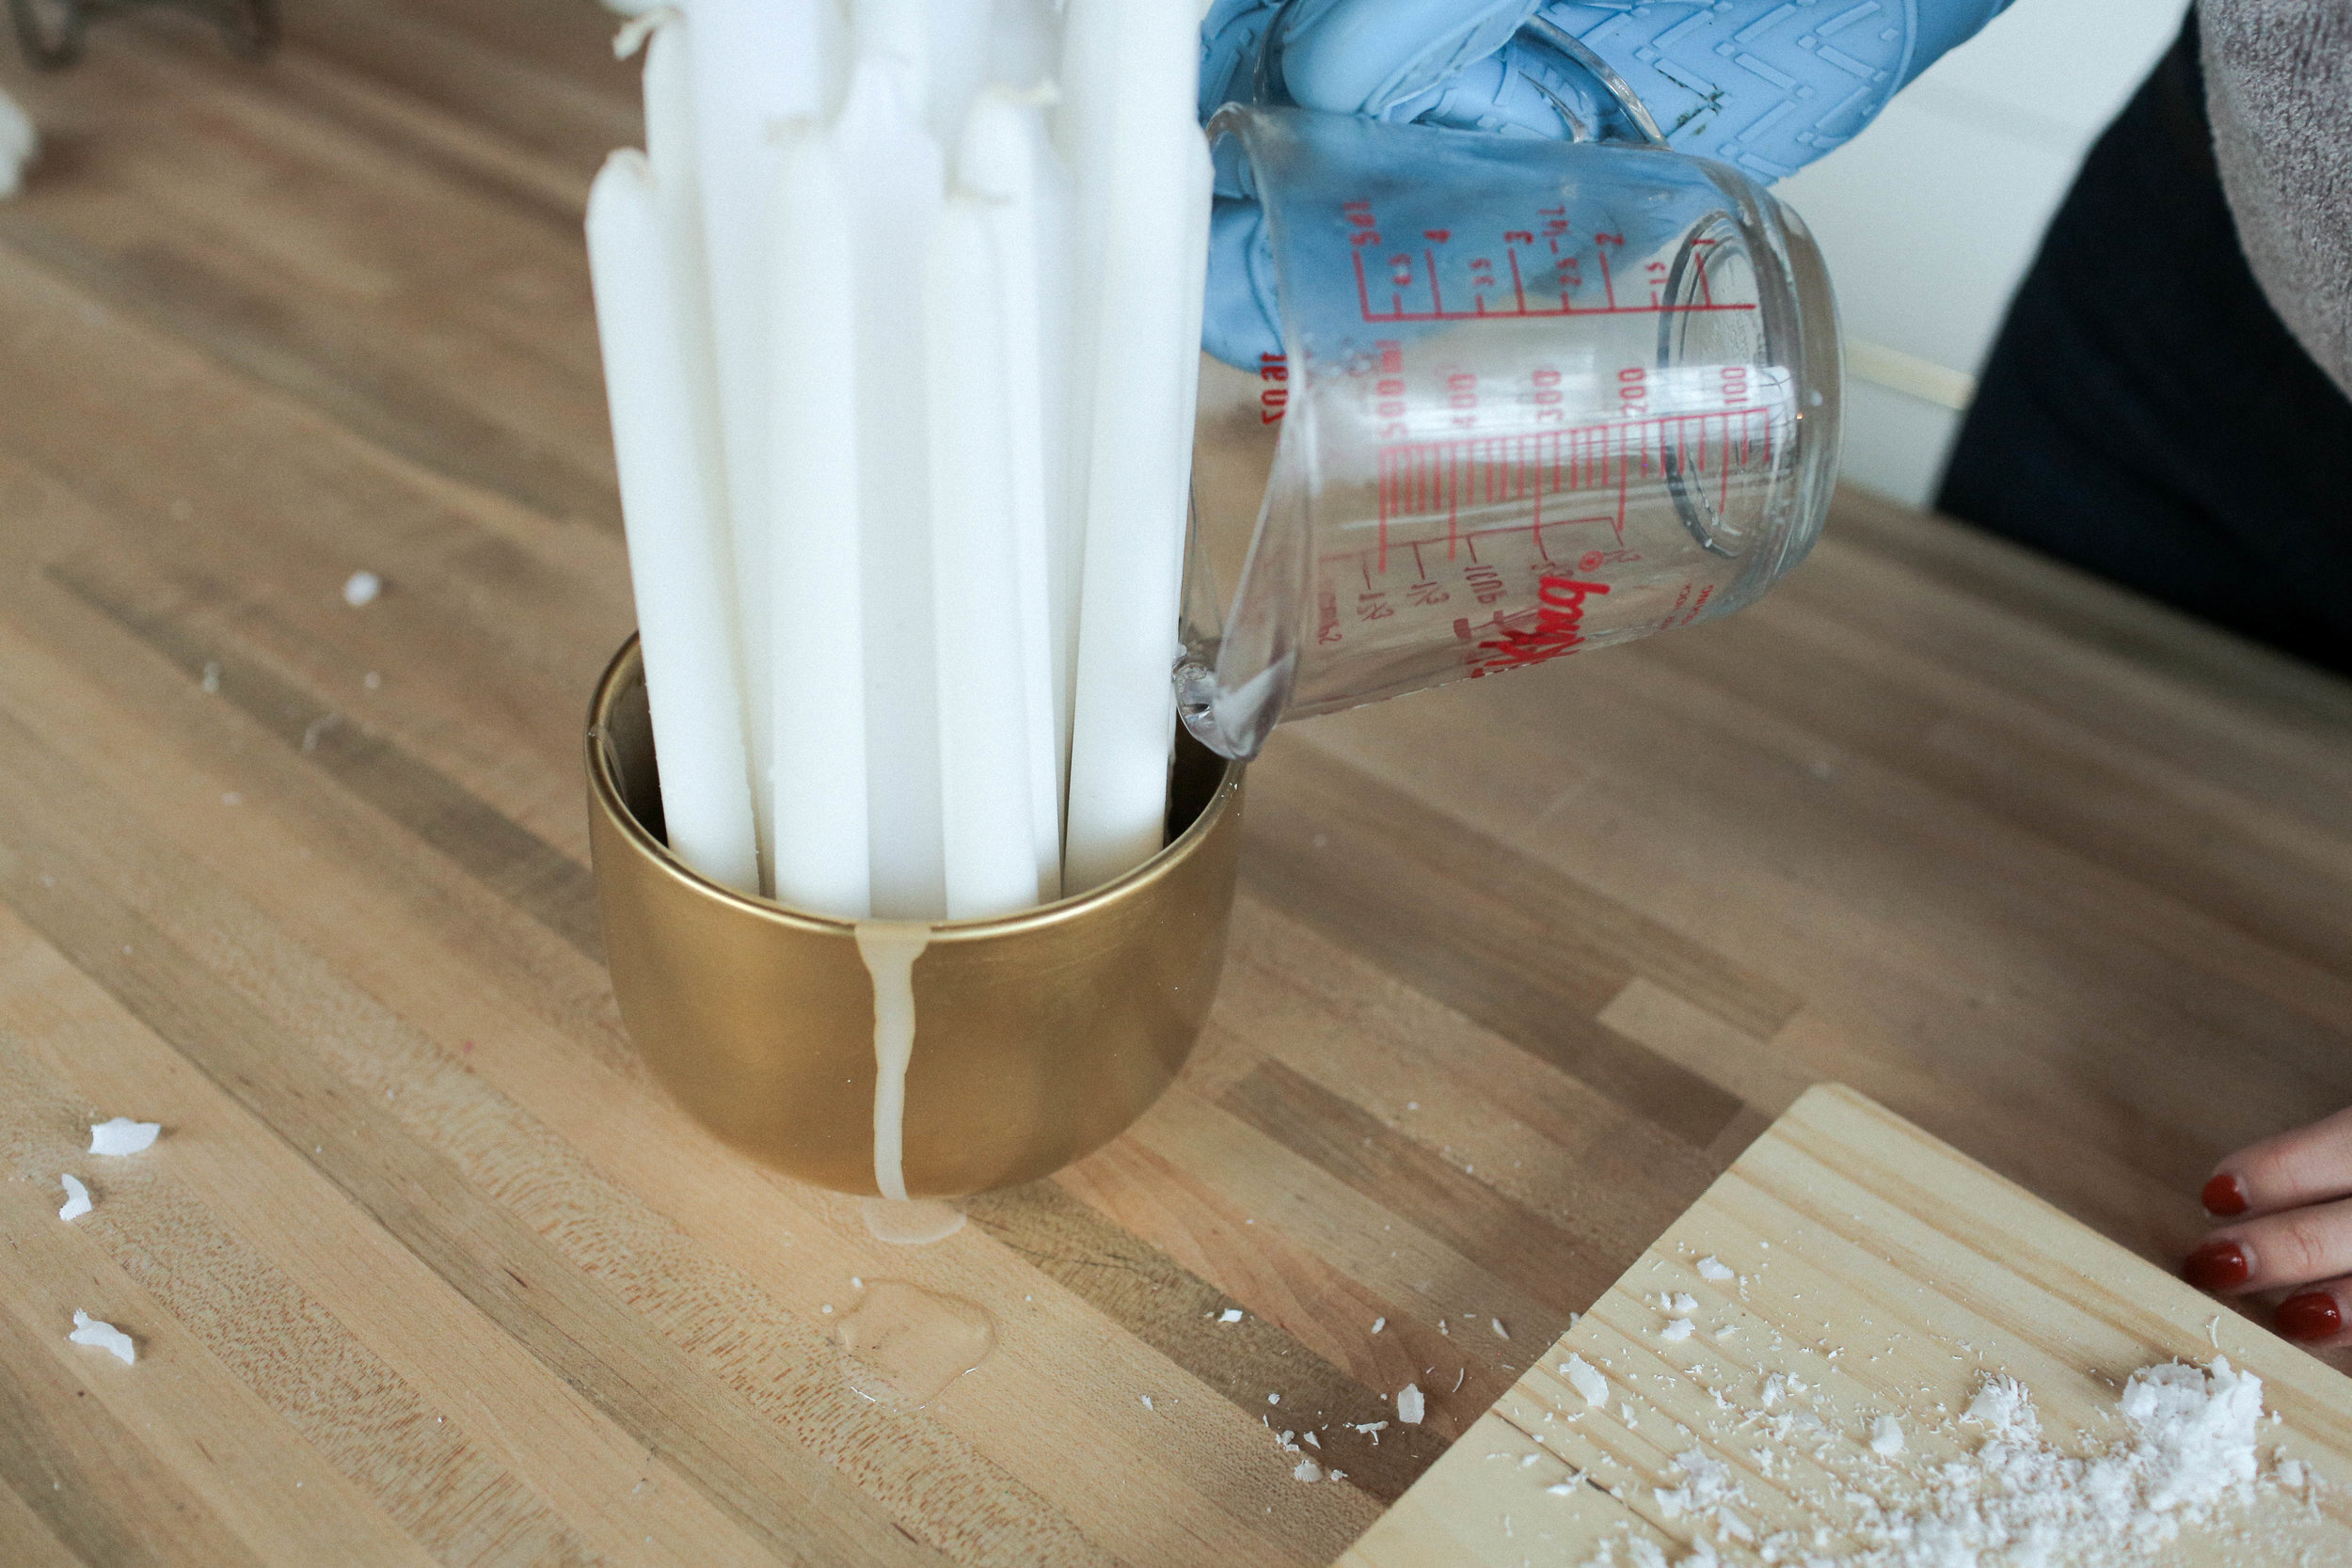
Now, if you stop here, this can be a lovely centre piece. Here’s what went wrong: when we lit the candles, we found that it got too hot with all of the candles burning at once (our smoke detected totally went off). We then tried to light just a few of the candles, and again they got too hot and started lighting other candles around them. So, maybe don’t try this one at home? It’s pretty though!
upcycled candle
Lastly, we have this hack that we personally needed! If you have candles that still have a little bit of wax still left at the bottom, or have candles that don’t burn properly anymore, this is the hack for you!
Materials:
Old candles
Lavender
Tools:
Spoon
Small pot
We started by grabbing our old candles that couldn’t be lit anymore. We used a spoon to scrape off any parts of the candle that had black charcoal, or anything else in it that we didn’t want in our final candle.

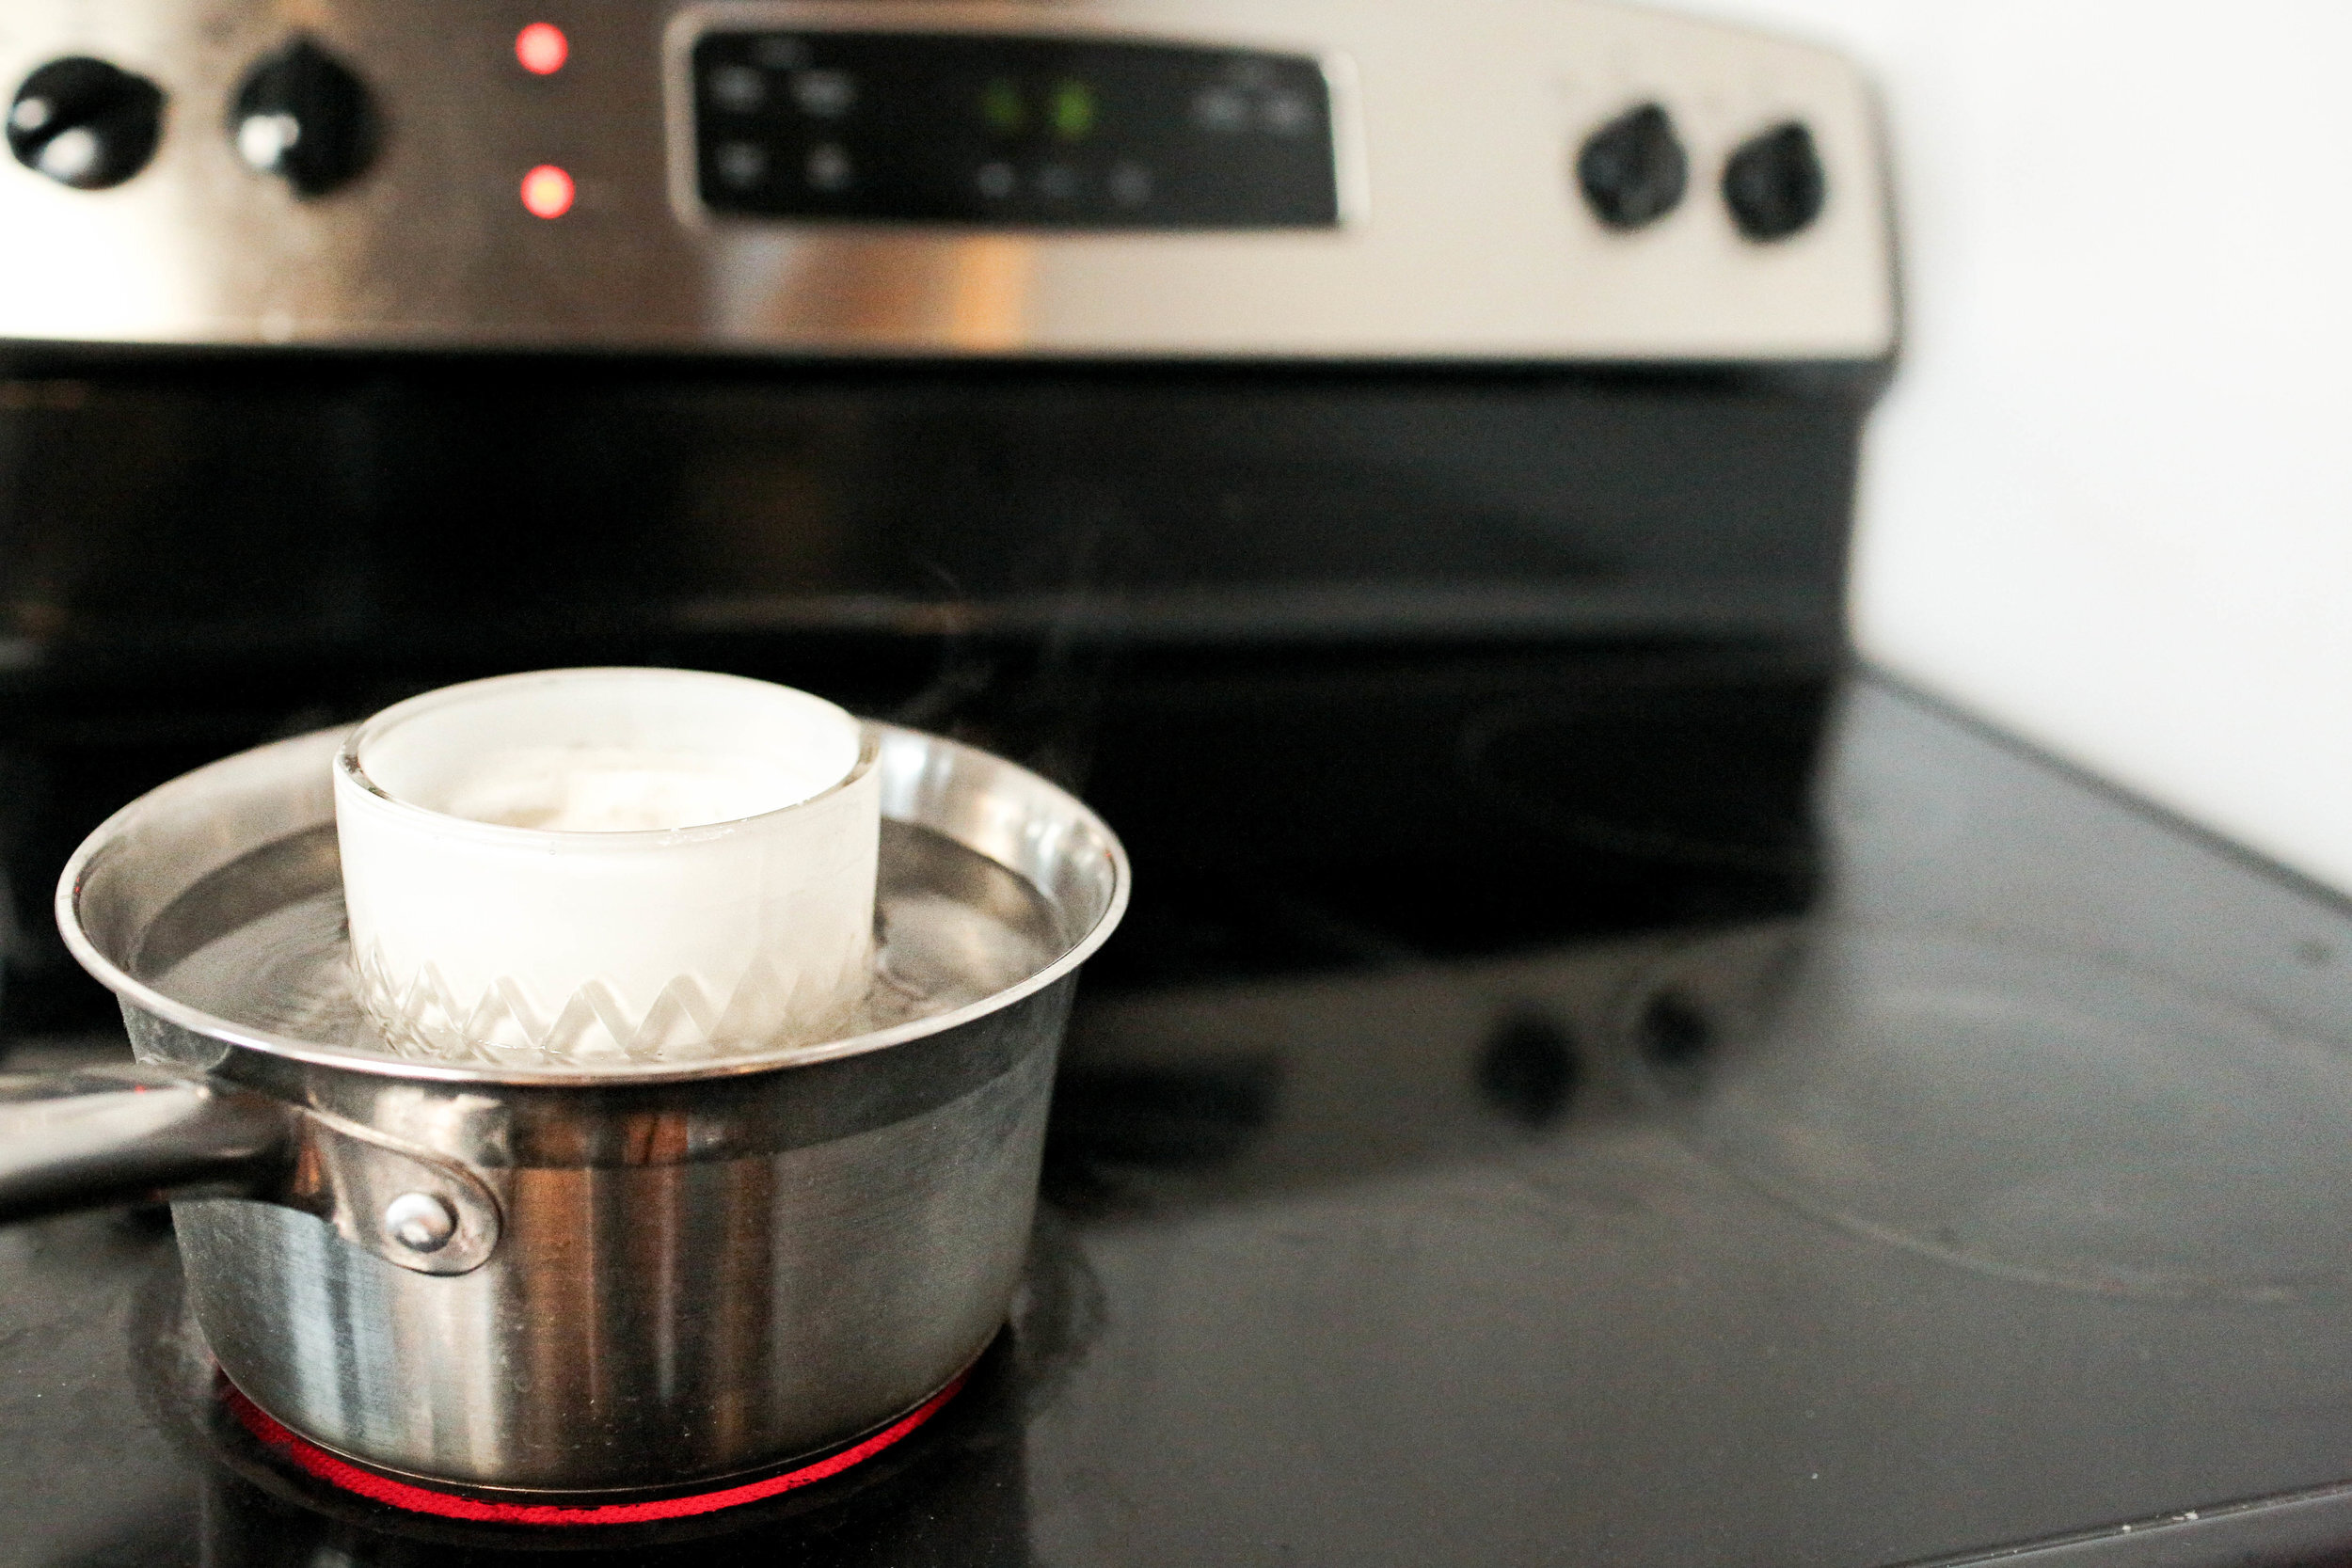
Next, we placed the candle inside of a pot of hot water on the stove to melt the wax. We were very careful with this, as there is a possibility that the hot water could crack the glass.
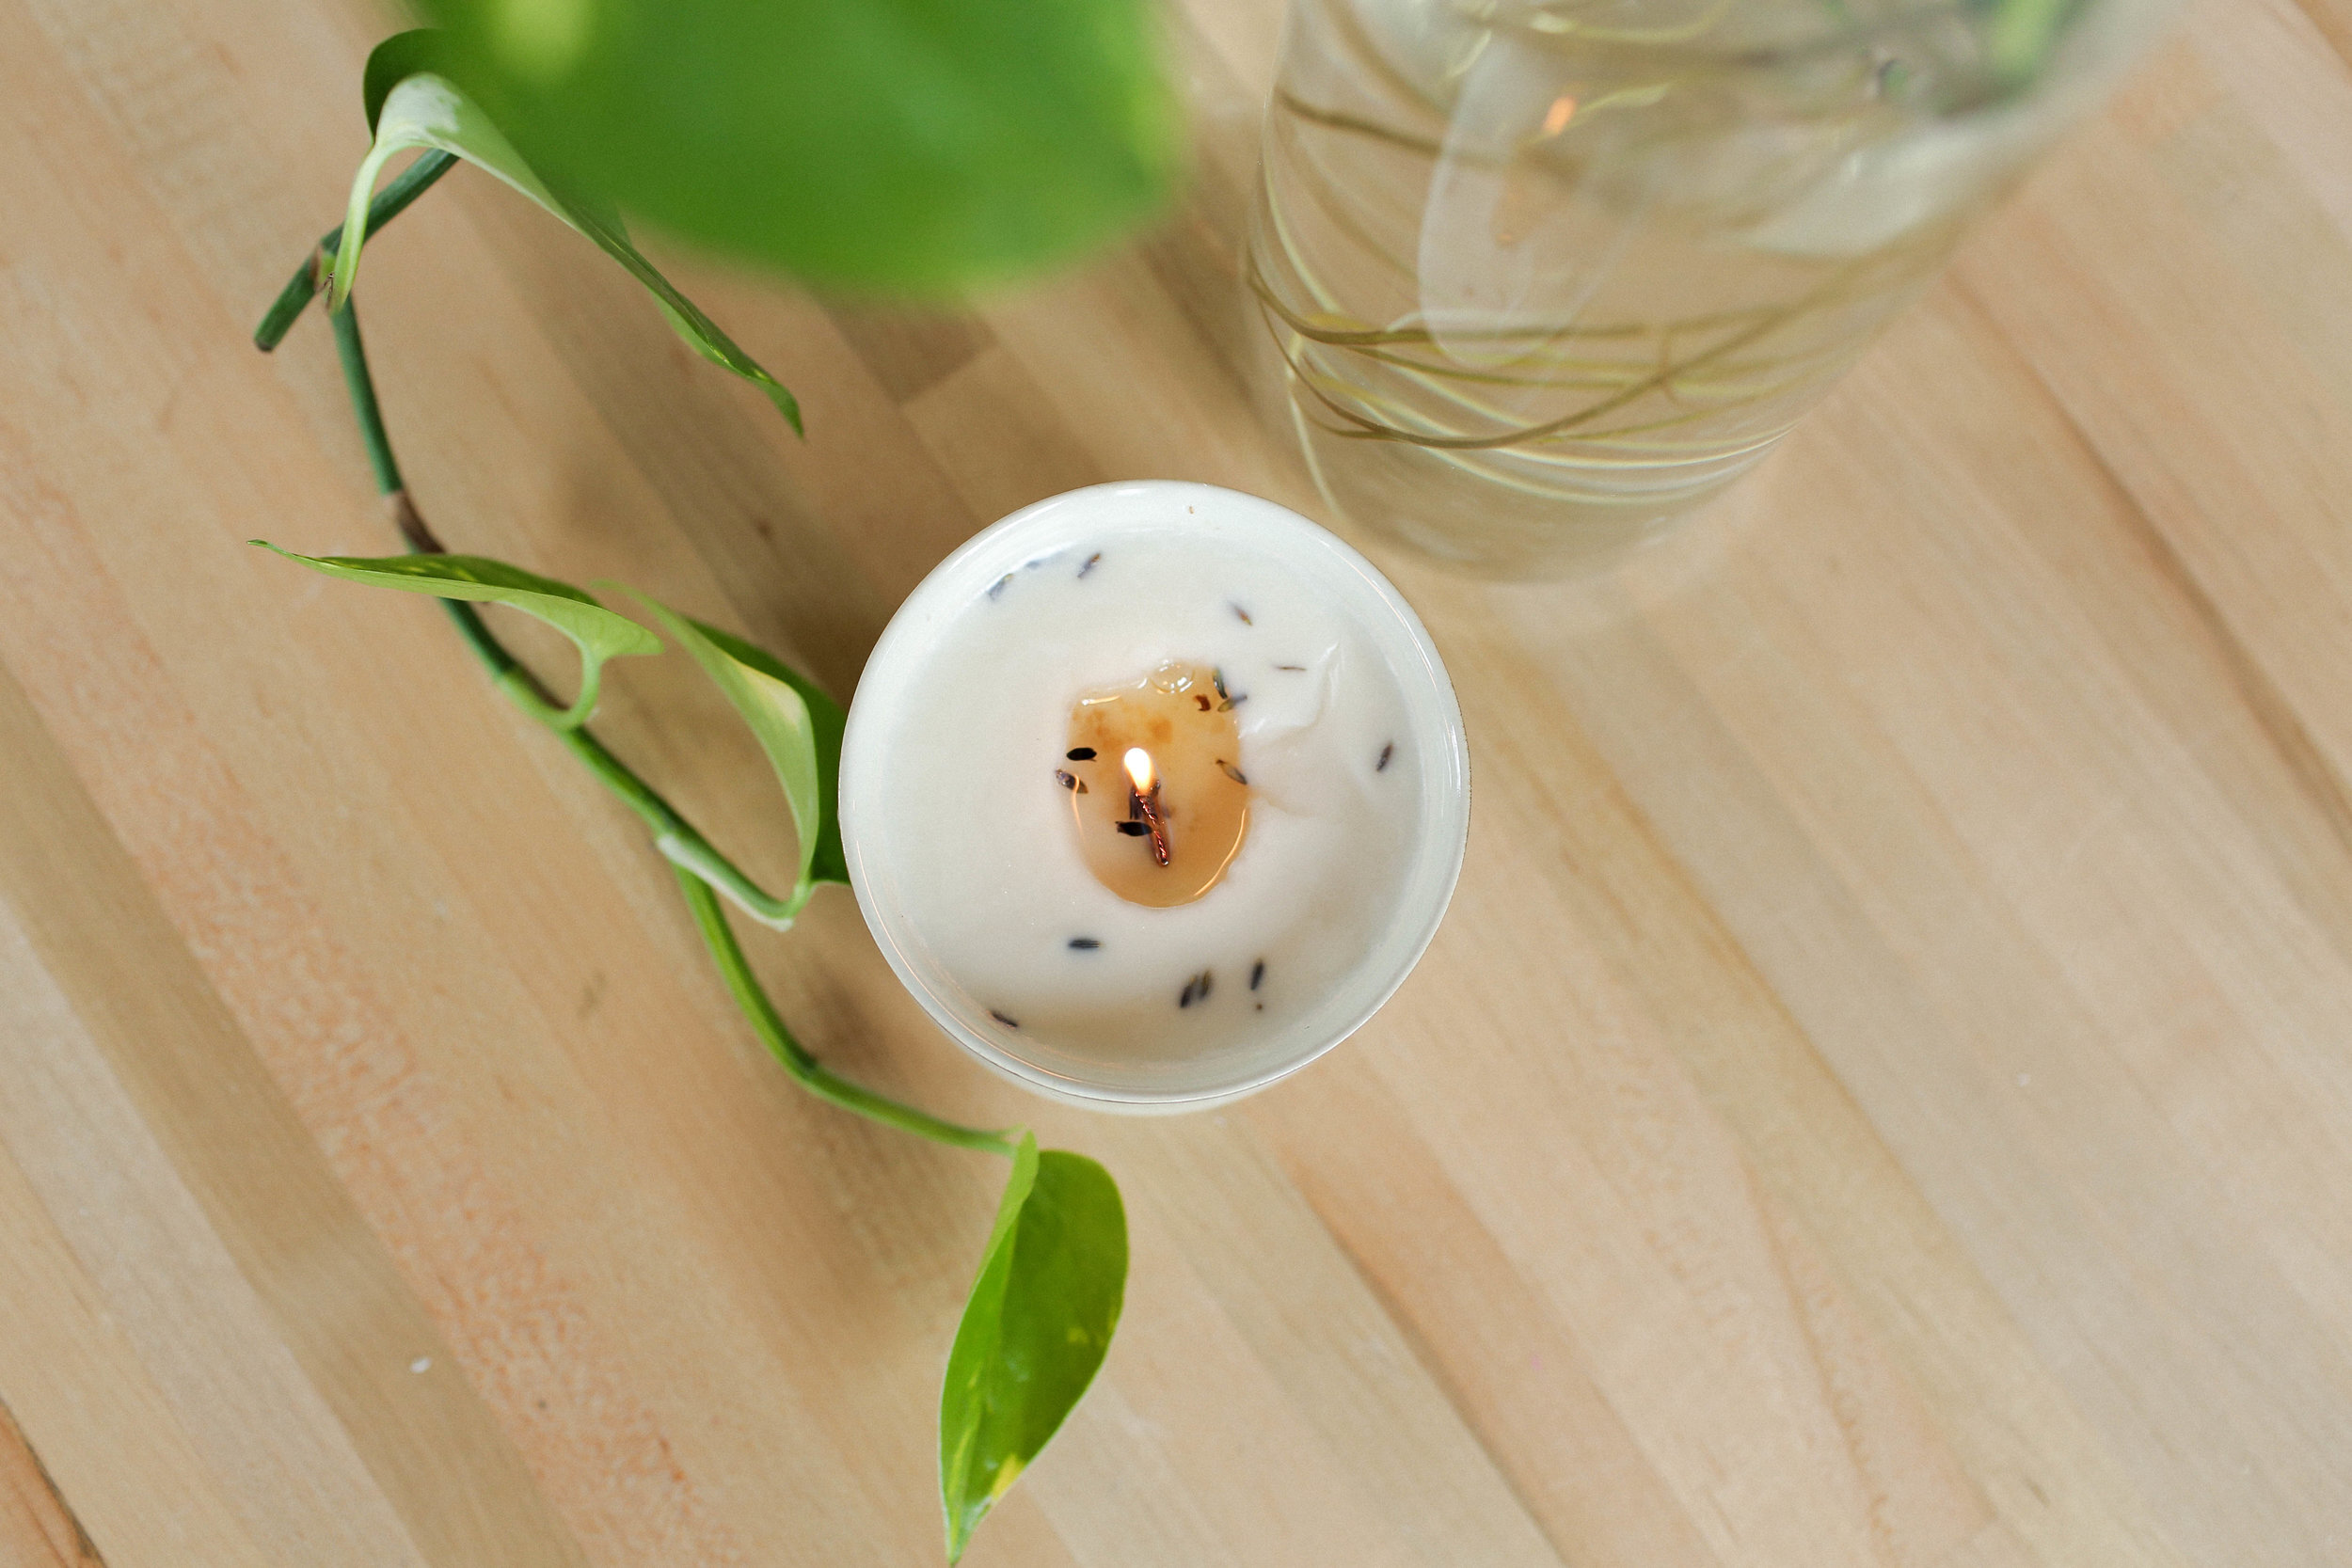
For our new candle, we are using a wooden wick (which gives your candle that campfire effect). Place your wick inside of your bowl, and cut the wick so that is flush with the top of your bowl. Go ahead and glue the base of the wick to the bottom centre of the bowl.


Once your old wax from the candle has completely melted, go ahead a pour it into the new candle bowl! On the top of the candle, we sprinkled some lavender to add something special. Once your candle has hardened, it’s ready to use! If your old candle still has wax inside of it, simply let is harden, and it may still be able to be used!


And that’s it! If you make any of these DIYs (but NOT mega candle guys), please send us a photo using the hashtag #SorryGirlsSquad! Also be sure to check out the video below!