HOW I UPCYCLED A BASIC COFFEE TABLE INTO A DREAM ORGANIC MODERN PIECE
Welcome back to another instalment of Project Profit! This is the series where I find free or low cost second hand items with the goal of trying to flip them for some cash. All profits I do make from the series are donated to charitable causes throughout the series!
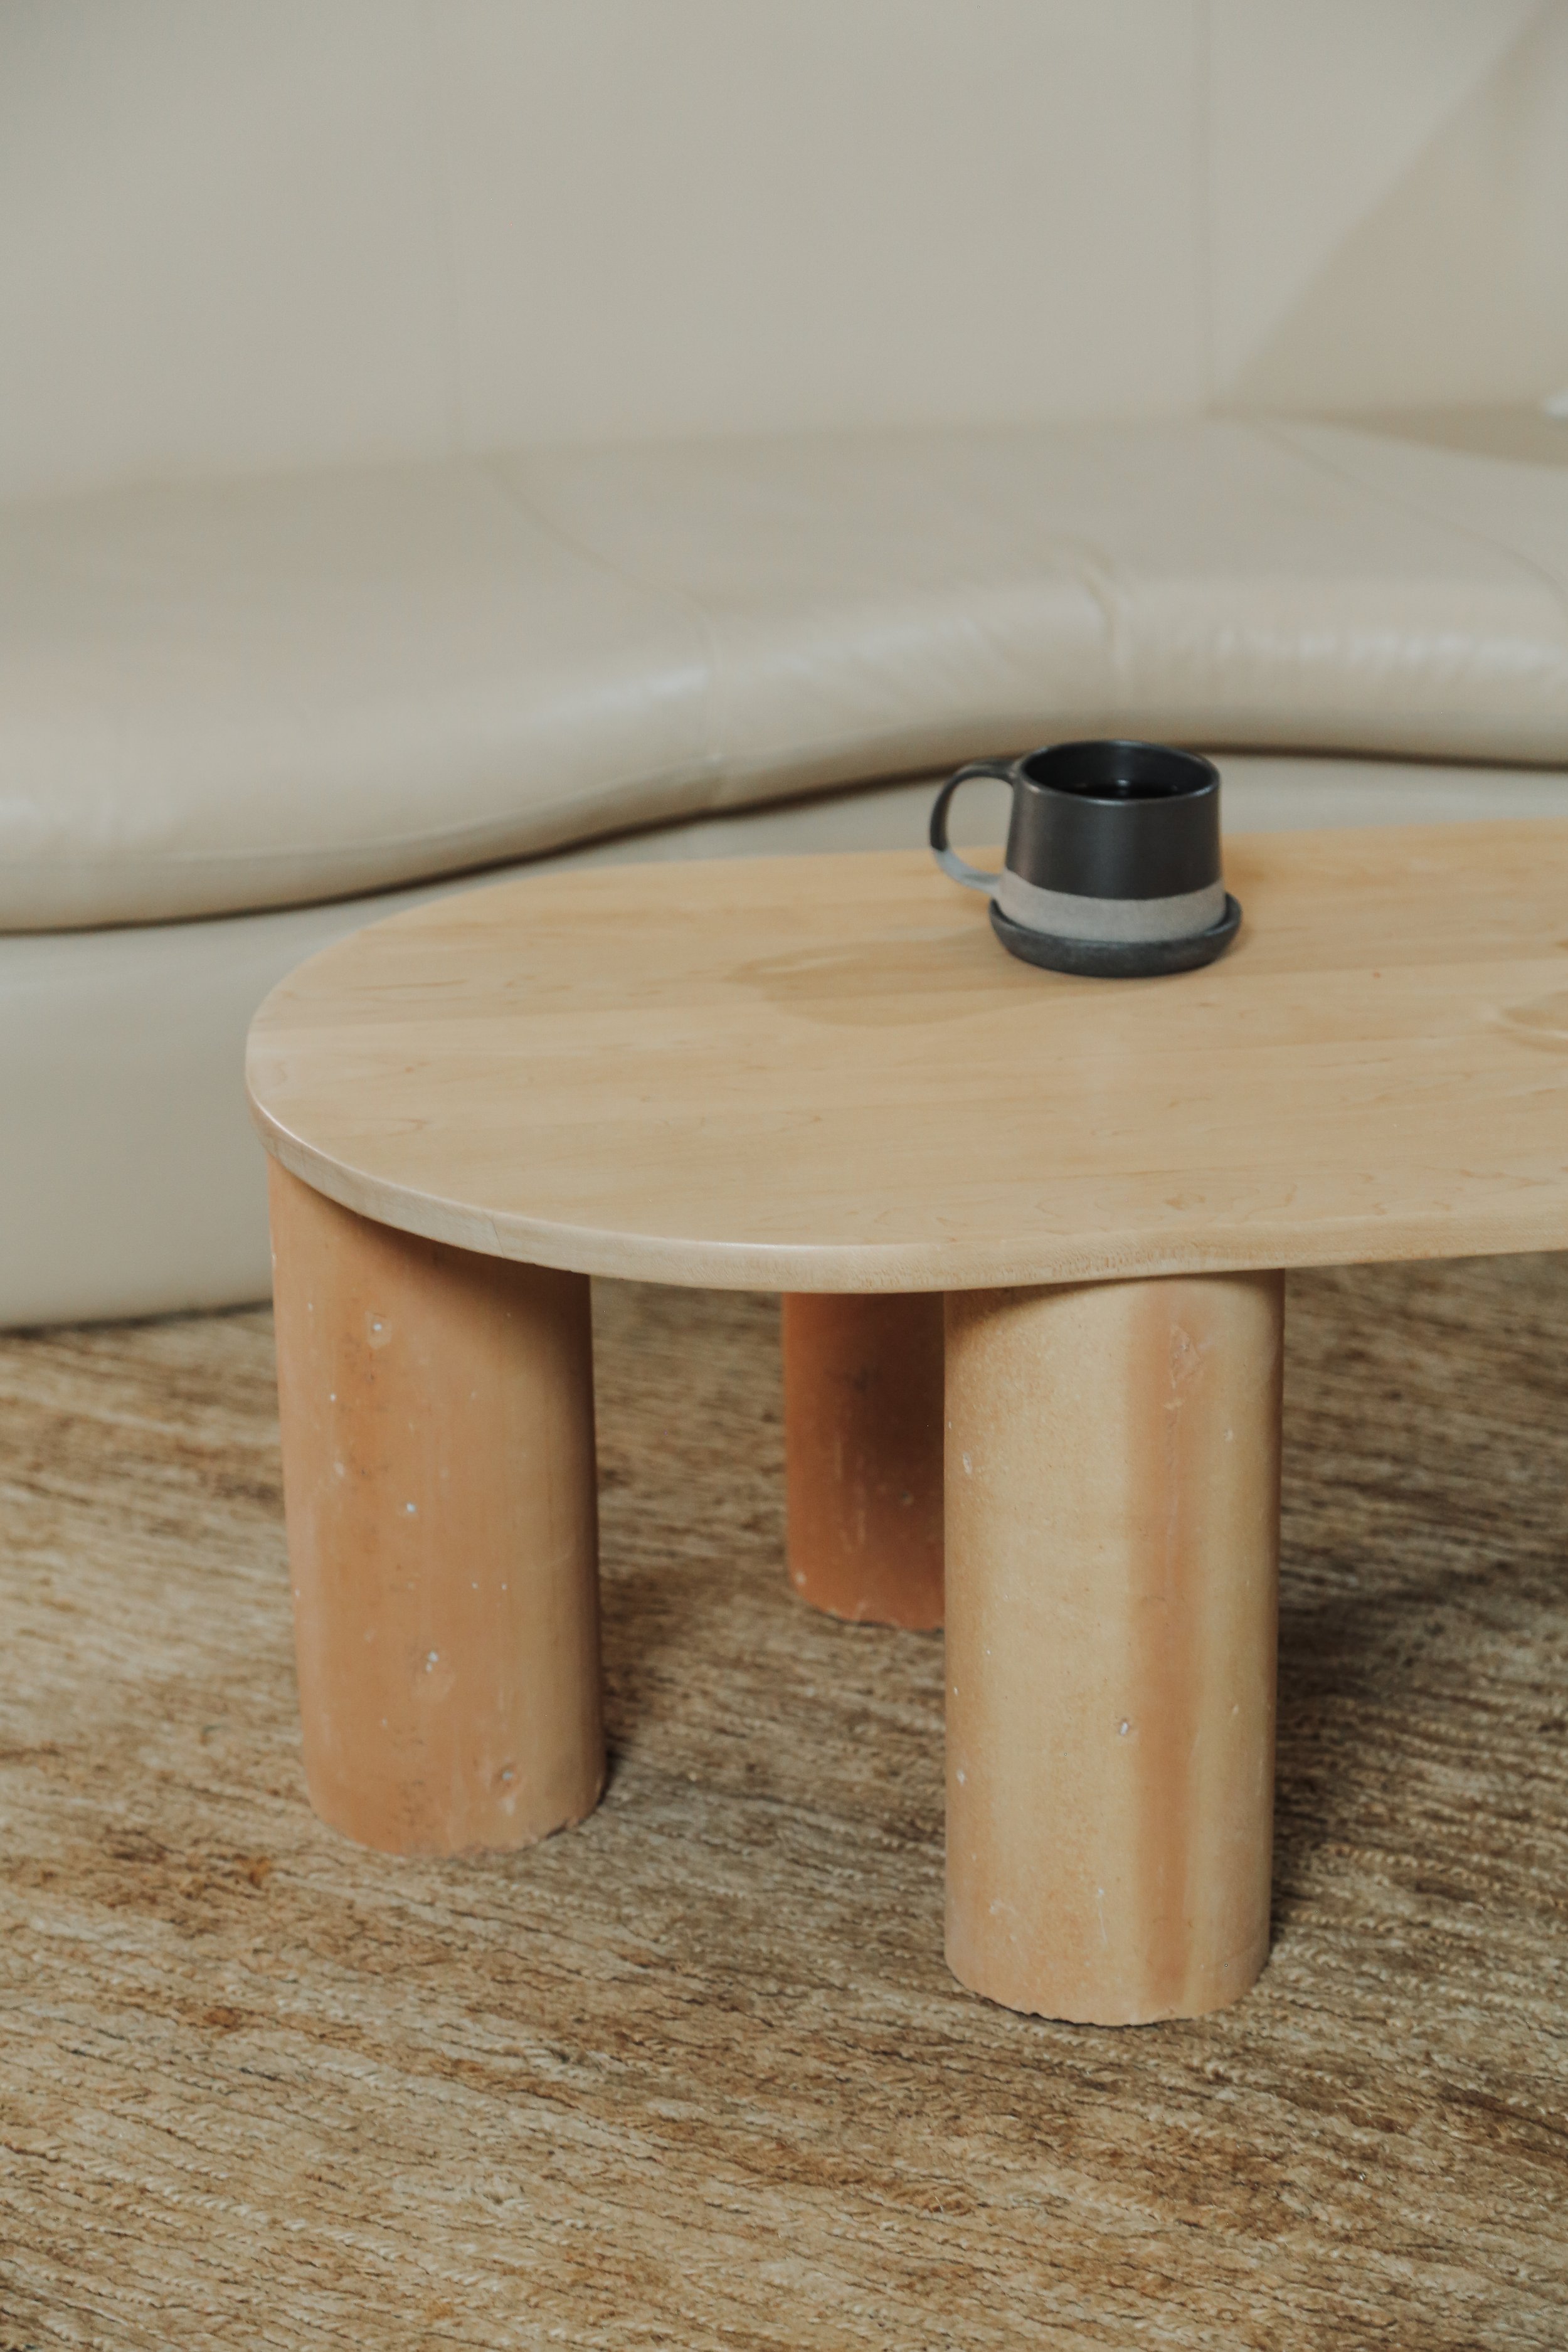
As I was scrolling through Facebook Marketplace, I came across some weeping clay tiles being sold for $2.50 a piece! These were once used as an underground drain solution in the 19th century, but the seller told me he used them for wine storage himself! I snagged them up knowing that I could use them on an upcycle project in the future, and as soon as I saw them in person, thought they were the perfect height for coffee table legs, so the idea took form and I got to work!
Inspiration


With the clay tiles acquired, I went to the office because I knew we had a coffee table that our team was hoping to get rid of. While functional, we honestly didn’t really have space for it and the style was a bit outdated, so I decided I would take the tabletop for my project.


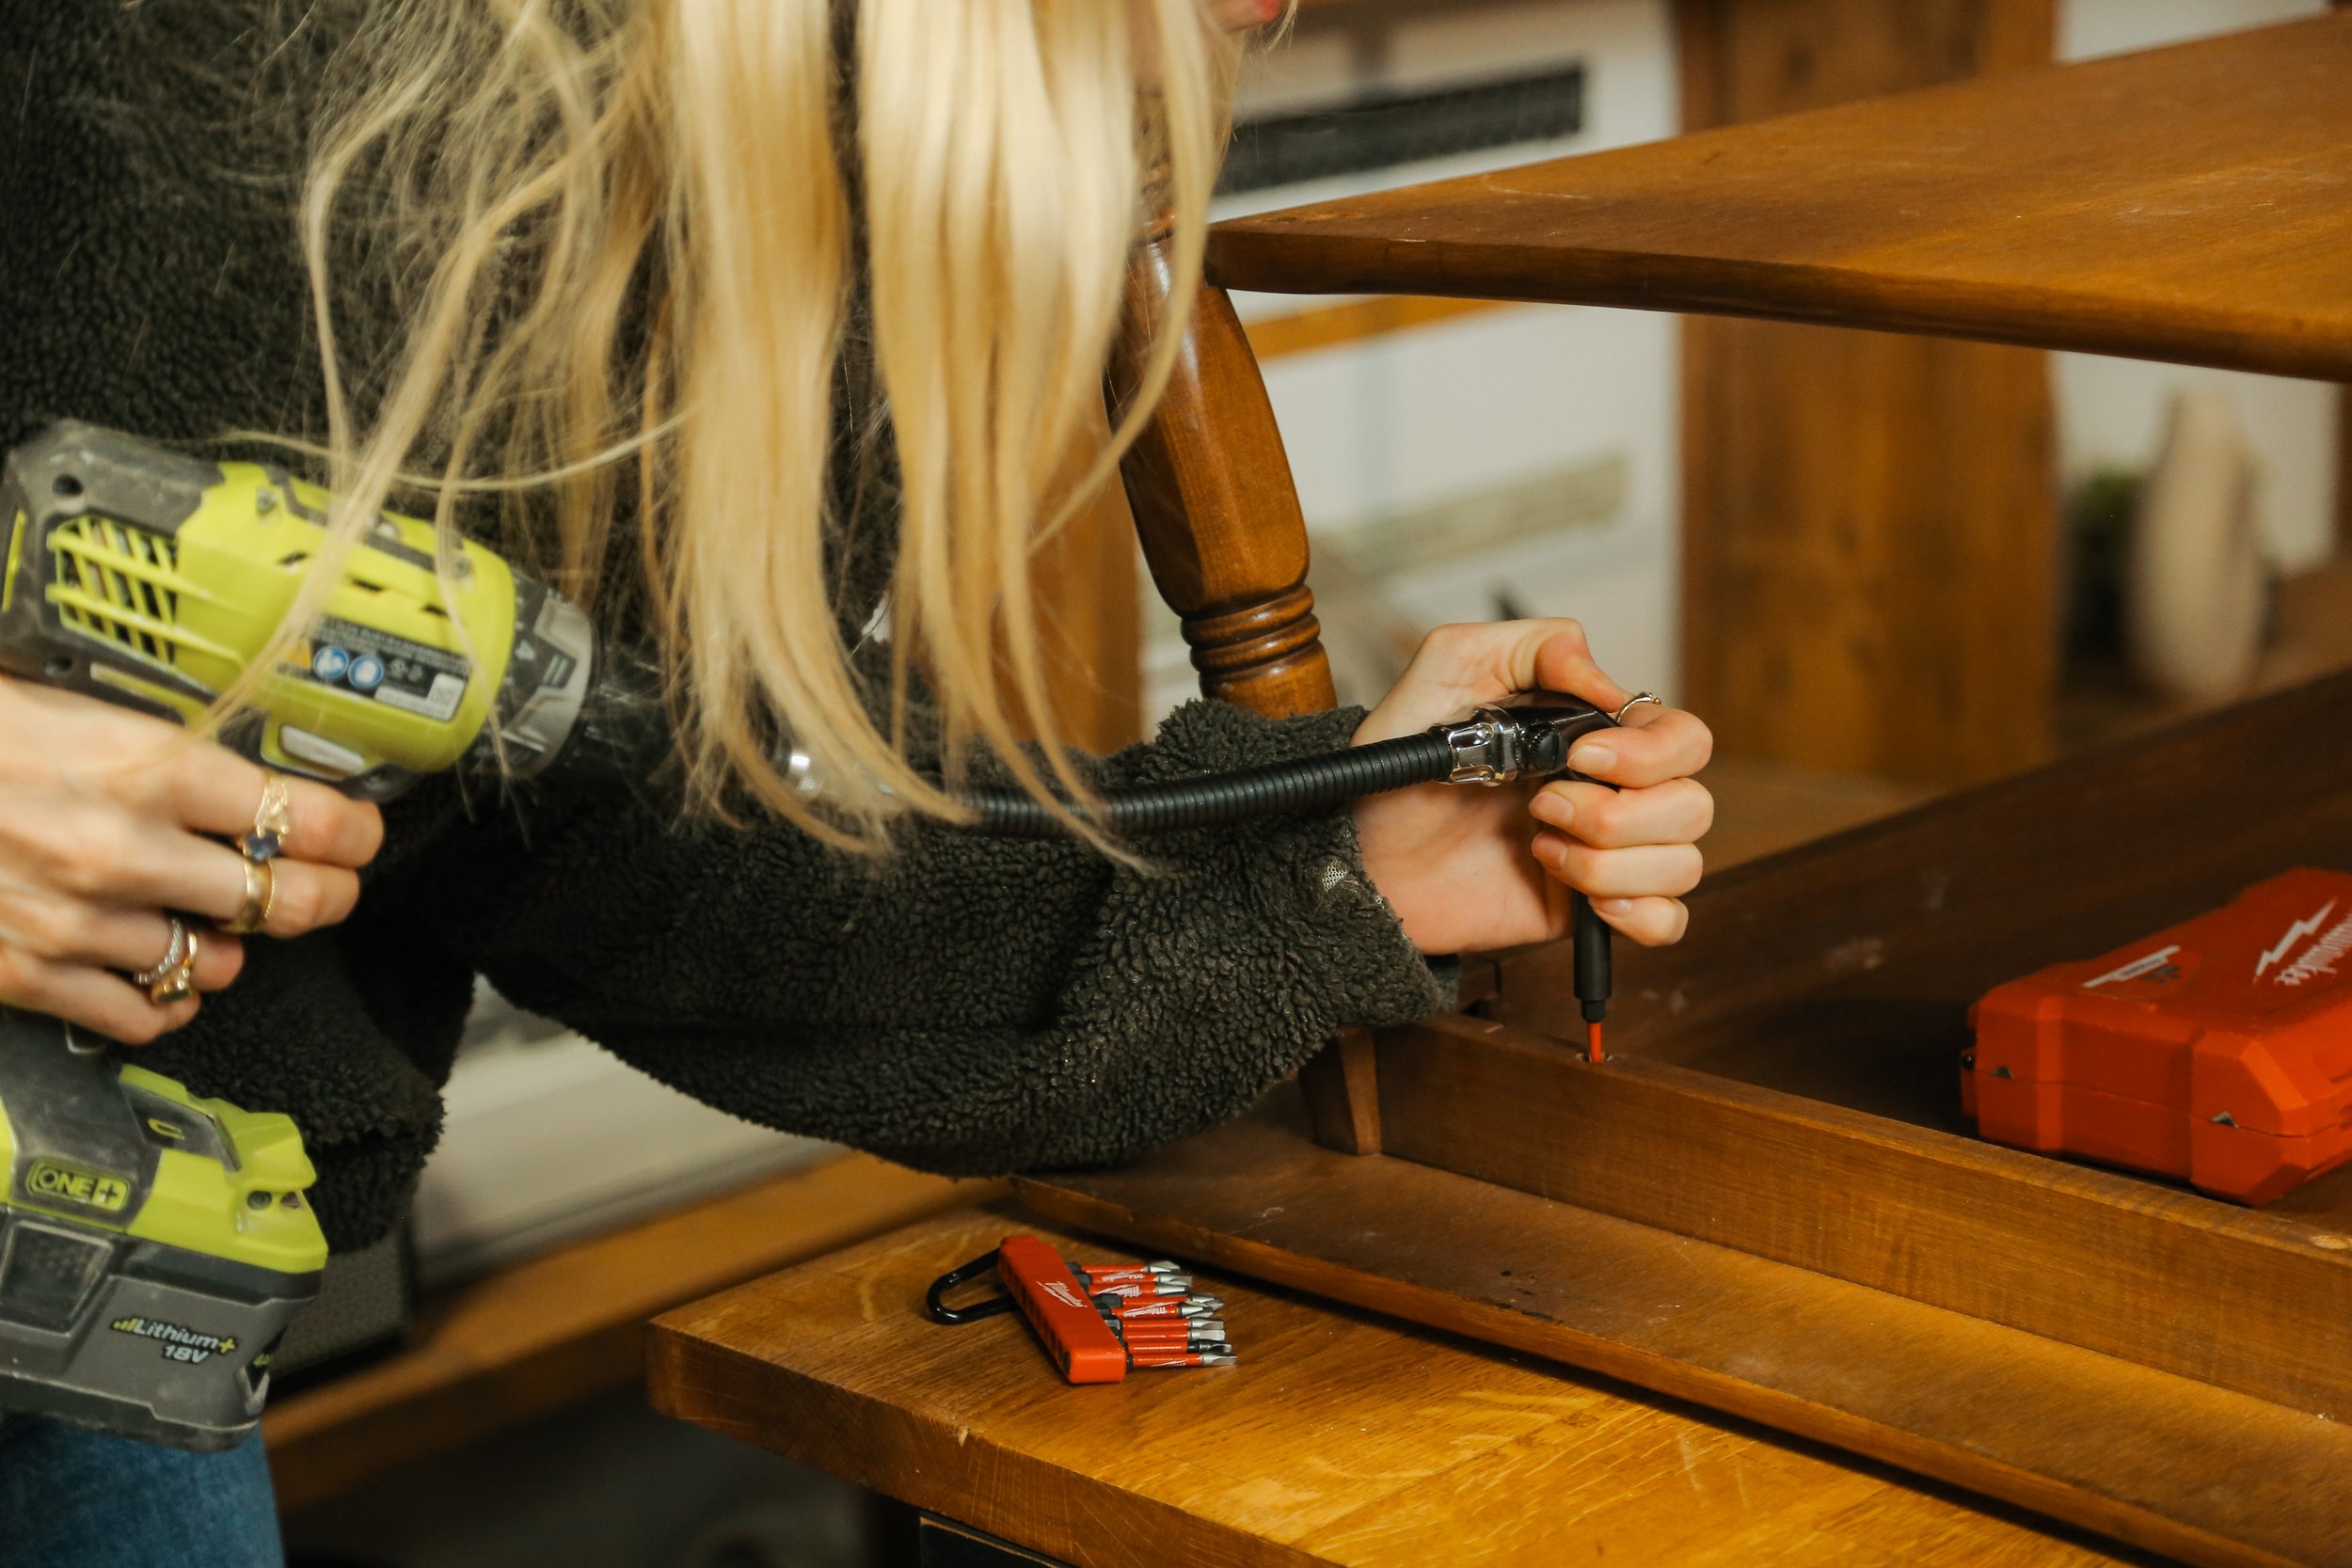
First things first, I seperated the table top from the base of the old coffee table to use the top. (Don’t worry, we kept the rest of the table to use for a project in the future).

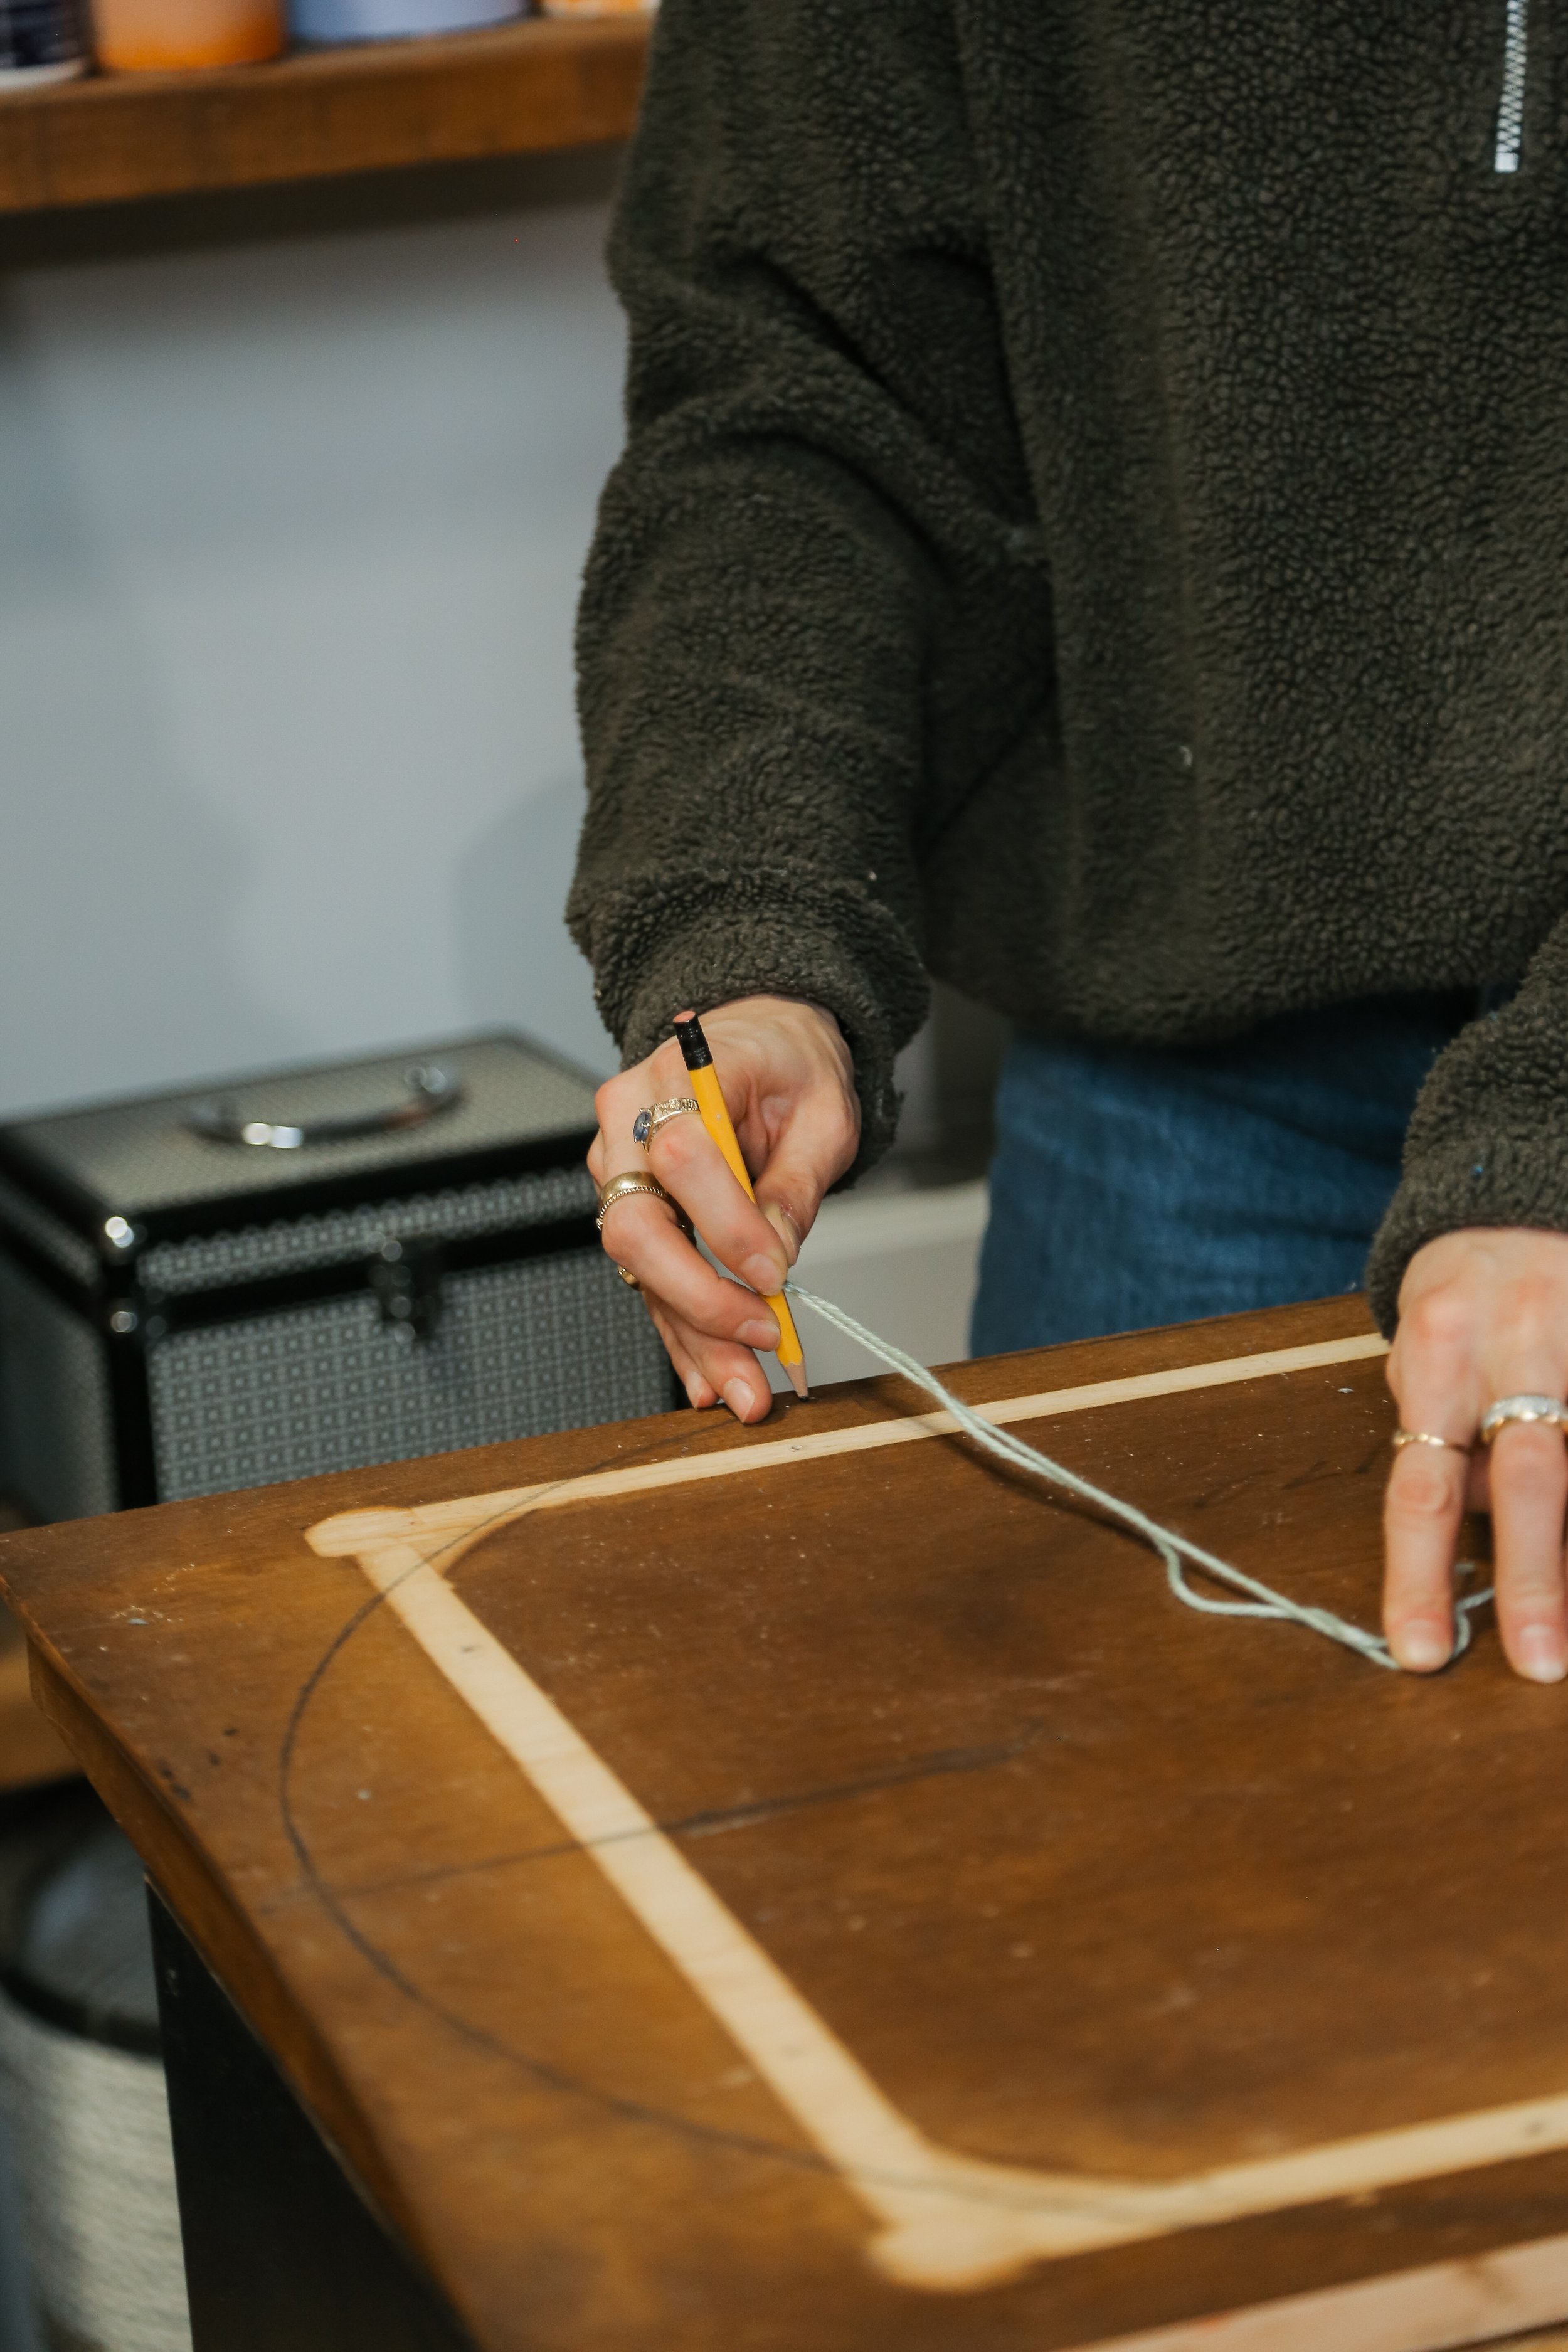
Inspired by the shape of the cylinder legs, I decided to create a pill-capsule-like form for the tabletop. I marked the center of the table and created the capsule shape using a string-tied pencil to draw it out. Using a circular saw, I trimmed off the marked curved edge.


Before sanding the whole thing, I covered it in paint stripper and scrapped off the pre-existing varnish so that the sanding process would be easier. Next, I sanded the whole thing down to the original grain.


Once I was done sanding, it was time to move onto the legs. I decided on six pillars for the table to stand on and glued them to the top using construction adhesive, focusing on the inner part for a secure hold. Then I just made sure to let the adhesive dry for a few hours.


I opted not to stain the wood, but instead applied a clear top coat. To give it the natural look I was going for.