BACK TO SCHOOL IKEA UP CYCLE

Today we decided to raid the ‘AS IS’ section at IKEA and see if we could find something bland and flip it into something incredible! When we went to IKEA, we kept our eyes out for something that could be useful for a student or a dorm room.

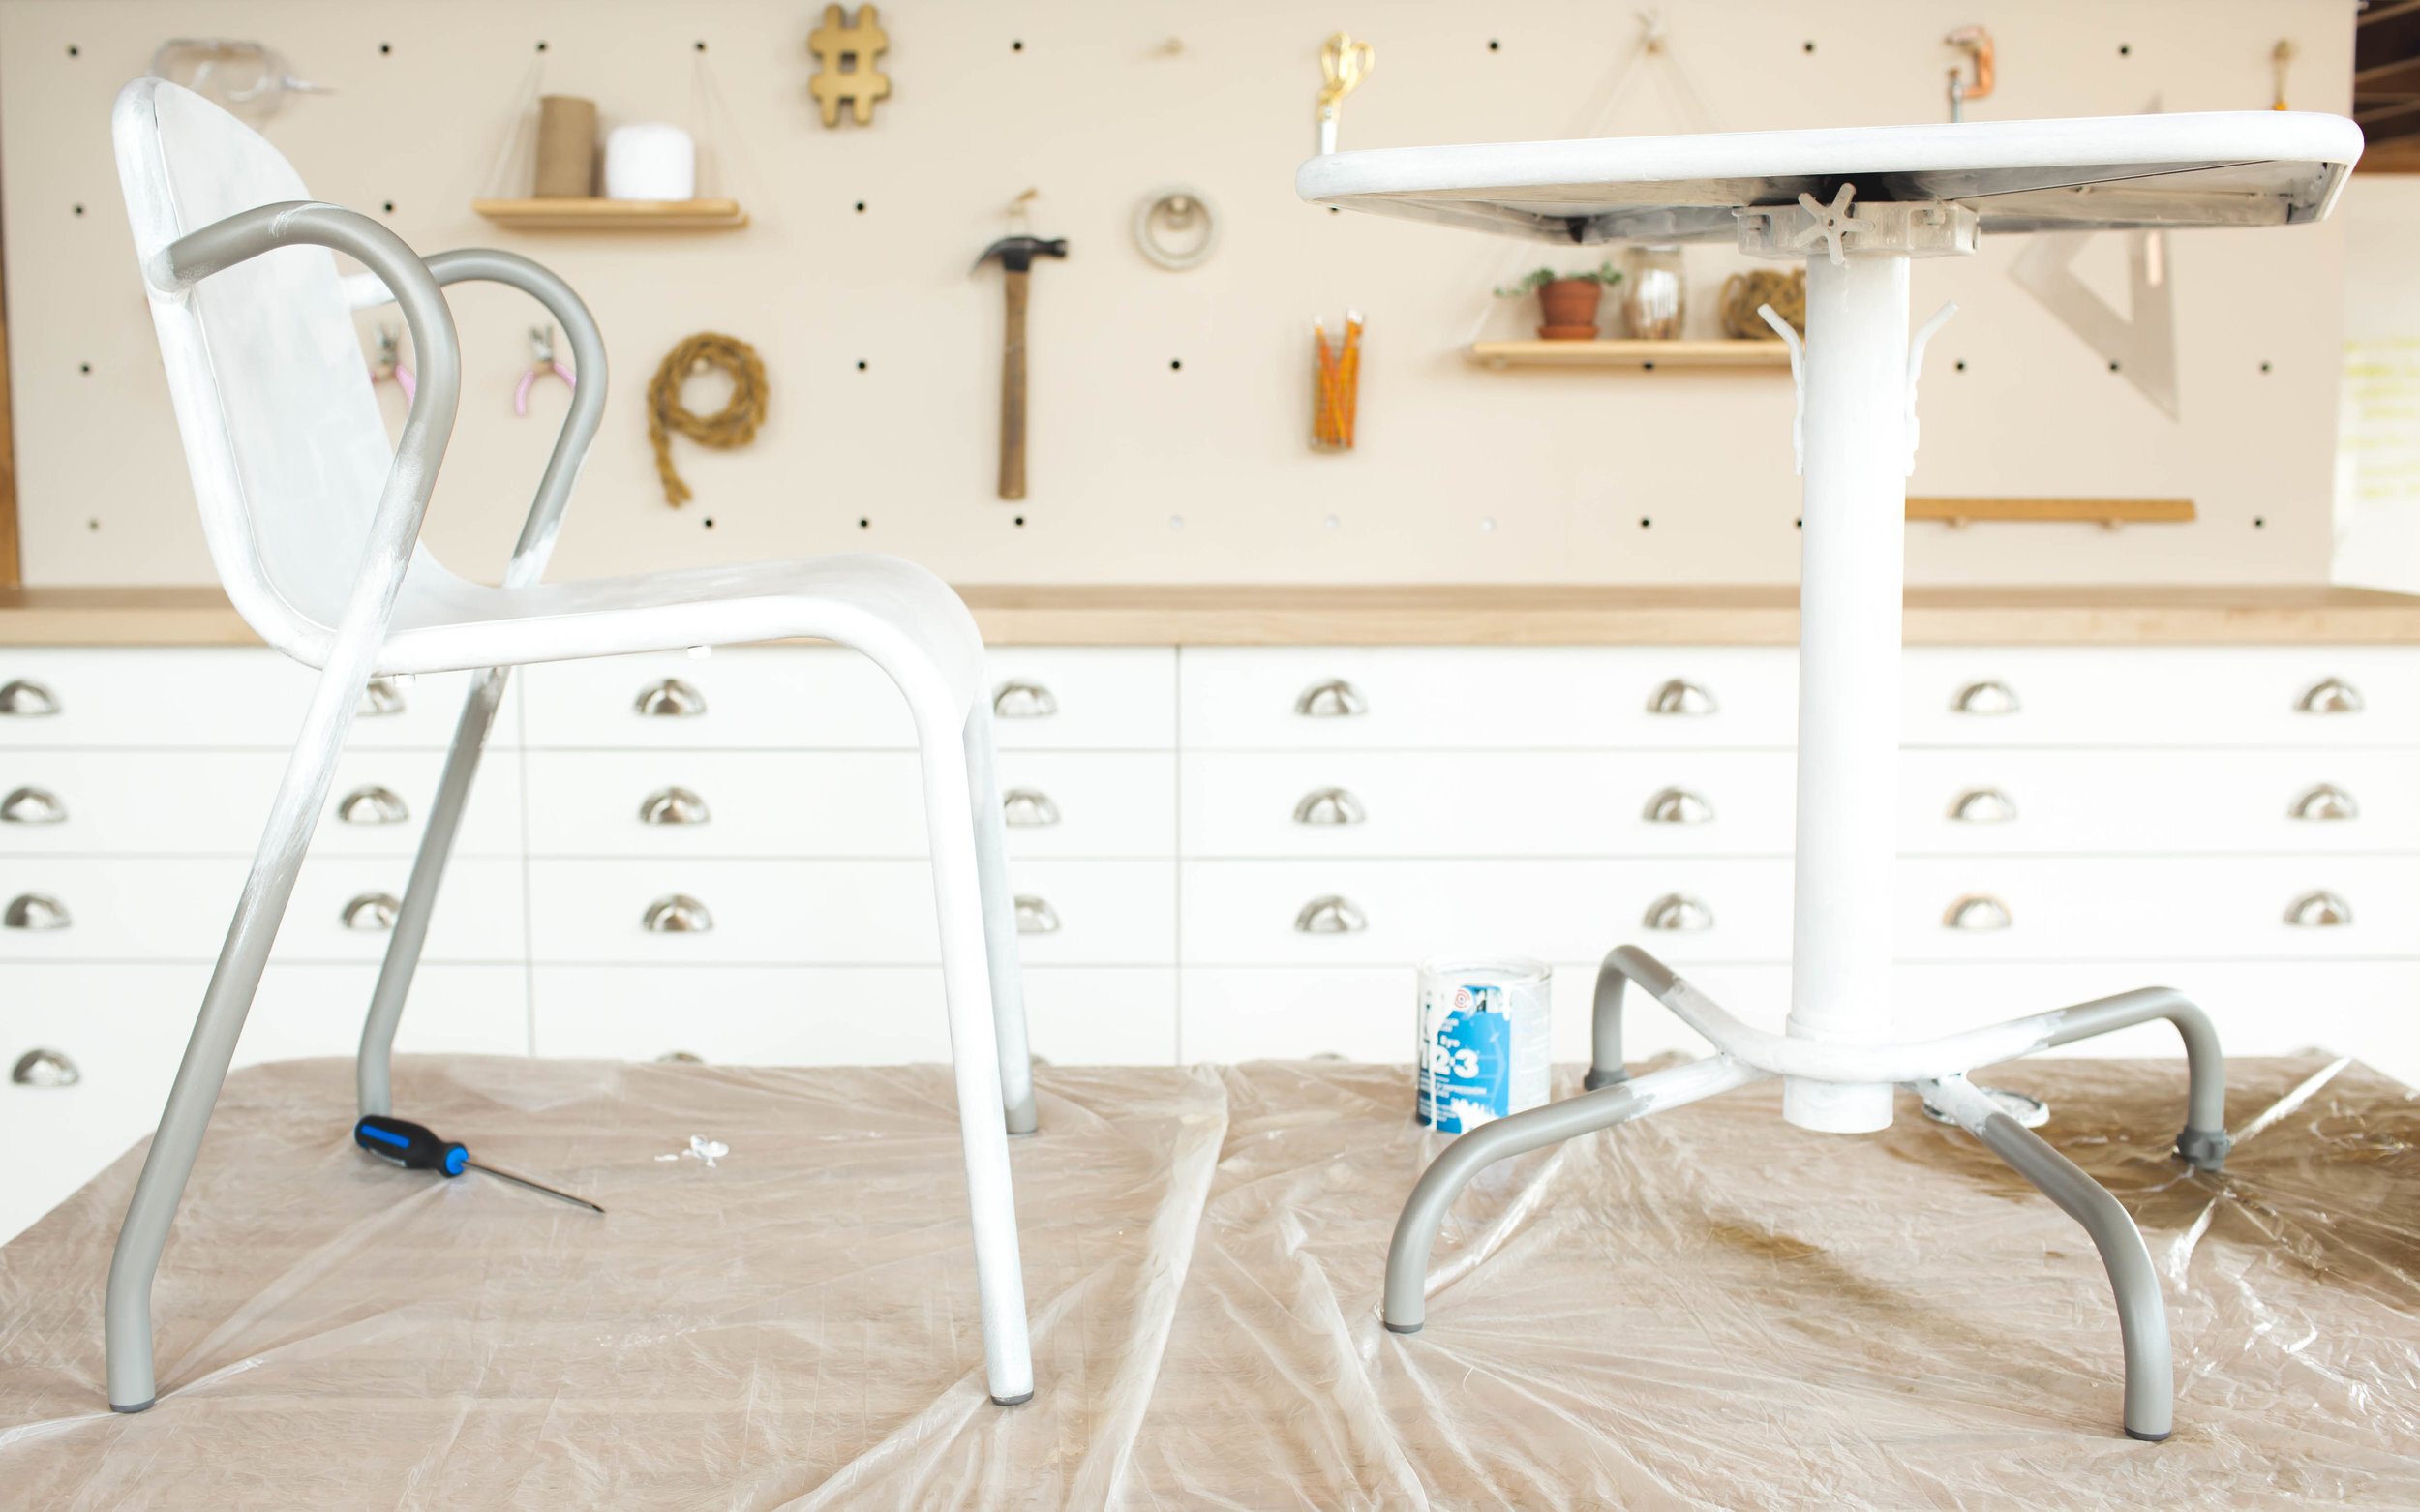
While at the store, we found an interesting desk and chair set that we think we can transform into something really cool.

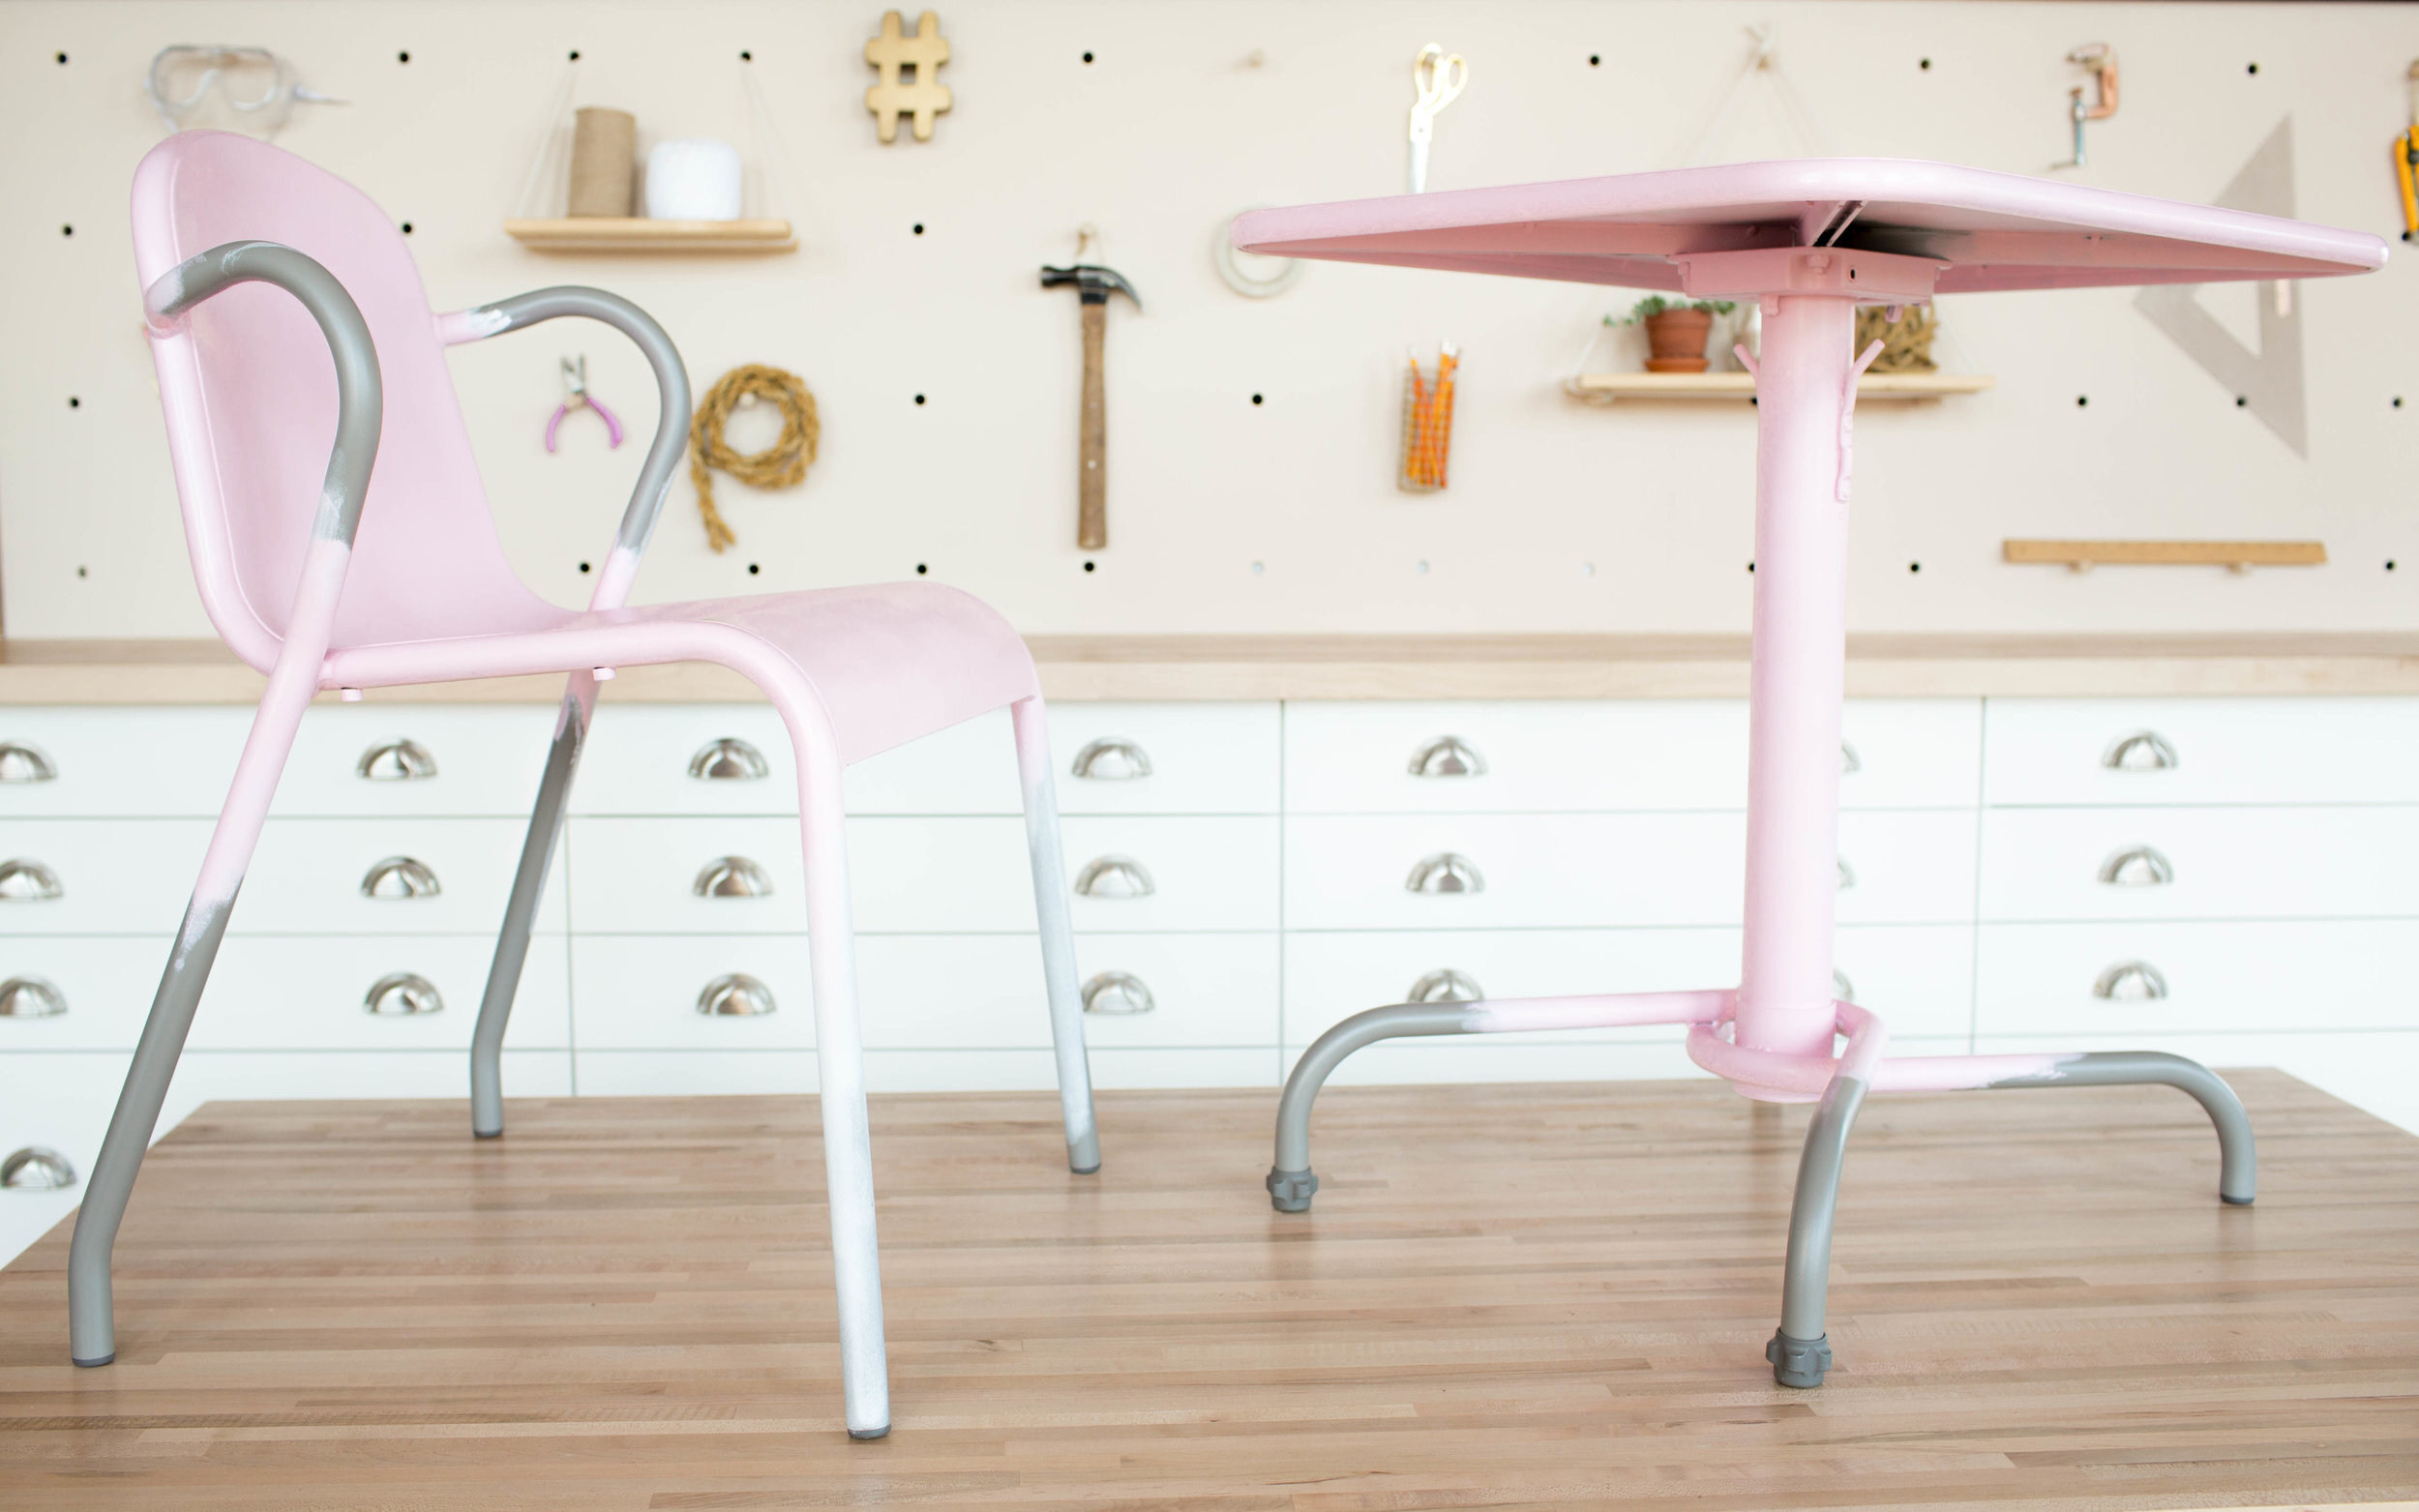
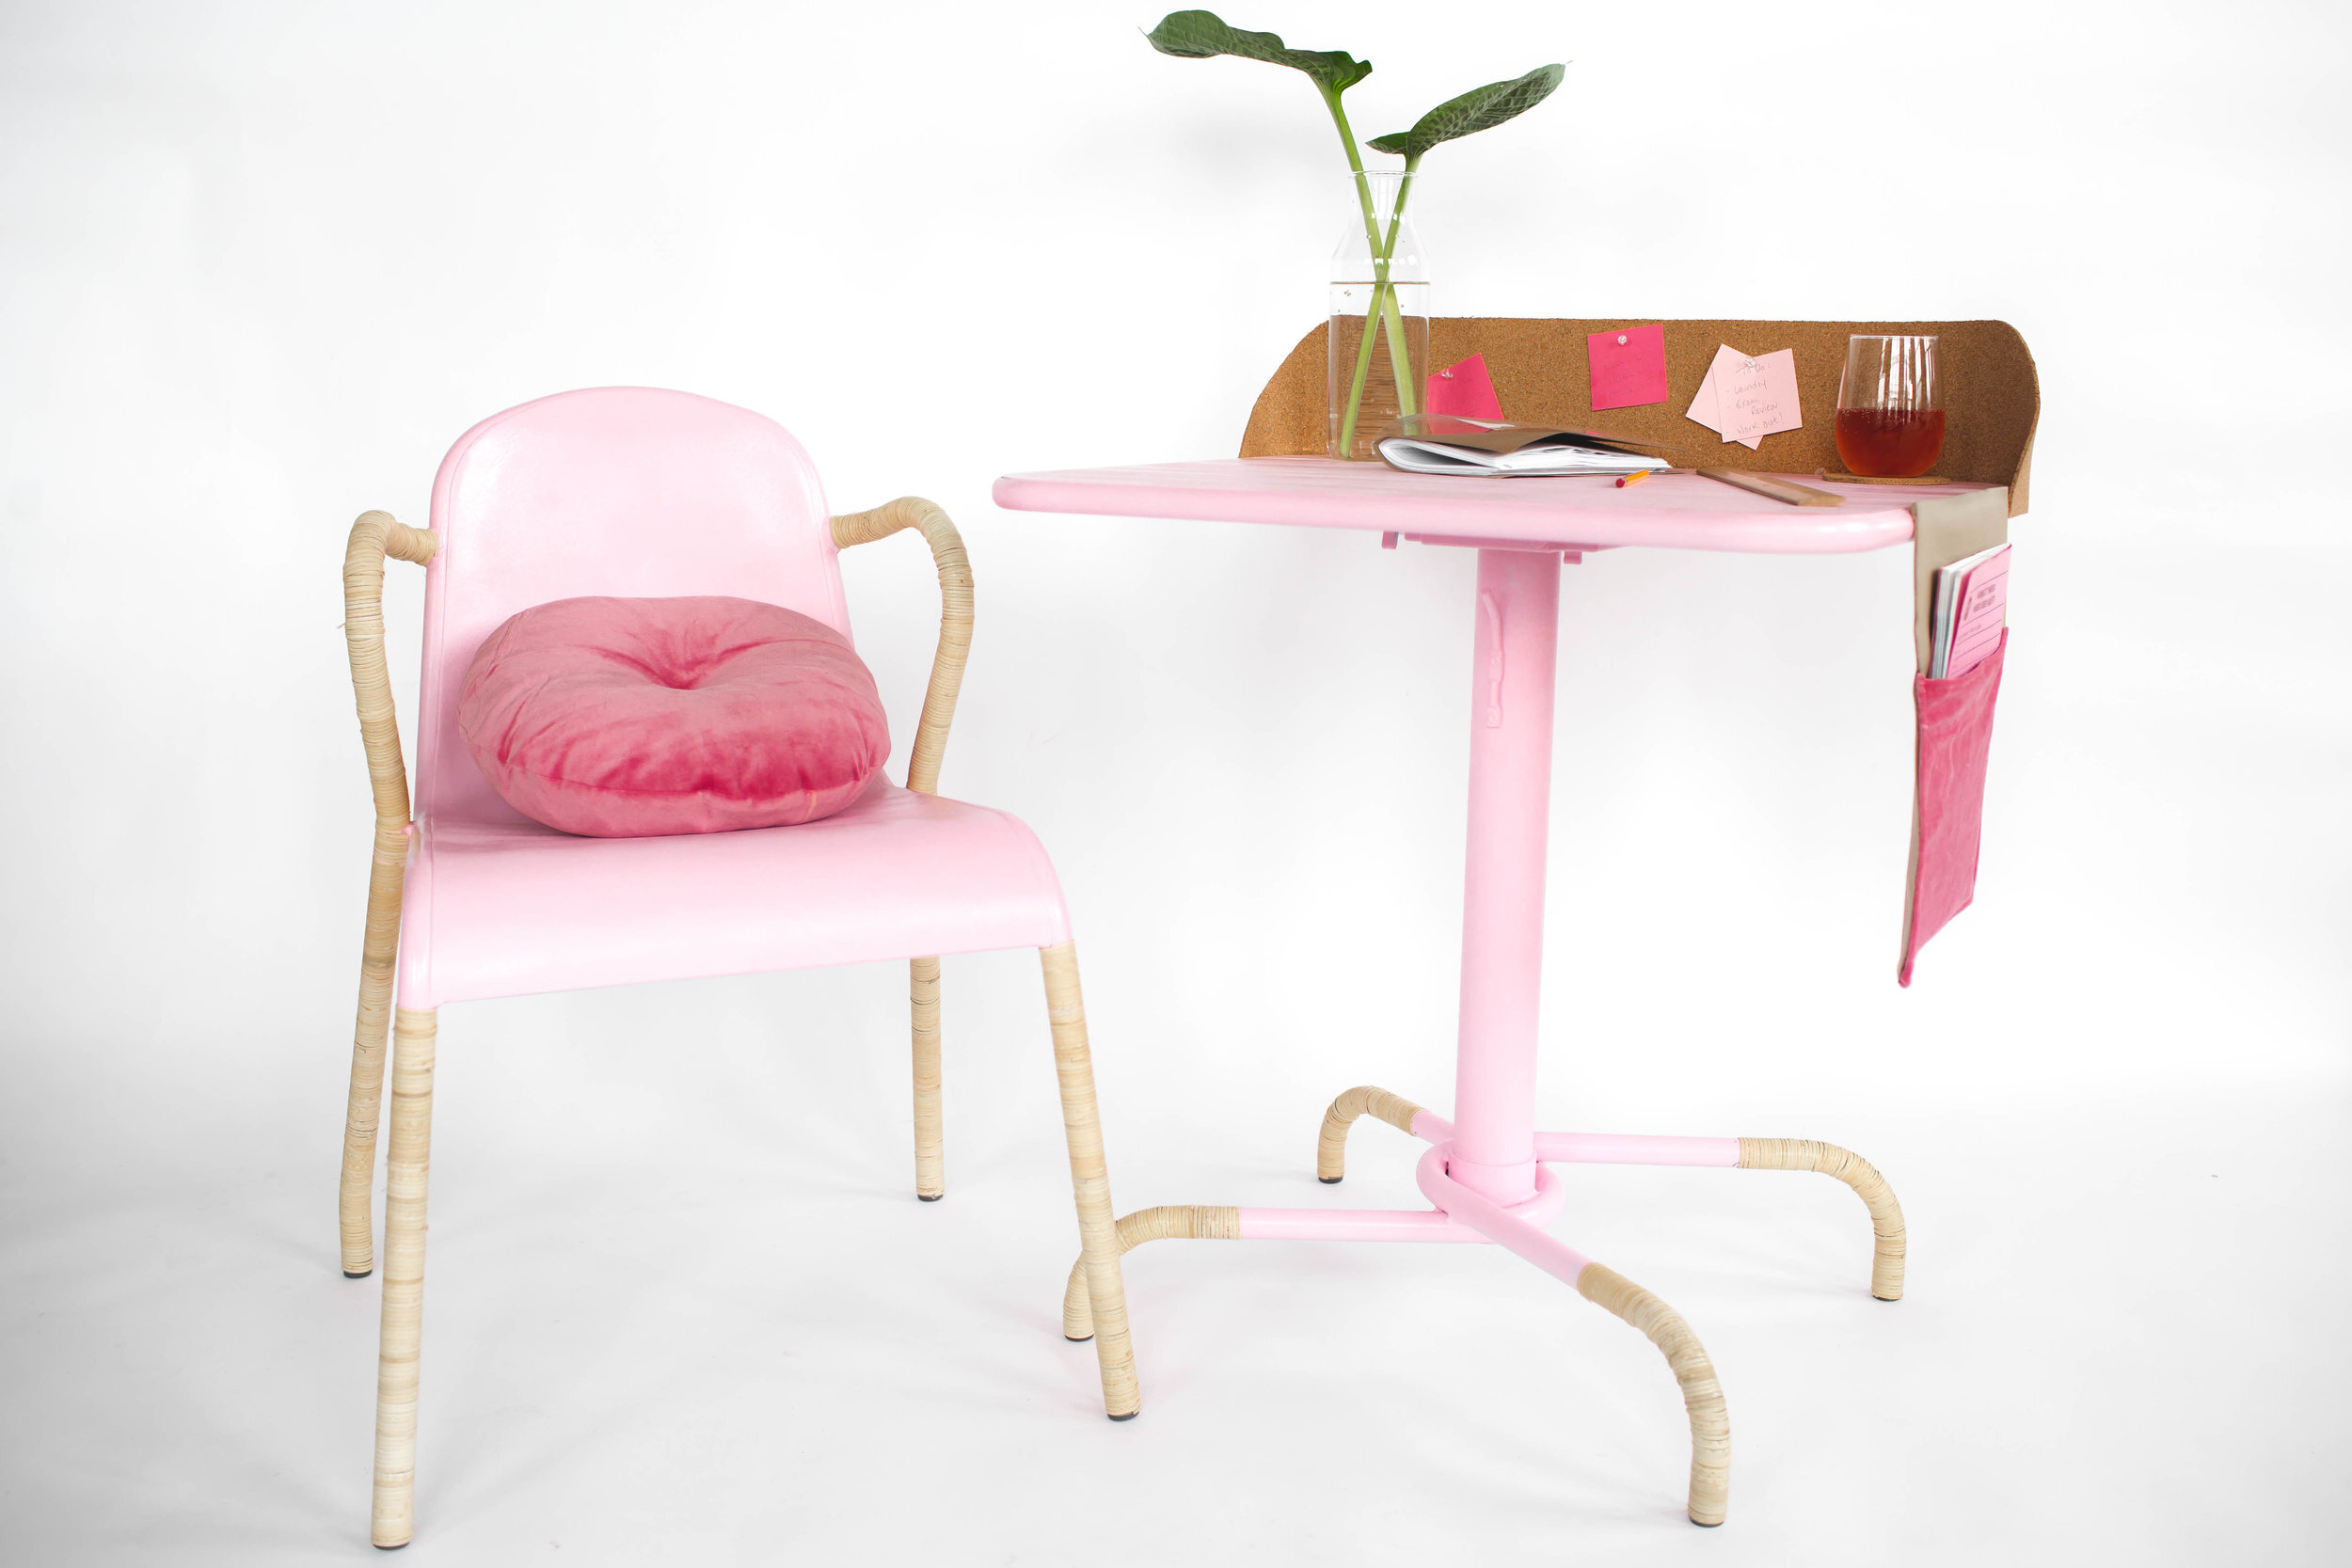
We started by priming then painting our set pink. We decided to add a clear coat sealant as well to hold everything in place.
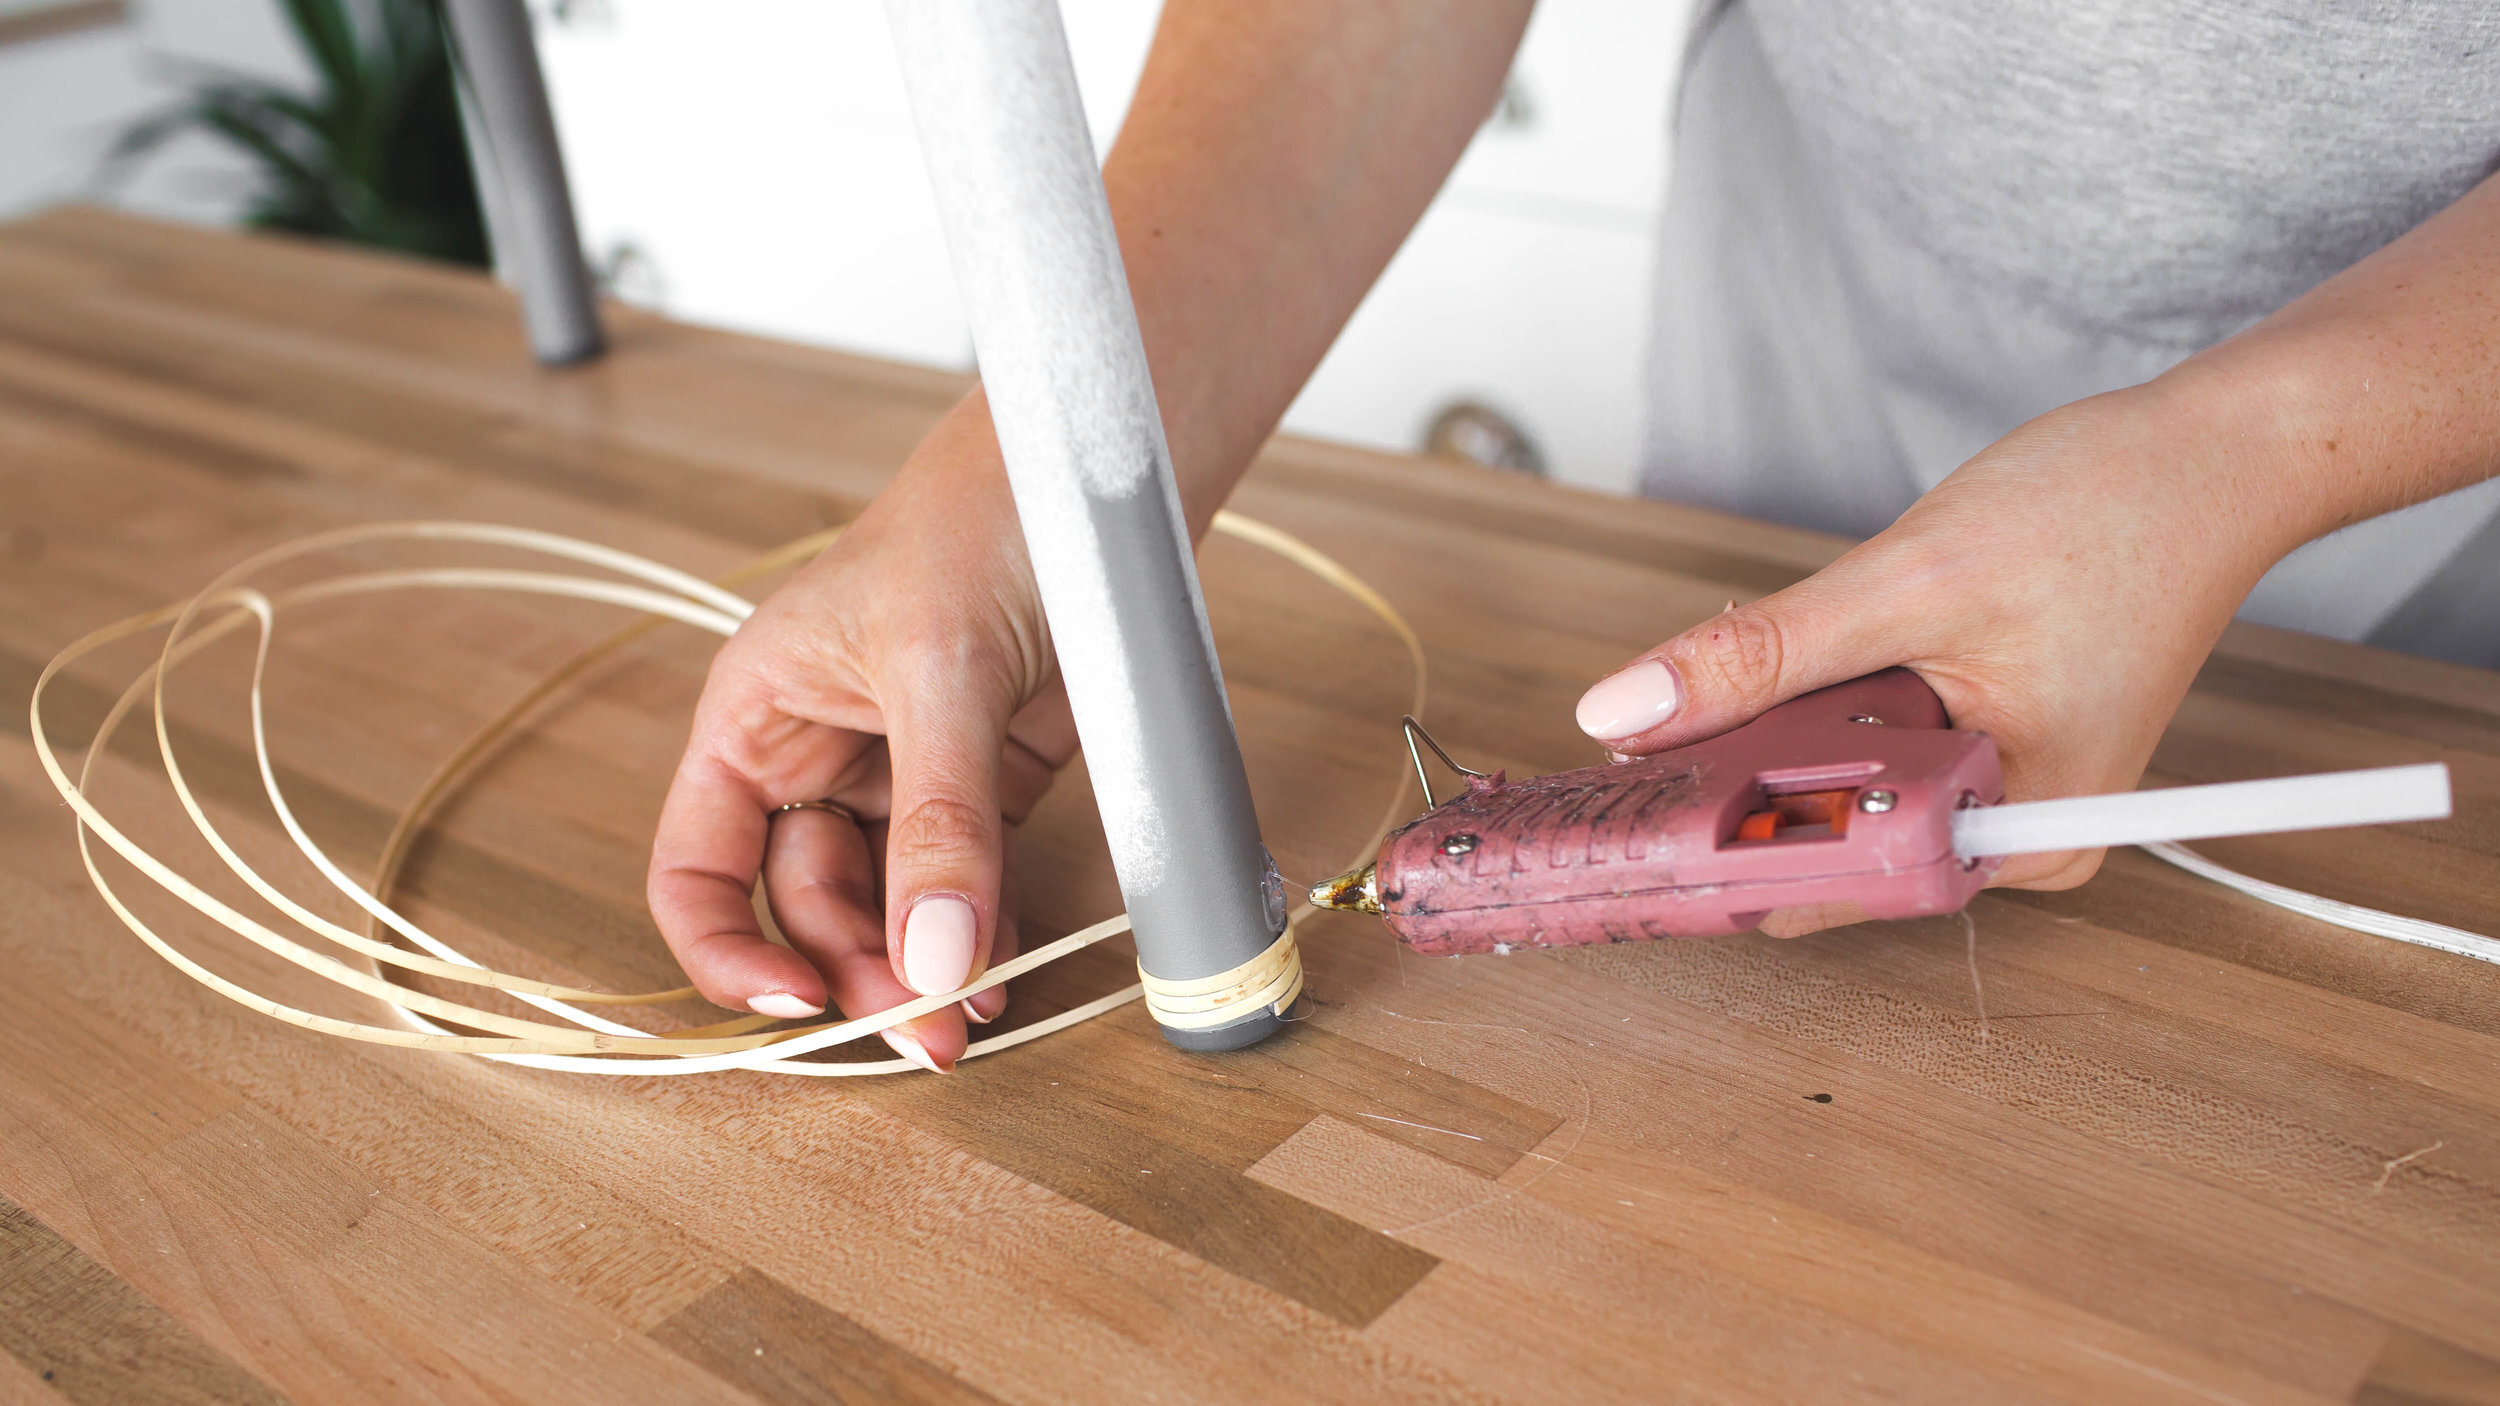
Next to make this set next level detailed! We decided to wrap strand cane around the legs of the table and chair, and the arms of the chair. We hot glued the end of the strand cane around the base of the leg and worked our way up, wrapping and hot gluing as we went.
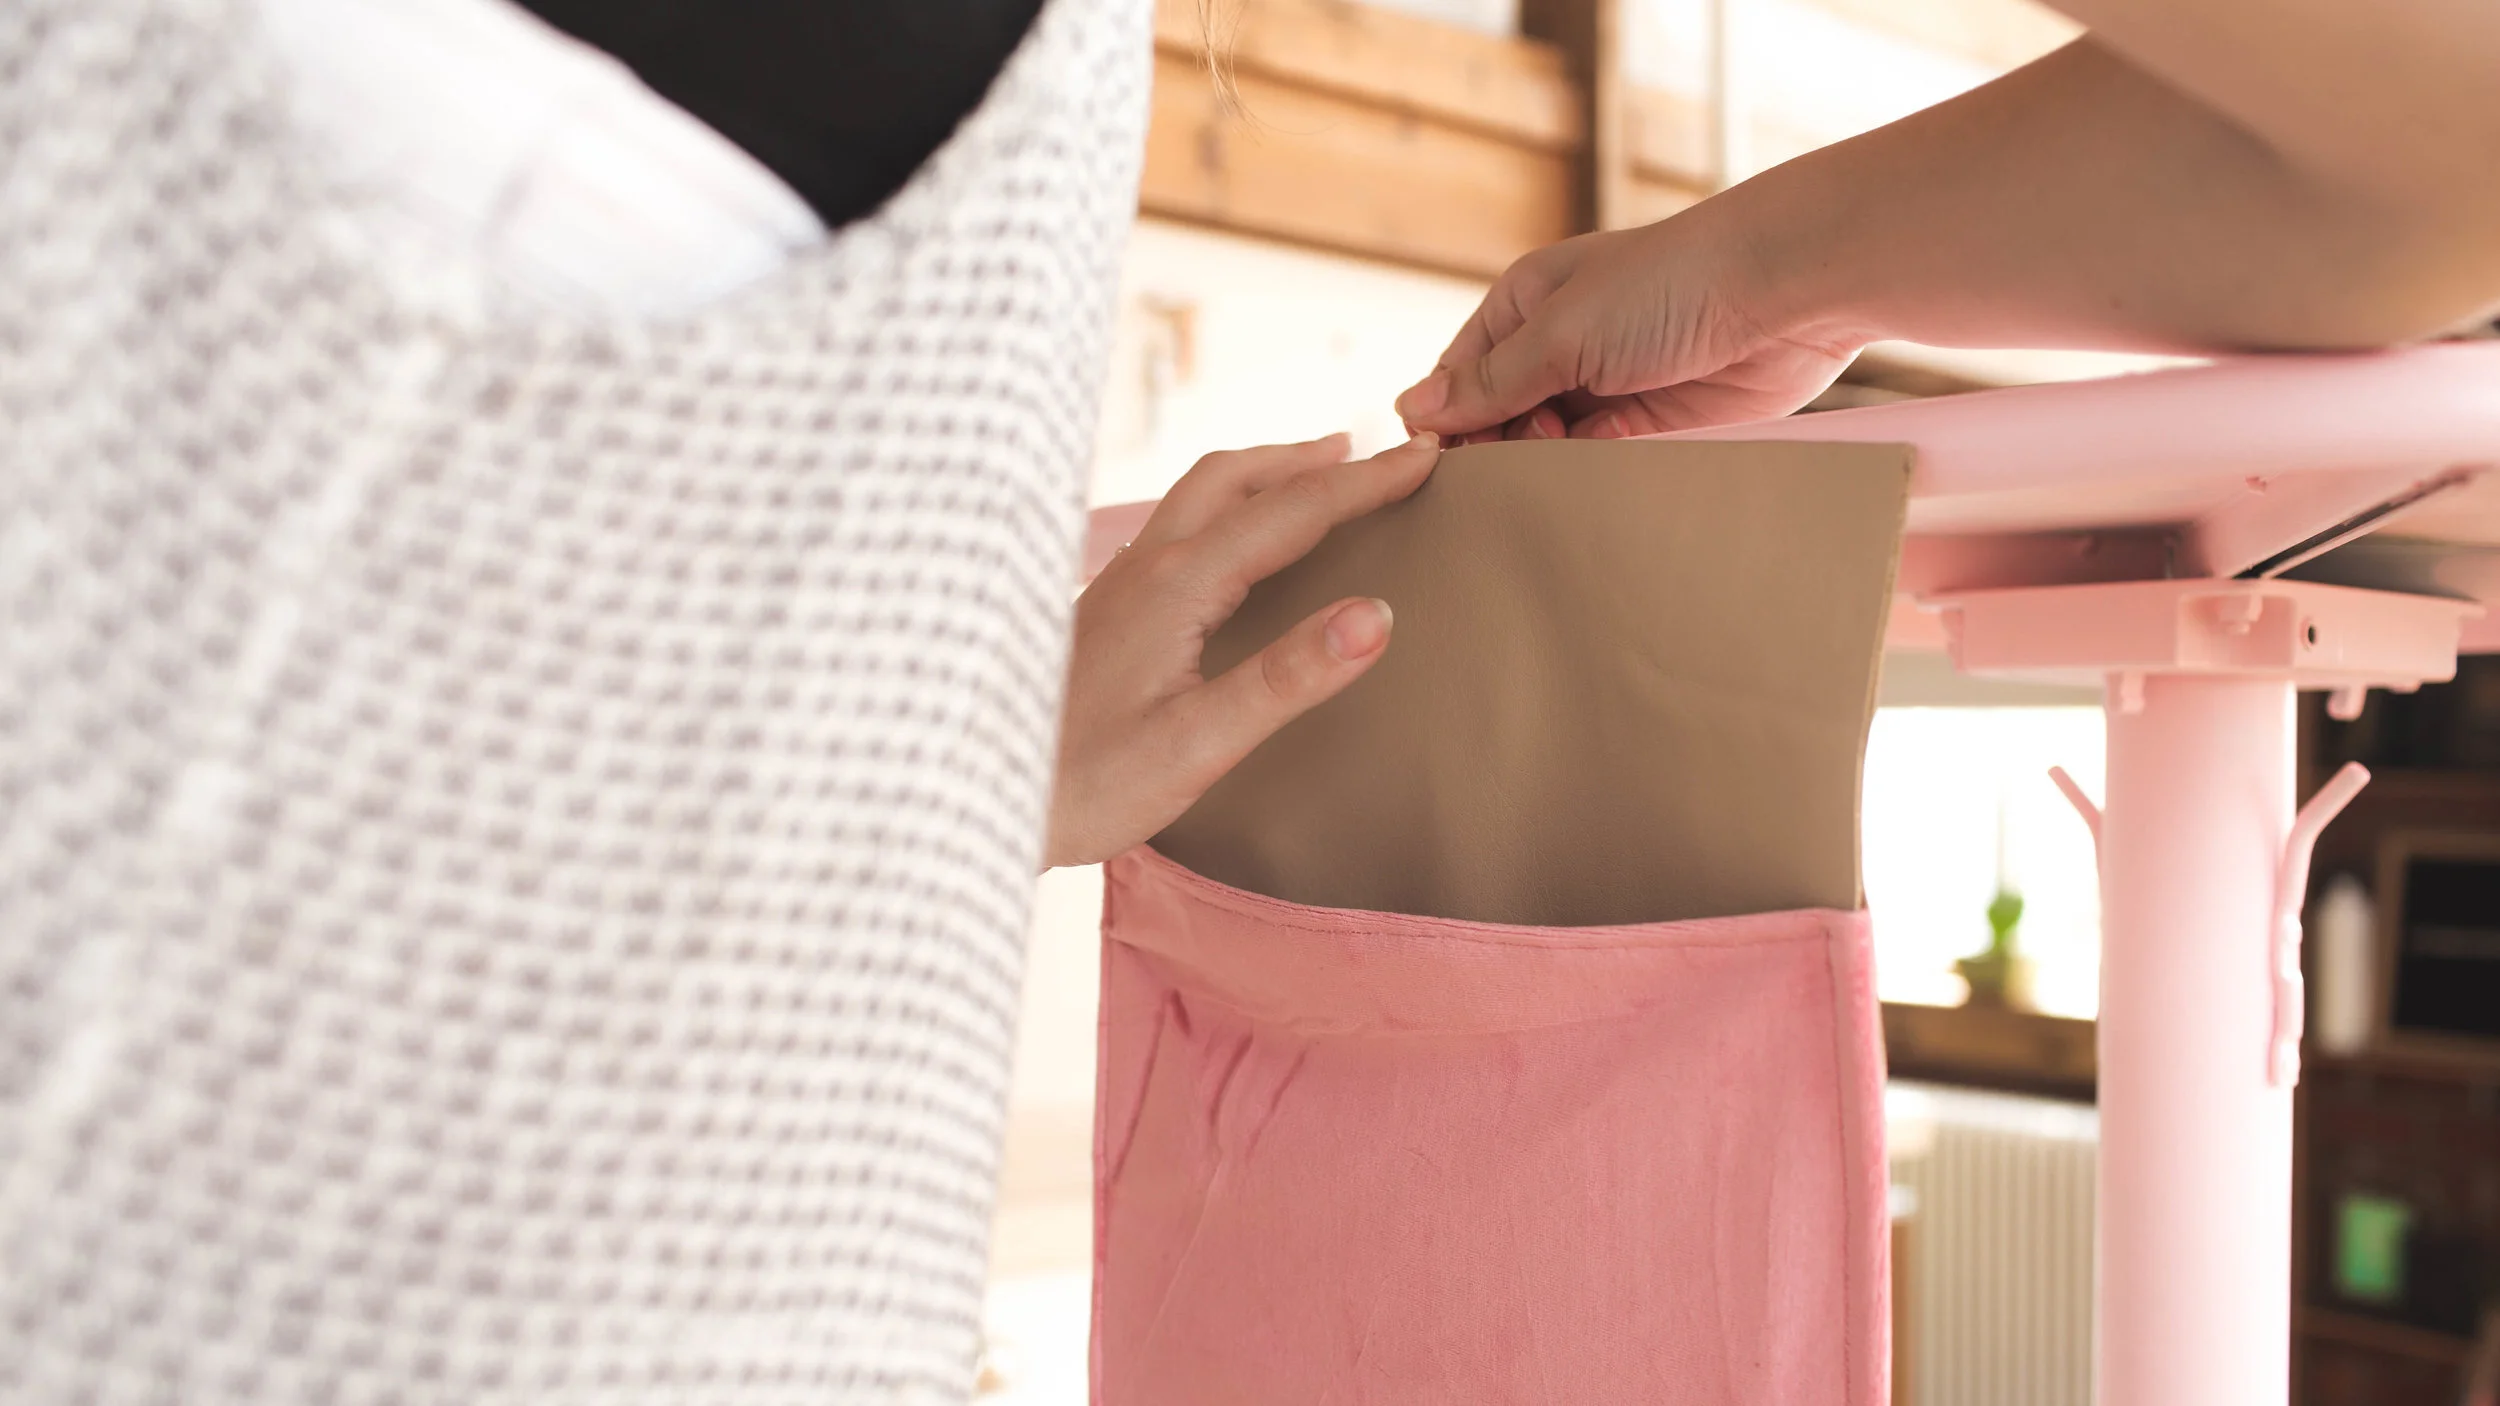
Now that the legs and arms are wrapped, we are going to add a pocket on the side of the desk for book and paper storage! We made this out of faux leather and faux velvet. With the leather material, we cut out a rectangular shape. With the velvet material, we cut a shape similar to the previous one, except this one was a little shorter and a little wider than the leather. We wrapped the velvet around the leather material to form a pocket and sewed it in place on three sides to create a pocket. We folded down the top of the leather to hem it and hot glued the pocket to the side of the table!
To finish the table off we made a cork board backing for the table! This helps your things not roll off of the table while also giving you a place to stick notes and pictures to your desk. We used a soft tape measure to measure the amount of space we want covered by cork. We marked that measurement onto our piece of cork and cut out our shape! We then hot glued the cork to the back of the desk.

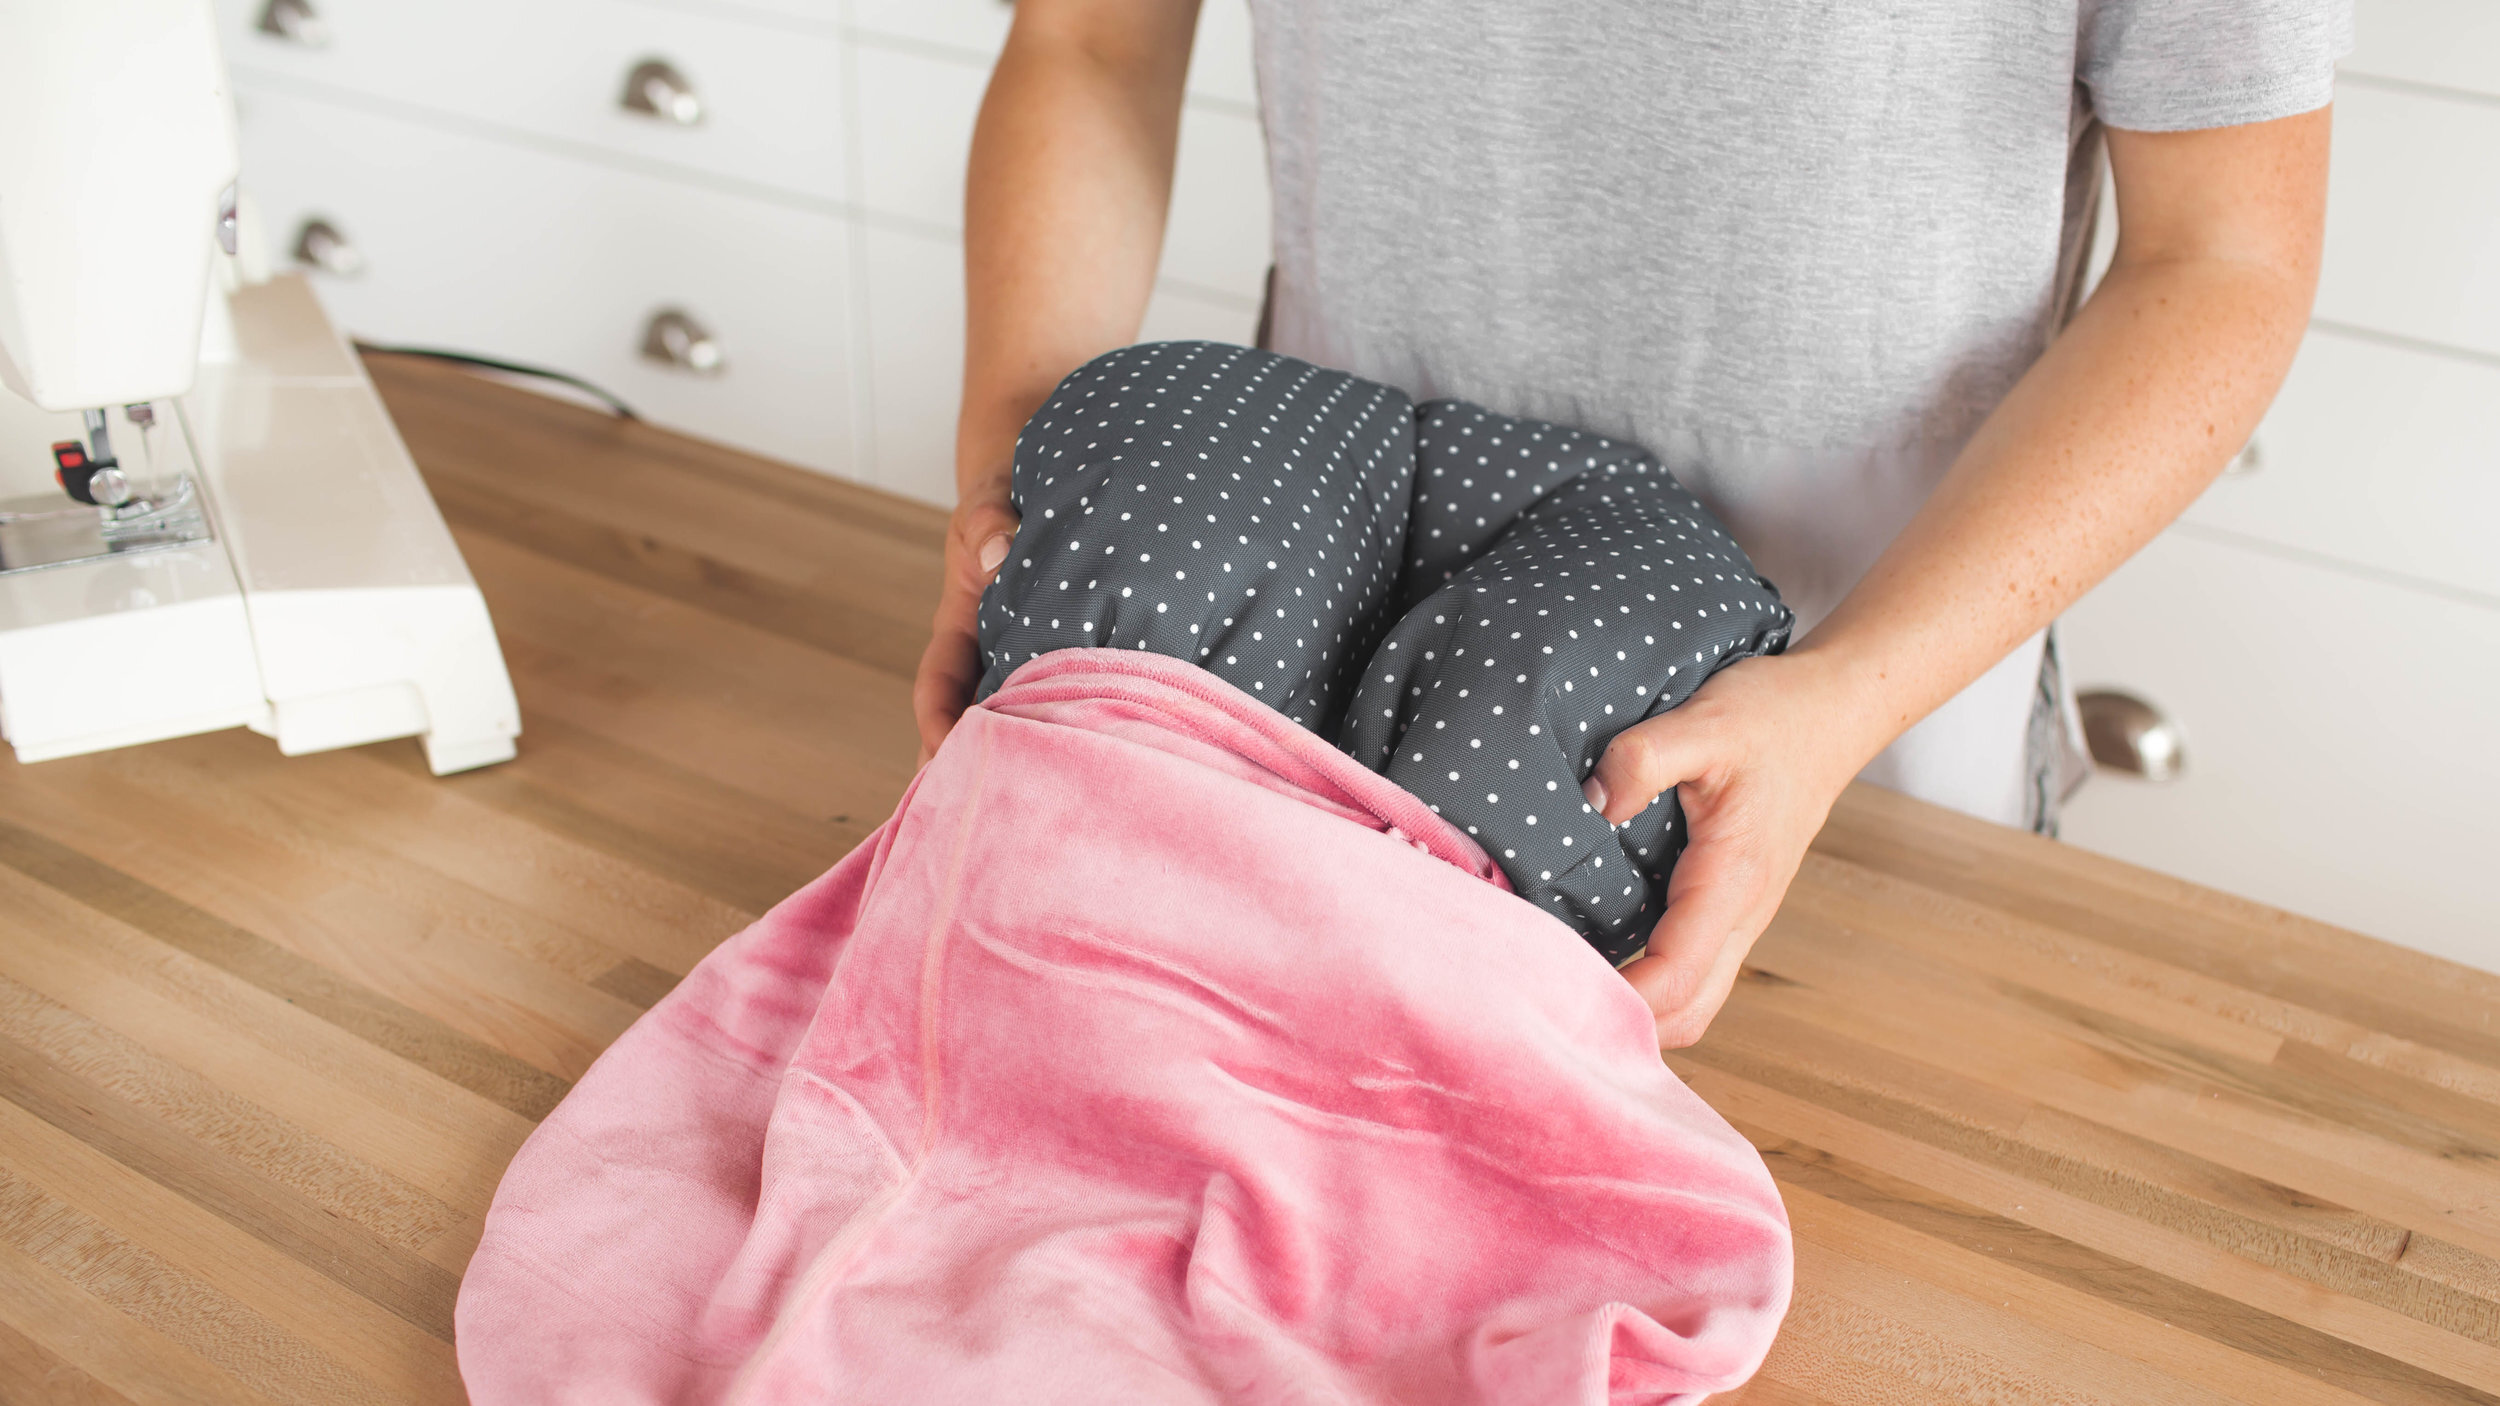

The final touch on the chair was to spruce up the pillow that we grabbed along with it. We cut out two circles the size of our pillow out of the faux velvet from earlier, sewed the two sides together almost all the way around, and then flipped it inside out to insert the pillow. Next we sewed the hole we made to stuff the pillow case closed, and made a few stitches in the middle of the pillow to create the little pillow tuft in the centre.

Add your school supplies, sticky notes, and desk plants, and you’re all done! We definitely didn’t predict how wacky and fun this set would turn out, but we kind of love it?! If anything, we hope this inspires you to do something fun and unique with a piece that you might find that you don’t like as much anymore. Let us know if you like this new style of taking IKEA as is furniture and making it into something new, we had a lot of fun making it!

If you do end up up cycling some furniture, send us a picture using the hashtag #SorryGirlsSquad! Also make sure to check out the video below.