3 easy & Affordable Ways To DIY Floating Shelves
Hey guys! We wanted to make some shelves to put up in the studio, so I thought I'd take the opportunity to show you three ways to make custom floating shelves that are affordable and pretty easy to do, using construction lumber and some pretty basic hardware and tools. As I go through these three methods, I will let you know what the pros and cons are to each one so you can pick and choose your favourite!

Note Before you start
Once you have figured out where you want to place your shelves make sure to check the material of the wall and check if there are studs in the area. This example screws directly into wooden studs behind drywall, so the stud locations are going to impact the shelf placement. That said, if you can't get every screw into a stud, make sure you use the strongest wall anchors you can for the type of wall and use quite a few of them! Screwing into a solid wall like concrete also works as long as you've got the right screws or anchors for the job. Screws and anchors are generally labelled for the specific material they should go in, so just head to the hardware store and alter to your needs.
In regards to the wood, all three methods use construction lumber. This is because:
it’s widely available (always can be found at big box hardware stores)
it's relatively inexpensive
at 1 1/2" thick, it gives you the desired Pinterest look we are going for AND makes it easier to work with than the 3/4" thinner material
it’s easy to have cut to size at the store
it’s easy to sand and then use stain or paint or even just a clear coat to achieve that custom look you're going for

Method 1 : Metal Bracket
This method uses commercially available metal brackets to give the shelf the floating effect. The brackets are pre-made for you, so this should be a pretty quick install!

Materials Needed
Wood for shelf
Metal Brackets
Measuring Tape
Stud Finder
Pencil
Drill & Drill Bits
Screws & Drywall Anchors
Level
Optional: Chisel & Hammer
Optional: Drill Guide
Pros of Method 1
saves time to purchase hardware
metal brackets are quite strong
can be done with minimal tools, you probably already own
Cons of Method 1
have to cut a mortise or groove for them to sit flush
purchase brackets for every shelf which can get expensive
individual brackets means room for error when installing
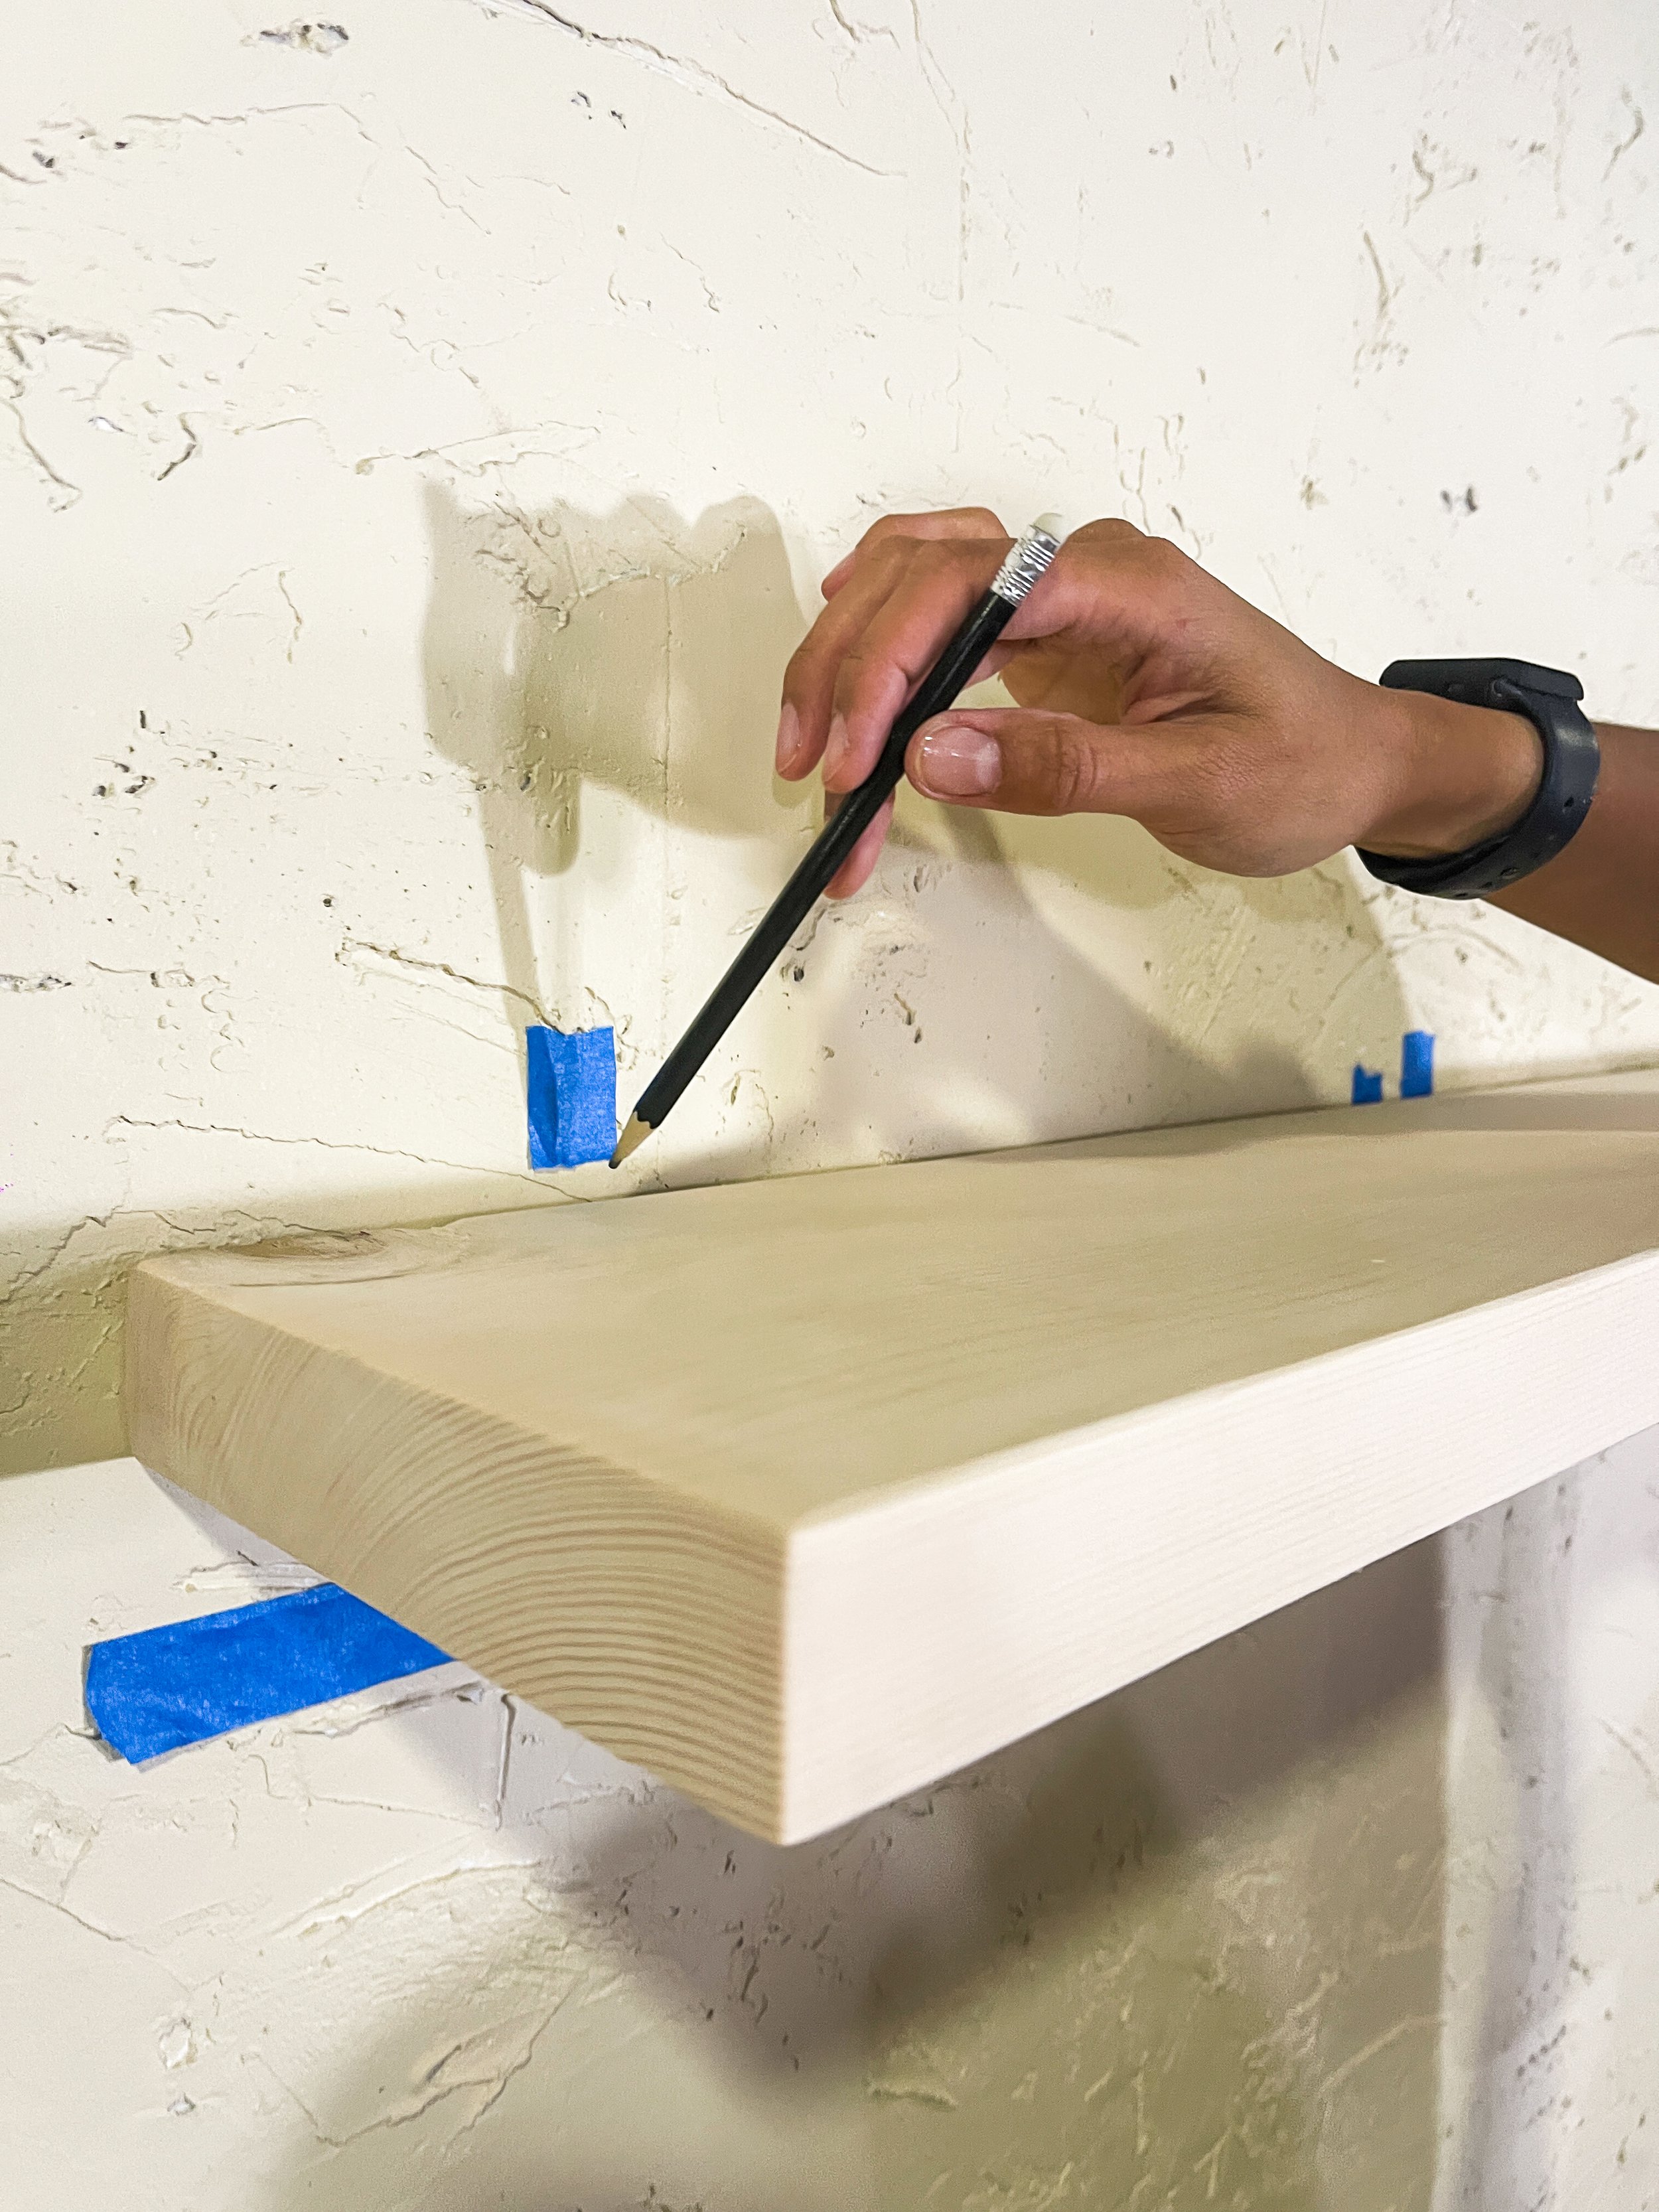
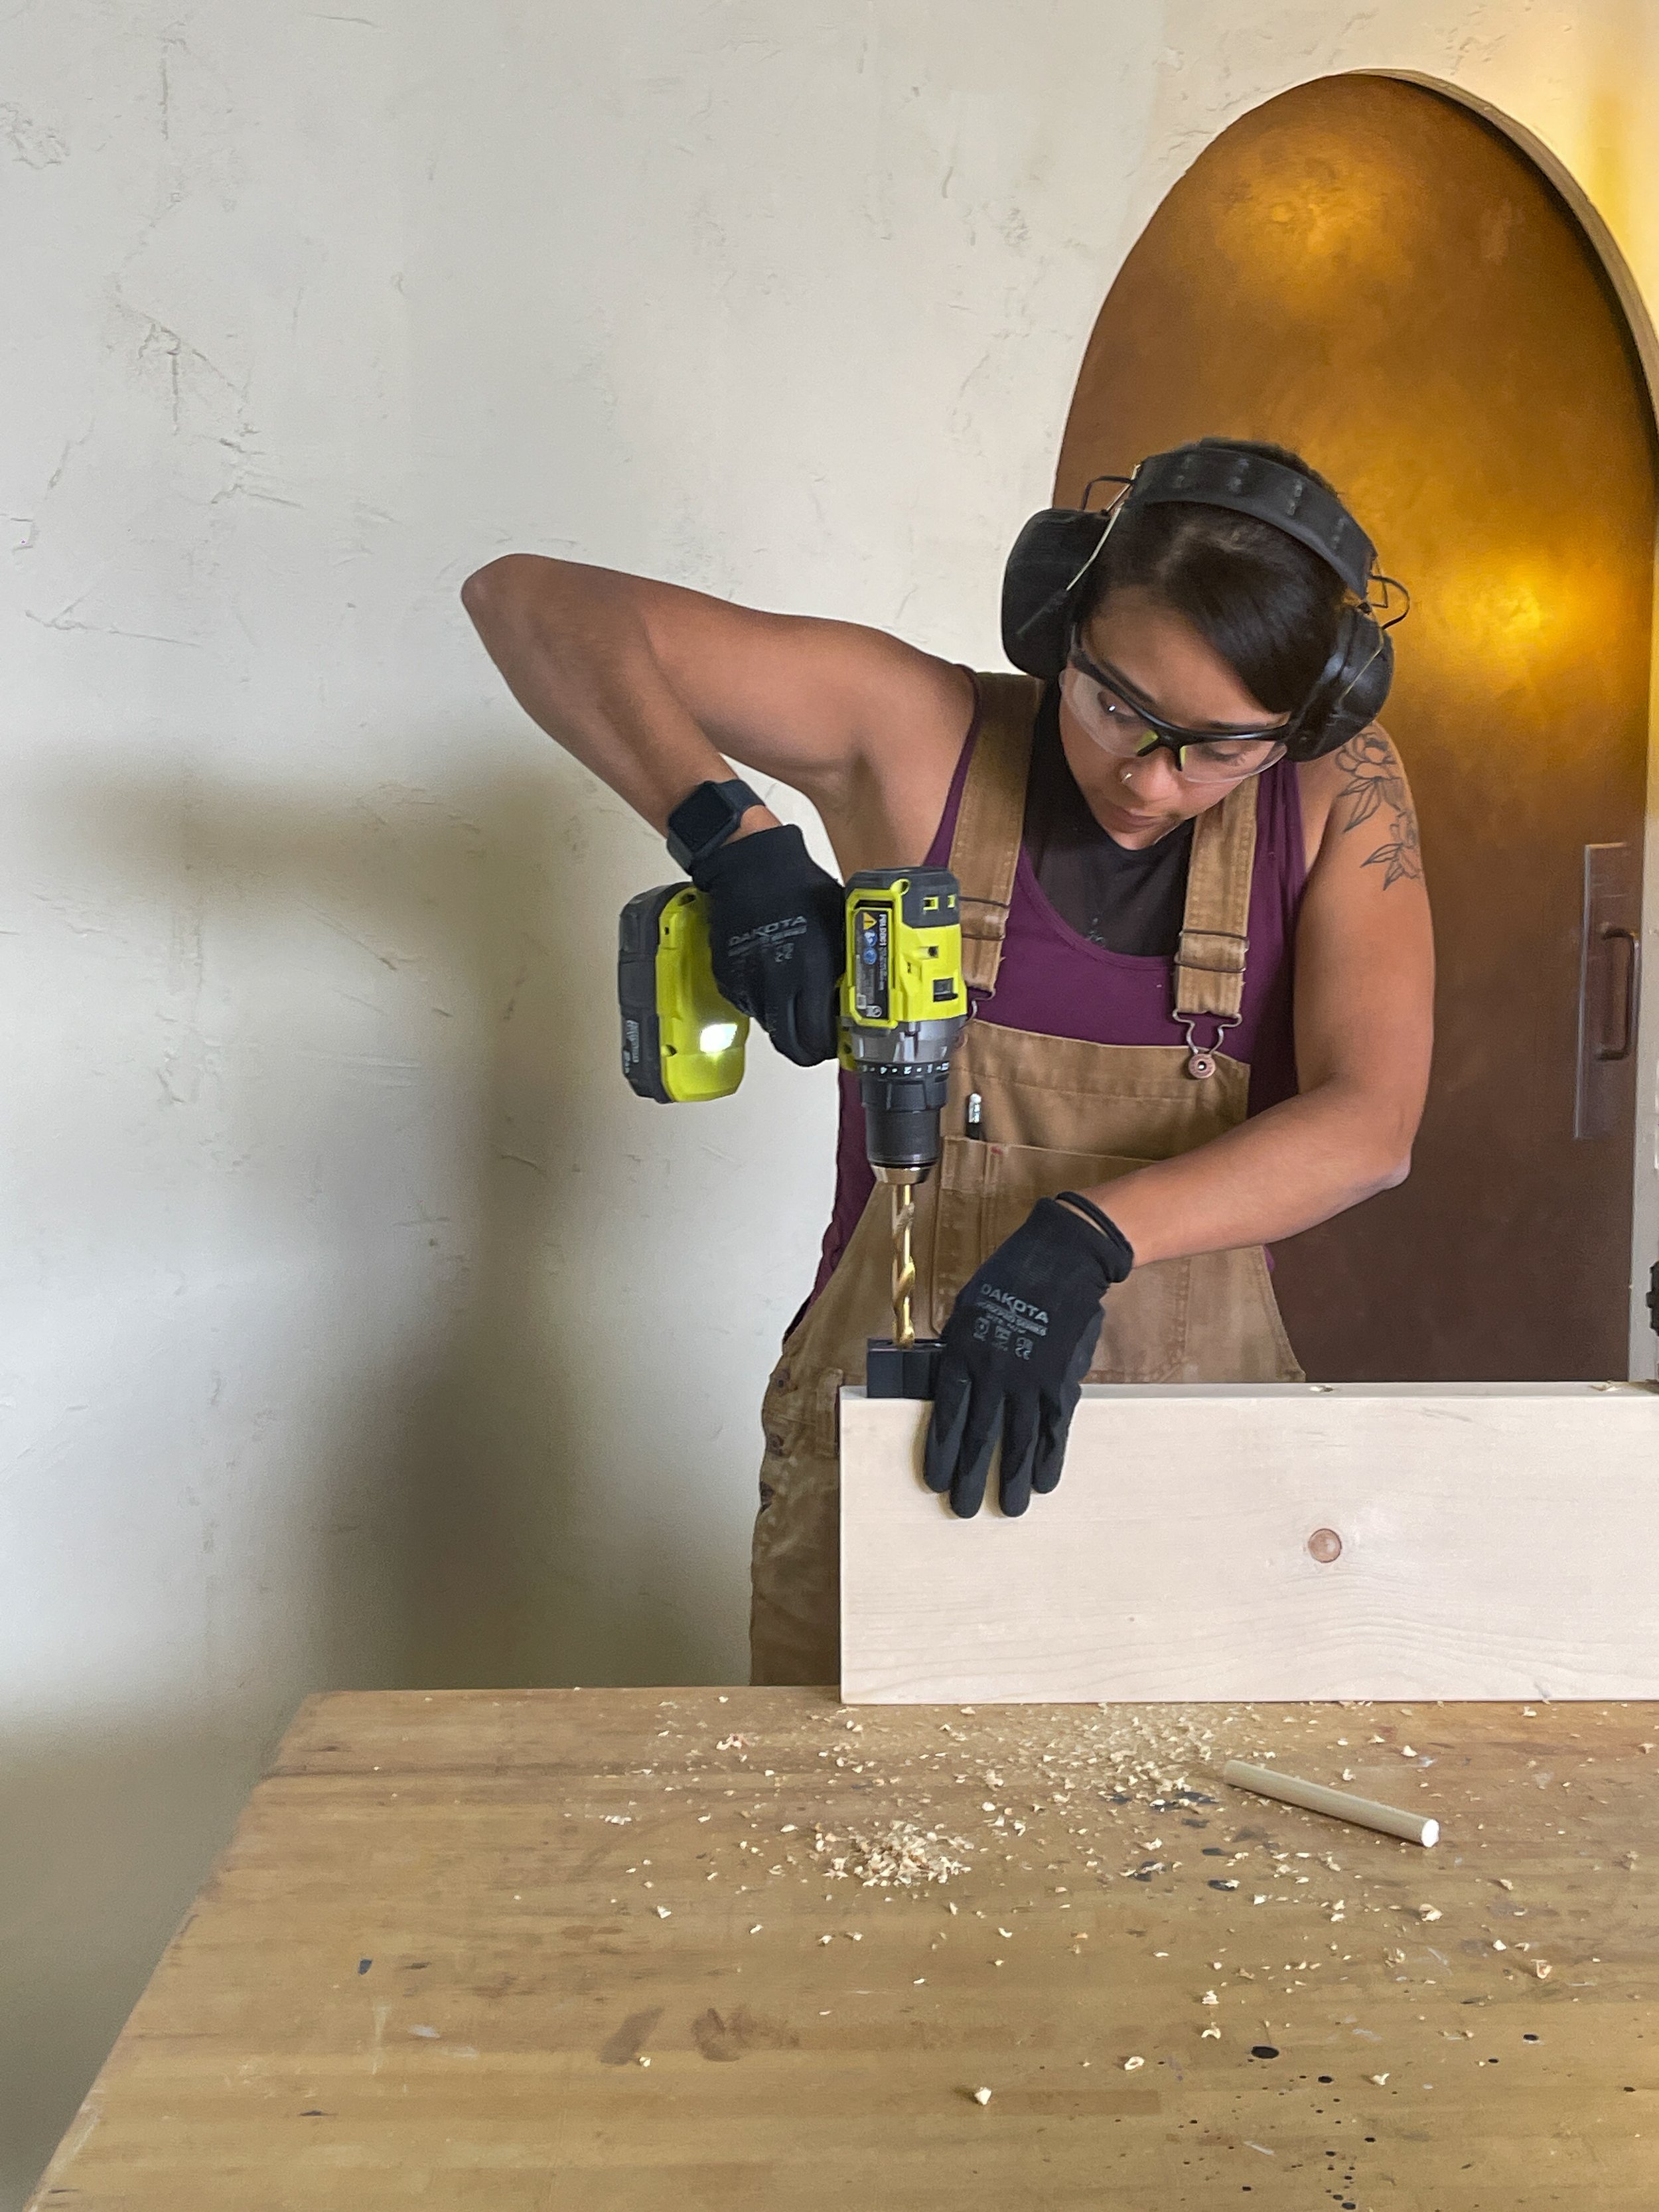
Step 1
As mentioned before, find and mark the studs in the wall if applicable. Hold the shelf up where it's going to be mounted and transfer the stud locations onto the back of the shelf.
Note: If you are mounting it into a stud, they are only 1 1/2" wide, so it isn't wide enough to hit both holes on this bracket, so in this case, secure one hole into the stud and use a drywall anchor for the second hole. If there is no stud, ensure you are following the instructions to your specific screws/studs when drilling into the wall to ensure the sturdiest hold.

Step 2
Now that it is established where the screw will be, those markings will be an indication of where the support rod will go. Drill holes the same diameter of the hardware into the wood where the markings are, as straight as possible.
Note: a drill press would be helpful for this job, but I personally don't have one, so I used a drill guide to get the hole started straight.


Step 3 (optional)
If you're ok with a small gap between the shelf and the wall (caused by the backplate of the bracket), you can skip this step, but to have the shelf sitting as close as possible to the wall, create a mortise in the wood.
Note: In layman’s terms, a mortise is a recess in the wood, that allows something else to fit in it - in this case, the bracket.

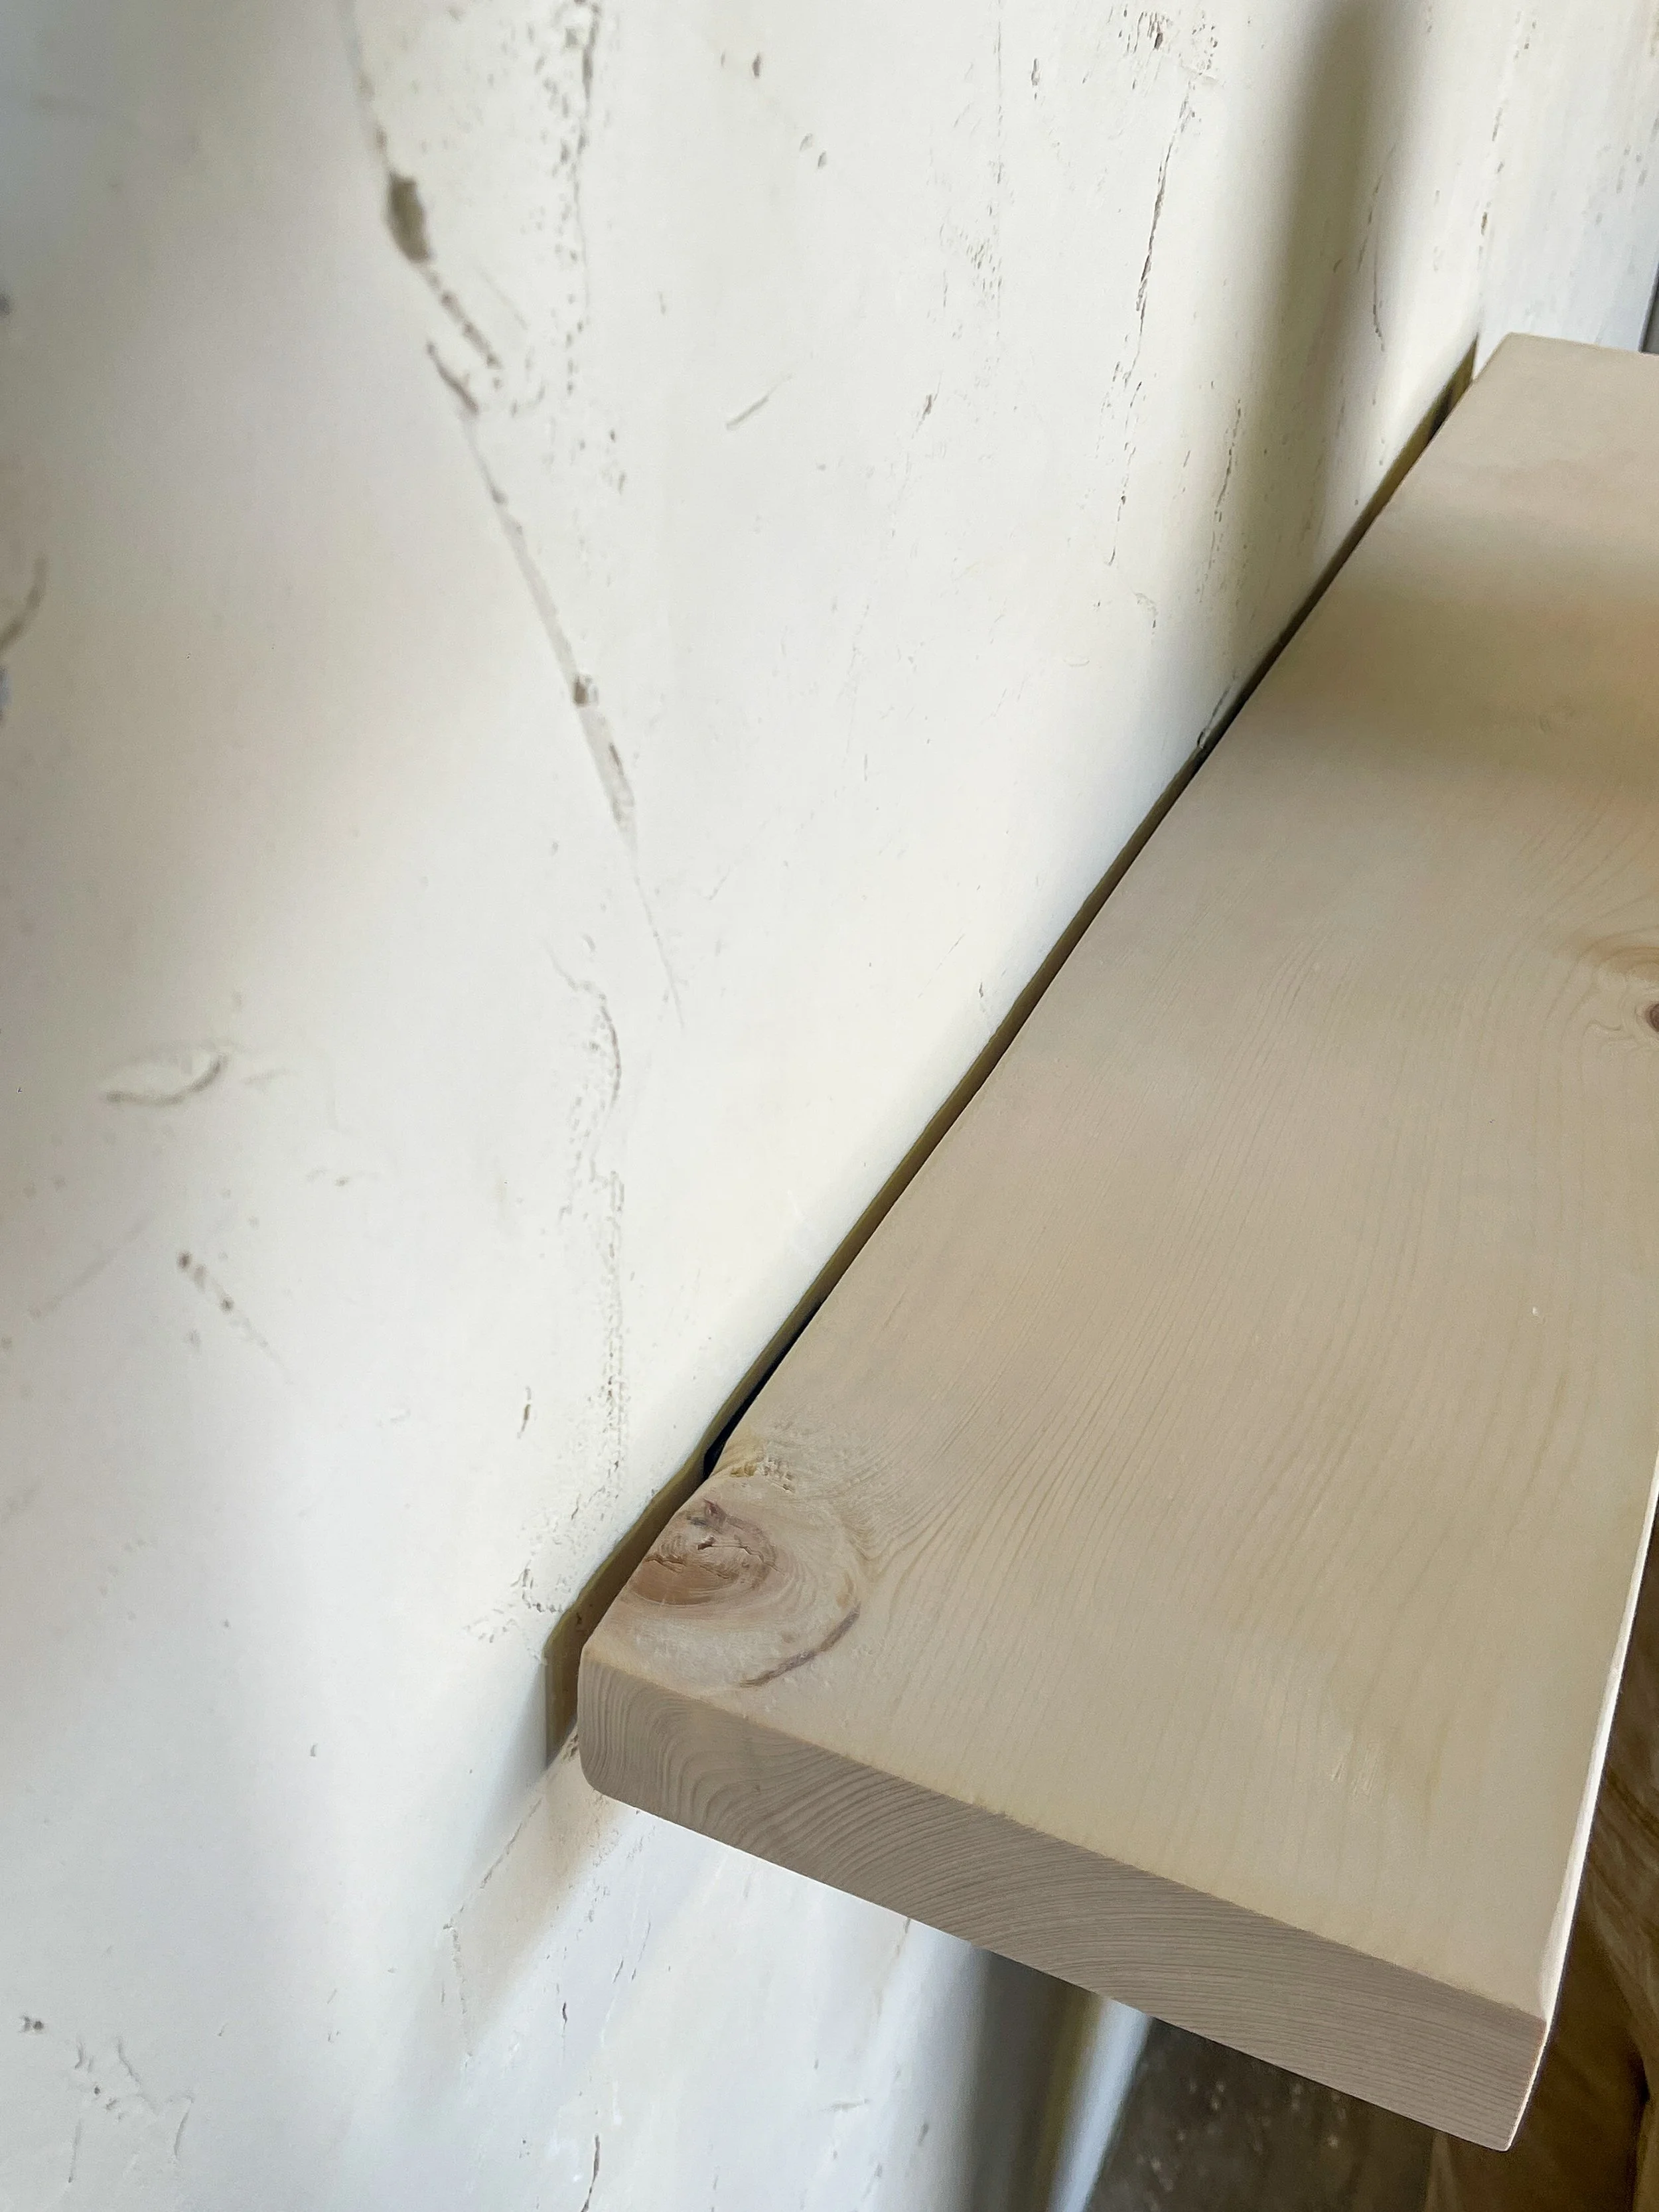
First, measure out the backplate of the bracket and mark it on the wood, then chisel out one of the mortises by removing a bit of wood at the back to create a space for the backplate of the bracket to sit in. Now there is room for the bracket to sit behind the shelf.


Step 4
Before hanging them up, make sure you sand and finish them to your desired colour!
Note: You’re going to want to do this before installing any of these floating shelf methods!


Step 5
To install the brackets on the wall. Attach one side of the bracket to the stud and then, like mentioned before, add a drywall anchor for the second hole. Before drilling in the other bracket, to ensure the shelf is hung up level, hold the shelf up with the brackets sticking part way out, using a level, check that the bubble is in the middle and mark the holes.


Step 7
Finally, secure the other two brackets and install the shelf by sliding the shelf onto the brackets.


Method 2 : DIY Bracket
This method is essentially the same thing, but this time instead of buying the shelf hardware, we’re going to DIY it using a wooden dowel!

Materials needed
Drill & Drill Bits
Level
Measuring tape
Stud Finder
Pencil
Driver Bits
Screws
Wooden Dowel
Circular Saw
Wood Glue
Clamps
Optional: Drill Guide
Pros of method 2
only need to add a dowel to your purchase
can add a set screw to "lock" the shelf in place
one bracket is easier to line up than multiple
Cons of method 2
need a circular saw or table saw
wood can expand and contract, might make it harder to align / to get on and off
you can see up close that it's two pieces, not one solid piece
Step 1
Just like the last method, find and mark the studs and transfer those markings onto your wood. The difference this time is the liberty to choose where the shelf supports are going to be.
Note: Make sure you avoid placing them where your studs are, we're going to need that space to attach this to the wall
It’s recommended to use at least as many dowels as the number of feet in the board. In this case, a 2x8 is being used (which is actually only 7 1/4" wide), so the dowels are going to get cut 5" long, which should sit deep enough in the wood to support the depth of the shelf.
Step 2
Next, drill some holes the same diameter and depth as the dowels.

Step 3
Now, cut about an inch and a half off the side of our board that has the holes drilled in it
Note: keep track of which way these pieces line up so they can be mounted the right direction

Step 4
Next, insert the dowel through the cut-off piece into the shelf
Note: If you're using the same size drill bit as your dowel, you may find that it's a little bit too snug, if this happens, sand down the section that goes into the shelf, just enough to slide in and out easily.
Step 5
Next, drill some countersunk pilot holes on the inside of the cut-off piece (where the studs should be). Countersinking involves widening the rim of the pilot hole so the screw head will sit flush with the wood.
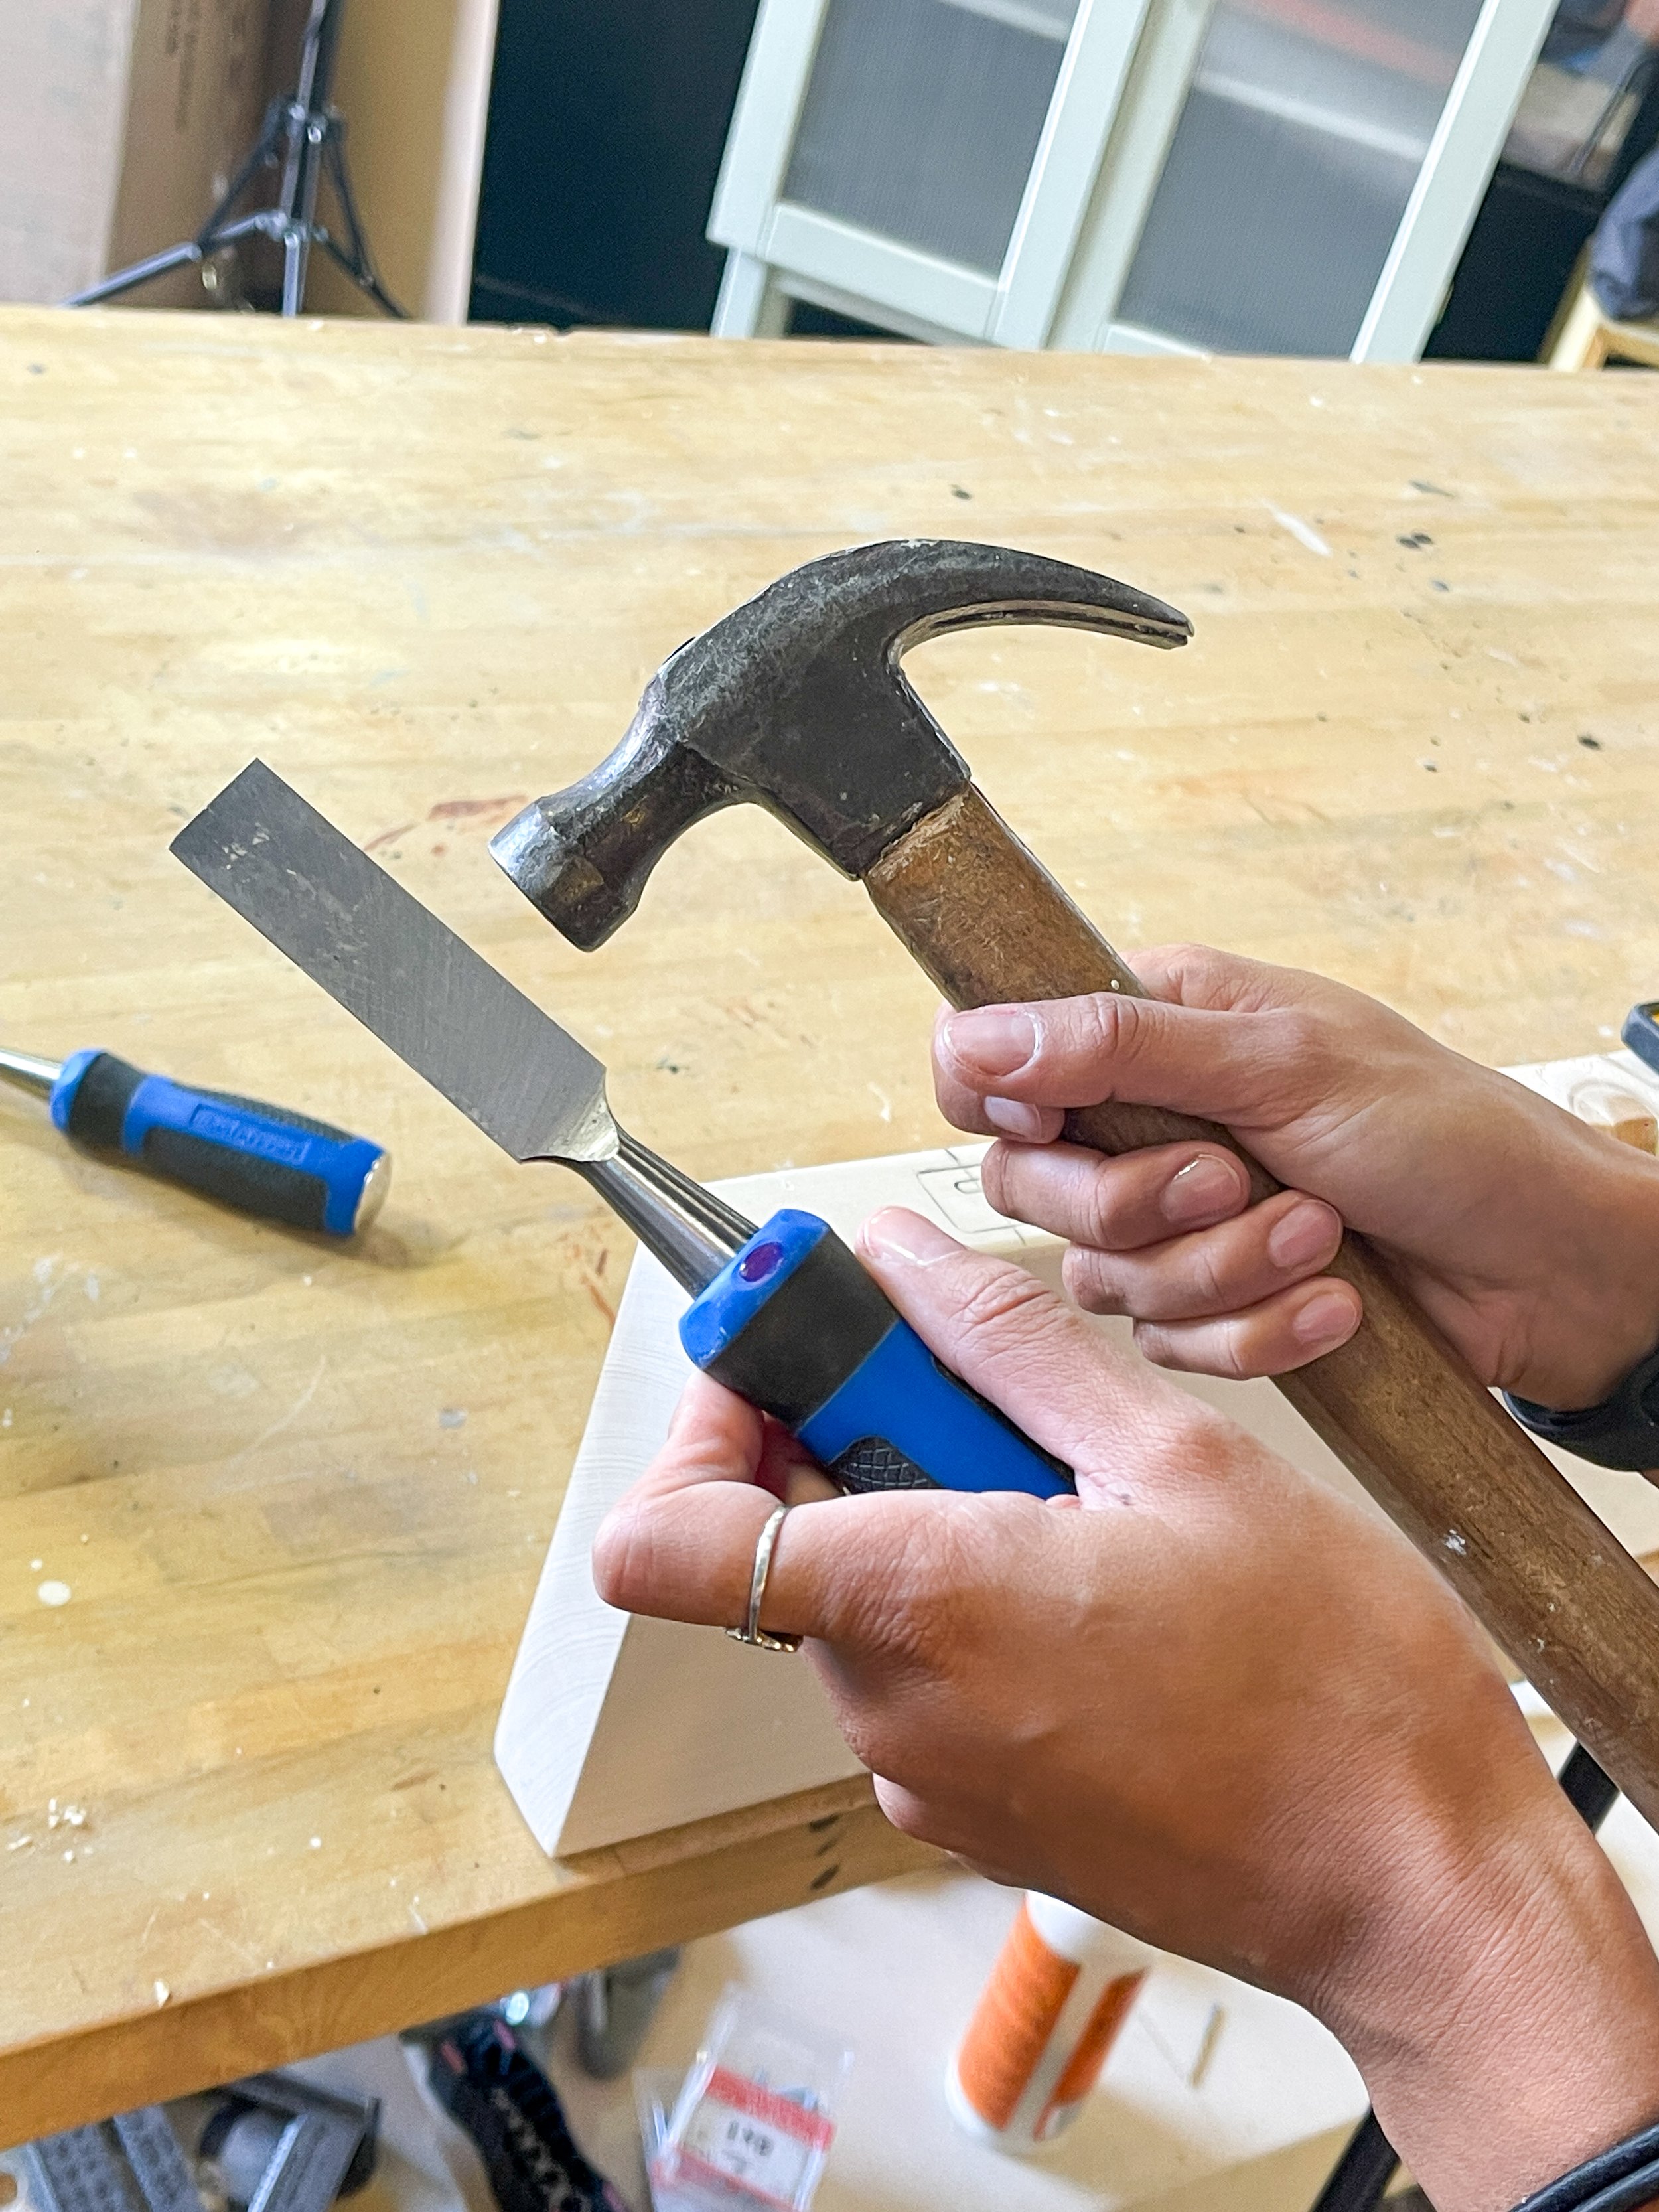
Step 6
Now add some glue to just the end of the dowel that will be in the bracket and insert it into the hole - glue side facing up. Hammer the dowel down into each hole, through the bracket and into the shelf.
Note: For a really secure fit, add a set screw to one or more of the dowels from the top or bottom of the shelf, depending on what will be visible when it's mounted.


Step 7
To attach to the wall, line up your countersunk holes to the studs, and continue the pilot holes into the wall. Use a flat head screw to secure the bracket made to each stud, making sure it's level the same way as the last method.
Note: Alternatively, simplify this process by using a construction screw with a self-tapping threads that can drive into the stud without splitting the wood - no pilot hole needed in the wall!

Step 8
Slide the shelf onto the dowels
Note: if there is trouble getting the shelf to slide on easily, try rubbing some paste wax, or beeswax onto the dowels
Add the set screws and you're done!


Method 3 : Pocket Hole Screw
Out of all these methods, this last one is hands down the easiest. That said, you'll need some specific tools for it, and not everyone might have those lying around. Just something to keep in mind before you dive in.

MATERIALS NEEDED
Drill
Level
Measuring Tape
Stud Finder
Pencil
Pocket Hole Jig Kit
2 1/2" pocket screws
Optional: Pocket Hole Pugs OR a 3/8" Dowel for Plugs & Flush Trim Saw
Pros of method 3
only need a few screws to mount
can be quite inexpensive to make if you've got the jig
really fast and easy to make
Cons of method 3
need a pocket hole jig
can't make your shelves too deep
need to fill holes if you want a solid look
Step 1
Once again, you’re going to need to find and mark your wall studs and transfer the locations onto your shelf - this time, mark them on the TOP of your shelf, at the back.
Step 2
As mentioned above, this method uses a pocket hole jig. Even though the wood is 1 1/2" thick, set the stop collar on the drill bit as though you were drilling into 3/4" material and the depth adjuster on the jig to 1" thick material.

Step 3
Align the jig to drill holes where the stud locations are marked on the top of the shelf.


Step 4
Grab some 2 1/2" pocket screws, your drill and a level. Attach one side of the shelf to the stud with a screw, level the shelf and drive the second, third…however many screws you’re using, to secure the shelf in place.


Step 5
There are some commercially available plugs that can fill the holes OR just use a dowel. With the measurements used above, use a 3/8" dowel to plug the hole and a flush trim saw to cut the excess, but personally, I never fill the holes. Simply cover them with decor - they will never be seen and then they will be super accessible if/when you want to remove the shelf.

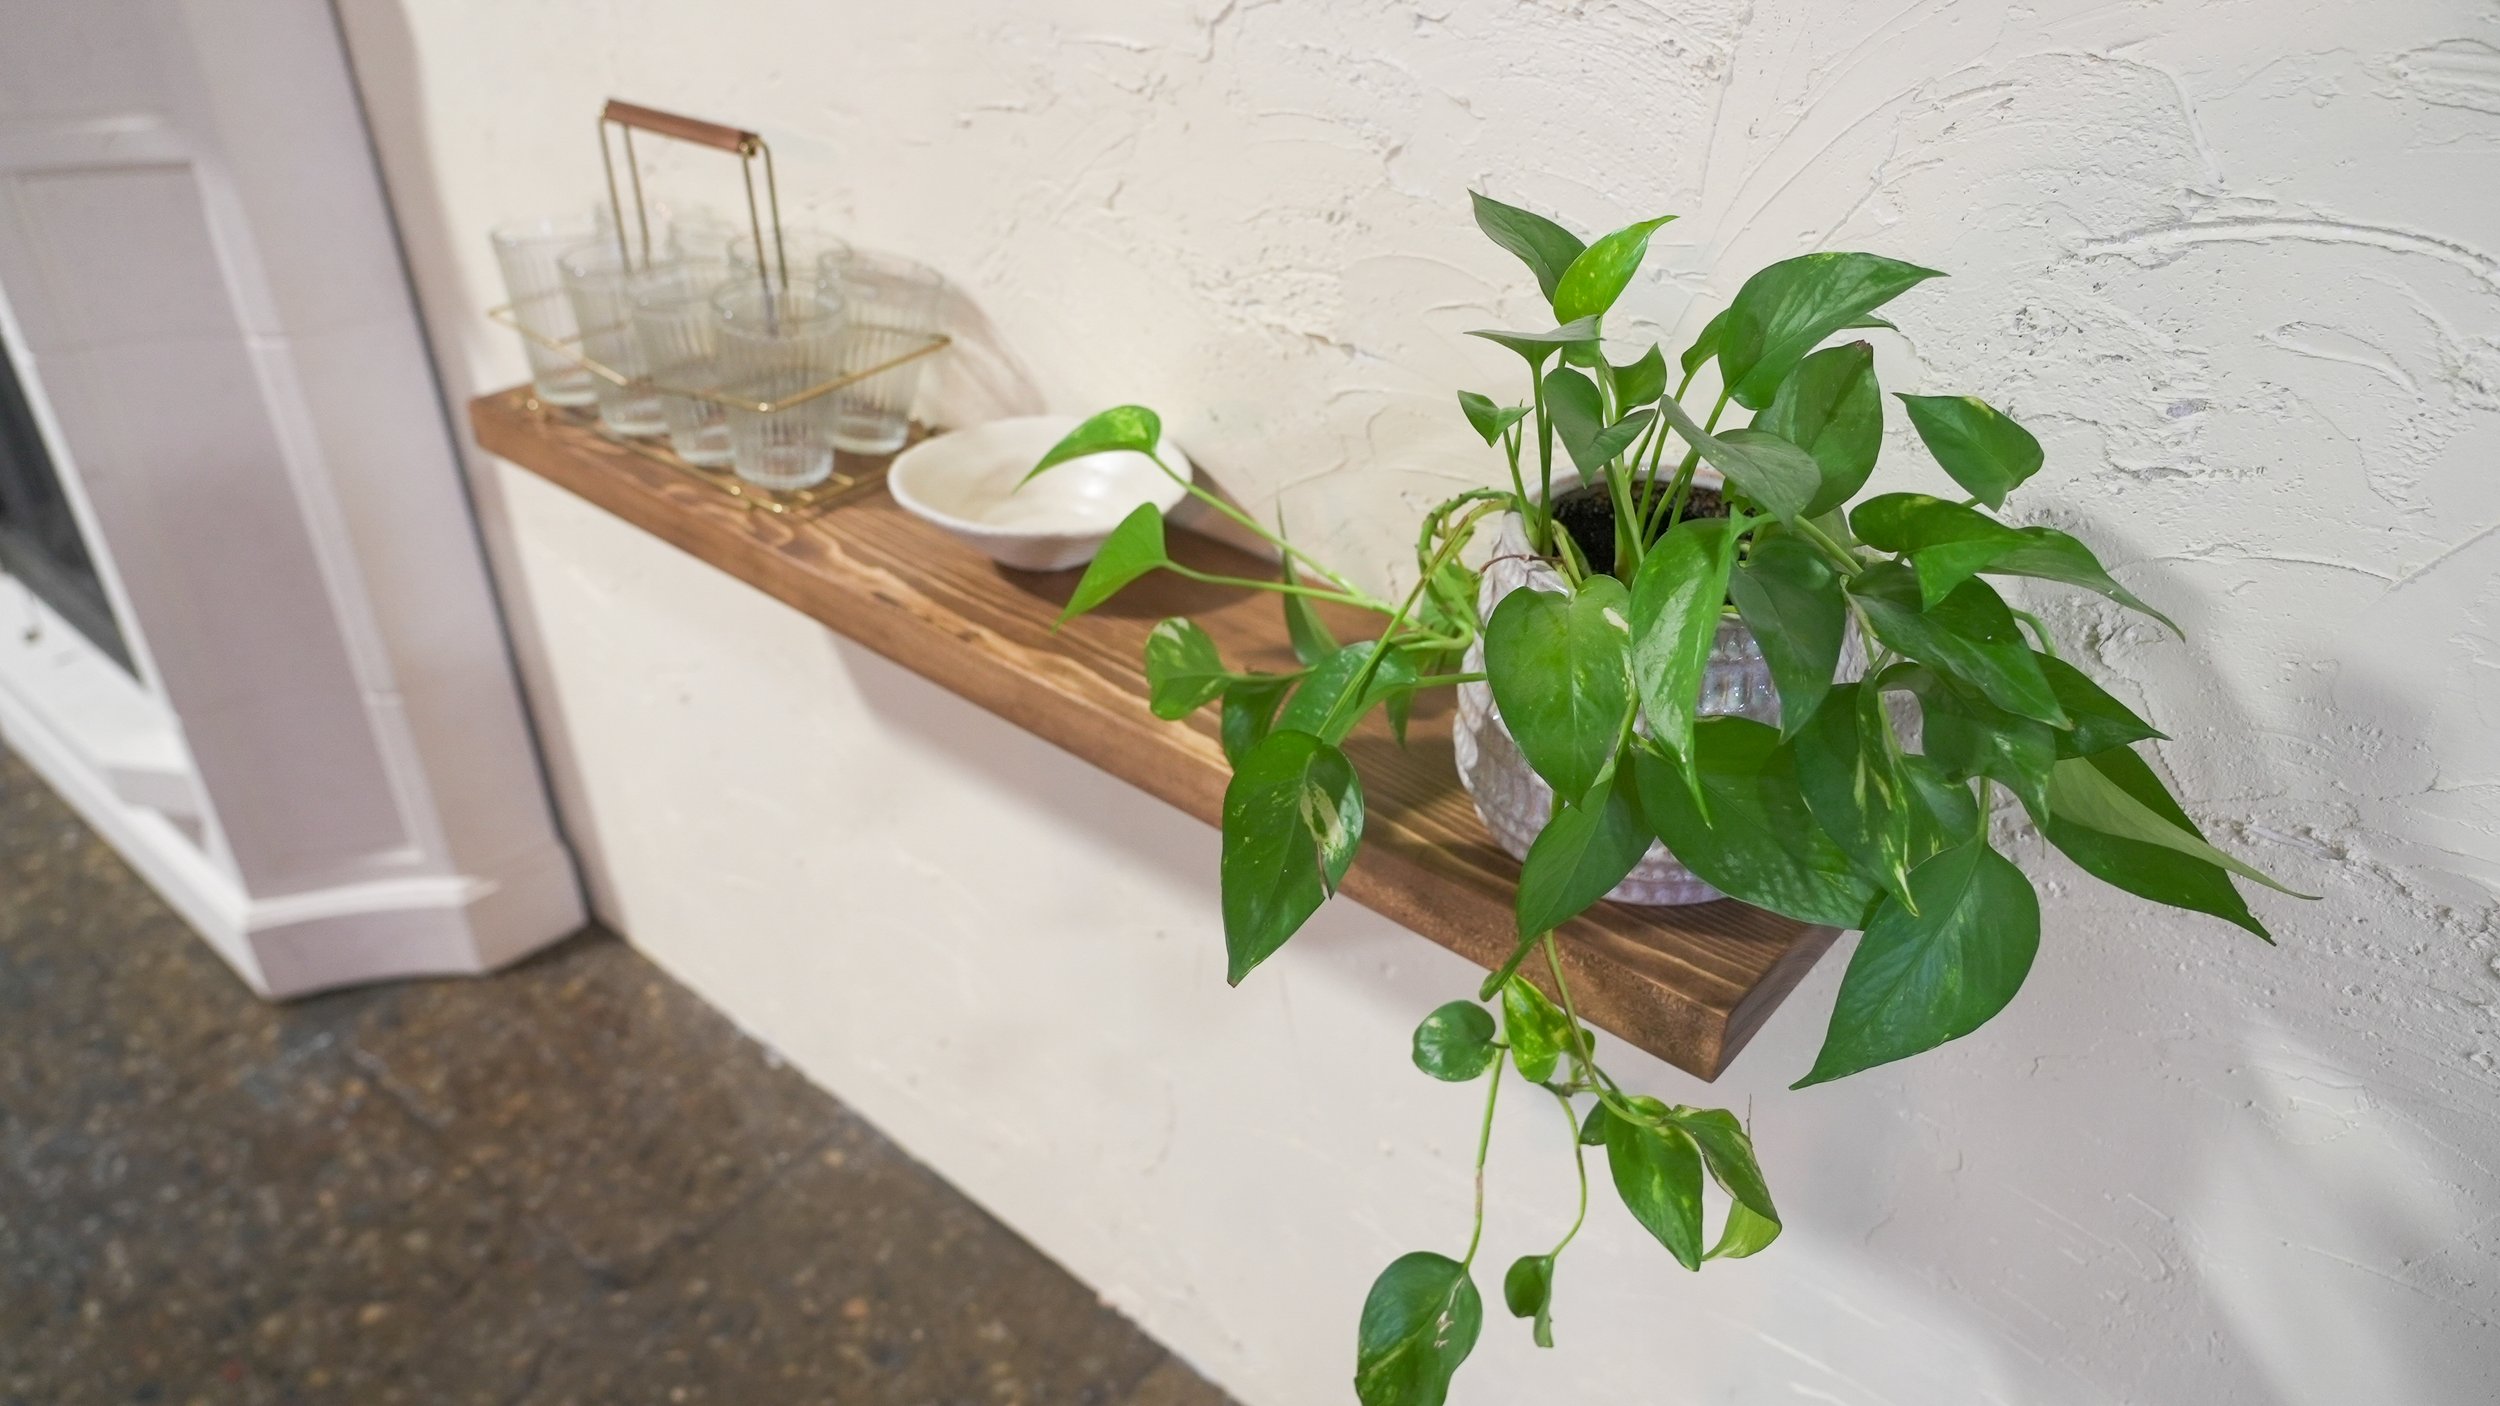
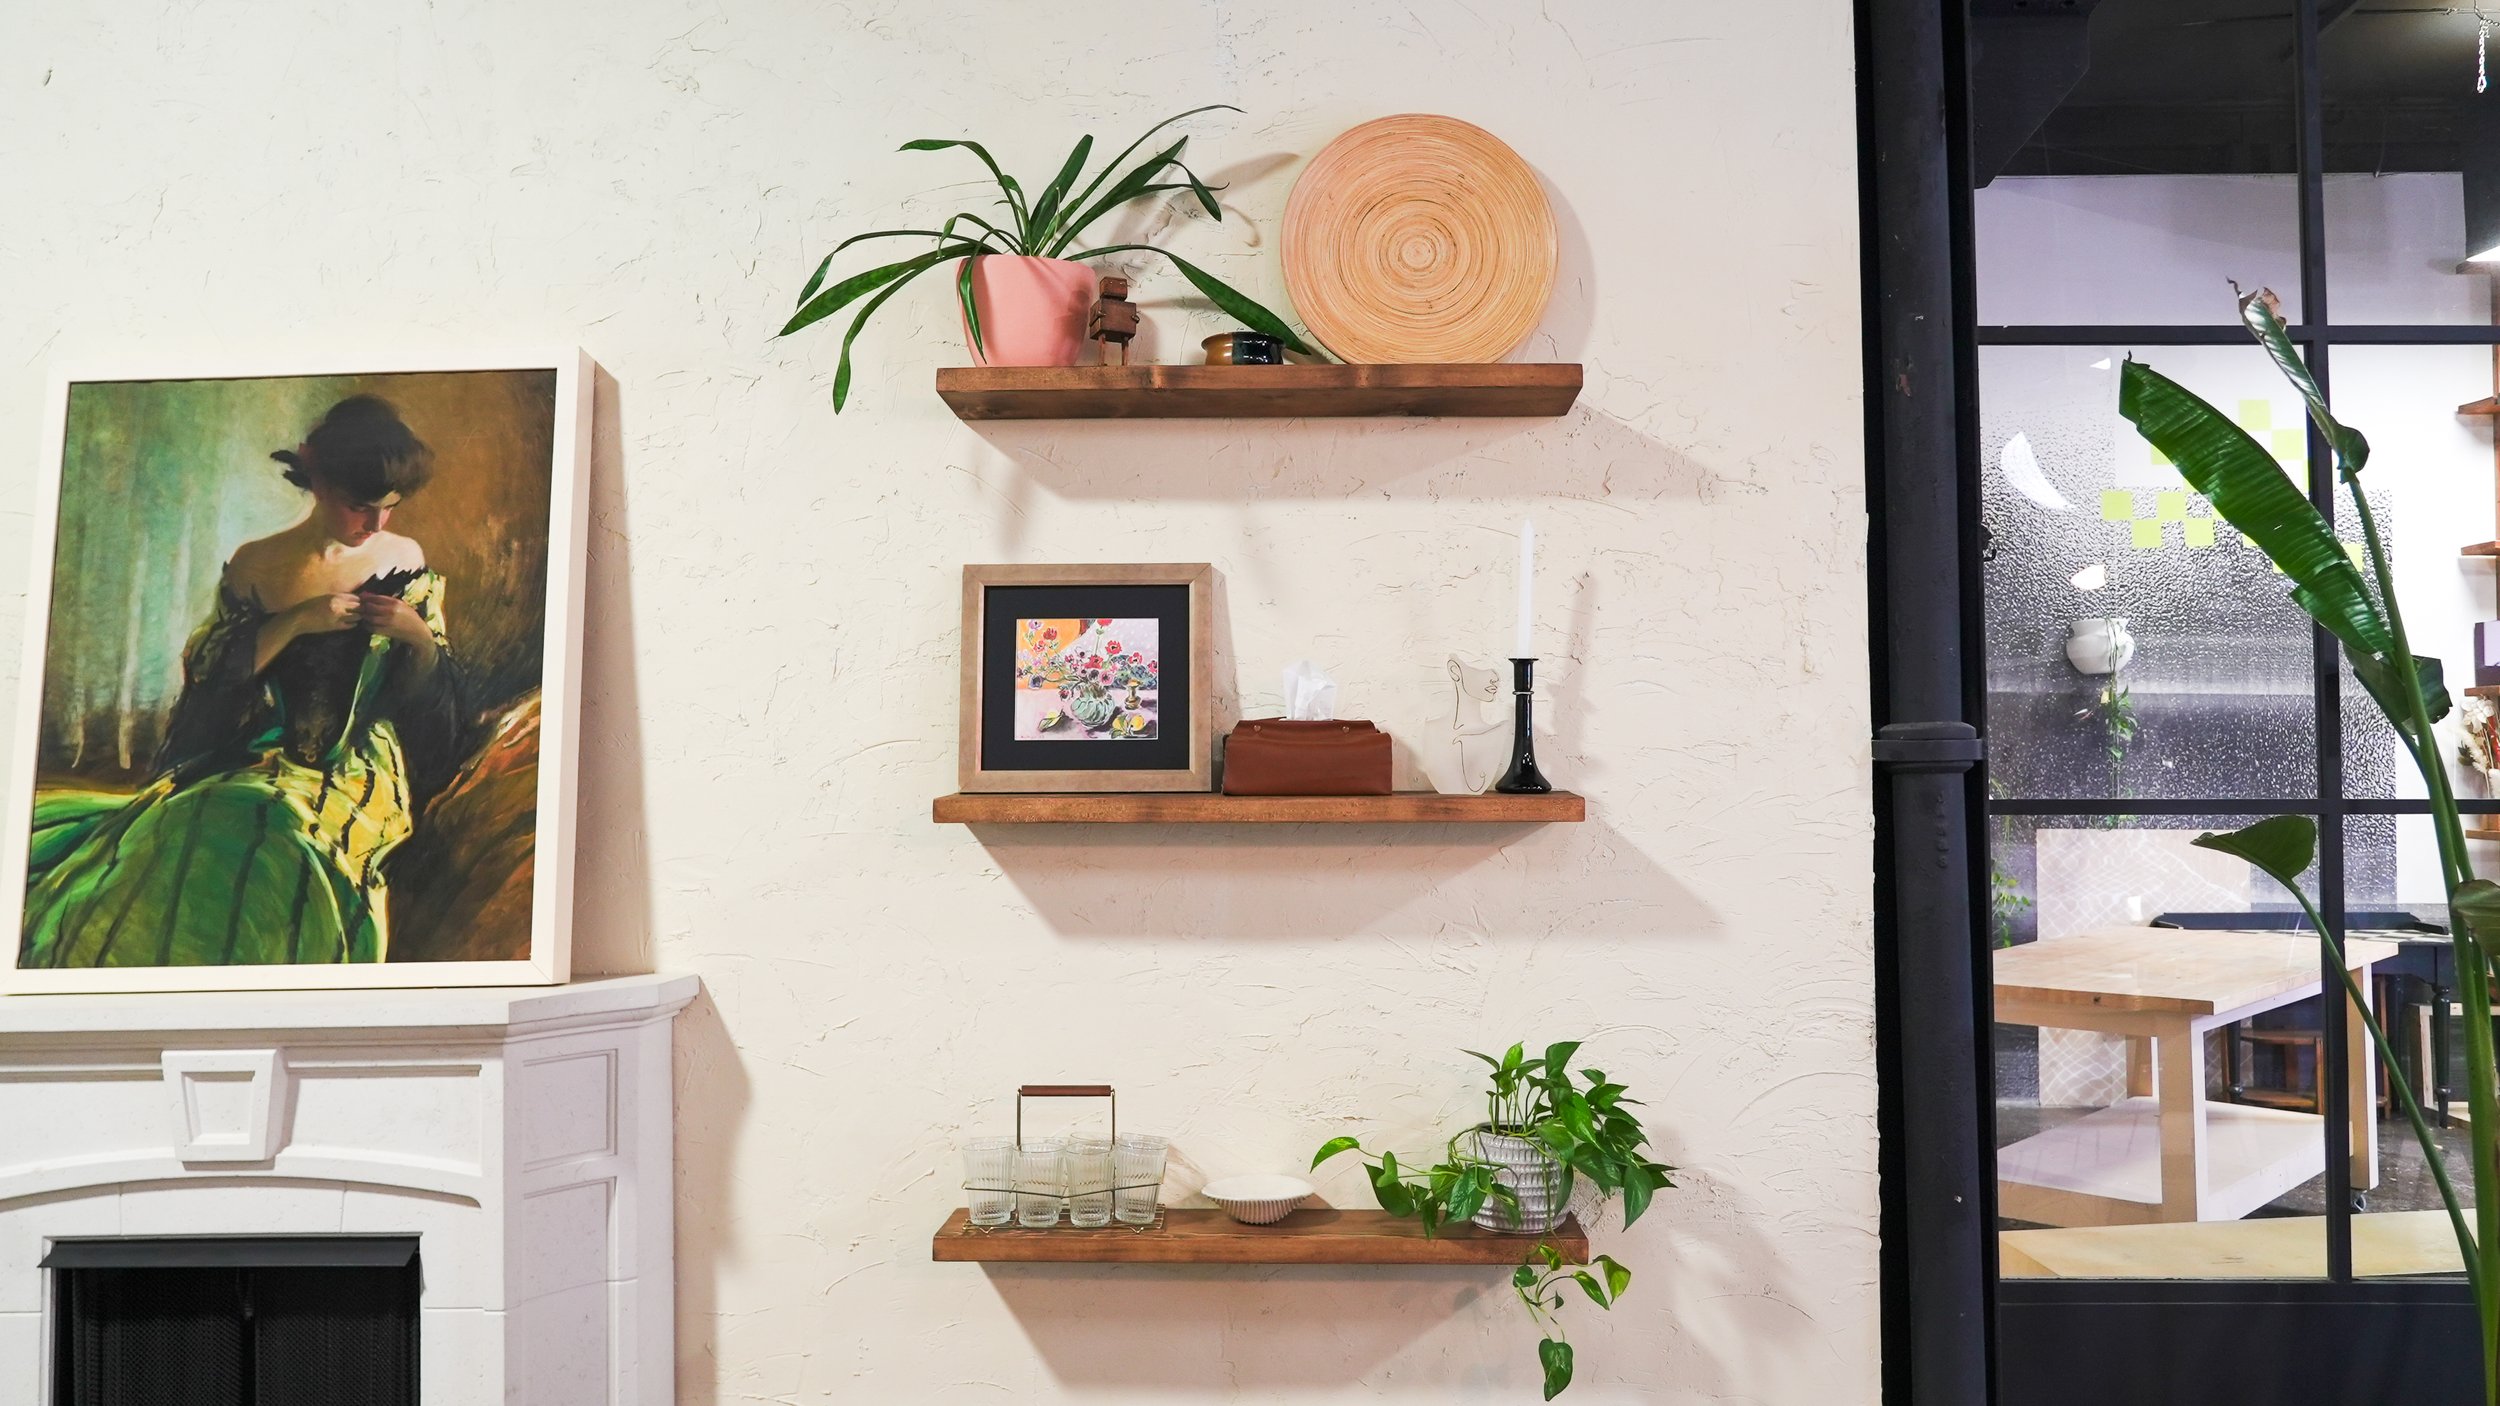
Final Results
Head over to the full video for more of a visual step by step tutorial of each of these methods! Let us know which one you would opt for.