NO Reno Bathroom Makeover *on a Budget*
Recently, I made over the bathroom in my rental suite and let me tell you, this bathroom was in dire need of a refresh, with outdated fixtures, lack of storage, and an off-center light fixture, I really needed to tackle a couple projects.


Watch the full makeover from start to finish here
Caulking
First, I tackled the caulking around the bathtub and sink to take away the grime and transform it to clean, crisp edges. Here is a little step by step of how to do this:

Start by taking off the old caulking
First, start loosening up both edges of the old caulking using the utility knife.
Peel away as much of the old caulking as possible, using your fingers.
If needed, use a plastic spatula with a sharp edge to scrape away stubborn remnants.
For particularly tough spots, you can use an abrasive tool, but be cautious not to damage the surfaces.
Use vinegar as a cleaning solution to remove any residue left behind (scrub stubborn areas with an abrasive brush or use 100% alcohol for extra cleaning power). Ensure that the area is thoroughly cleaned before proceeding.
Give the cleaned area ample time to dry, approximately one to two hours.
Use a caulking gun to apply the new caulking.
Remove the cap from the caulking gun and insert the nozzle at an angle.
Trigger the handle once to create an opening. If your caulking gun doesn't have a built-in blade, cut the tip of the caulking tube at an angle using a utility knife.
Insert the provided pokey bit into the end of the caulking tube to break the seal.
Begin by applying a small bead of caulking to the edge you want to seal.
Use your finger to press and smooth out the caulking, removing any excess.
Regularly wipe off excess caulking from your finger on a rag to prevent messiness.
Repeat the process, working in small sections, until the entire area is smoothly sealed.
Run a spatula across the caulking to create a smooth finish.
Allow the caulking to dry completely before using the shower or sink. Follow the recommended drying time mentioned on the caulking product.
Partition

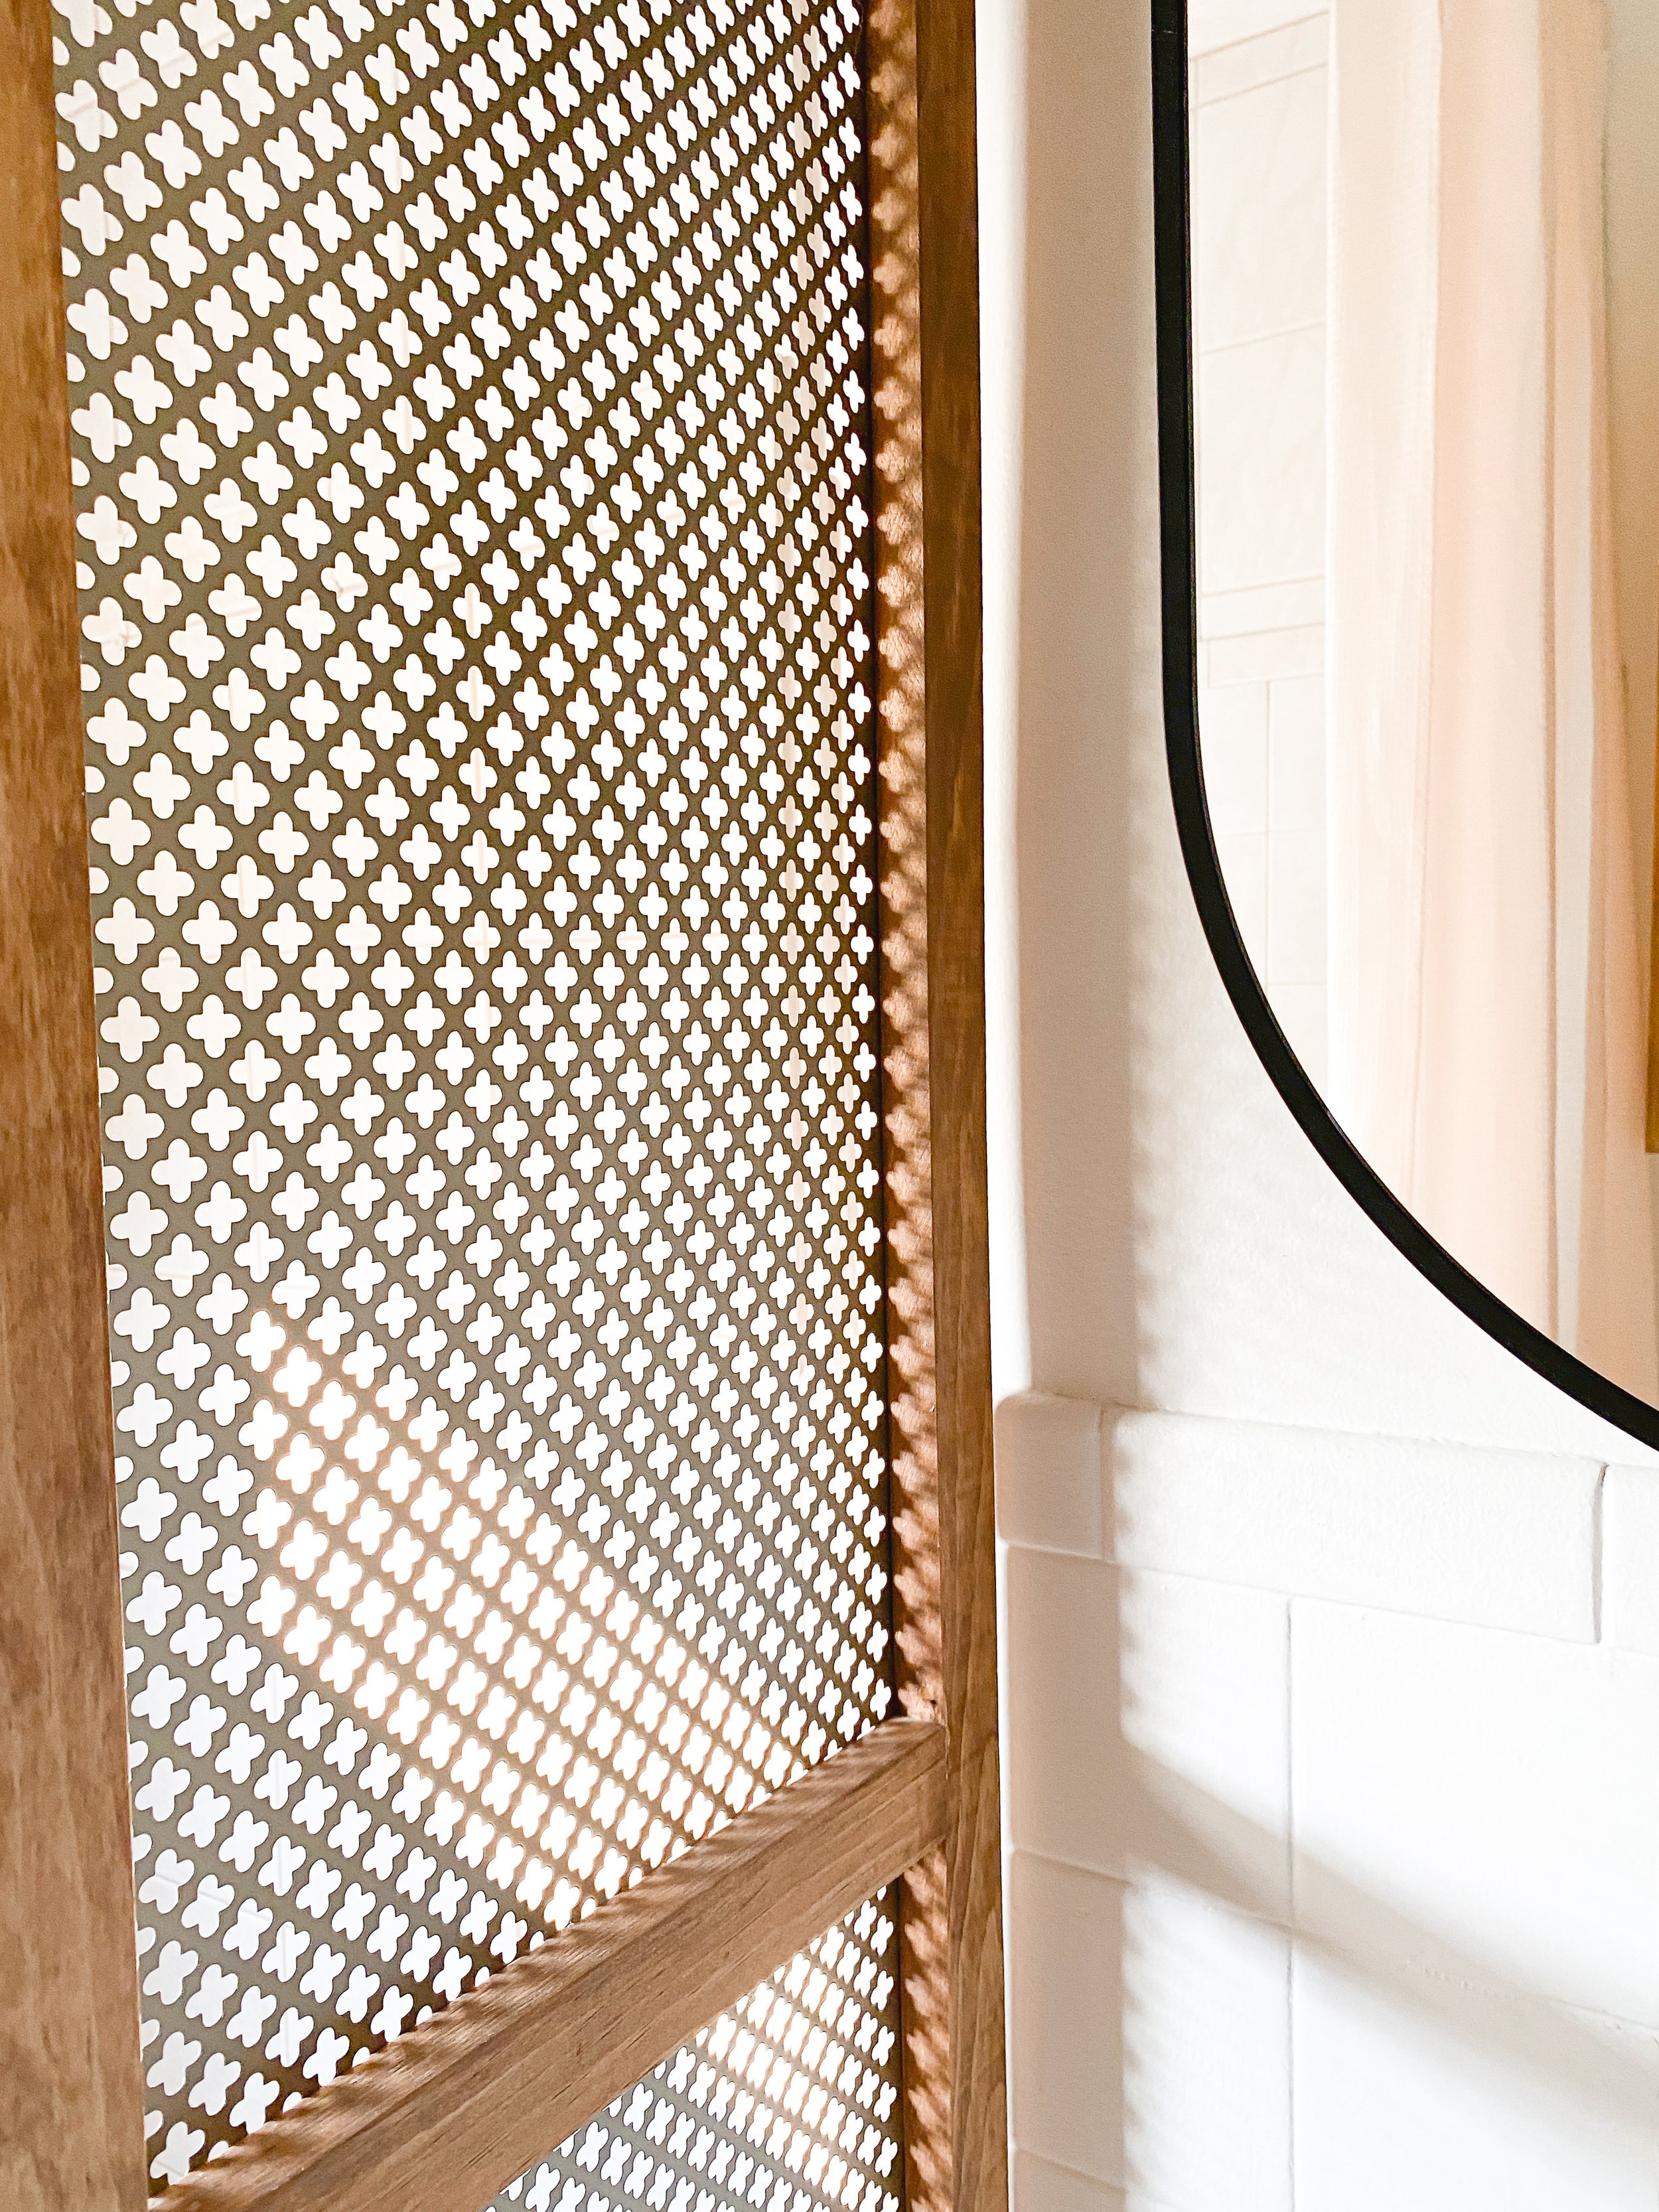
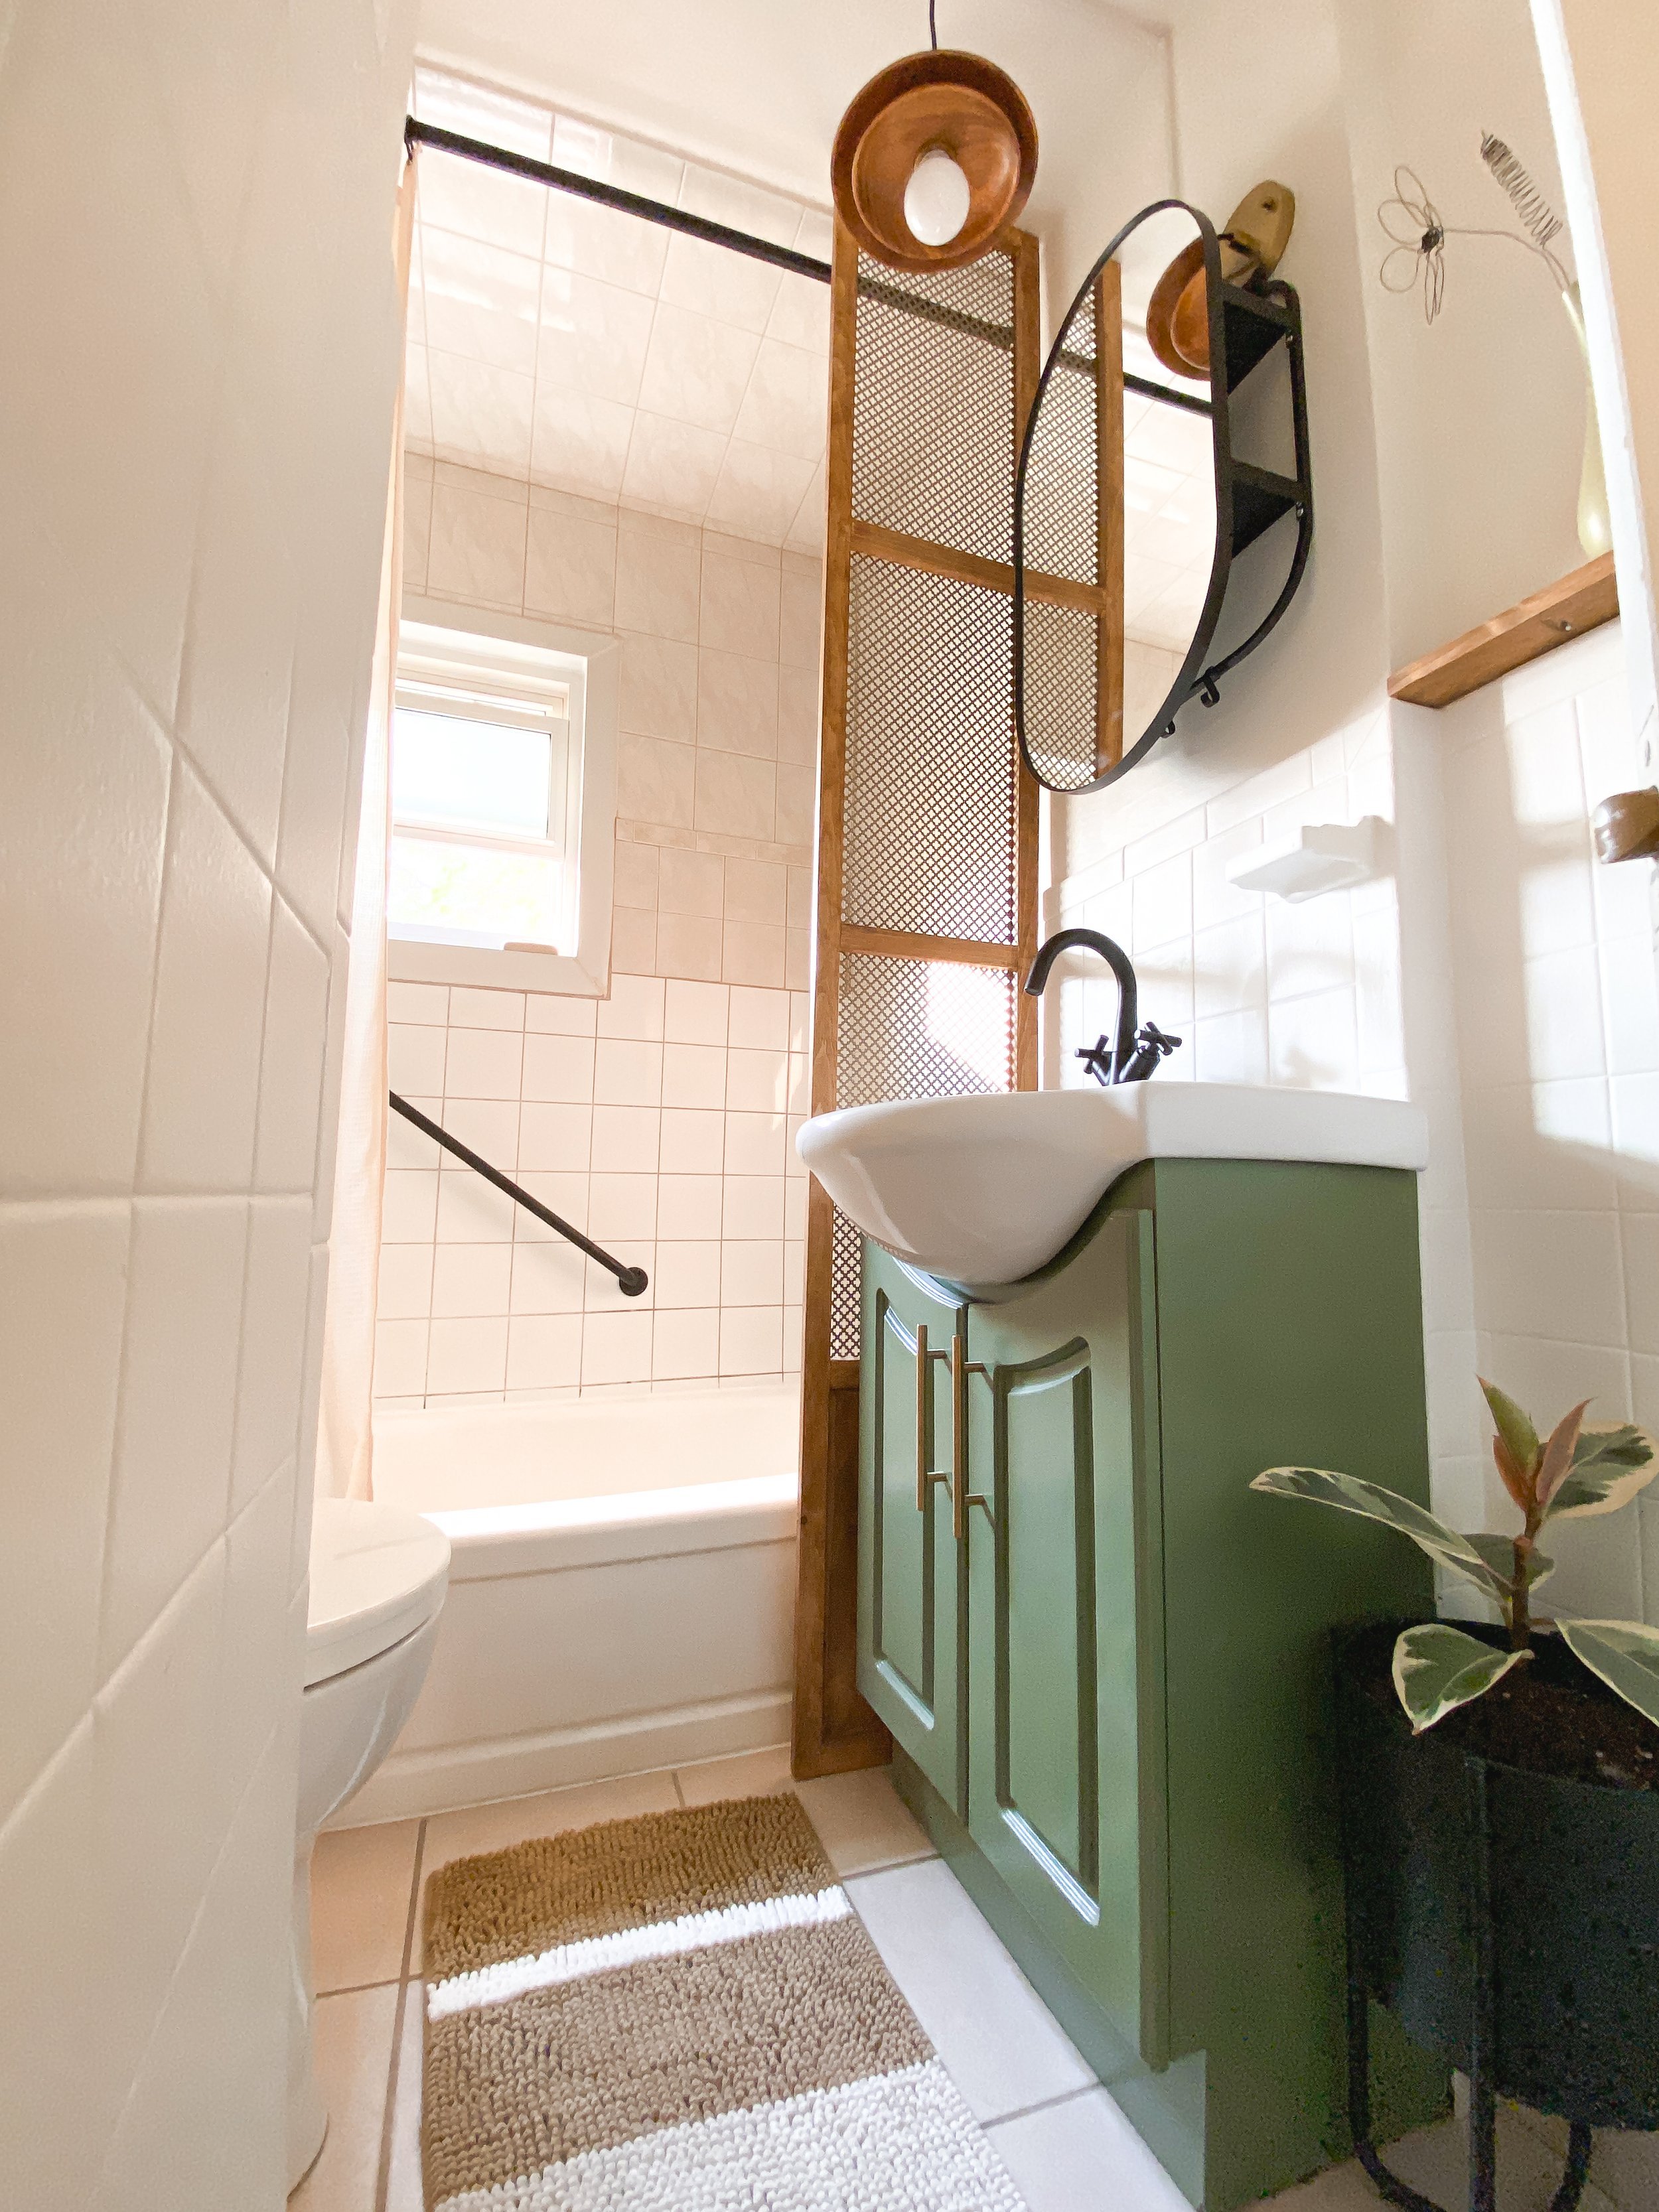
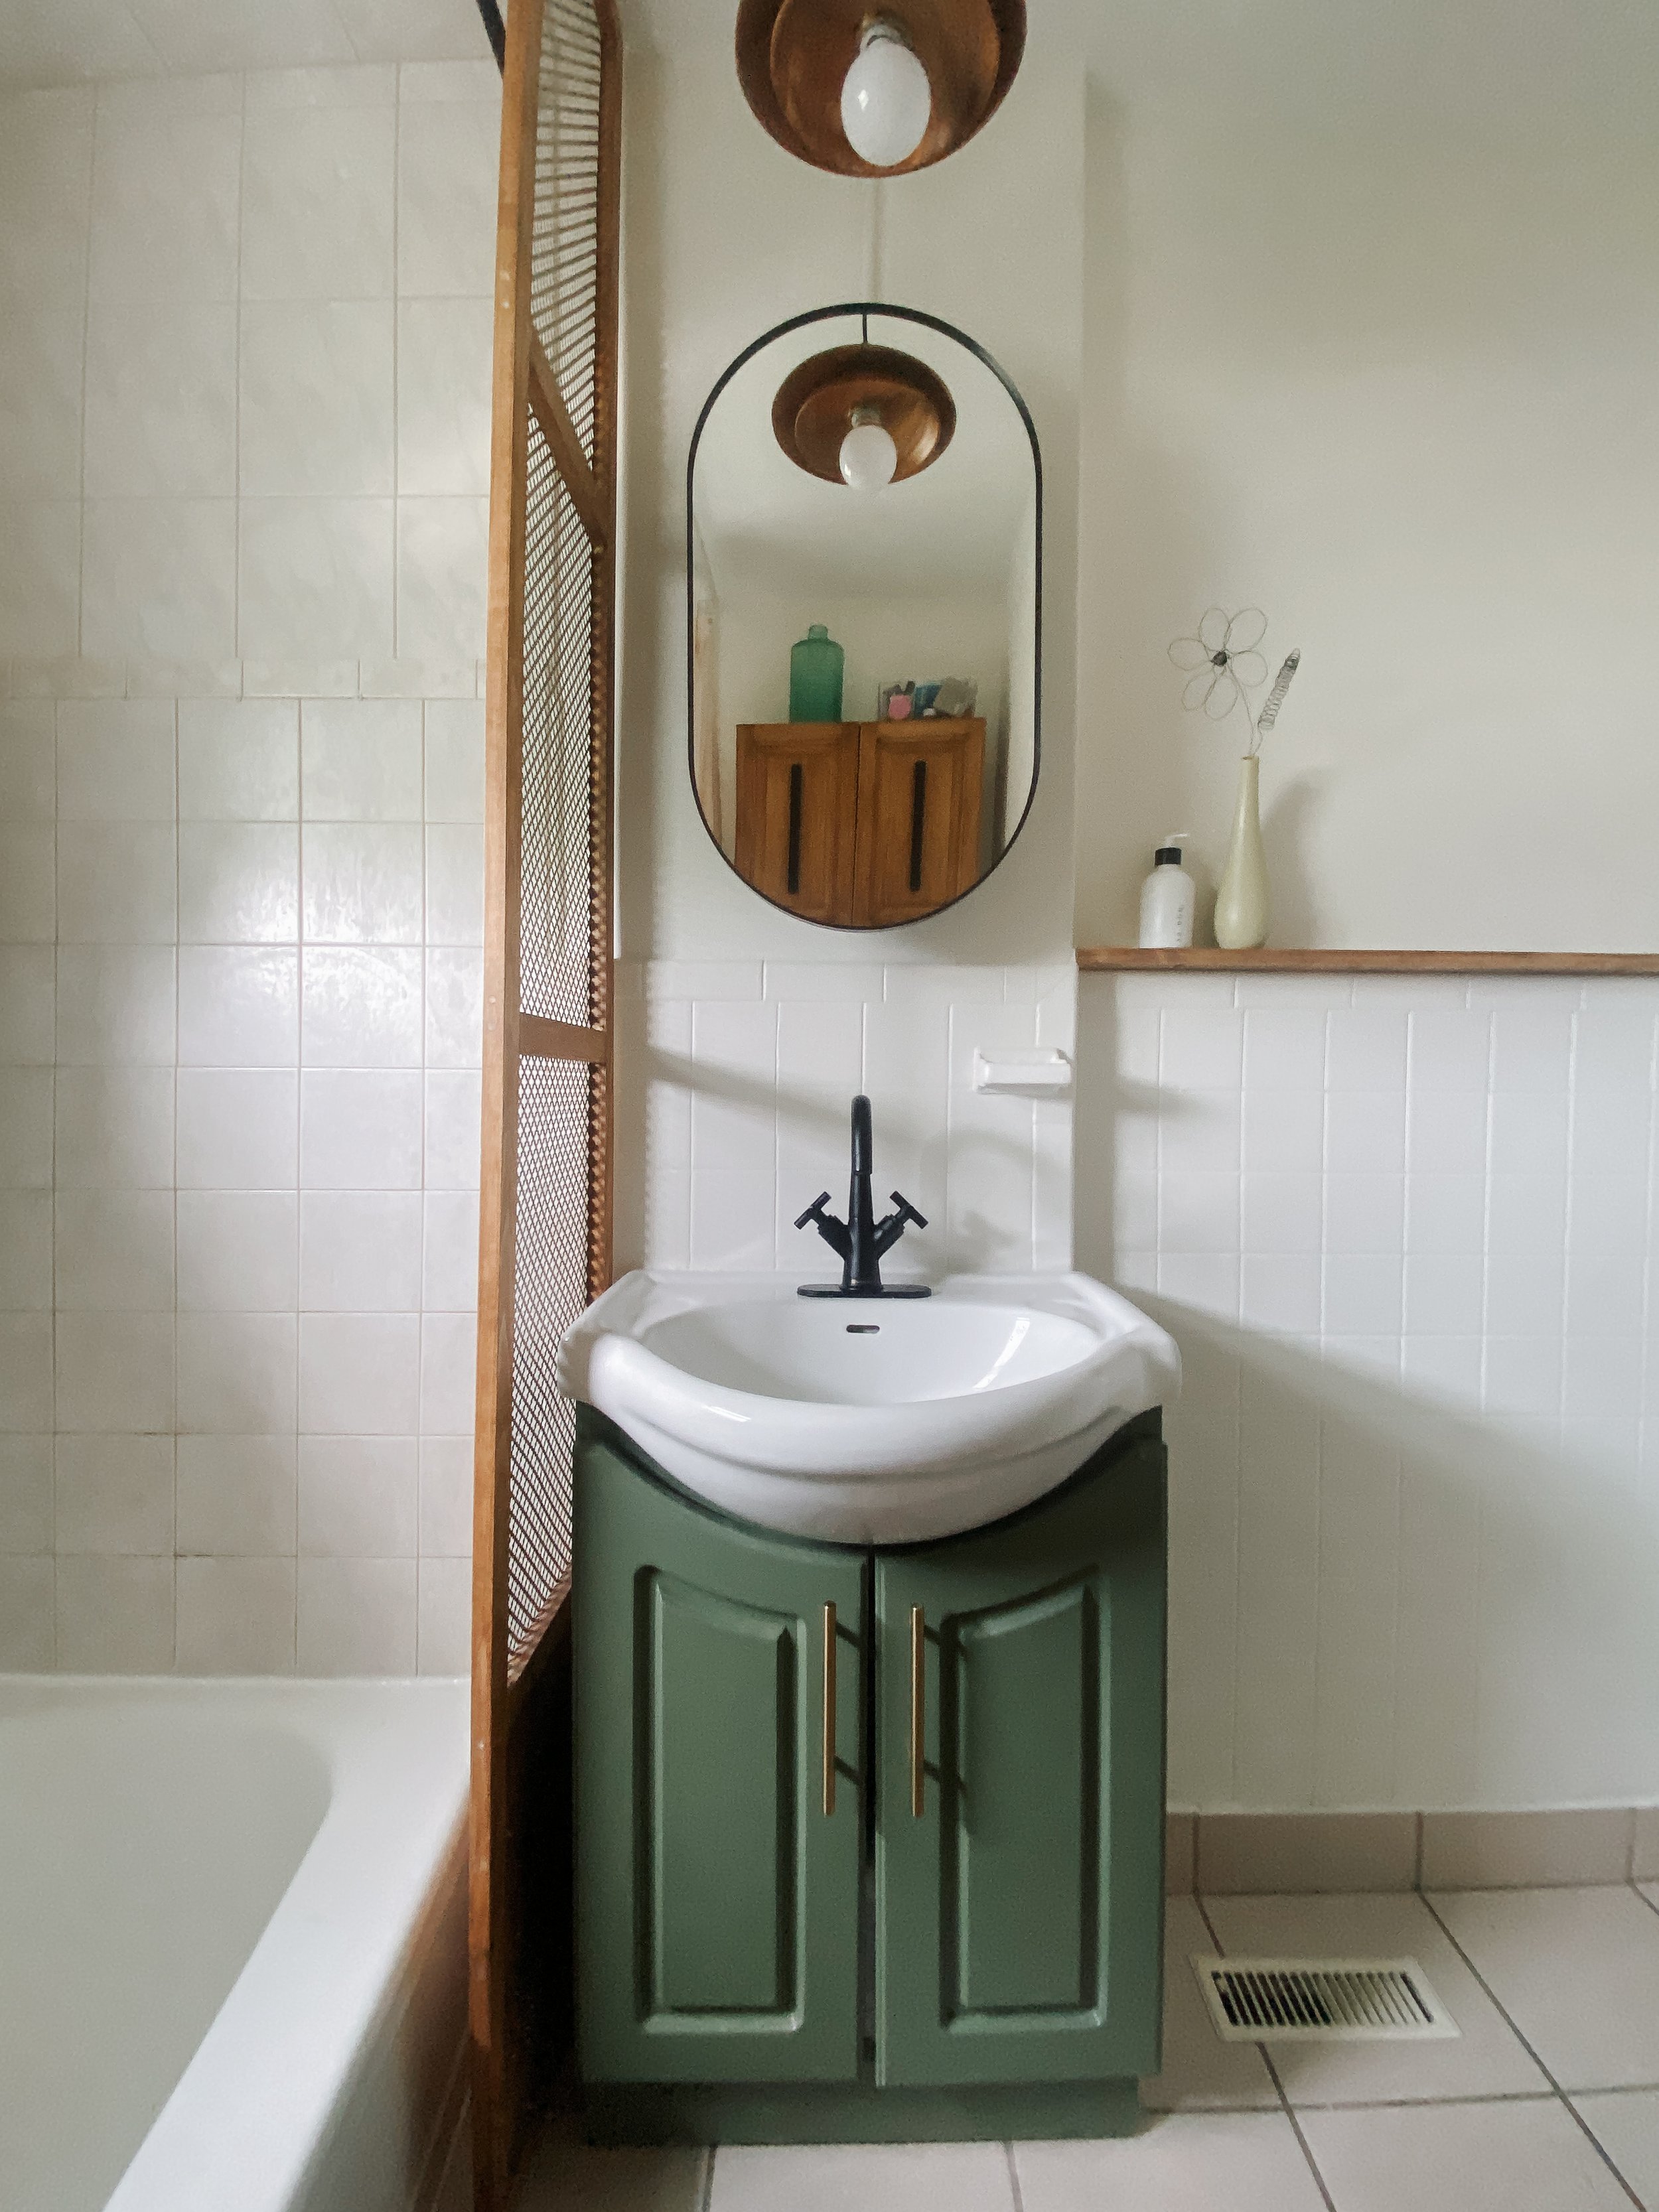
Next, I decided to build a partition using a combination of wood and metal. I measured and cut the pieces of wood to create a sturdy frame. Once the frame was complete, I used a patterned metal sheet over it, securing it with a staple gun. The partition not only added privacy but also served as a stylish visual element.
Here is a step by step on how I made the partition.
MATERIALS NEEDED:
1x2 boards
Circular saw
Wood glue
2" screws
Drill
Countersink bit
Wood filler
220-grit sandpaper
Stain
Sealer
Perforated aluminum sheet
Brad nailer
0.5 inch nails
STEP 1:

Cut two pieces of 1x2 boards to the height of the ceiling. These will serve as the longer pieces for the partition.
Cut another 1x2 board into five pieces, (I made mine each measuring 11.5 inches in length). These will be the shorter pieces that will be the width of the partition.
STEP 2:
Space out shorter pieces between two longer pieces, leaving 23” of space between each piece.
STEP 3:
Pre-drill pilot holes and countersink them in each joint of the frame.
Apply wood glue to the joints.
Use 2" screws to secure the frame together, inserting them through the pilot holes.
STEP 4:
Measure the bottom space of the partition, which will vary based on your ceiling height.
Using a circular saw, cut a piece of 3/4” plywood (or wood panel of choice) to fit the measured dimensions.
Ensure the bottom panel fits snugly within the frame.
STEP 5:
Apply wood glue along the edges of the bottom panel.
Place the bottom panel inside the frame, aligning it properly.
Secure the bottom panel to the frame by driving countersunk screws through the panel into the frame.
STEP 6:
Fill the countersunk screw holes and any gaps between the bottom panel and the frame with wood filler.
Allow the wood filler to dry according to the manufacturer's instructions.

STEP 7:
Once the wood filler has dried, sand the entire partition using 220-grit sandpaper.
Sand all surfaces until they are smooth to the touch.
STEP 8:
Apply stain to the wood according to the manufacturer's instructions.
Allow the stain to dry completely.
Apply a coat of sealer to protect the wood.
Sand lightly between each coat of sealer for a smooth finish.
Repeat the staining and sealing process a total of three times, sanding between each coat.
STEP 9:
Lay a perforated aluminum sheet along the back of the partition.
Use a brad nailer and 0.5” nails to secure the aluminum sheet in place.
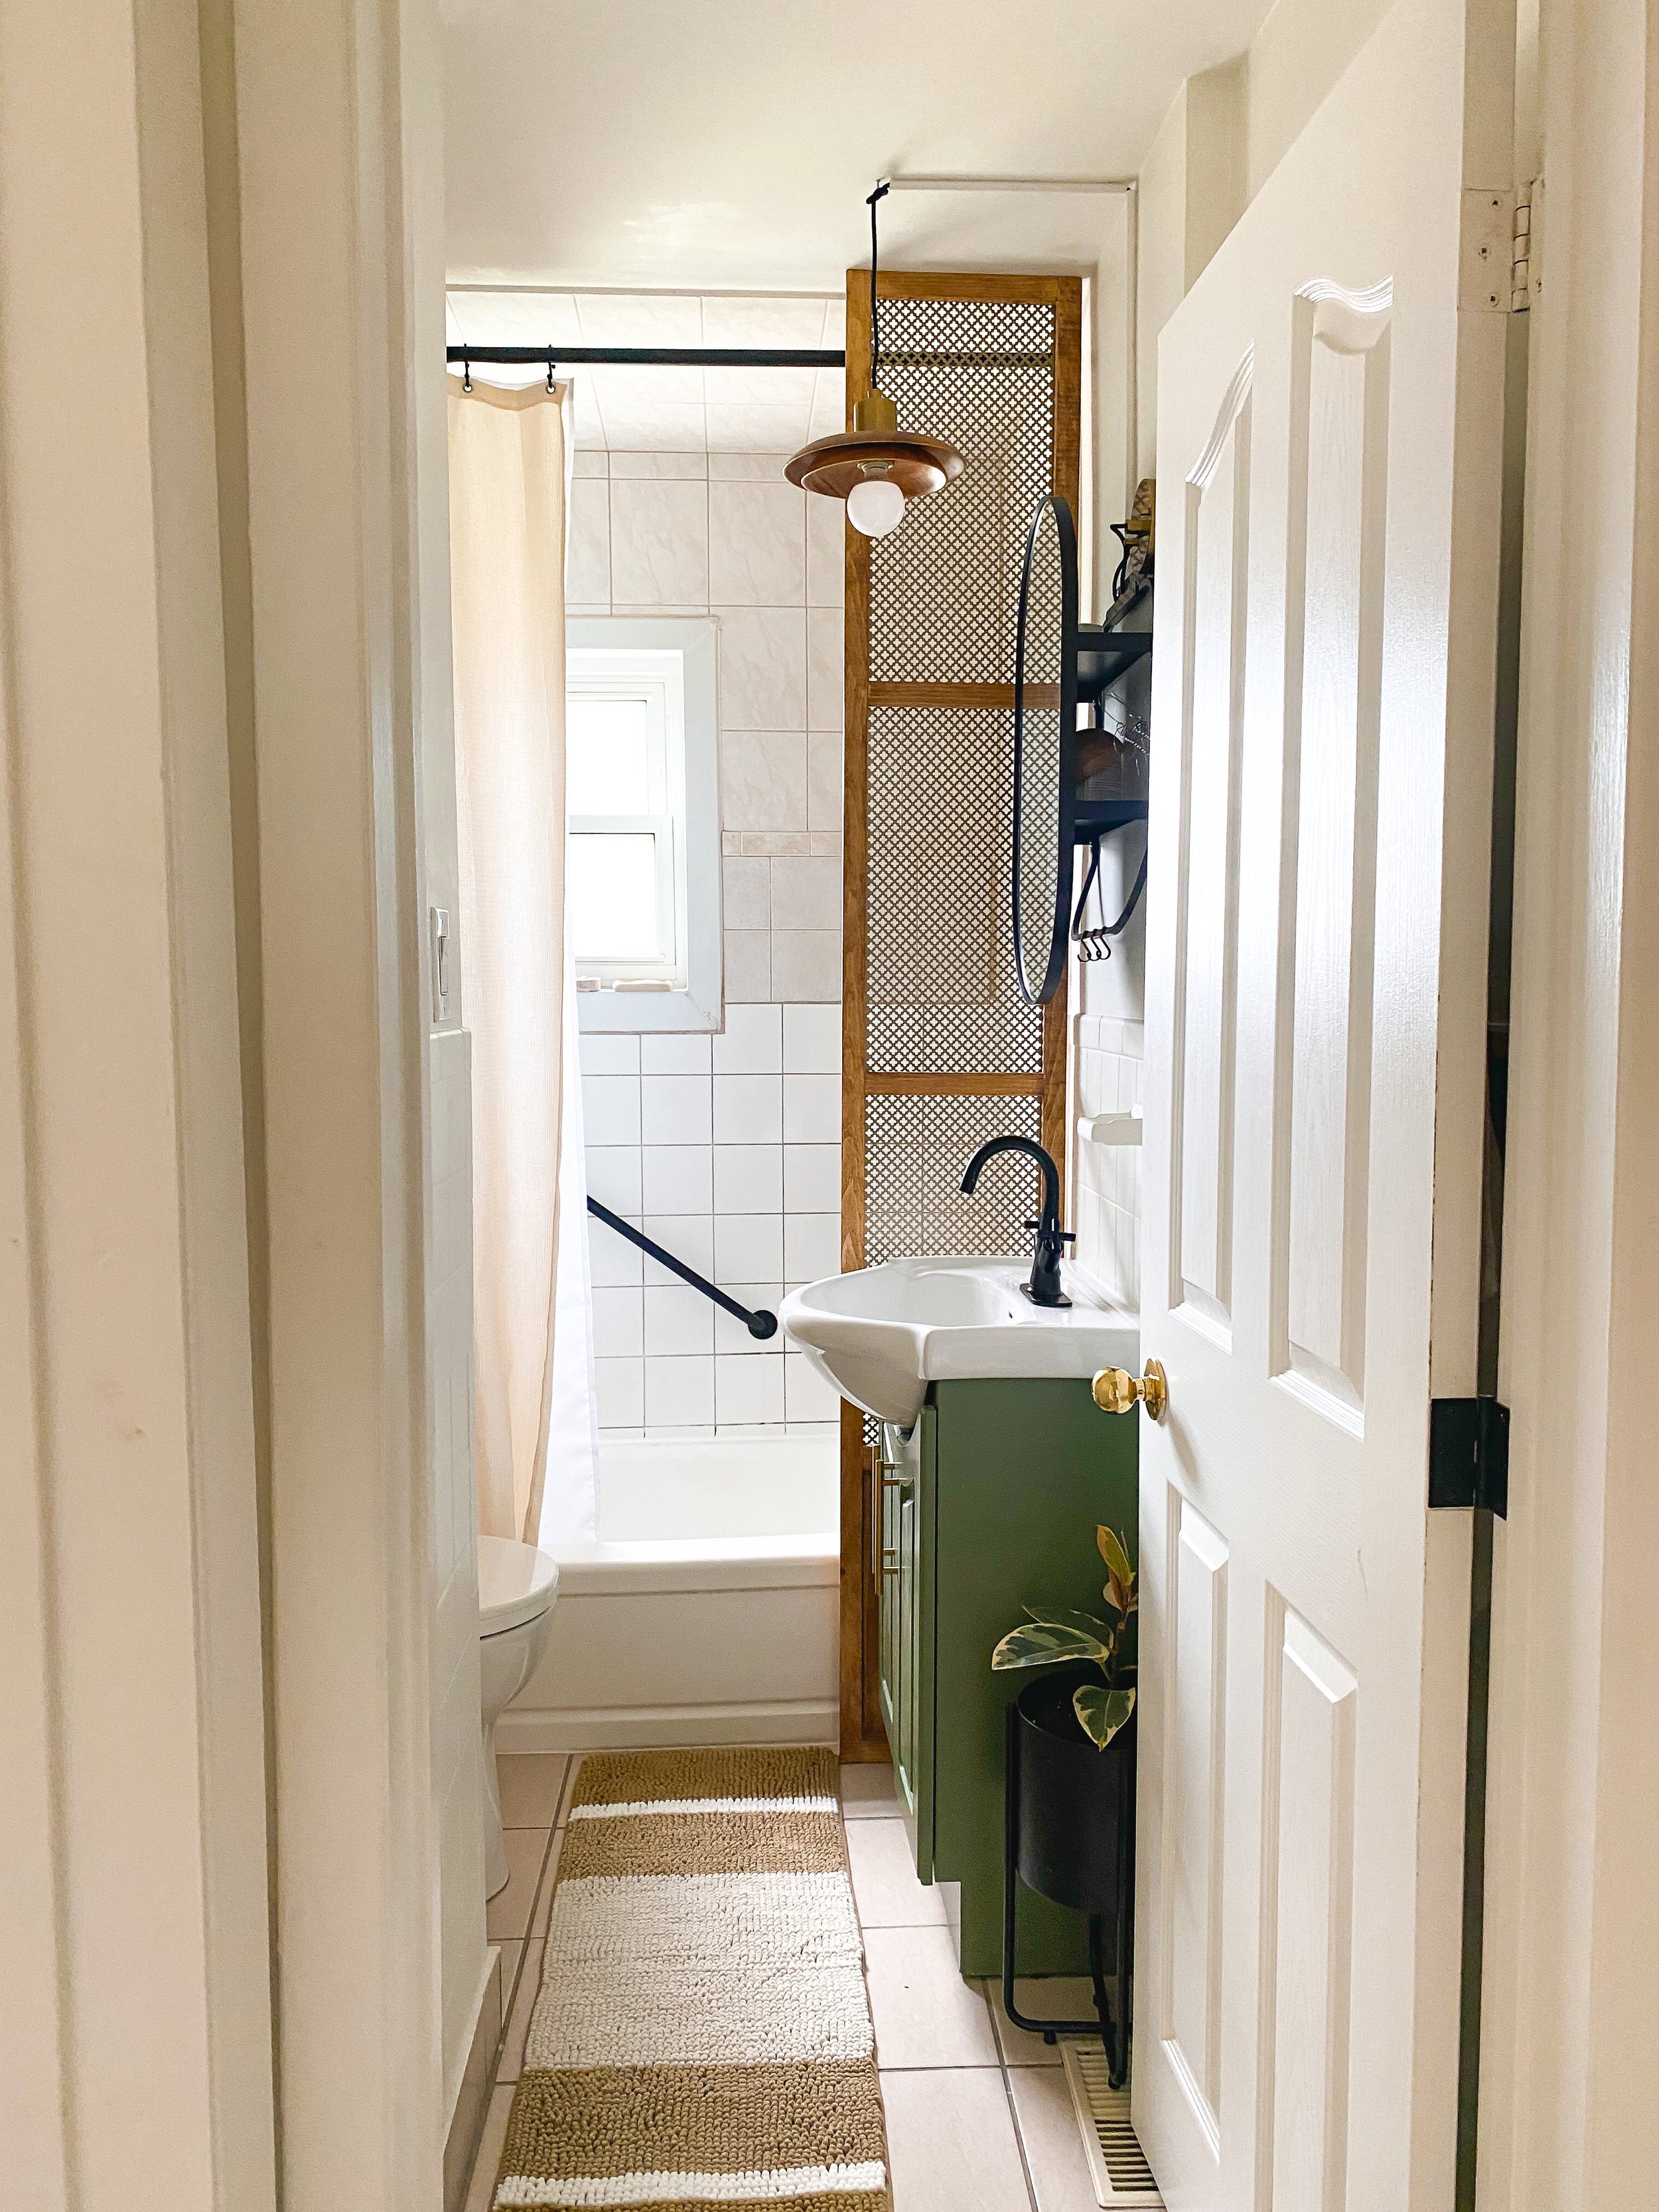
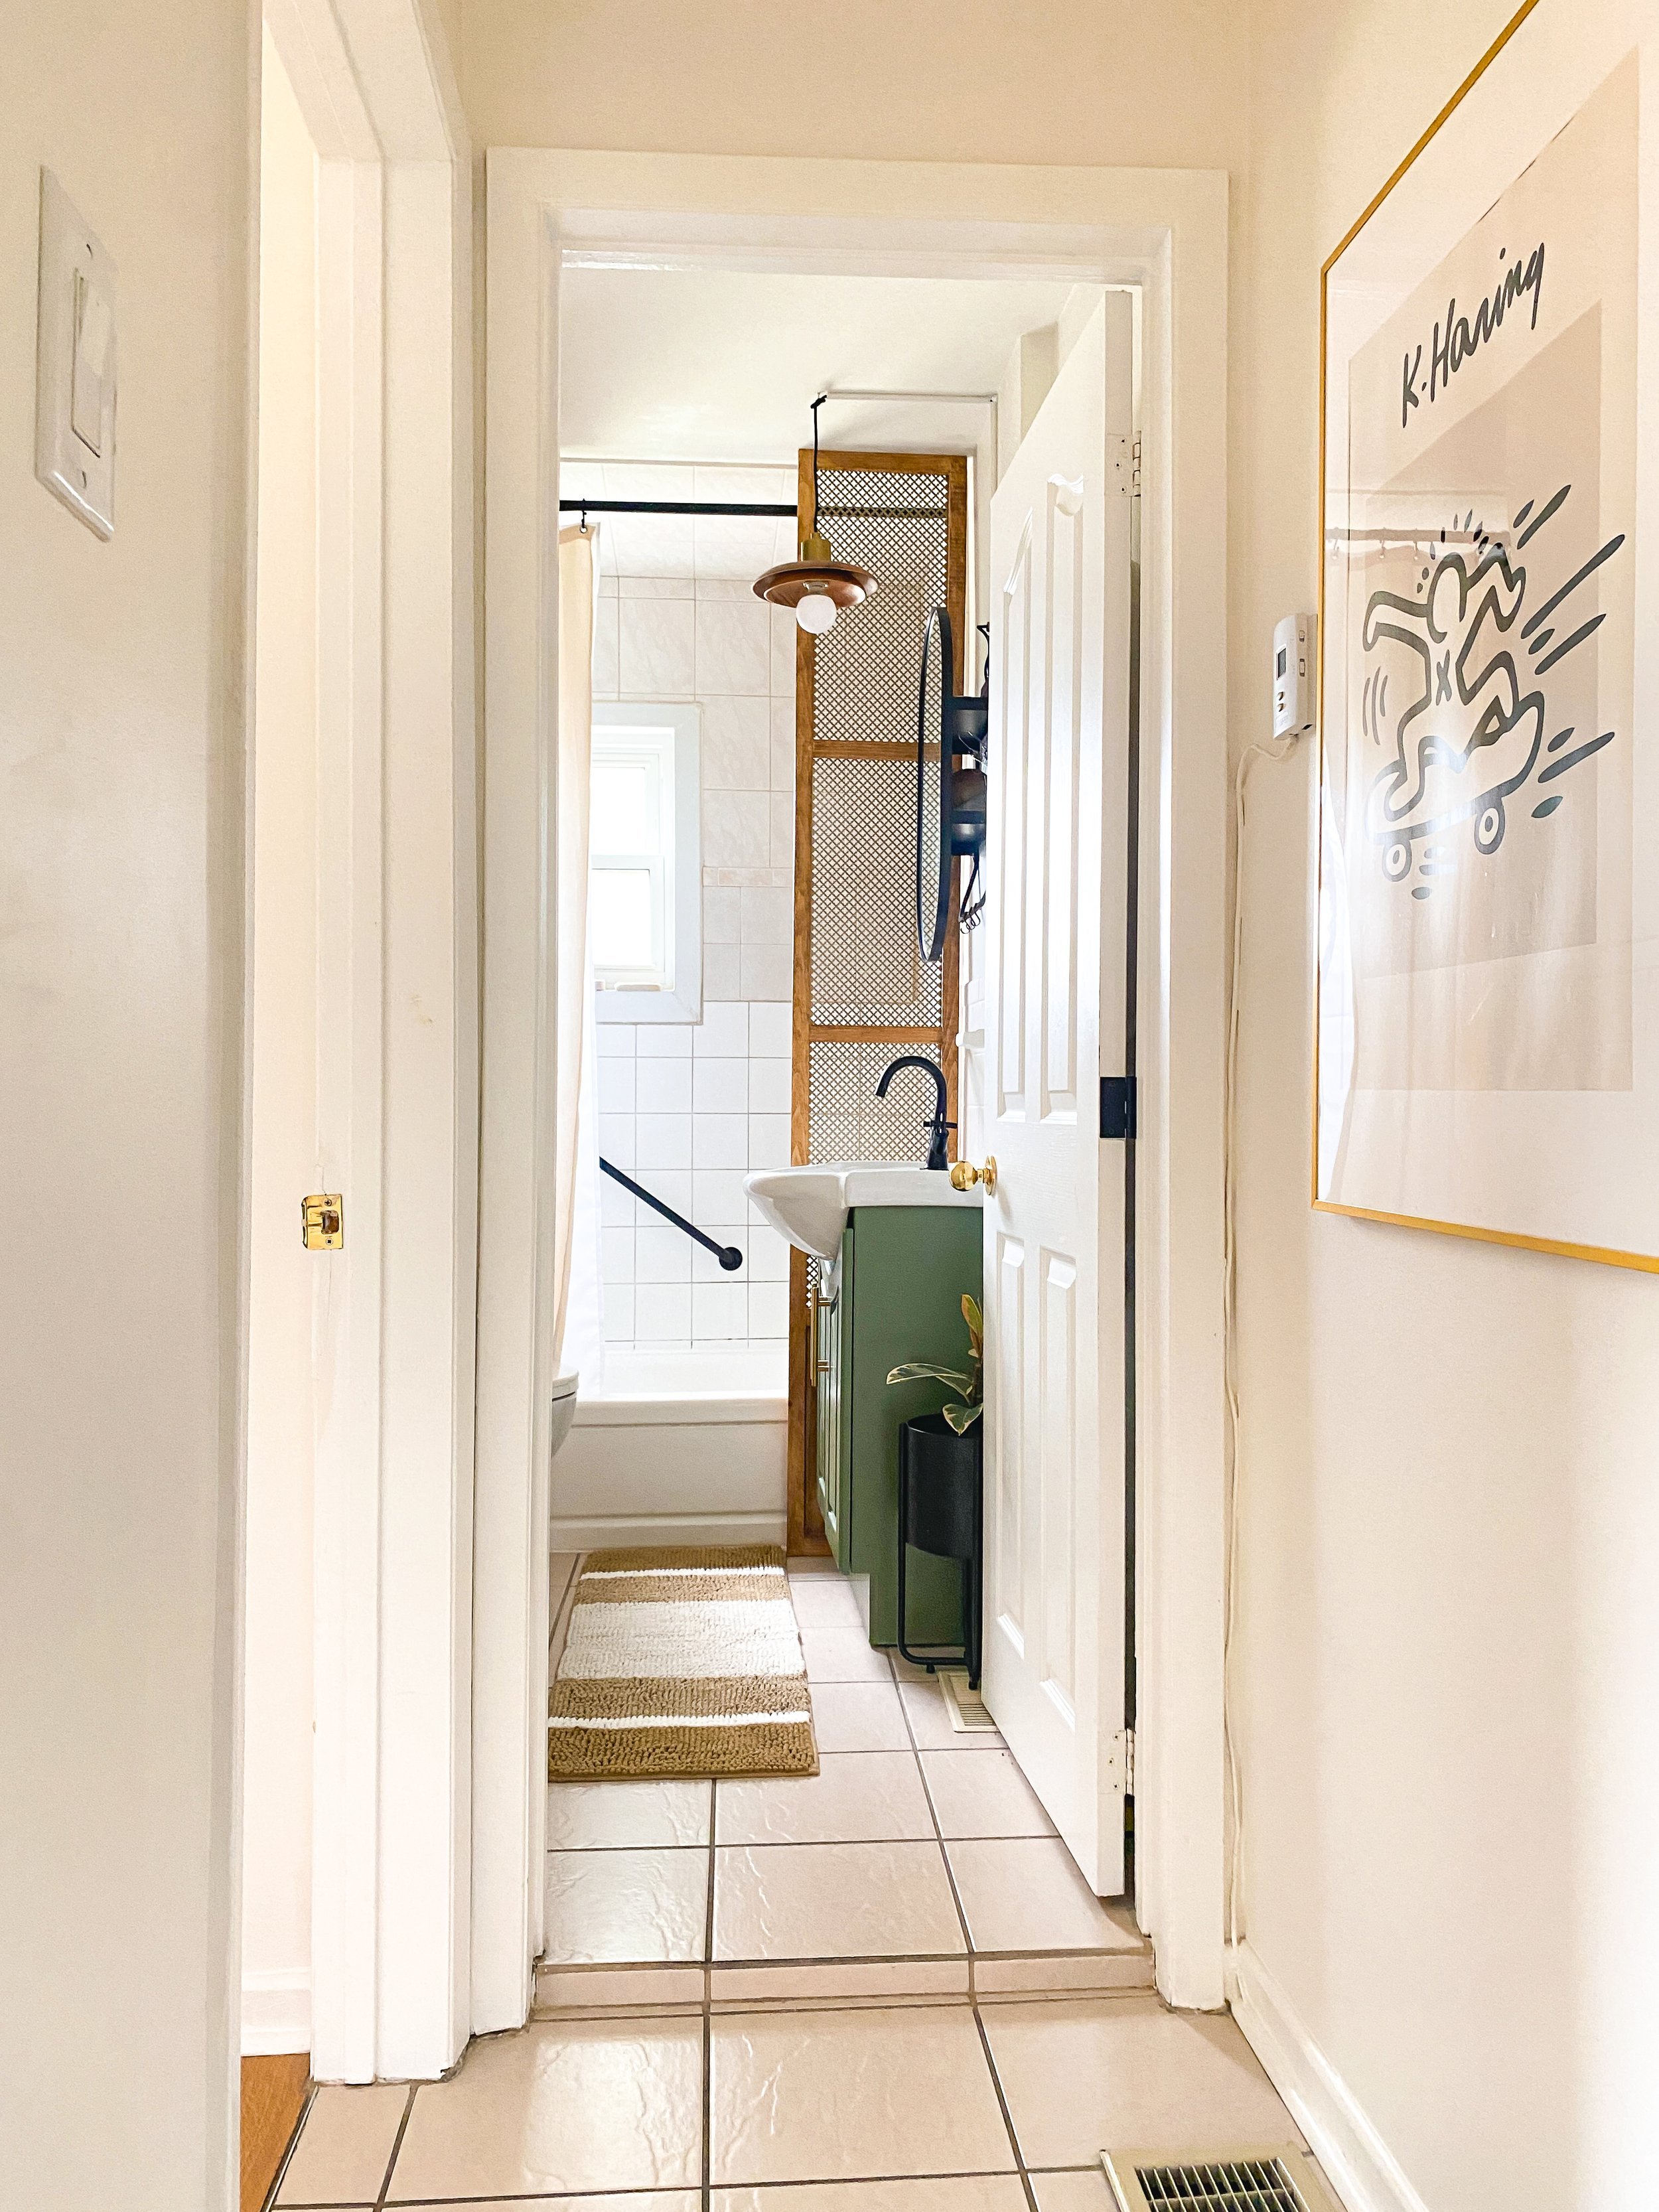
With the partition ready, I securely attached it to the wall using brackets and screws, ensuring stability and eliminating any wobbling. The partition instantly transformed the bathroom, providing a bit of seperation and becoming a focal point.
Lighting
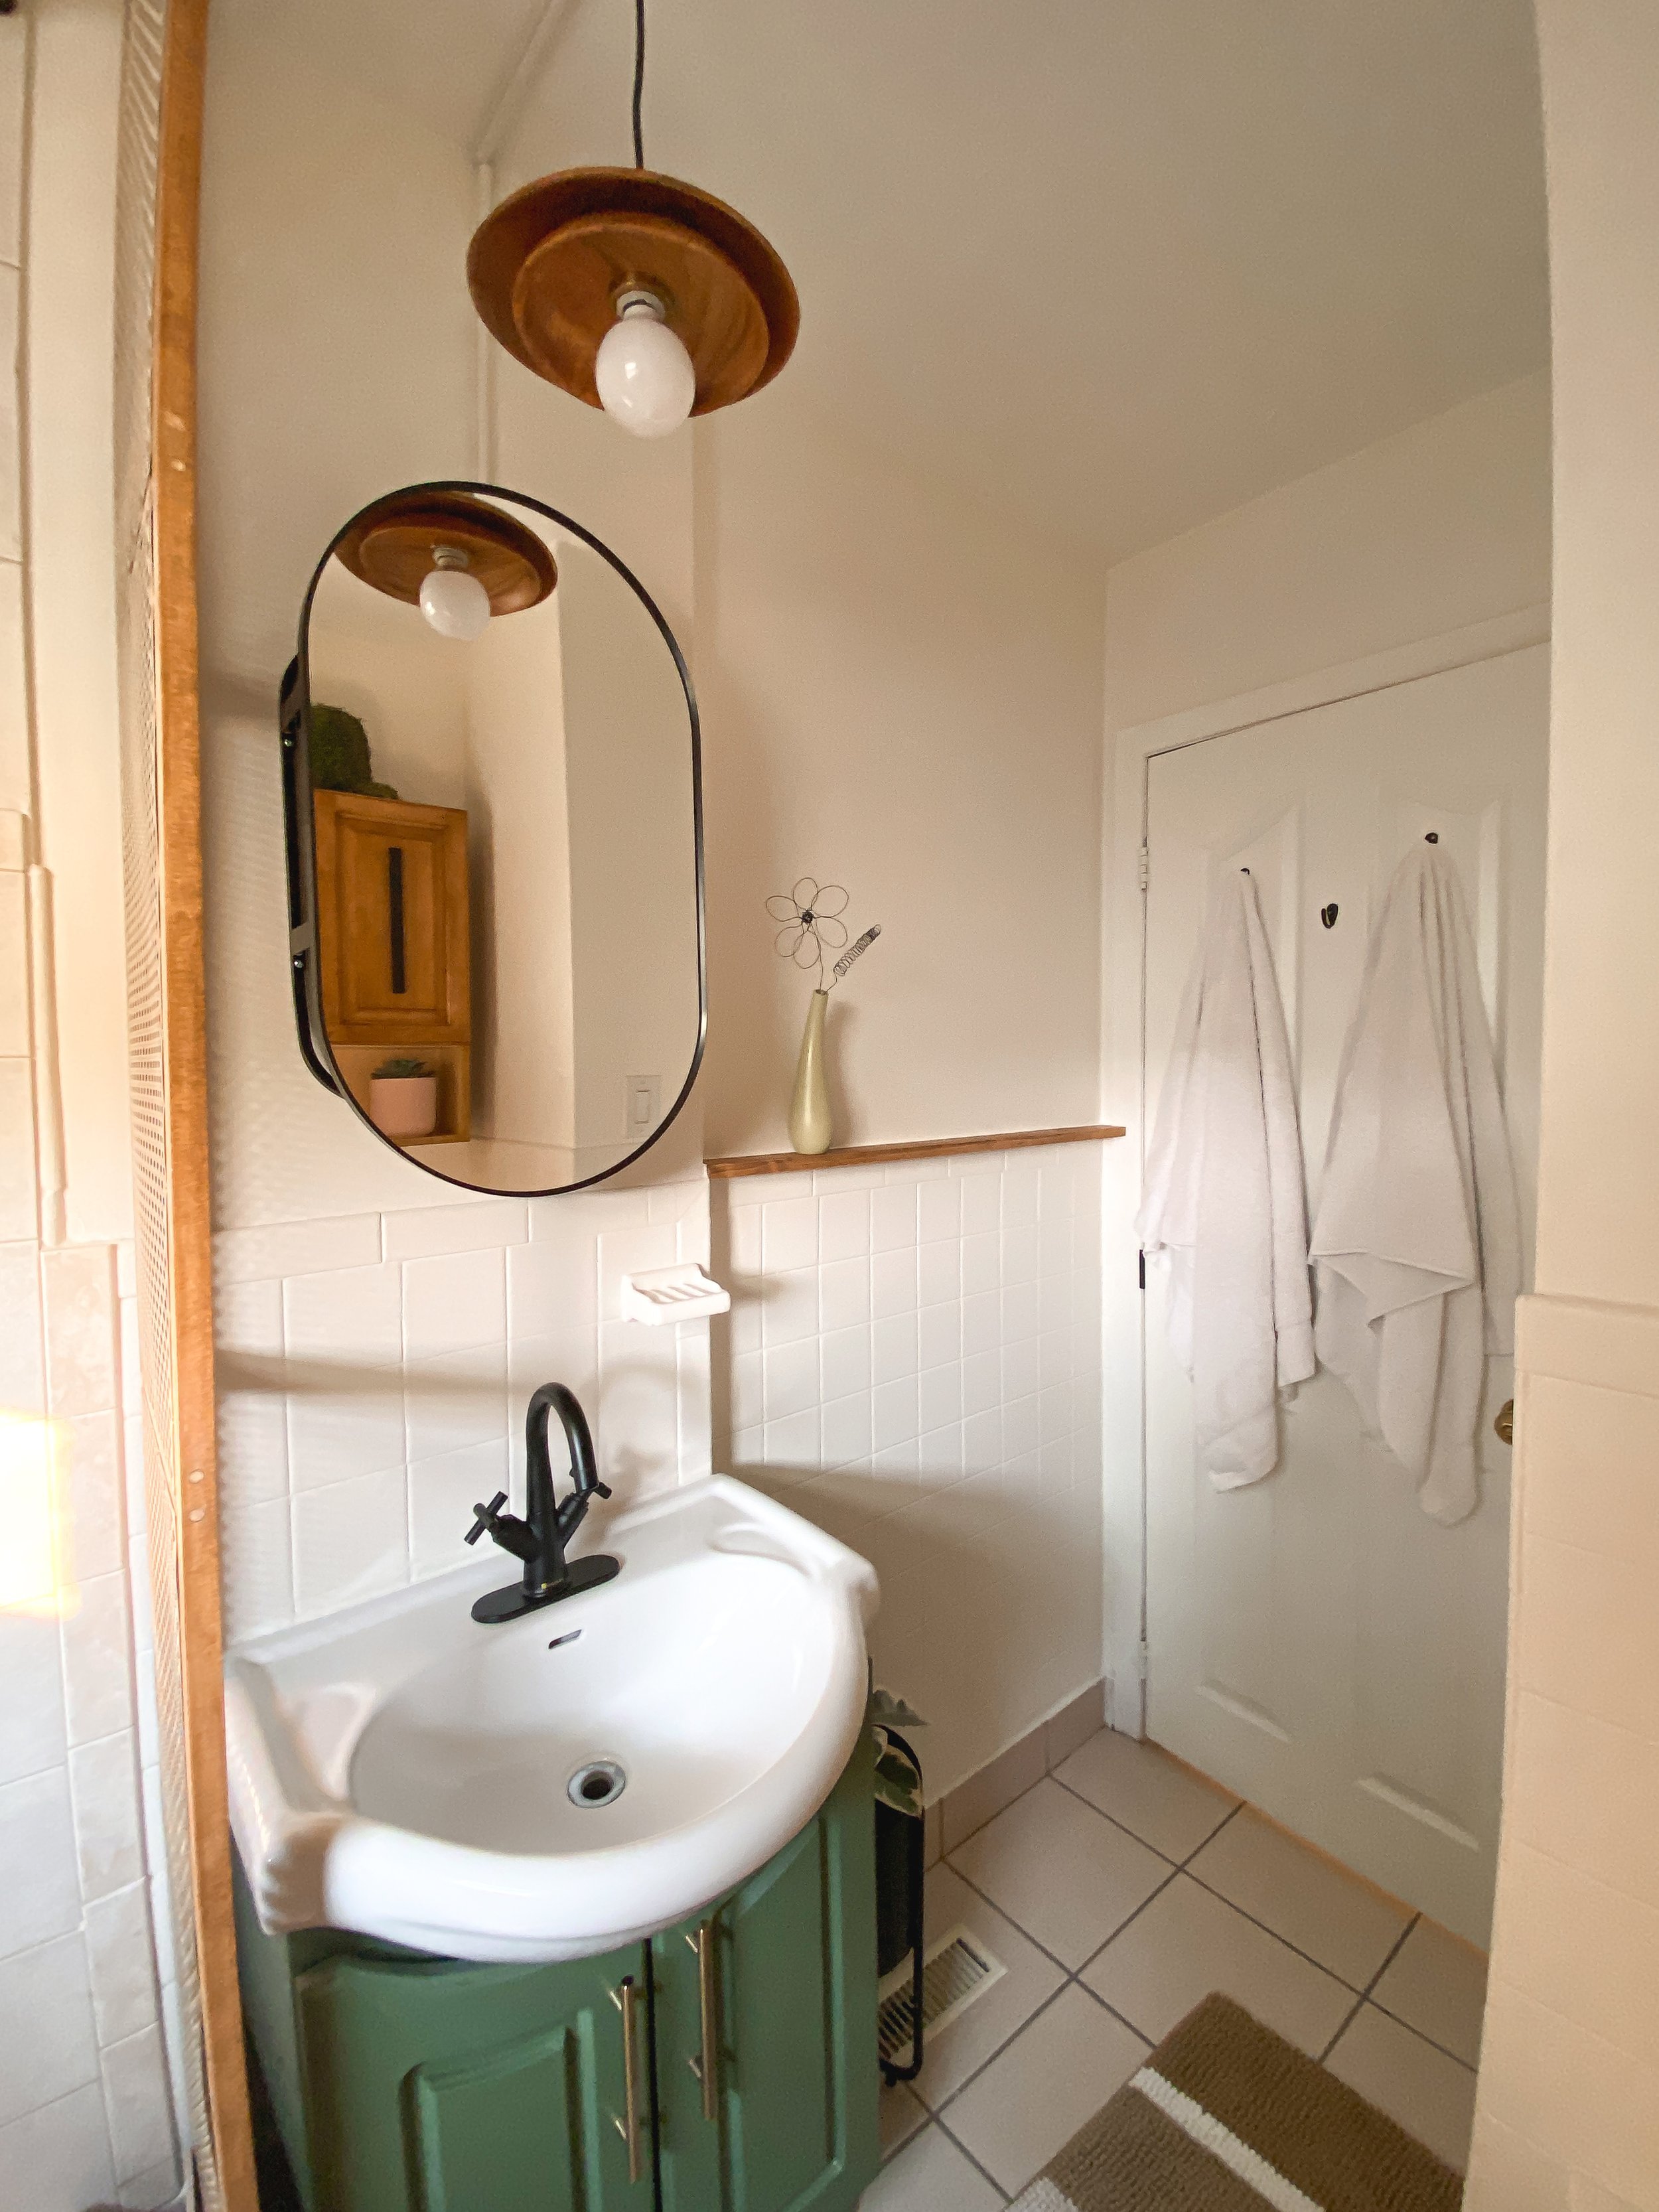
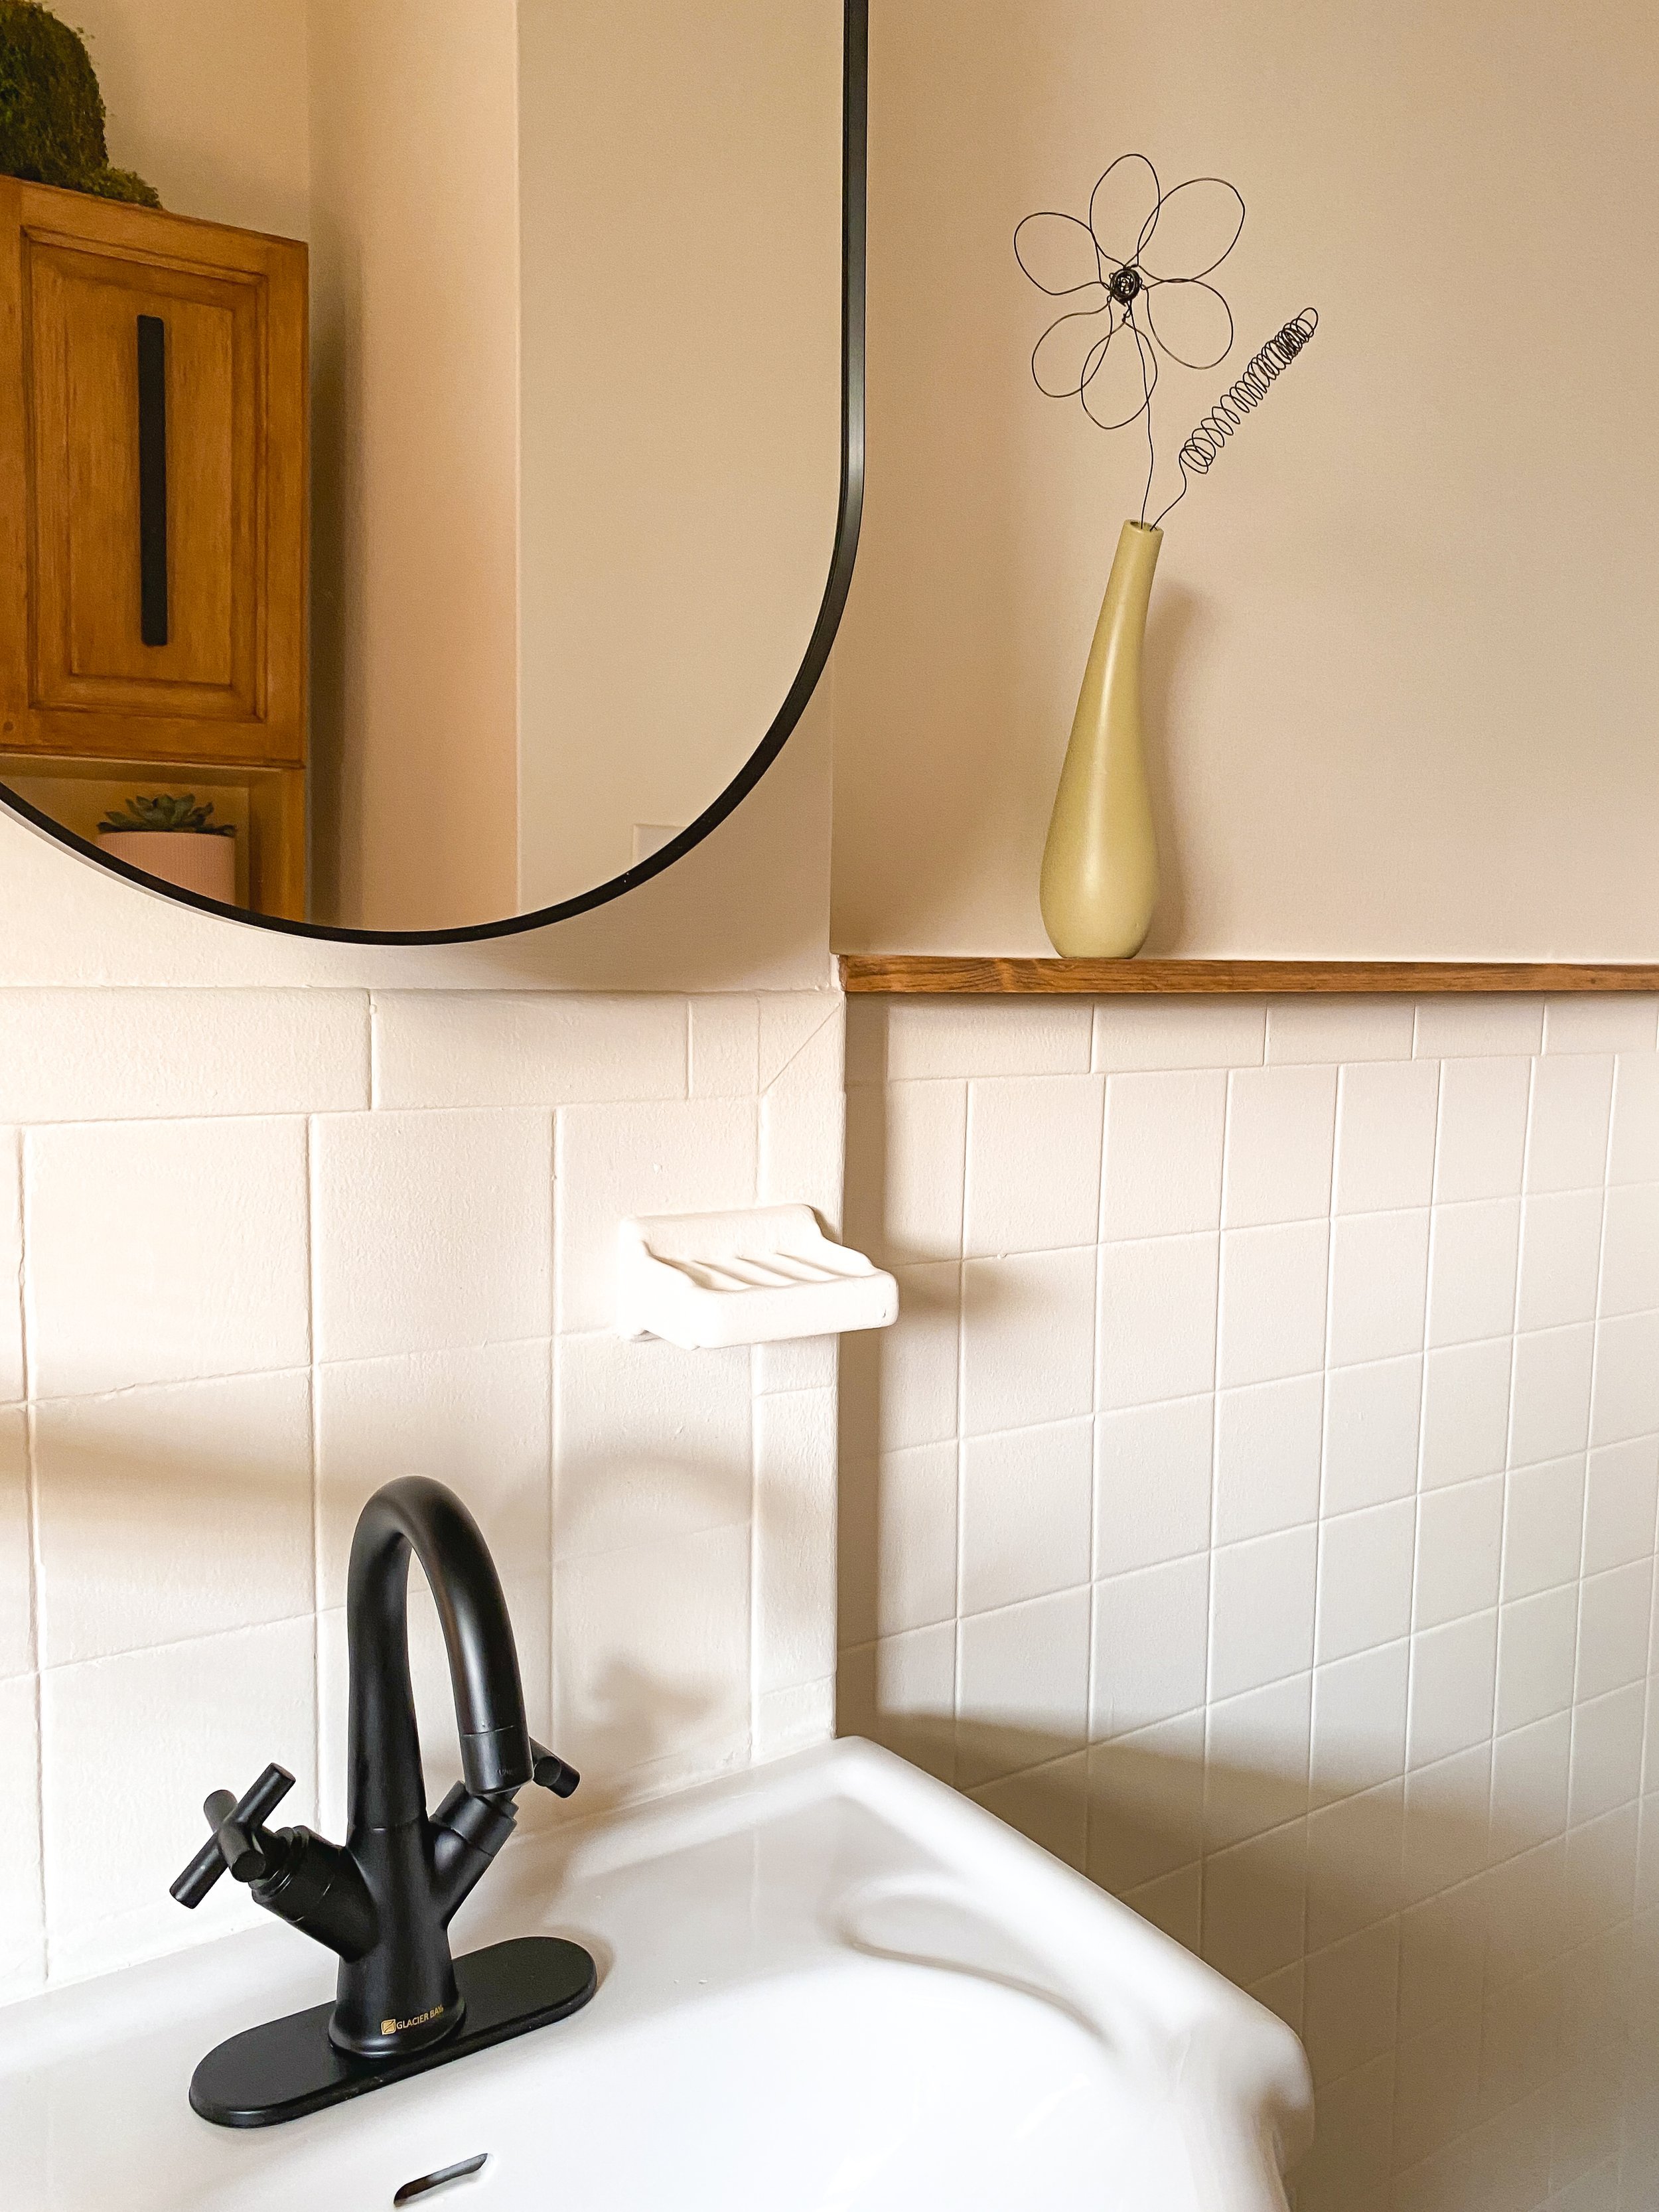
Next to address was the off-center light fixture. I sourced a pendant light that would draw attention away from the awkward placement; I figured this would be the best way to hide it, covering up the plate with a mirror and hanging it centred up above. After switching off the power, I removed the old light fixture and installed the new pendant light.
Storage
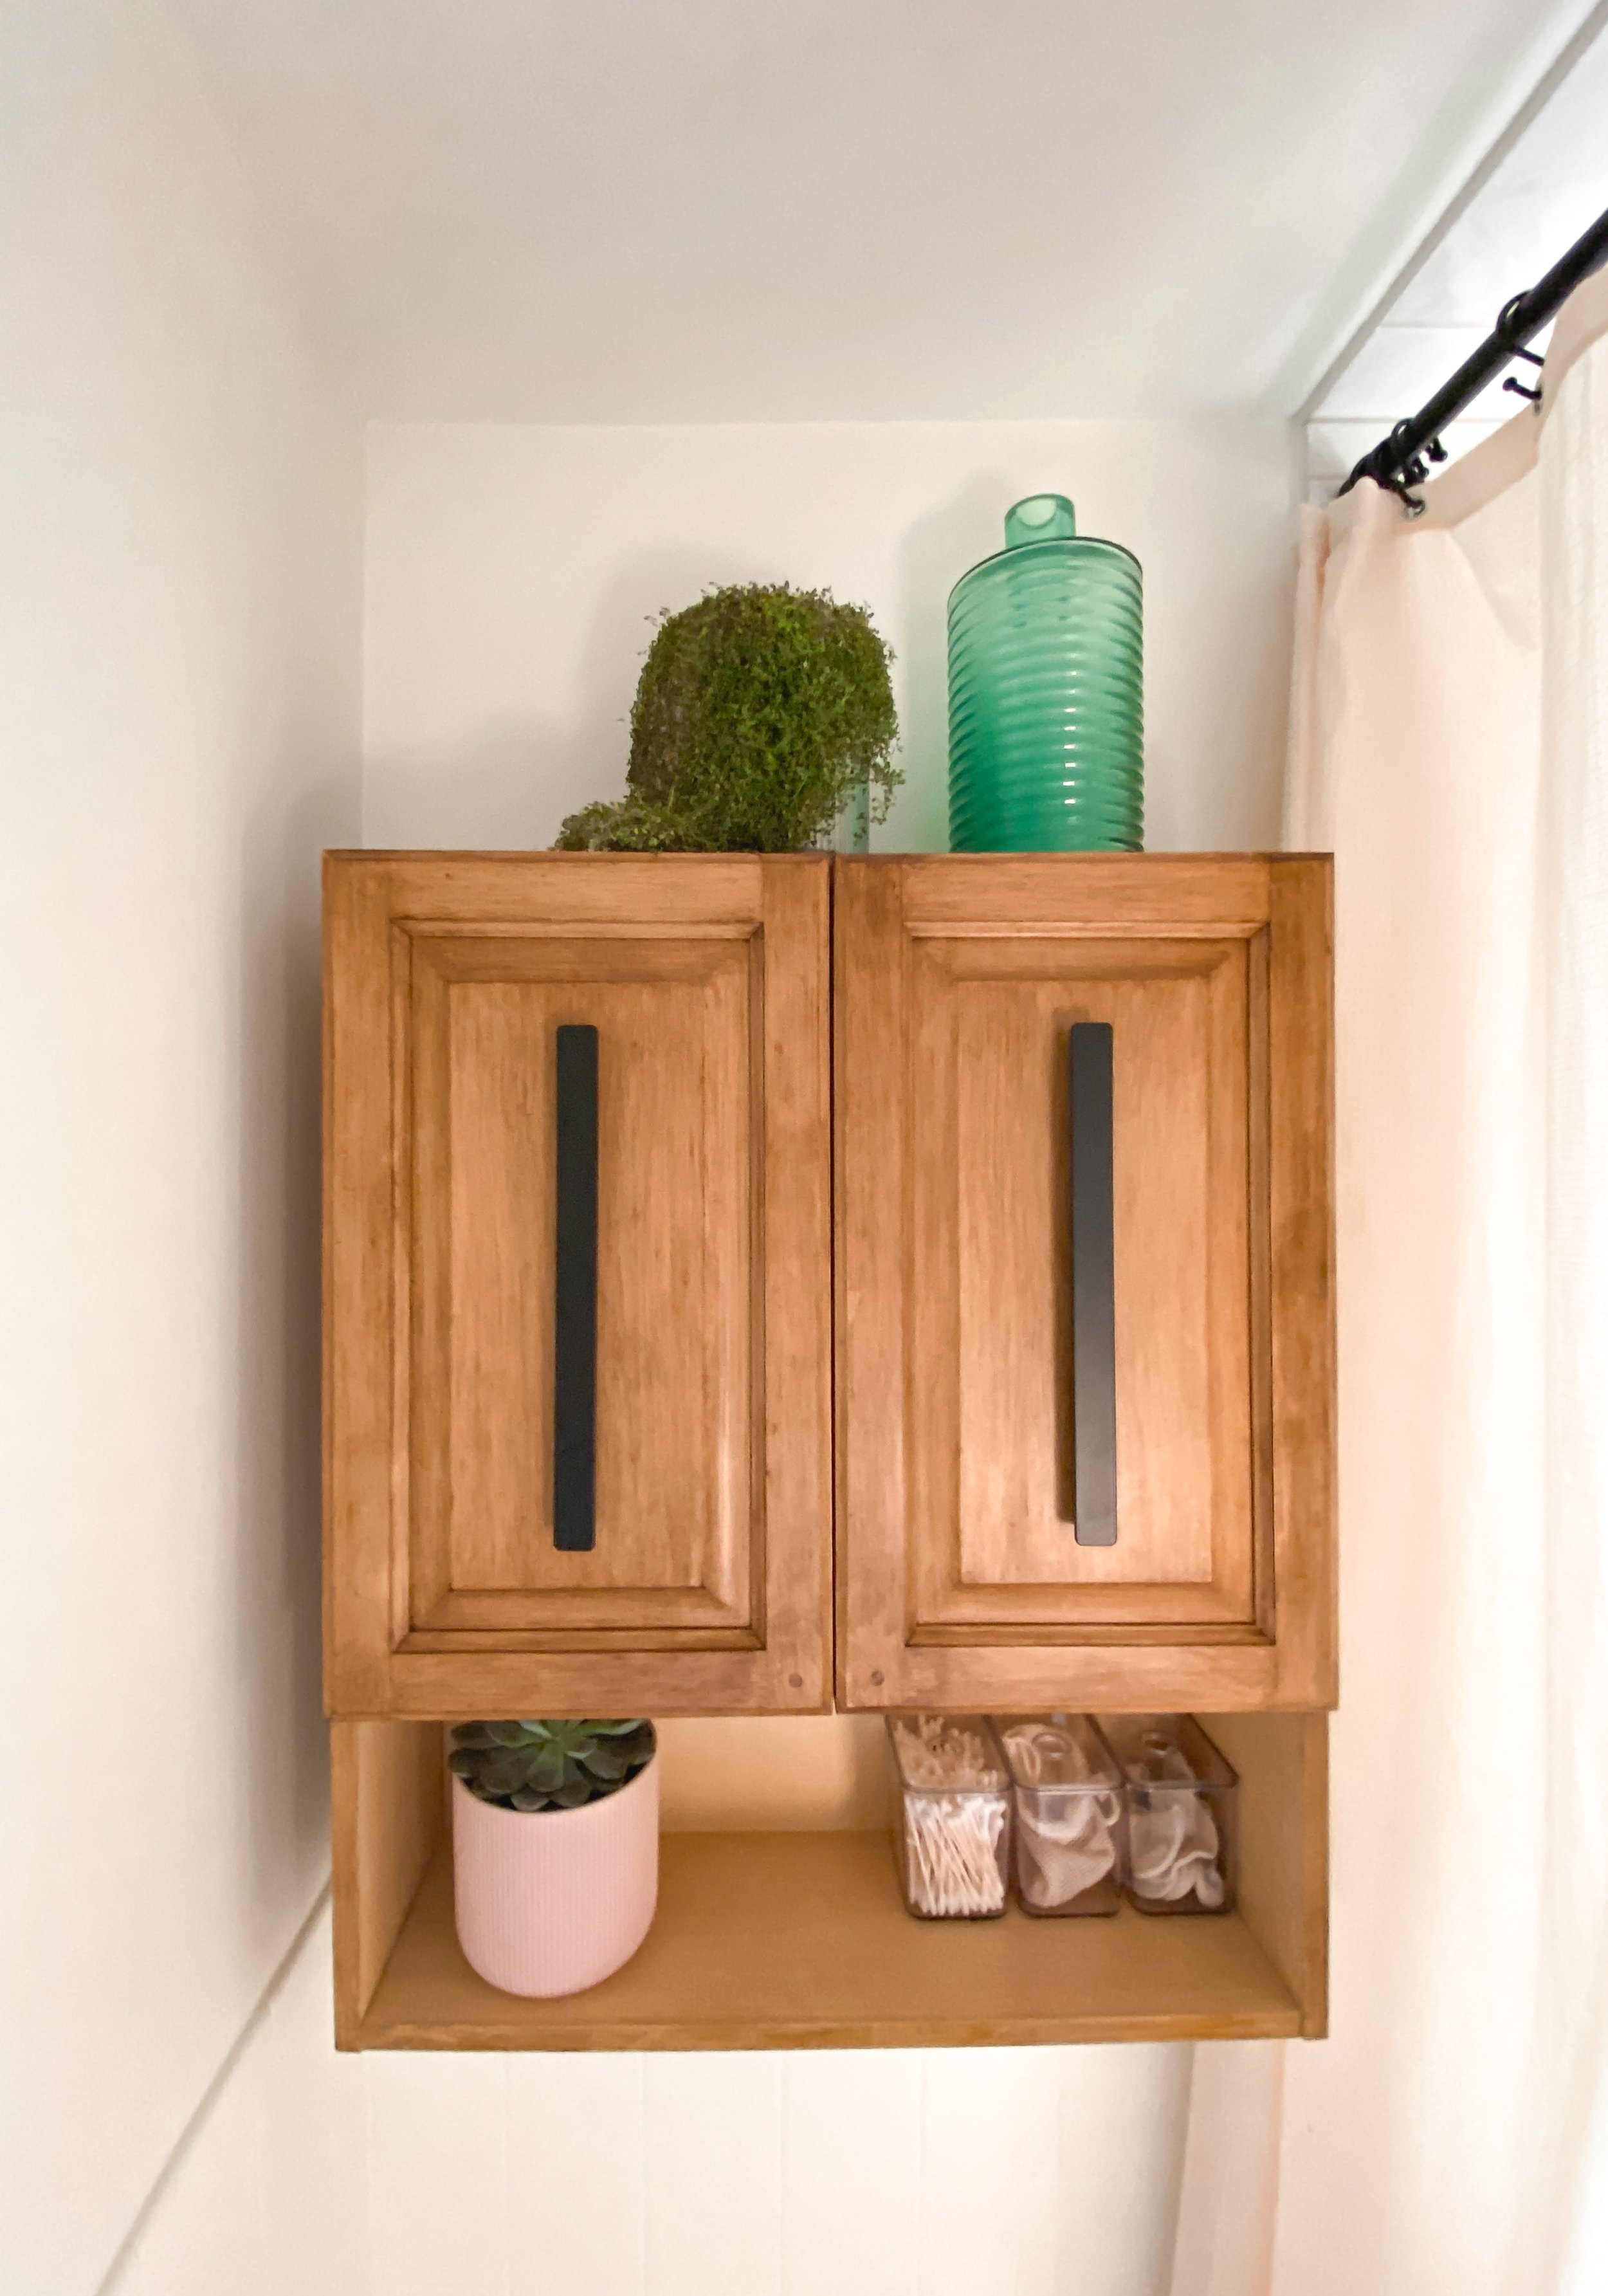
To address the storage issue, I found a floating cabinet shelf from Facebook Marketplace, and refinished it to match the partition wood. I hung this up above the toilet to utilize that space a bit more for functional purposes.
Final Touches
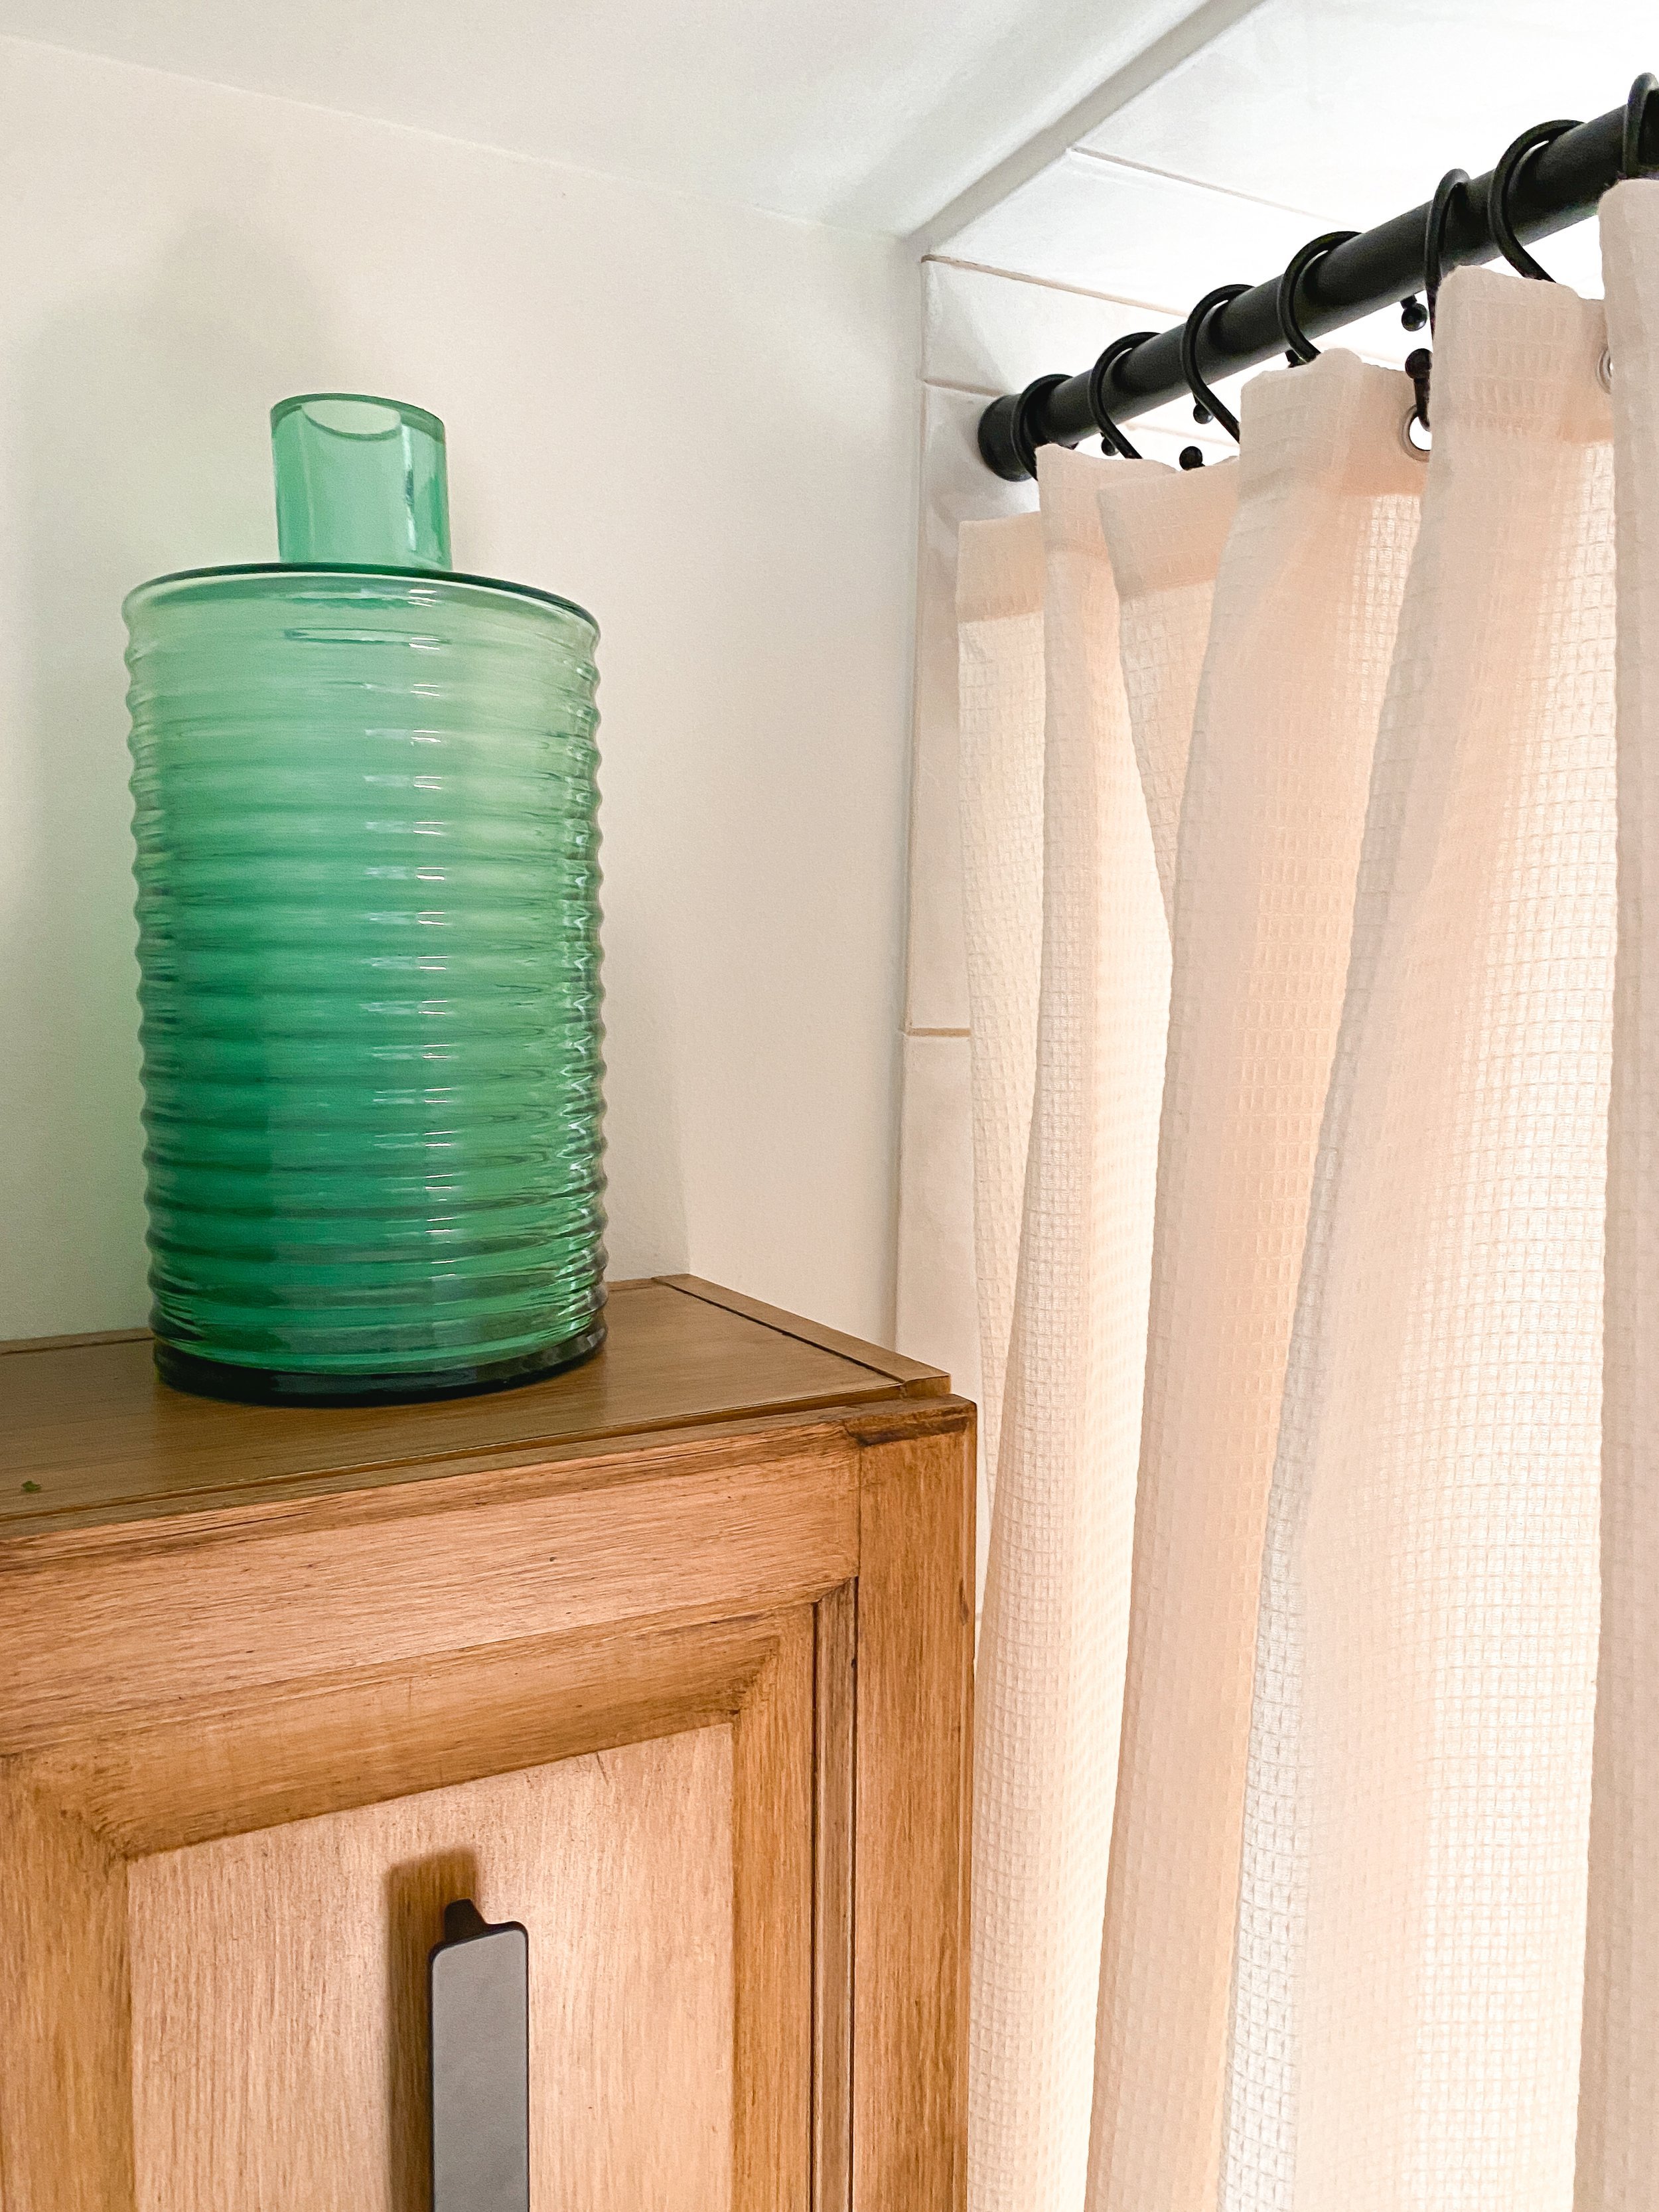
One small thing I did that made all the difference was switch out the faucets and fixtures to coordinate with each other. I also replaced the old, worn-out bath mat with a plush, earth-toned one that brought warmth to the floor. Mismatched towels were replaced with fresh, coordinated ones, completing the cohesive look. Lastly, I added some low light plants to bring a bit more life into the room and a new mirror that replaced the outdated one from before.
So what do you think, do you like the transformation?


Final Results