Miniature DIY: Transforming a City Guardrail into a Space-Age Apartment
**Editors note before you read the article: just letting you know that since posting this video we’ve decided to disassemble this miniature installation. The intent was always joy for the neighbourhood but we’ve heard some concern about if this would be safe in the long-run. Out of an abundance of caution it has been removed. Thanks for joining me on this miniature journey.
_________________________
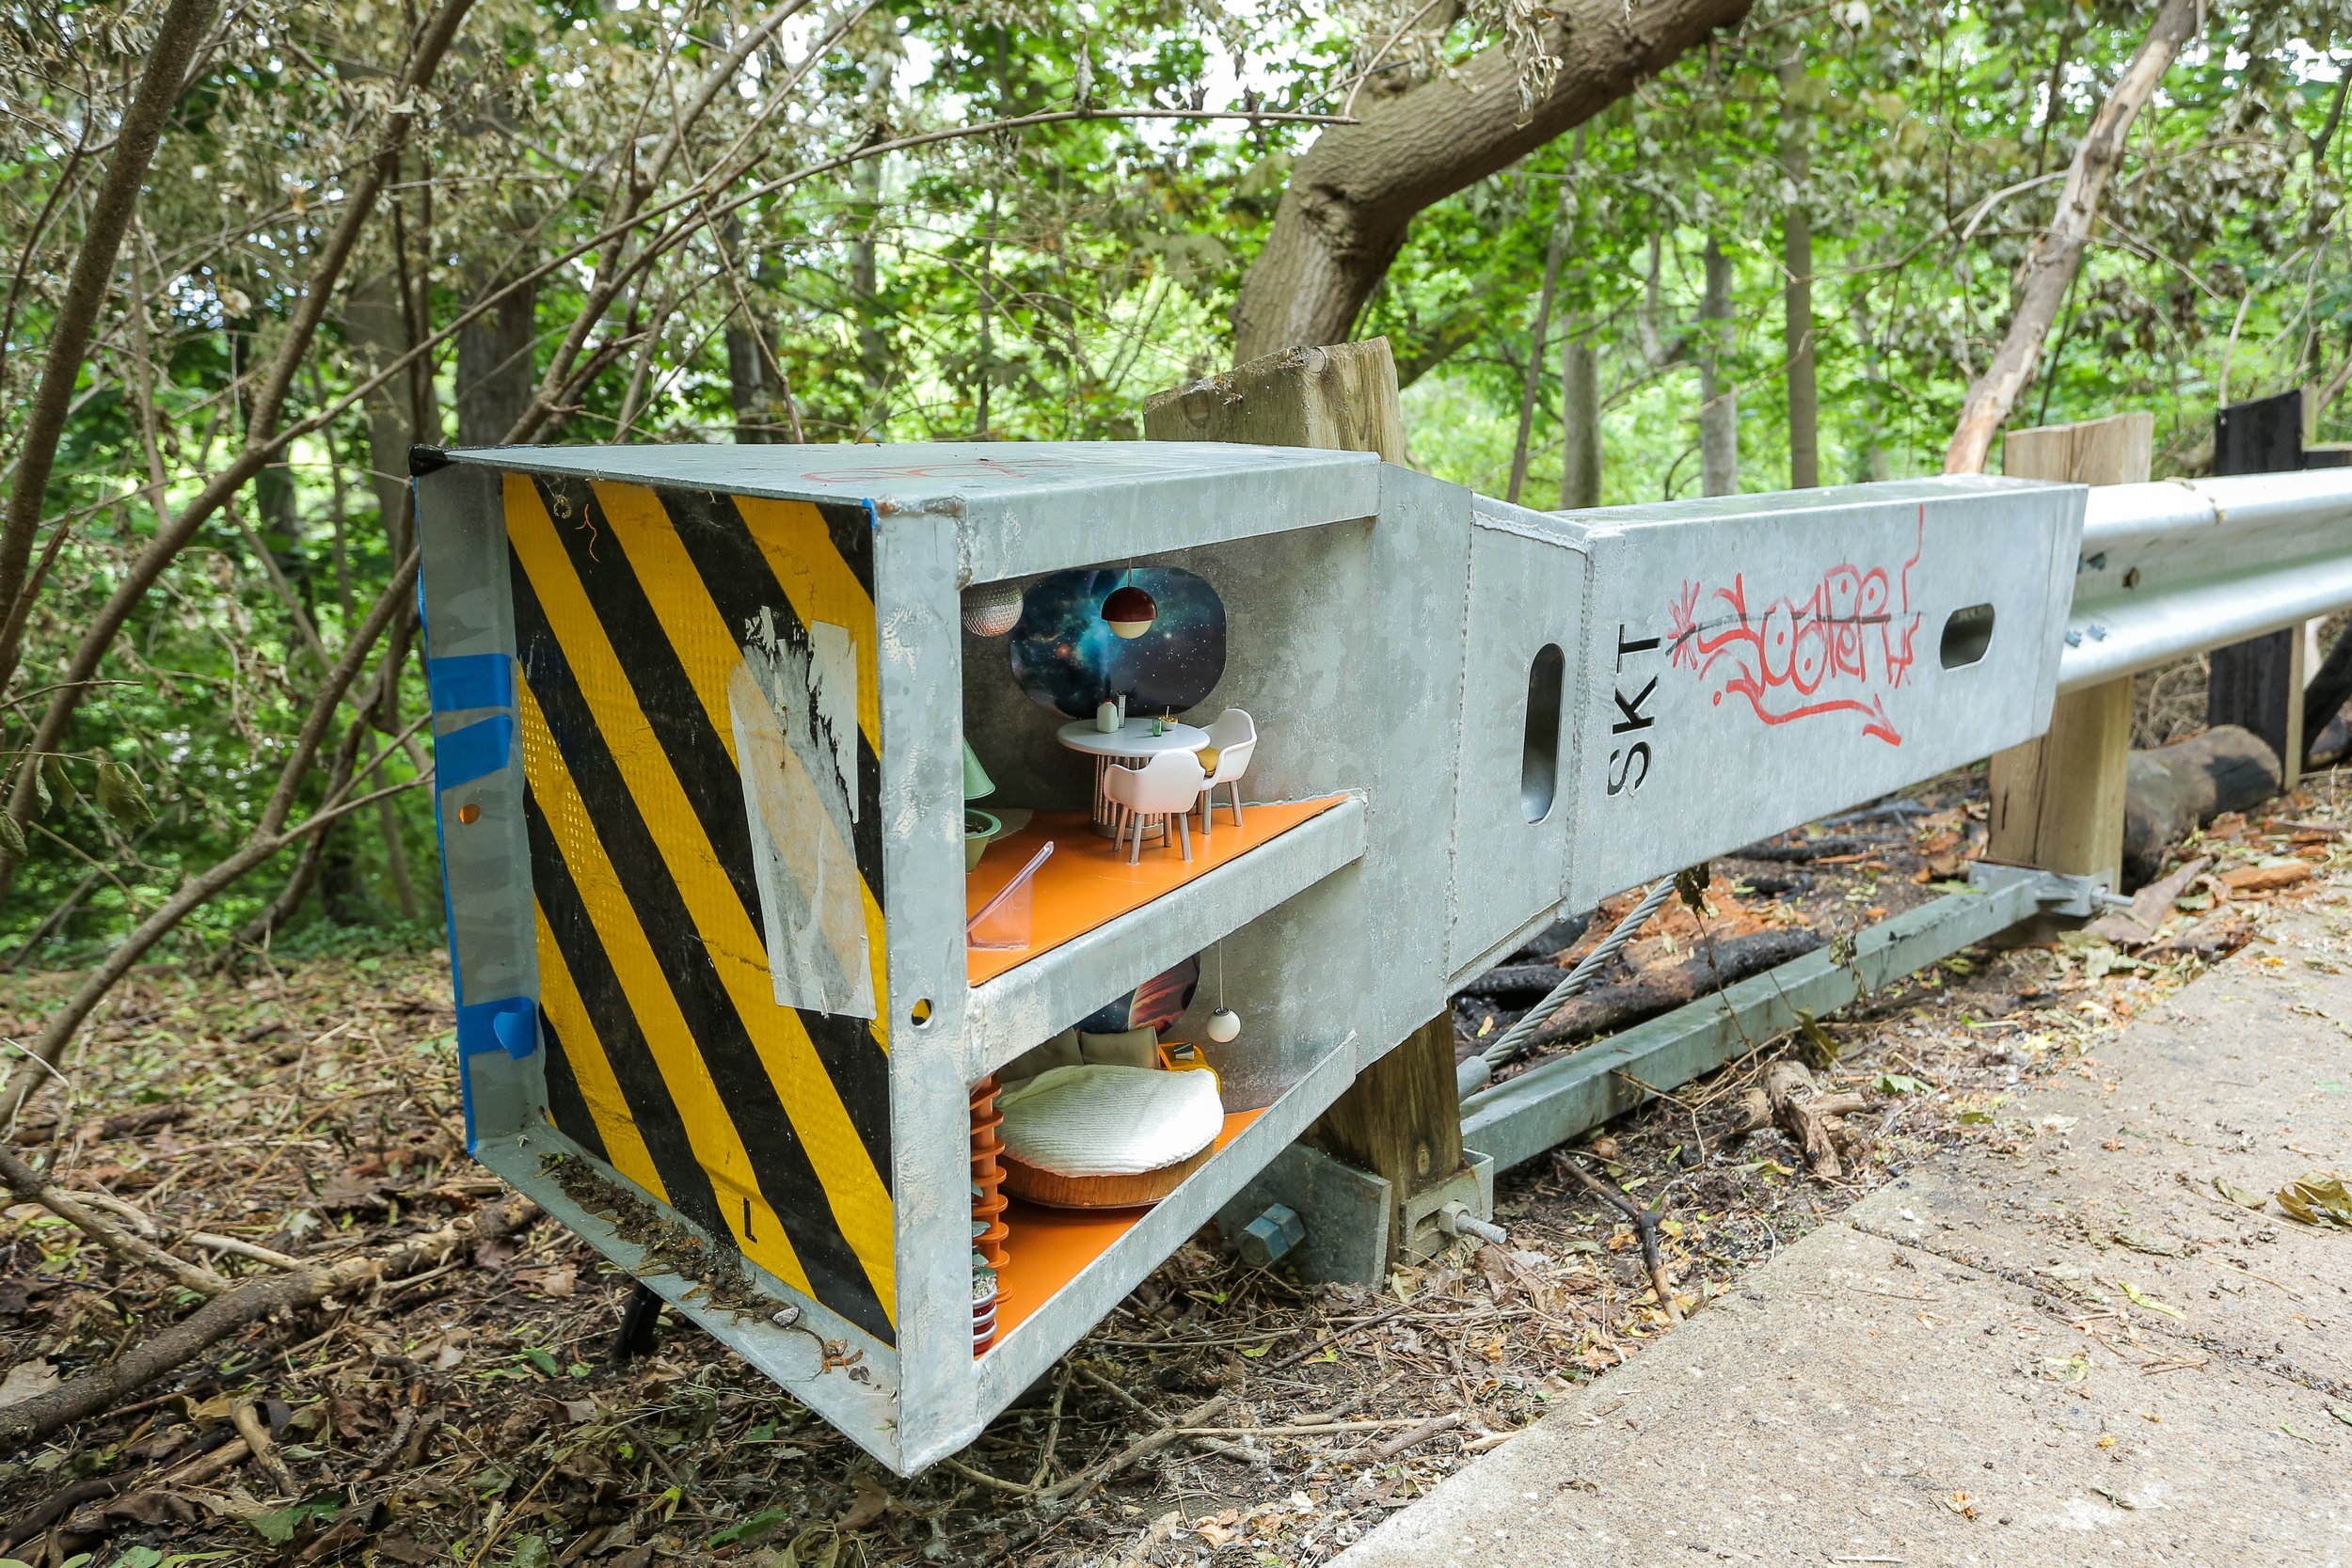
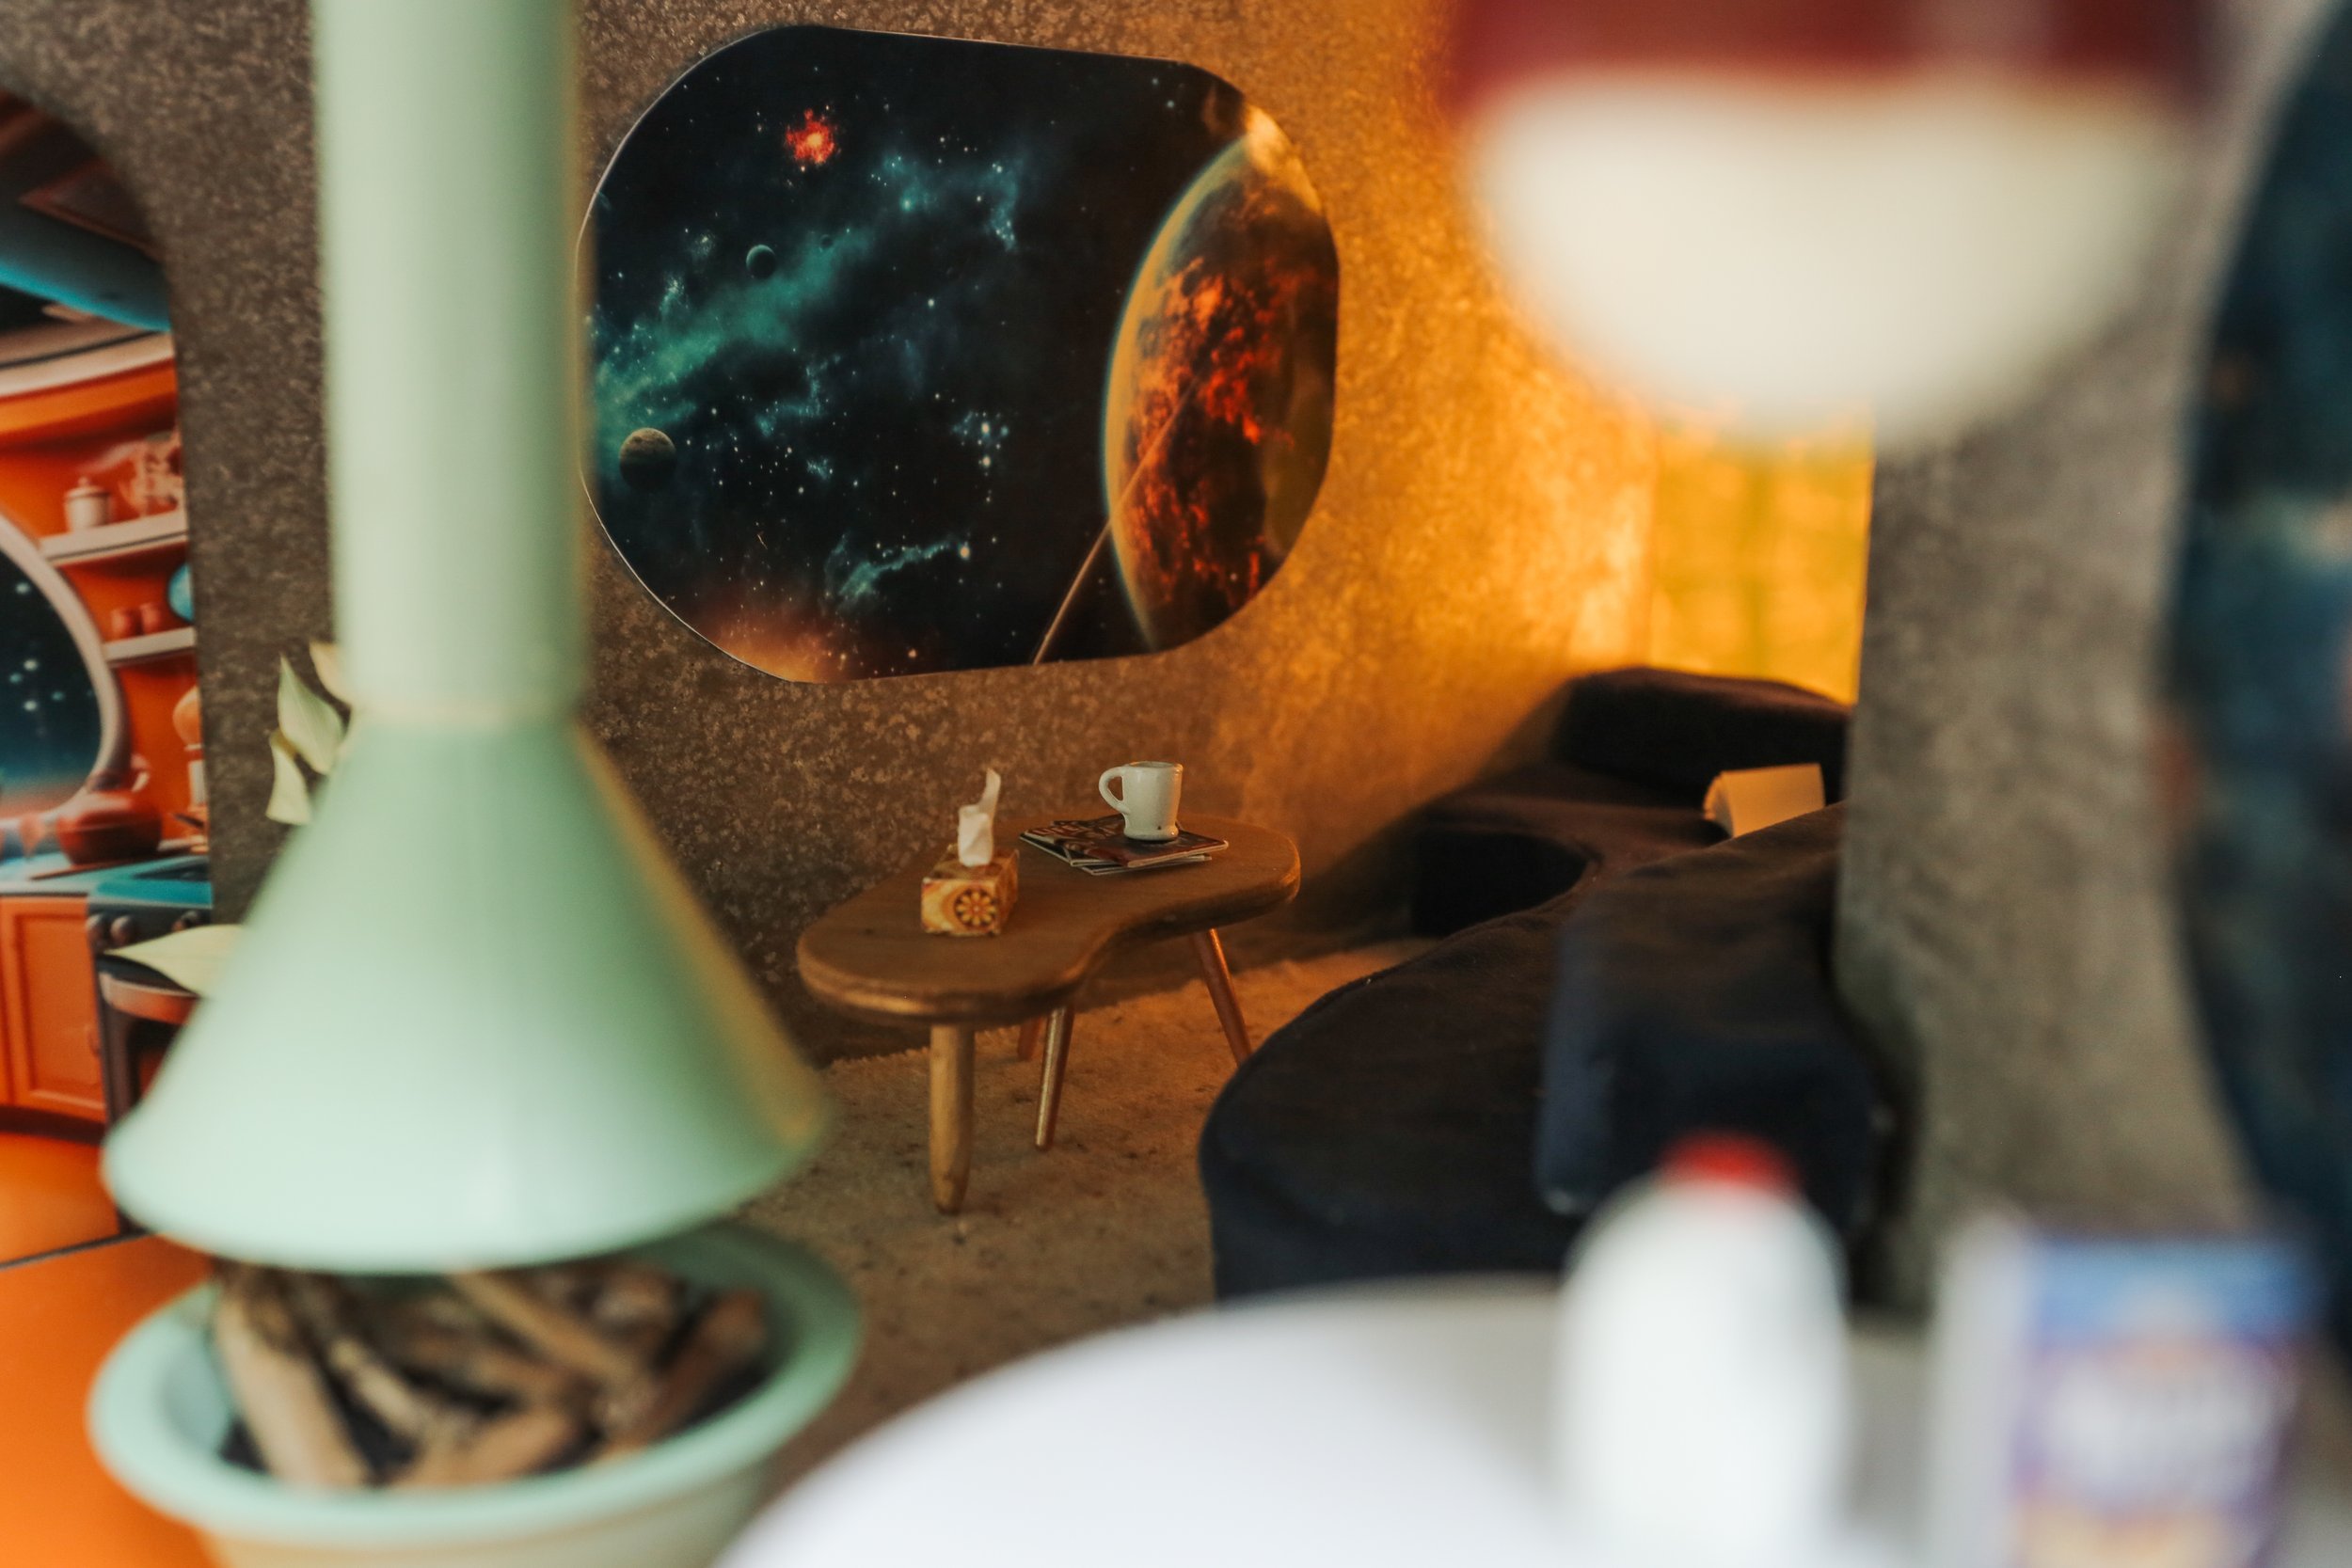
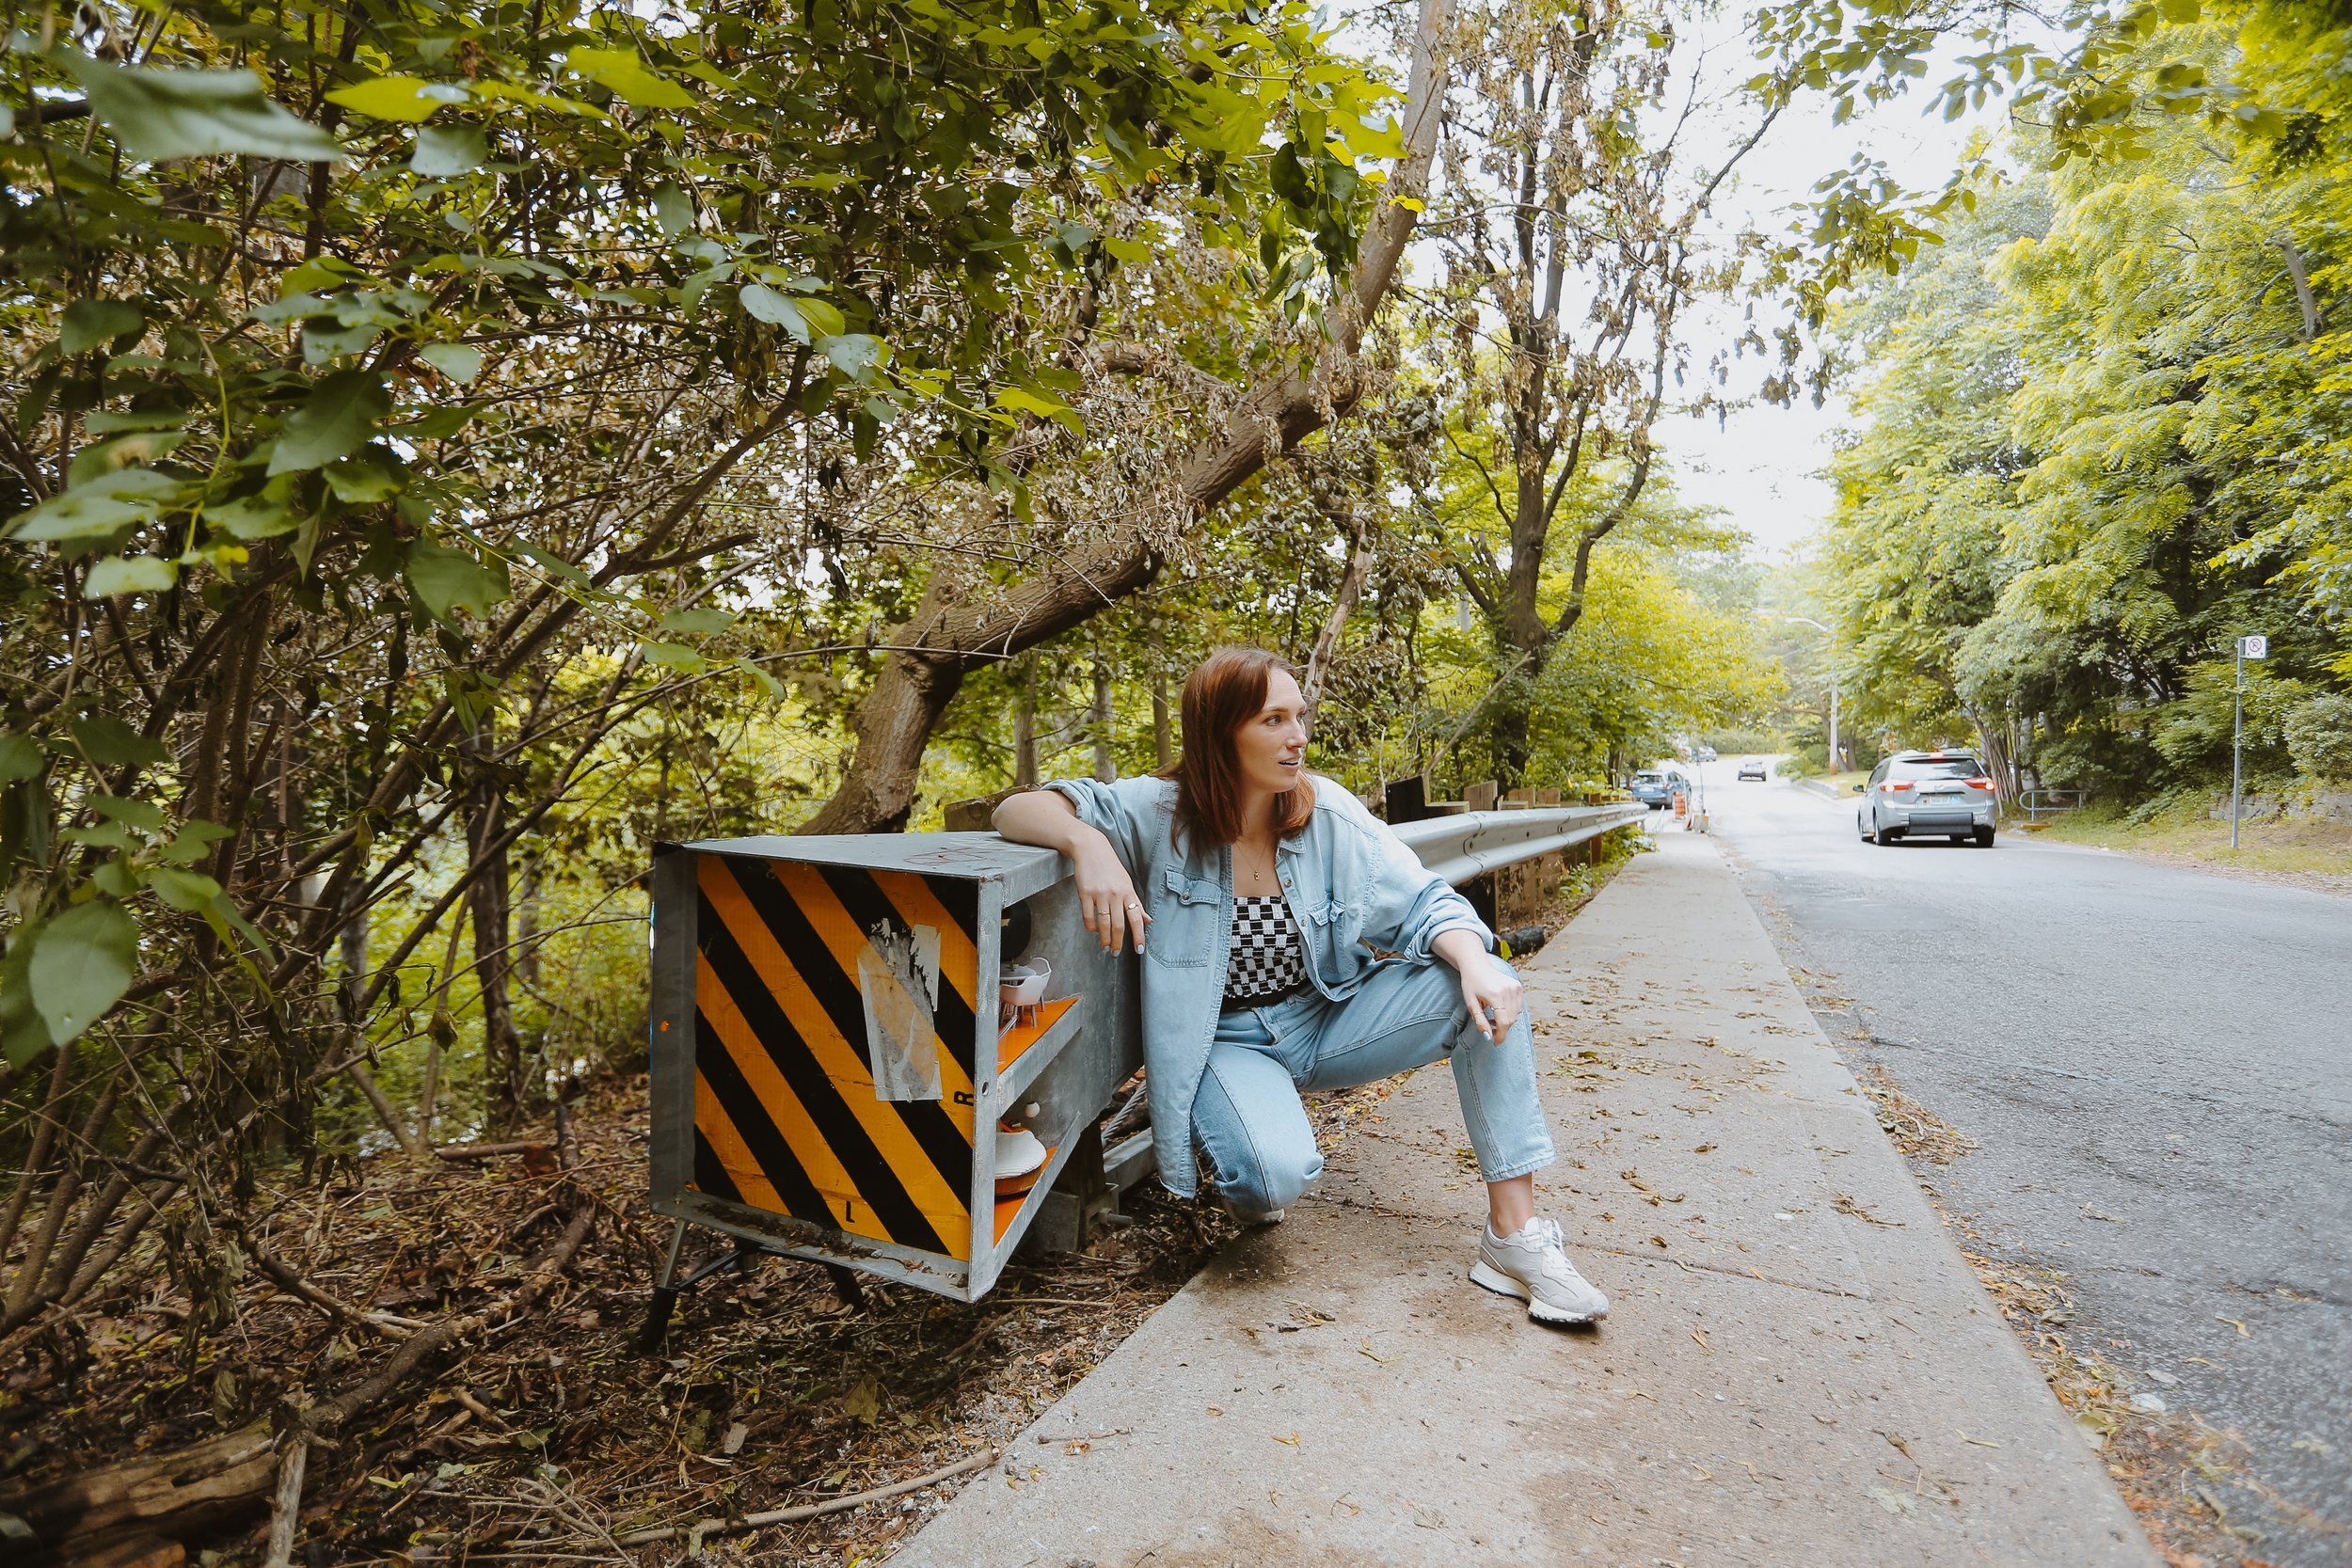
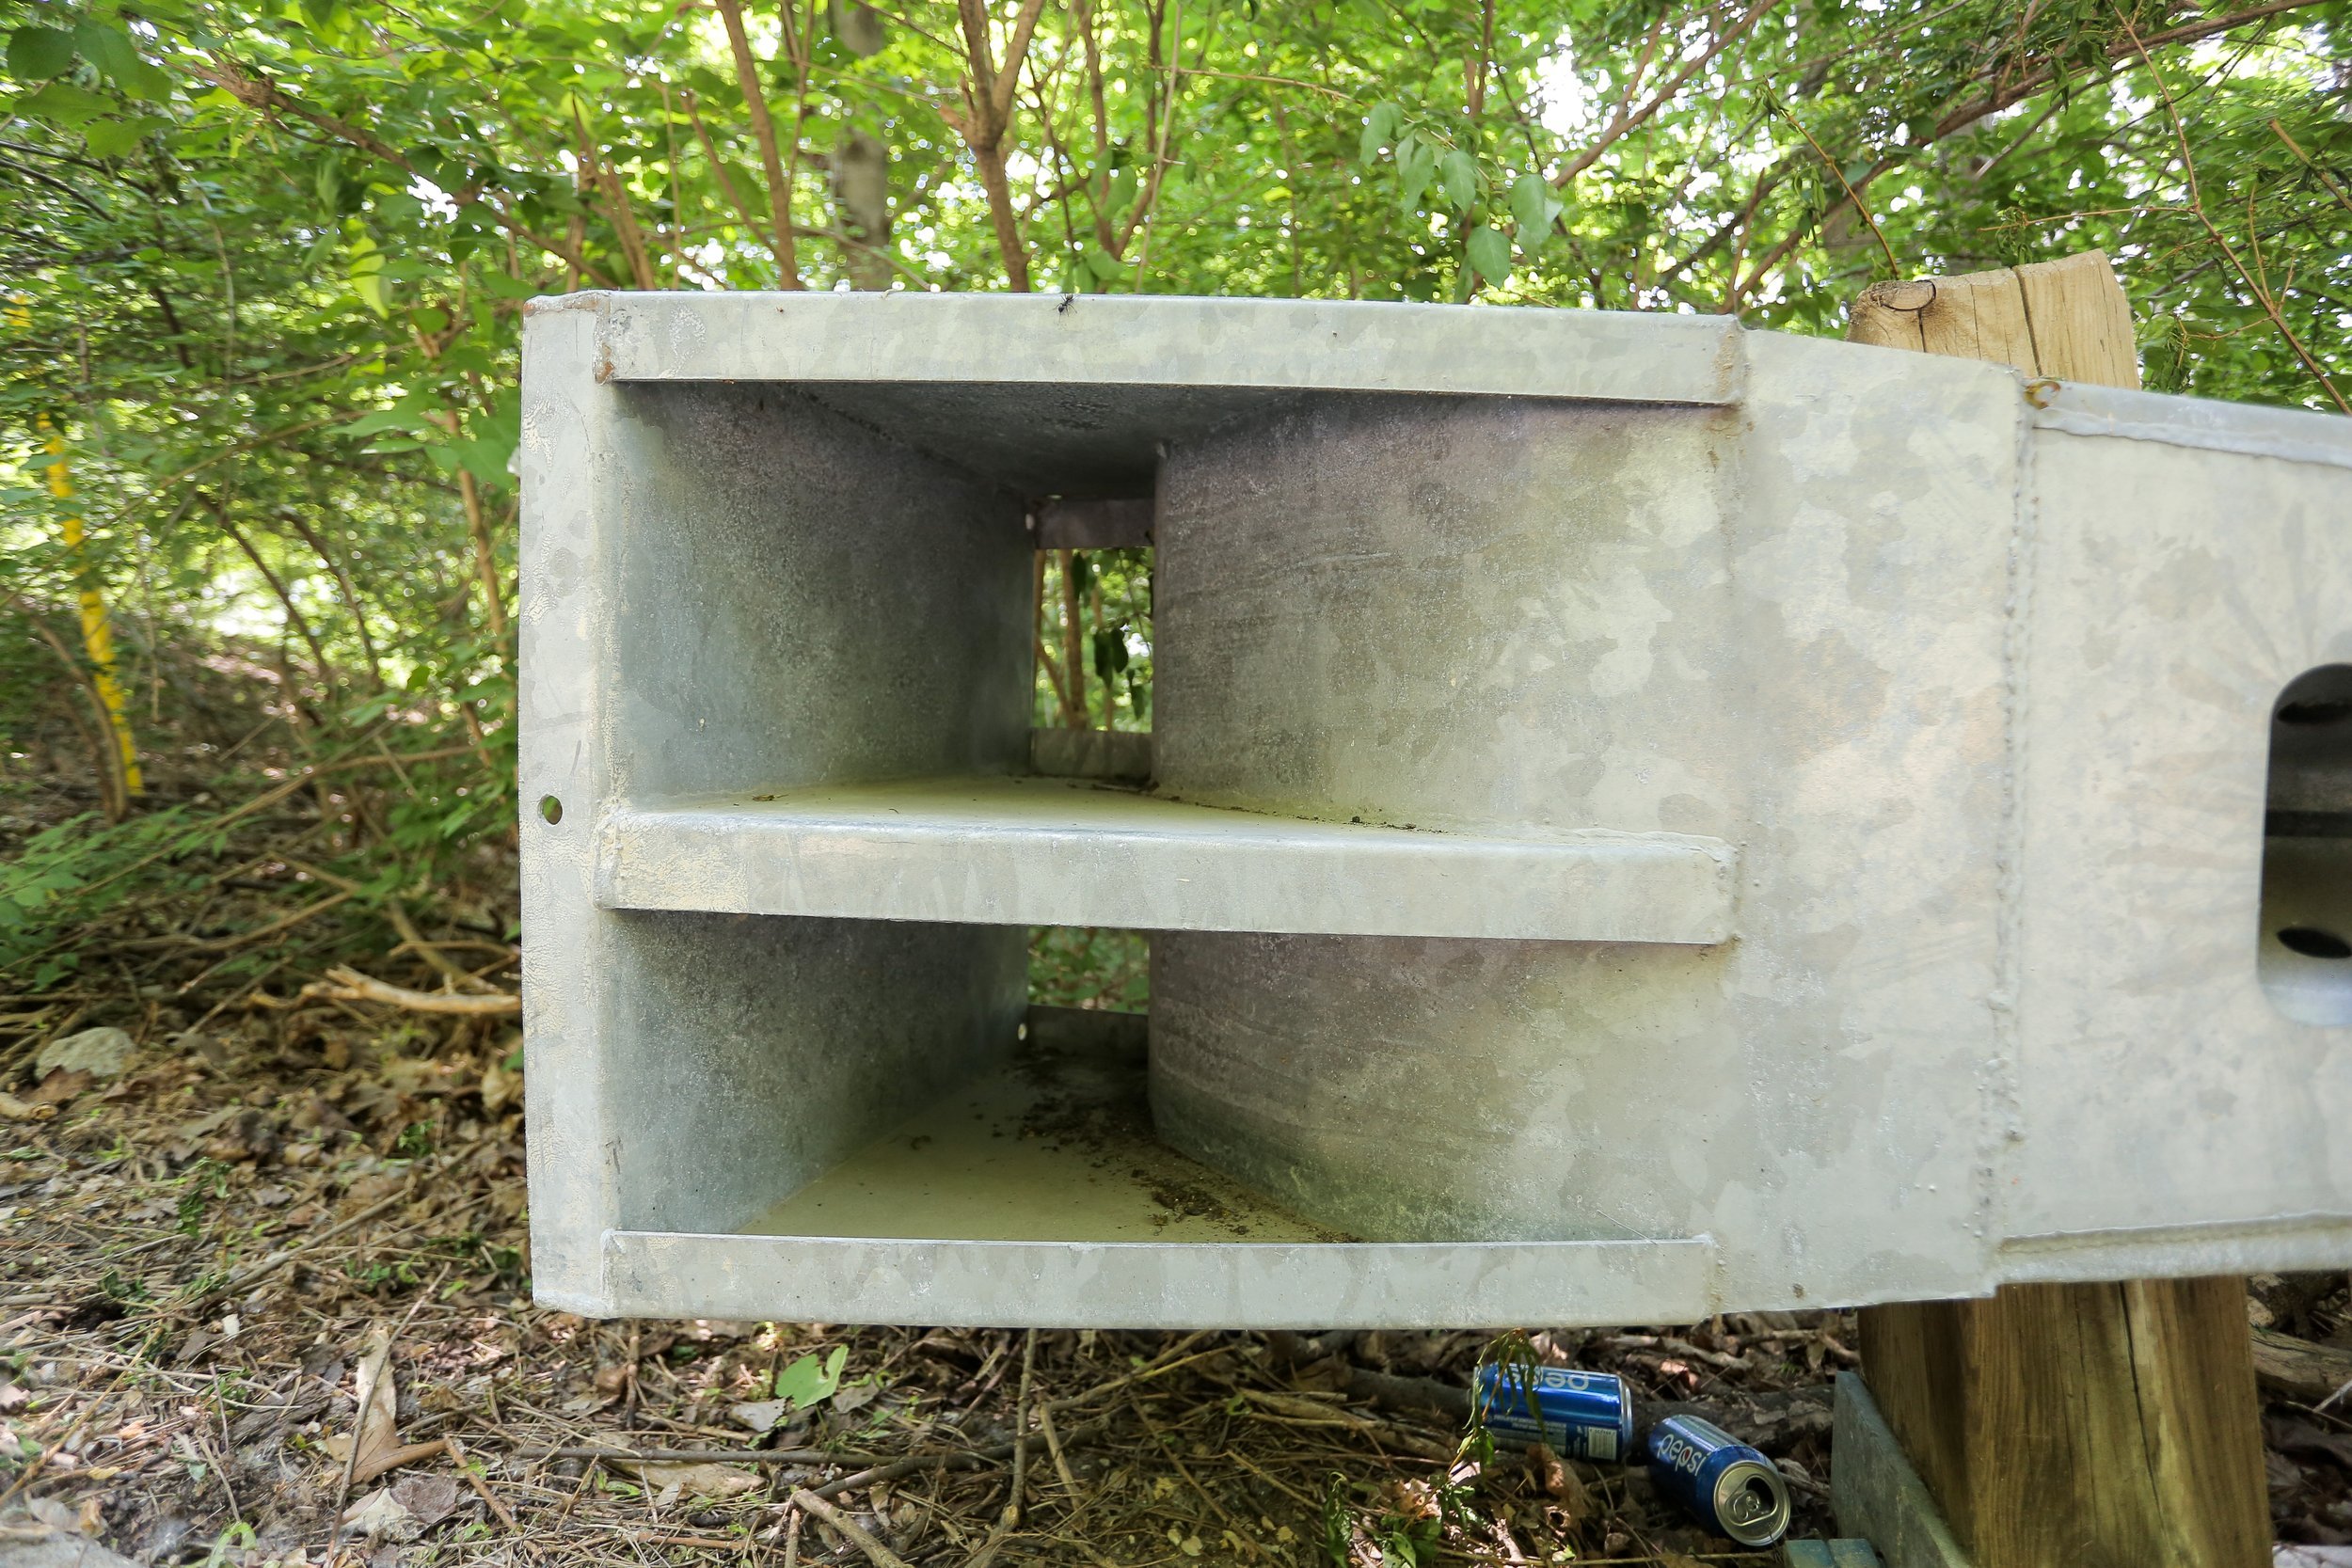
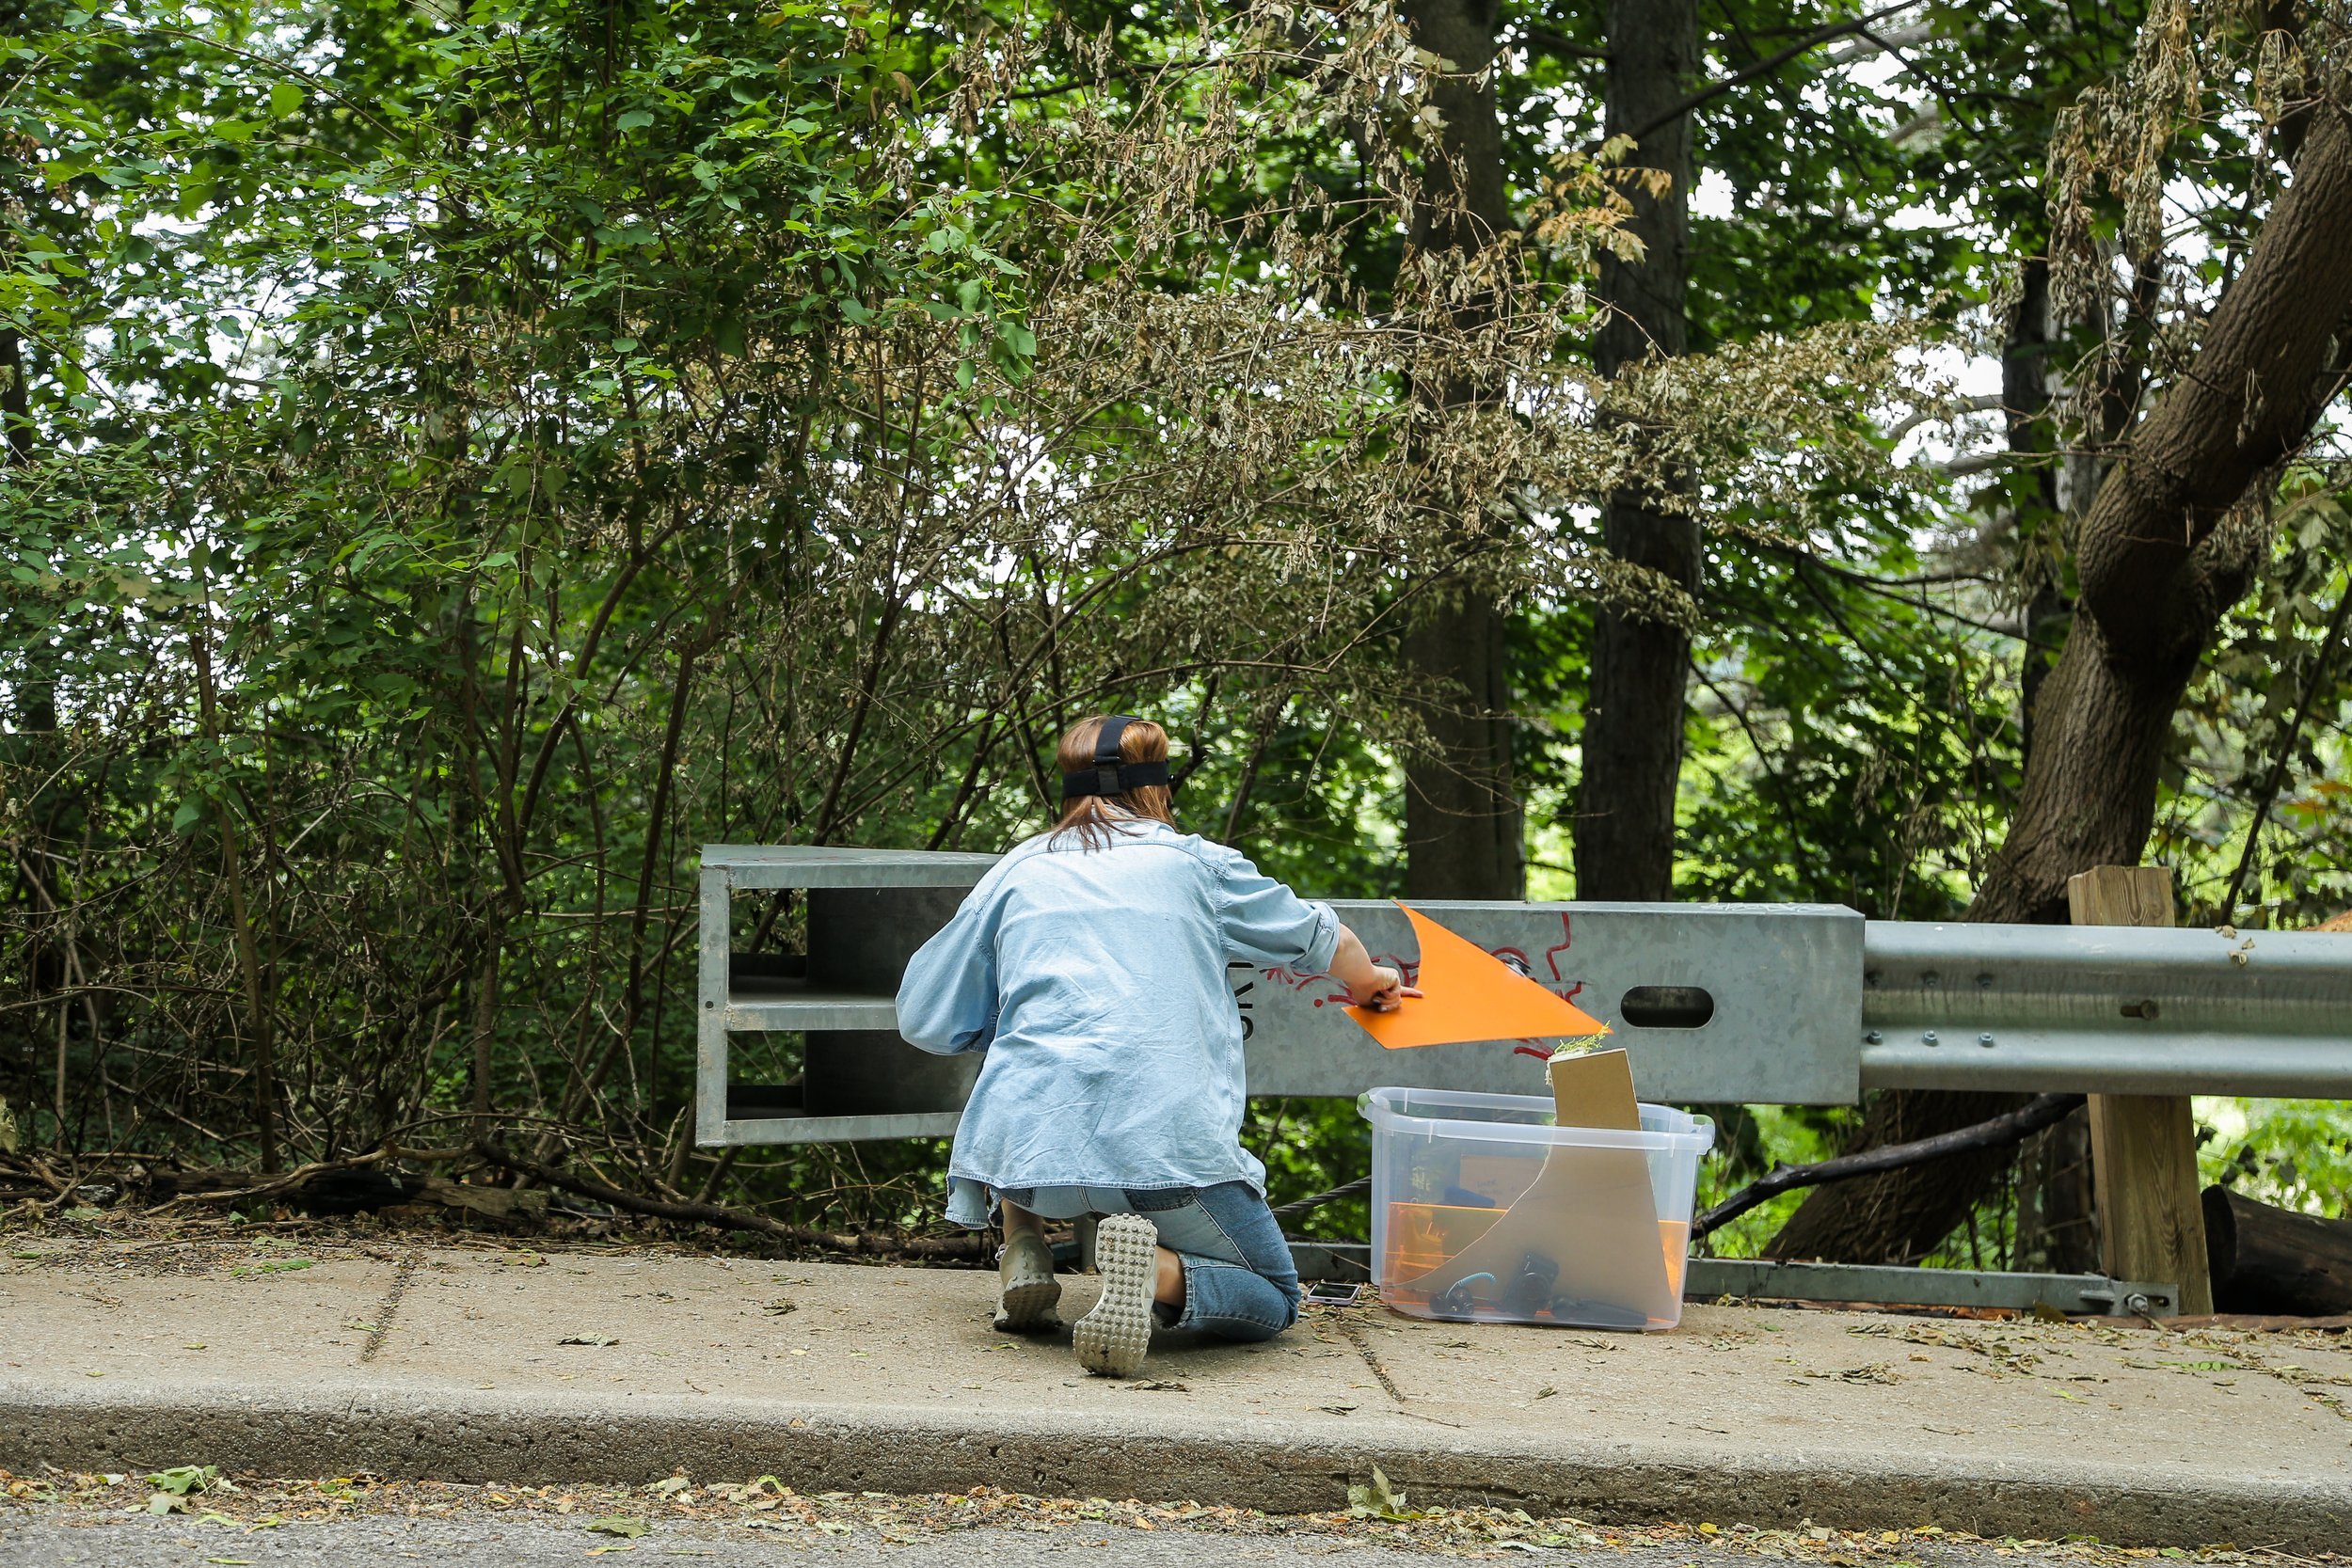
Recently I took on a project that I’ve been wanted to do for a while. It all started when I stumbled upon the perfect nook hidden in a city guardrail and decided to use it for my next miniature DIY challenge: transforming a mundane guardrail into a space-age atomic retro futuristic apartment (located on a spaceship of course).

Floor Plans and Mood Boards
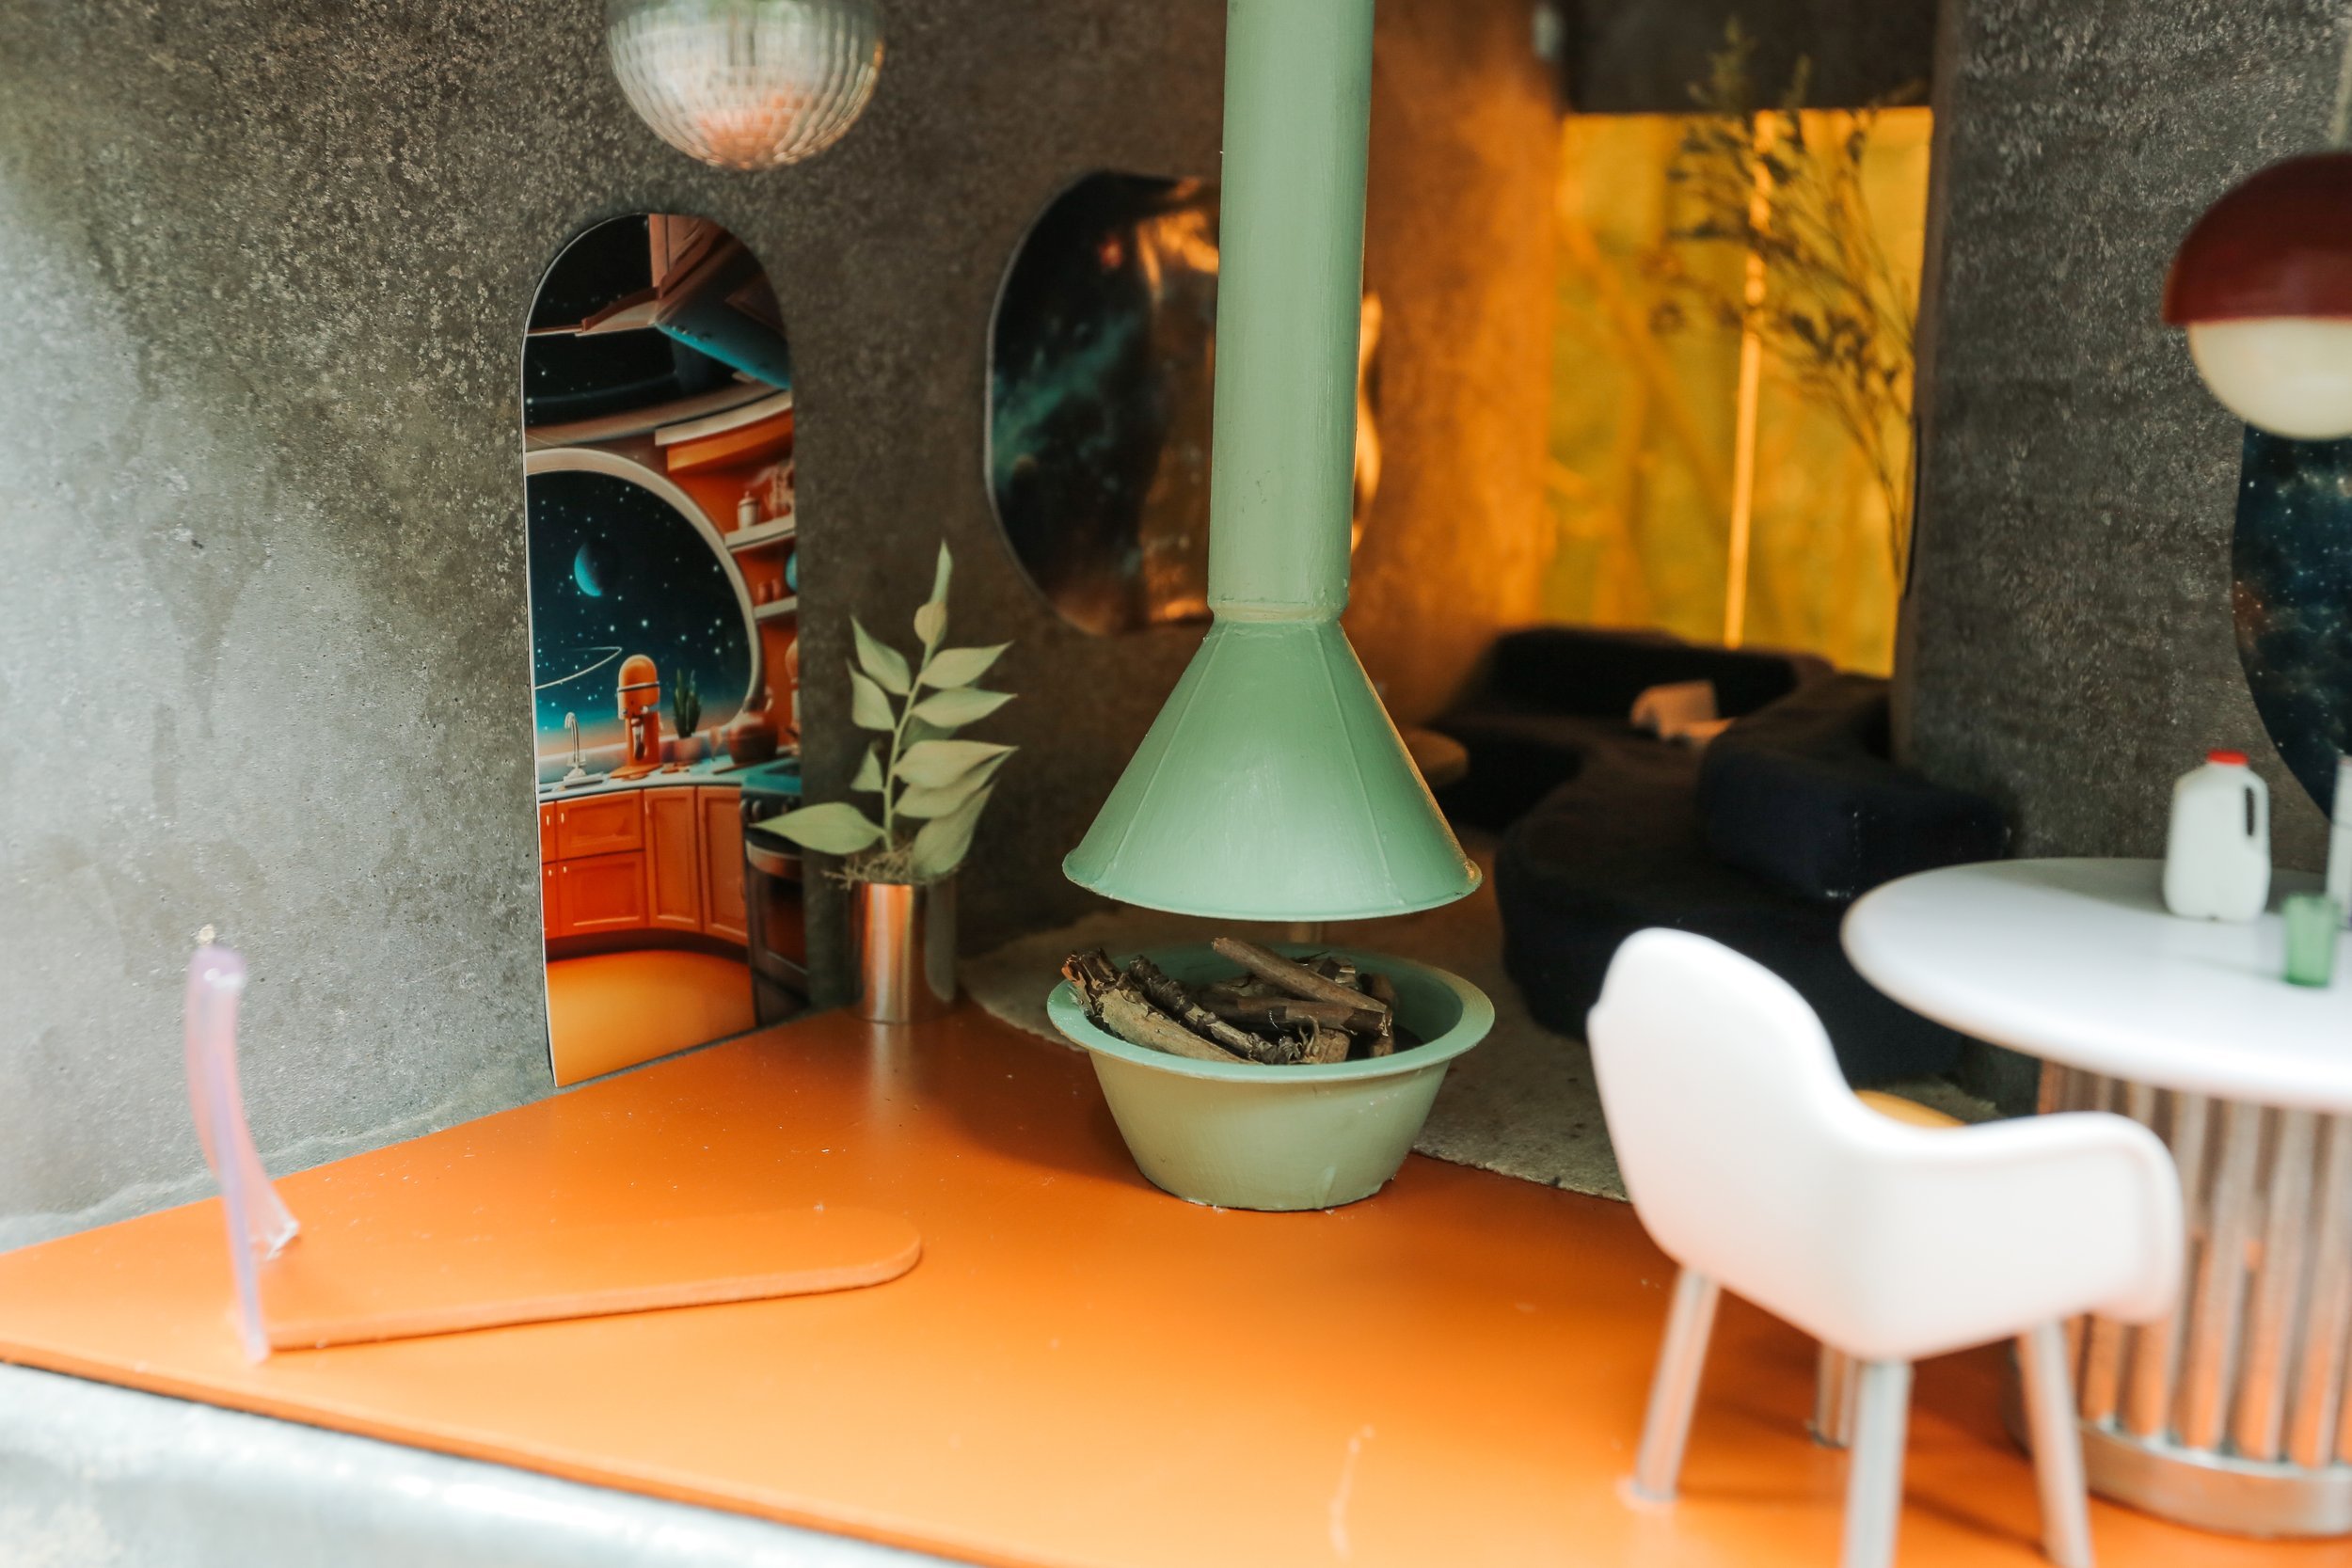
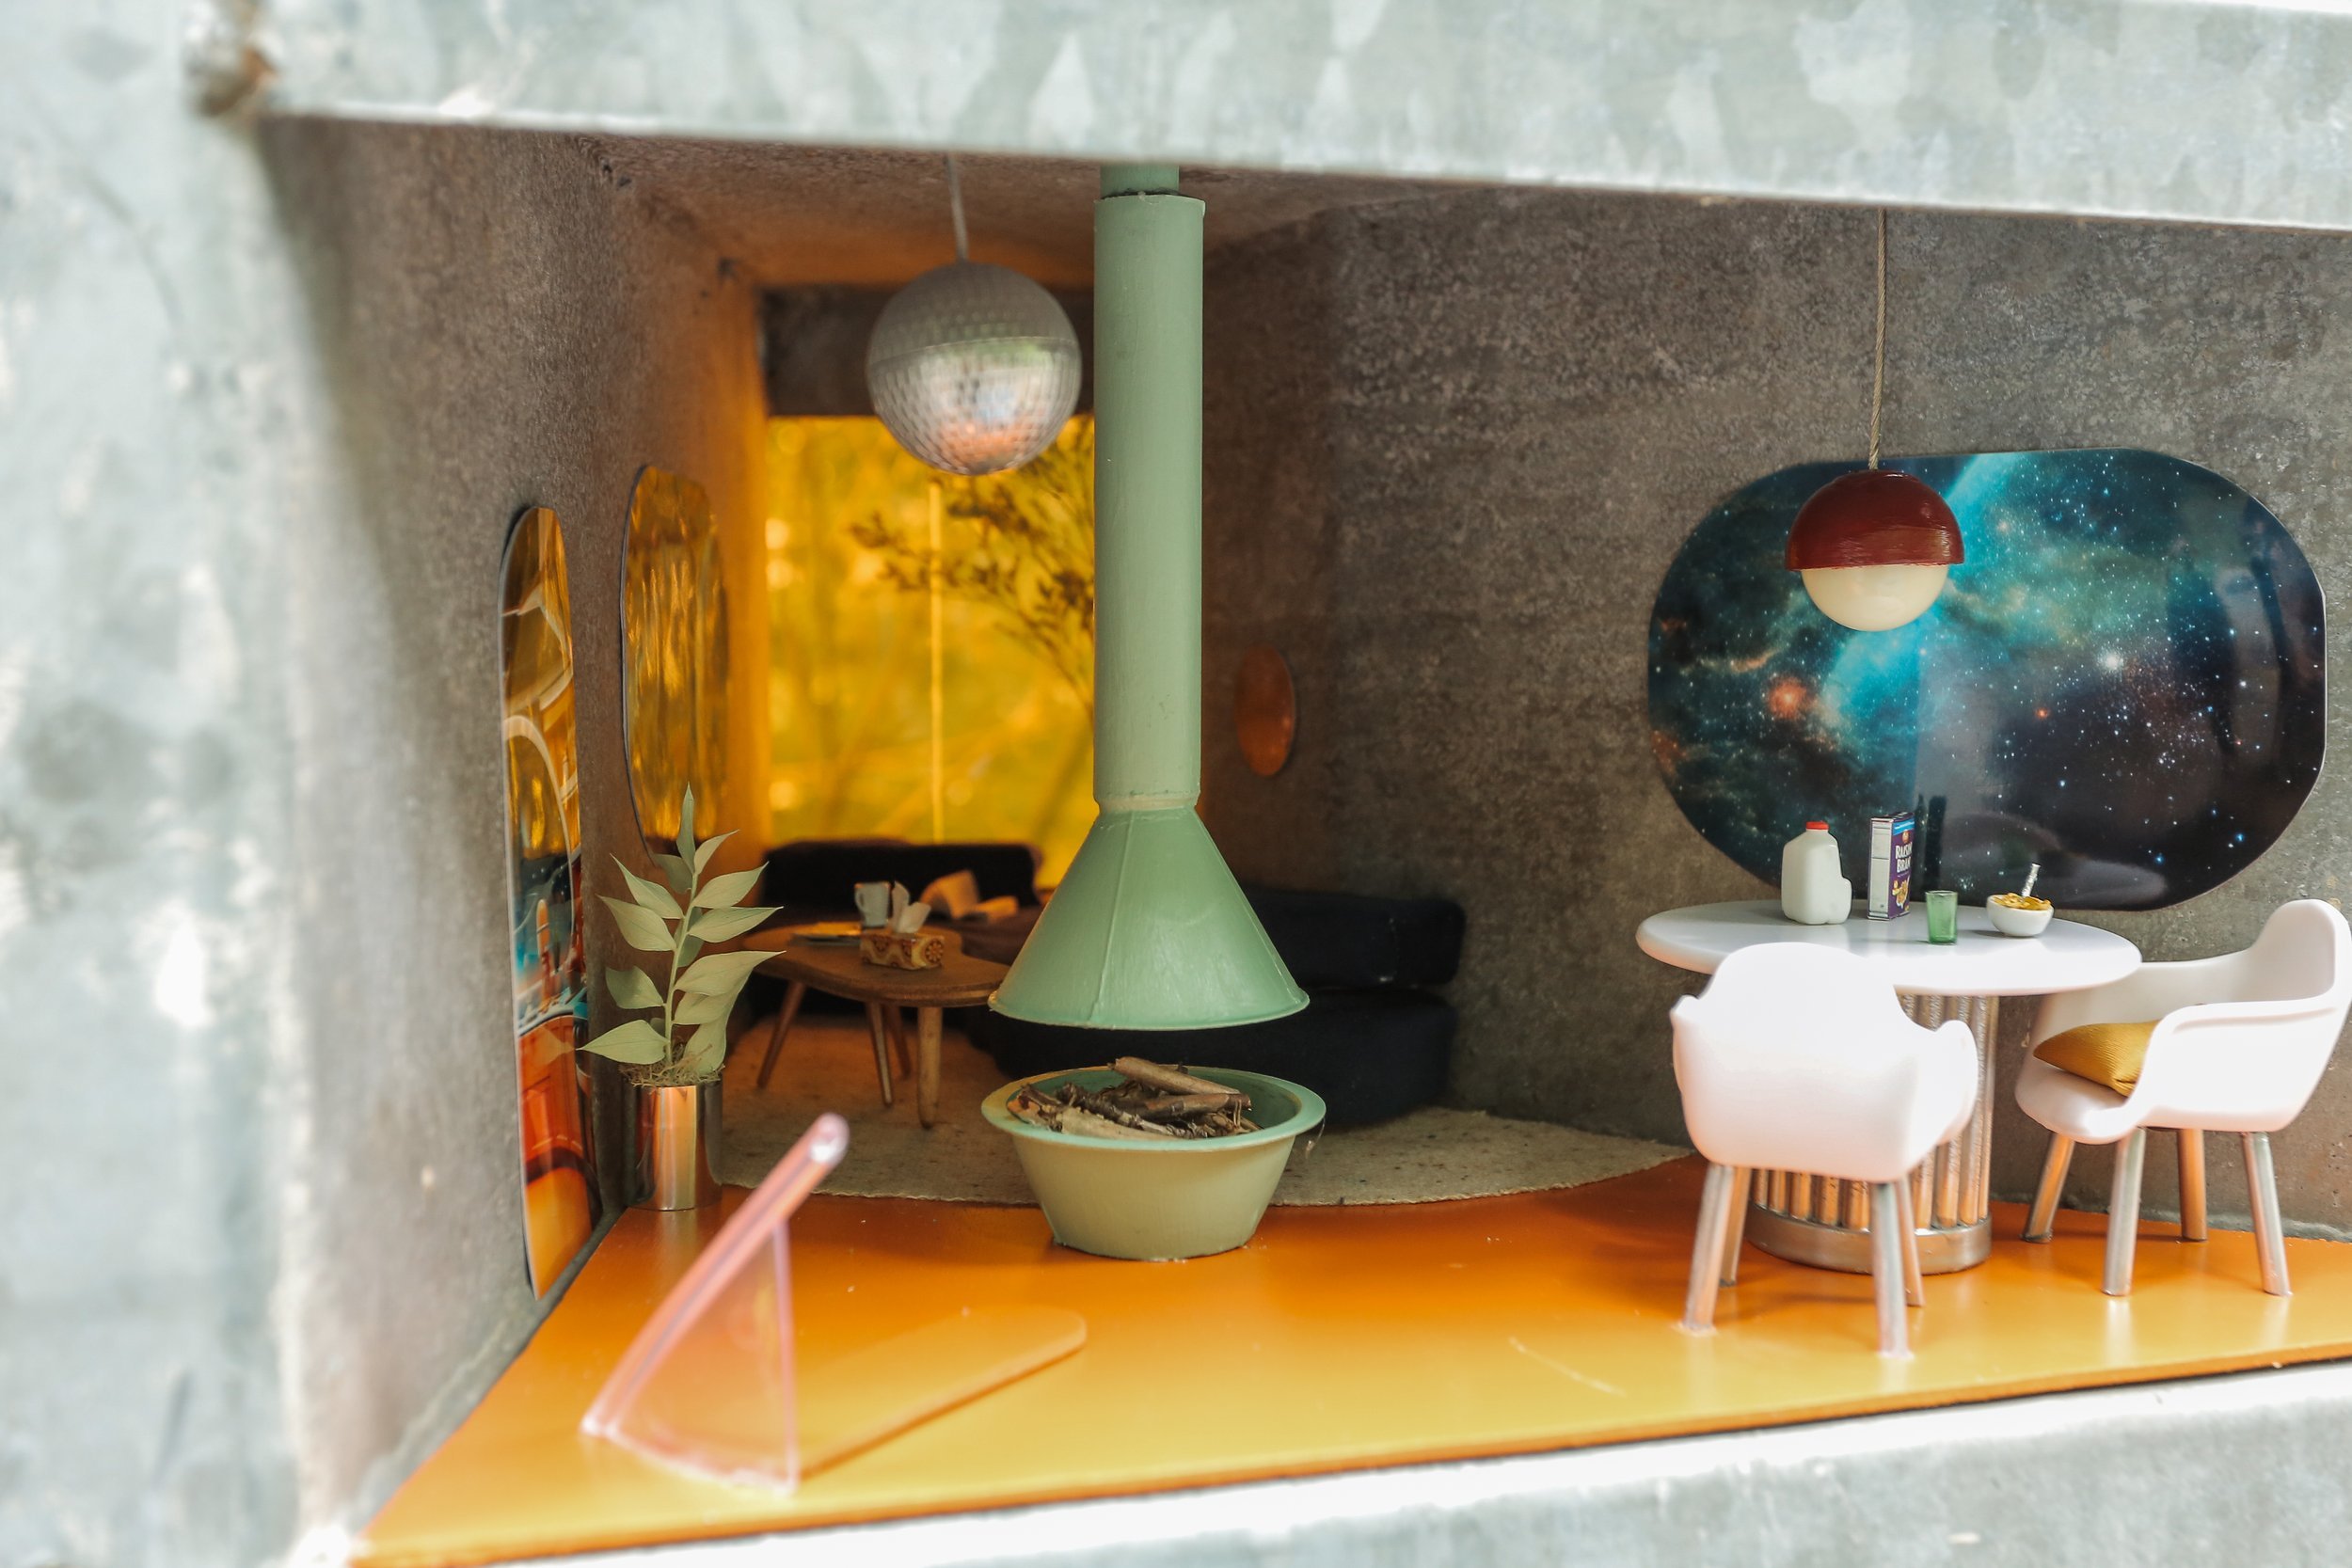
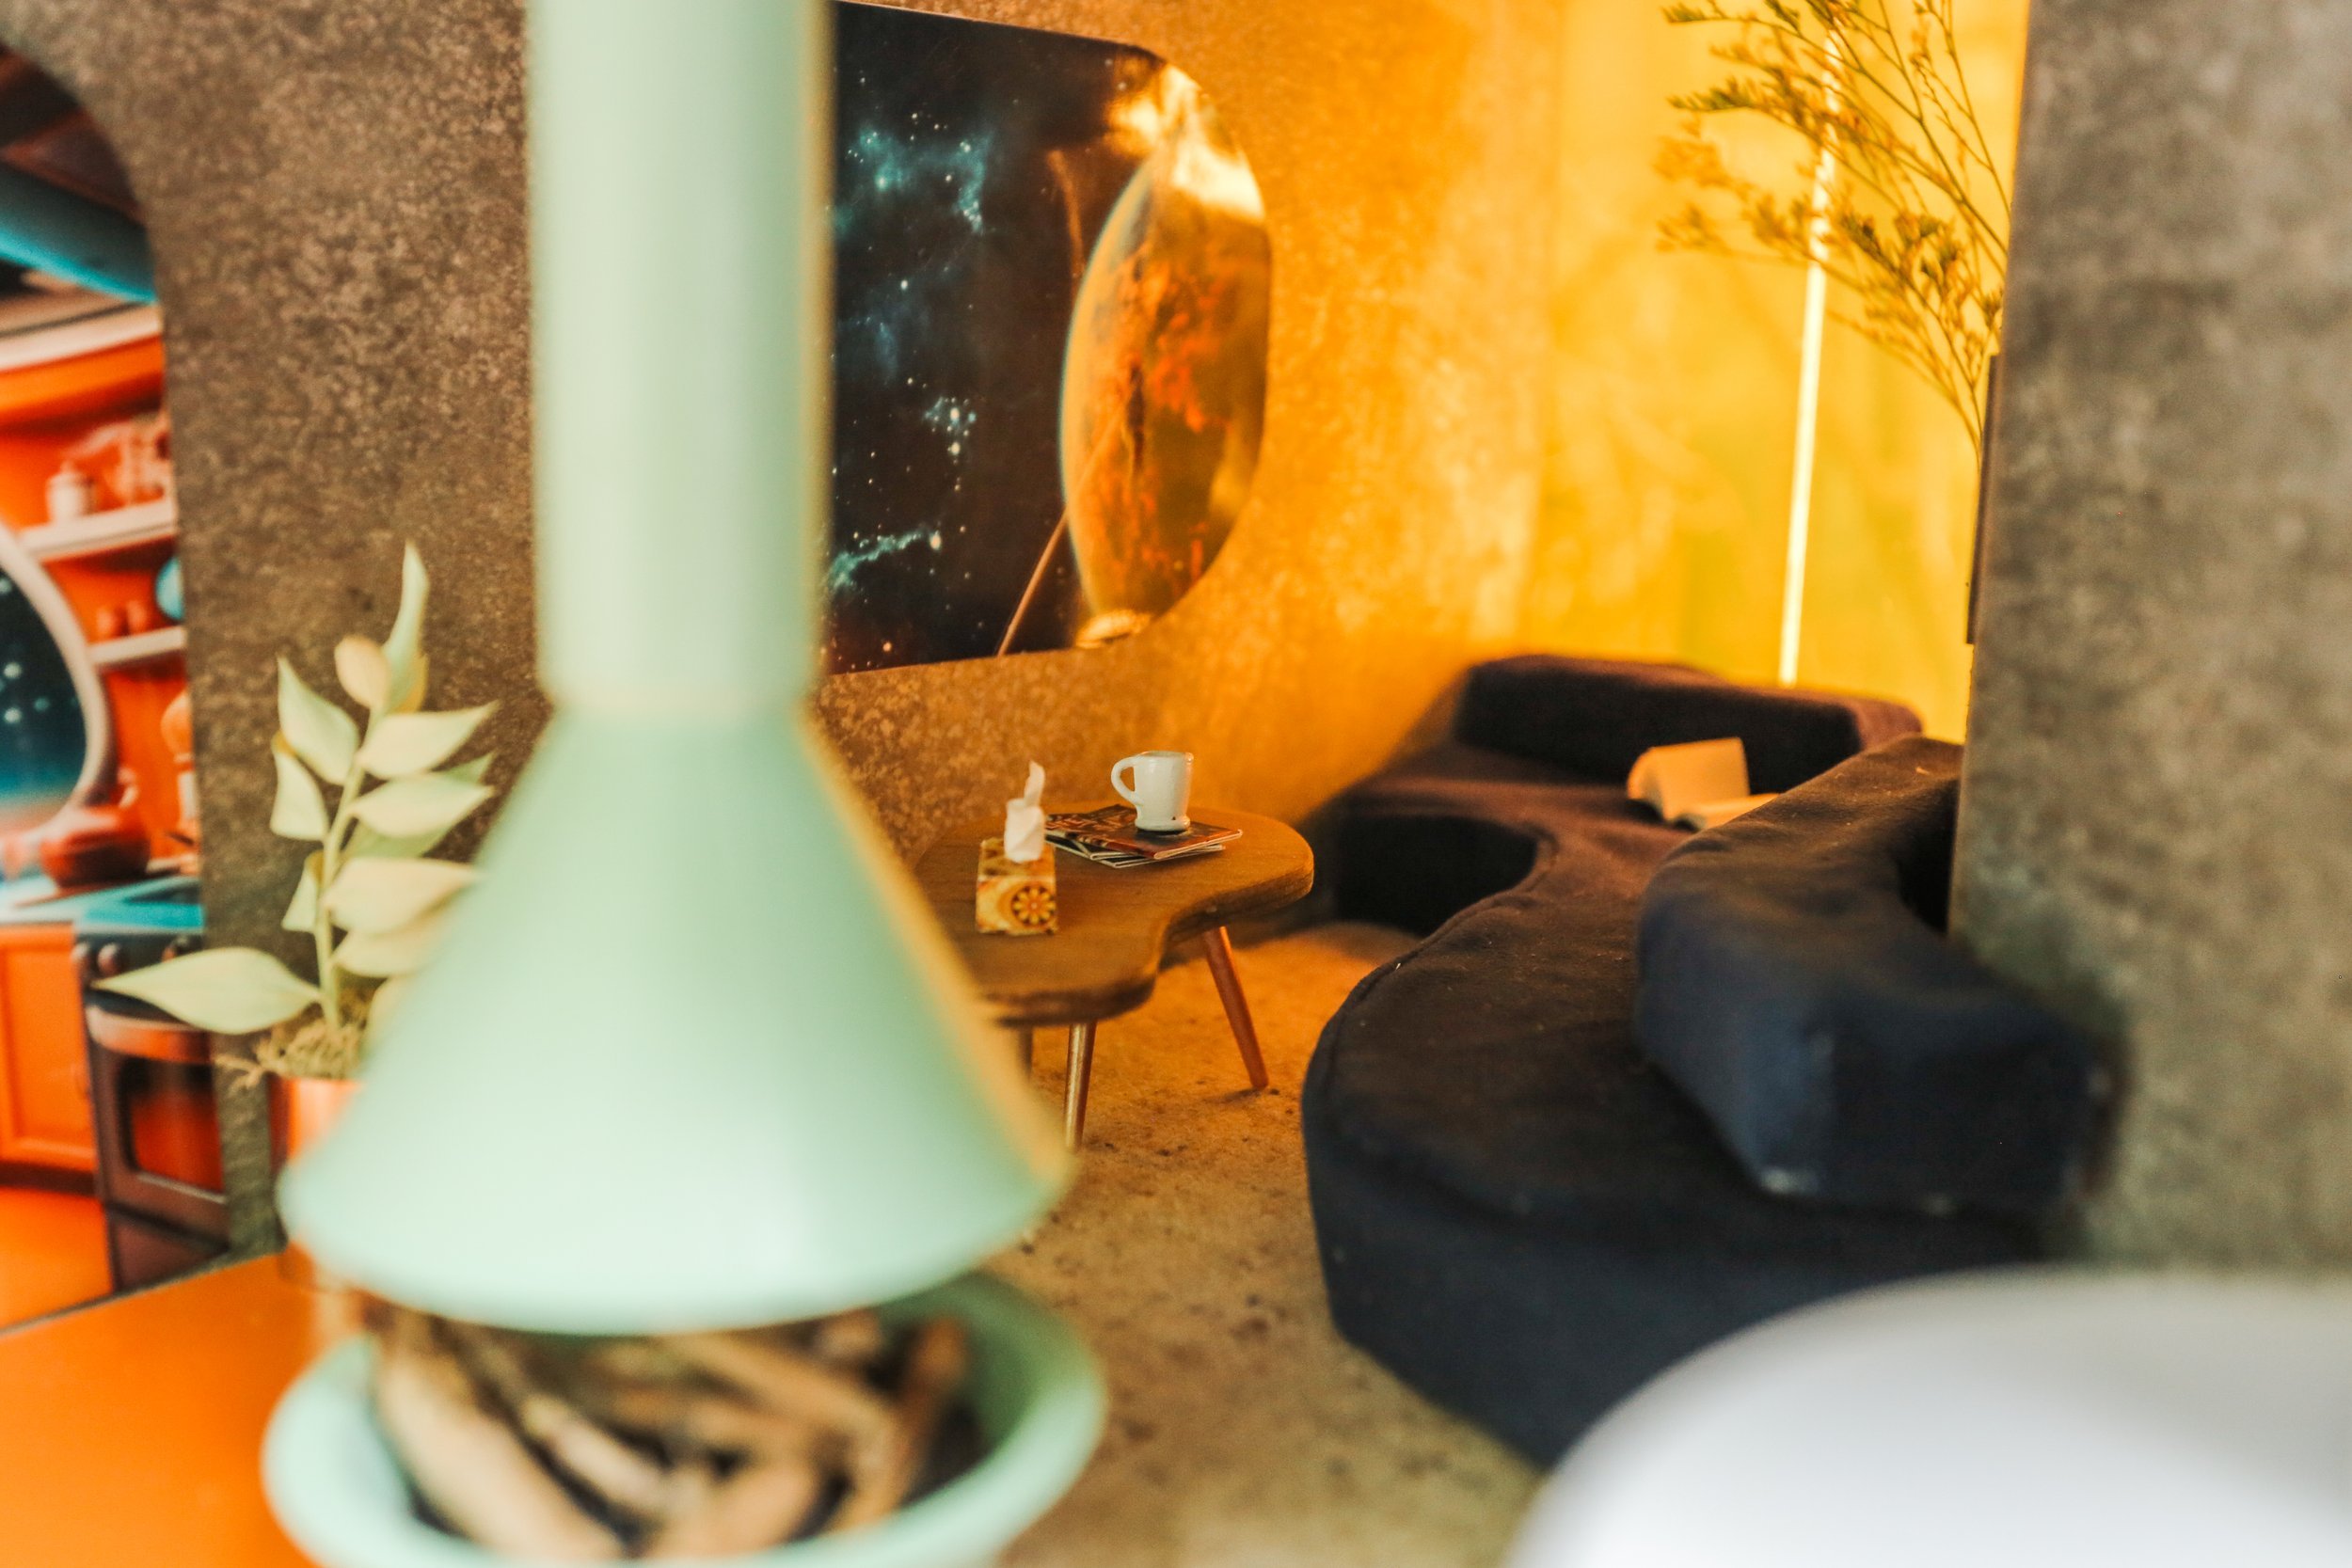
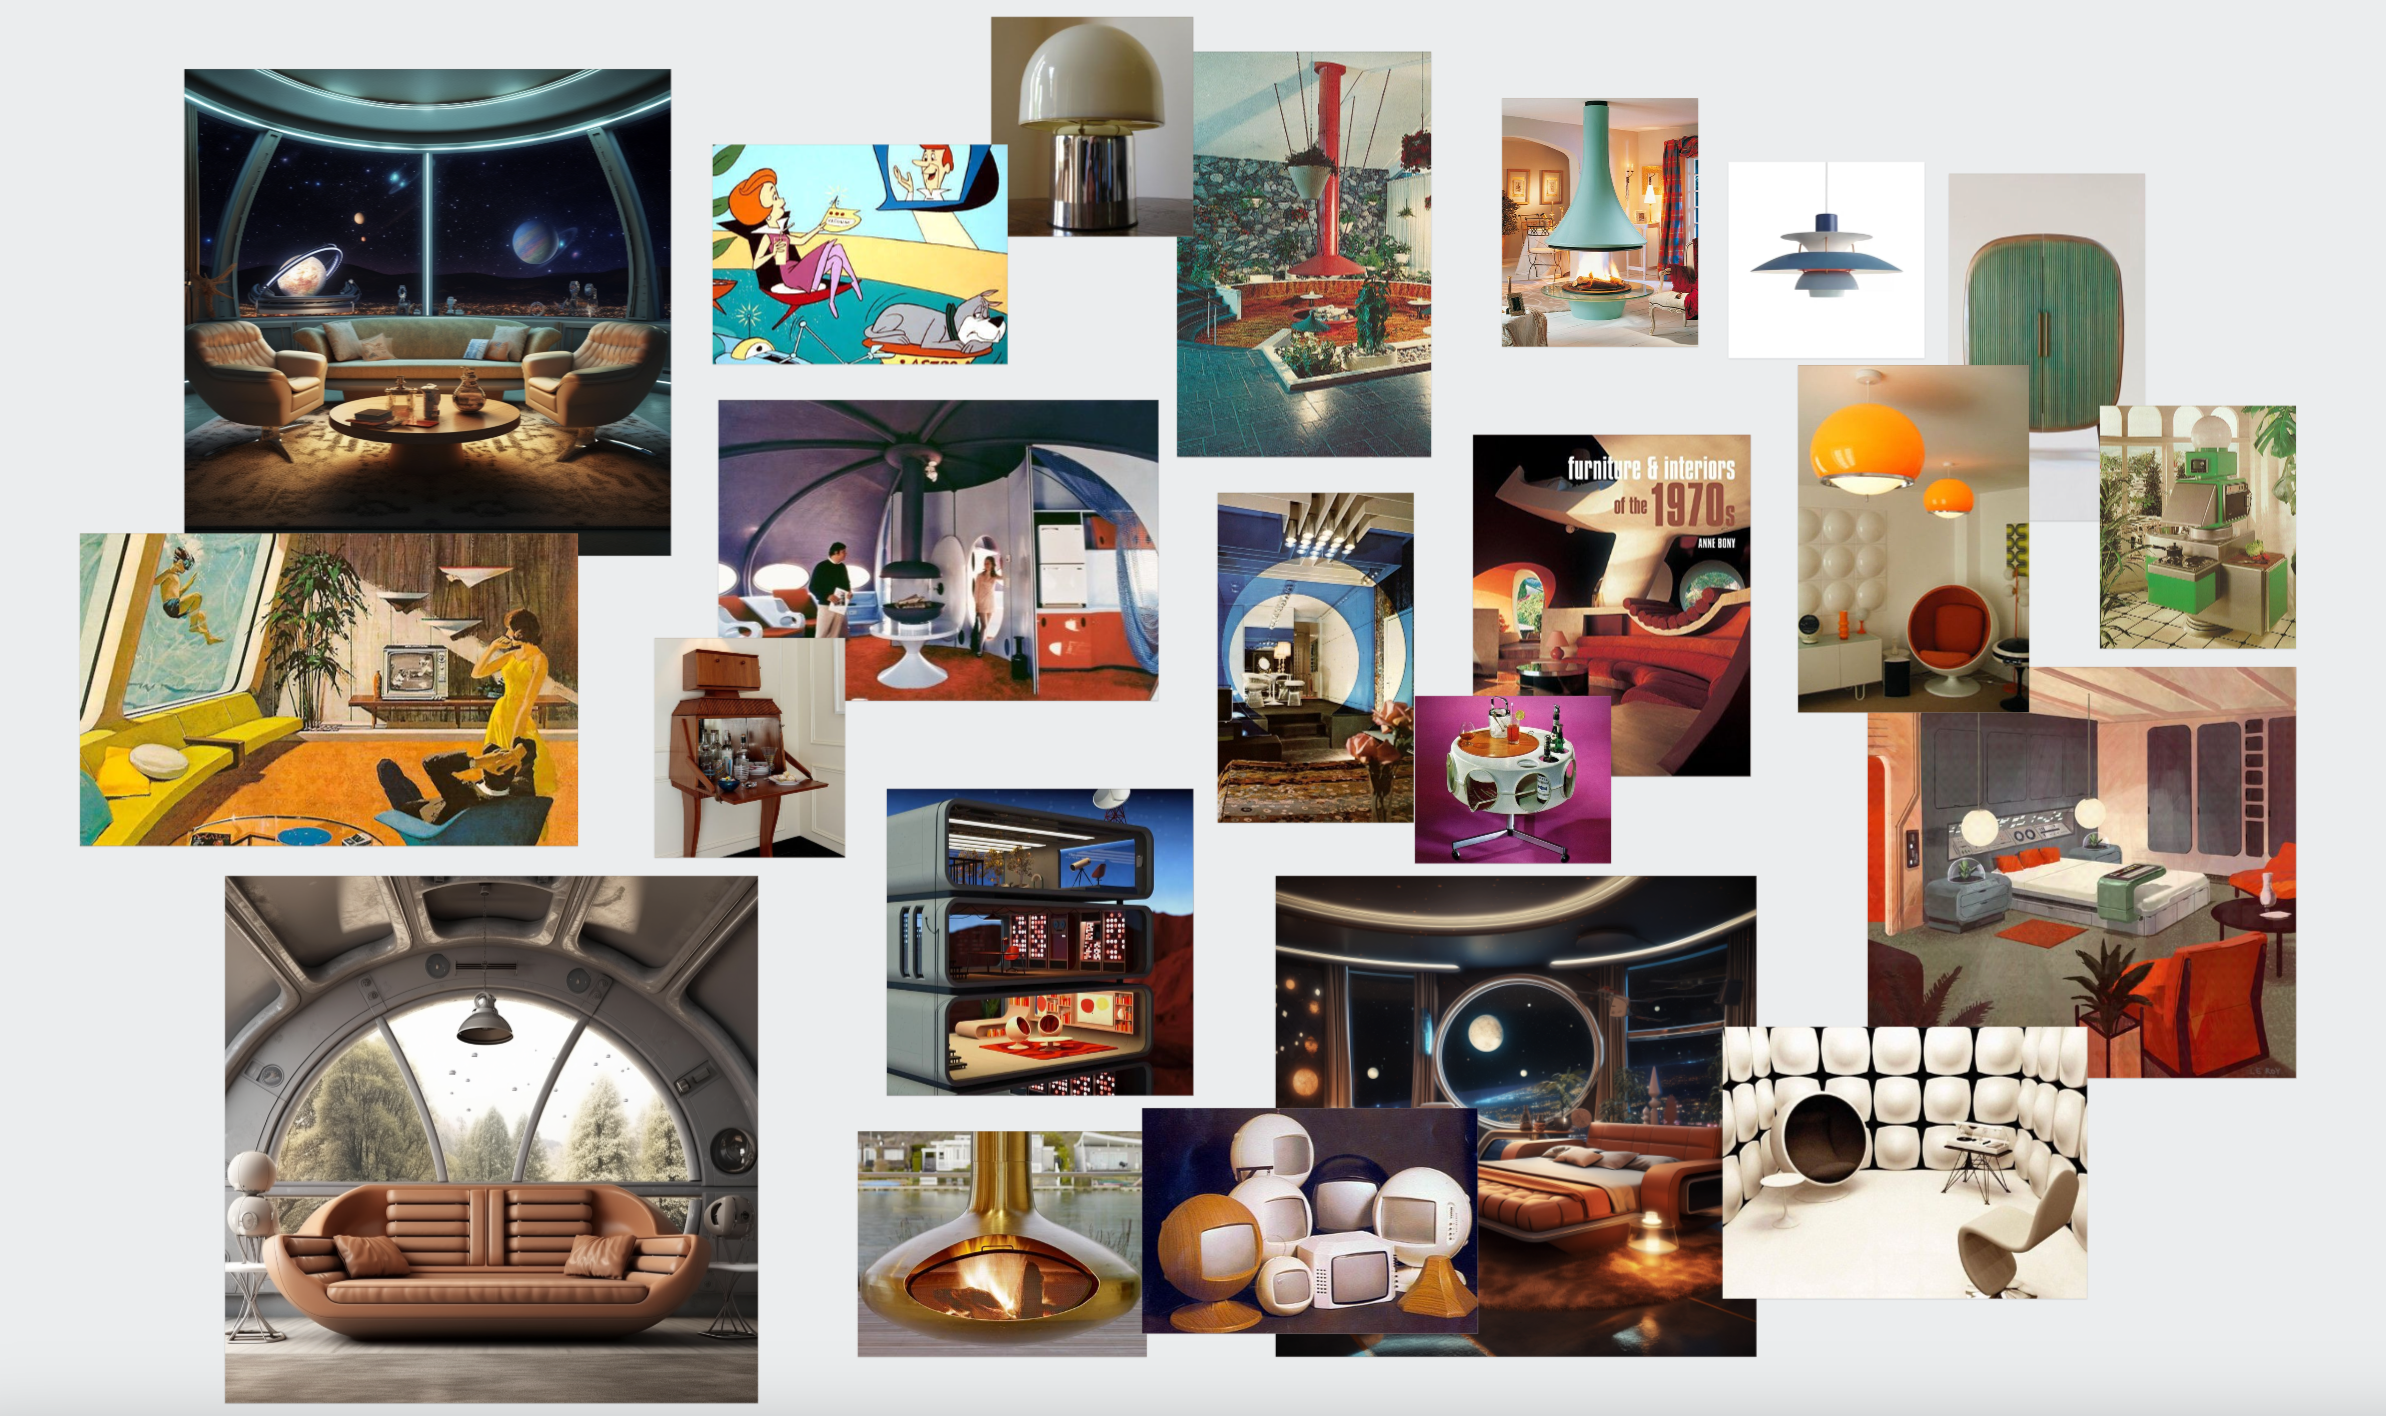
I went ahead and took measurements of the guardrail interior and created a detailed floor plan for my dream space. Back home, I made a mood board with Pinterest images and various other sources. This provided me with a BUNCH of ideas—from fireplace designs to lighting and colour palettes.
Sourcing and Secondhand Finds
One valuable lesson I had learned from previous miniature makeovers was the cost-effectiveness and convenience of secondhand items from things like dollhouses and miniature collectors. So, I looked on Facebook Marketplace and stumbled upon a dollhouse that held the potential to provide the necessary assets for my project. Salvaging and repurposing became the name of the game as I disassembled and reevaluated the dollhouse to fit my vision.

Crafting and Assembling
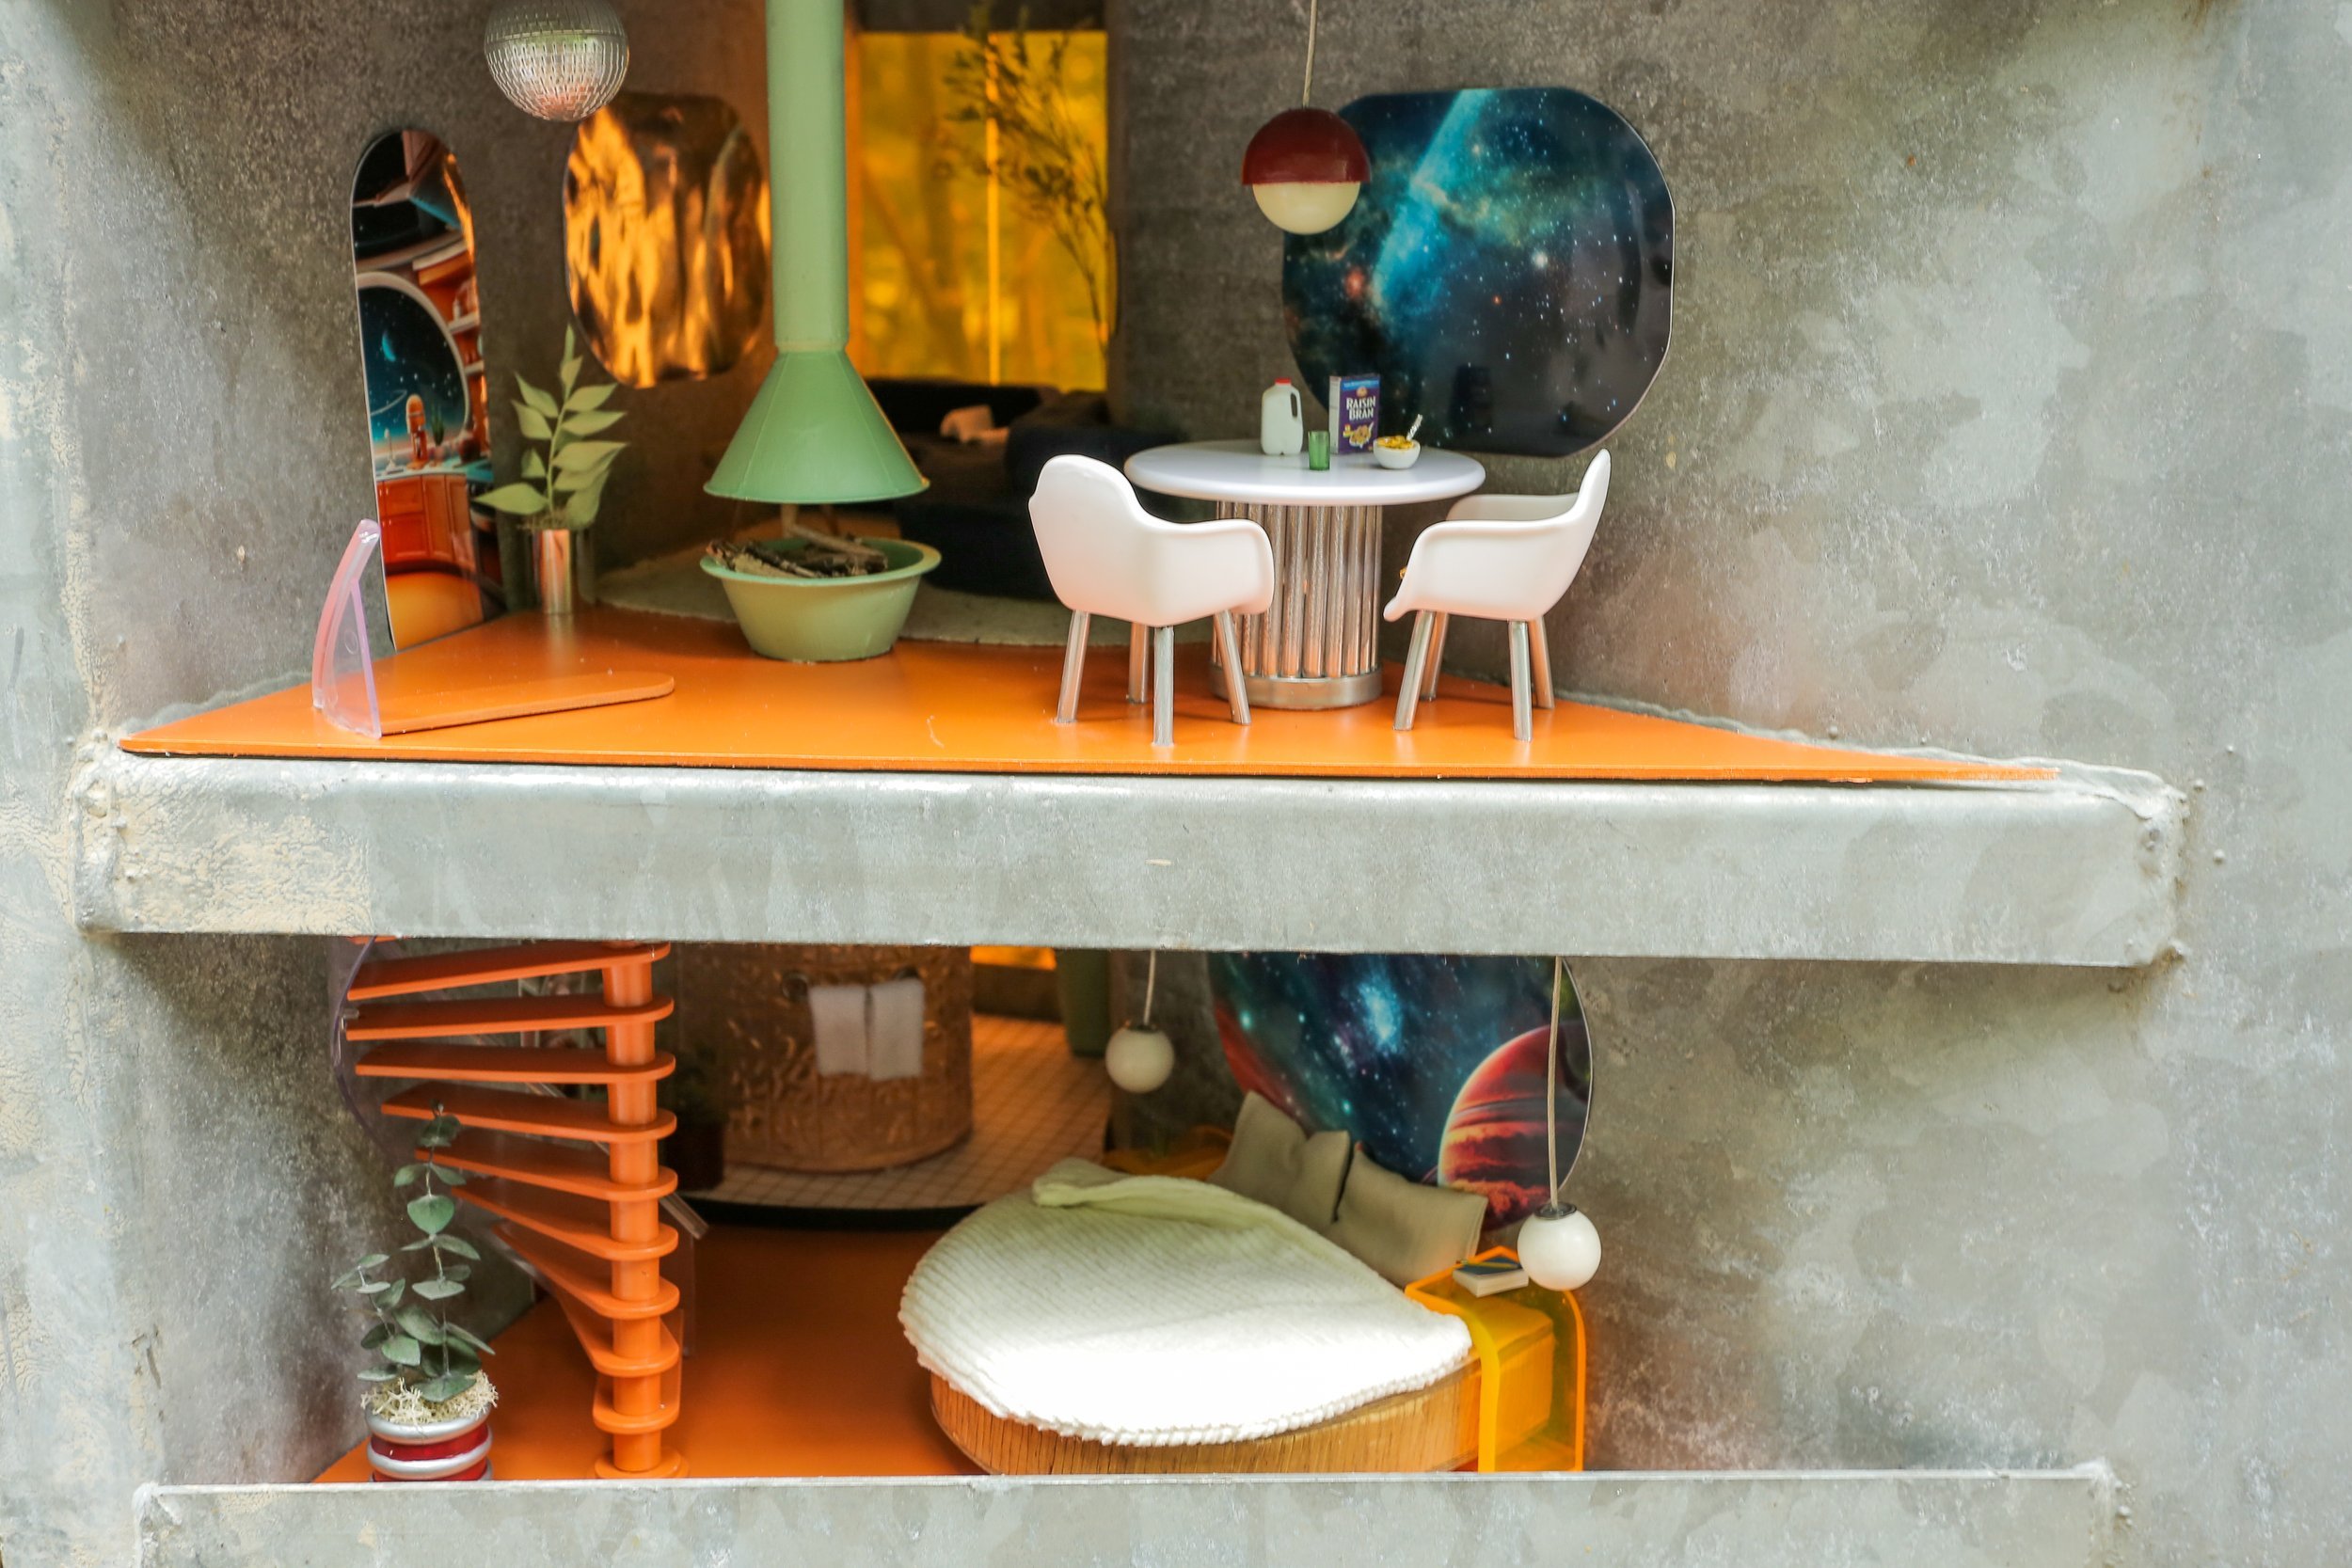
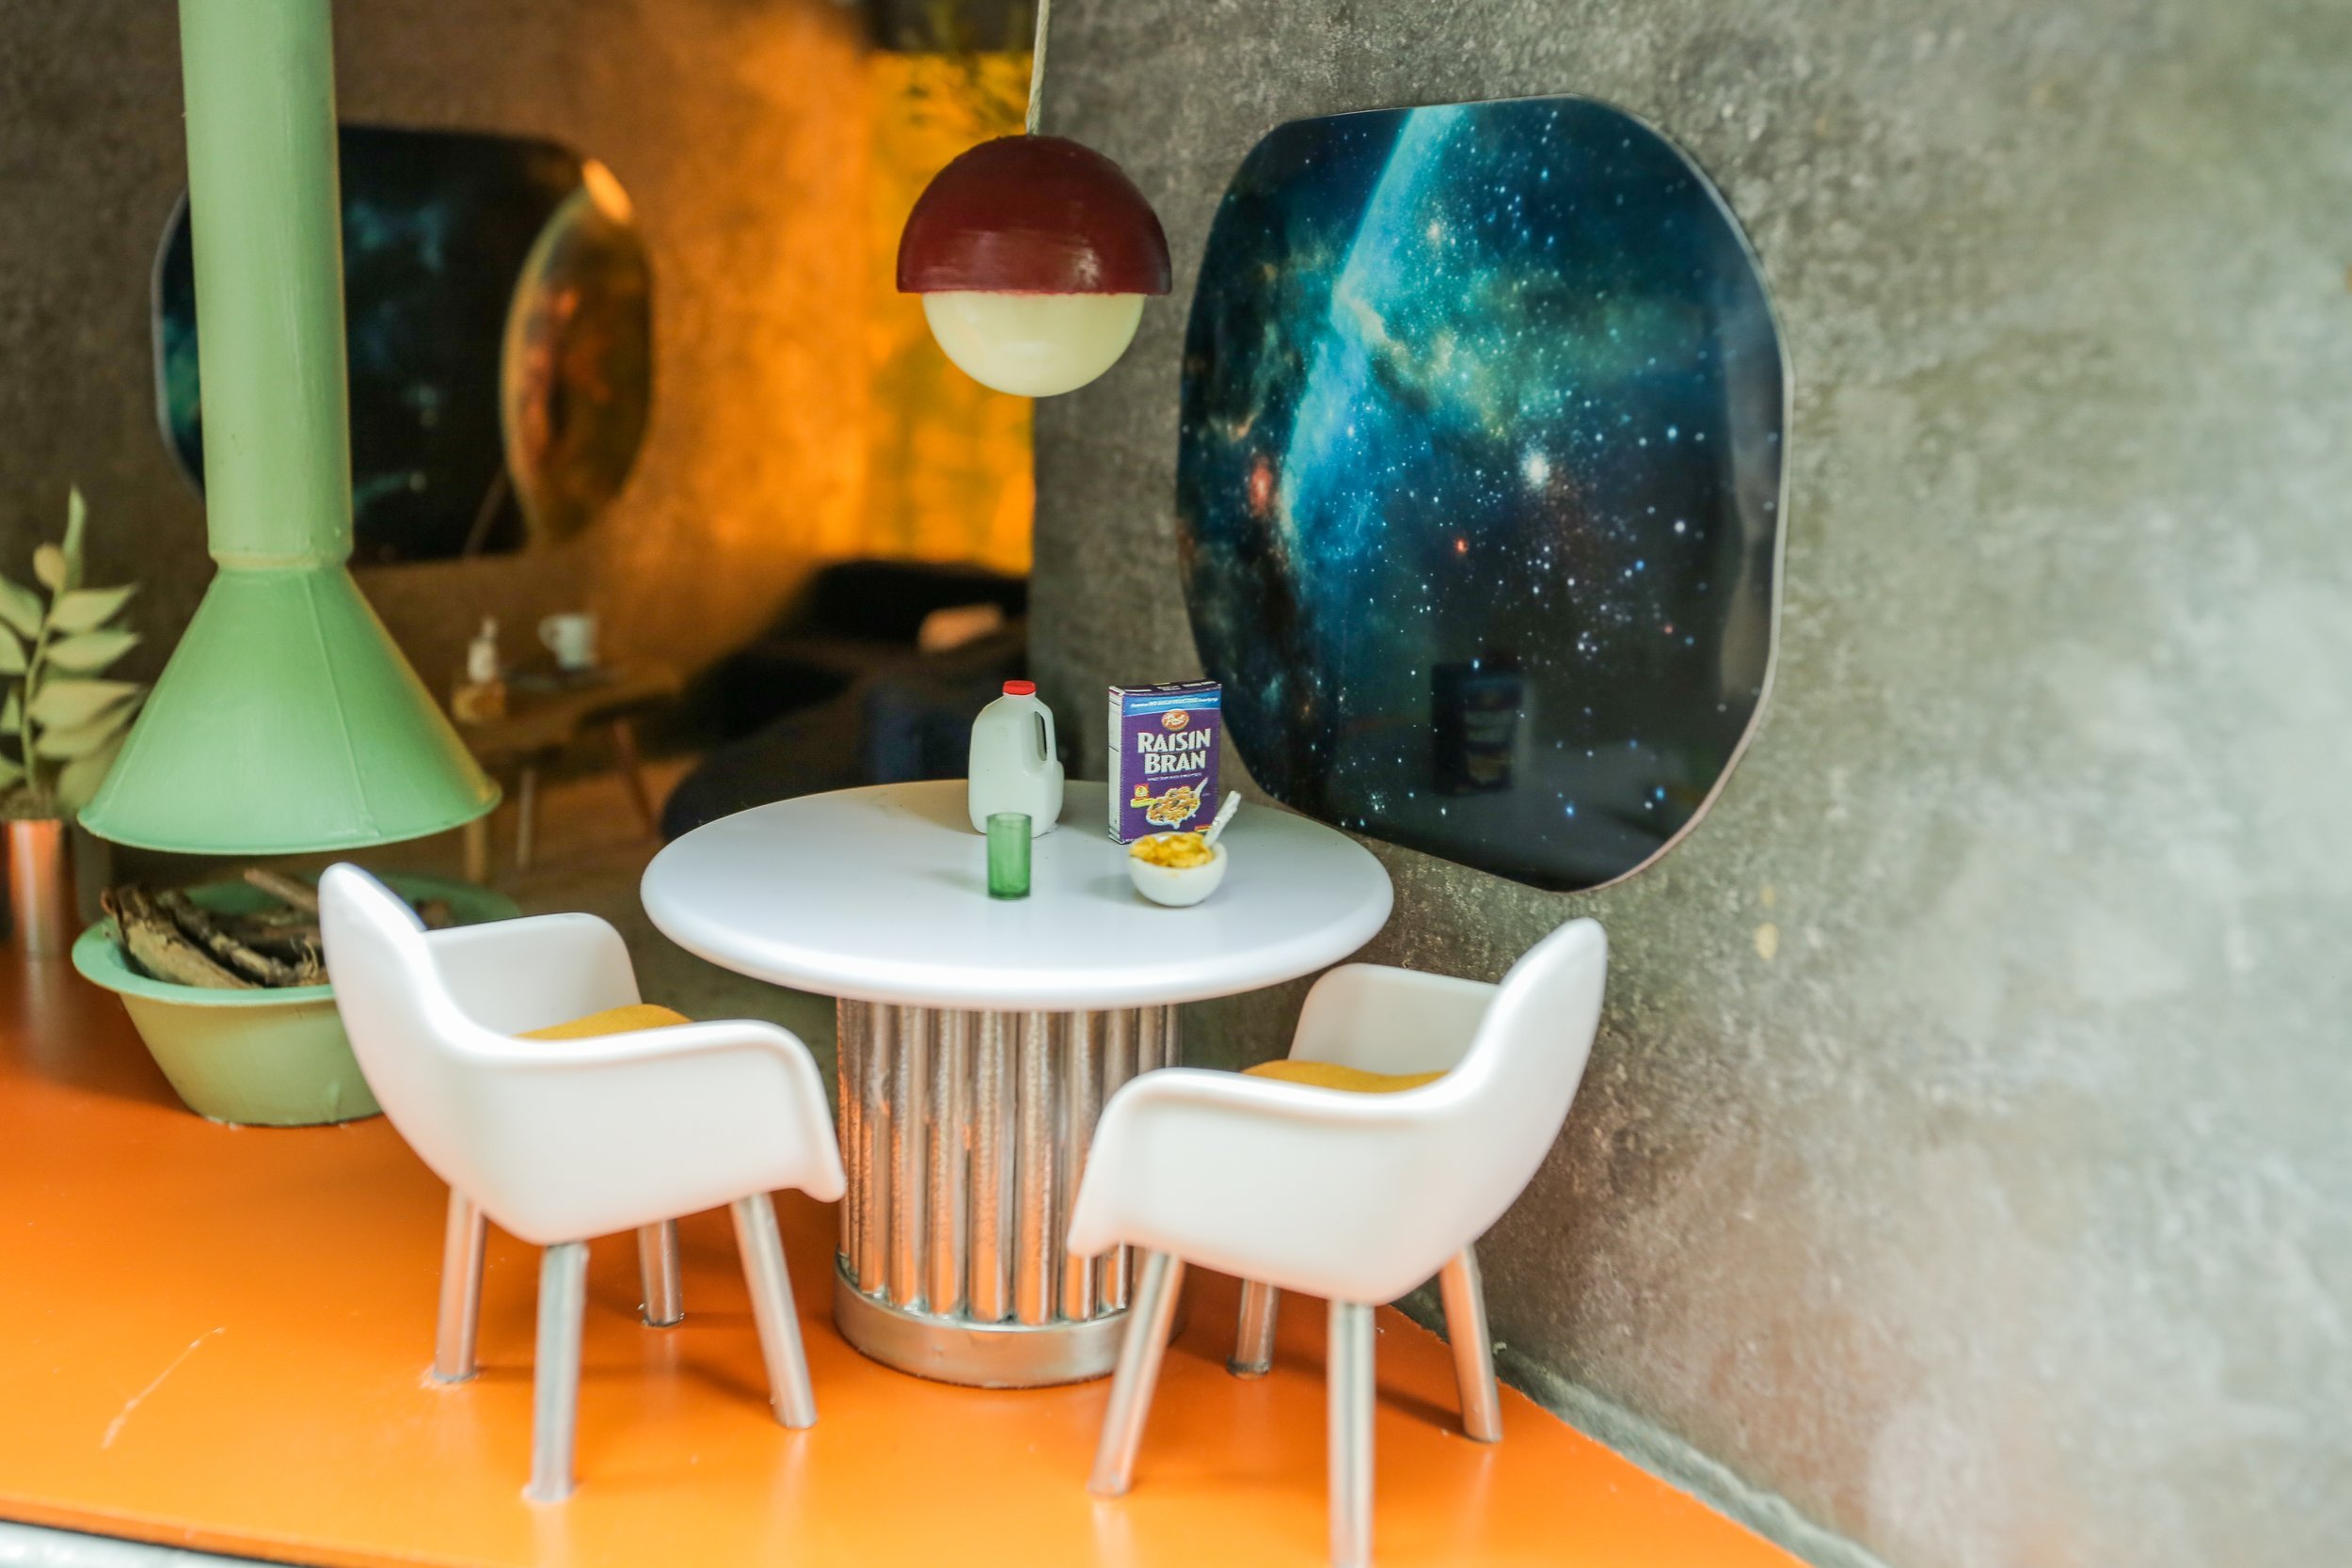
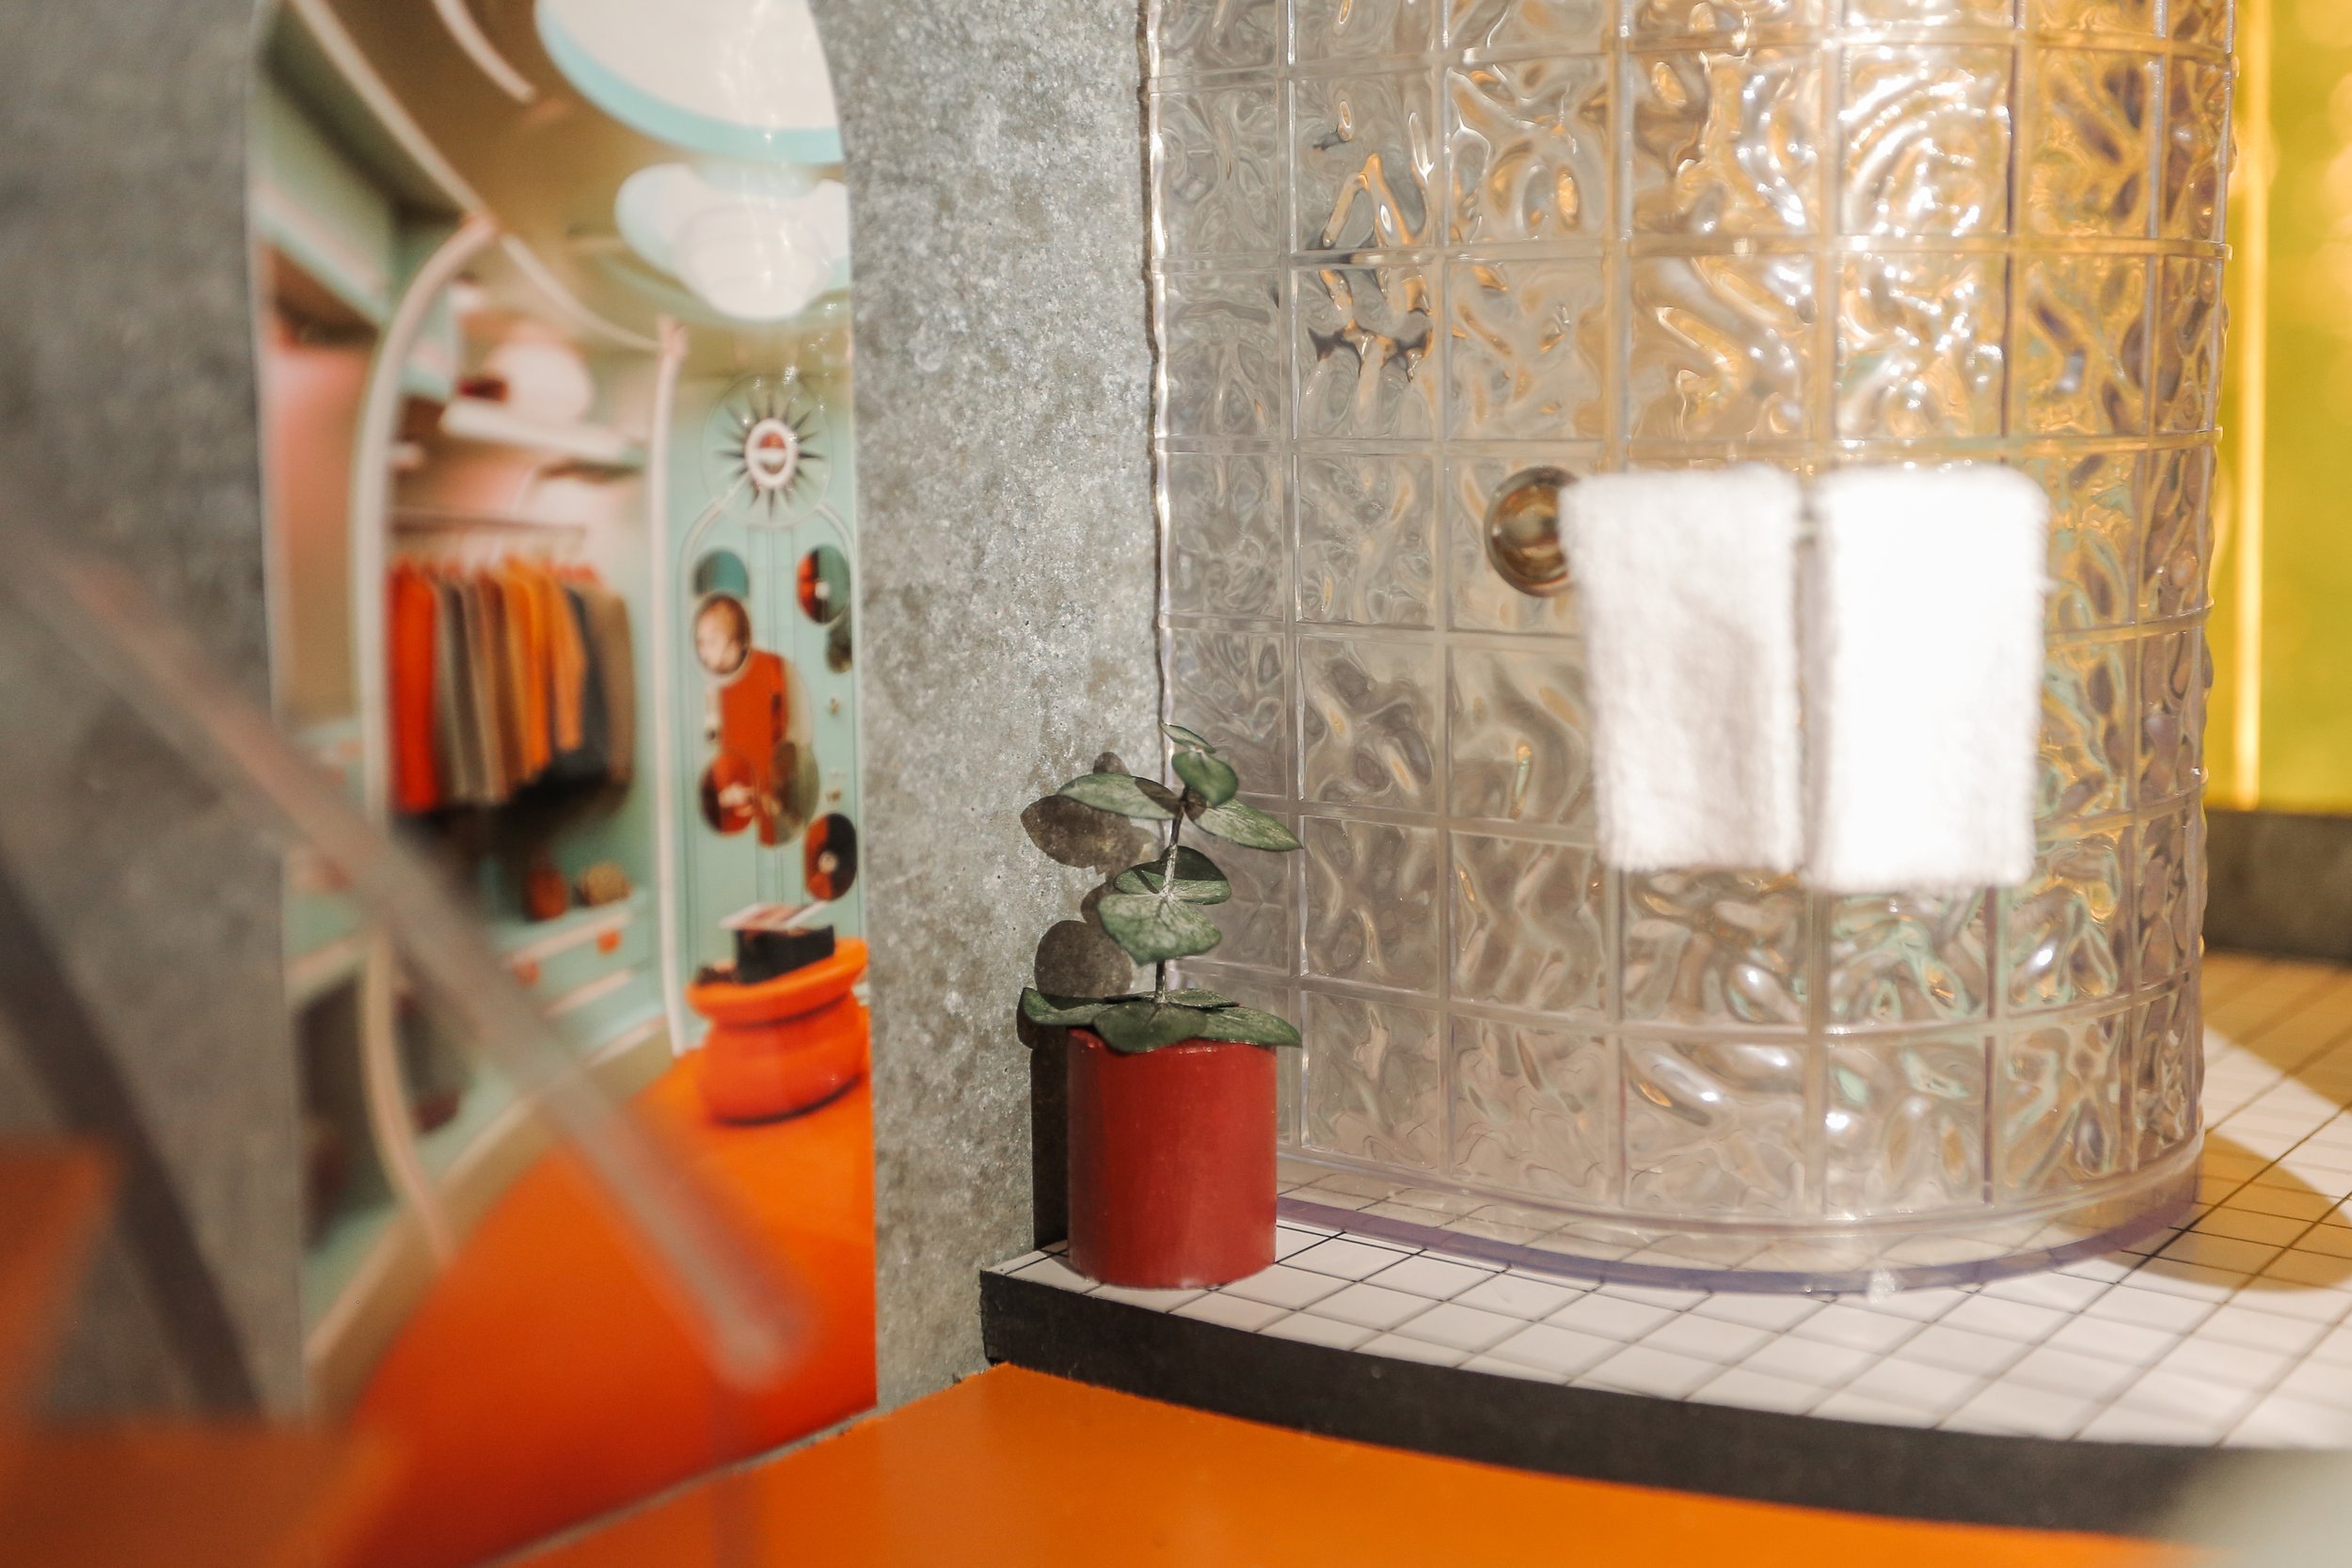
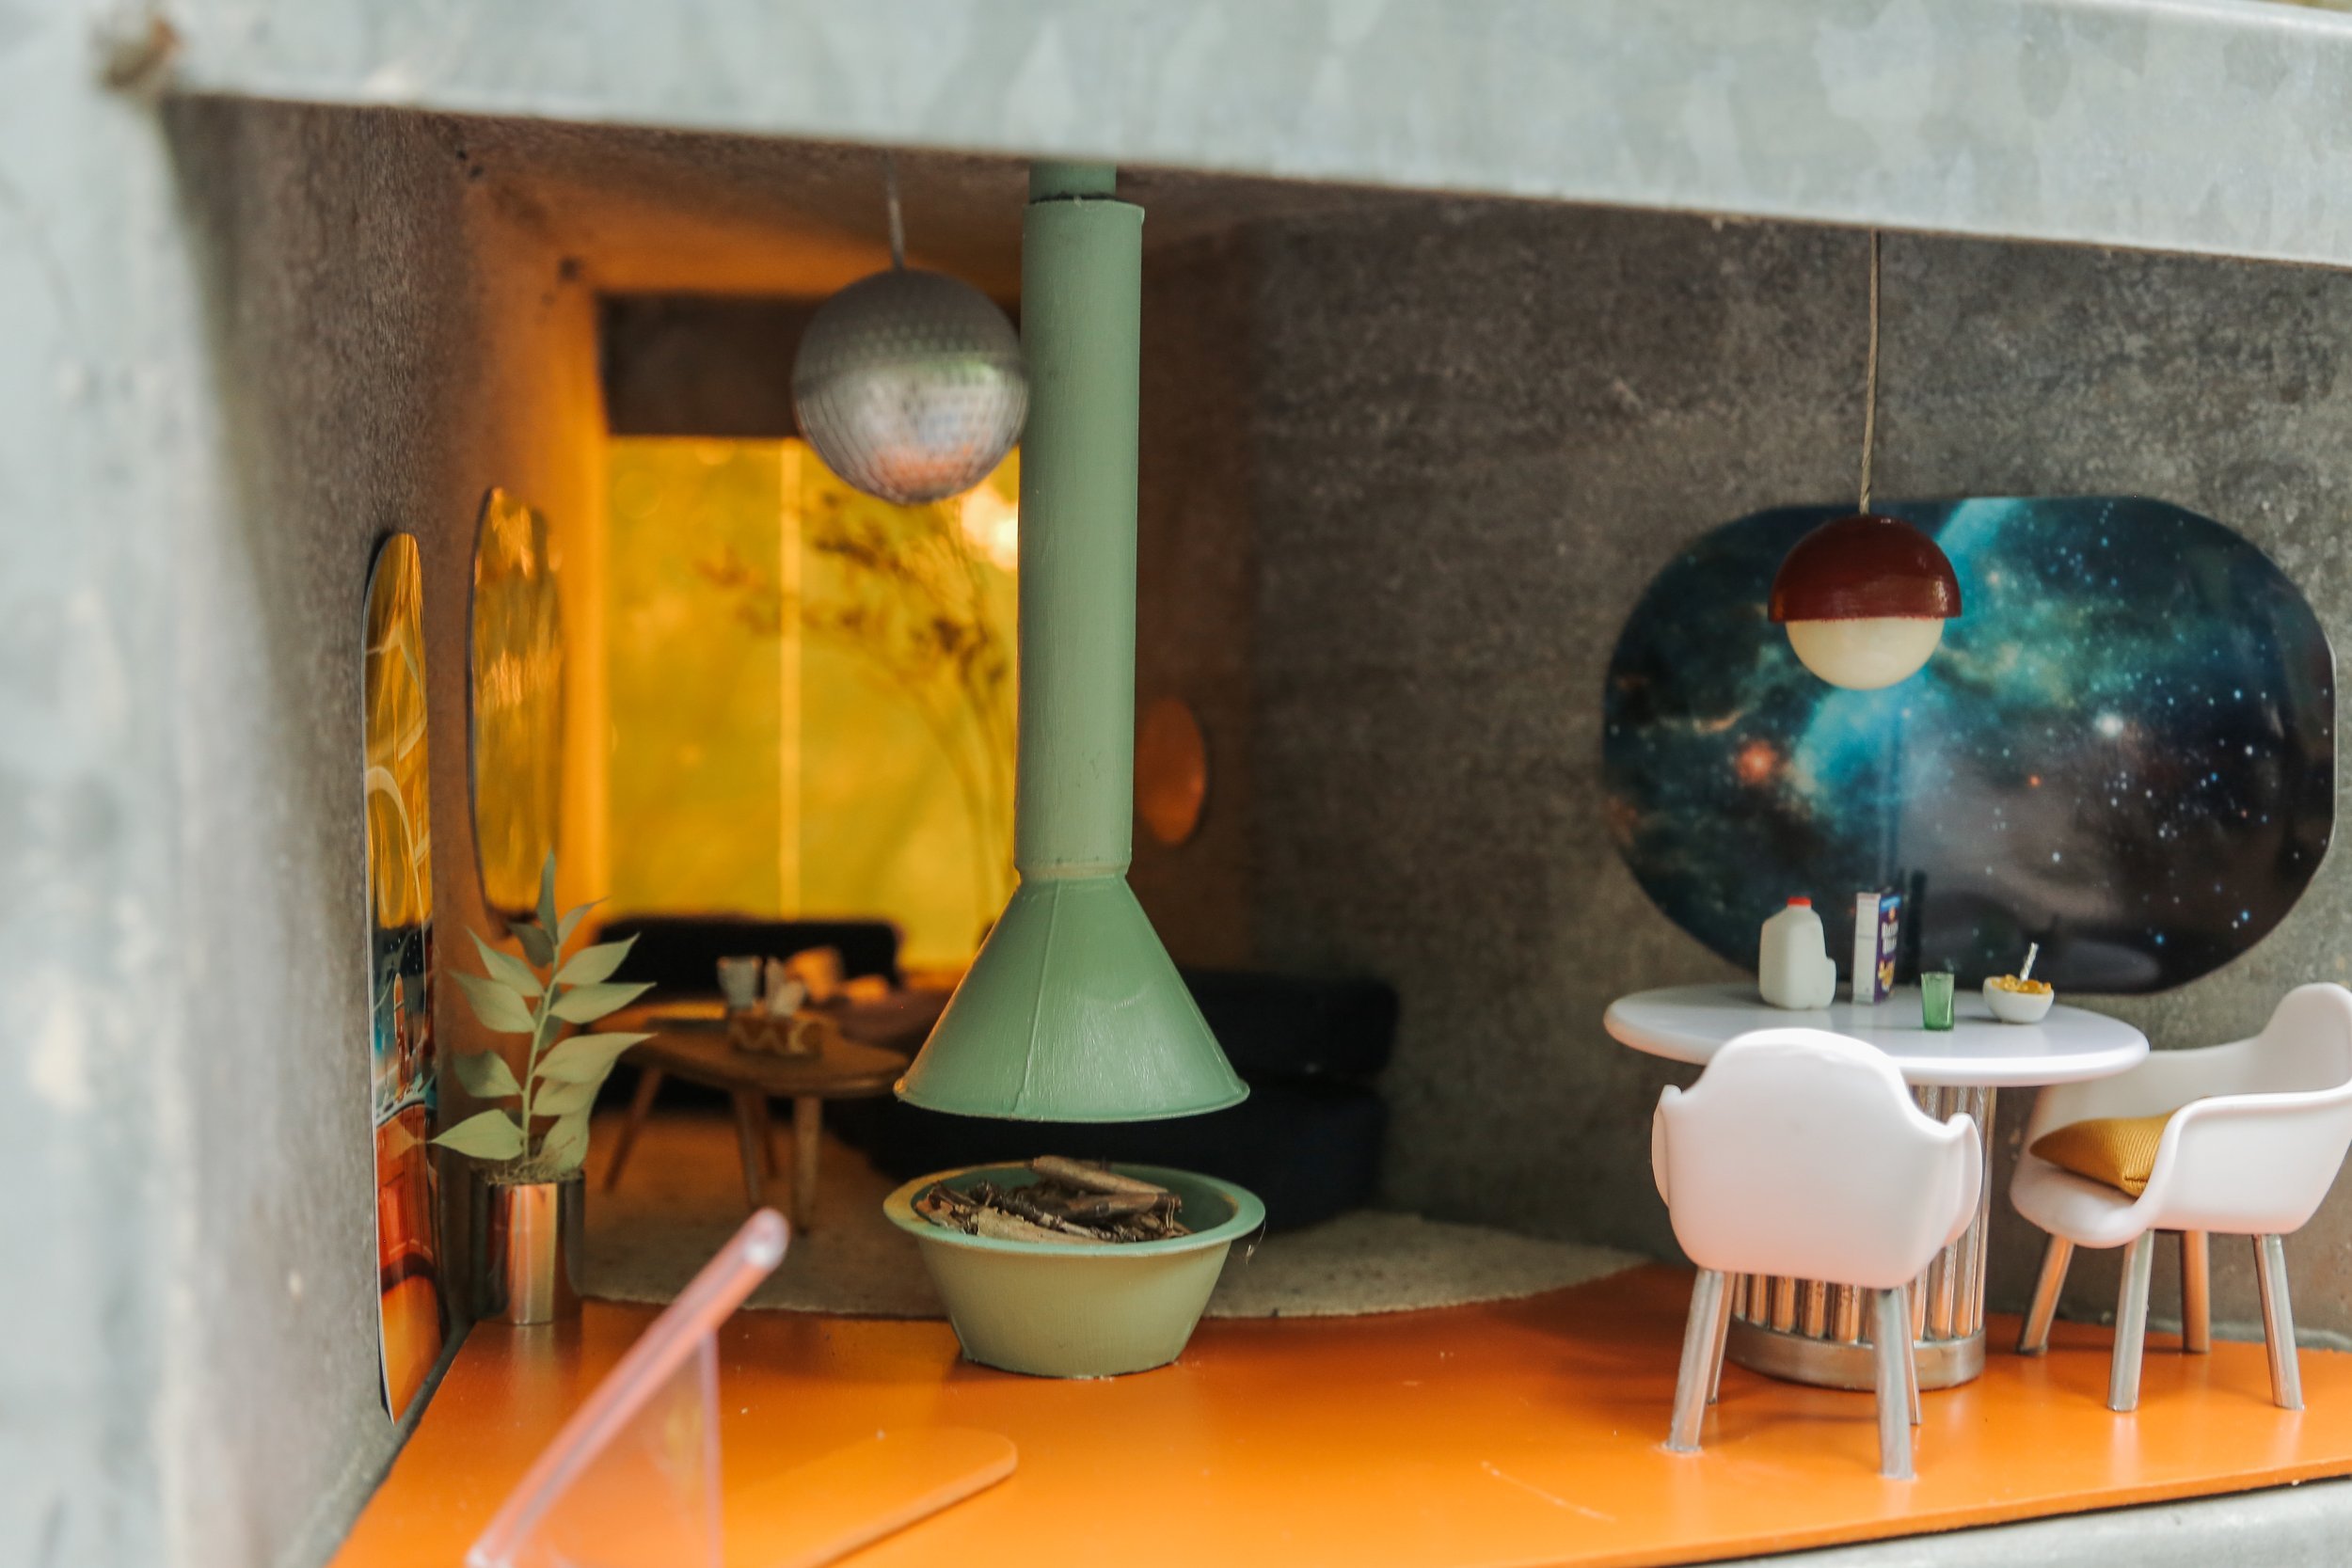
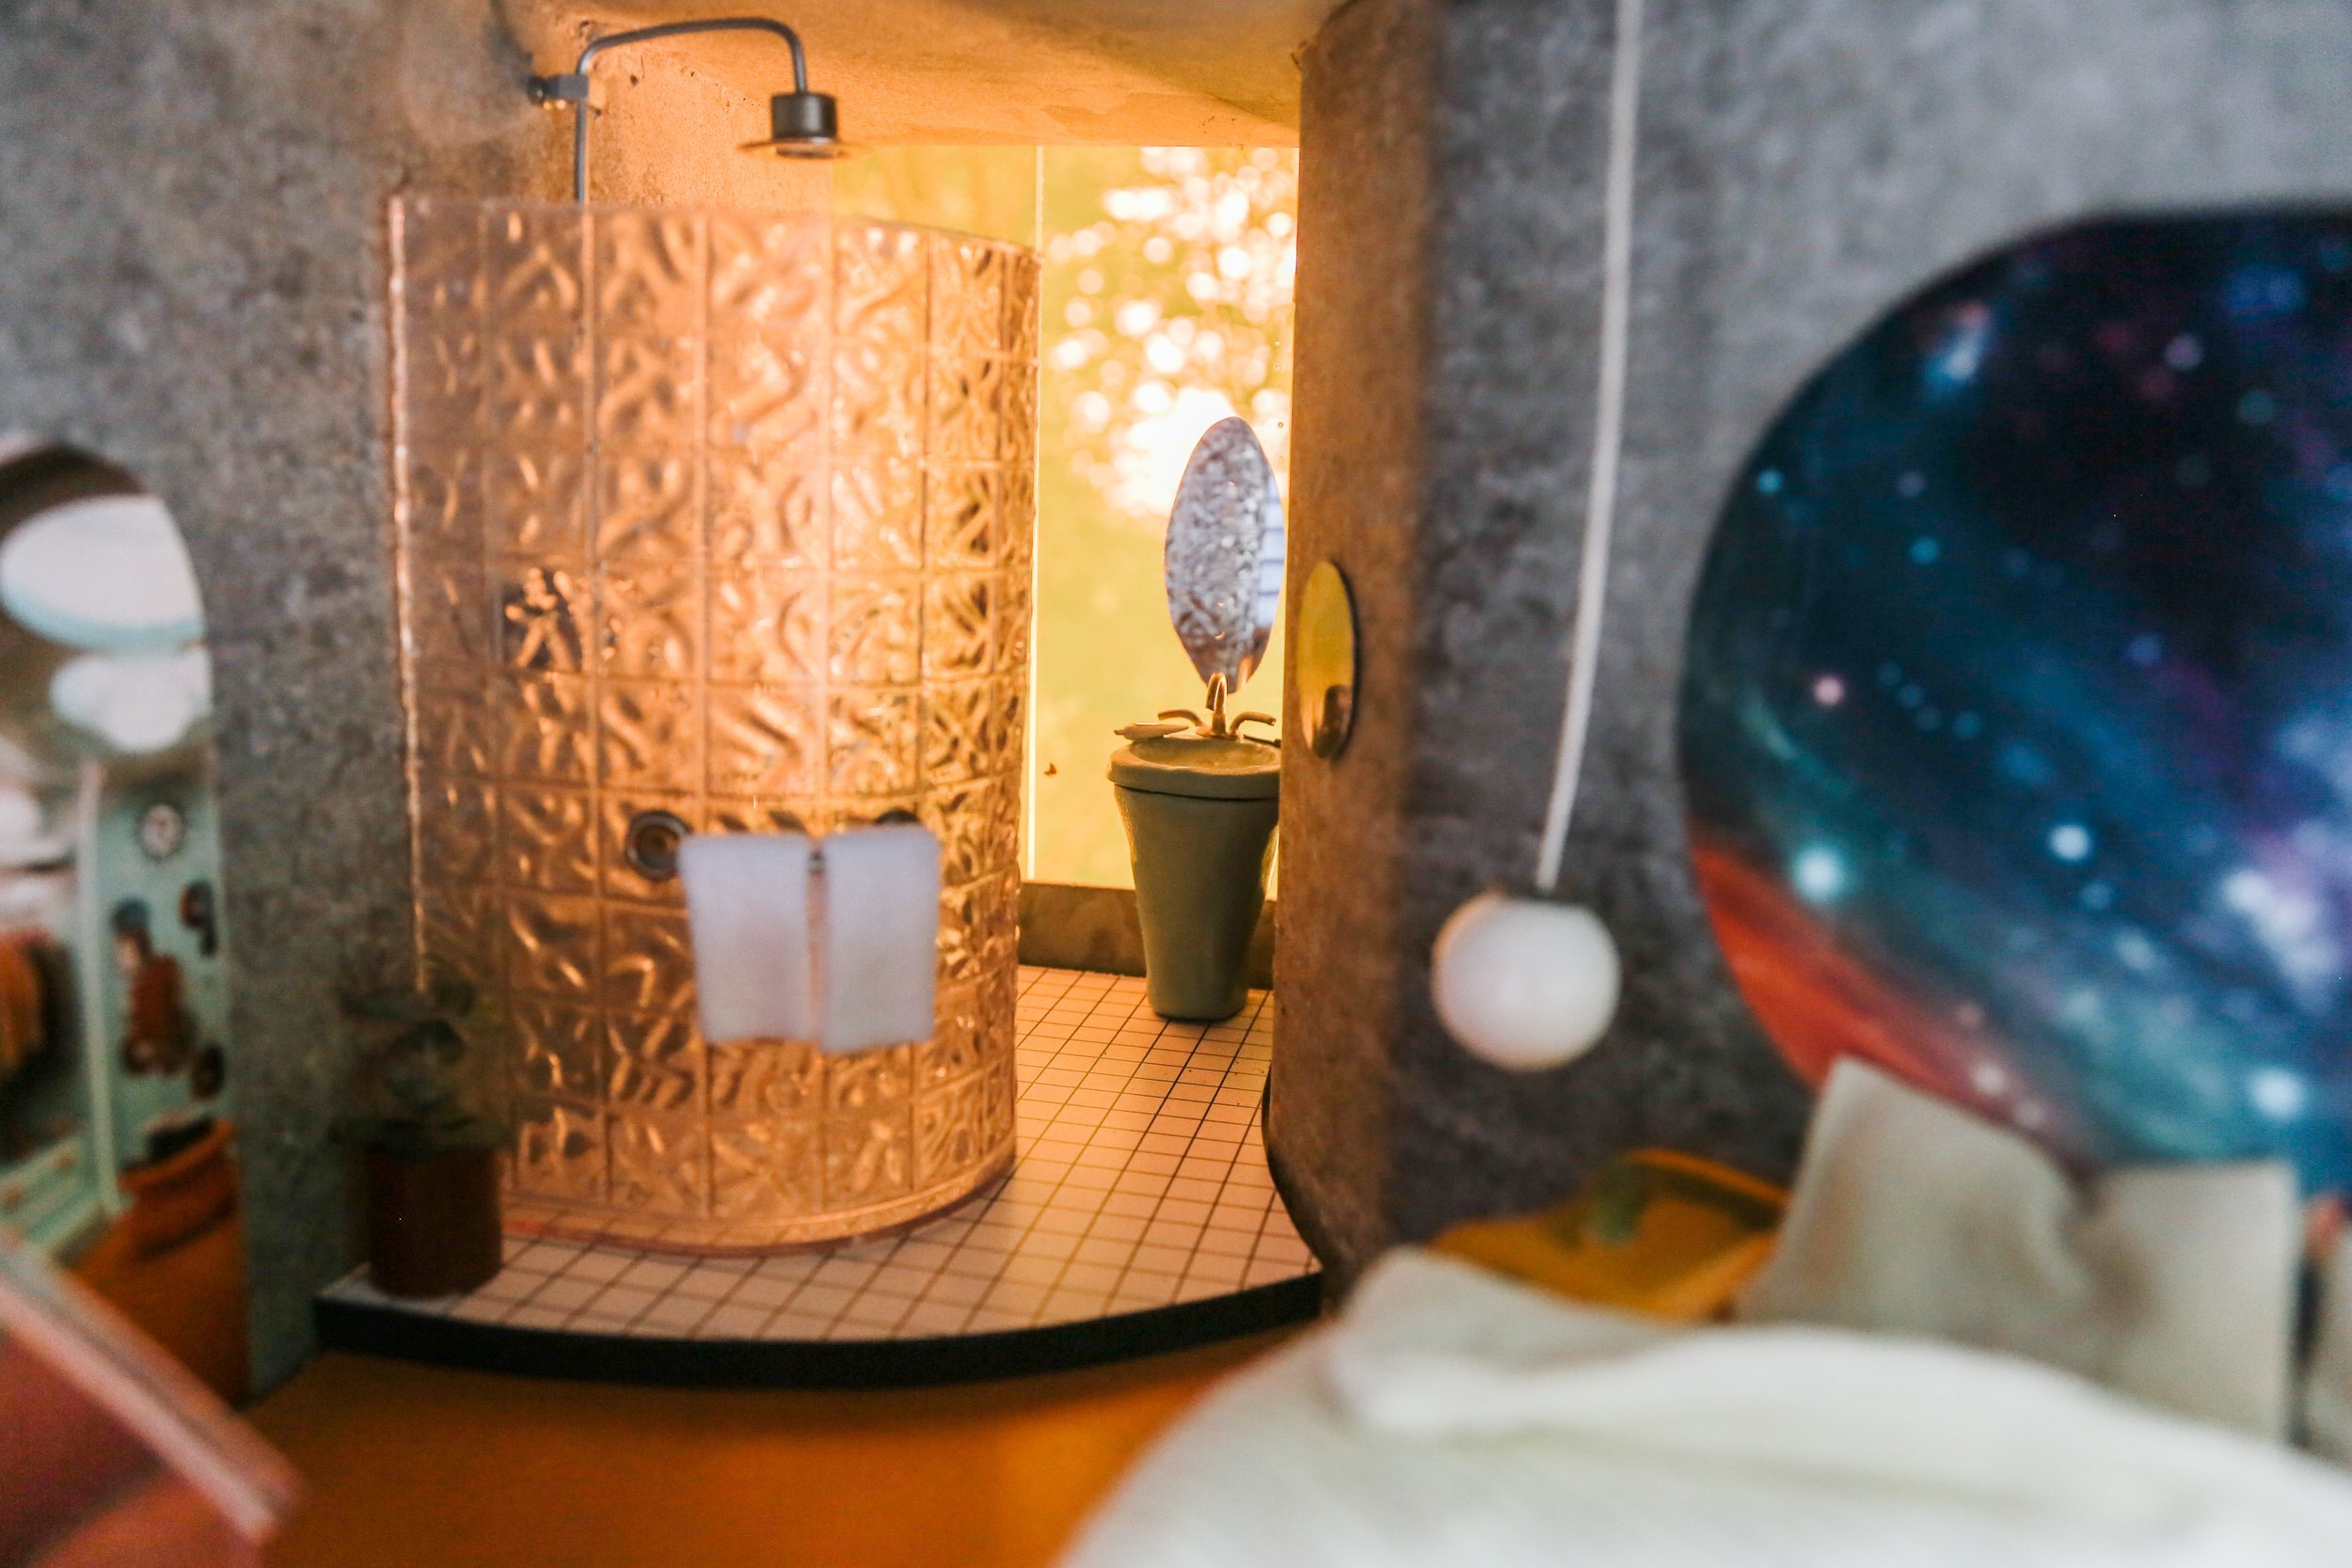
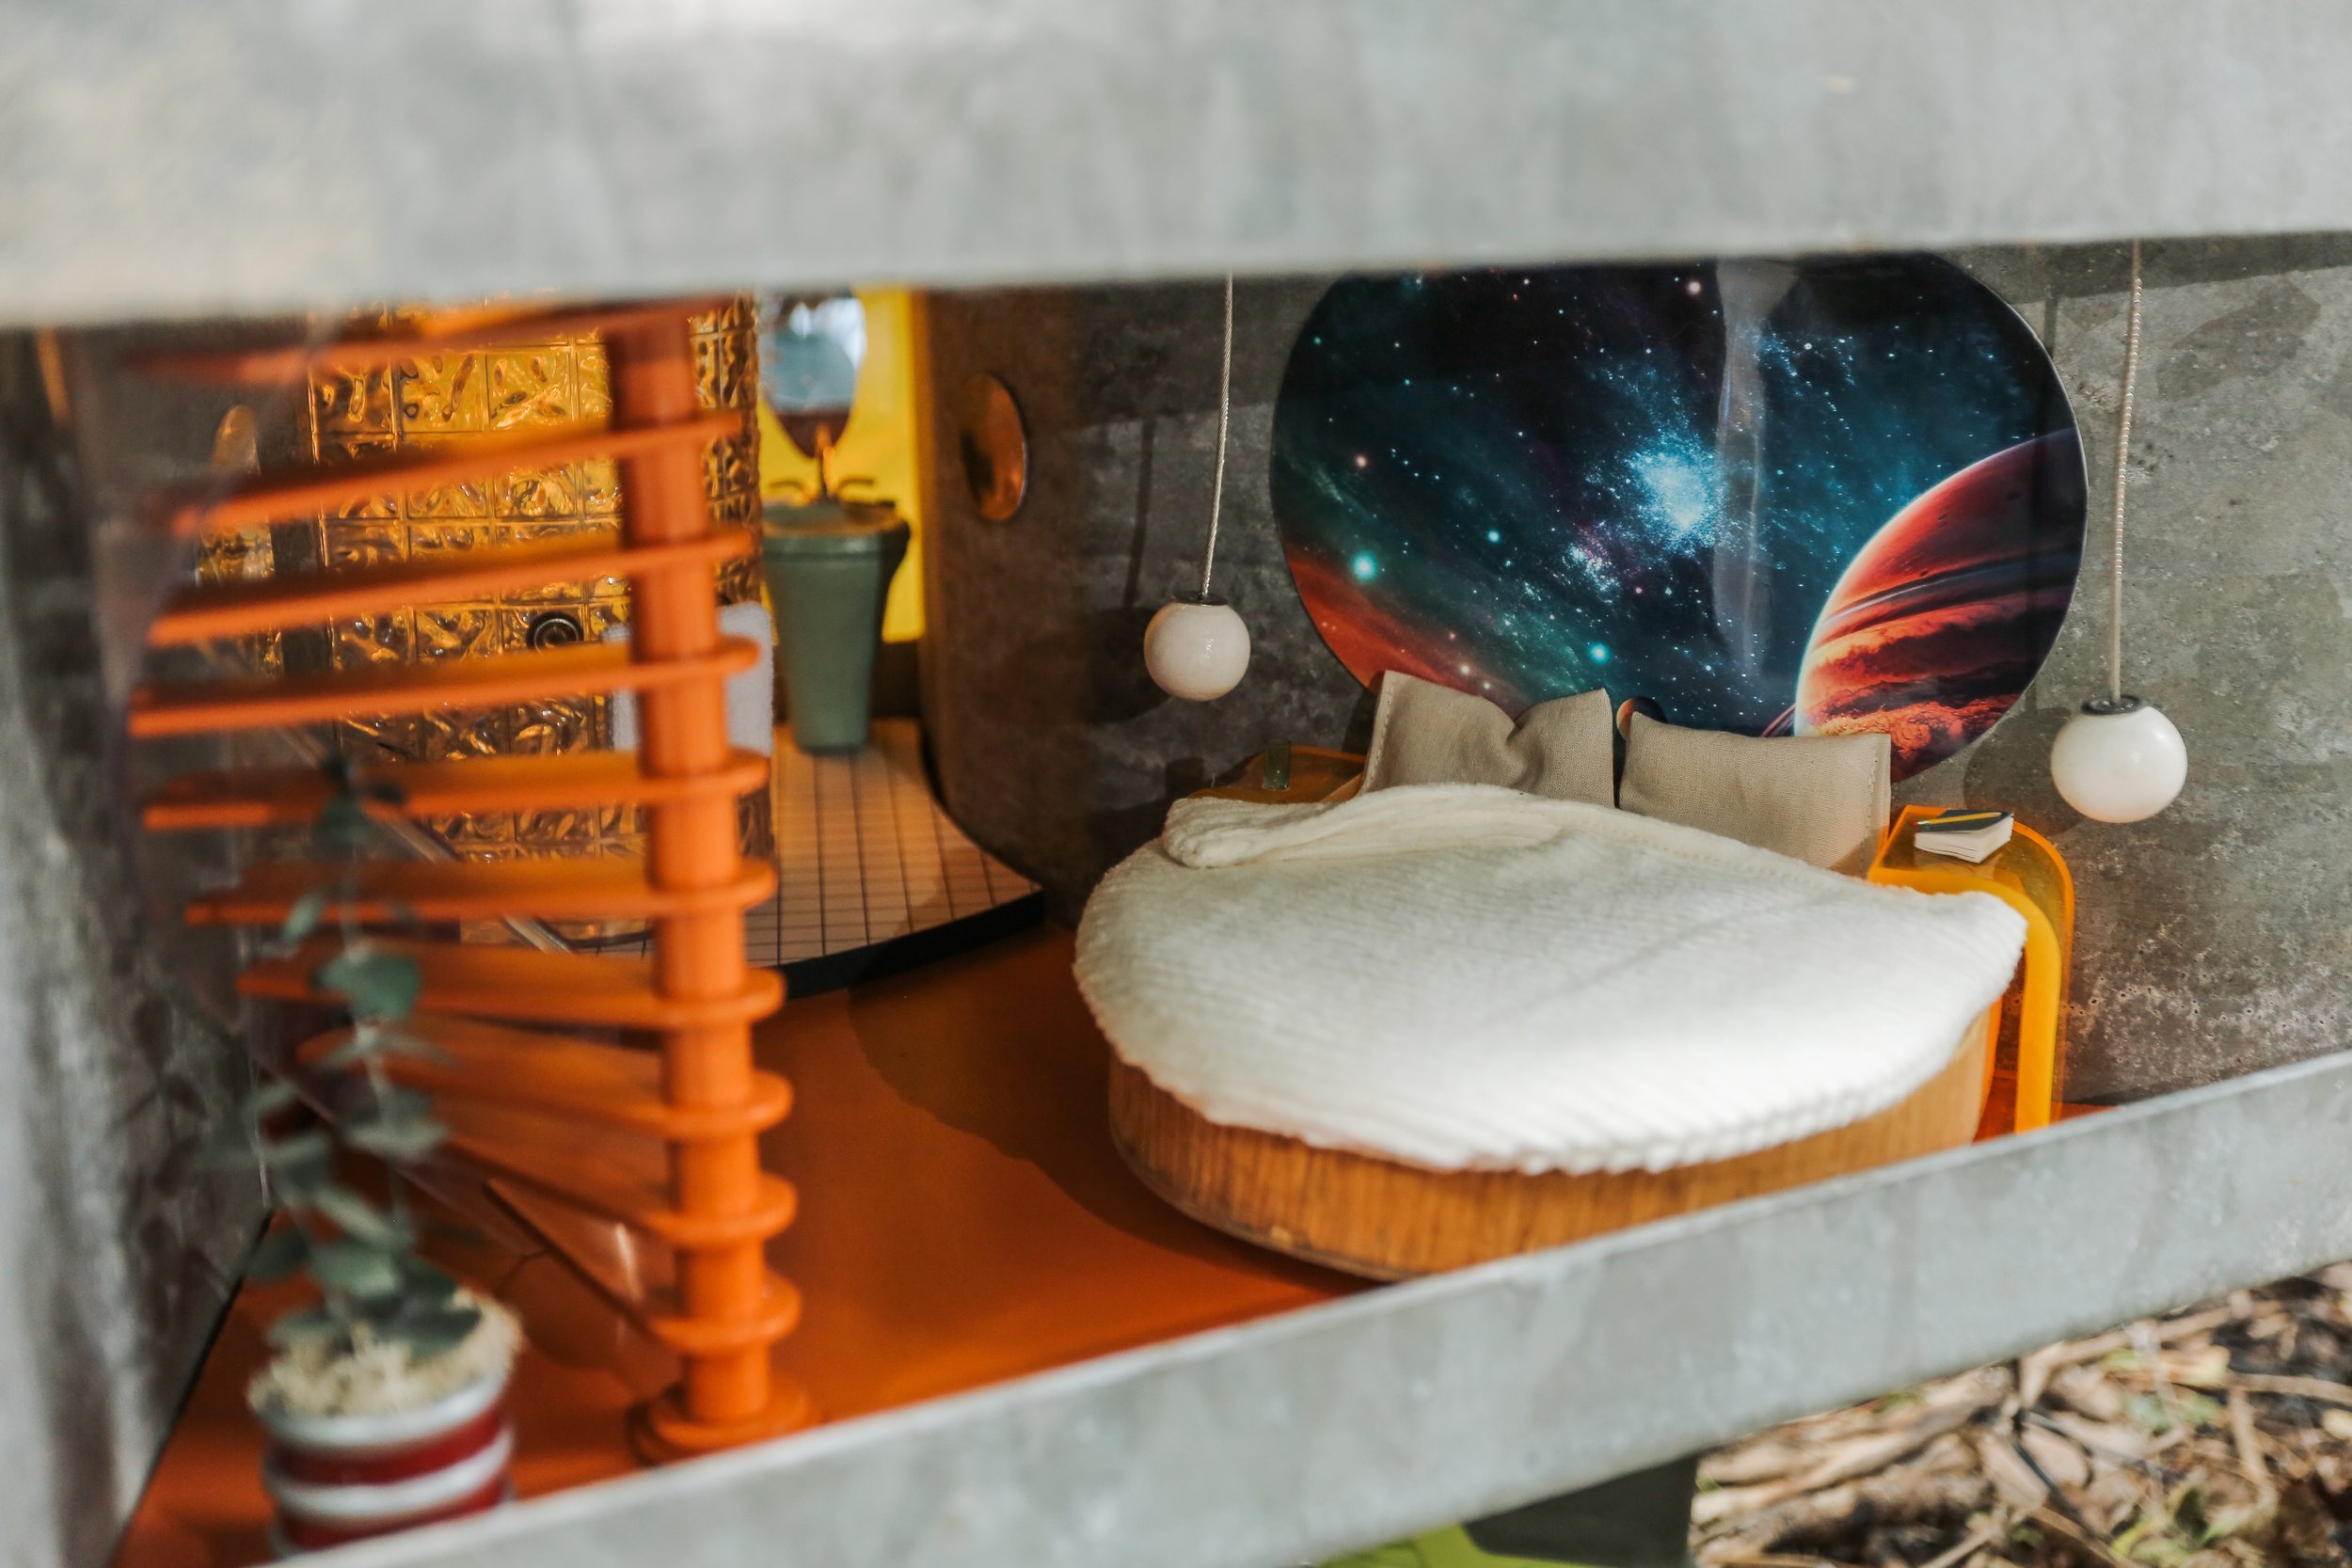
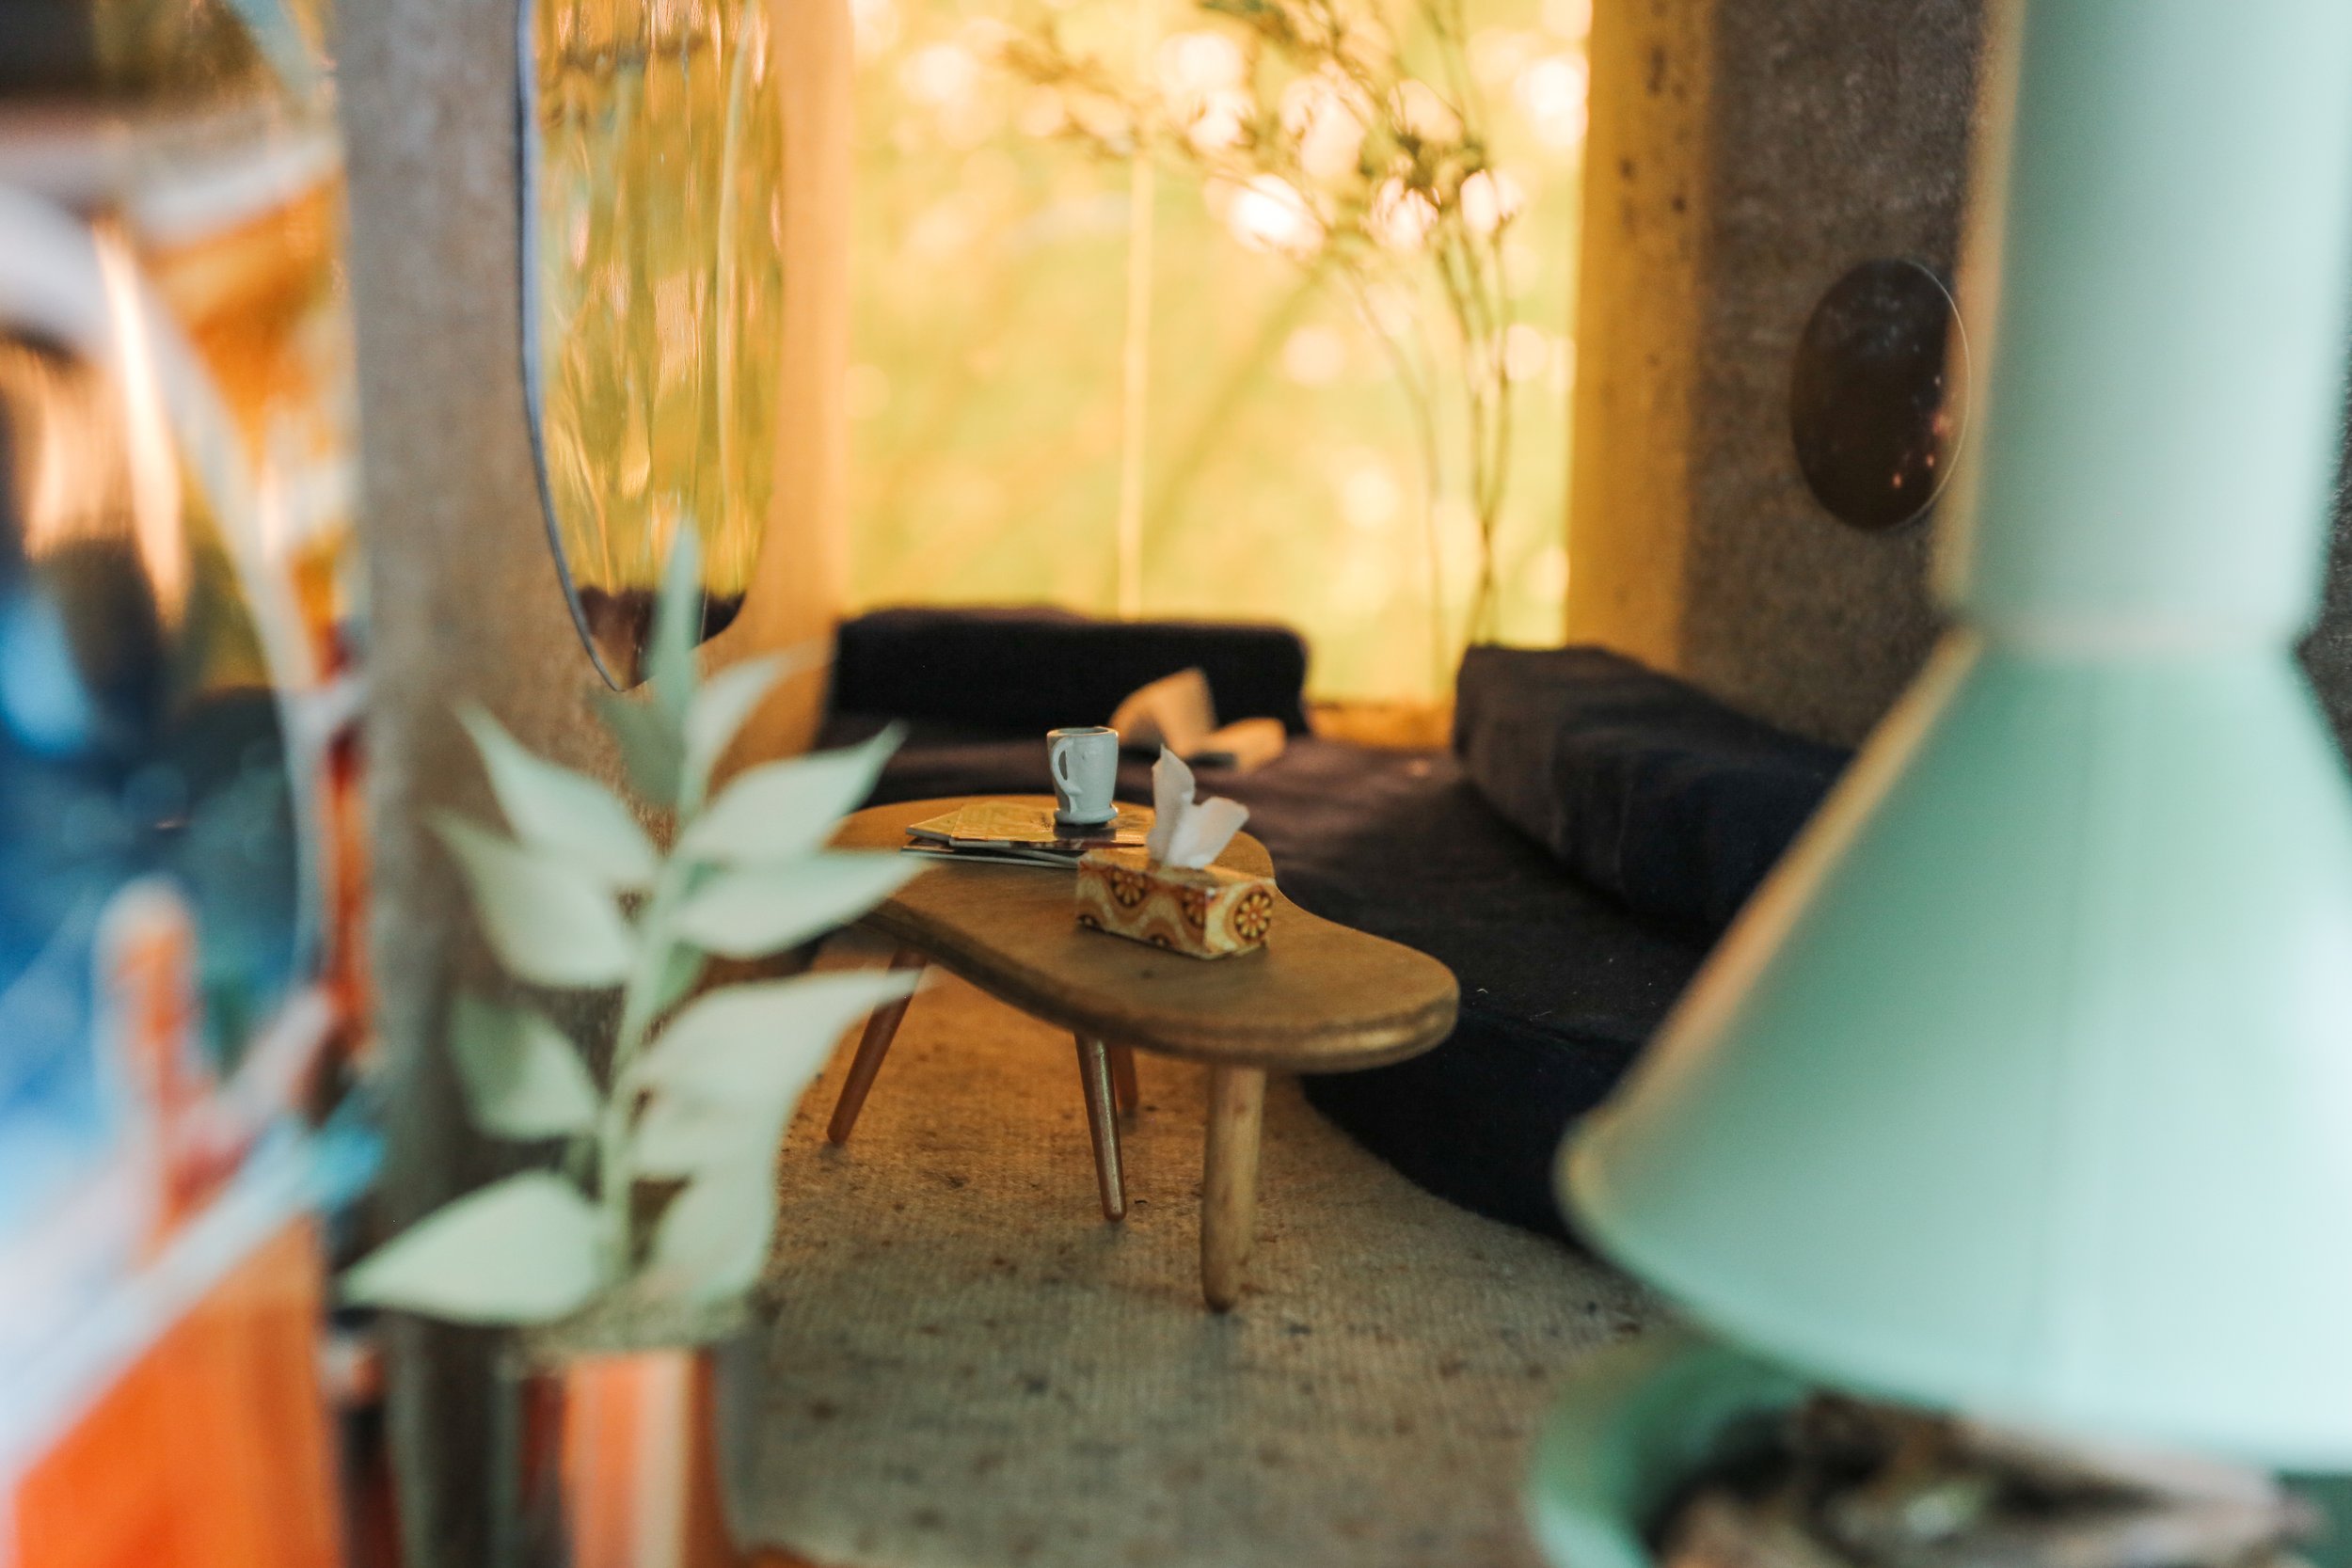
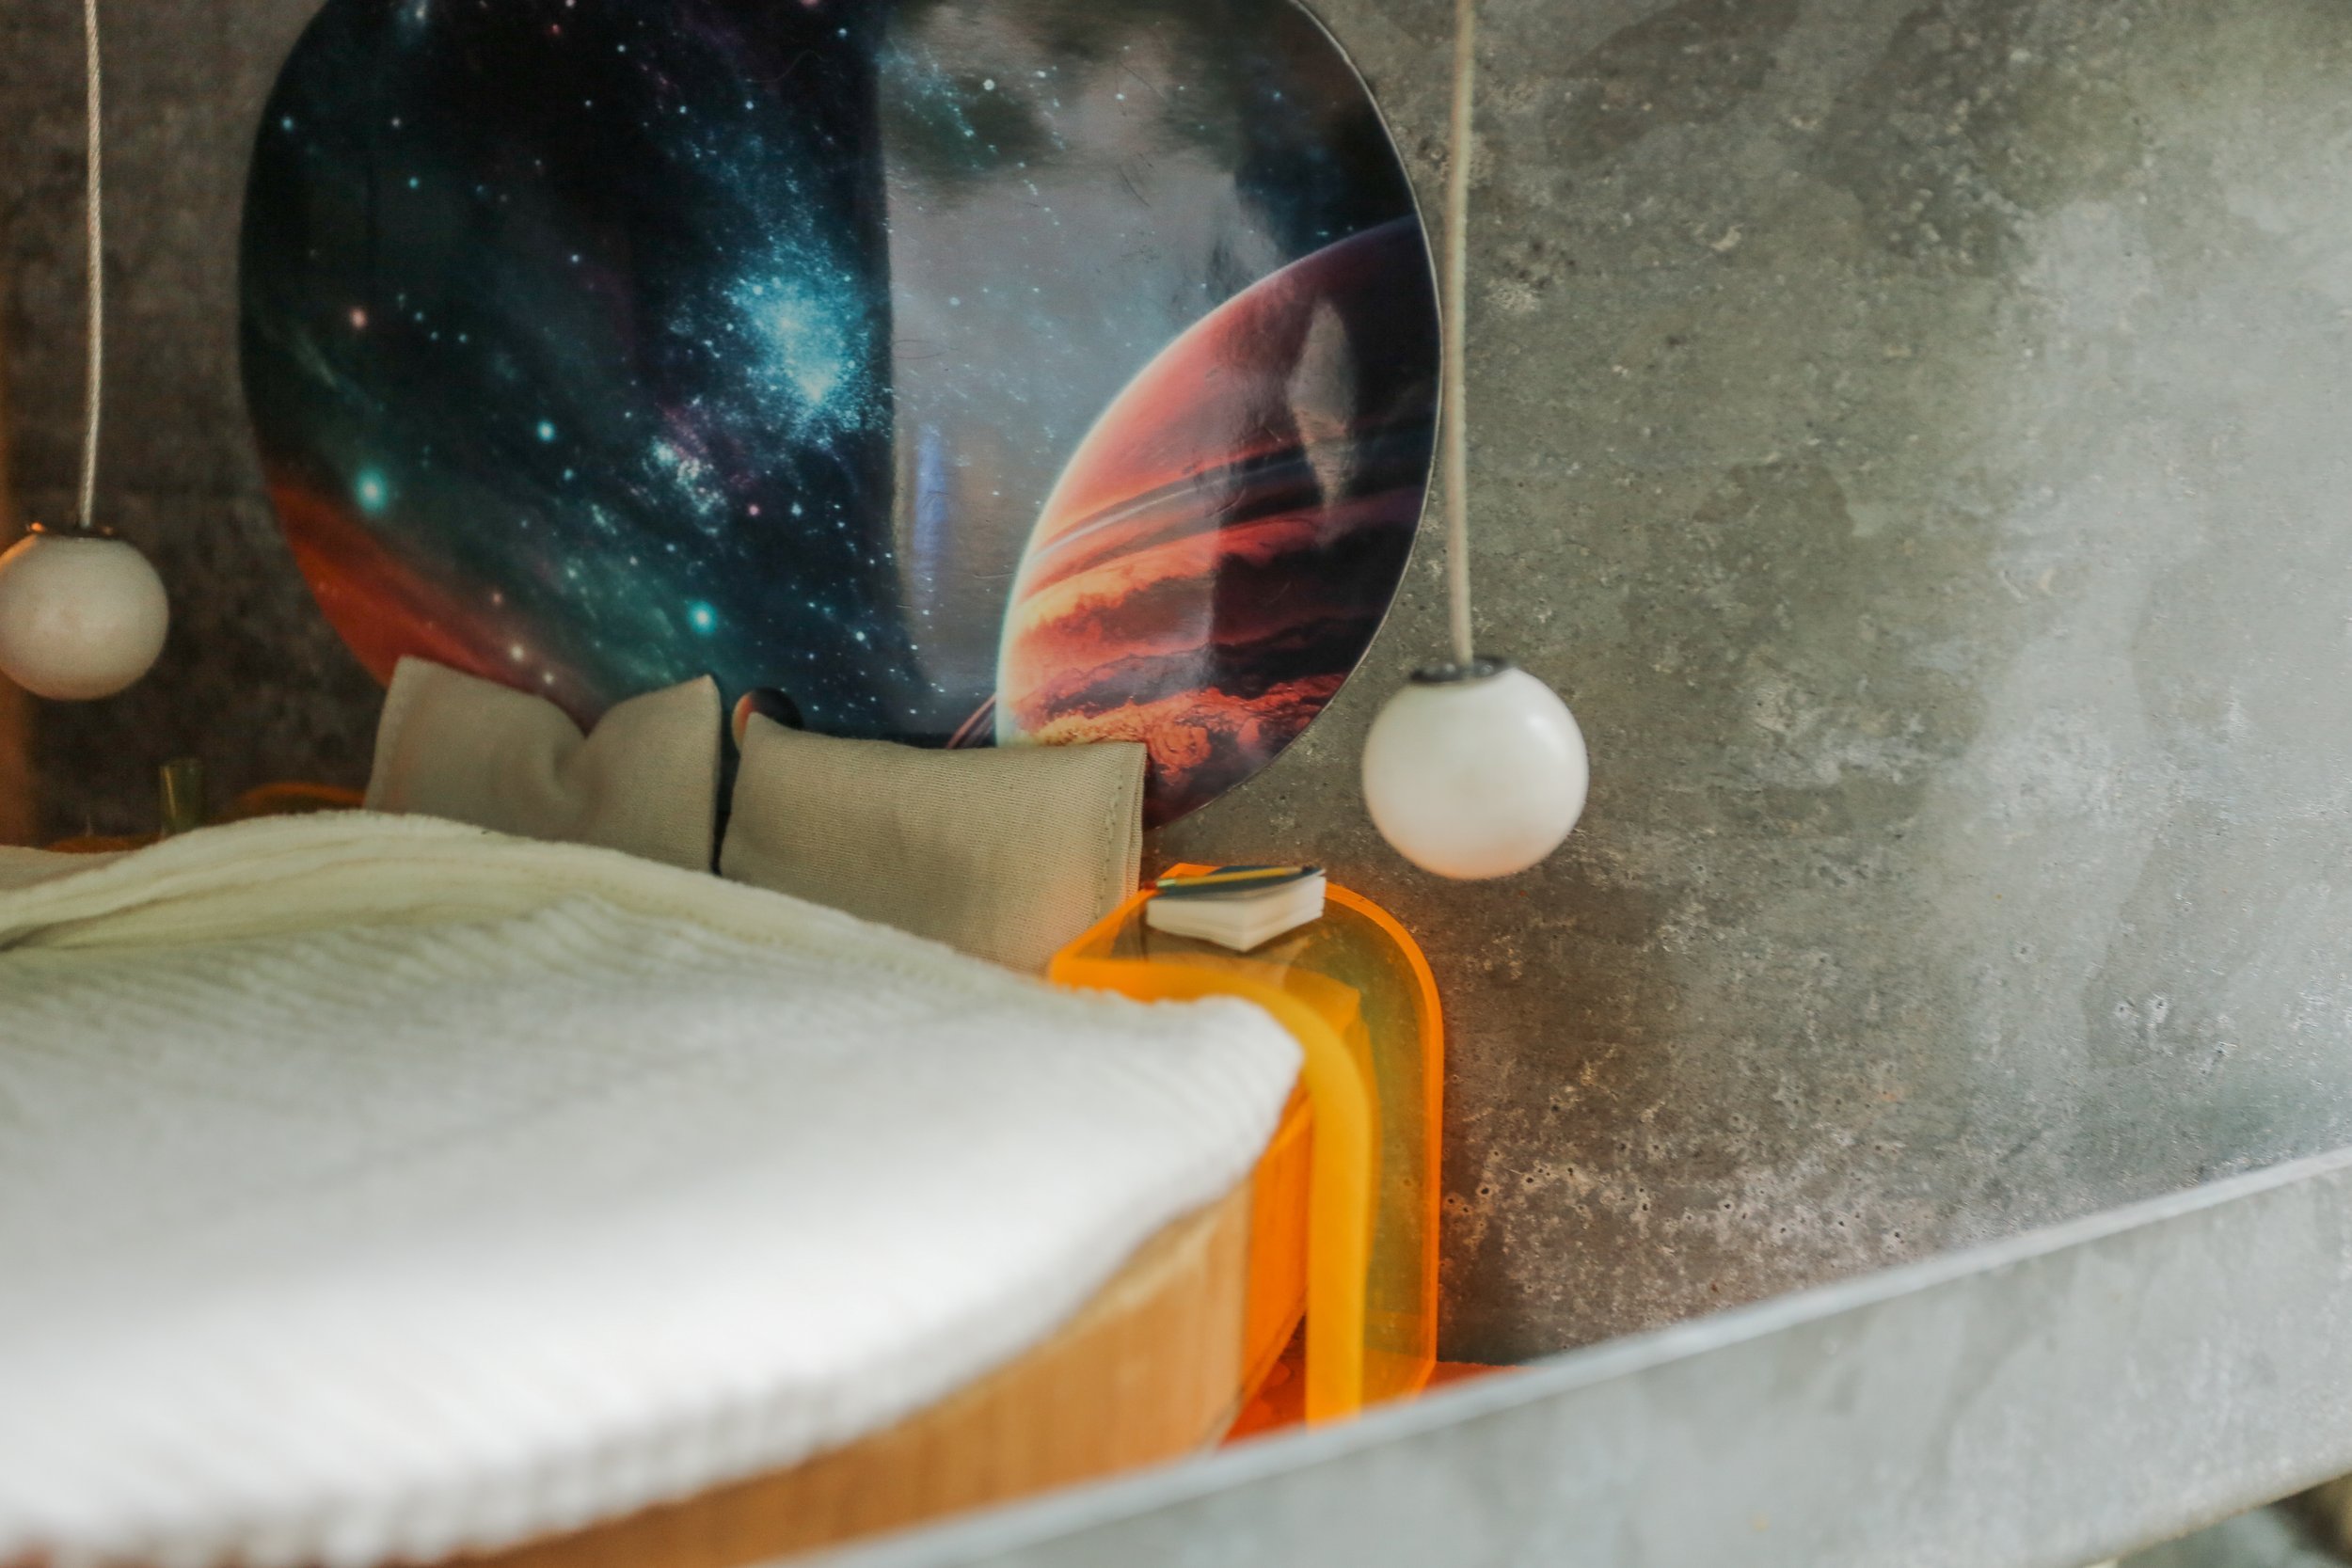
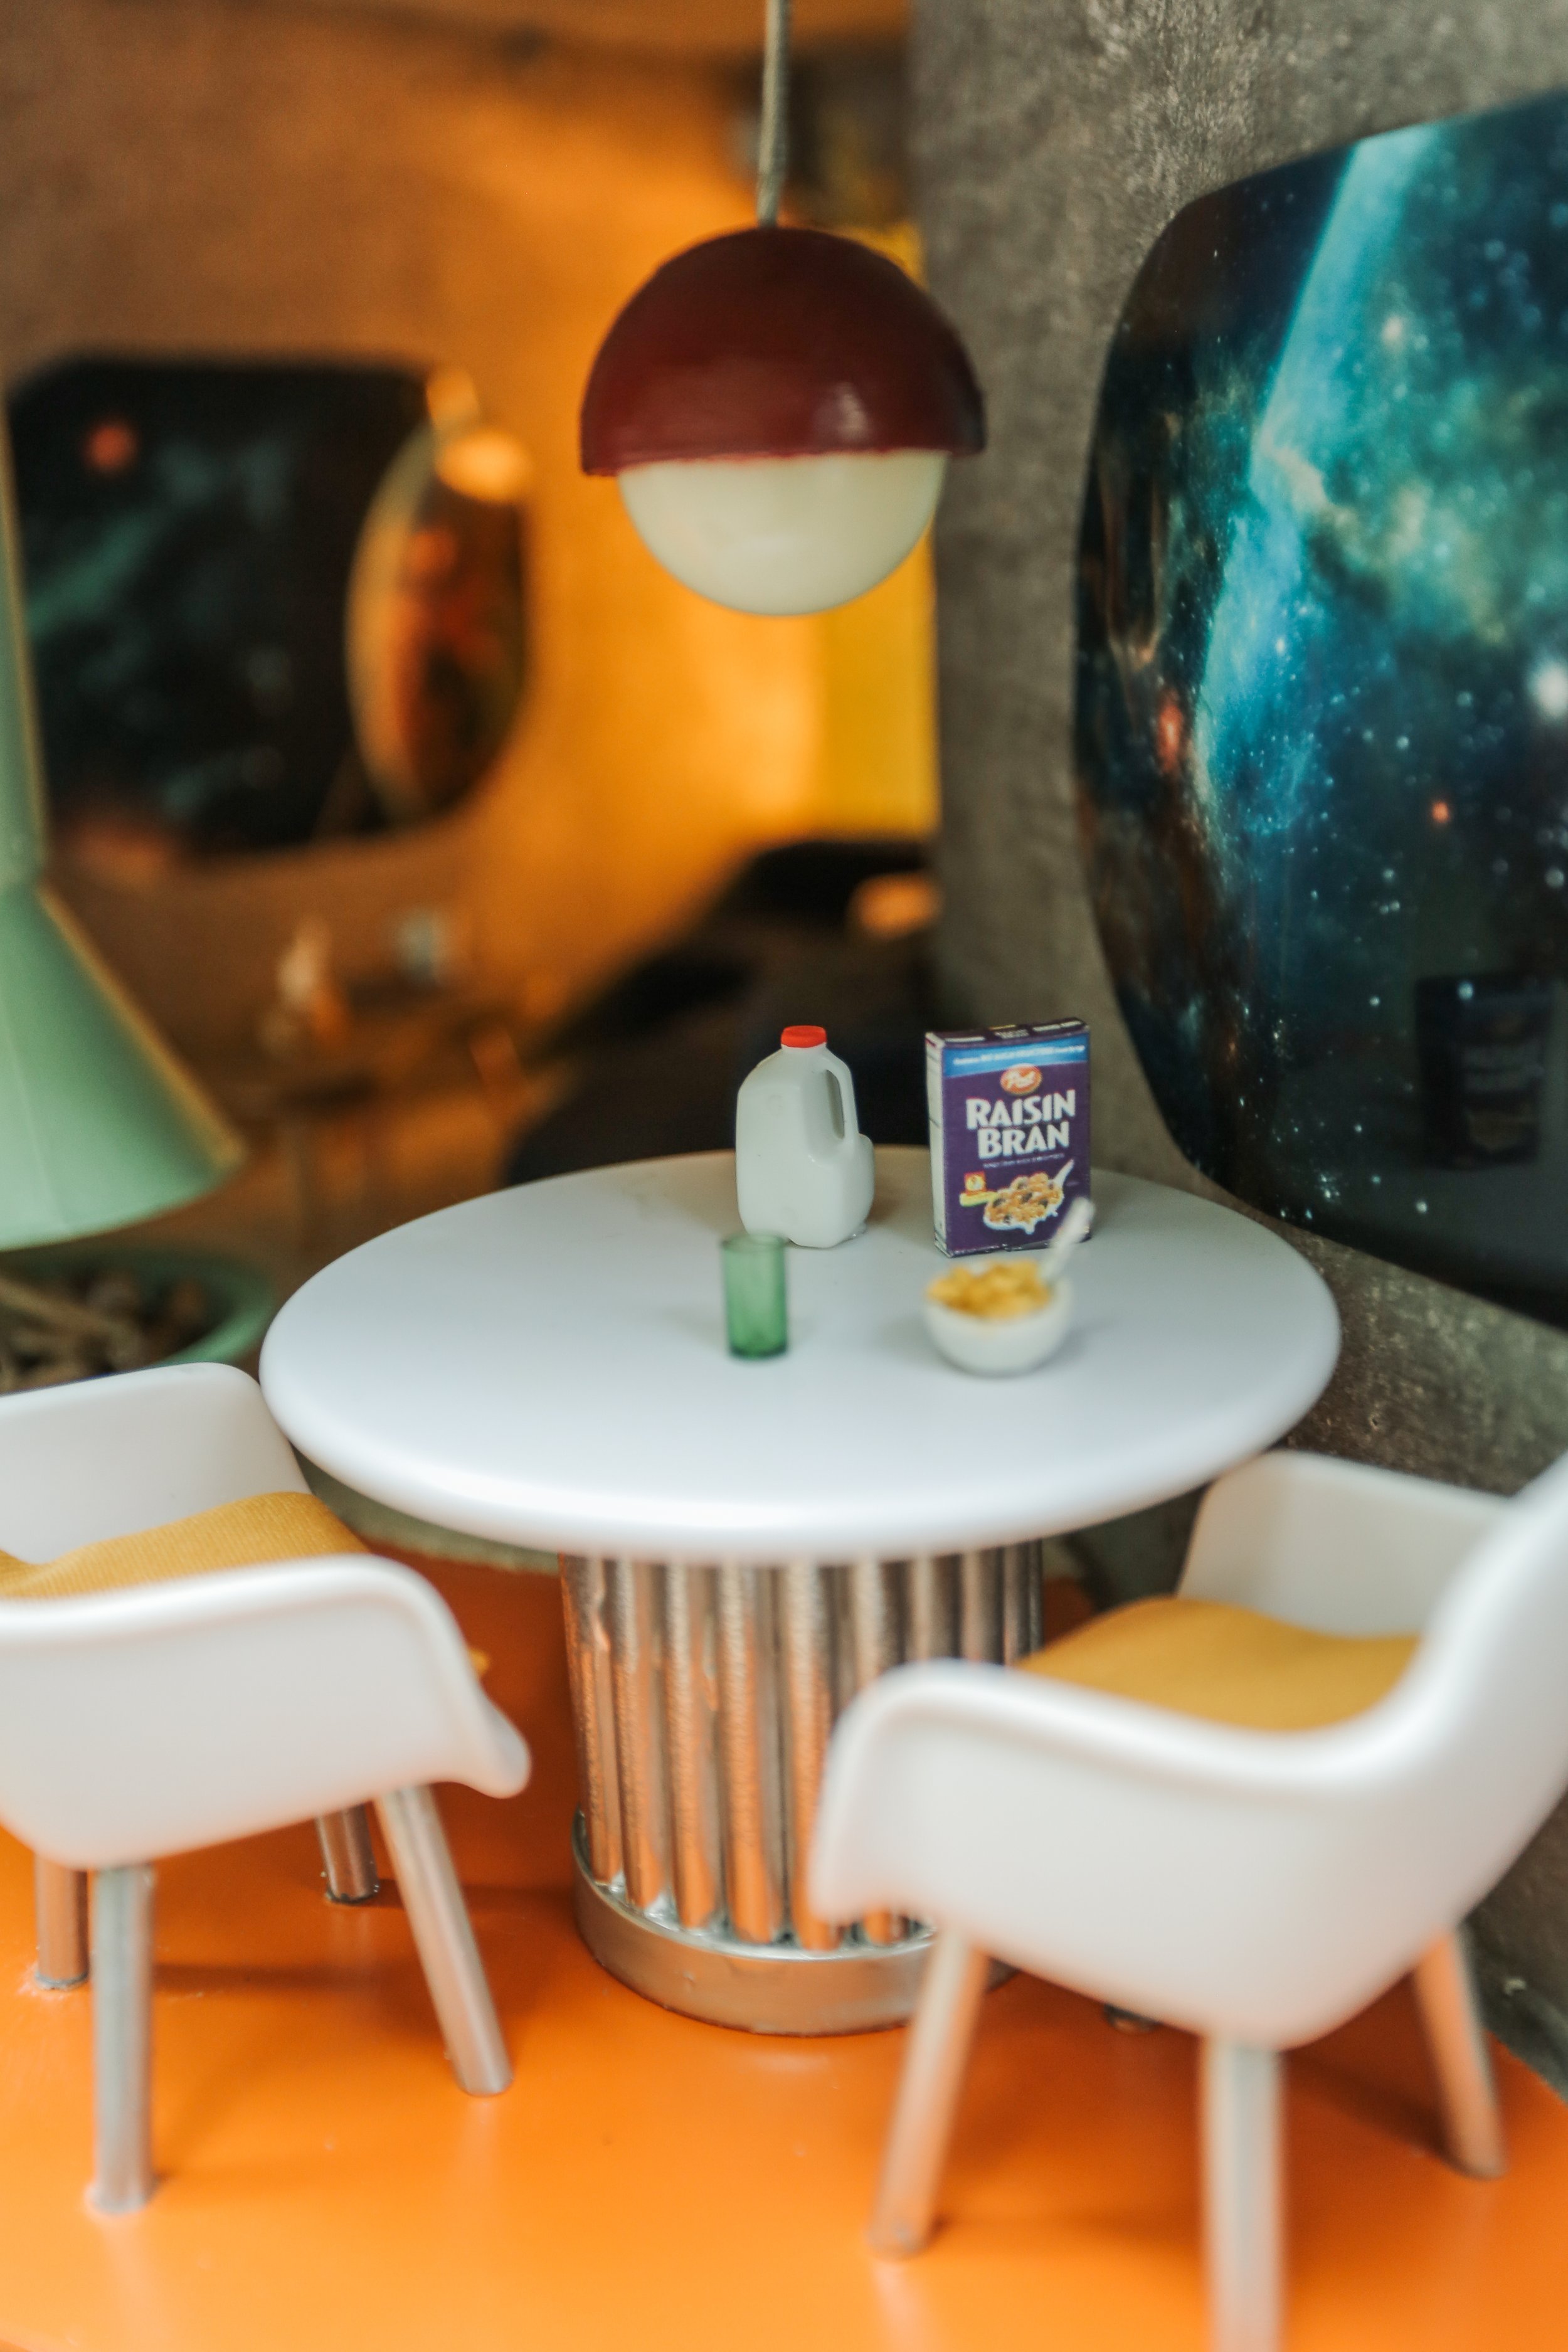
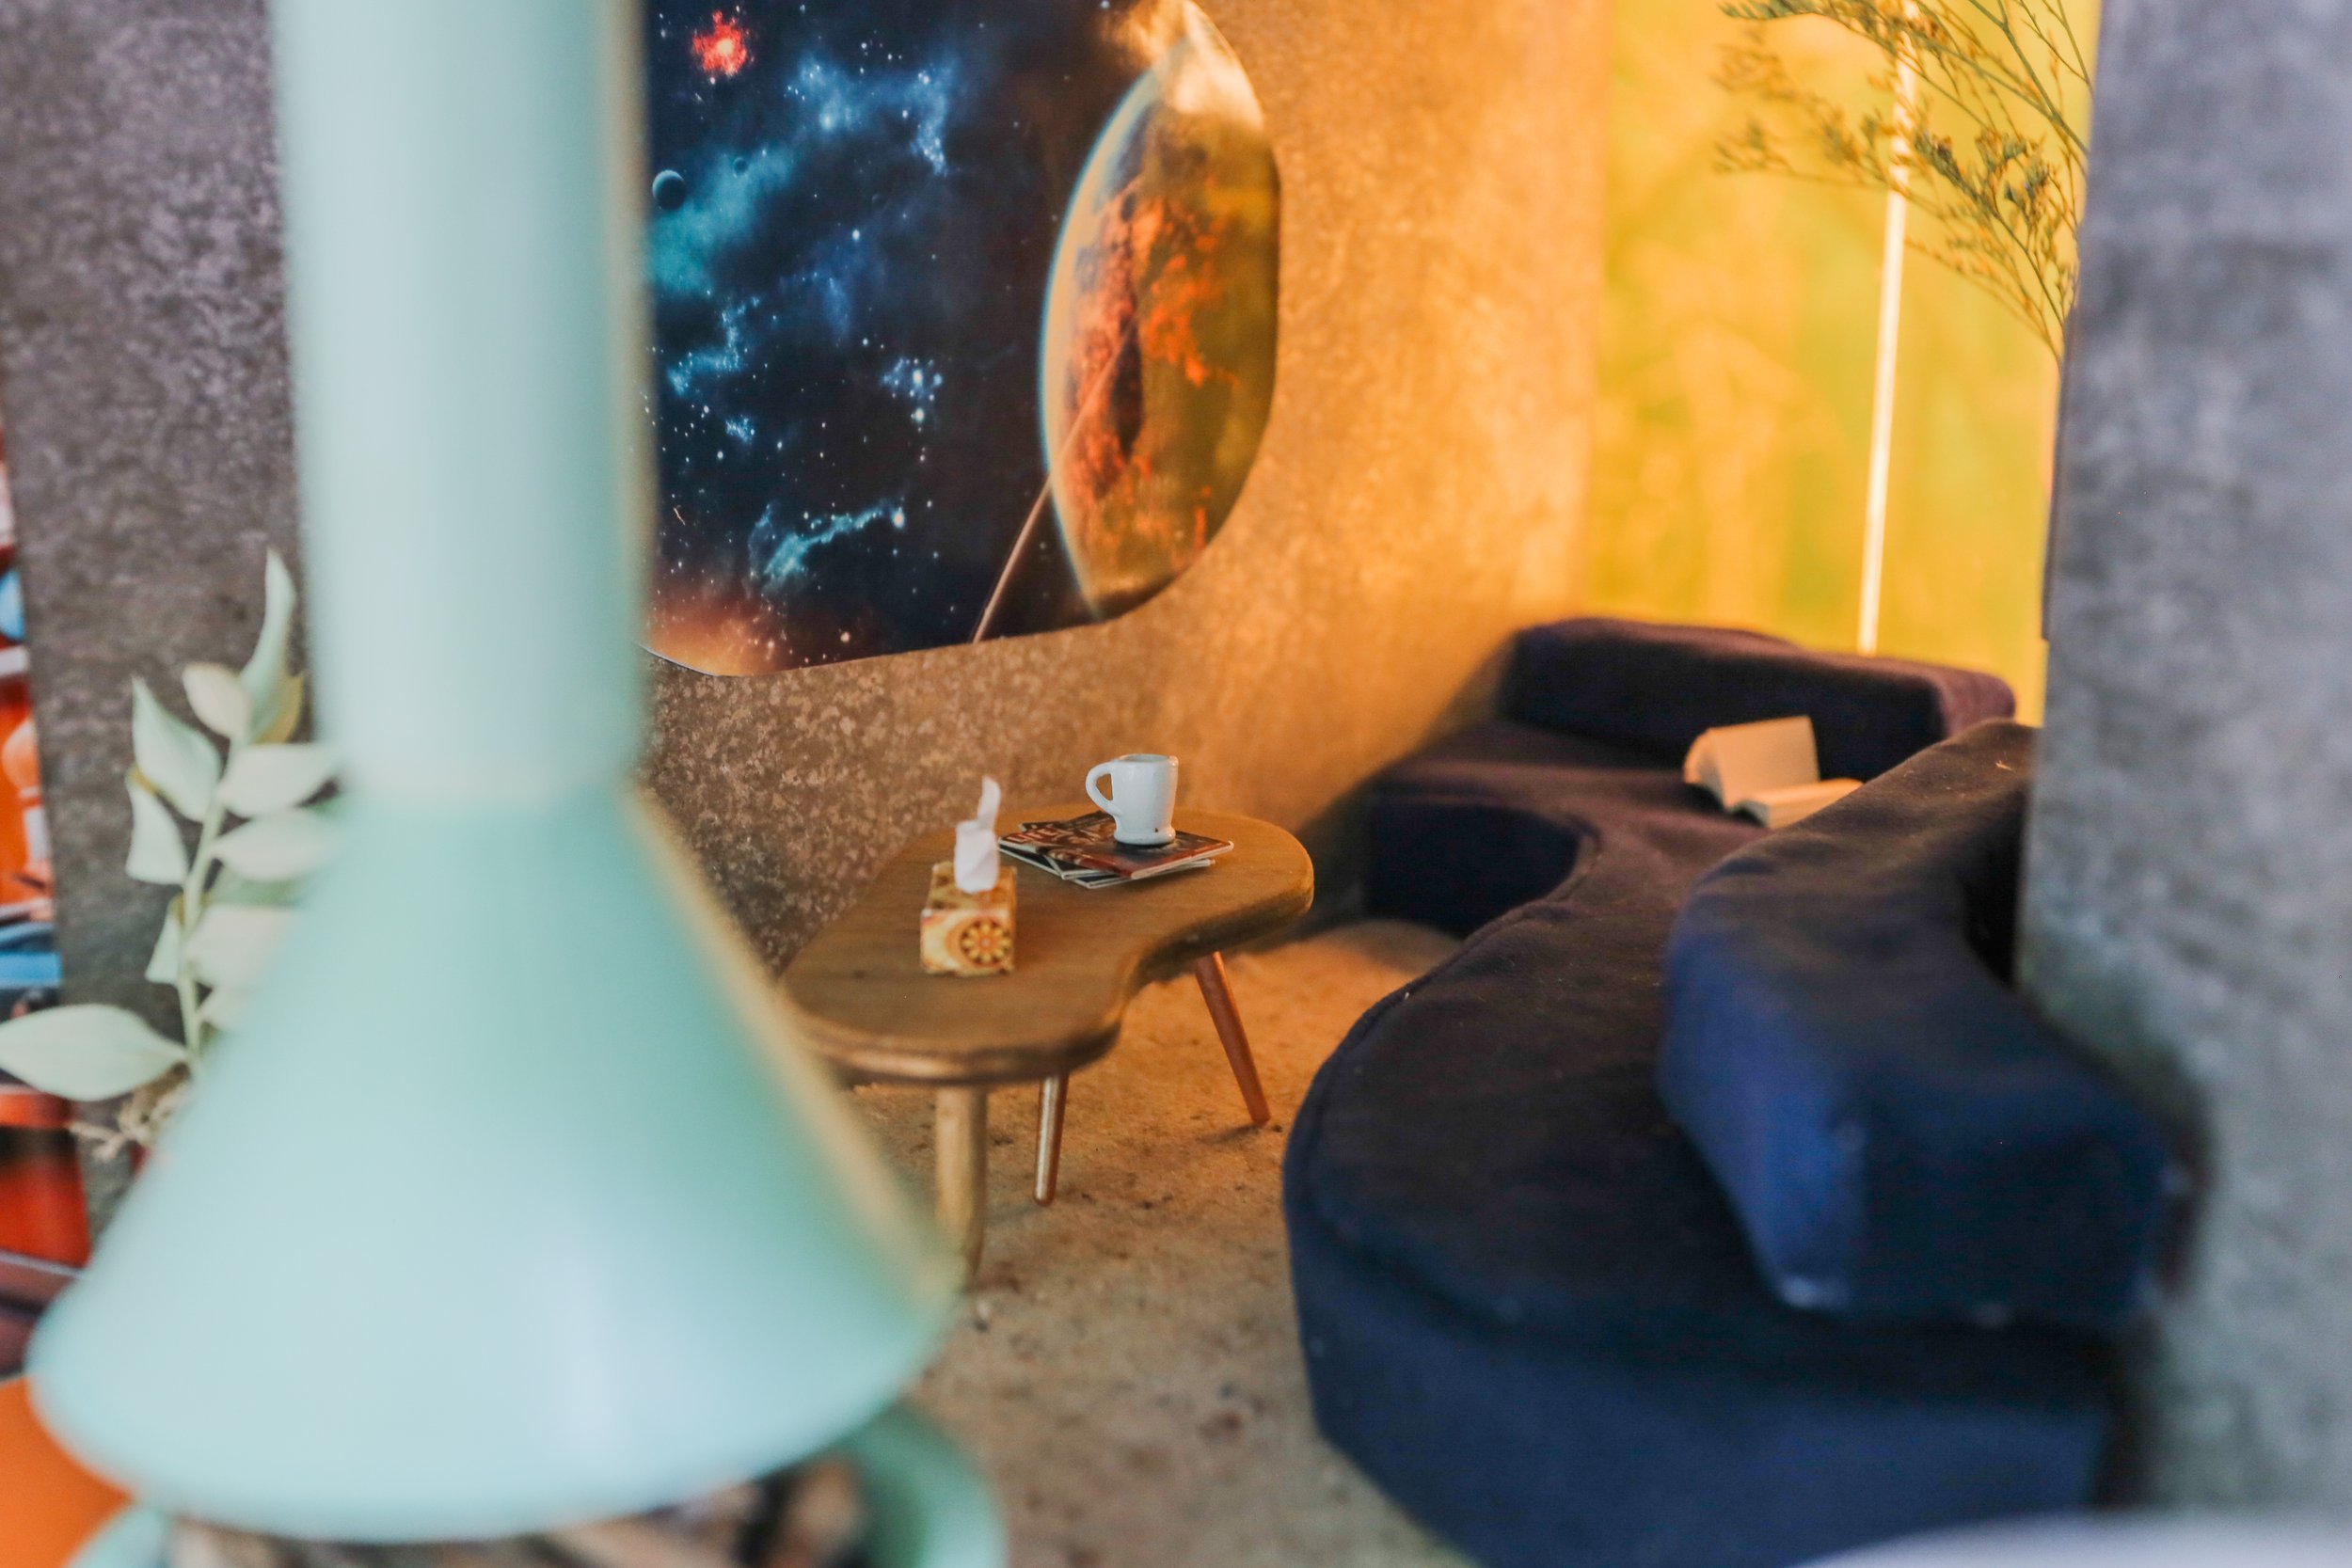
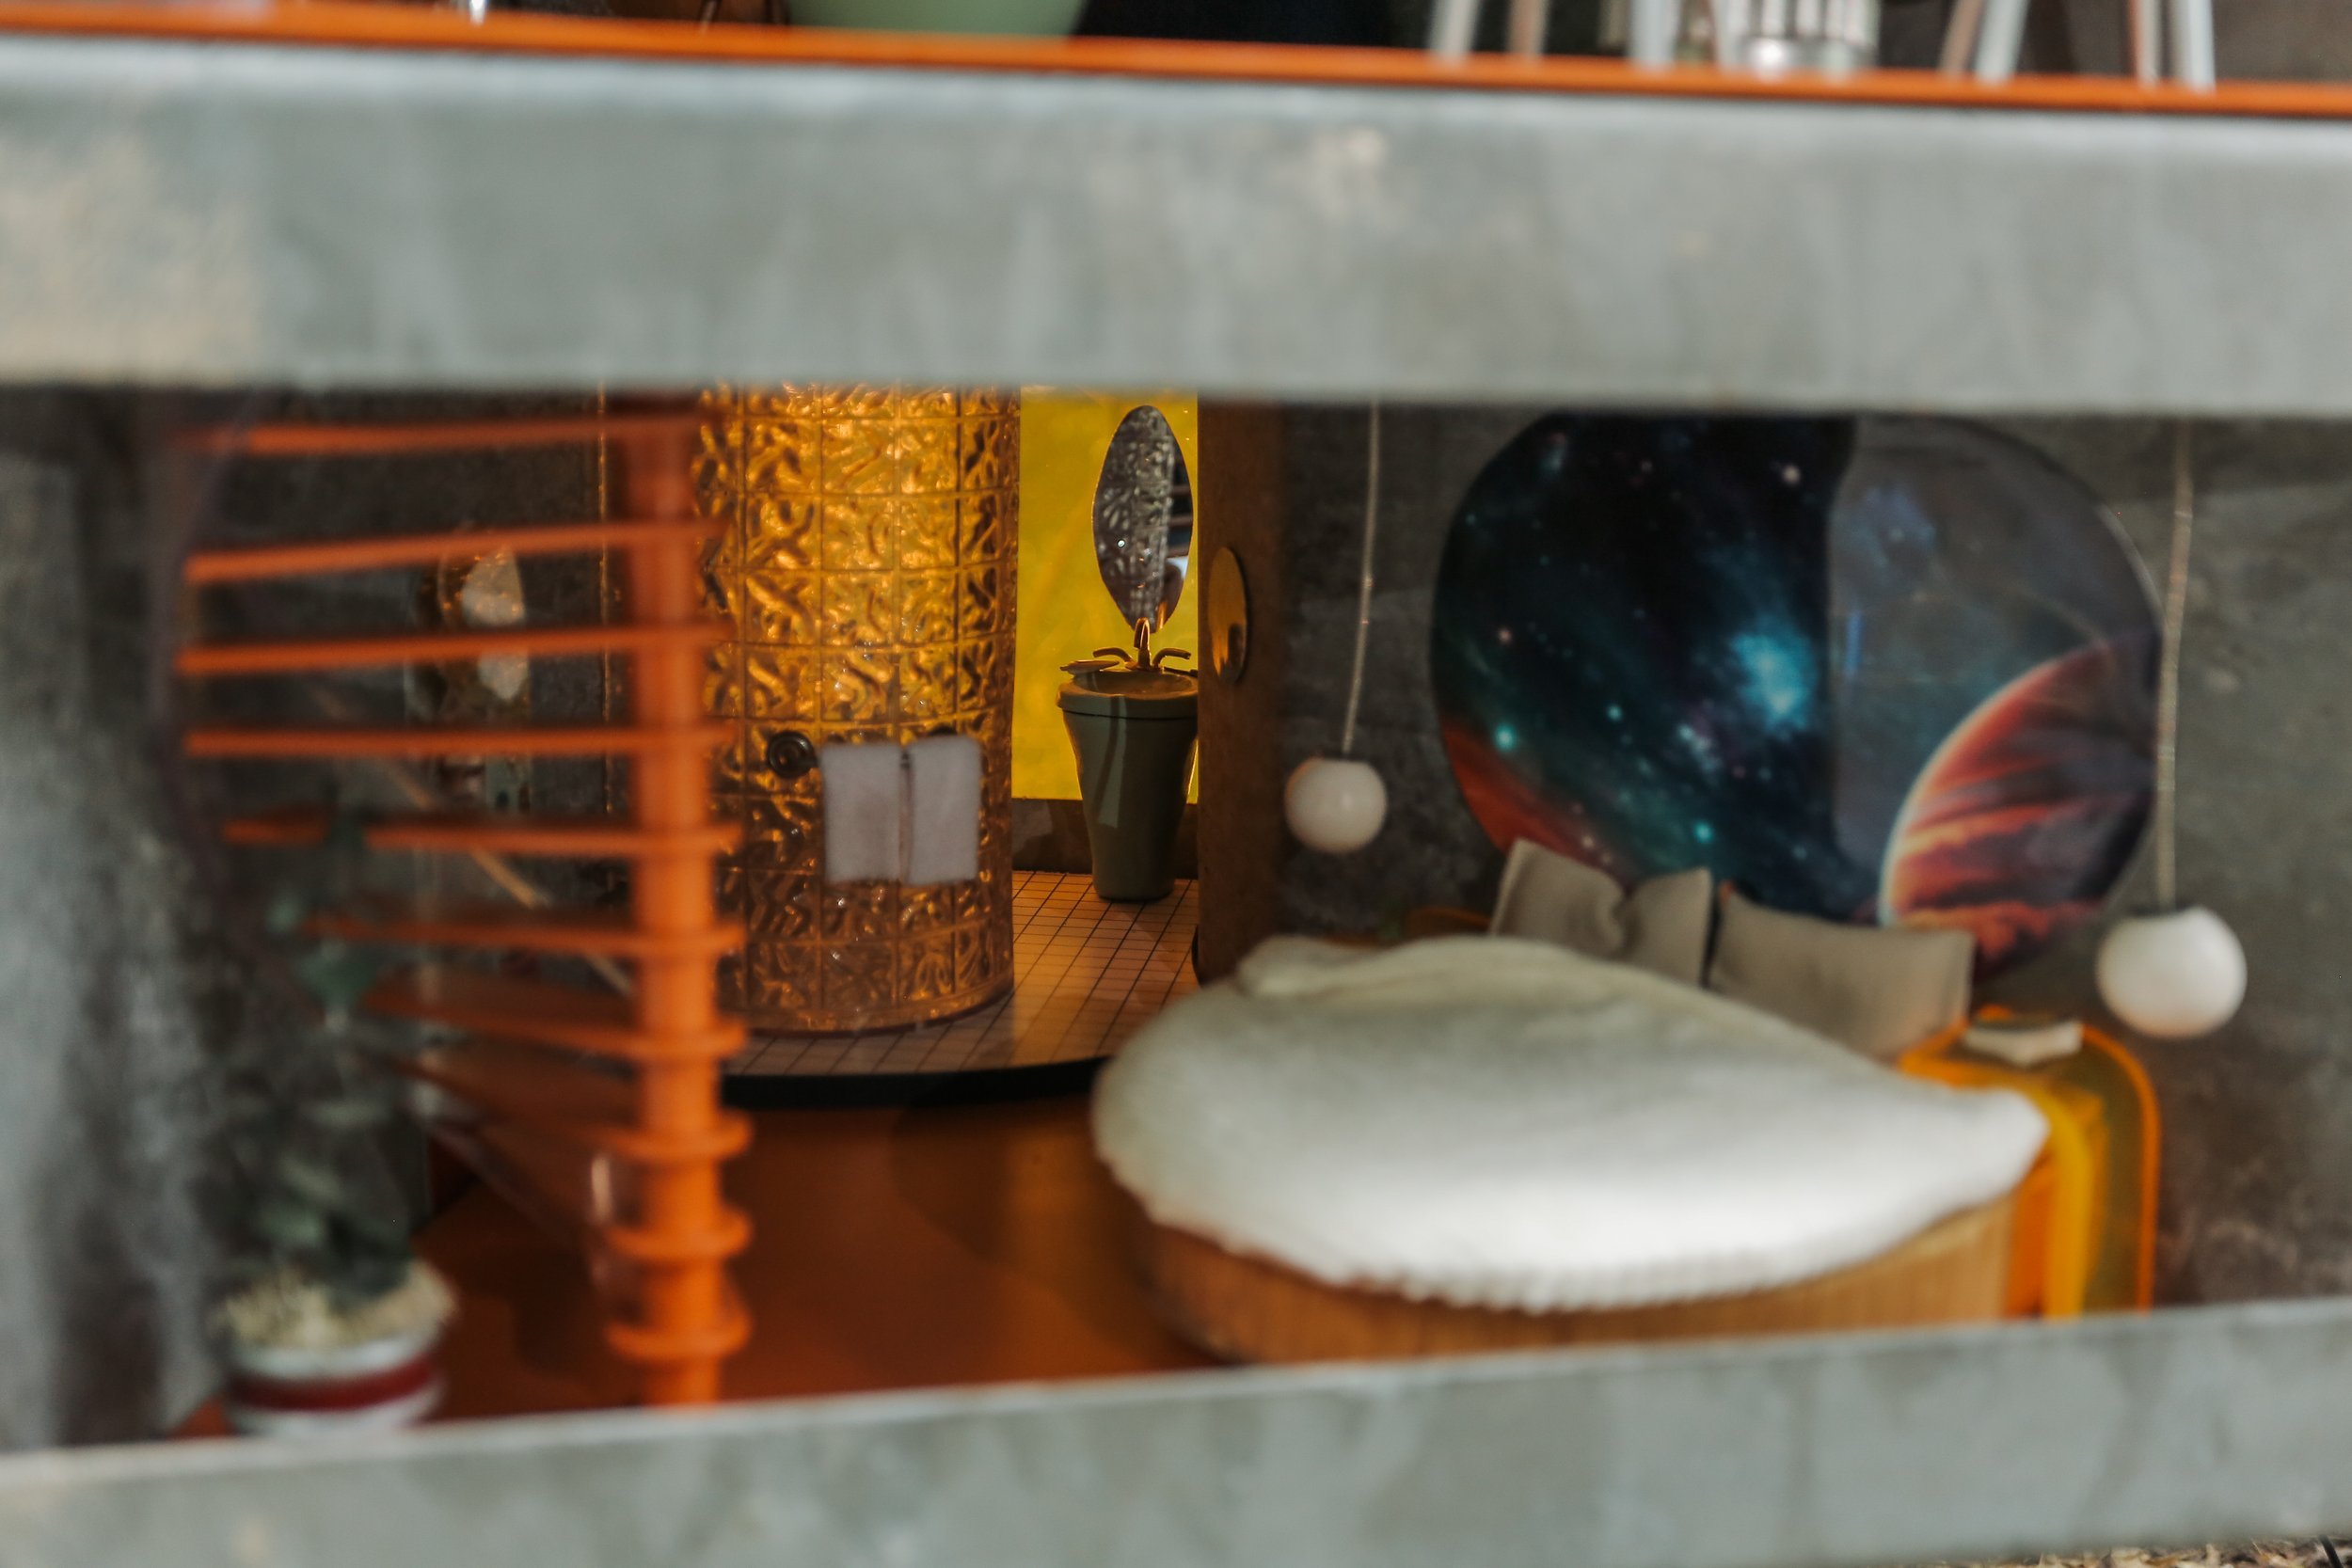
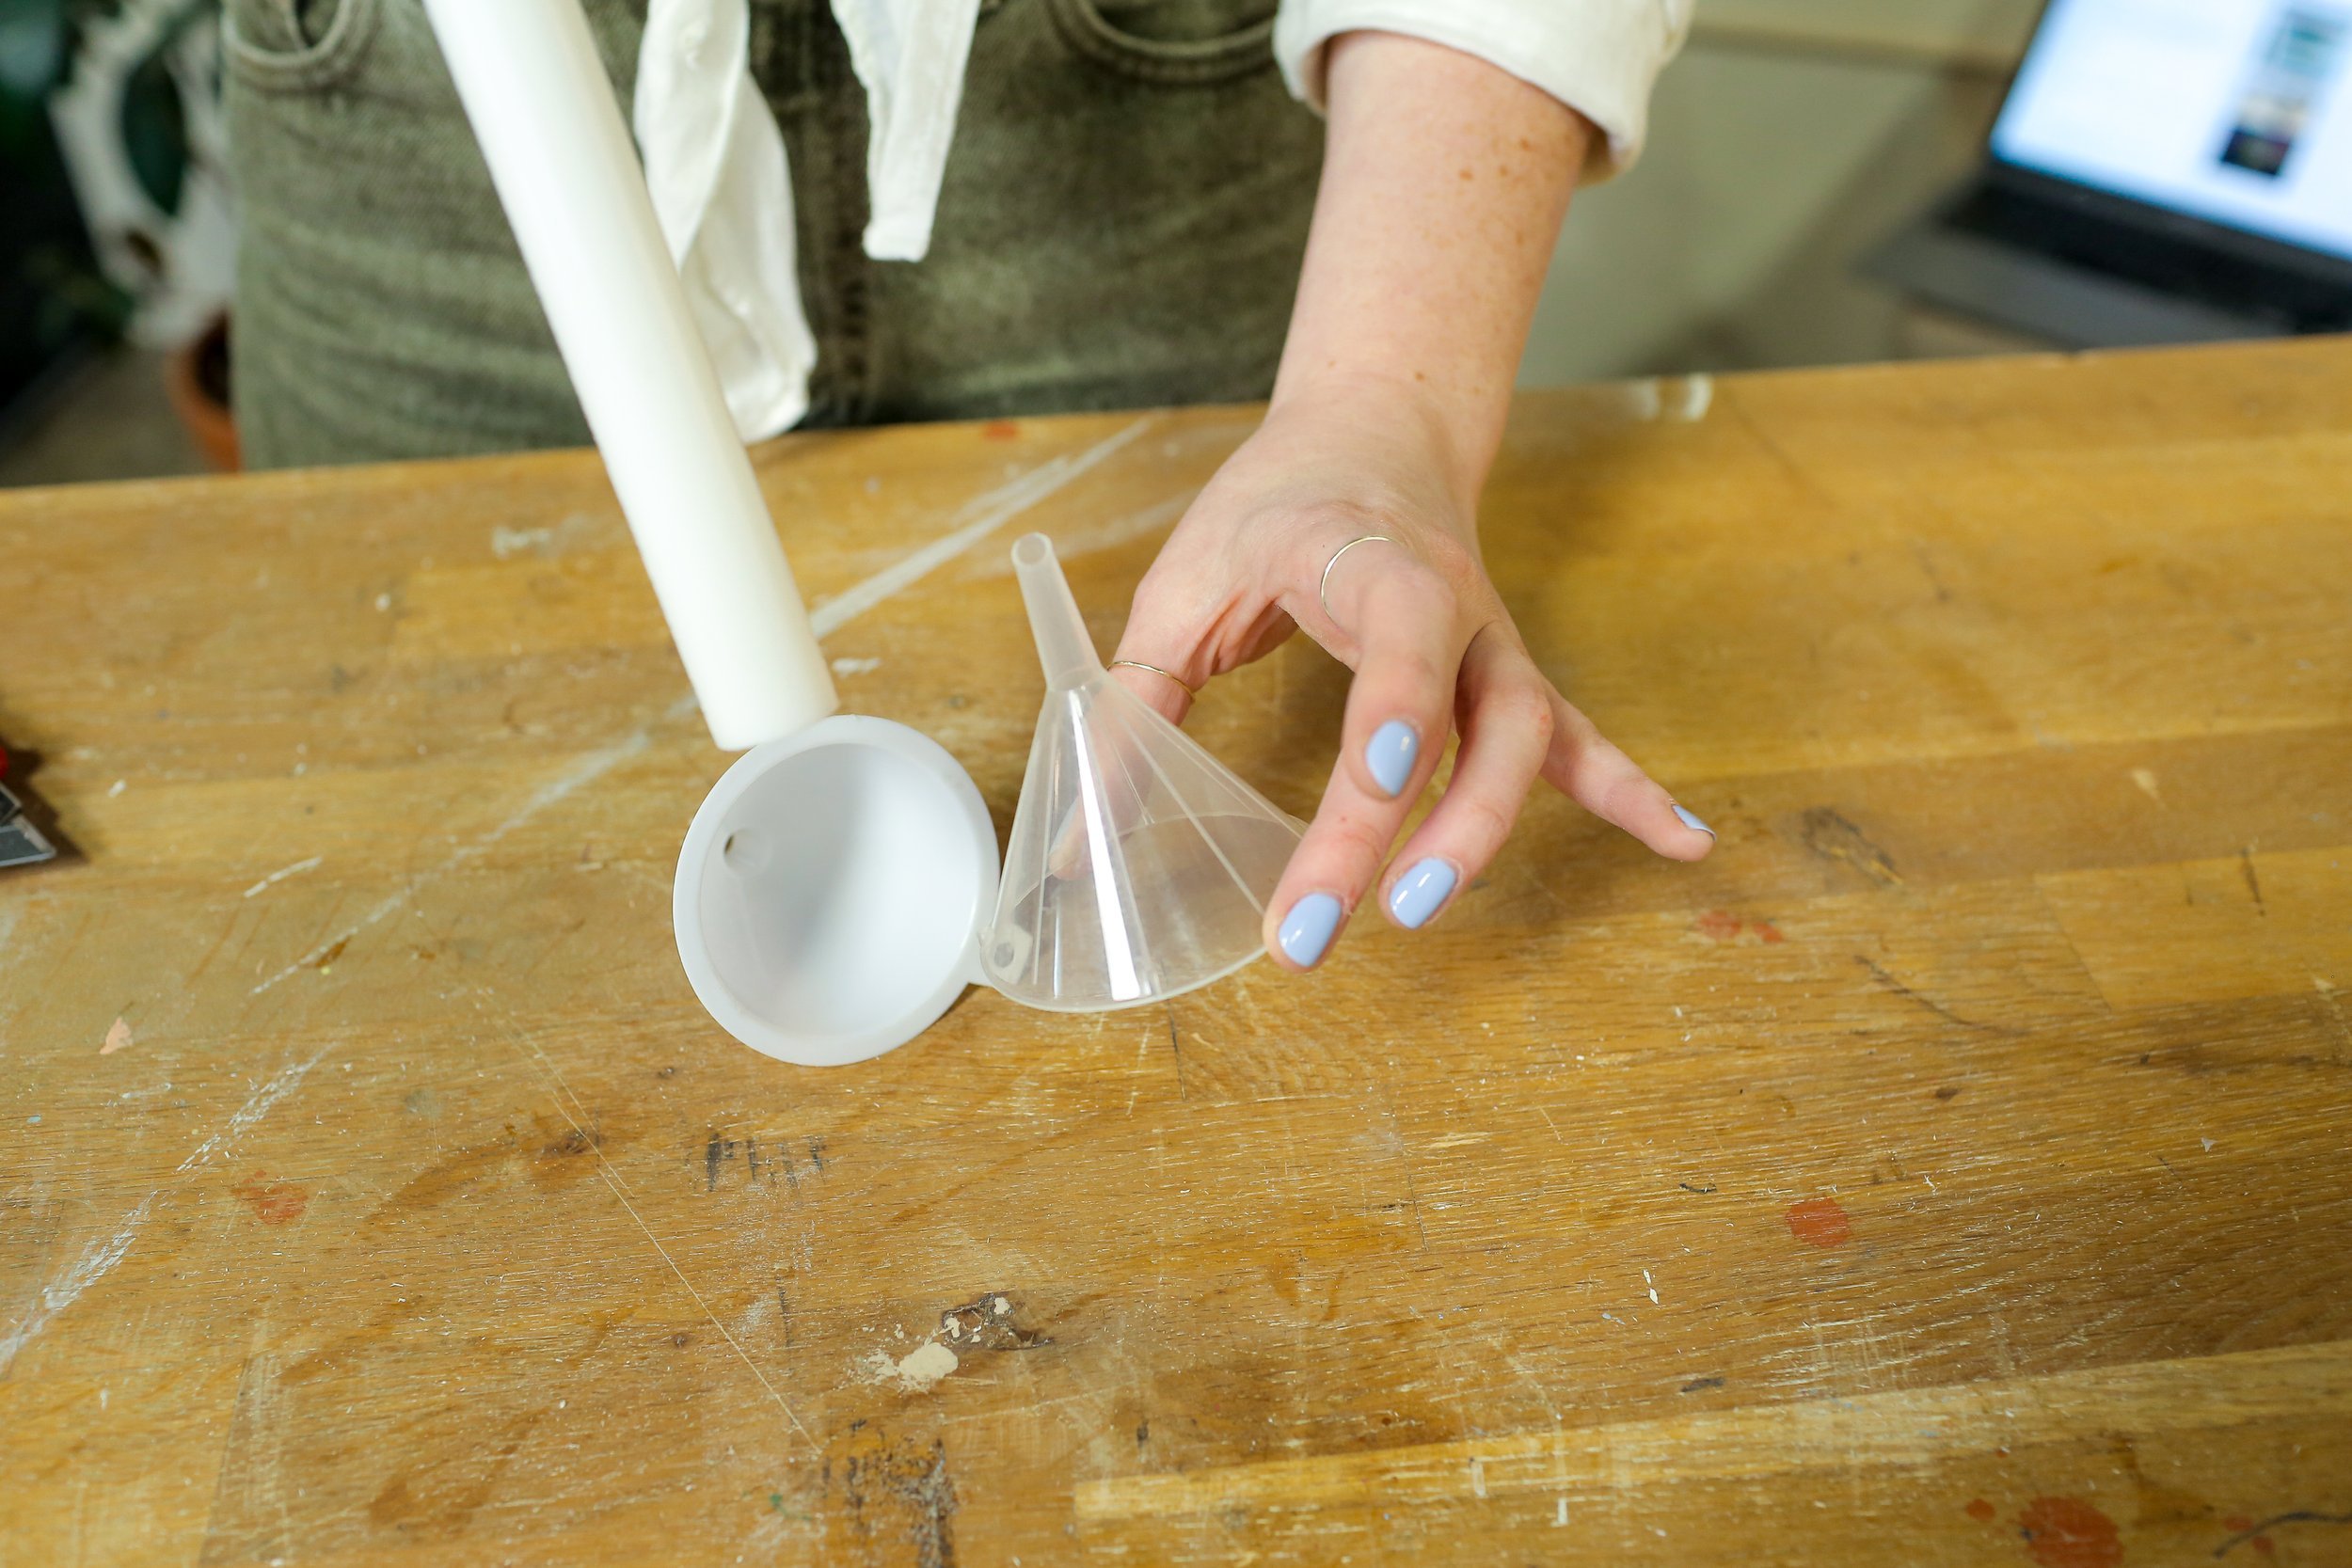
After collecting my materials, I got to building. Aside from up-cycling the secondhand dollhouse, I created a miniature fireplace with old cooking funnels and pipe we had in our office. And used polymer clay to mold a sink and toilet. I also used other items from around our office like old tinted acrylic sheets to add colour for the desired ambiance. Every detail mattered, and I was committed to leaving no stone unturned.


The Final Installation
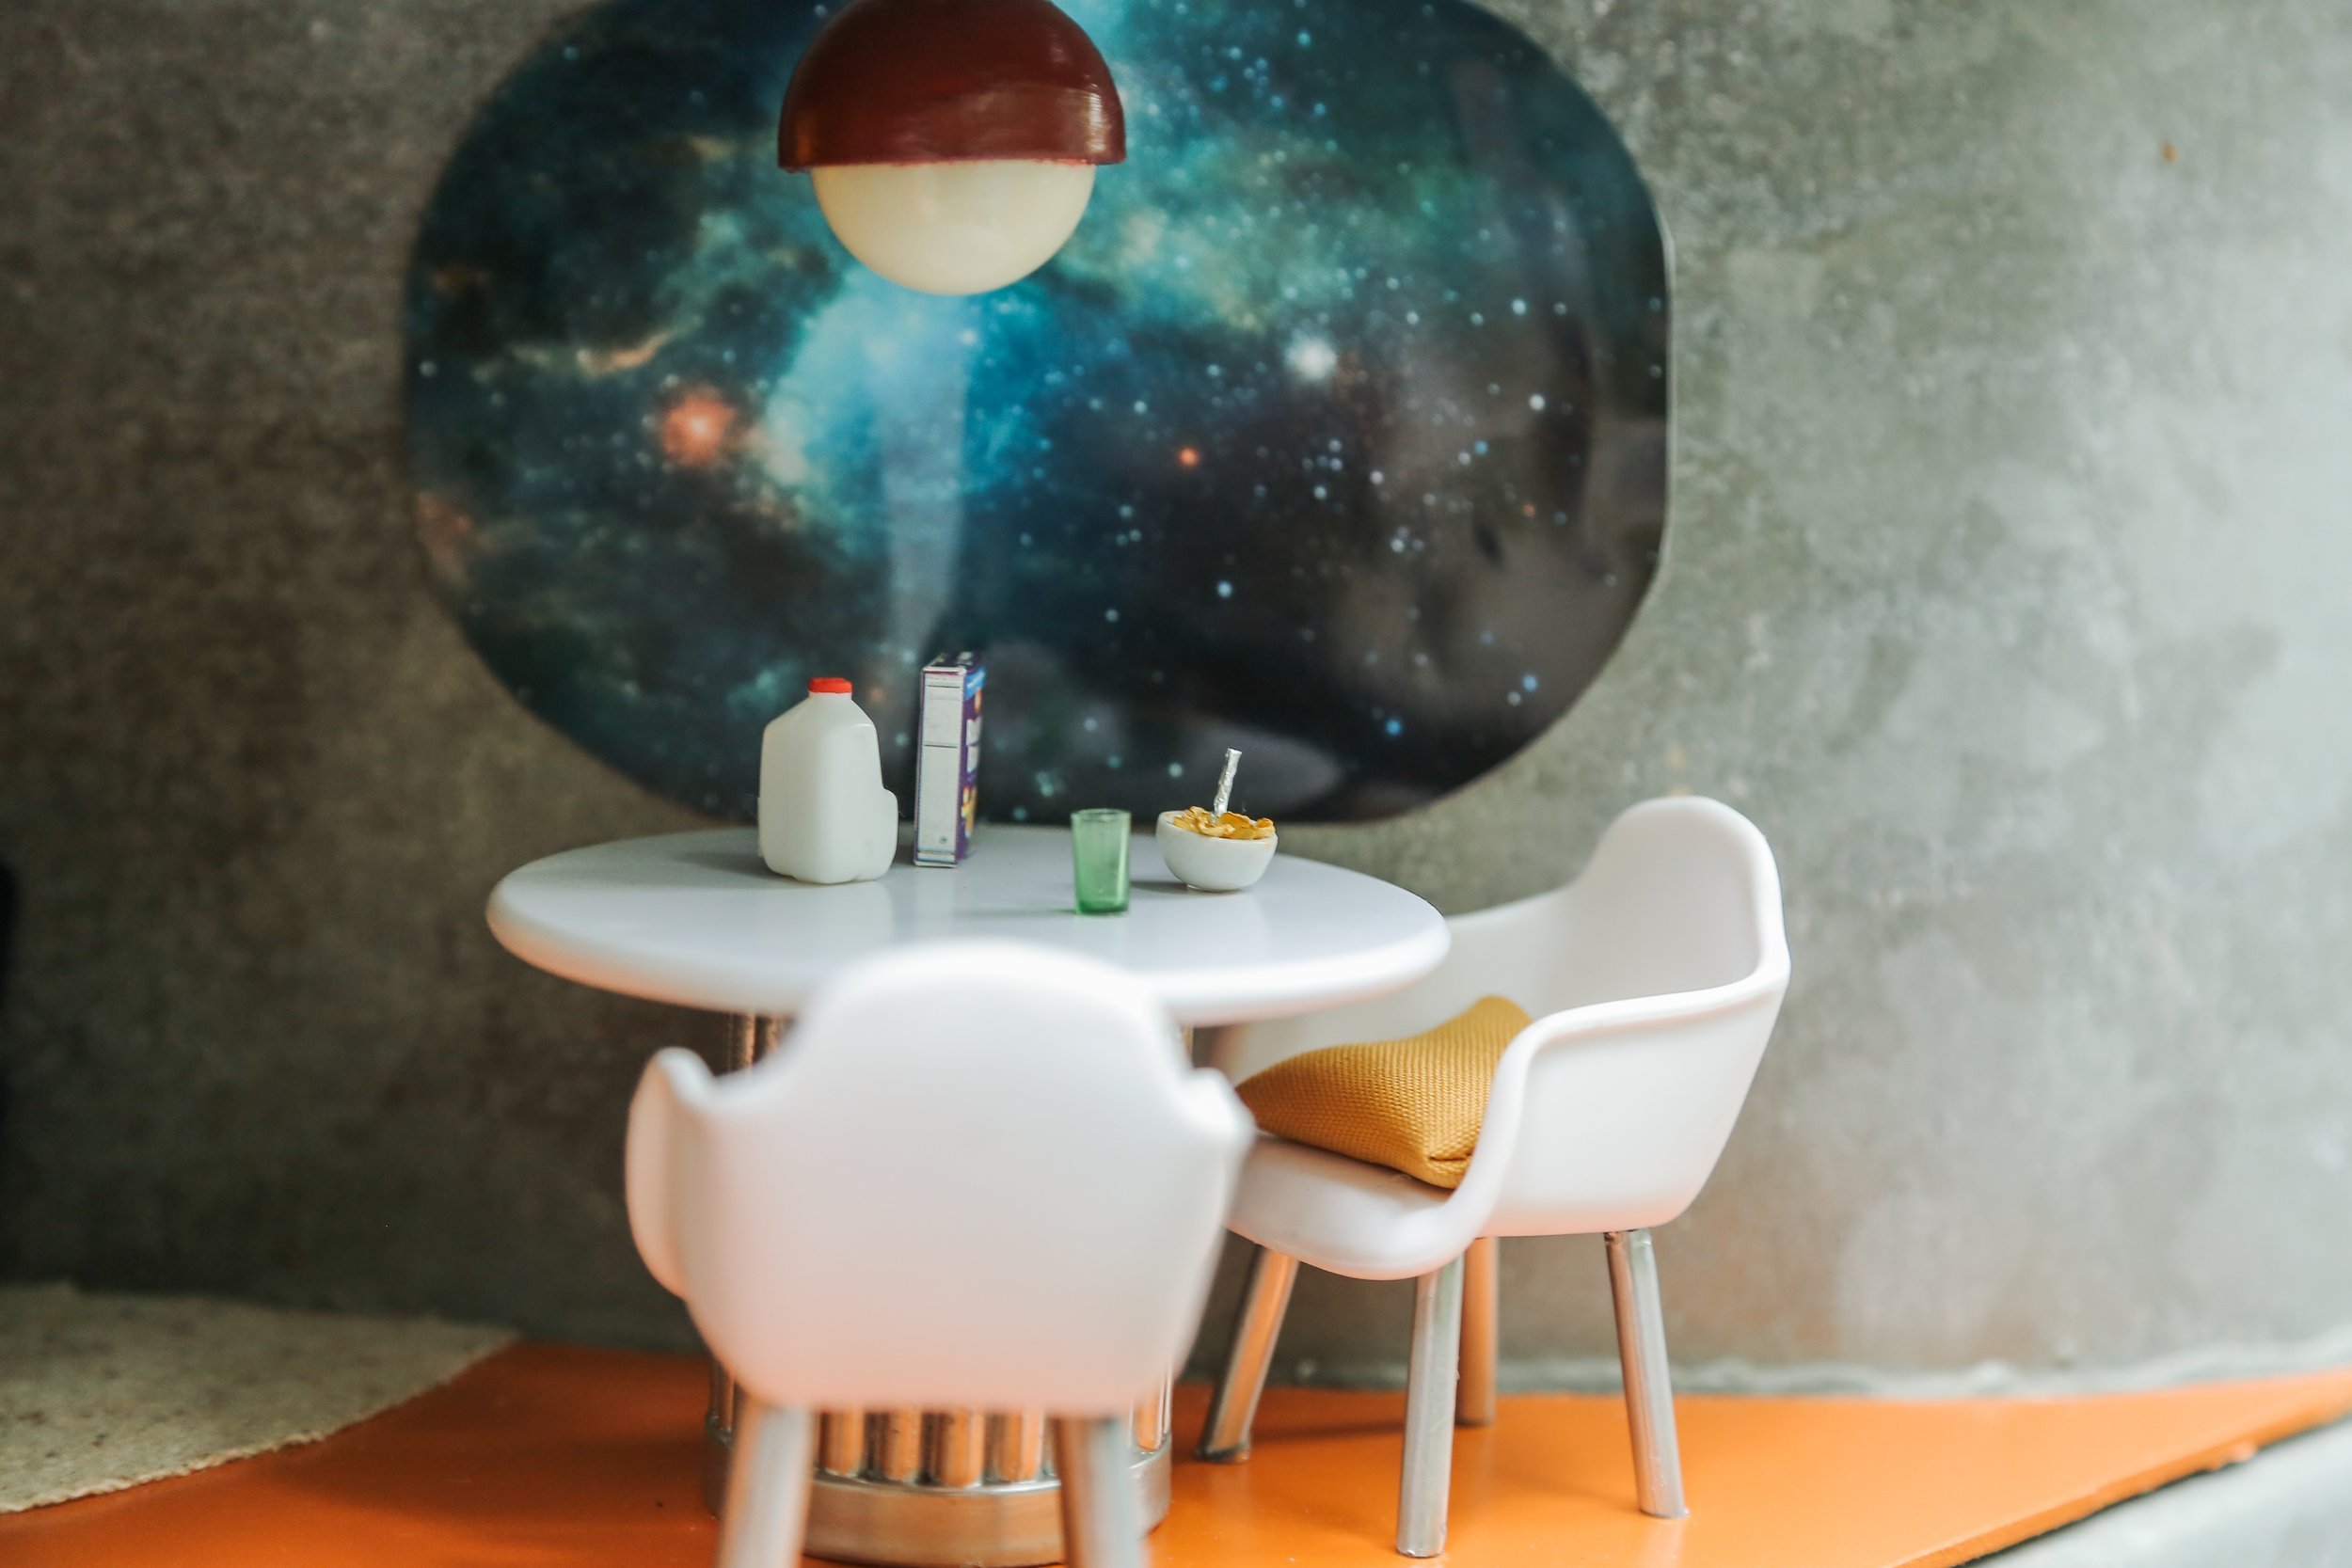
With all the pieces prepared and the miniature apartment taking shape at home, the time came for the grand installation. I brought everything to the location, and installed it with a whole lot of glue and last minute fixes. I also added a couple small details like a mini cereal box and milk that I got from a local doll store, that really just added that extra pizazz to the space. In the end, I am so happy with how the final results turned out, and if you are wondering, yes, I added some clear plexiglass on top of the design to protect it from the elements! Head over to our YouTube video to let us know what your favourite part is!


Final Reveal