GIFT WRAPPING INSPIRED BY STORES
We’re here today to get some gift wrapping done! This year we decided to spice things up by using different iconic stores to inspire our wrapping! It could be fun to match the present to the wrapping paper. Some of these can also be interactive!
Let’s get started!
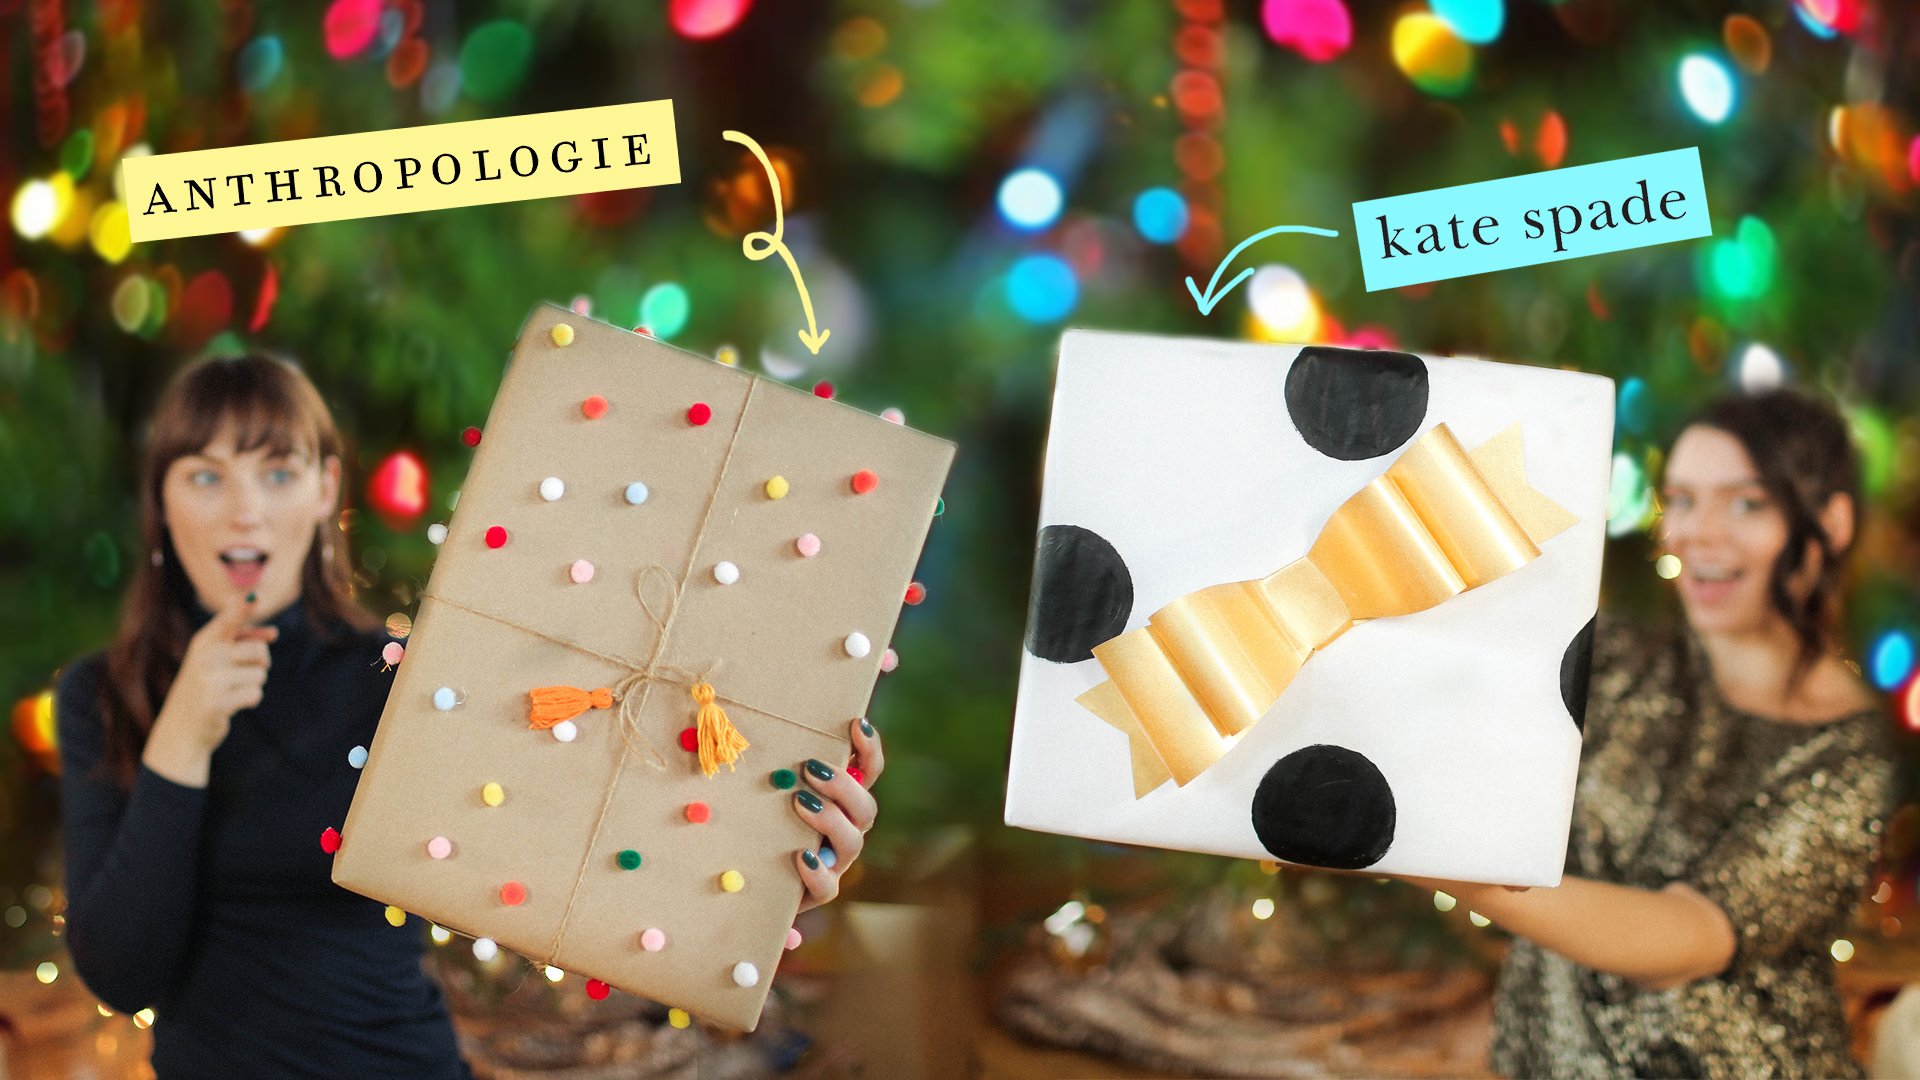
ANTHROPOLOGIE
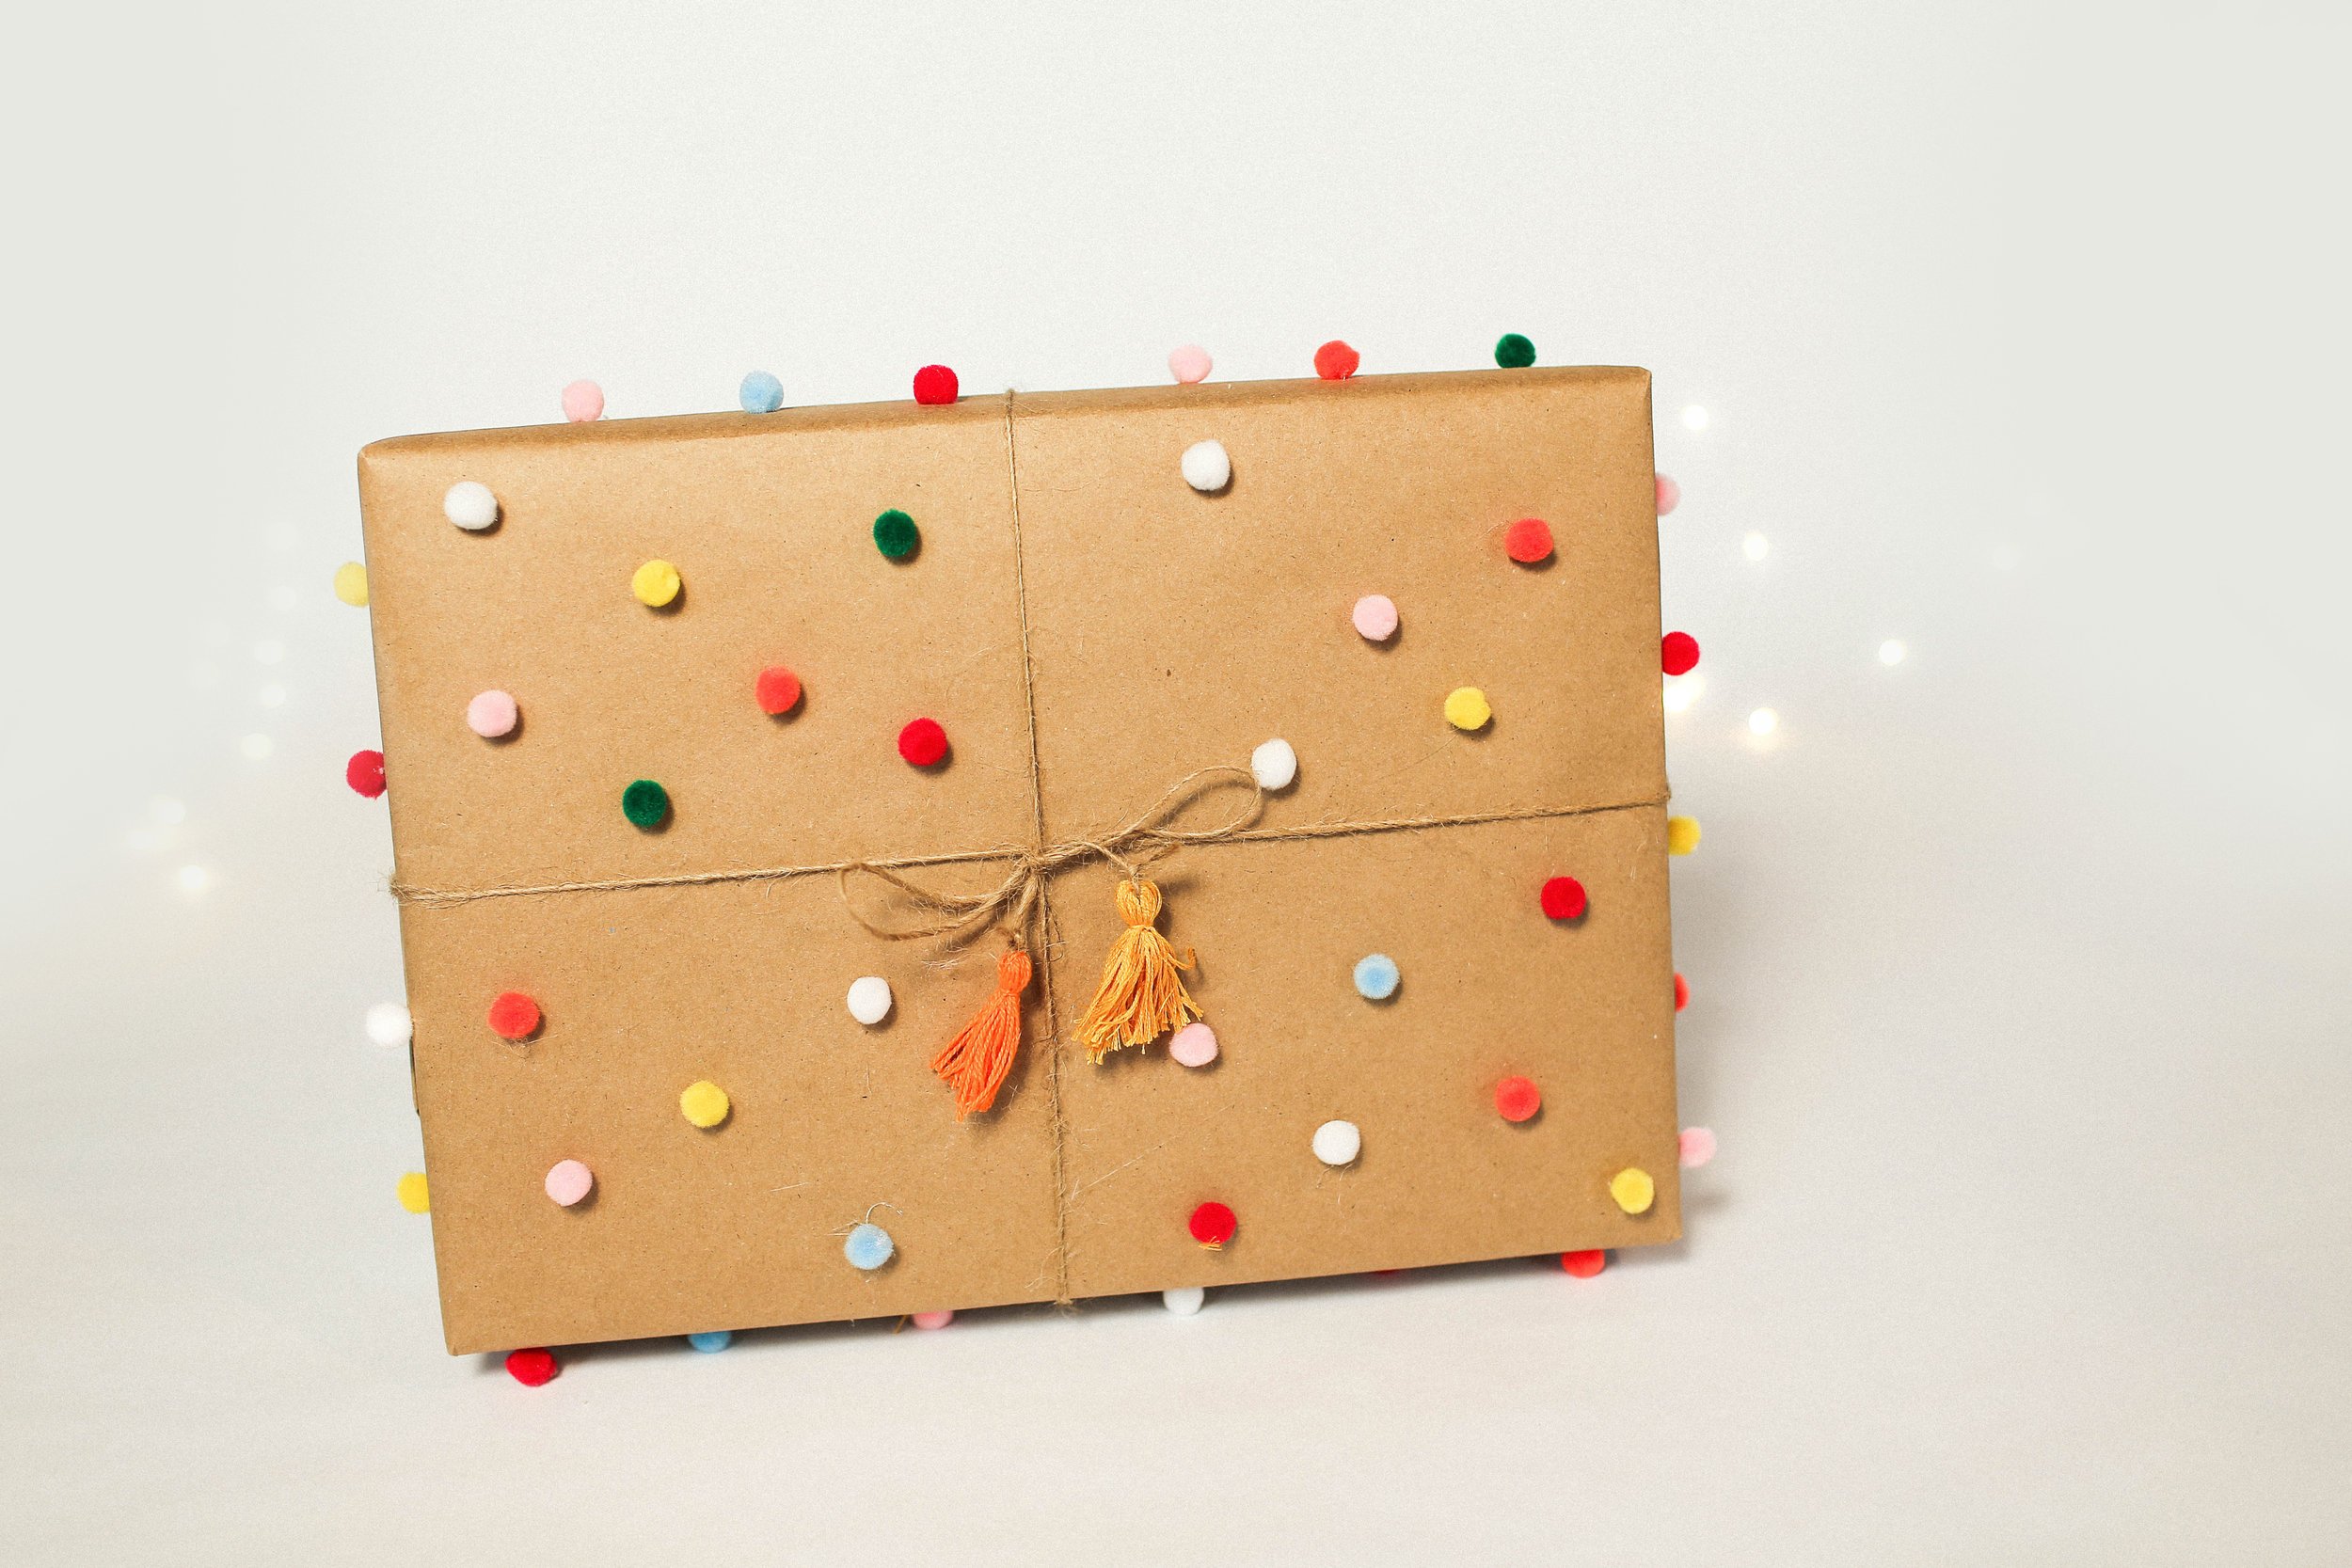
When we think of Anthro, we think of a boho, natural, easygoing, and colourful look.
To wrap this gift, we started by wrapping our present with a simple brown craft paper and tied some twine around the box. Next, time for the fun part! We made some tassels by wrapping some colourful yarn around four fingers and tying it onto the twine that is extending from the bow on the present. Next, we tied a small piece of the yarn to the “head” of the tassel and trimmed the looped pieces at the end! Go ahead and trim the ends to even everything out. Make another tassel for the other end of the bow! To finish it off, glue some pom poms all over the wrapped box!

URBAN OUTFITTERS

Urban outfitters is all about fun colours, twinkle lights, and polaroids!
Start by grabbing some fairly wrinkle free tissue paper. Go ahead and wrap your box in the tissue paper. We started by gluing the battery pack of the string lights to the bottom of the box, and wrapped the string lights all the way around the box, gluing the end to hold it in place. Finally, we made a little faux polaroid out of some craft paper and a gold paint pen. Feel free to add a polaroid of you and your person if you have that! You can go ahead and use this as a gift tag.
POTTERY BARN


Pottery Barn makes us think of classic timeless Christmas. We started by choosing a very classic red and green printed wrapping paper. Next, go ahead and collect some classic holiday things, such as antlers, garland, and cranberries. Tie all of these things together to create a Christmas bouquet. Next, we layered some tulle and a fancy yarn to create a fancy ribbon effect. We wend ahead and tied this around the box. Finally, we hot glue gunned our Christmas bouquet to the top of the box.
IKEA
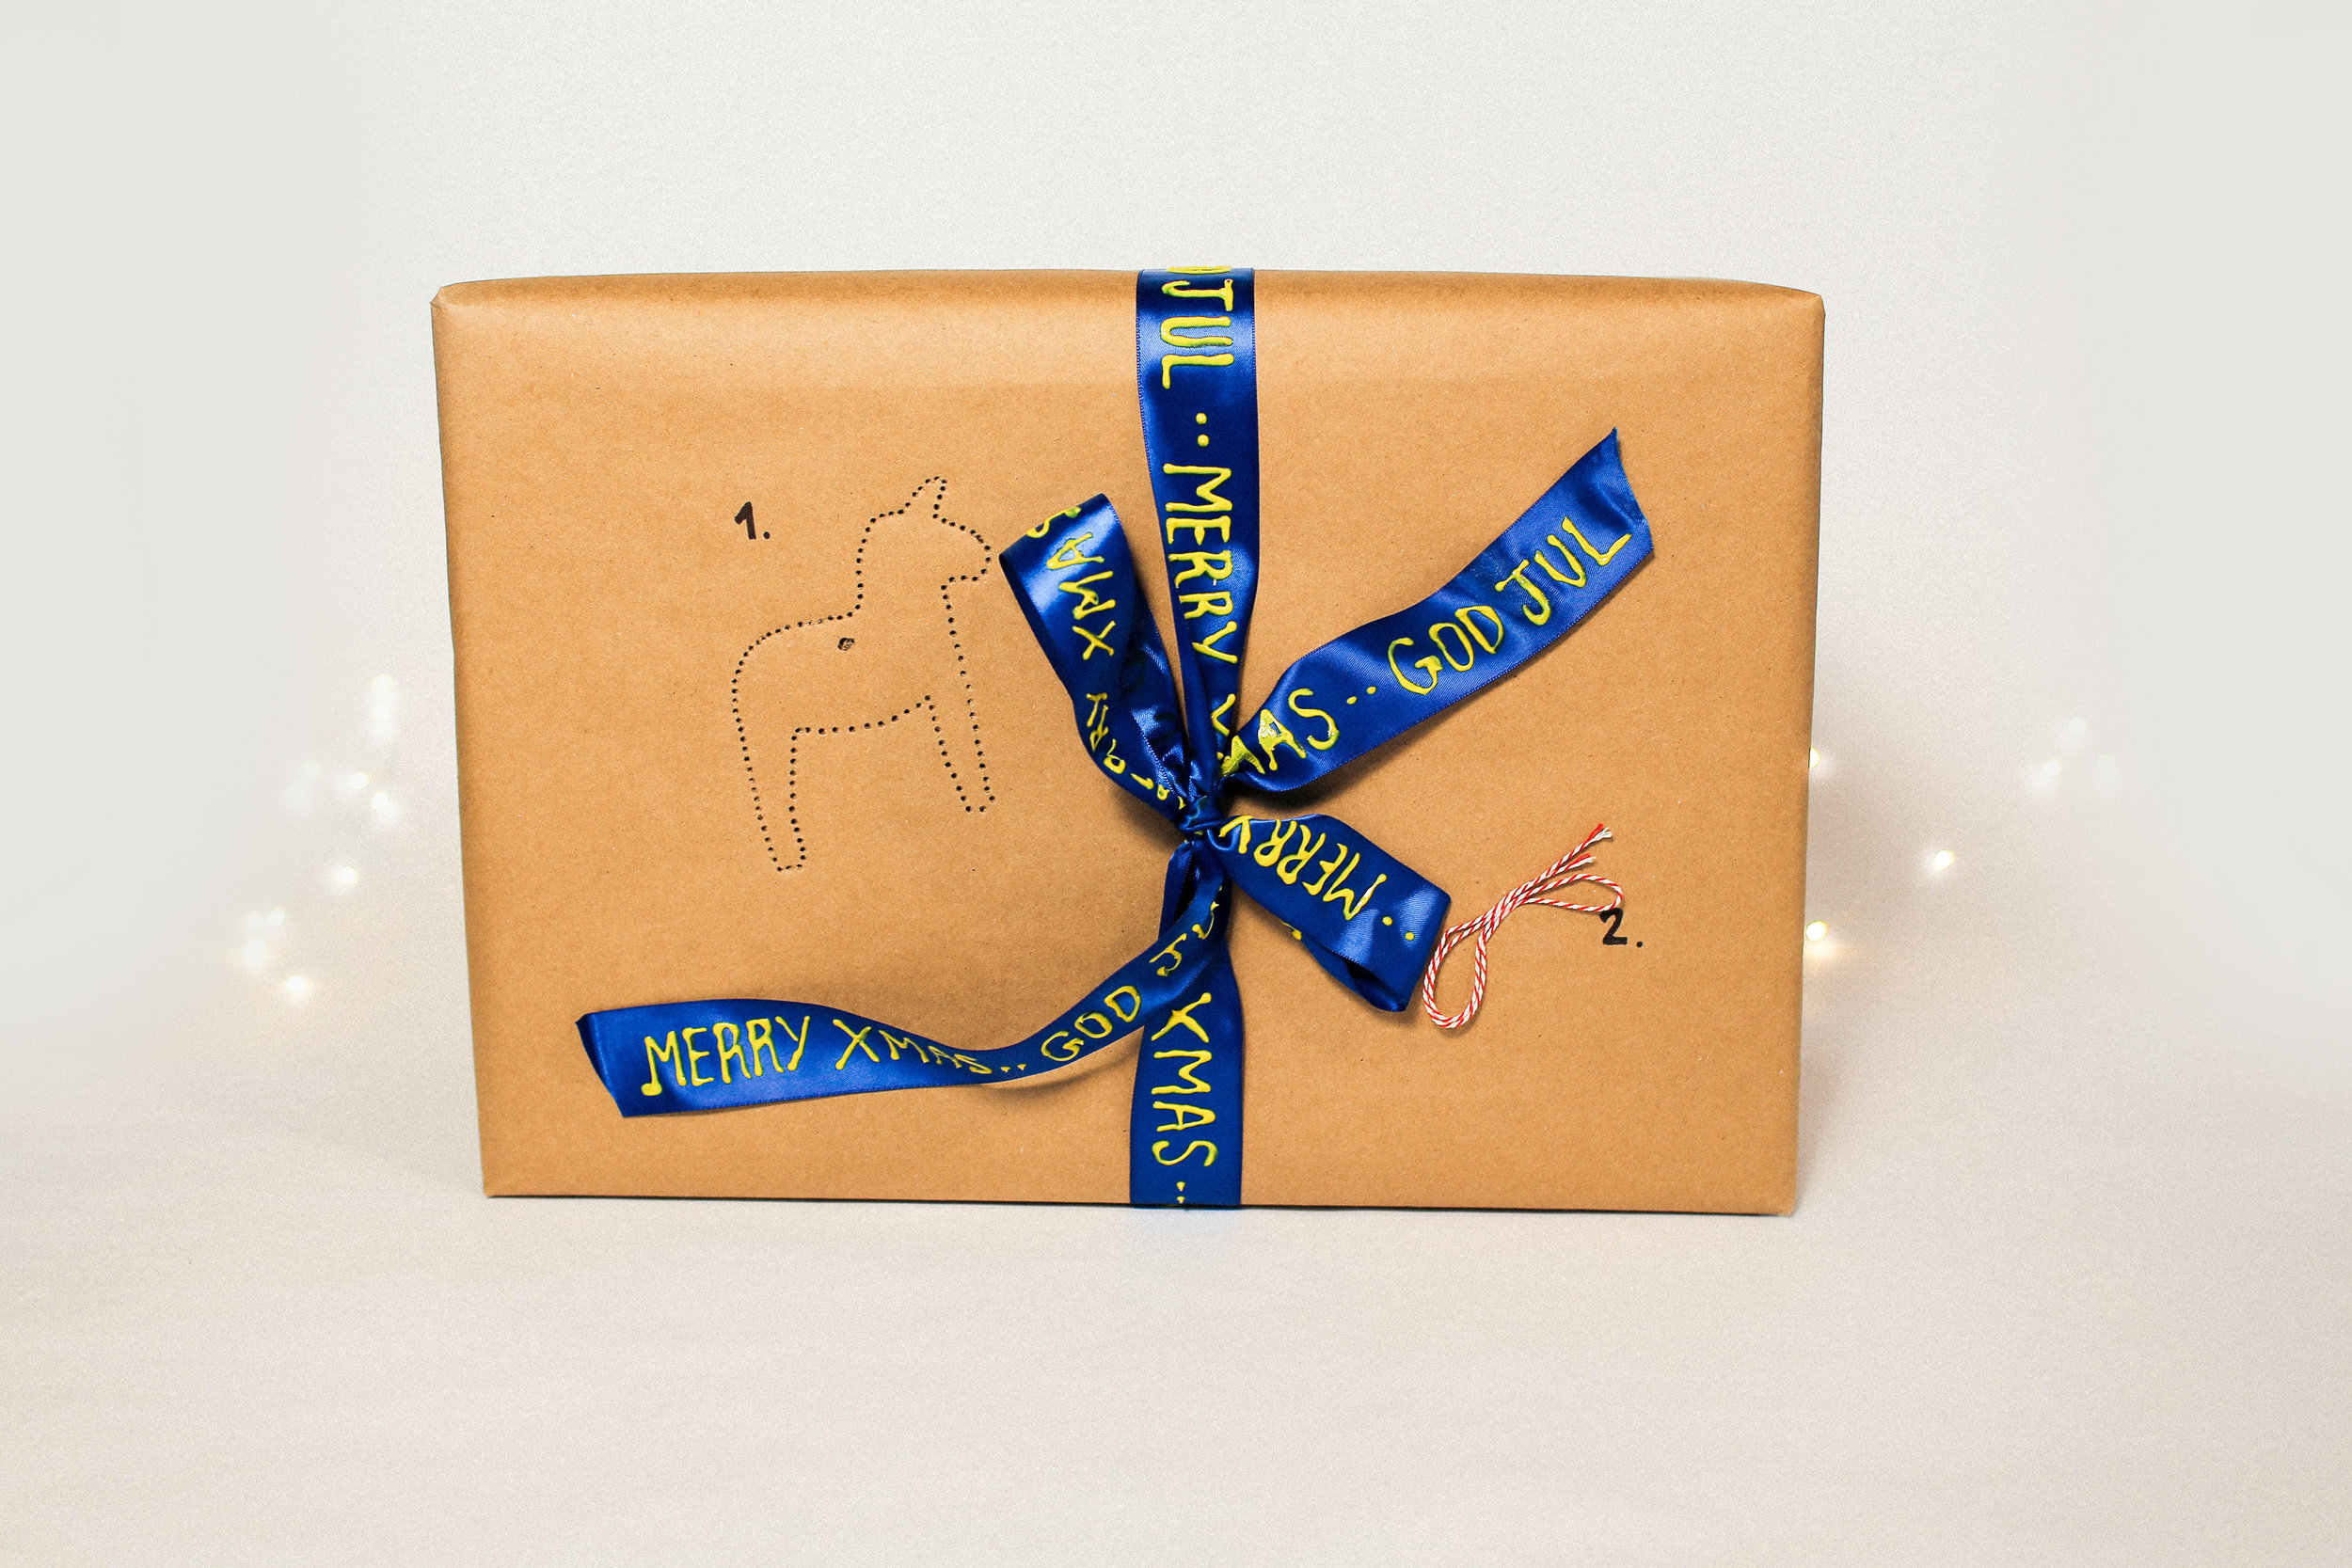
This one is both funny and actually really cool to give somebody if they LOVE IKEA. This is also great for those practical and smart people in your lives.
Start by grabbing some craft paper and half wrapping the present without the tape, just to get the creases of the box into the paper. Take the paper off of the present, and find where the top of the box would be on the paper. Draw a simple shape somewhere on the area where the top of the box will be (we chose a Swedish horse design). Next, we used an awl (or any sharp object) to outline your shape with tiny holes. Add a larger hole in the top centre of the design. Once the gift receiver gets the gift, they will be able to pop out this design and use it as an ornament! We wrote a number one beside our horse shape, and attached a small piece of string onto the other side of the box, with a number two beside it. This is meant to emulate IKEA instructions!
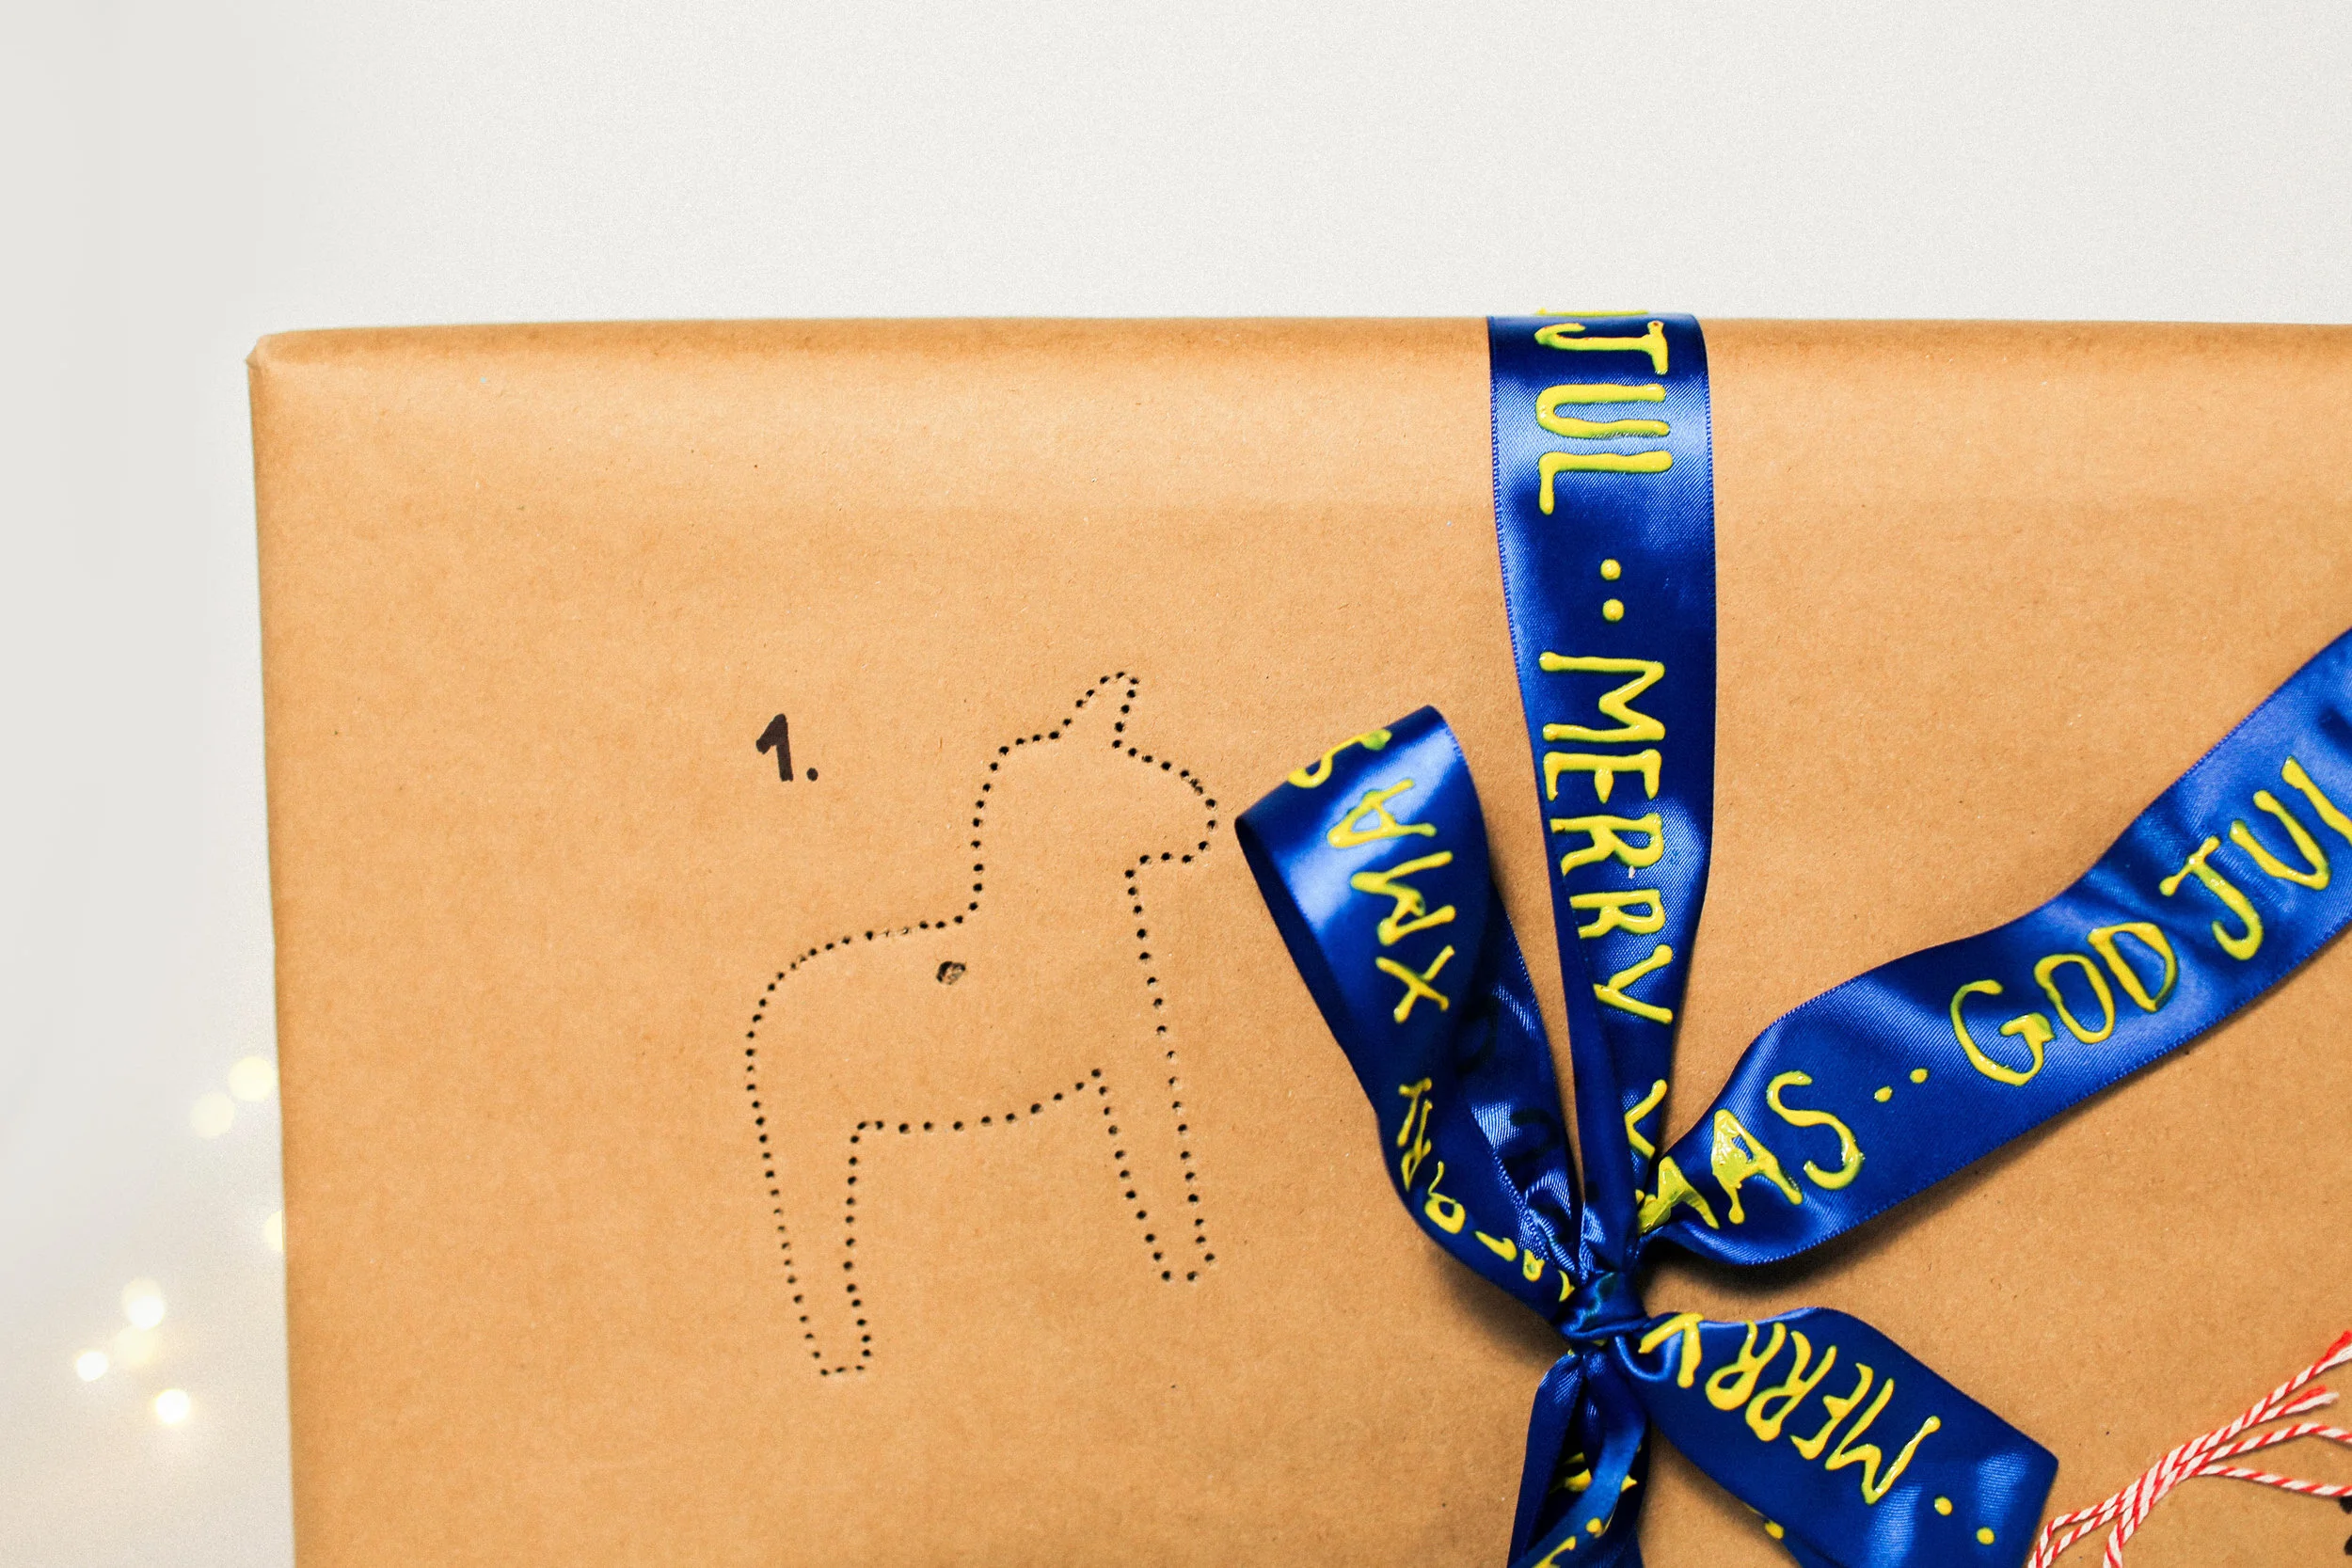
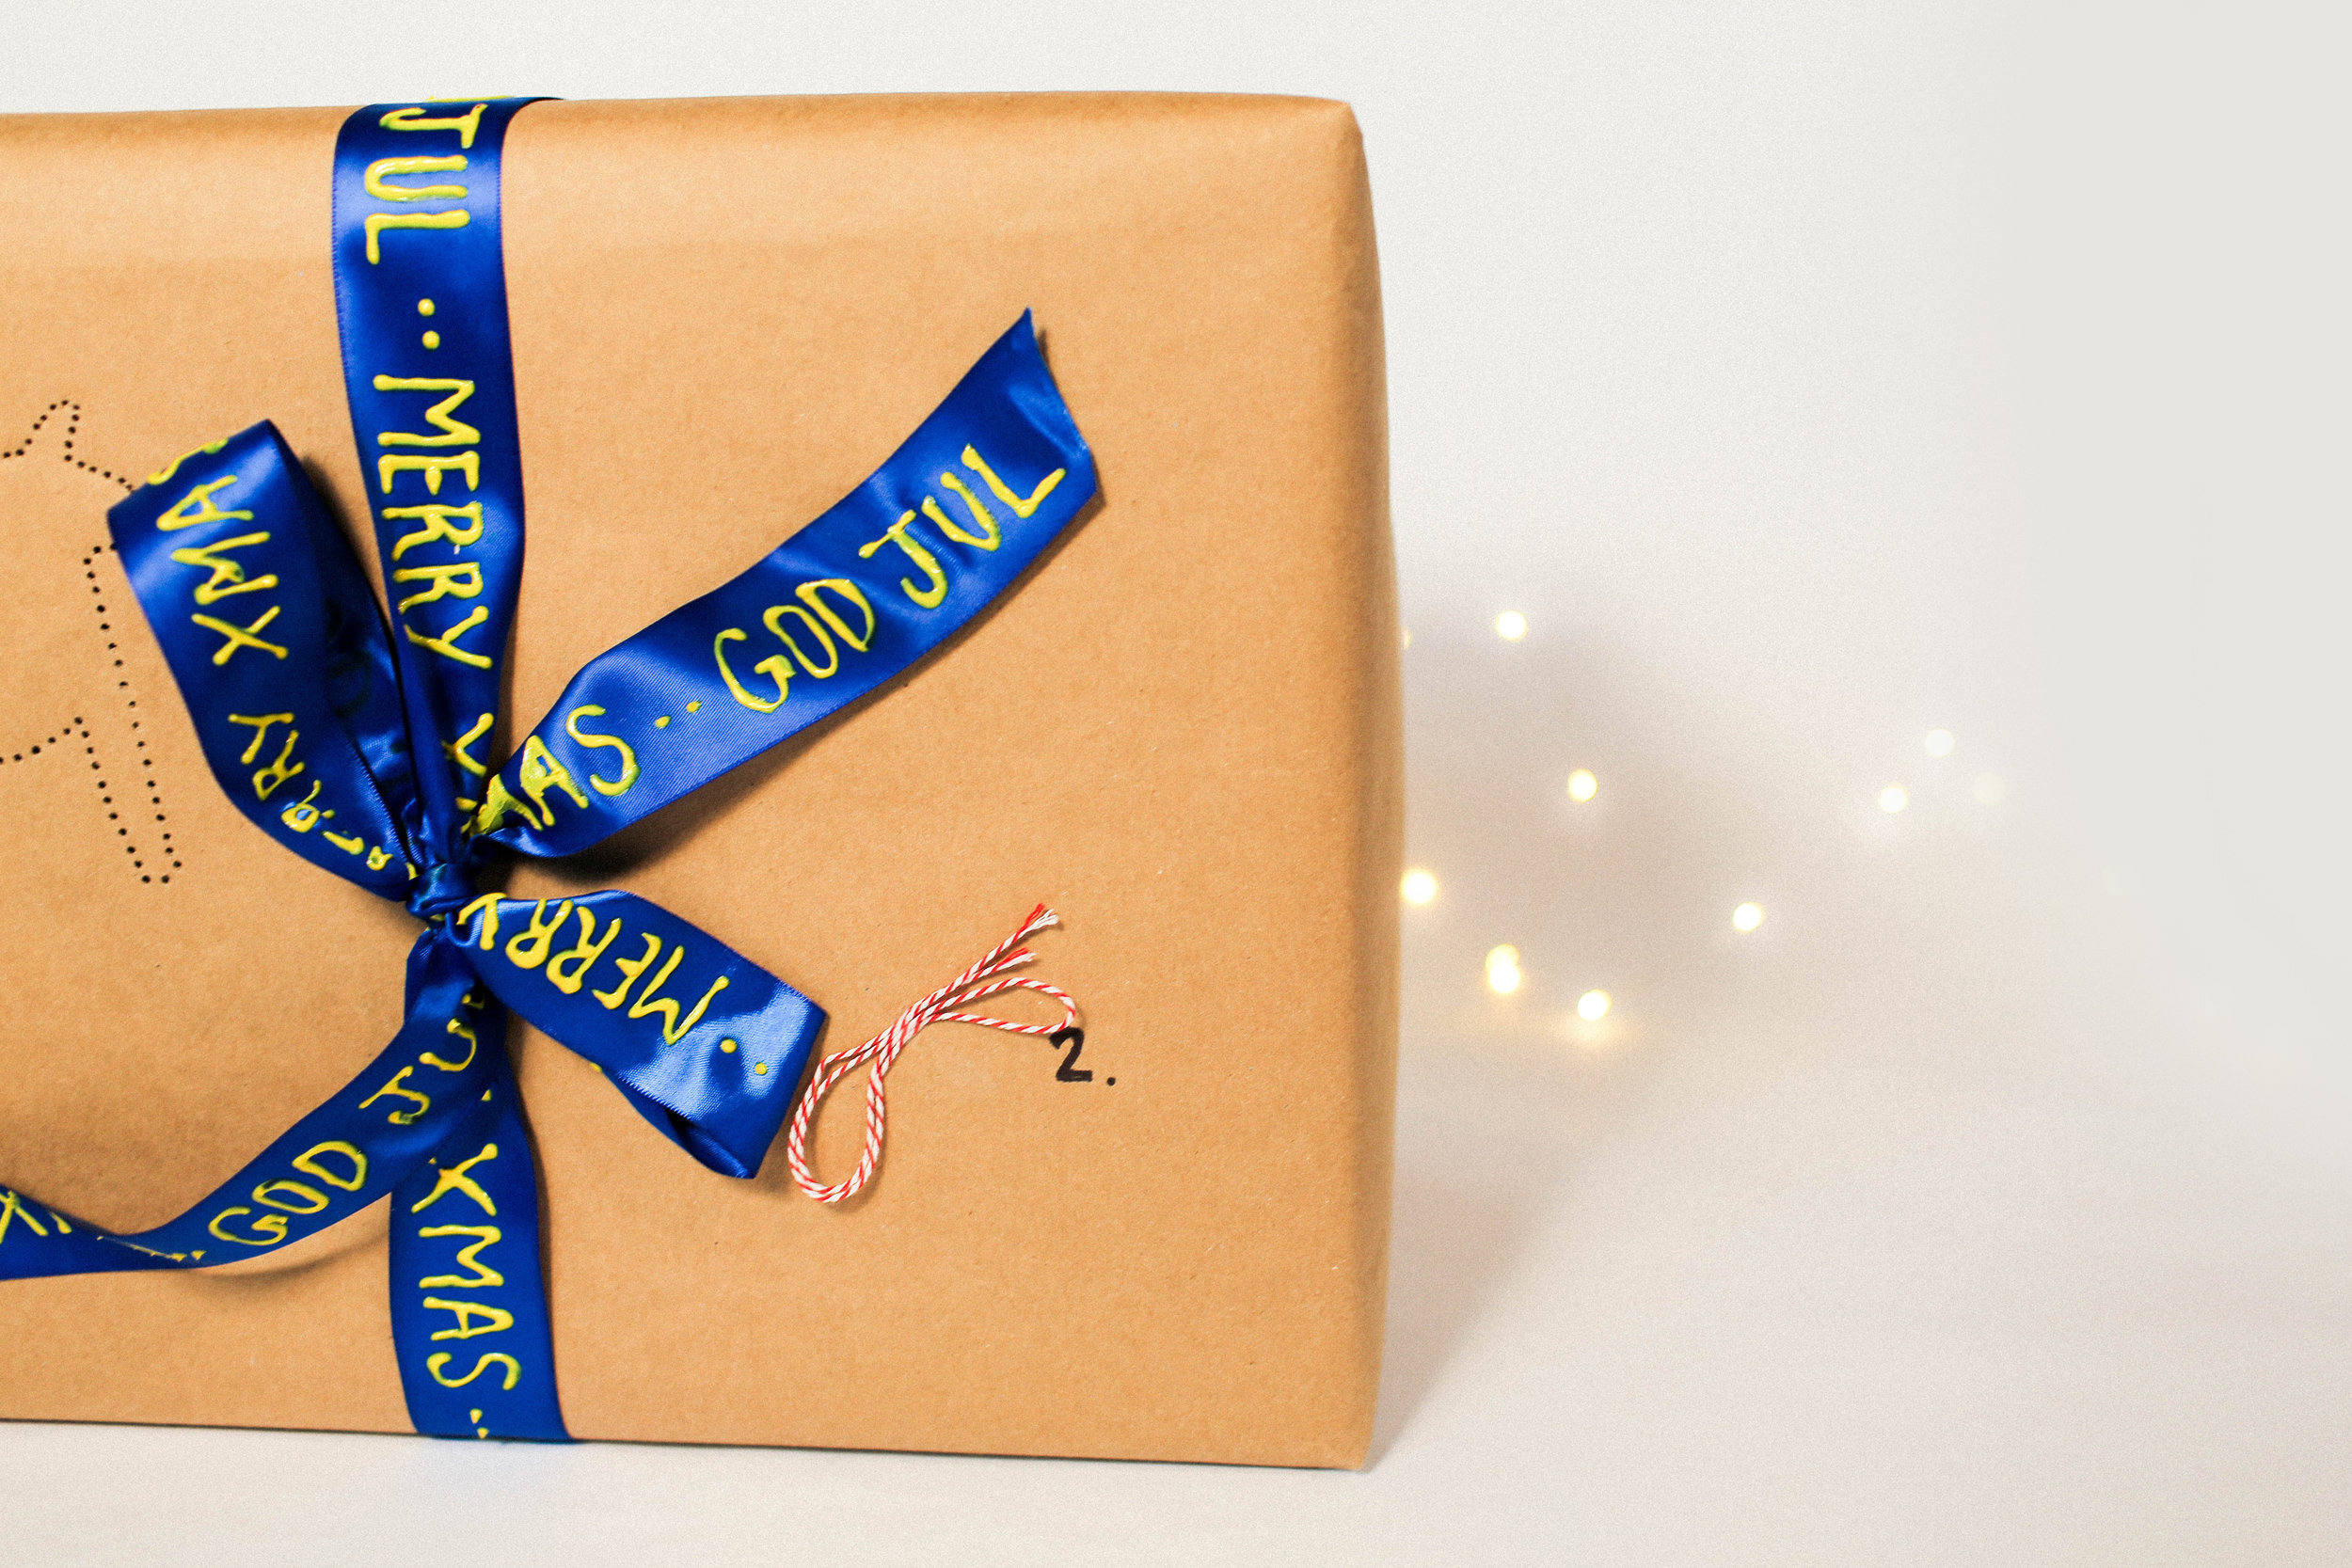

What really seals the deal on this IKEA present is the IKEA ribbon! We picked up some thick blue ribbon and some yellow 3D paint. We wrote both “Merry Christmas” and “Godjul” (Swedish for Merry Christmas) all the way down the ribbon. Once the ribbon was dry, we tied it around our present!
KATE SPADE

Our next wrapping is Kate Spade inspired! Girly, fun, bold, chic, and modern! We started by rolling out a big roll of white paper, and painting large black circles all over it (classic black and white Kate!). We went ahead and wrapped the gift with this paper once it was dry. The finishing touch is this incredible custom gold bow! Start by downloading out template found here. Cut out all of the pieces of the template and tape together the ‘A’ and ‘B’ pieces together. Trace this shape onto a gold card stock. Trace out the template marked ‘big bow’ twice! Trace out the rest of the pieces once. Cut everything out. Start by gluing the two ends of each of the ‘big bow’ pieces together. Glue the two big bow sides on top of the longest ‘A and B’ piece. Glue the two ends of the ‘small bow’ piece into the middle of itself. Glue the small bow onto the top of the big bow. Finally, glue the middle piece onto the middle of the bow and fold it over the sides, to hide all of the layers. Now that your bow is finished, go ahead and top your present!

THRIFT STORE

This idea is great for the eco-friendly/thrifting queen in your life! This way of wrapping is also great for larger presents that are kind of hard to wrap traditionally. We started by heading to the thrift store to find some kind of large sheet of old fabric. Fold your fabric in half, and cut out a shape large enough to fit your gift. Hem the top edges if needed. Take some wide red ribbon and sew the middle of your strand to the top/middle of your deconstructed bag. Fold your fabric (good sides and ribbon on the inside) and sew up the edges. Flip the bag inside out, and your reusable bag is done! You can create a larger version of this in the same way! For the larger version, we used rope and added some large white pom poms to the ends of the rope. We also wrote “Santa’s Sack” on the front of the bag with red paint.

FOR THE PERSON THAT DOESN’T SHOP MUCH

The final wrapping paper is for the person who would rather not spend money and shop a ton! This idea is also super eco-friendly. For this idea, try shopping around the house for things to wrap your gift with! We used newspaper to wrap the gift, elastic bands as the ‘ribbon’, and a classic tree air freshener as the gift tag!

And that’s it! If you decide to wrap any presents like this, tag us using the hashtag #SorryGirlsSquad! Check out the video below if you’re more of a visual learner.