DIY MEMORY BOX TIMELINE

Today’s project involves taking the best parts of your Instagram or other forgotten photos, and combining that with new crazy easy DIY home décor! This is our #PassionProject brought to you by HP. Thanks HP for partnering with us!

For this DIY you’regoing to need to take a trip down memory lane and gather photos and other mementos that represent special events or moments in your life. Think wristbands, tickets, photos, articles, handmade items – anything! The purpose of this DIY is to make a timeline of your life into décor, featuring your photos and other keepsakes. This is the one kind of décor you will cherish and talk about with pride!
For our first timeline we chose a minimalist style based on our YouTube career. Some inspo for what your timeline could be for include:
– Your high school years (past or ongoing)
– Your college years (past or ongoing, this is what Becky did for our second idea!)
– New married life
– New baby (a timeline of important moments as they grow up, SO CUTE)
– New business
– Tell us your ideas below!

Minimalist Memory Timeline
Cost: $18 (photo paper & tape)
Difficulty: ✂
Materials:
– wall safe tape
– black tape (we used electrical tape, but there are other wall safe options)
– black pen/ marker
– embossing label maker
– HP photo paper
Tools:
– scissors
– printer (we used HP OfficeJet 4650)
Our first step was to print our photos and cut them out. We left a small border so that we could write the date on the top and the event title on the bottom. If you have any mementos you can use the photo paper/ pen as a label or an embossing label maker like we did in order to label the keepsake with a date/ title. After everything was labeled we put a line of black electrical tape on the wall as our timeline base. We then made small crosses with some electrical tape and used this to attach our images to the timeline (as well as some wall safe tape balled on the back of the image). We alternated placing events on the top side of the tape line and the bottom side. If you want to keep adding to this timeline make sure that you leave room! We love the look of this minimalist timeline that would just SLAY in addition to a gallery wall.
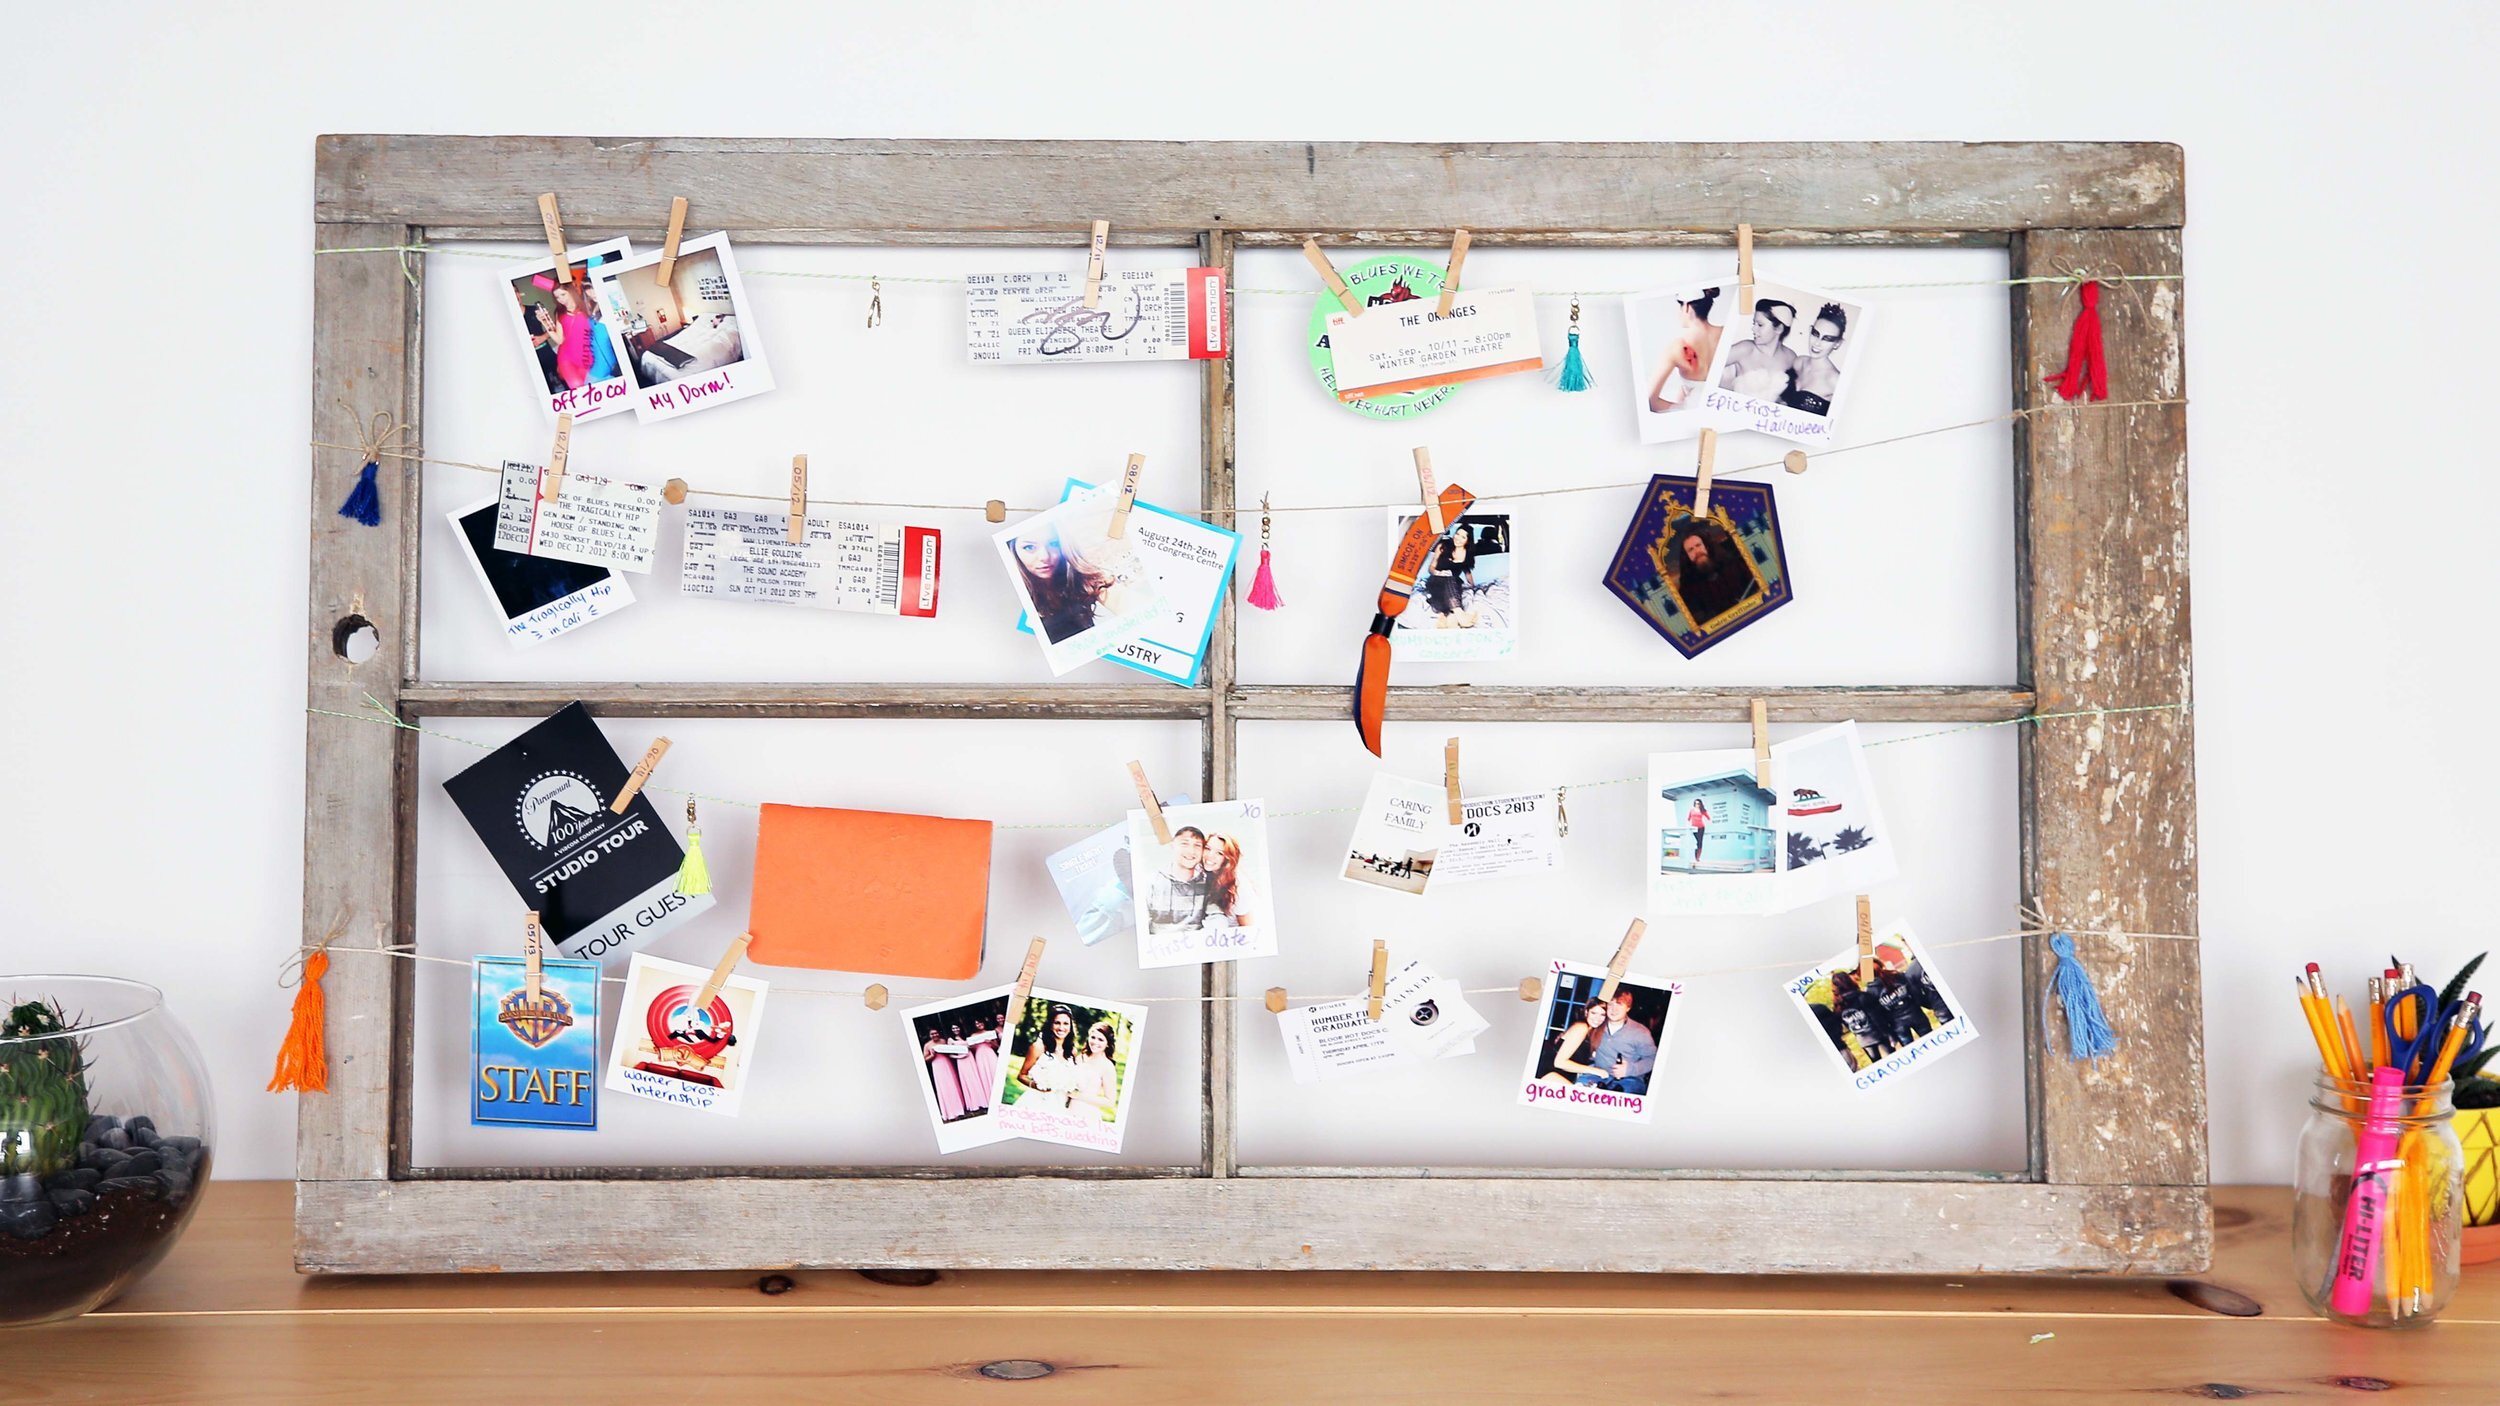
Window Pane + Twine Timeline
Cost: $20 (photo paper and charms)
Difficulty:
Materials:
– vintage window pane or wall safe tape
– twine (we used 4 different colours)
– wooden beads
– charms
– embroidery thread to make our tassels
– OR pre-made tassels
– coloured markers
– HP photo paper
– mini clothes pegs
Tools:
– scissors
– printer (we used HP OfficeJet 4650)
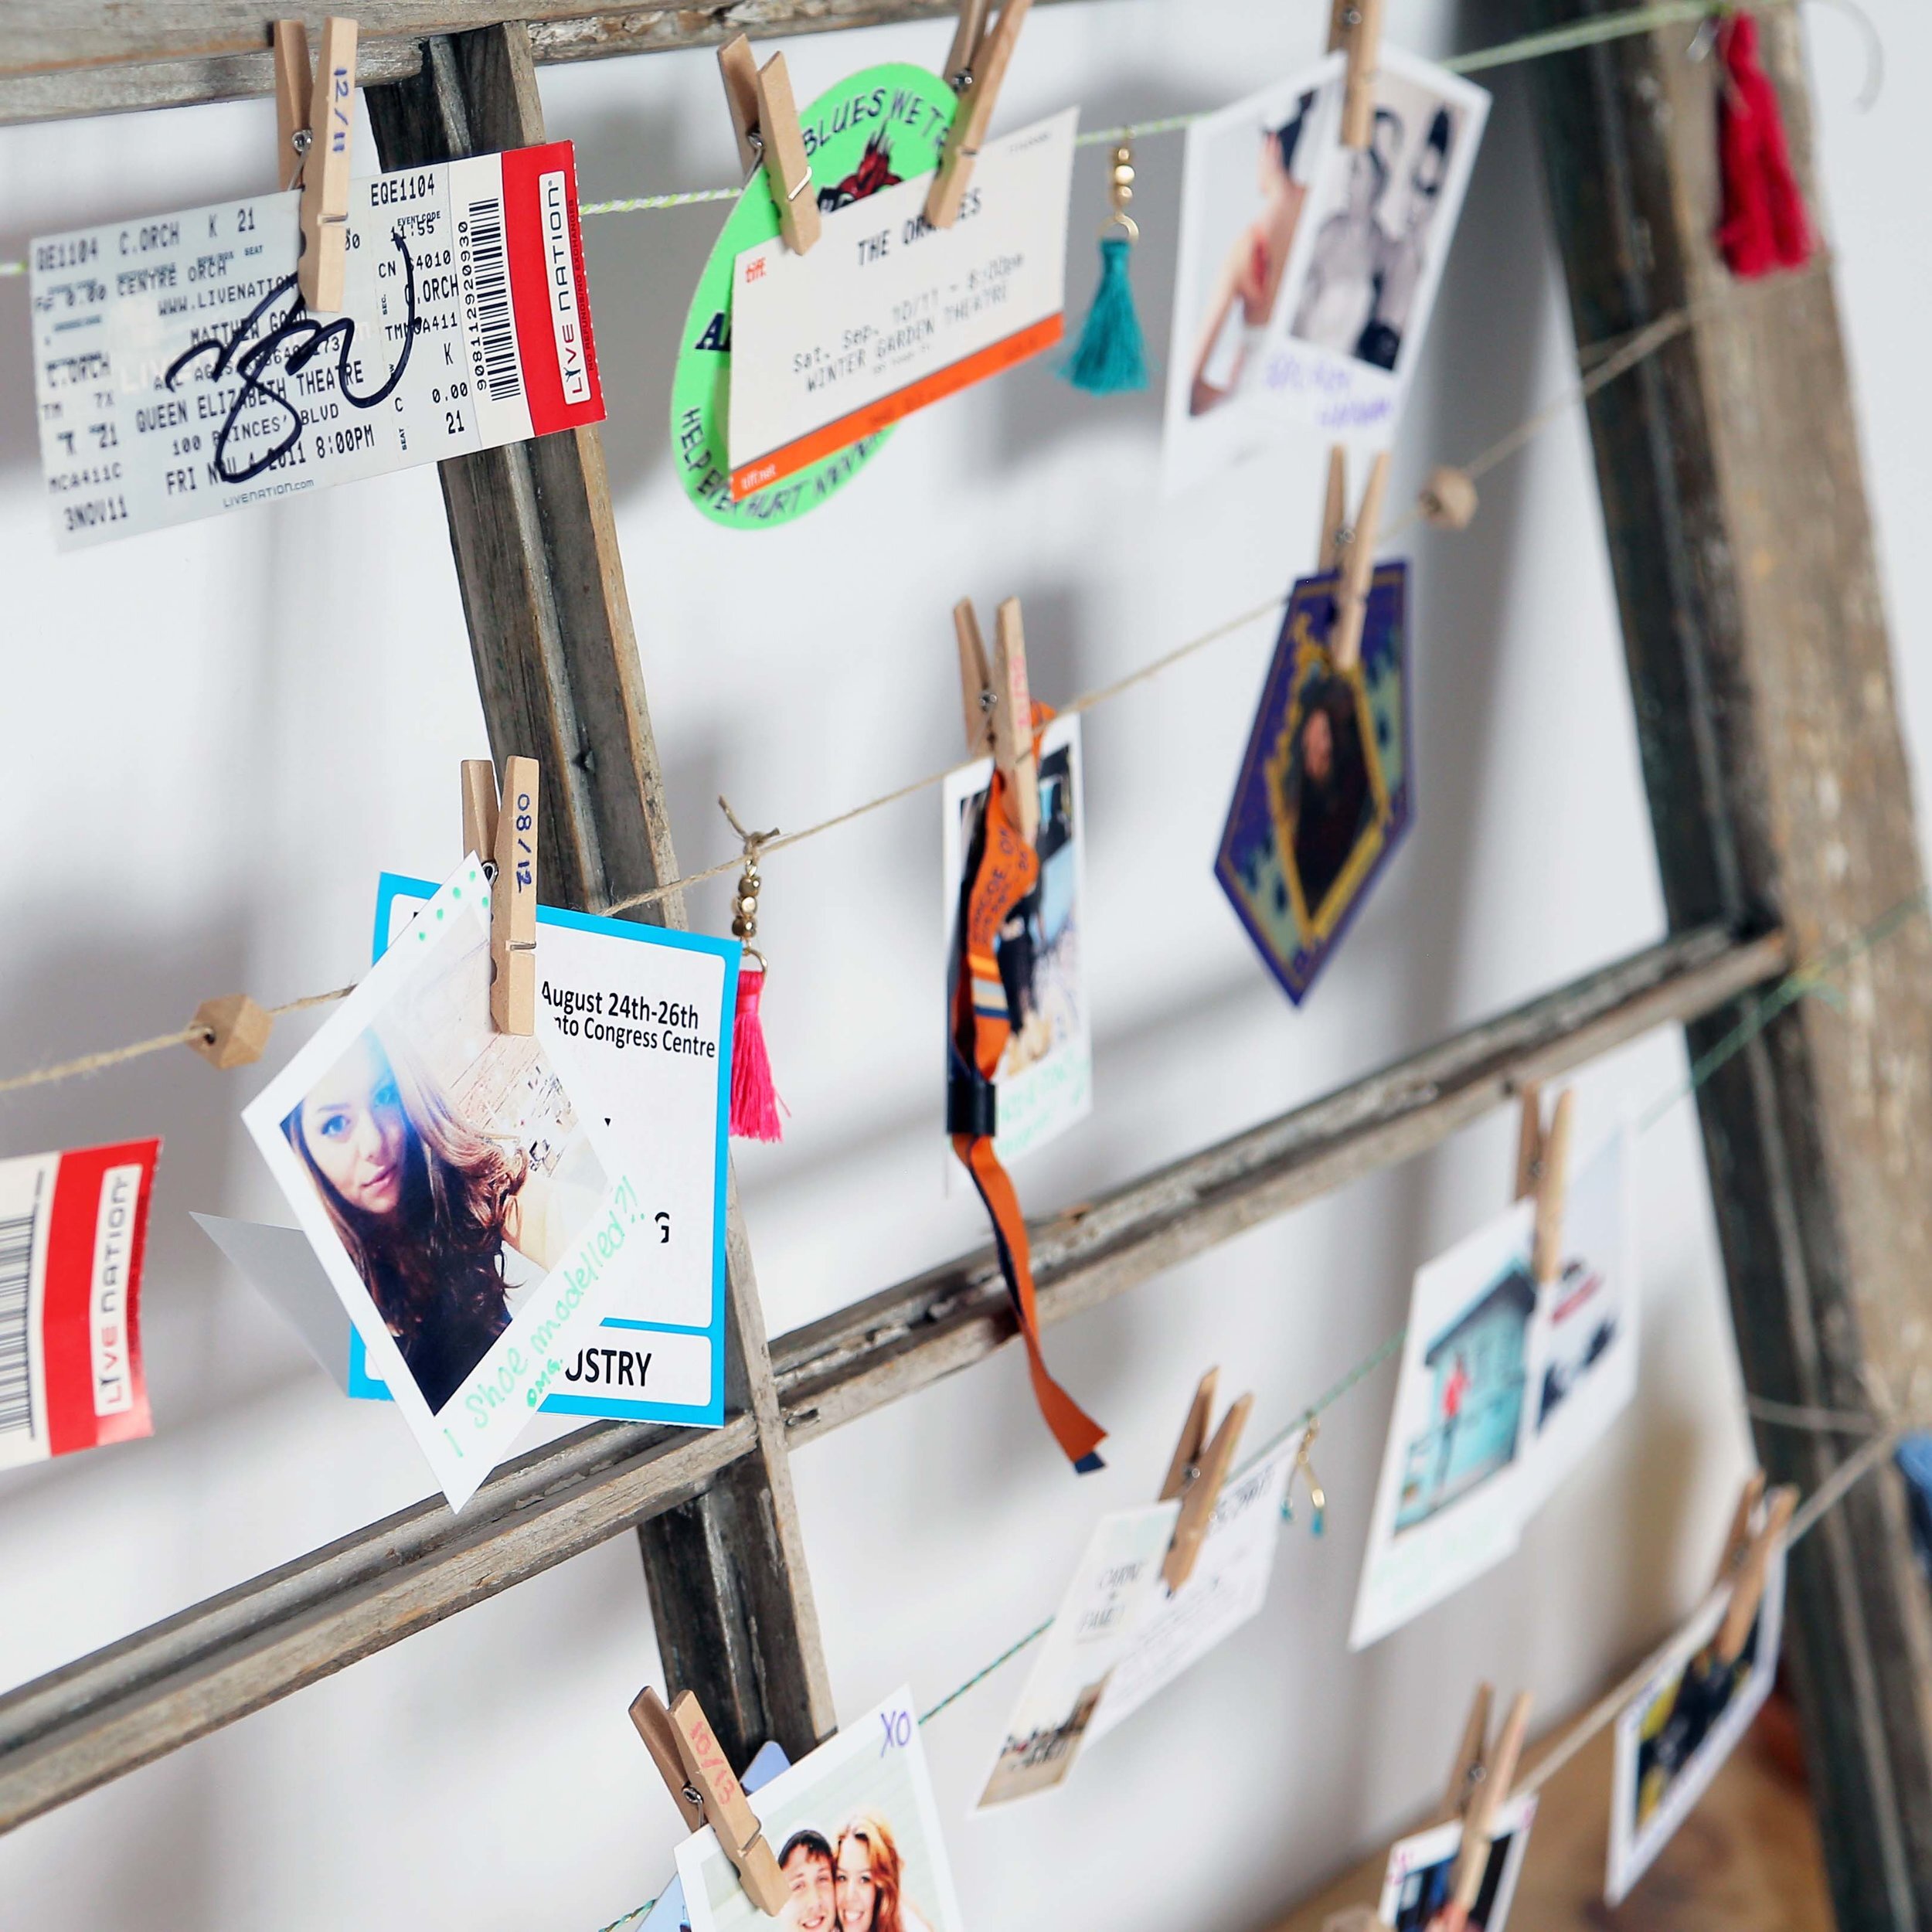
Our first step for this timeline was also to print out our photos and cut them out. For this one Becky chose insta photos and wirelessly printed them to our HP printer! We left a large border at the bottom so that we could write the event on the bottom with a coloured marker. Make sure to also have all of your mementos gathered! Before we started hanging the photos we also wrote the dates of each event on to the clothes peg. This is a subtle way of including the date instead of writing it on the photo!

We decided to do this on a vintage windowpane but you could do it on a door, wall, or picture frame! Using our different types of twine we created 4 rows, one for each year of college. Before we tied up the other side of the twine on the windowpane we made sure to string on some charms or beads for more personality! After that was complete we added our photos and mementos in order using the clothes pegs with the corresponding dates. At the very end we added tassels where we anchored the twine. You can click here to make our DIY tassels in 120 seconds or less! It’s actually so inexpensive and easy!

We’d love to hear which timeline is your favourite and what event/years you would make yours of!