DIY BUSINESS CARDS

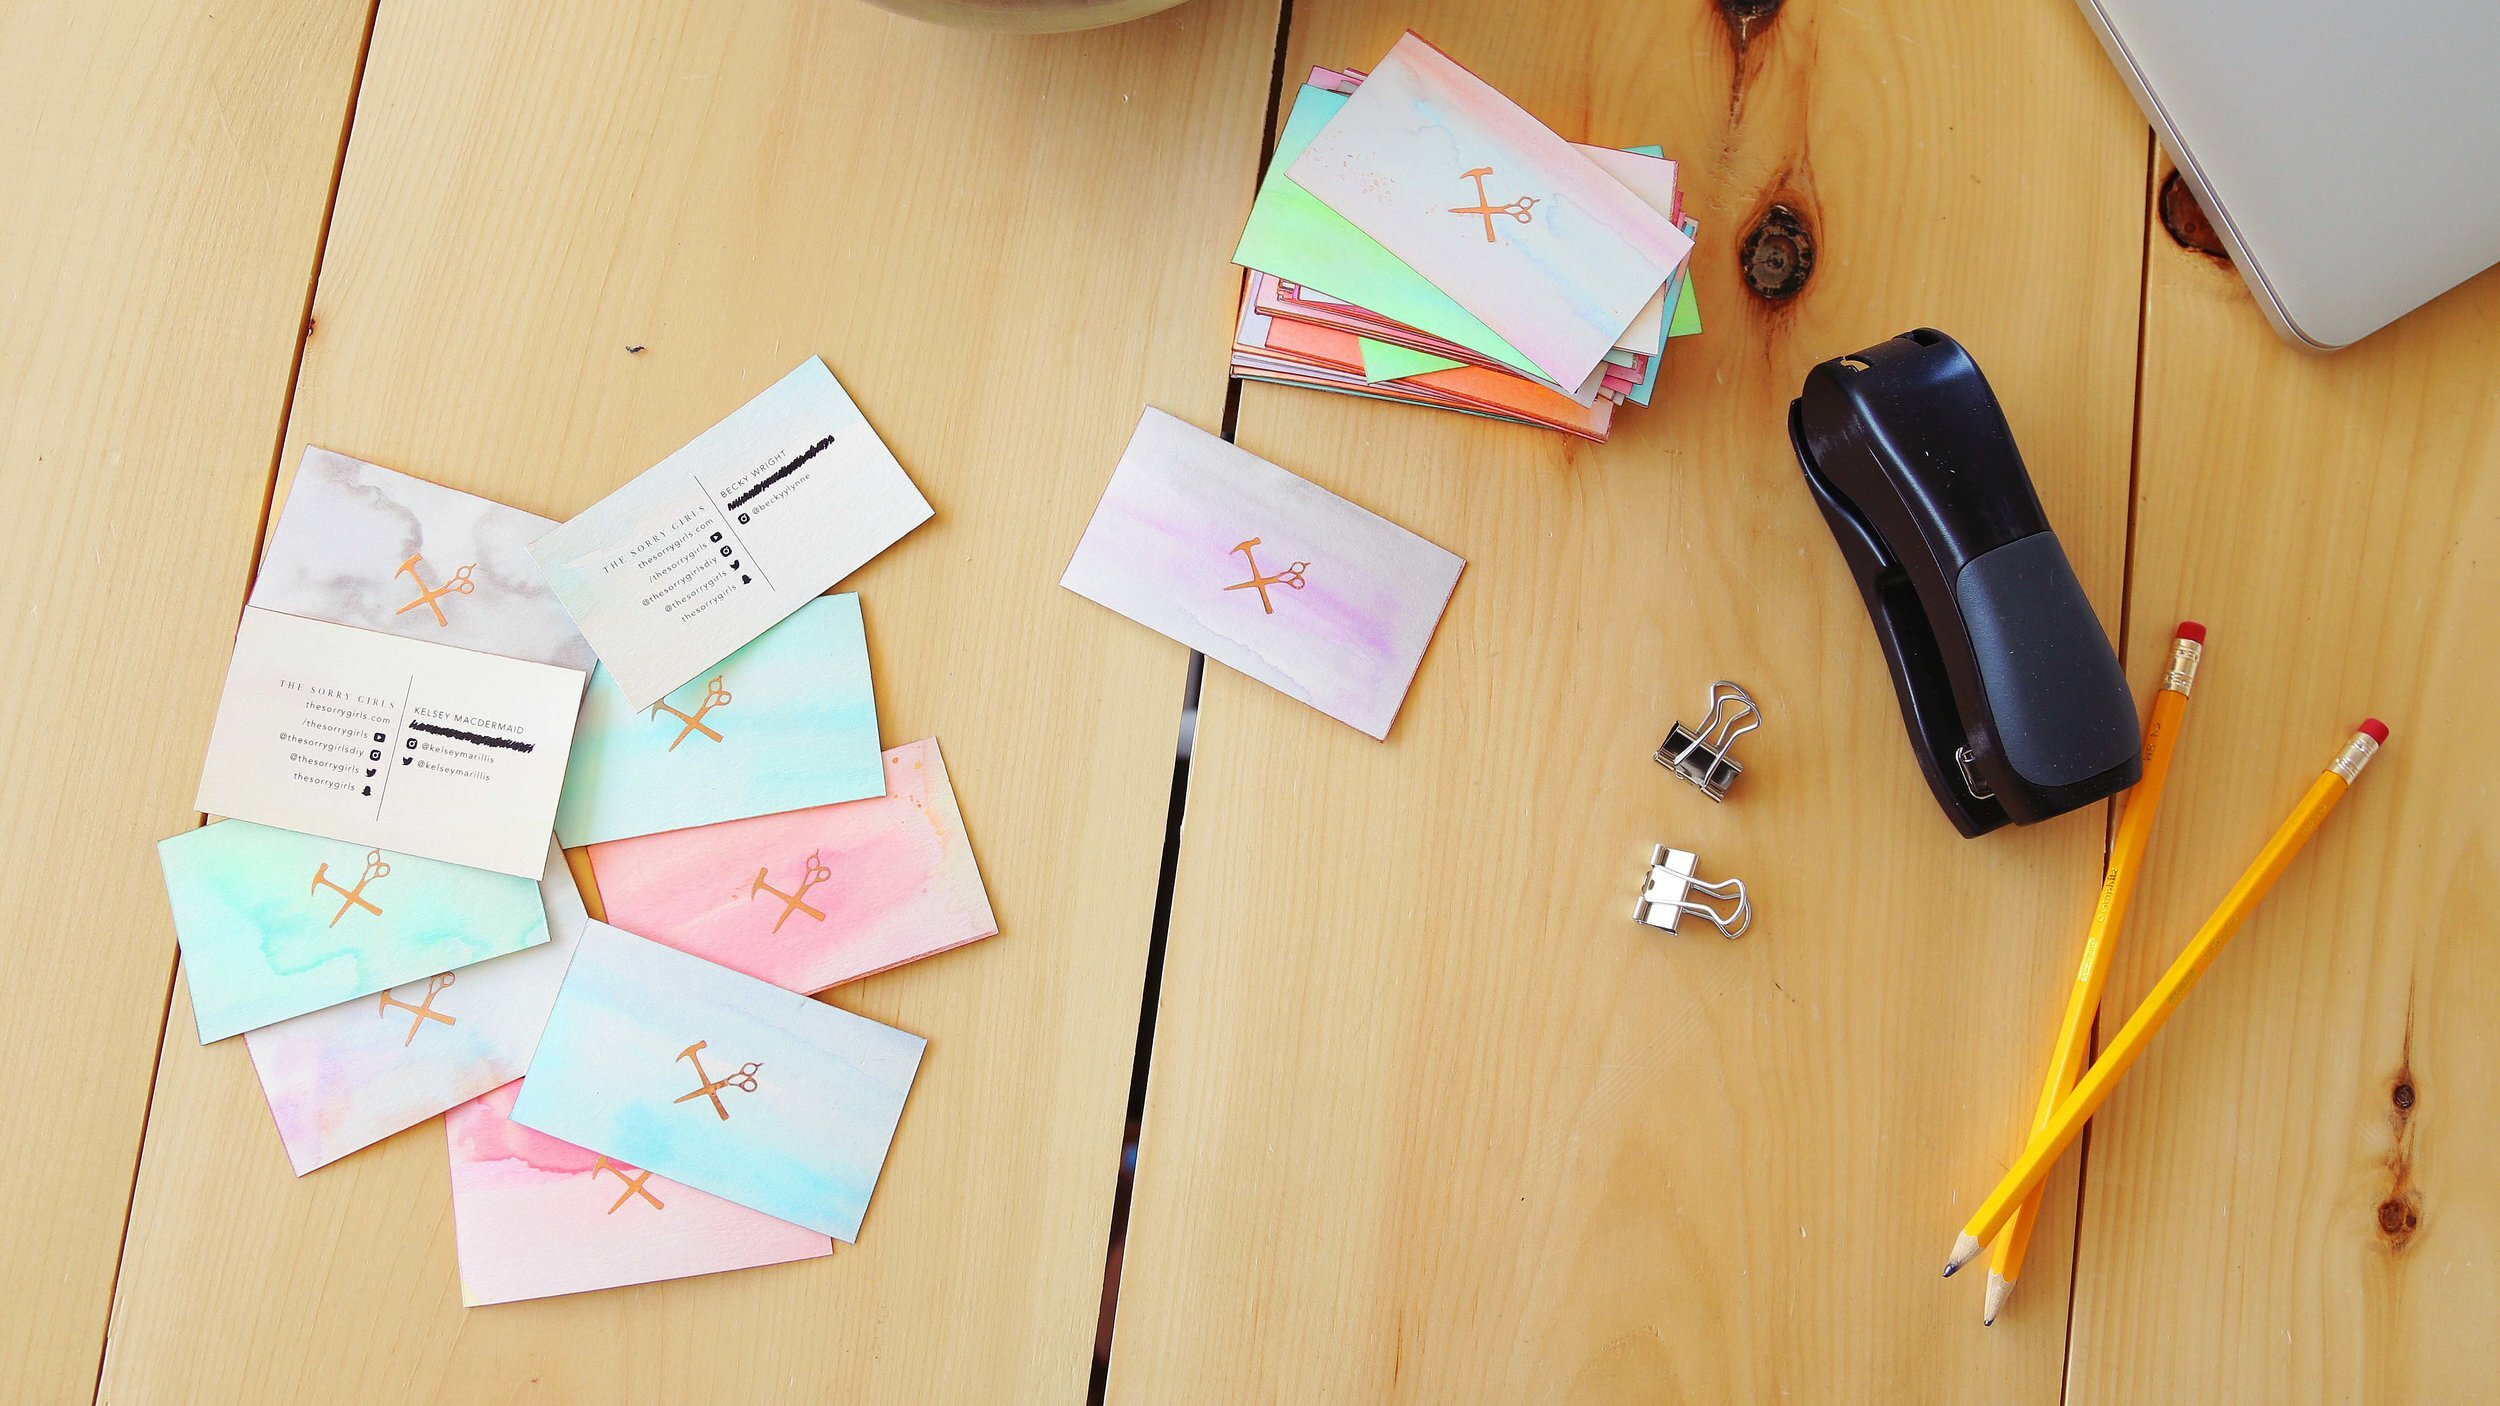
Kelsey and I just came back from a trip to VidCon (a convention for YouTube creators, fans, and business people in the online industry). We knew we’d be meeting a lot of important people and sometimes, yes, people do read a book by it’s cover (or a person by their business card). This sent us into a mad dash a week before we left to create the most perfect, brand representing, business cards. We had to balance a fine line between being able to tell they were DIY’d (because that’s what we do) and still looking professional. Below we show you the process of how we got from blank page to gorgeous watercoloured, rose gold edged, minimal yet stand out, business cards.

Cost: ~$10
Difficulty: ✂
Materials:
– watercolour paper
– watercolour
– copper sticker vinyl
– copper/ rose gold spray paint
– this blank business card template
Tools:
– paint brushes
– laser printer
– ruler
– exacto knife
– cutting mat
– C-clamp
– wooden blocks
Our custom business cards were created on a watercolour base so to do this you’ll need to start with some water colour paper. Our was 140 pound watercolour paper from the craft store
Next using some basic watercolours, start to add colour to the paper. The more water you add, the easier it will be to blend the colours. We chose to stick to colours that had the same tone per page so it didn’t become to tie dye looking
We made 12 different sheets all with different colour patterns
Once the sheets were dry, we flipped them over and added some colour to the back
Since the back is where the bulk of our information will go, we needed to keep this pretty light
We used mostly just the dirty water with a little bit of new paint to tint the paper instead of fully colouring it. Try to stick to light colours for this as well
Once the front and back are completely dry it’s time to print
We created a file that had our information printed multiple times across the back
We’ve linked a blank version of this template below if you want to create your own cards as well, linked above in the materials list
To actually print we ran into some trouble due to the fact that my printer is quite old and couldn’t handle the thickness of the paper. So in the spirit of honesty, we did run down to our local print shop and have our cards printed onto our custom watercolour paper. A newer laser printer that can handle thick card stock should have no problem with this at all!
Once all of our sheets were printed, it’s time to cut them out
Because printers can’t print exactly edge to edge, your page will have a slight border around it
Standard business cards are 3 ½ inches wide by 2 inches tall. Cut your cards out to these dimensions
It’s helpful to use the center line of the cards and just measure half way out in each direction
Once they’re all cut out, it’s time to finish the front.
Using our silhouette machine, we cut out our logo multiple times from a copper vinyl sheet we bought off Amazon
We stuck one sticker to the front center of each card.

Our cards are looking great but it’s time to add the final touch
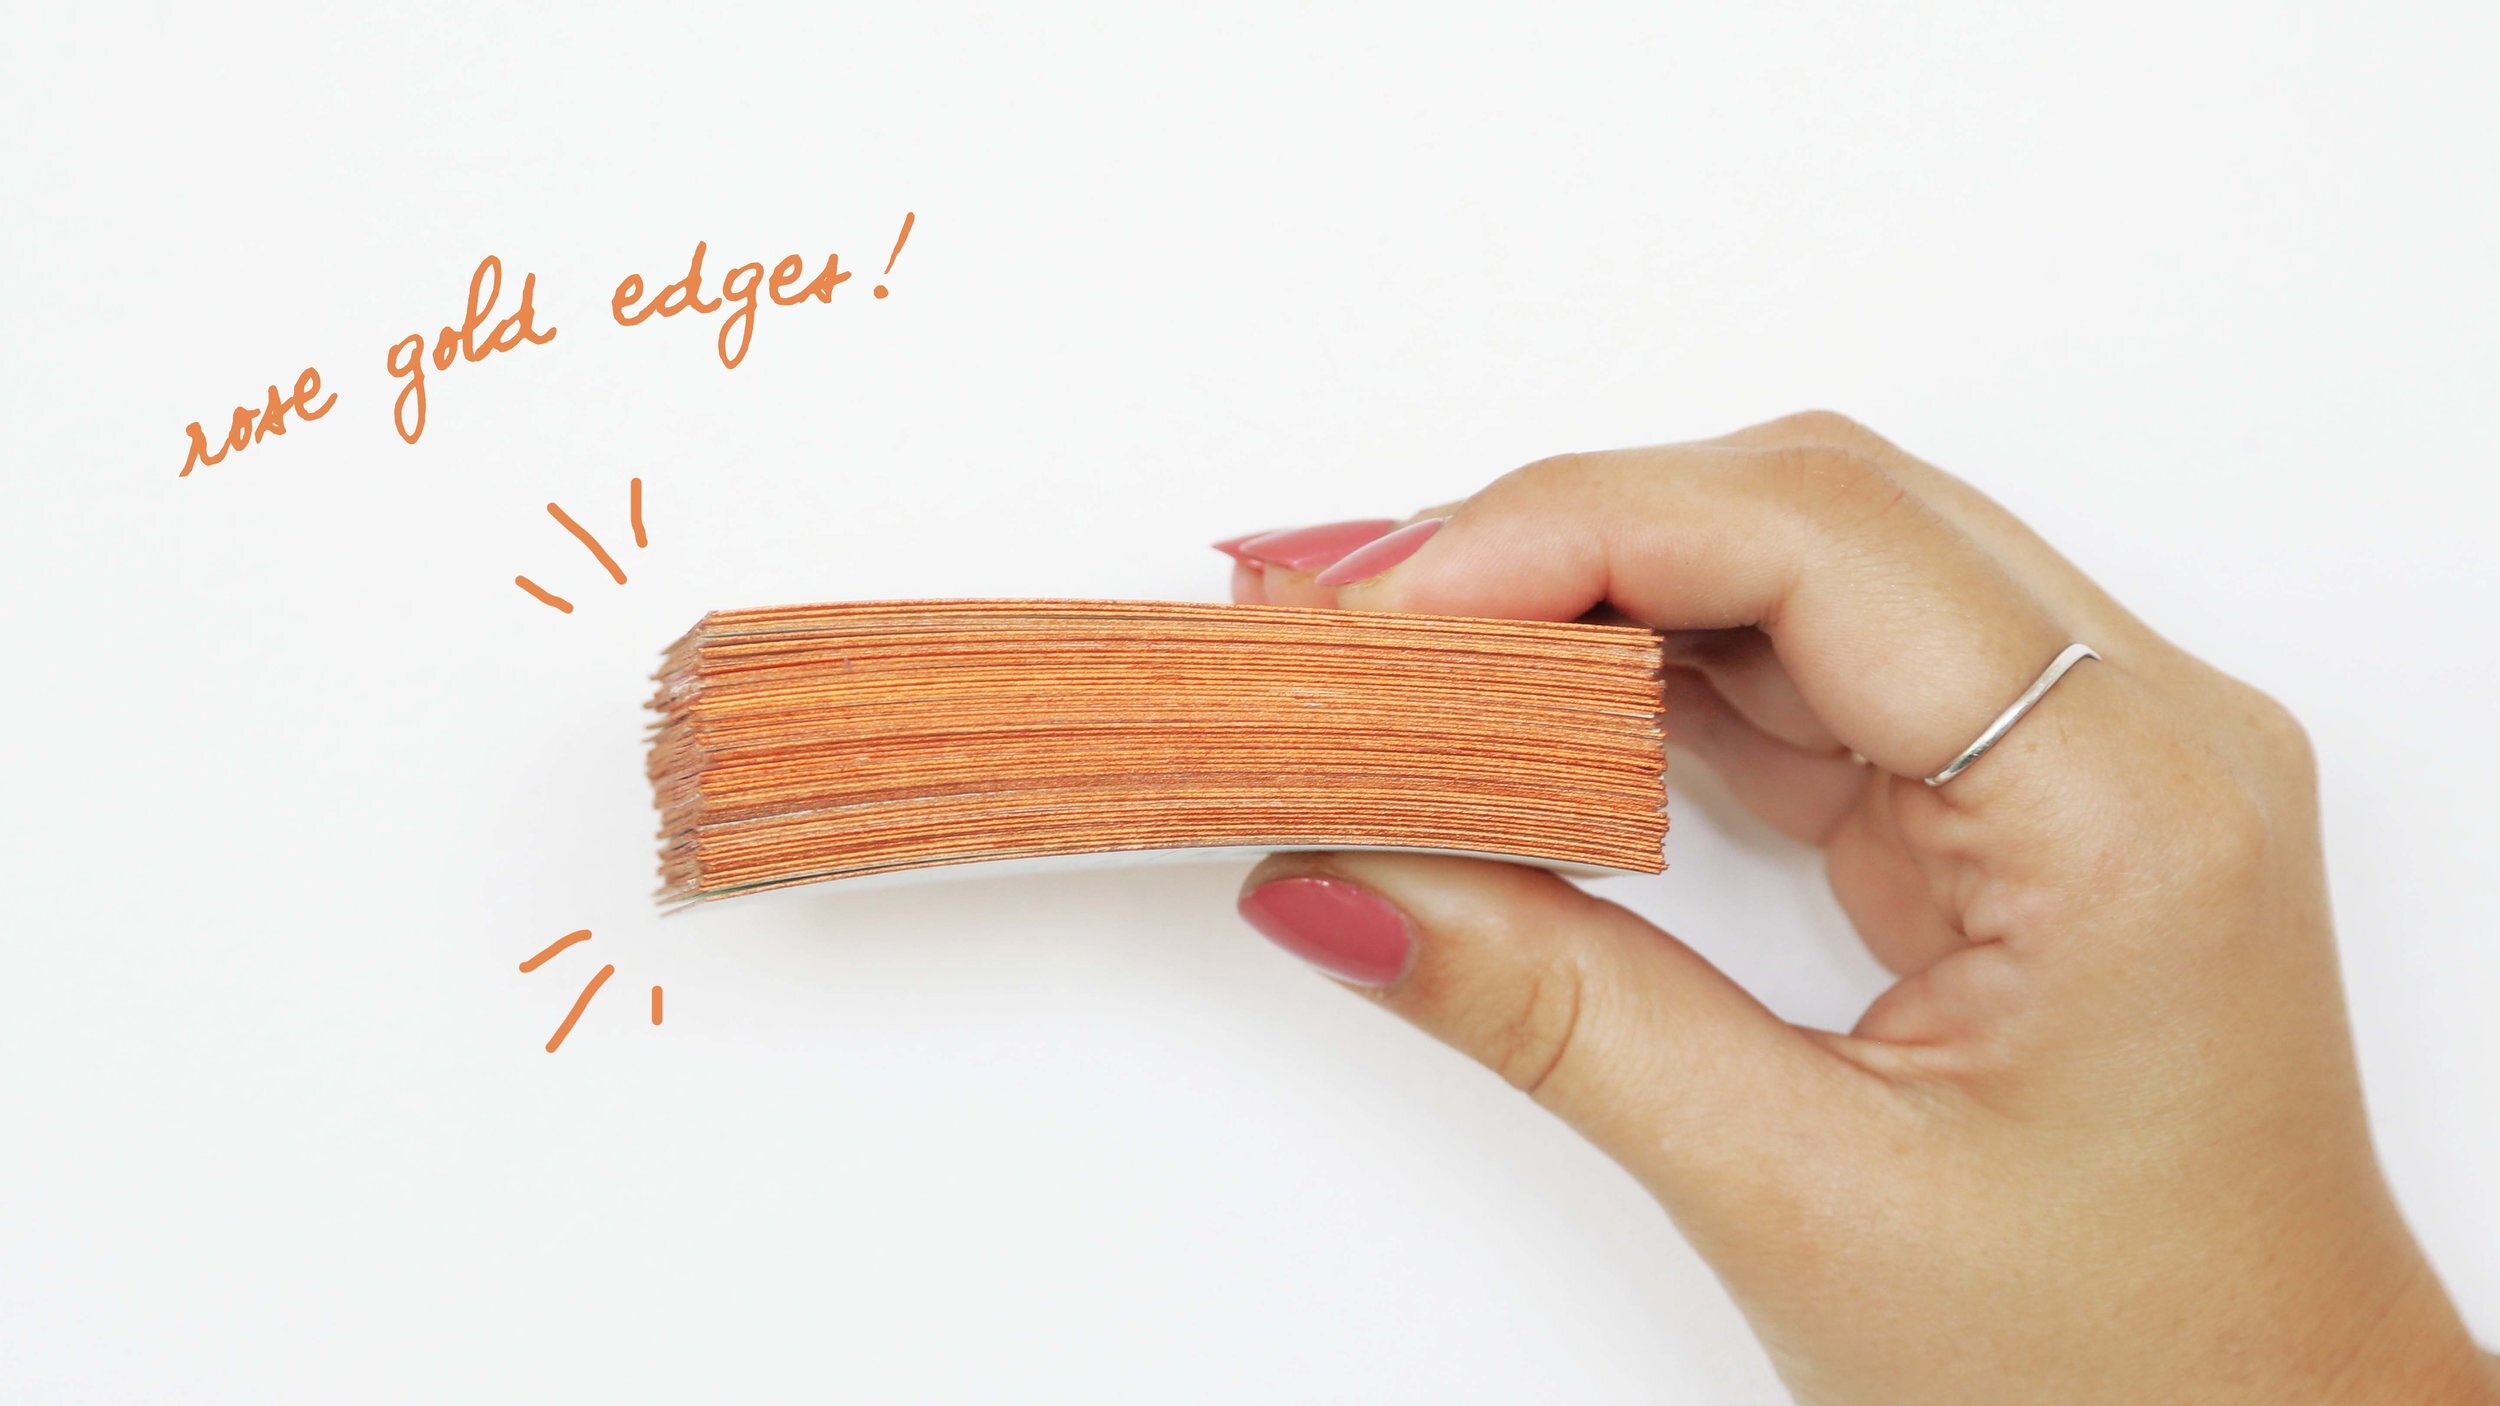
We going to add a copper border around the cards using some copper spray paint.
To make sure we only get the paint on the border and not on the cards, you’ll need two blocks of wood or very sturdy card slightly larger than the size of your cards, and a c-clamp.
Try to line your cards up as evenly as possible and sandwich them between the blocks of wood. Clamp the c-clamp around this tightly.
Use gentle strokes of the spray paint to go around the edges of the cards.
Make sure to not apply the paint too heavily or it could leak in between the cards
Let the paint dry and take the clamp off.
Your cards now have a beautiful copper edge!
Watch the video below for more details!