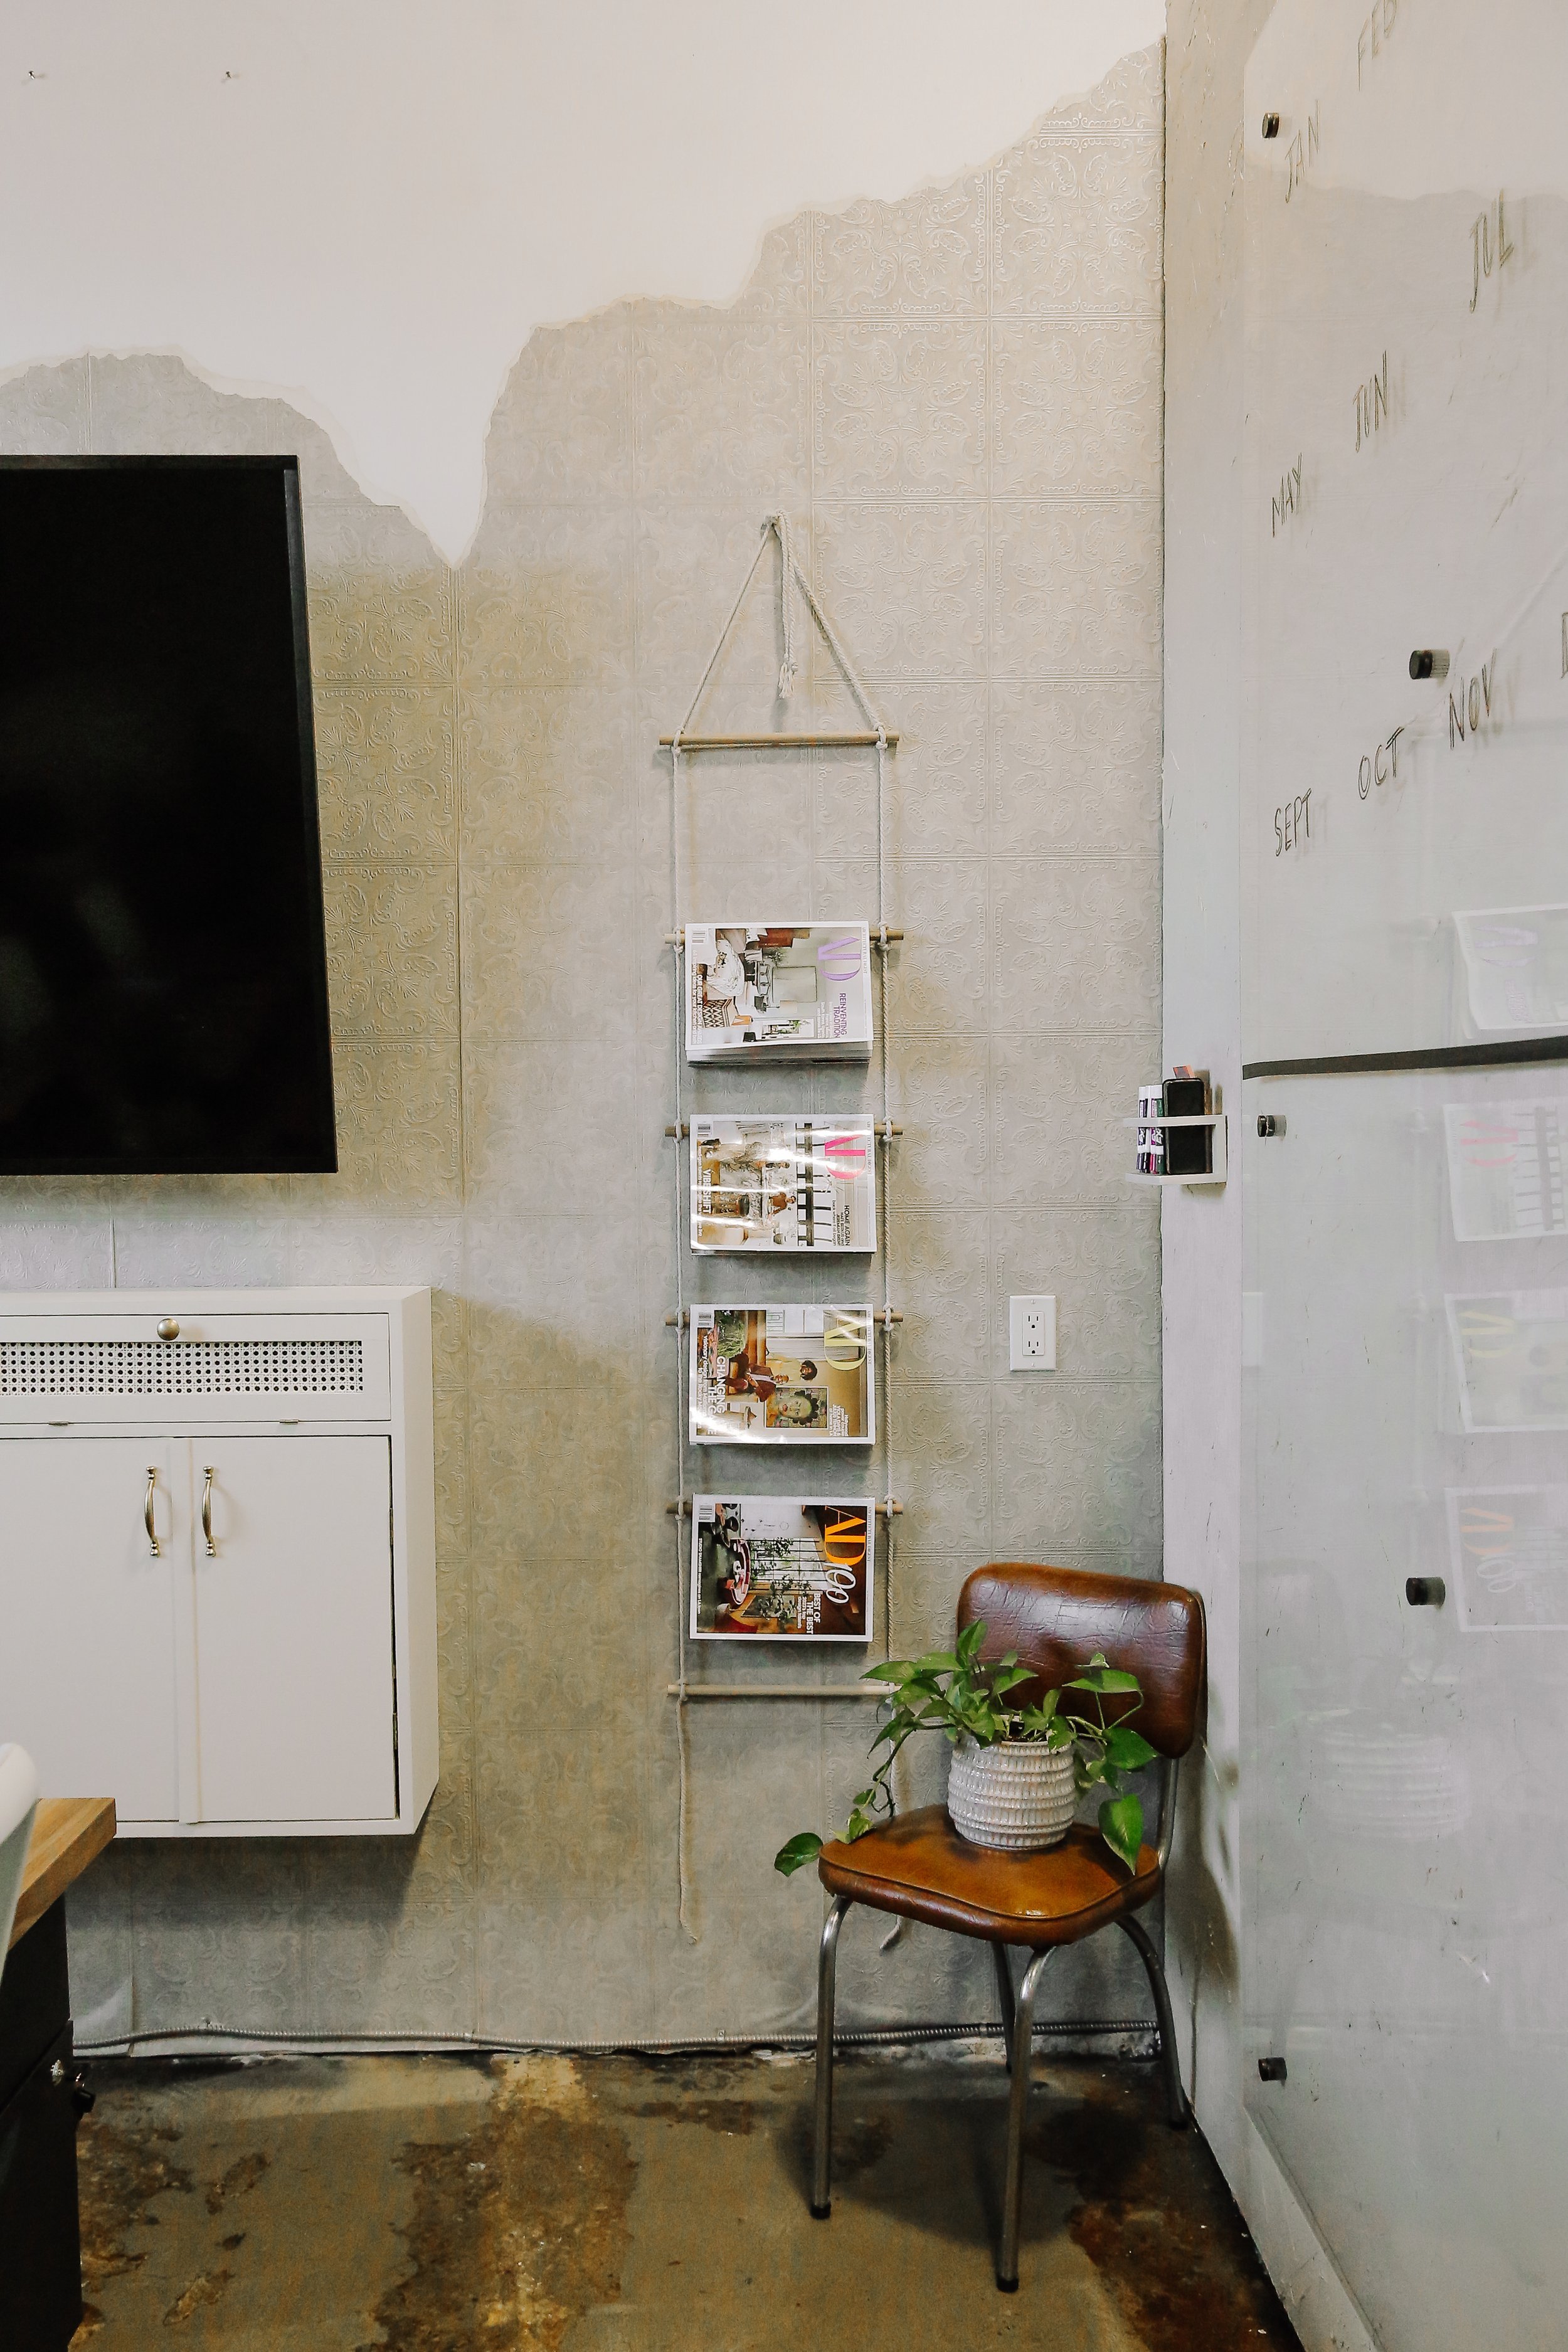
EASY & AFFORDABLE HOME DECOR DIY : Hanging Ladder Decor Display
For this DIY home decor project, we'll be creating a unique and stylish hanging ladder. This ladder is the perfect solution for anyone looking to add a touch of rustic charm to their home while also creating a practical storage solution. Whether you're looking for a place to hang your tea towels, face cloths, or magazines, this ladder is versatile enough to suit all your needs. Best of all, this DIY project is SO simple to make, affordable, and can be customised to fit your home's existing decor. Grab your materials and let's get started on creating your very own DIY hanging ladder!
What you’ll need:
Wooden dowel (the one I am using here is 6ft / 1.82 m)
Macrame Rope
A nail to hang up the finished product
Hand Miter Saw
Step 1
Measure and mark the wooden dowel to the desired length of 14 inches (35 cm) using a pencil and a ruler or measuring tape. Secure the wooden dowel in a handheld mitre saw clamp, making sure it is firmly held in place and won't move during cutting. Carefully use your hand saw to cut the wooden dowel, following the marked line. Use a slow and steady motion to avoid any mistakes or injury. I made a total of 6 rods for my ladder, but you can adjust this to your liking!
Step 2
After cutting the wooden dowels to the desired length, use some Gator sanding sheets (grit 220) to sand down all surfaces. This will help to smooth out any rough edges or splinters, and create a clean and even surface for staining.
After sanding, wipe the wooden dowels down with a damp cloth to remove any sawdust or debris. Let them dry completely before moving on to the next step.
Note: Always wear a dust mask and safety goggles when sanding wood, and work in a well-ventilated area to avoid inhaling sawdust.
Step 3
Now it's time to stain the dowels to match the decor in the space you will be hanging this up. Using Varathane wood stain, apply a thin coat of stain to the surface of each wooden dowel using a foam brush, lint-free cloth or rag. Be sure to apply the stain evenly and allow the stain to penetrate for a few minutes, and then wipe away any excess stain with a clean cloth.
If you desire a darker colour, apply a second coat of stain, following the same process as before. Once the stain is completely dry, inspect the wooden dowels for any missed spots or areas where the stain has pooled. Touch up as needed, and then allow the stain to dry completely before moving on to the next step.
Step 4
To ensure long lasting results, I went in with Varathane Diamond Wood Finish and covered all the dowels using a foam brush. This finish never yellows, resists water, alcohol, and household chemicals, AND is low odour and environmentally friendly.
Step 5
Now it's time to assemble the ladder using the stained wooden dowels and the macrame rope. Starting with one end of the rope, tie a ladder knot around the top of one of the wooden dowels. Repeat this process down the rope with all your dowels evenly spaced and all knots complete on the same side. Next, cut the rope with a generous amount of slack and repeat on the other side of the dowels.
Note: It's important to ensure that the rope you use is strong enough to hold the weight of the items you plan to hang on the ladder. Avoid overloading the ladder or hanging heavy items, as this could cause it to break or become unstable.
Step 6
Now using the extra slack you left, create a loop to hang it from and your DIY hanging ladder is now complete! Hang it up on a wall and use it to hang tea towels, face cloths, magazines,or any other lightweight items you wish to display.


