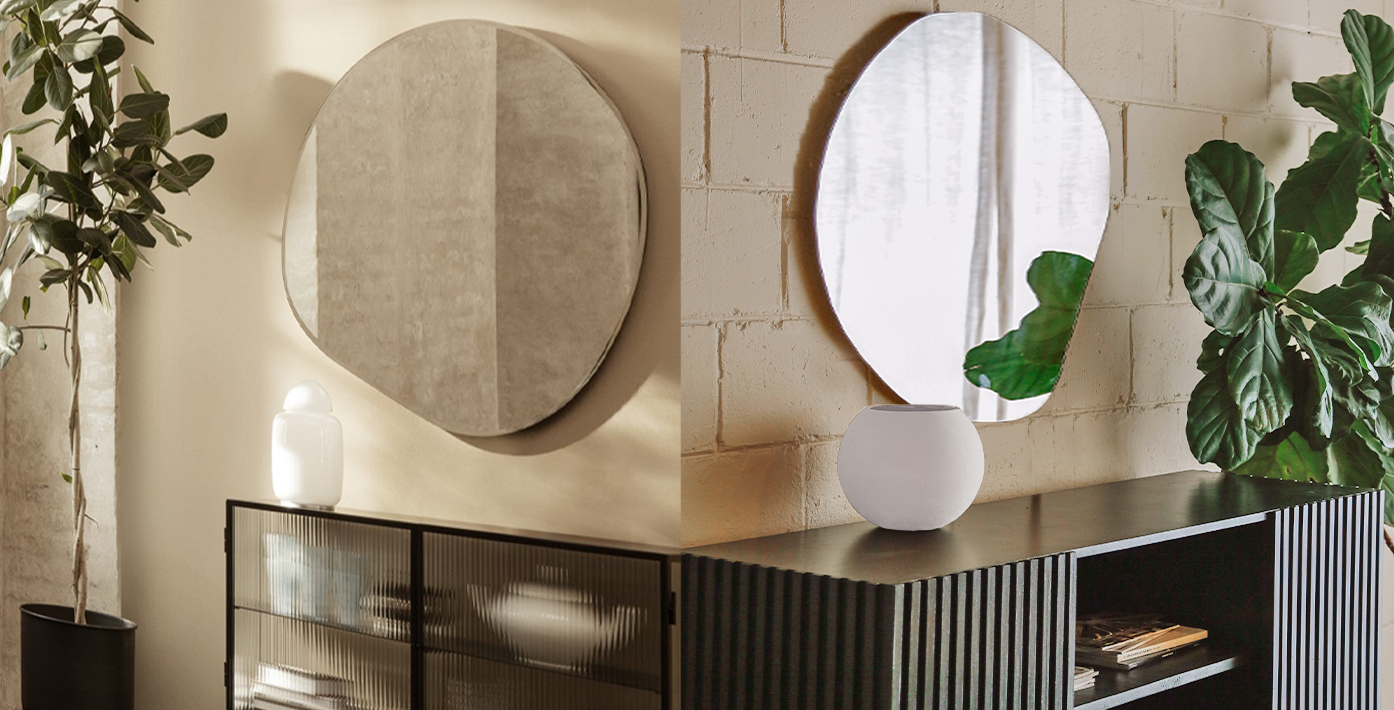
Duping The Iconic Ferm Living Pond Mirror For WAY Cheaper
Today I am remaking this Ferm Living Pond Mirror that retails for $469, which personally is a bit too much to spend on a mirror of this size, so I decided to try and make it myself!
I took to the thrift store and found a second hand mirror for $11.87! It was a decent size so I had a lot of mirror surface to work with (2x3 ft), and it was a great price so I swiped it up, so it’s time to DIY!


So the first step is opening the mirror up, taking out the frame and figuring out what shape I want to do! Because I am a perfectionist, I don’t trust myself to draw the shape perfectly onto the mirror on the first try, so I went ahead and drew it onto some craft paper first. Once I was happy with the shape, I cut that out and used it as a stencil to trace it onto my mirror with a bright coloured sharpie.


Now that the shape is all drawn out, it’s time to get to cutting this mirror. After doing some testing and researching, I found that a pistol grip glass cutter (linked here = $7.50) works the best when scoring out unique shapes because it has a great hold and the scoring tip has some movement to it. Additionally, I put some all purpose oil ($6.70) on the blade to really help move as smooth as possible and get a nice clean cut. [note: glass can be dangerous so please remember to protect your skin and eyes by using appropriate PPE while doing this DIY]


Instead of attempting to score this all in one go, I am splitting it up into sections that go along the straightest parts of my shape. This way I can cut a more or less straight line that will let me start and end off the mirror, making it easier to split. Once scored, if you apply enough pressure, you will be able to split your mirror easily.
Now that it’s all cut, it’s very important to sand down the edges with a rough sandpaper (I am using an 80 grit sheet) while being very careful (i.e. glasses, gloves and mask).


In order to be able to hang the mirror, I am adding a backing to the mirror with a set of D ring hanging hardware (linked here = $2.65) and screwing them into a piece of scrap plywood that is a bit smaller than the entire mirror ($11.88). Using some mirror adhesive ($8.41), I am adding the backing onto the back of the mirror and leaving it until it’s fully dry (~24 hours).


Lastly, I want to add a brass edge around the mirror, so I taped off the parts of my mirror that I didn’t want painted and covered the edges in a coat of brass gold metallic spray paint (linked here = $5.48).

And there you have a beautiful mirror that cost a total of $54.40 to make compared to the original price of $469!! On top of that, a lot of the items used in this DIY are already items you may have around your house (for example: gold spray paint), so that would drop your cost even more!


