MARBLE PRINTED FABRIC

How this idea started….
Have you seen that nail polish/water/ mug dipping trend? It would be cool if we did that with fabric! *Does research* Use shaving cream!
And here we are! Today we are showing you how to use shaving cream and fabric paint to create a marble effect on fabric. We are mind-blown how this turned out and it is actually SUCH A FUN DIY!

Cost: $5 + the cost of fabric
Difficulty: ✂
Materials:
– fabric (your choice for size, ours was a cotton base)
– small piece of cardboard
– large piece of cardboard
– foaming shaving cream
– black fabric paint
– stir stick (we used a pencil)
– plastic sheets/ washable surface
– spare piece of fabric/ cloth
Tools:
– scissors
– iron
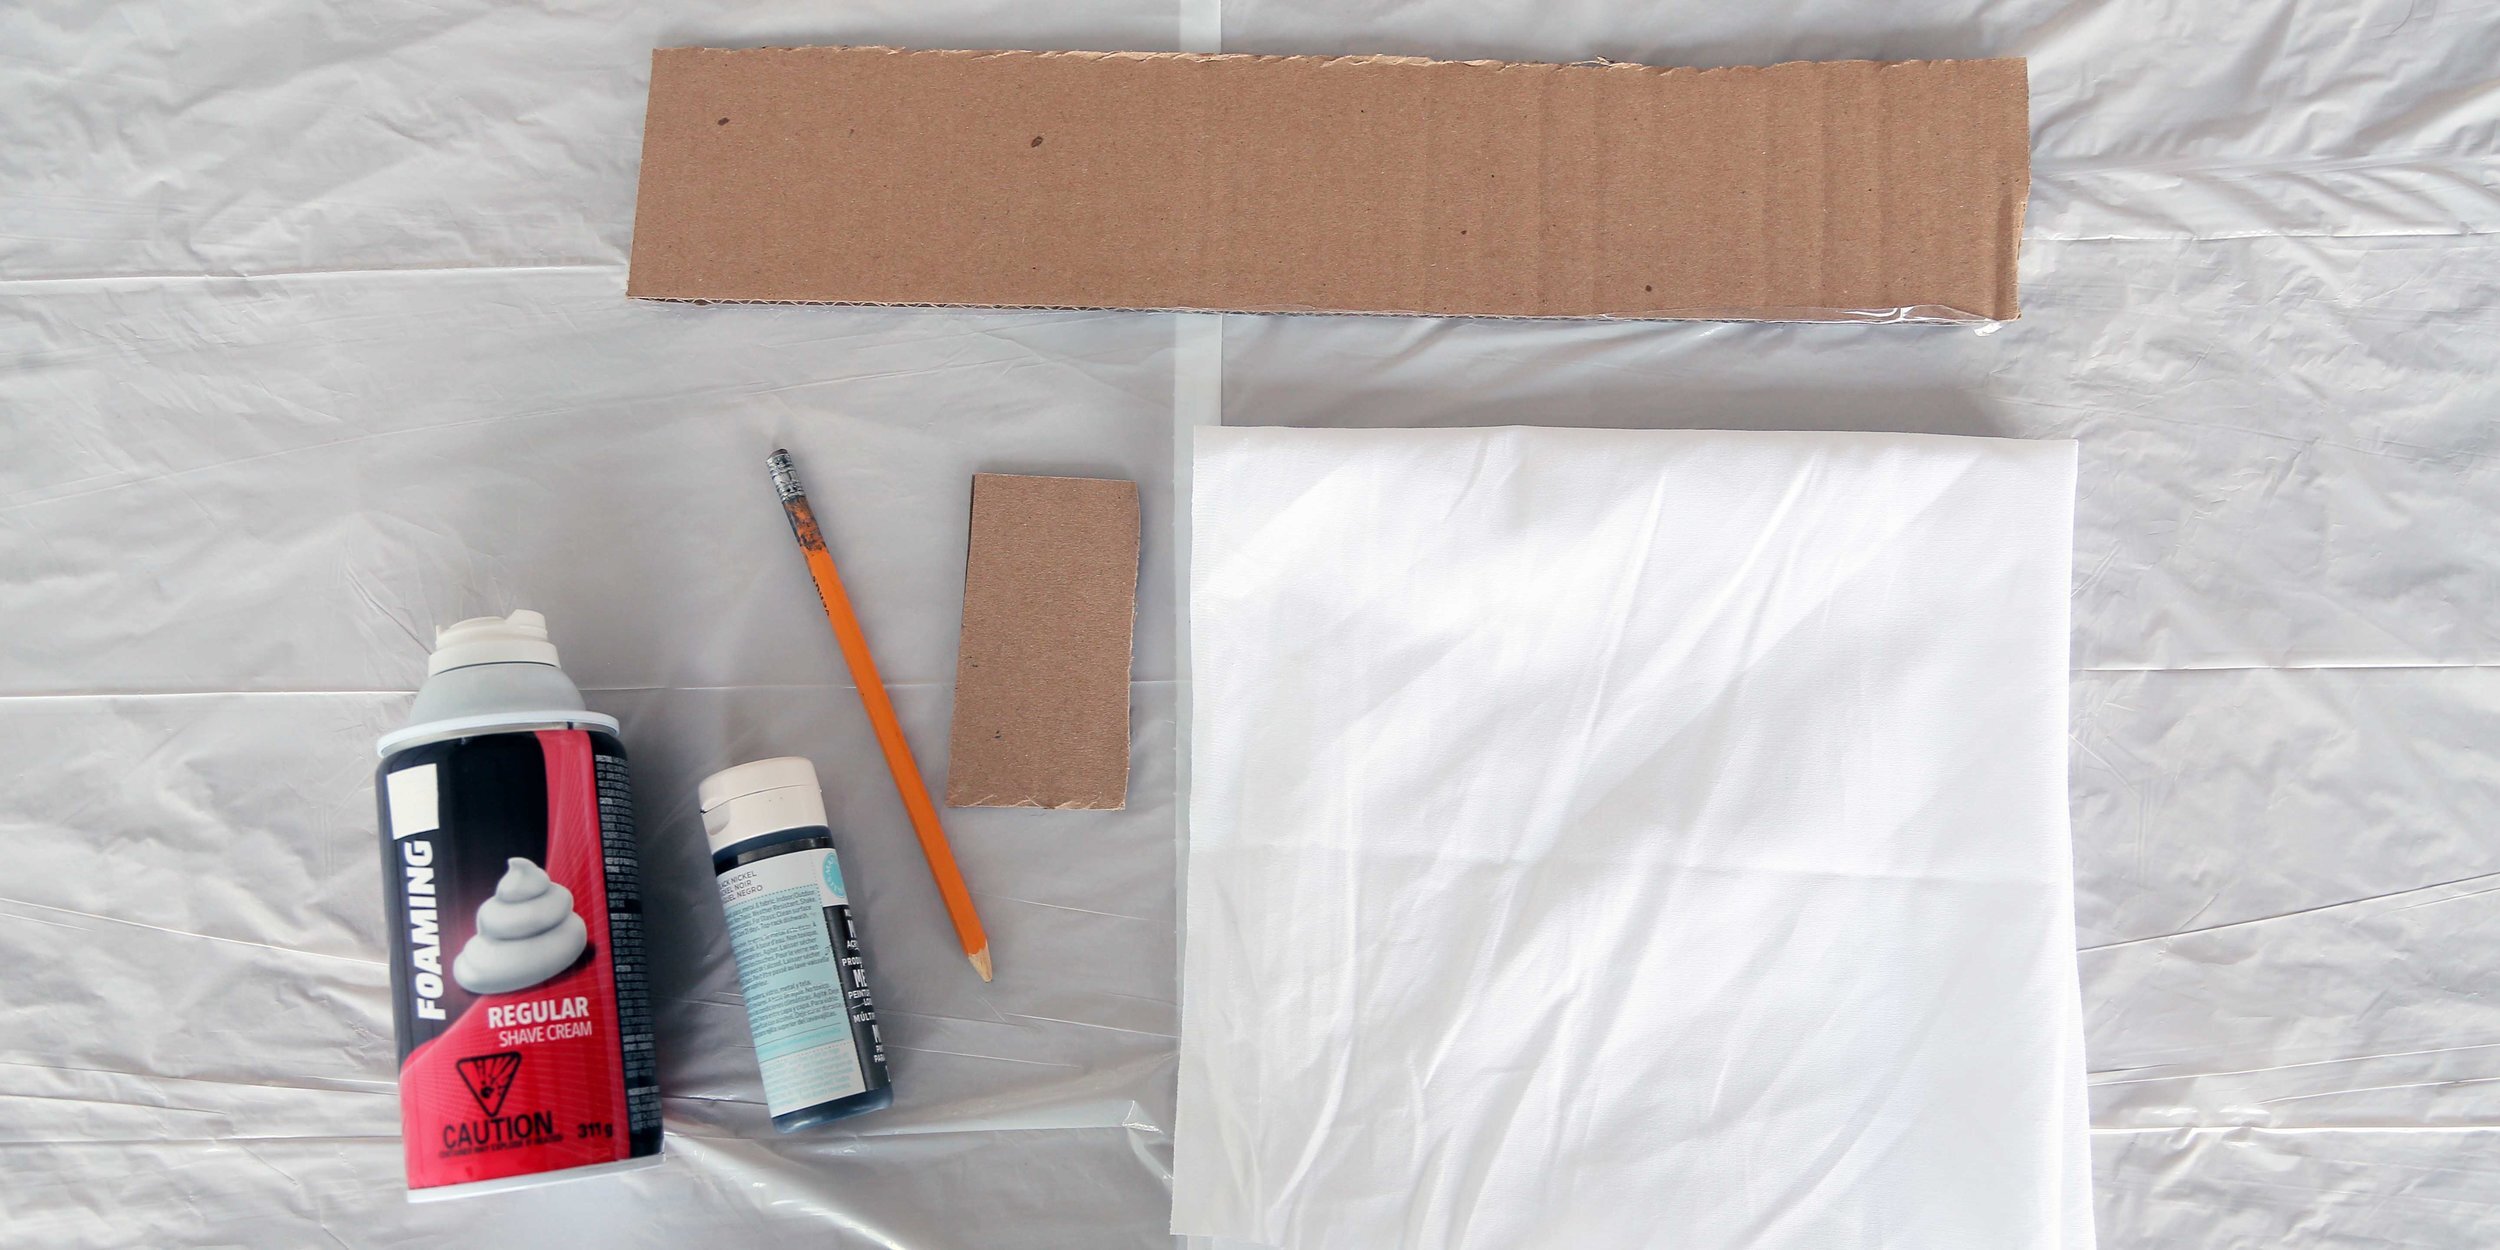
To turn your basic fabric into a gorgeous marble print, we are going to need foaming shaving cream, black fabric paint, some kind of small stir stick, a small and long piece of cardboard and our base fabric, we chose a simple cotton. The amount you need will vary on what you plan to make with the fabric.

On an easy to clean surface or some disposable plastic that is larger than your fabric (we used garbage bags) add a small dollop of shaving cream. To this we added a couple of drops of black fabric paint. With your stir stick, aka pencil, mix the paint and the shaving cream. We did this by swirling the paint and shaving cream. In the end you want it to look something like this. DO NOT mix too much otherwise you will end up with grey shaving cream, which we don’t want. We are trying to get these swirled lines. Next we are going to lay a thin base layer of shaving cream the size of the fabric we wish to print. Use your hands to smooth out the shaving cream. Now we are going to take our small piece of cardboard and use it as a tool to spread our paint. We are applying it in small sections little by little in different directions. You really want to see those different tones lines.
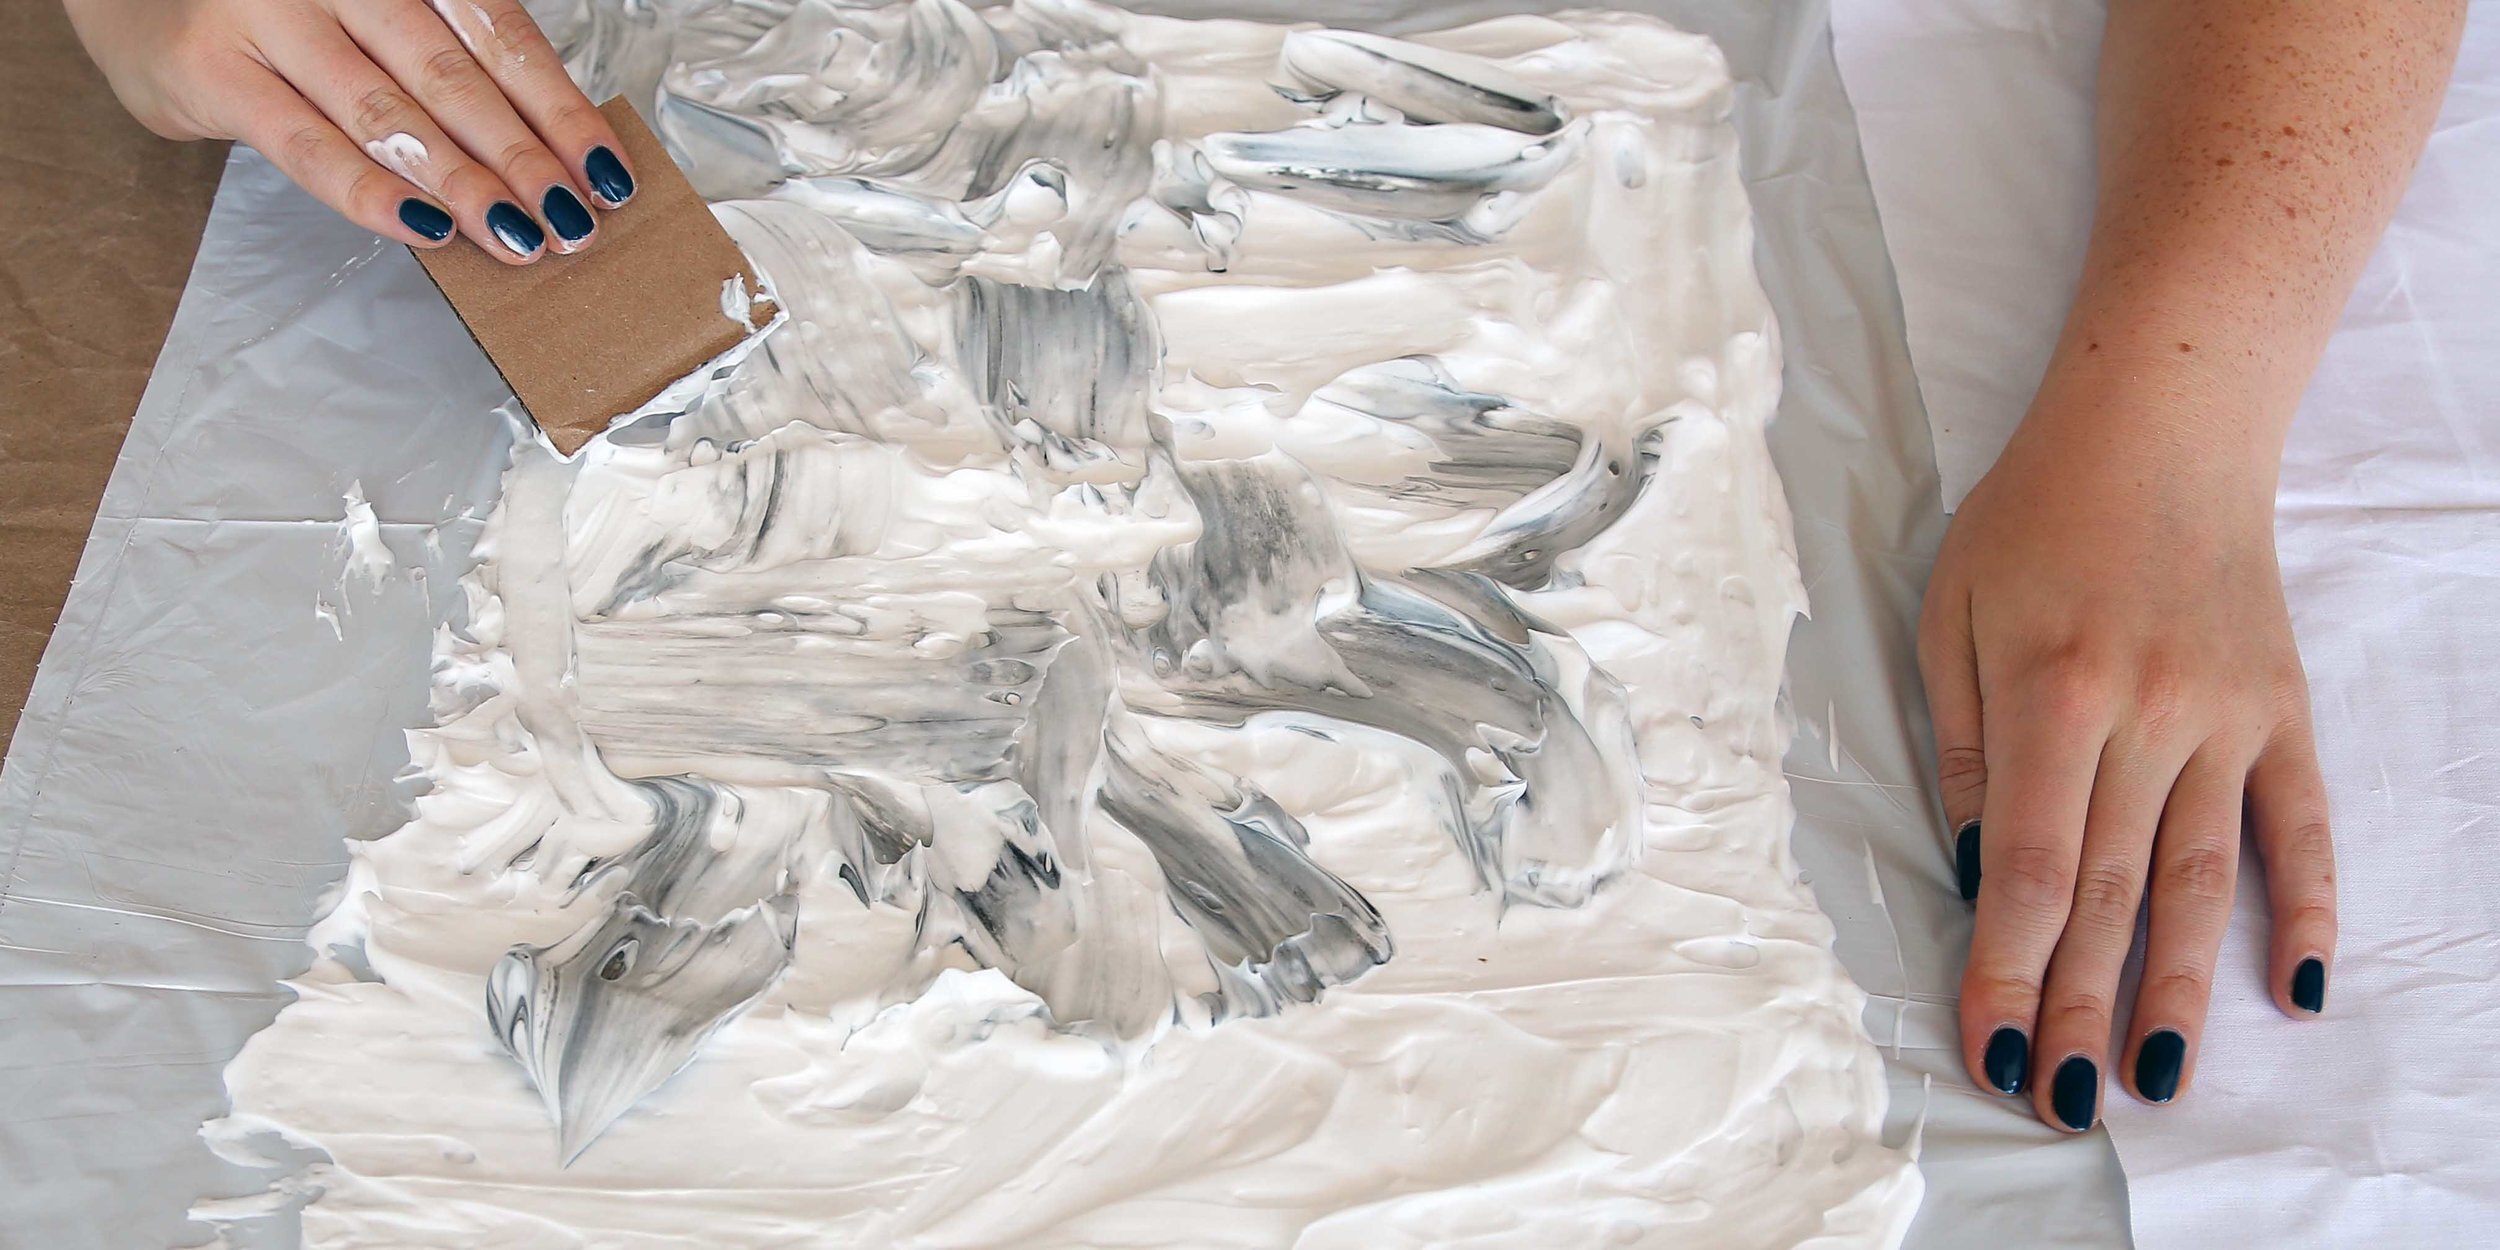

We made another batch of our paint mixture and continued to apply it to the area until the entire space was covered. Next we took our cotton fabric and carefully laid it down on our shaving cream. We then lightly pressed the fabric into the shaving cream so that we made sure the paint was touching the fabric. Make sure you don’t press down too hard, we don’t want the shaving cream to push out from under the fabric…until the edges. You can push along the edges of your fabric if you want to make sure your paint is getting to the edges, and it’s kind of fun!
After your fabric iscompletely pressed, you can go ahead and pull it off of the shaving cream. You’ll want to place this on another easy to wash/ plastic bag surface because the next step can get a little messy. Taking that long piece of cardboard we cut out we are going to use it as a giant scraper to get off all of the shaving cream. You want to try to do this in one go if possible, and if not, multiple is okay (we did!) but you need to make sure you clean your scraper afterwords. Otherwise the black paint can get on the white areas and your fabric will turn out mostly grey. Press down firmly and scrape off as much as you can at once.

The next step is to take your fabric and give it a good rinse with cold water to remove the shaving cream, we then let it air dry, not in direct sunlight but follow the instructions on your fabric paint. After it was dry we heat set it with an iron and a piece of fabric on top for a buffer.

From here you can turn your fabric into just about anything!
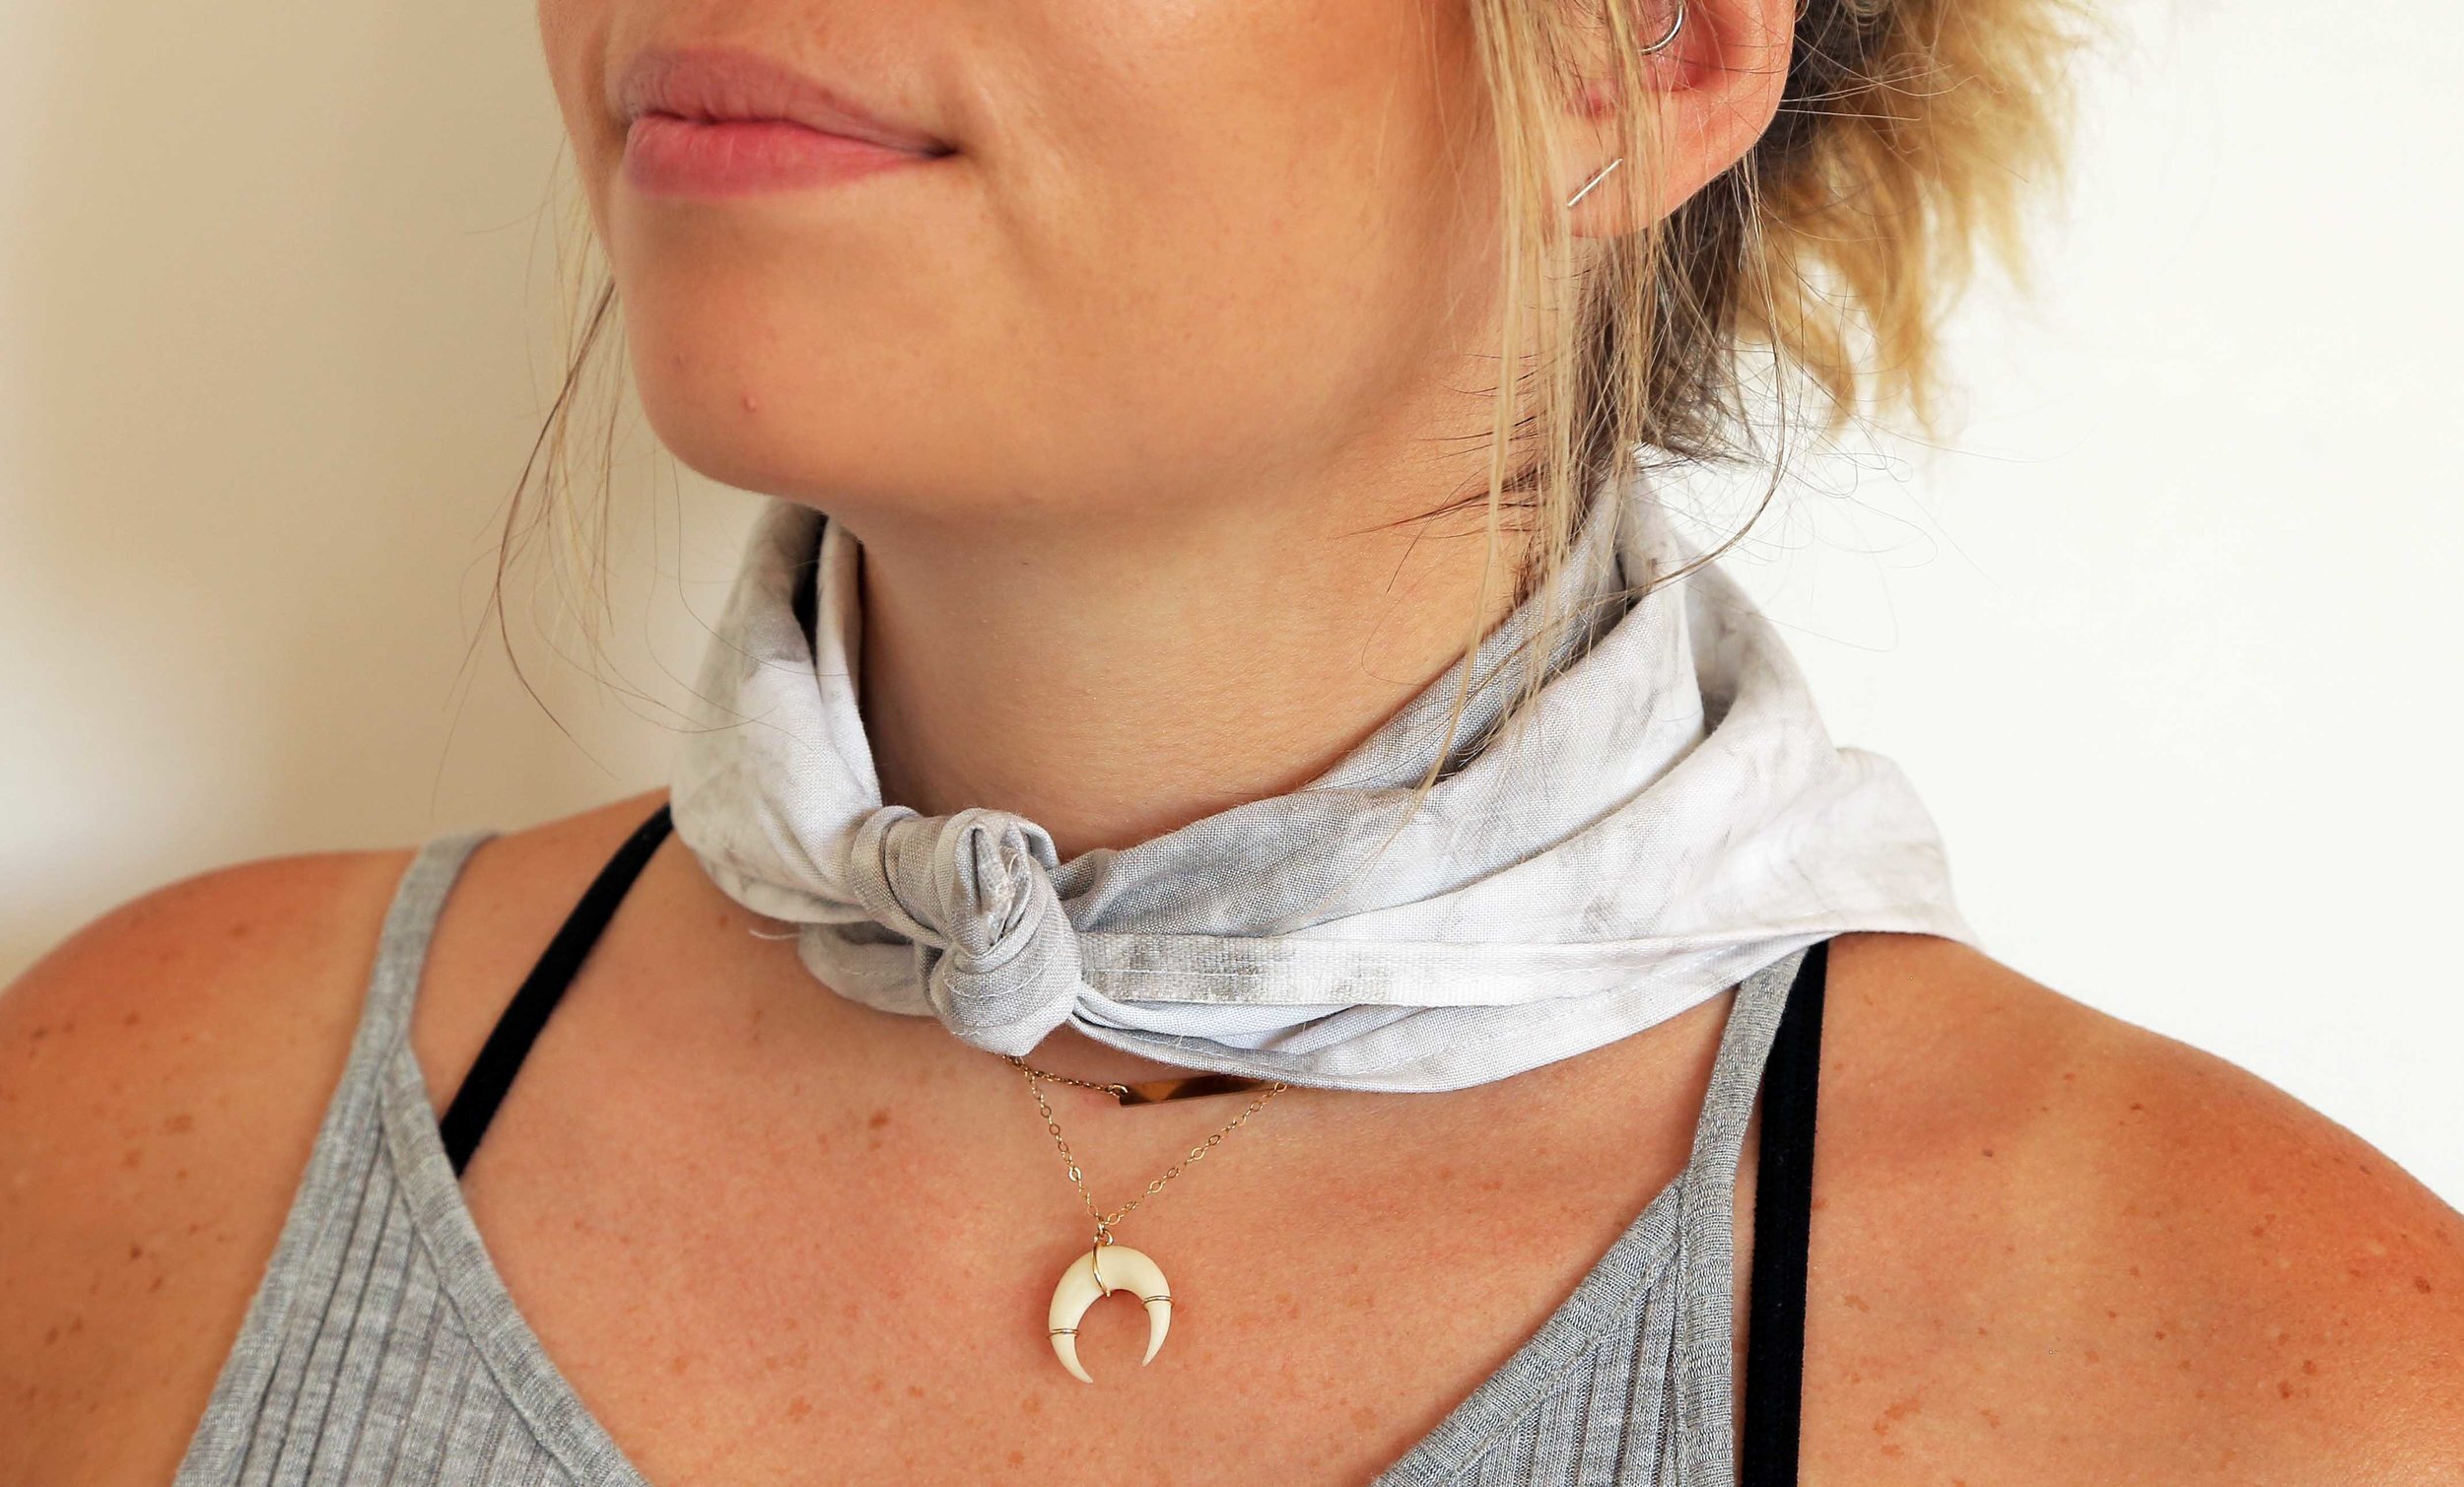
We took a square piece, rolled the edges over to create a hem, sewed it up and now we have a handkerchief. We turned a larger piece of fabric that we marble printed into a pillow case, we have a super easy way to make a pillow case which we’ll link right here! And lastly, we made a cute bag for makeup, pencils, whatever your heart desires!