DIY WONDER WOMAN COSTUME
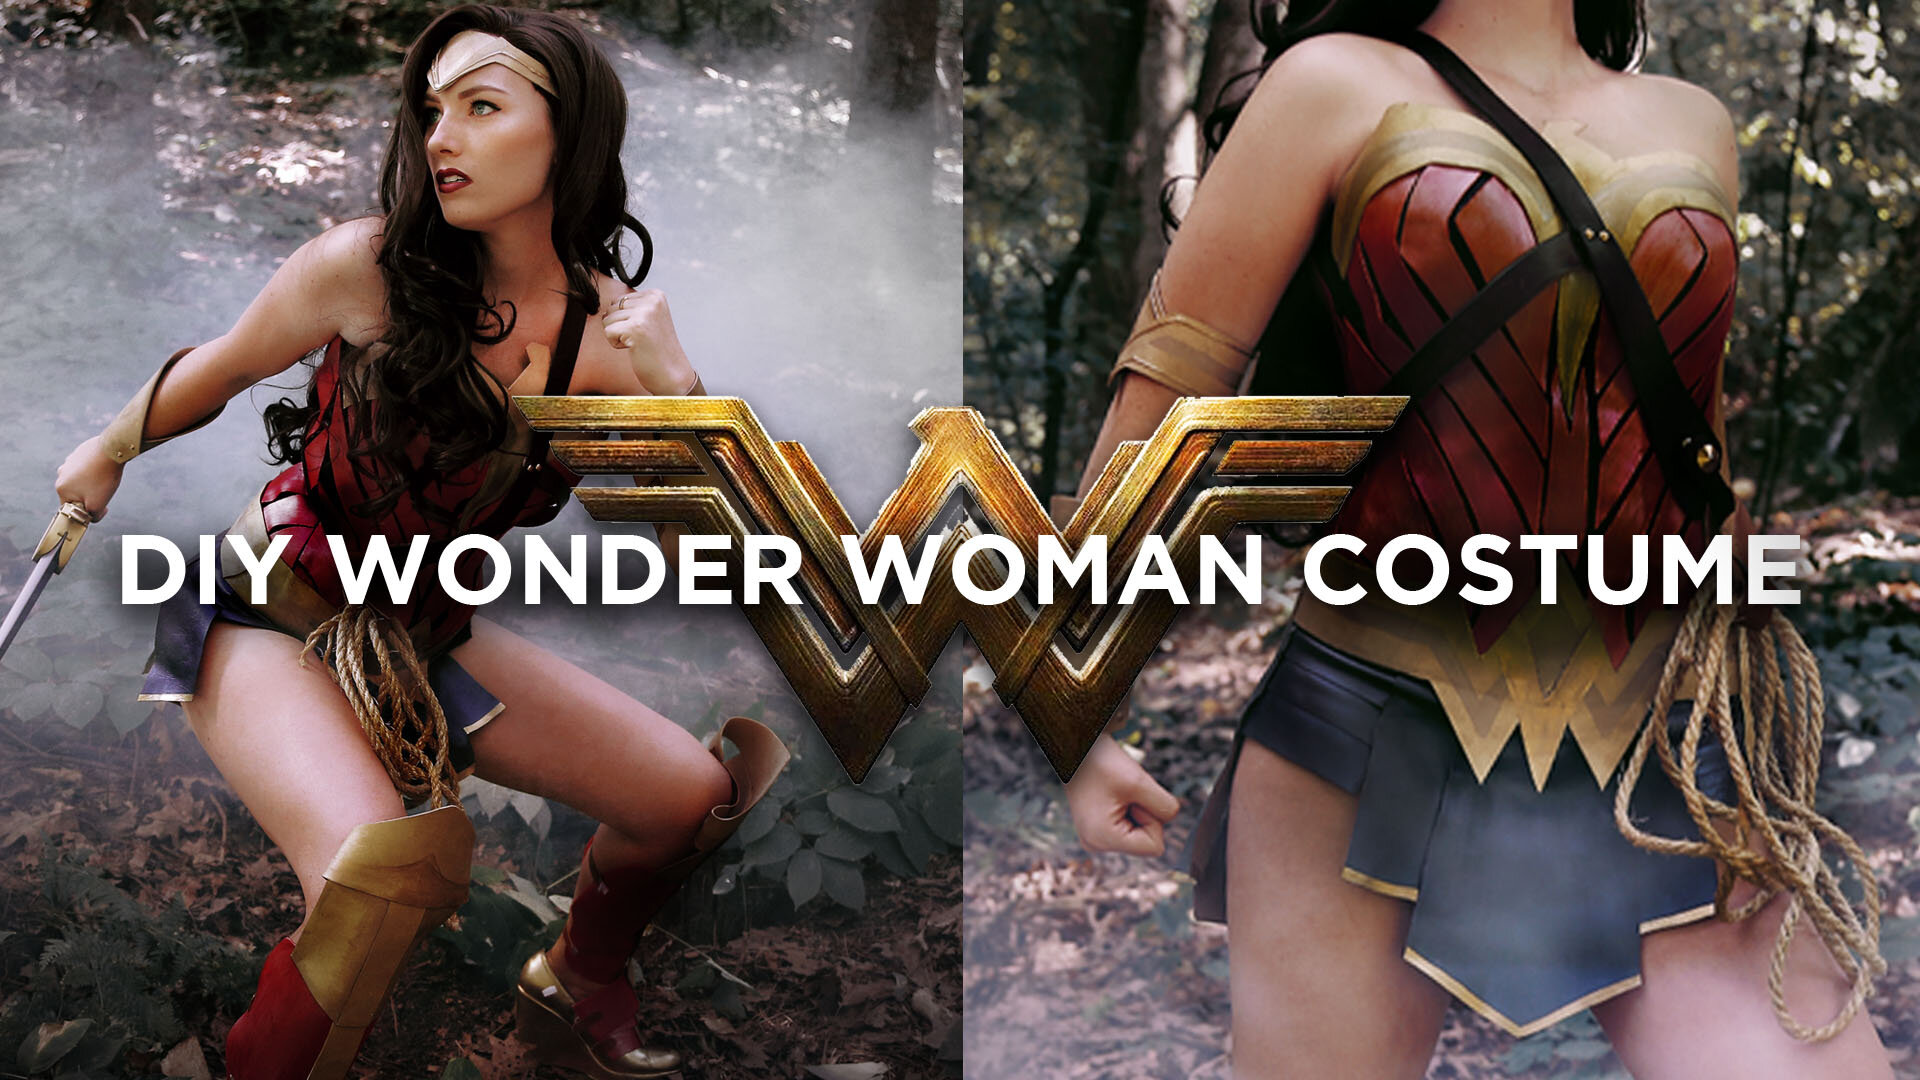
HI! We are The Sorry Girls and we LOVE Halloween. We start our costume tutorials early and we go HARD. If you already knew this, we apologize but we just wanted to make sure everyone was all caught up! Let’s get right into how we made this modern Wonder Woman costume (from Batman vs Superman, 2016 and Wonder Woman, 2017). For your reference, here are some photos we referenced here and here.
Materials:
– black corset
– 5 pieces of red craft foam
– 6 pieces tan craft foam
– navy leather (or scrap leather and metallic navy paint)
– red metallic paint
– gold spray paint
– liquid gold leaf paint
– rope
– sword
– 2 brown belts
– scrap brown leather
– brown wig (if you need it)
Tools:
– scissors
– measuring tape
– hot glue gun + hot glue sticks
– super glue
– paint brush
– scrap paper
– printer
– free templates

For the dress…
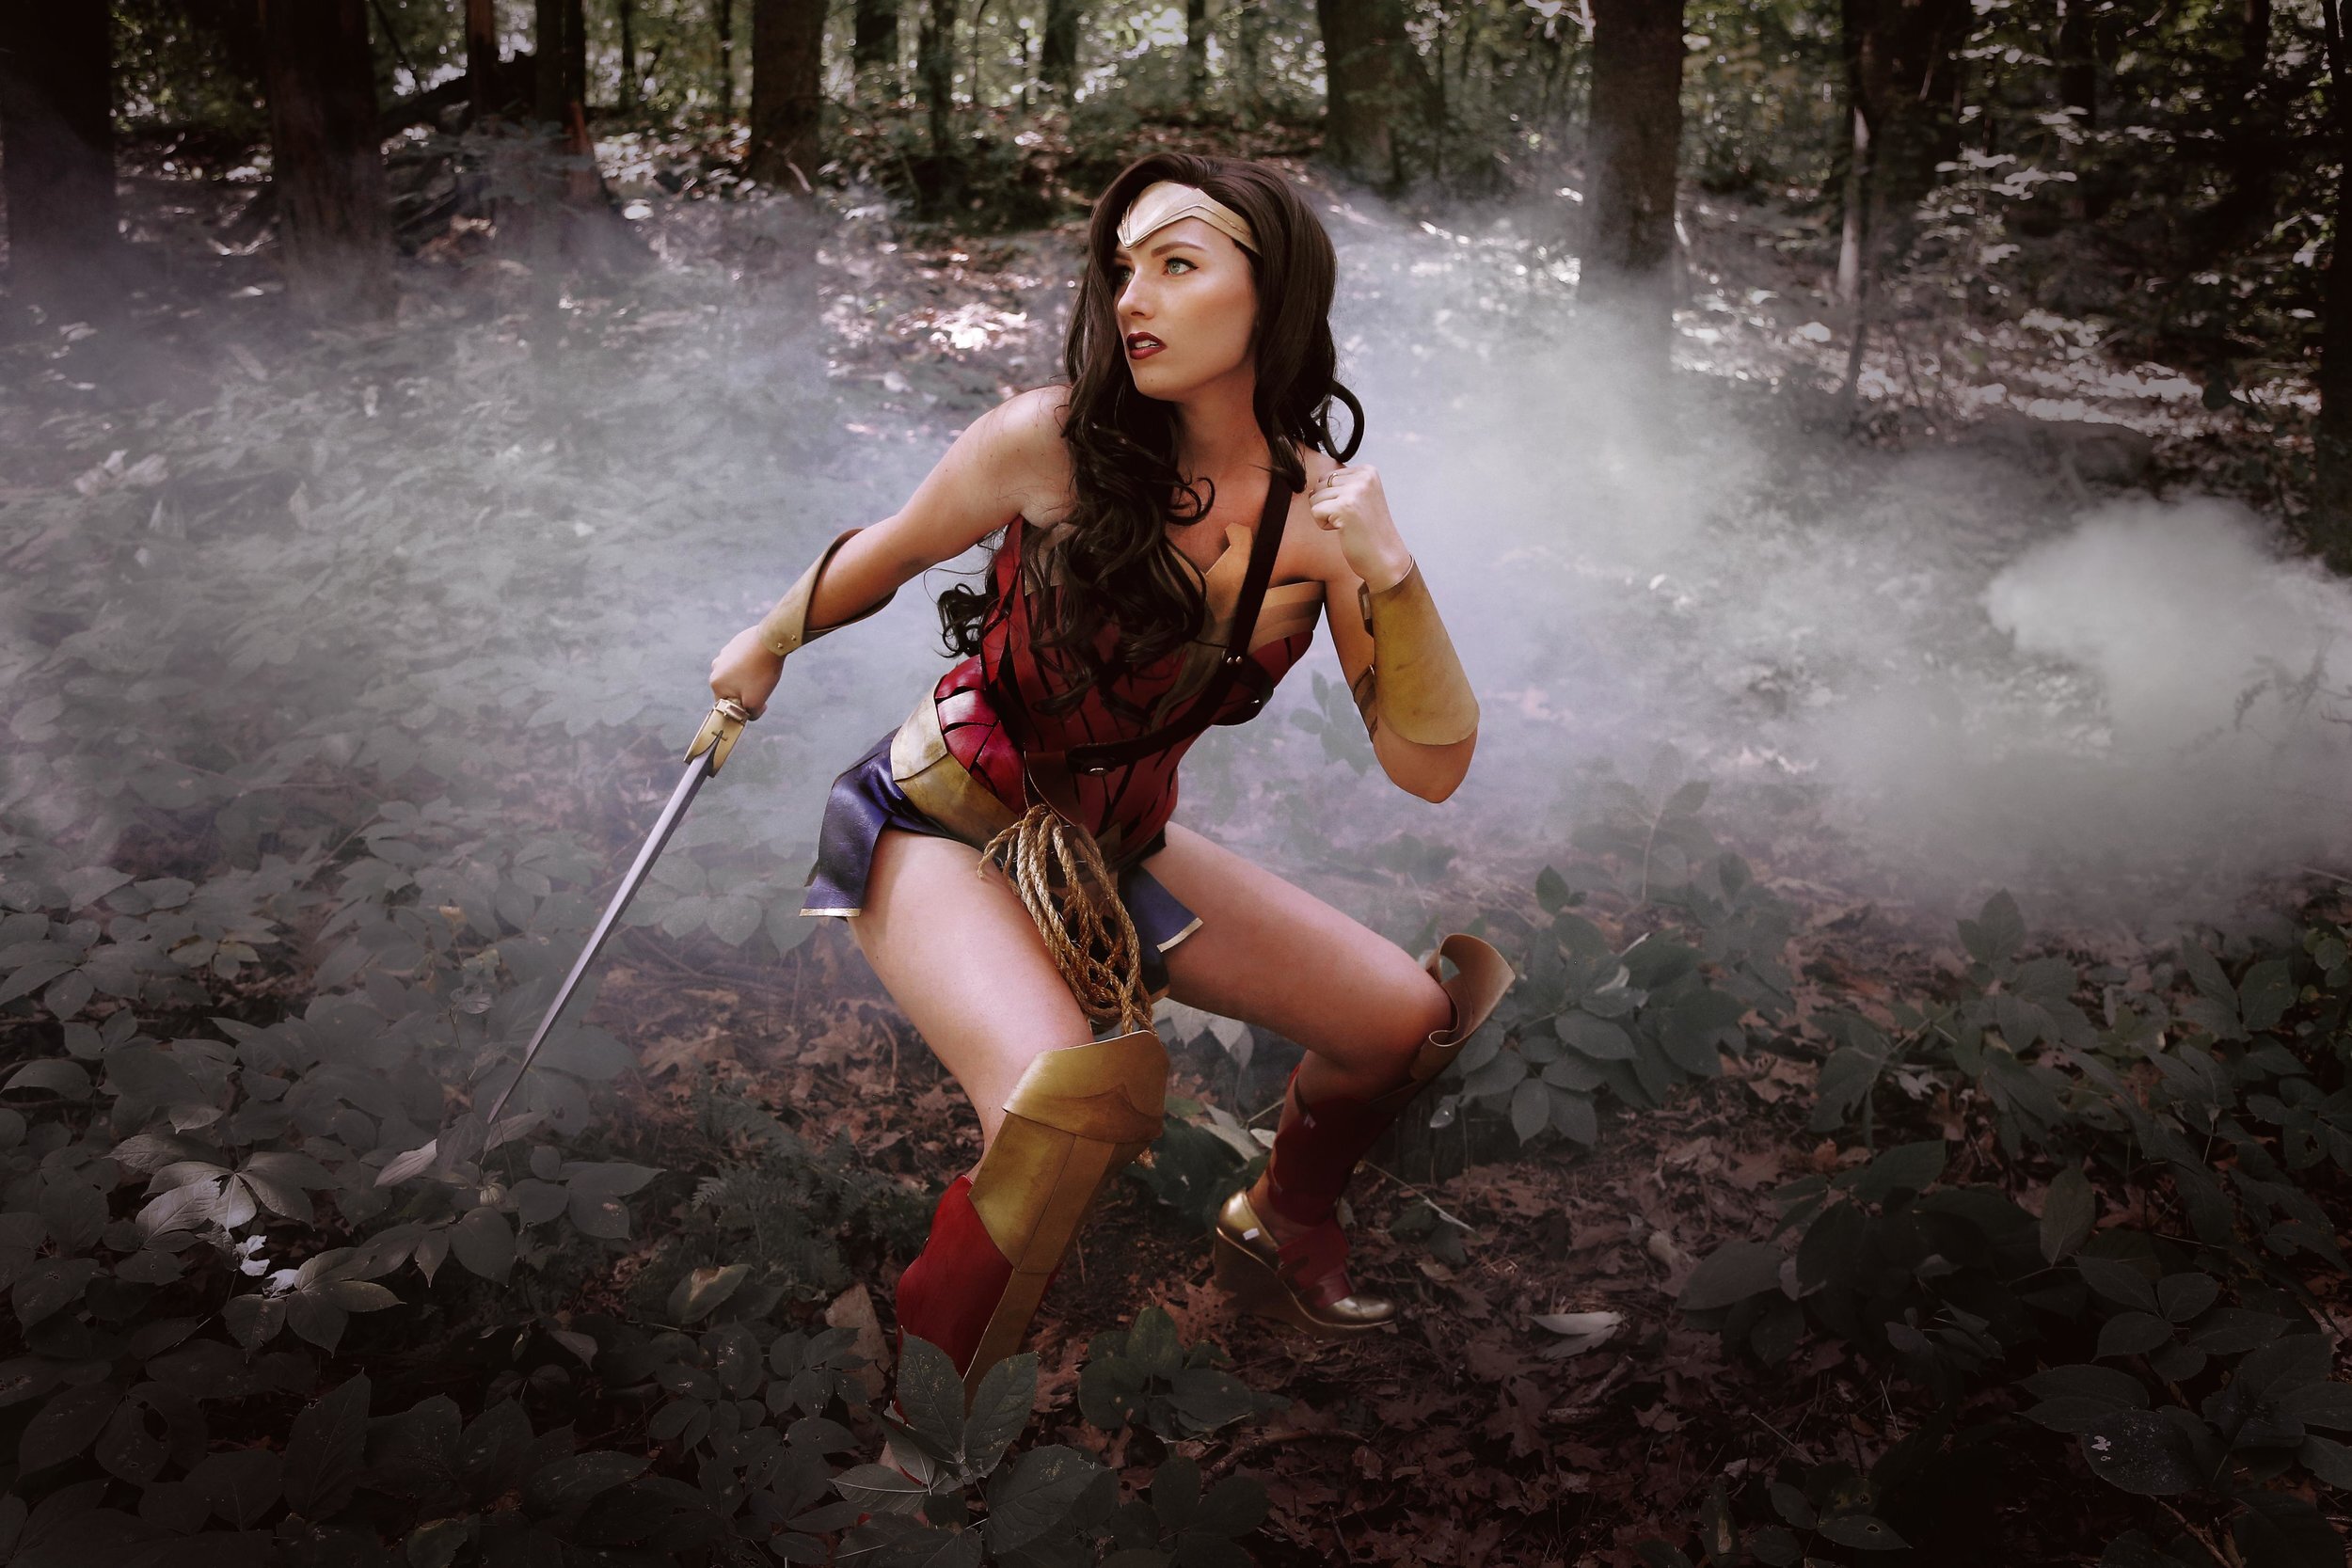
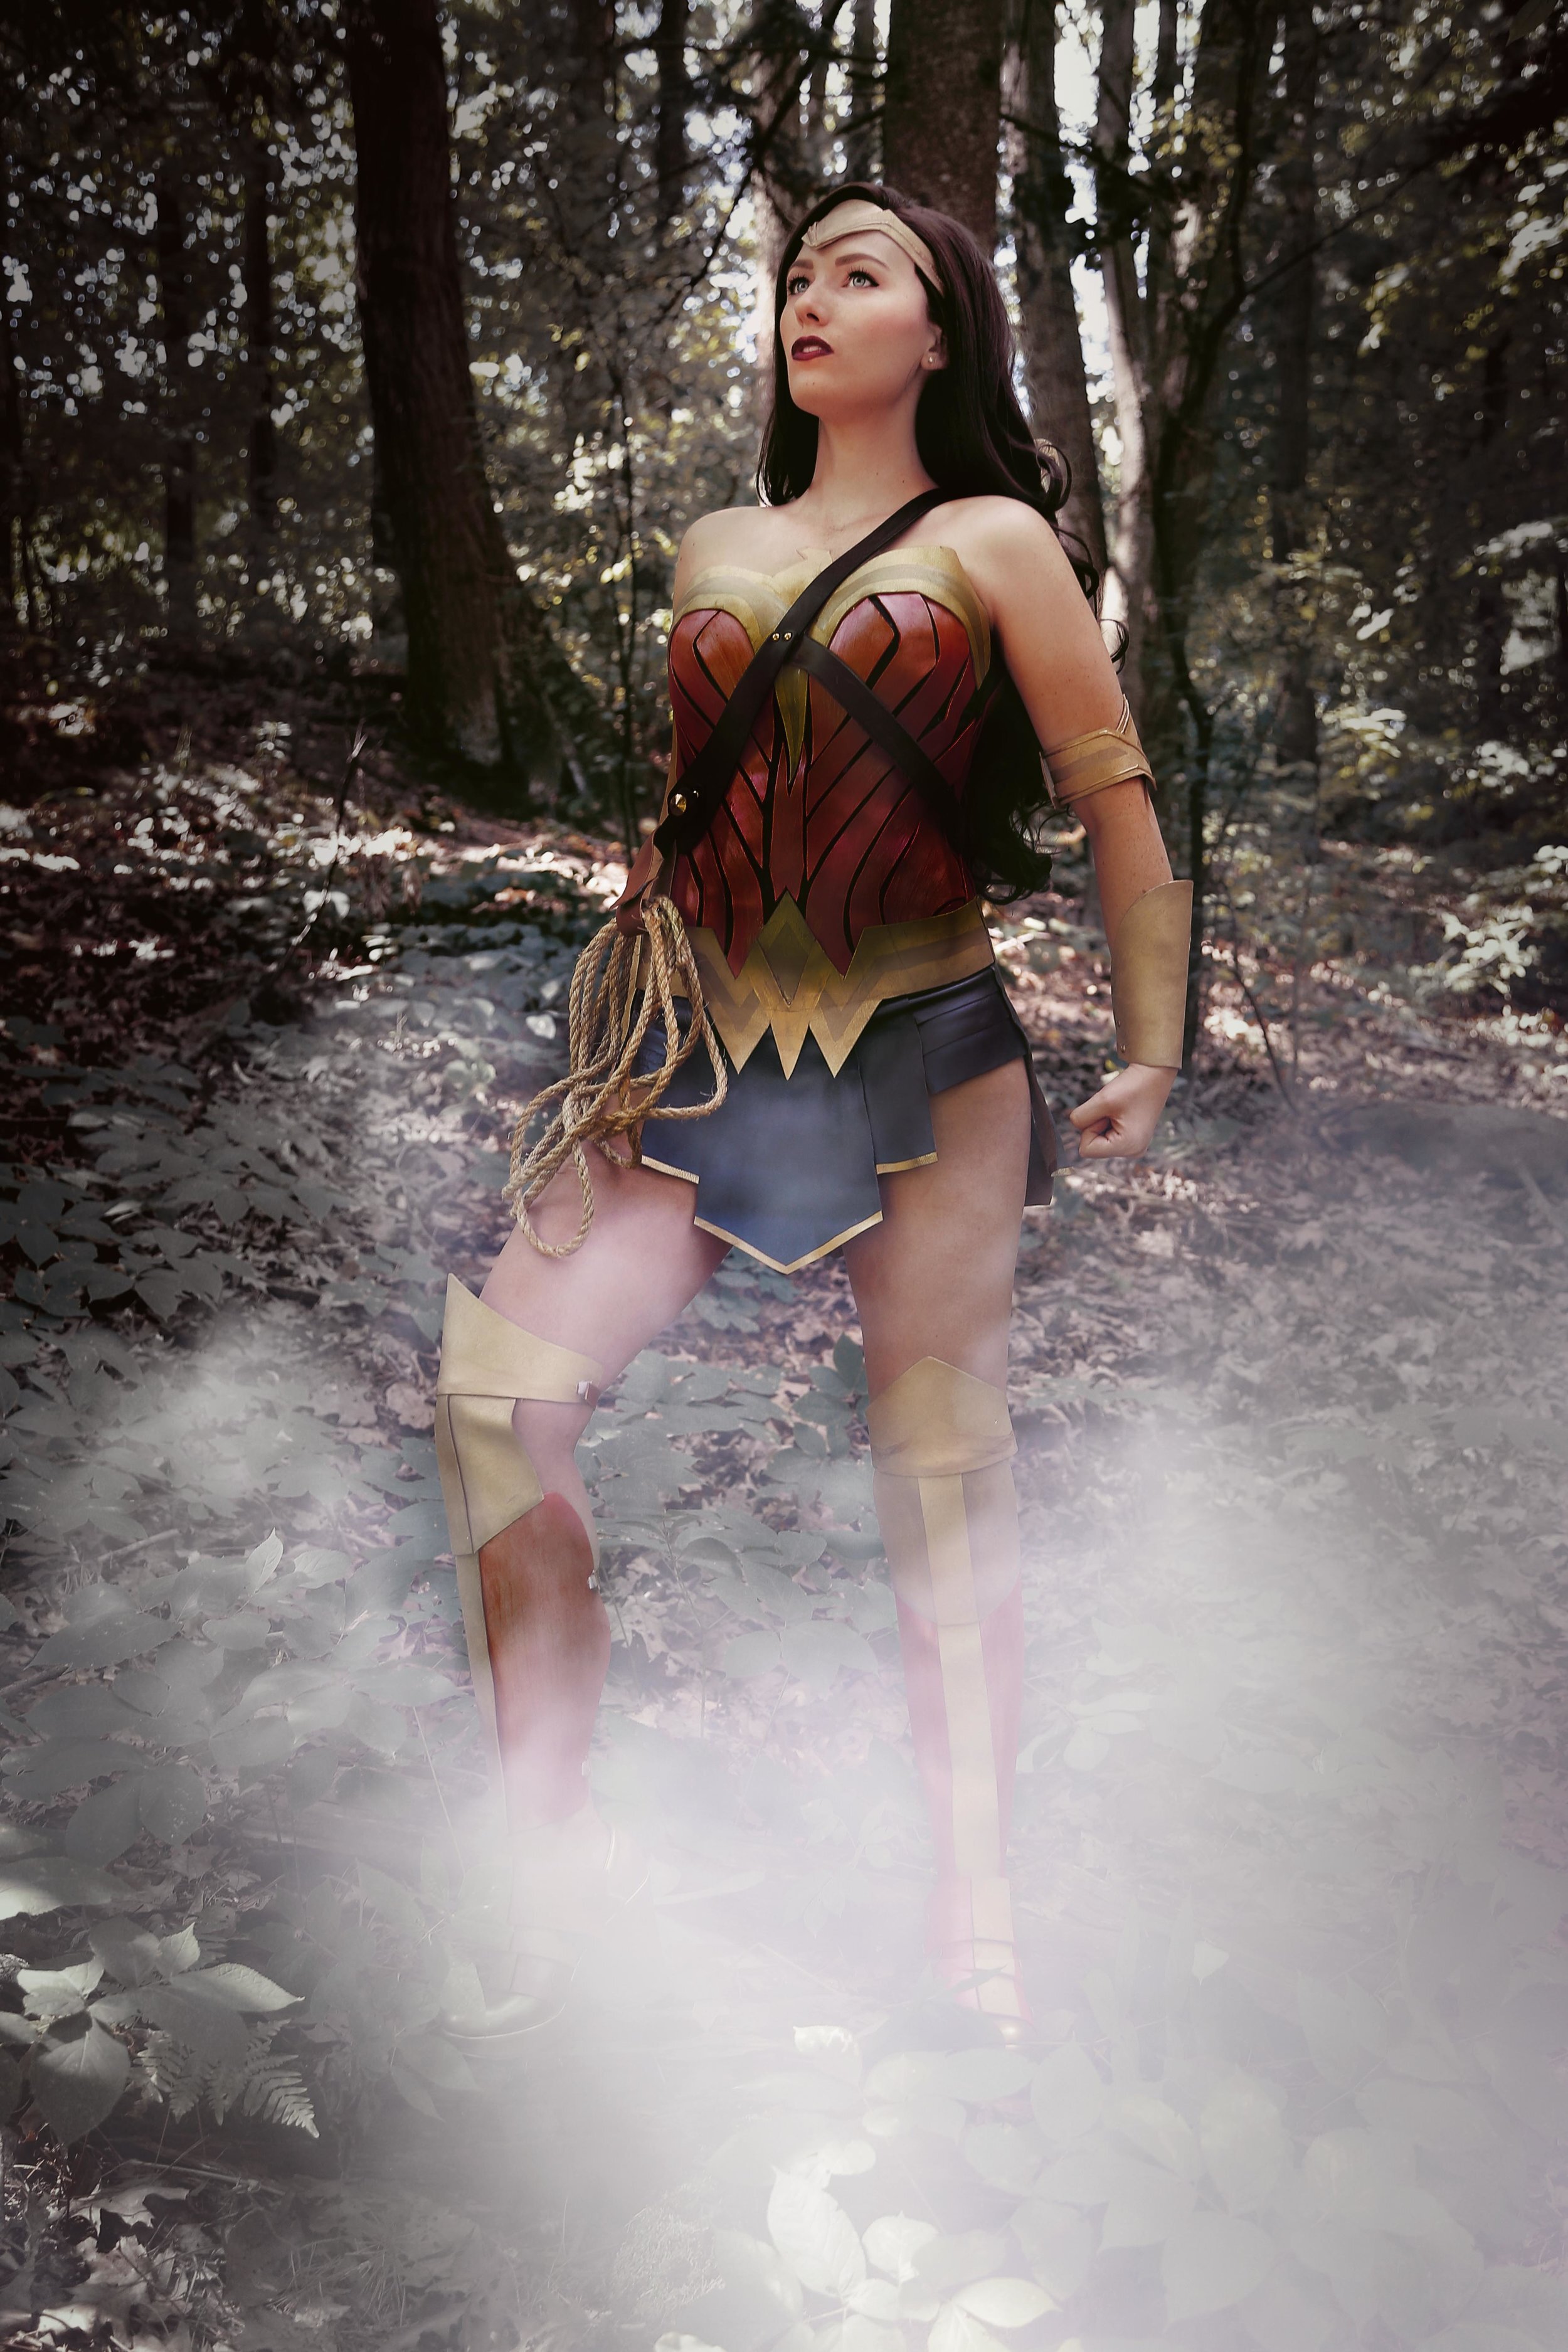
To make our modern wonder woman costume we are going to start with an inexpensive black corset, tan and red foam, navy scrap leather, and gold and red metallic paint.
We folded the corset in half and started tracing out a jagged design onto our red foam that is similar to the front of her corset piece, our reference photo is linked above. This includes pieces about 1.5 inches wide that go on one diagonal and then another, as well as straight pieces and even little slivers. There really isn’t a right or wrong way to do this step, we are just trying to mimic the look of her corset which kind of looks like a bunch of metal pieces came together to create a sexy armor top.
Once we were done one side we had this, this is the front, and this is the back. We need to cut this entire thing out again for the other front and back side. Don’t mix up your pieces! Make sure you remember where you wanted them to lay on the corset.

Once we had double of everything, we painted our foam with a metallic red paint. Once it was dry we started to hot glue it on our corset, while you’re wearing the corset – so make sure you have a shirt on underneath otherwise that will get hot! When attaching we left a gap in the middle for some gold details we will add later. Add the pieces on with small ribbons of black showing through. You might need to trim pieces as you glue the on but that’s A-OK. We did the front making sure both sides were symmetrical and then moved onto the back, make sure you don’t cover up your zipper or laces at the back. Trim all pieces that are hanging over the top and the bottom of the corset.
Using our tan foam we are going to cut out a giant W / arches with a deep point/ eagle shape. Create something that looks similar to this and make it gold baby! To attach it to our corset top we hot glued the eagle on starting in the middle.

For the skirt we pulled together some scrap pieces of navy leather we had laying around the office. You can find this at a leather store or online and you can paint the leather if you can’t find navy (we did for some pieces)! We just copied our Wonder Woman reference photo and cut out one large center flap, with two shorter flaps on either side of that, followed by layers of angled pieces that will go until the side of the thigh. The back is made up of more flaps, similar to the front but just more and longer. To attach the leather skirt pieces we opened our corset with the inside facing up and added small lines of hot glue (you can also use fabric glue), we attached the middle front piece first, followed by piece beside that, and then our 3 angled pieces. Think about the way these are overlapped, you want it to look good from the front (this is all easier to explain in the video! So watch that!). This flap will start at the side and we are adding it under the 3 angles pieces, we jumped to the back flap and glued it HALF ON the back, it will be in the center back so make sure the zipper lays mid way through that flap. Our two extra pieces we added and overlapped because your butt will make these flaps gape a little and we don’t want no booty poppin’ out. On the other side we glued this piece higher than normal because our large middle flap will need to tuck underneath it once we put it on.

We need to stop right here because we created a template for you! Bless templates, here is a package you can download for free of different templates we created for various part of this Wonder Woman costume! Cut out the W belt portion (template A) out of tan foam and then as much of the straight belt you will need to wrap around your waist, also out of foam. You guessed it, we painted this gold. Before we attached it to the costume we glued the diamond piece behind the W the same way it is in our reference photo. Simply glue the belt onto the costume making sure that you’re covering the seam between the corset and the skirt however we tried to just glue on the corset rather than the leather skirt. Repeat all the way around but make sure to leave a gap at the back so you can still do up the zipper. You’re now done the base of the costume! YAY!!
Moving on to the boots…
For the boots we are actually starting with some wedge shoes from the thrift store. We gave them a quick coat of gold spray paint. Back inside we used our red foam to cut out the pieces that cross the shoes, and tan foam to represent the gold stripe that goes all the way down the shin. We painted the red a metallic red and the tan a gold. We then hot glued the gold pieces to the center of the red straps. Next we cut out mini straps out of some scrap leather we had. We cut 12 in total. These will hold the red and gold portions to the shoes. Use some hot glue to attach the straps to the red foam on either side. Next, with your foot in your shoe glue the leather straps to one side of your shoe. For the first cross piece we were also able to glue it on the other side, but for the 2nd and 3rd cross piece we added a piece of Velcrootherwise you won’t be able to get your foot out! In the end you can unstrap the top two cross pieces.Repeat on the other shoe. Okay now we are going to make the boot/ shin parts. This is made up of 3 pieces, all of which are included in the template package! The shin piece (template B) will be red and the knee (template C) and top knee pieces (template D) will be gold, go ahead and cut out/ paint those. We also cut long strips offoam and painted them gold to go down the center of our shin and knee pieces. It’ll match our shoes perfectly! Glue those bad boys down. Bringing in all the pieces, use hot glue to attach the piece above to the piece below, knee to the shin piece and the top of knee piece to the knee piece. Next we cut leather straps similar to the shoes but these will wrap around and attach to the other side of the boot piece. Attach these the same way with hot glue and Velcro. We had 3 straps on each boot, repeat on the other boot!
At last, the accessories…
For the accessories, we wanted to make things SUPER easy for you guys so we created a template for the wrist cuffs (template E), and the headband and arm cuff (both on template F). Seriously, those templates are free to download, just saying. Cut out your pieces out of tan foam because they will be gold. Make sure you flip one of your wrist cuffs so they are opposite! We are using our Velcro friend to hold our wrist cuffs in place. Glue the triangle piece behind the V cut in the arm cuff the same way we did the belt, and again – Velcro helps us keep the arm cuff in place but easily removable. For the headband – glue the triangular shape behind the V cut and add elastic that fits your head to either end of the headband.
We are so close to the finishing line! Taking two leather belts and some scrap leather we are going to make our sword and rope harness! We removed the buckle on our first belt and wrapped it over the shoulder and under the opposite arm, glue the ends together. The second belt, also sans buckle, should be glued to the front center of the other belt, wrap underneath the other arm and attach at the back center-ish. From here we added a strip of leather with Velcro to the harness to act as our rope holster. On the back we’ll add our sword holster. We picked up this sword for $10 and spray painted the handle gold. We used a strip of scrap leather on the top and bottom portion of the harness to hold our sword in place, it works really well.

Add some details…
The VERY last step is to add details to your costume. No matter what you’re being for Halloween, you need to add details to your DIY costume in order to make it look authentic and worn in. Using multiple gold paints, paint pens and 3D paint we hadlaying around we added details on every gold part of the costume. It makes the whole thing look less like foam glued together and much more like aged metal!
Hopefully you found this tutorial helpful in your quest for a Halloween/ cosplay/ badass heroine costume! If you didn’t know, we have a YouTube channel with full video tutorials for everything you see on this blog (and way way more stuff because the blog was started after the YouTube channel 😉
If you have an questions feel free to tweet them to us! That’s the best way to get in contact with us (@TheSorryGirls). If you’ve made any of our DIY’s make sure you share them with us on Instagram (@TheSorryGirlsDIY).