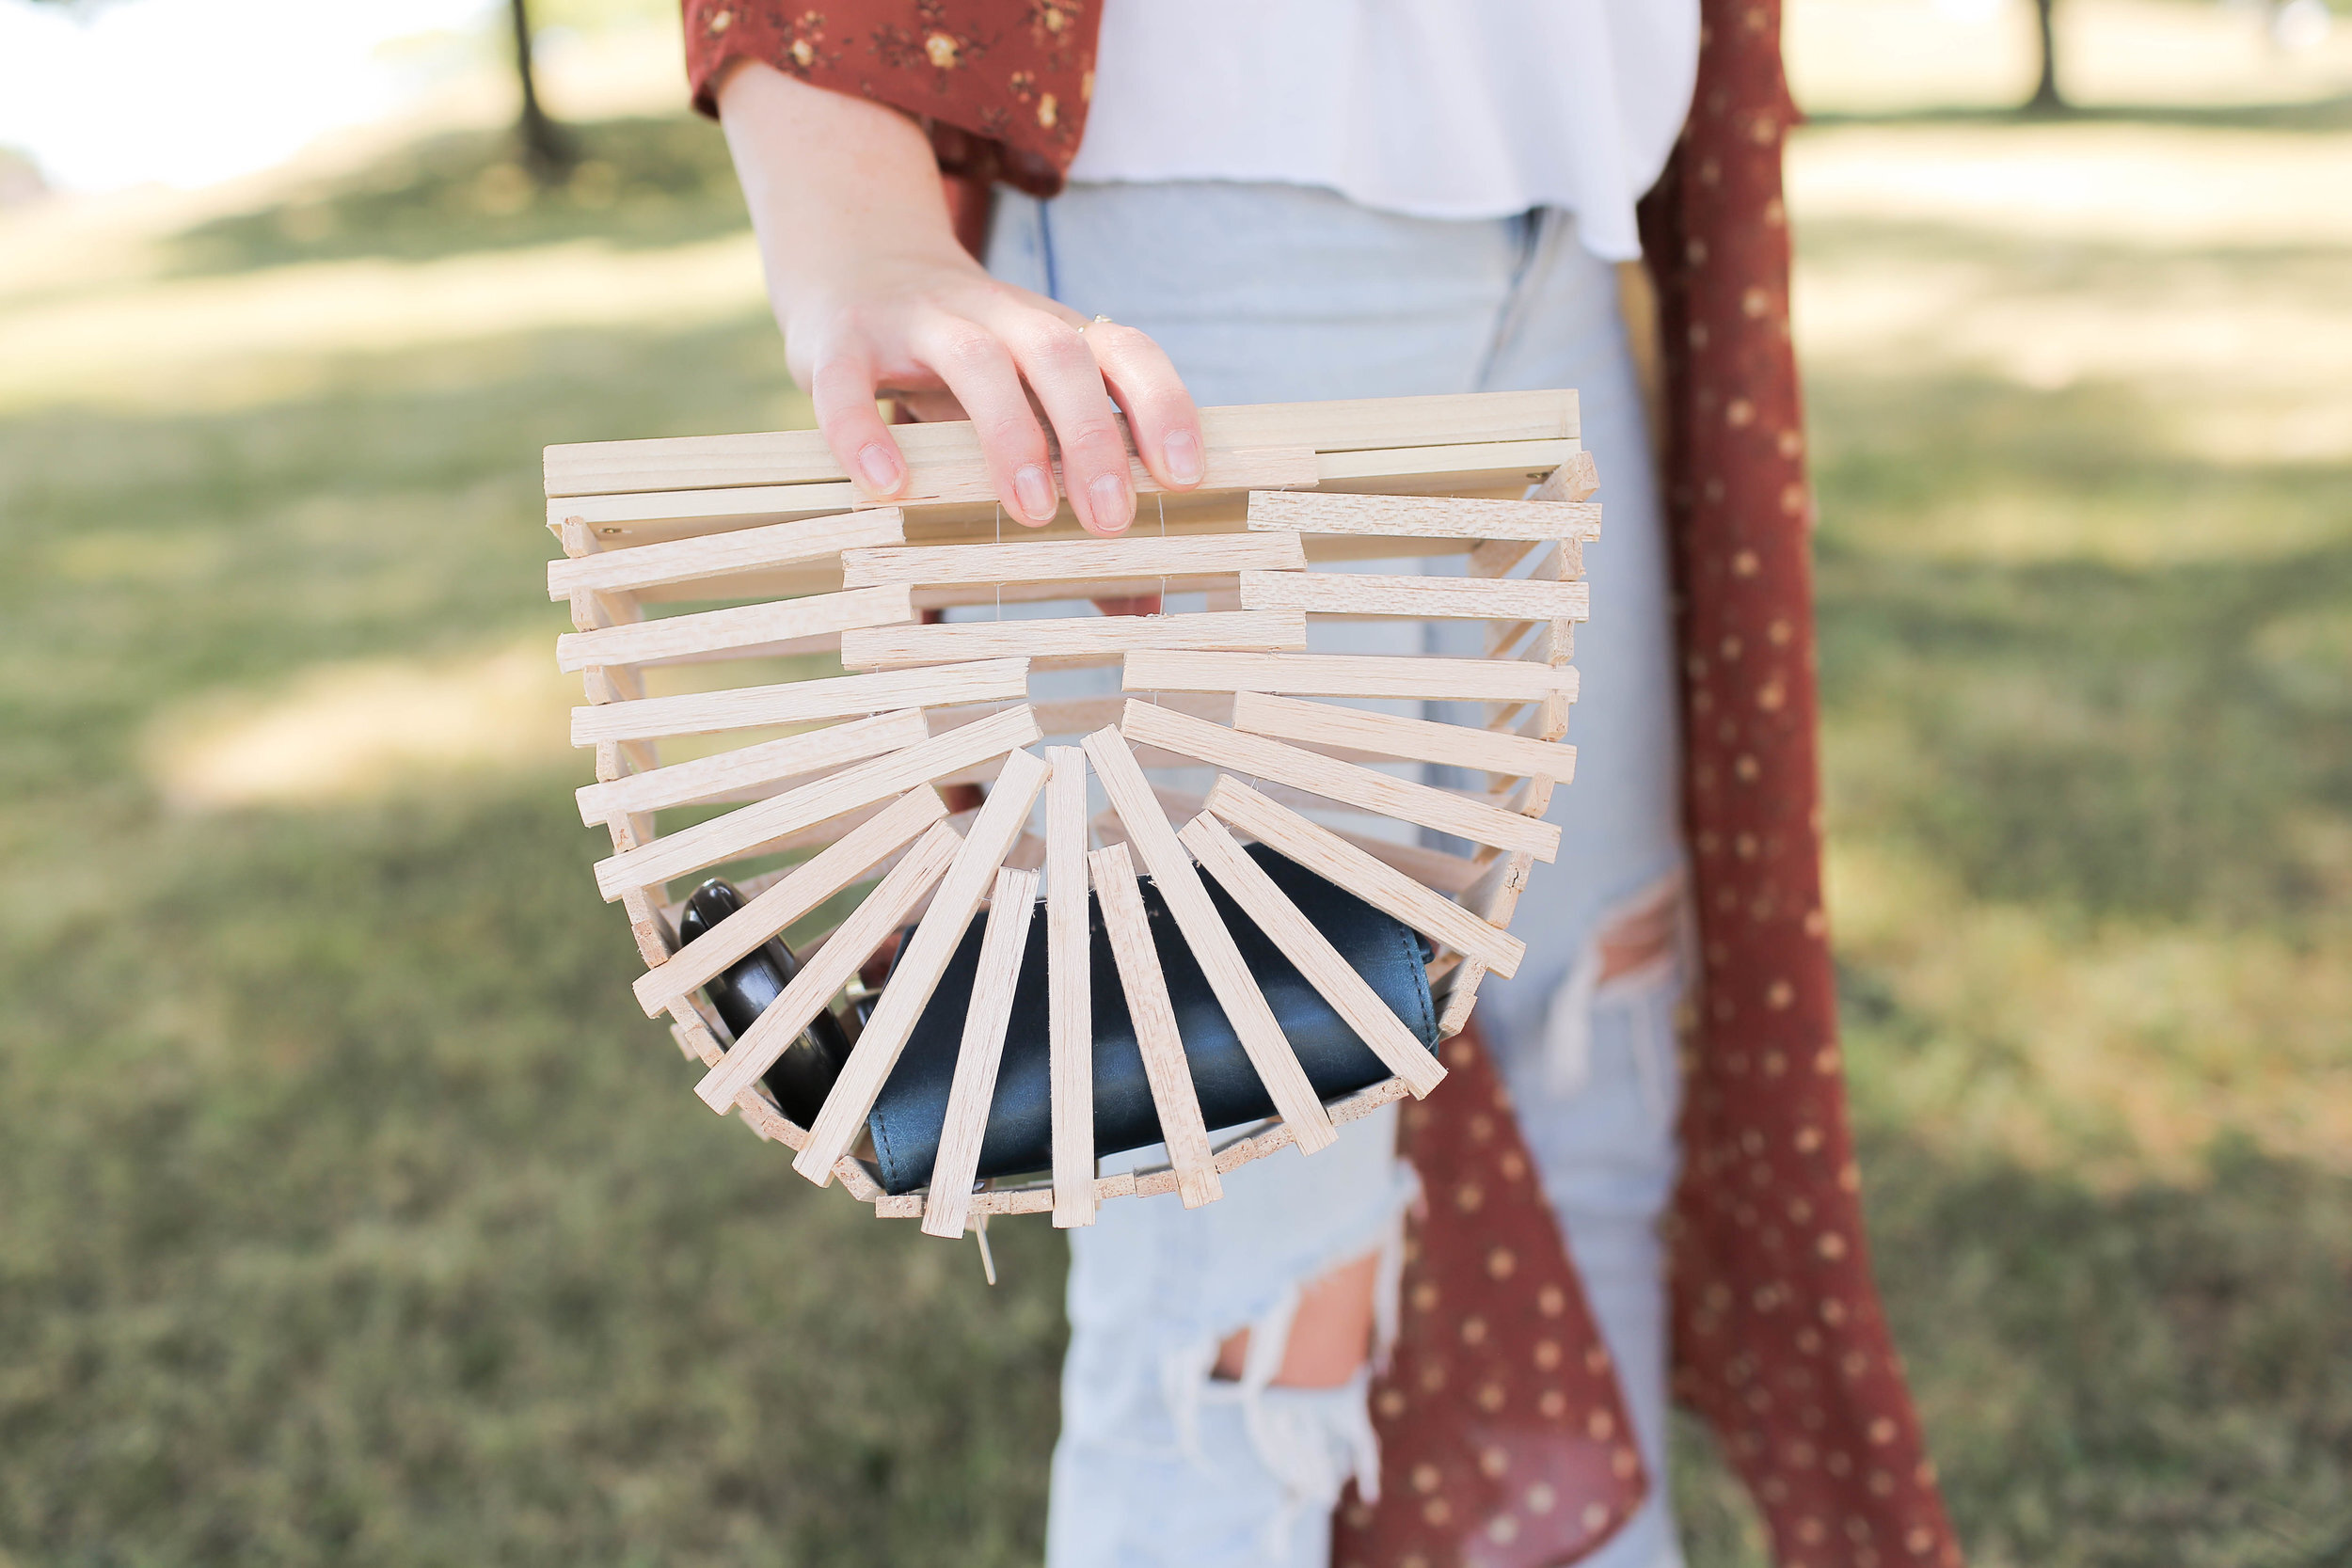
'Bamboo' Cage Purse DIY
We’ve been seeing these bamboo cage purses ALL over our Instagram and Pinterest feeds, and decided to jump on the bandwagon and DIY one for you guys. You can check out the original bag here!
MATERIALS:
9x balsa wood (3/6th of an inch by 3/8th of an inch OR 13mm by 9mm) ~ $15.75 USD
Fishing wire ~ $5 USD
Sewing needle ~ $3
Pine that is 1x2 (2.5 x 5 cm) ~ $1.75
Pine that is 1/16ths by 11/16ths inches (1.5mm by 17.4mm) ~ $1.75
TOOLS:
Exacto knife
Our template
We started by picking up some Balsa wood! They are tiny 3/6th of an inch by 3/8th of an inch (OR 13mm by 9mm) pieces of wood that come in 3 ft (91 cm) long pieces. They’re only about $1.75 USD (or $2.28 CAD) and can be found at your local craft store! You will need a total of nine pieces of this wood. This wood is super delicate, and is prone to splitting or cracking while DIYing with it, so this amount we picked up gives us a little bit of wiggle room to work with just in case these things happen. This type of wood is super easy to cut with an exacto knife, since it is so soft!


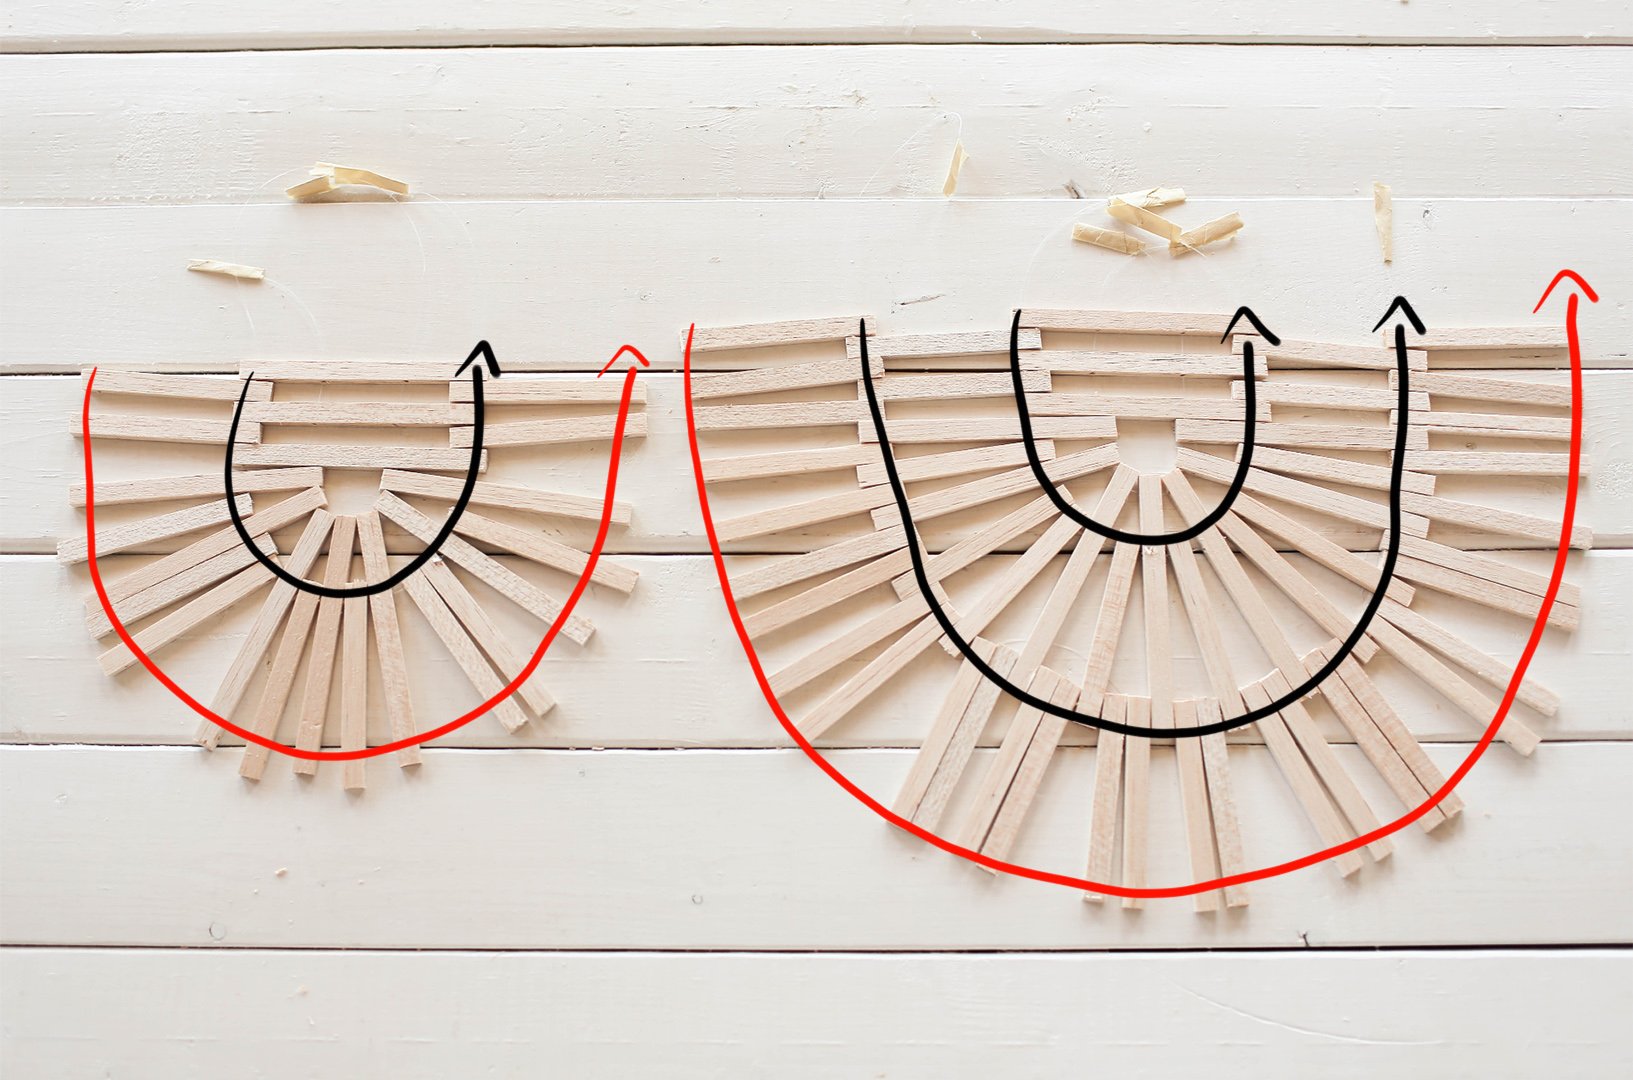
Using your exacto knife, cut 54 pieces of balsa wood that are 3 ½ inches long (9 cm), and 20 pieces that are 4 ½ inches long (11 cm). We created this super easy to follow template, you can check it out here. Print out the template, and lay out the pieces on the template as you go to keep you organized!


Once all of your pieces are cut, grab a drill and a super tiny drill bit. Ours was 5/64ths of an inch (1.9mm). On all of your 3 ½ inch long (9 cm) pieces, drill a hole on each end on the thinner edge. On all of your 4 ½ inch long (11 cm) pieces, drill a hole on each end on the thinner edge, and one additional hole in from the side about 1 ½ inches (38mm) down on each side. Each longer piece should have four holes, while the shorter ones should have two.
It’s time to start assembling! To hold the bag together, we are using some fishing wire and a sewing needle. Start by threading the fishing wire through the sewing needle, and measuring out enough fishing wire to go through your first row of balsa wood (with some extra). Once threaded, add some tape to the very end of the fishing wire to keep it from knotting or slipping out. Start by threading the needle through the first (smallest and most inner) curve of overlapping holes. Tape off the other end of the wire to stop it from slipping through. Continue cutting and threading fishing wire through each row of overlapping holes on the template, moving from smallest to biggest. Do this with the other side of the template as well.
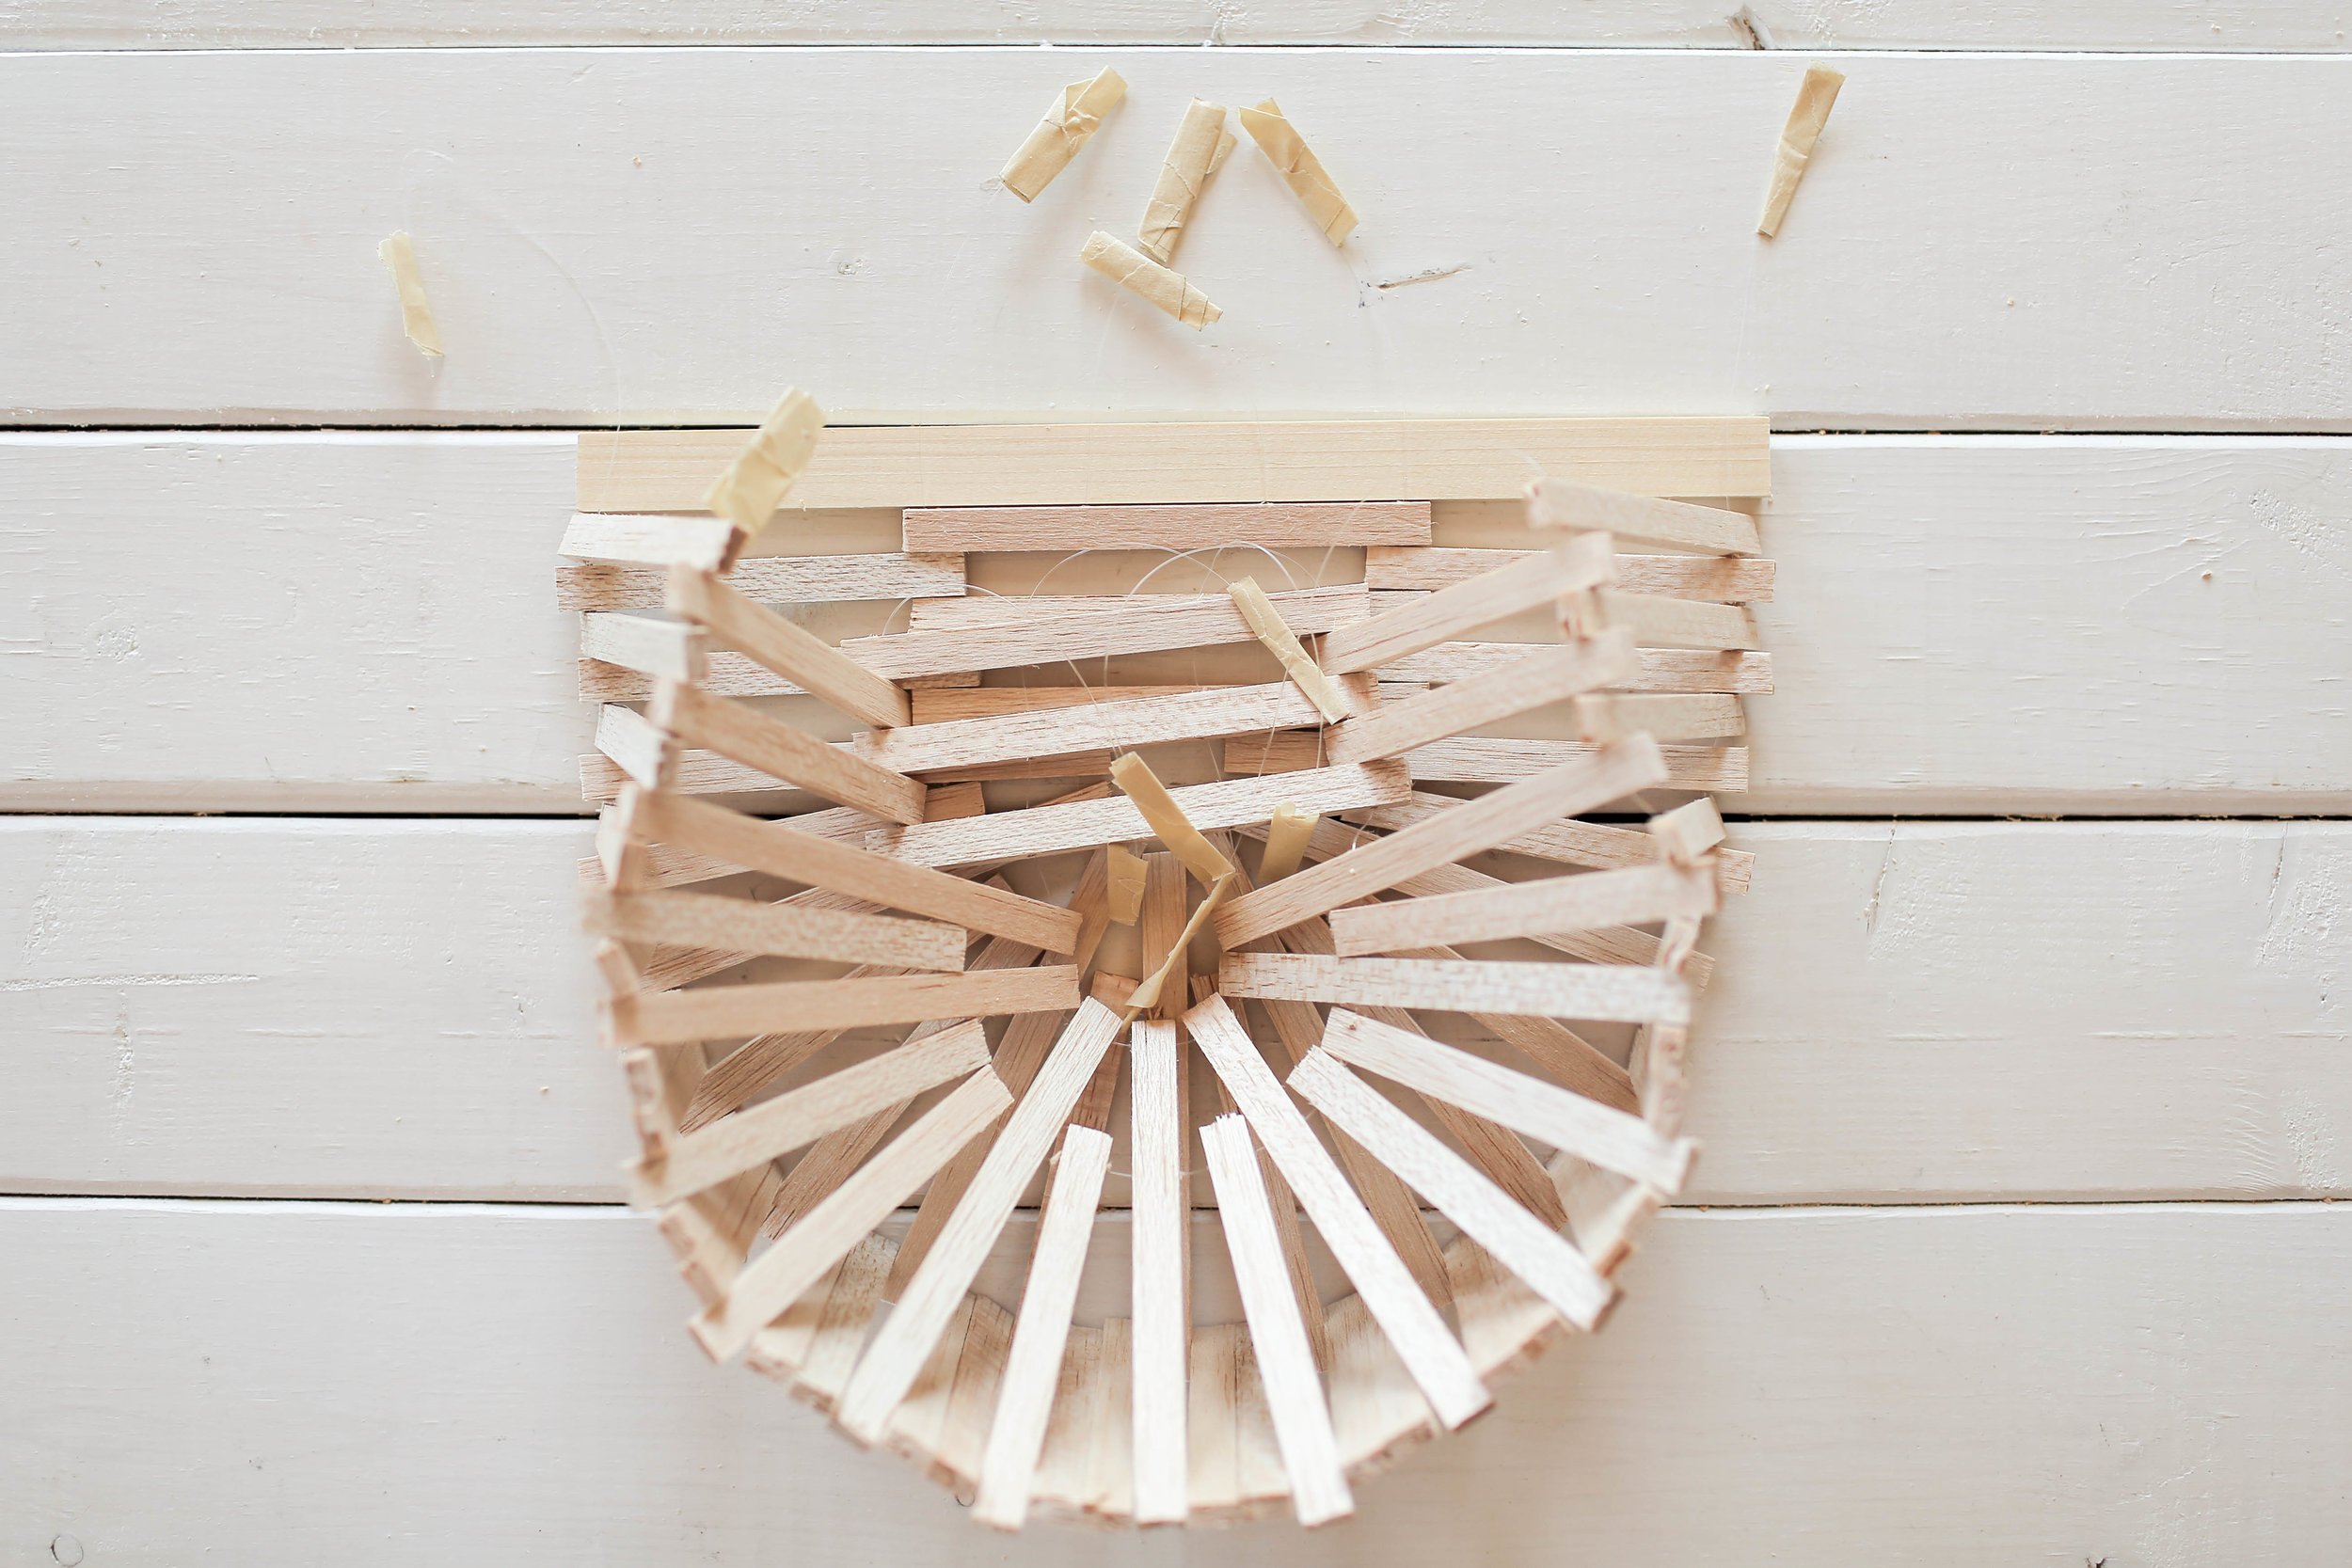
Once both templates are complete, you’ll notice that there are still holes on the outer edge of both of the templates, this is where the two sides come together. Go ahead and thread the needle through the edge holes, laying the two templates together like a zipper. You will thread through a hole on template A, then template B, then back to template A, again using the needle and fishing wire. Continue this until you get to the bottom, and it becomes too difficult to thread the wire through. Once this happens, flip one side of the template on top of the other side. It helps to use something to seperate the top side from the bottom, such as a small cup. Once this is done, continue threading up the sides. Time to add a handle!
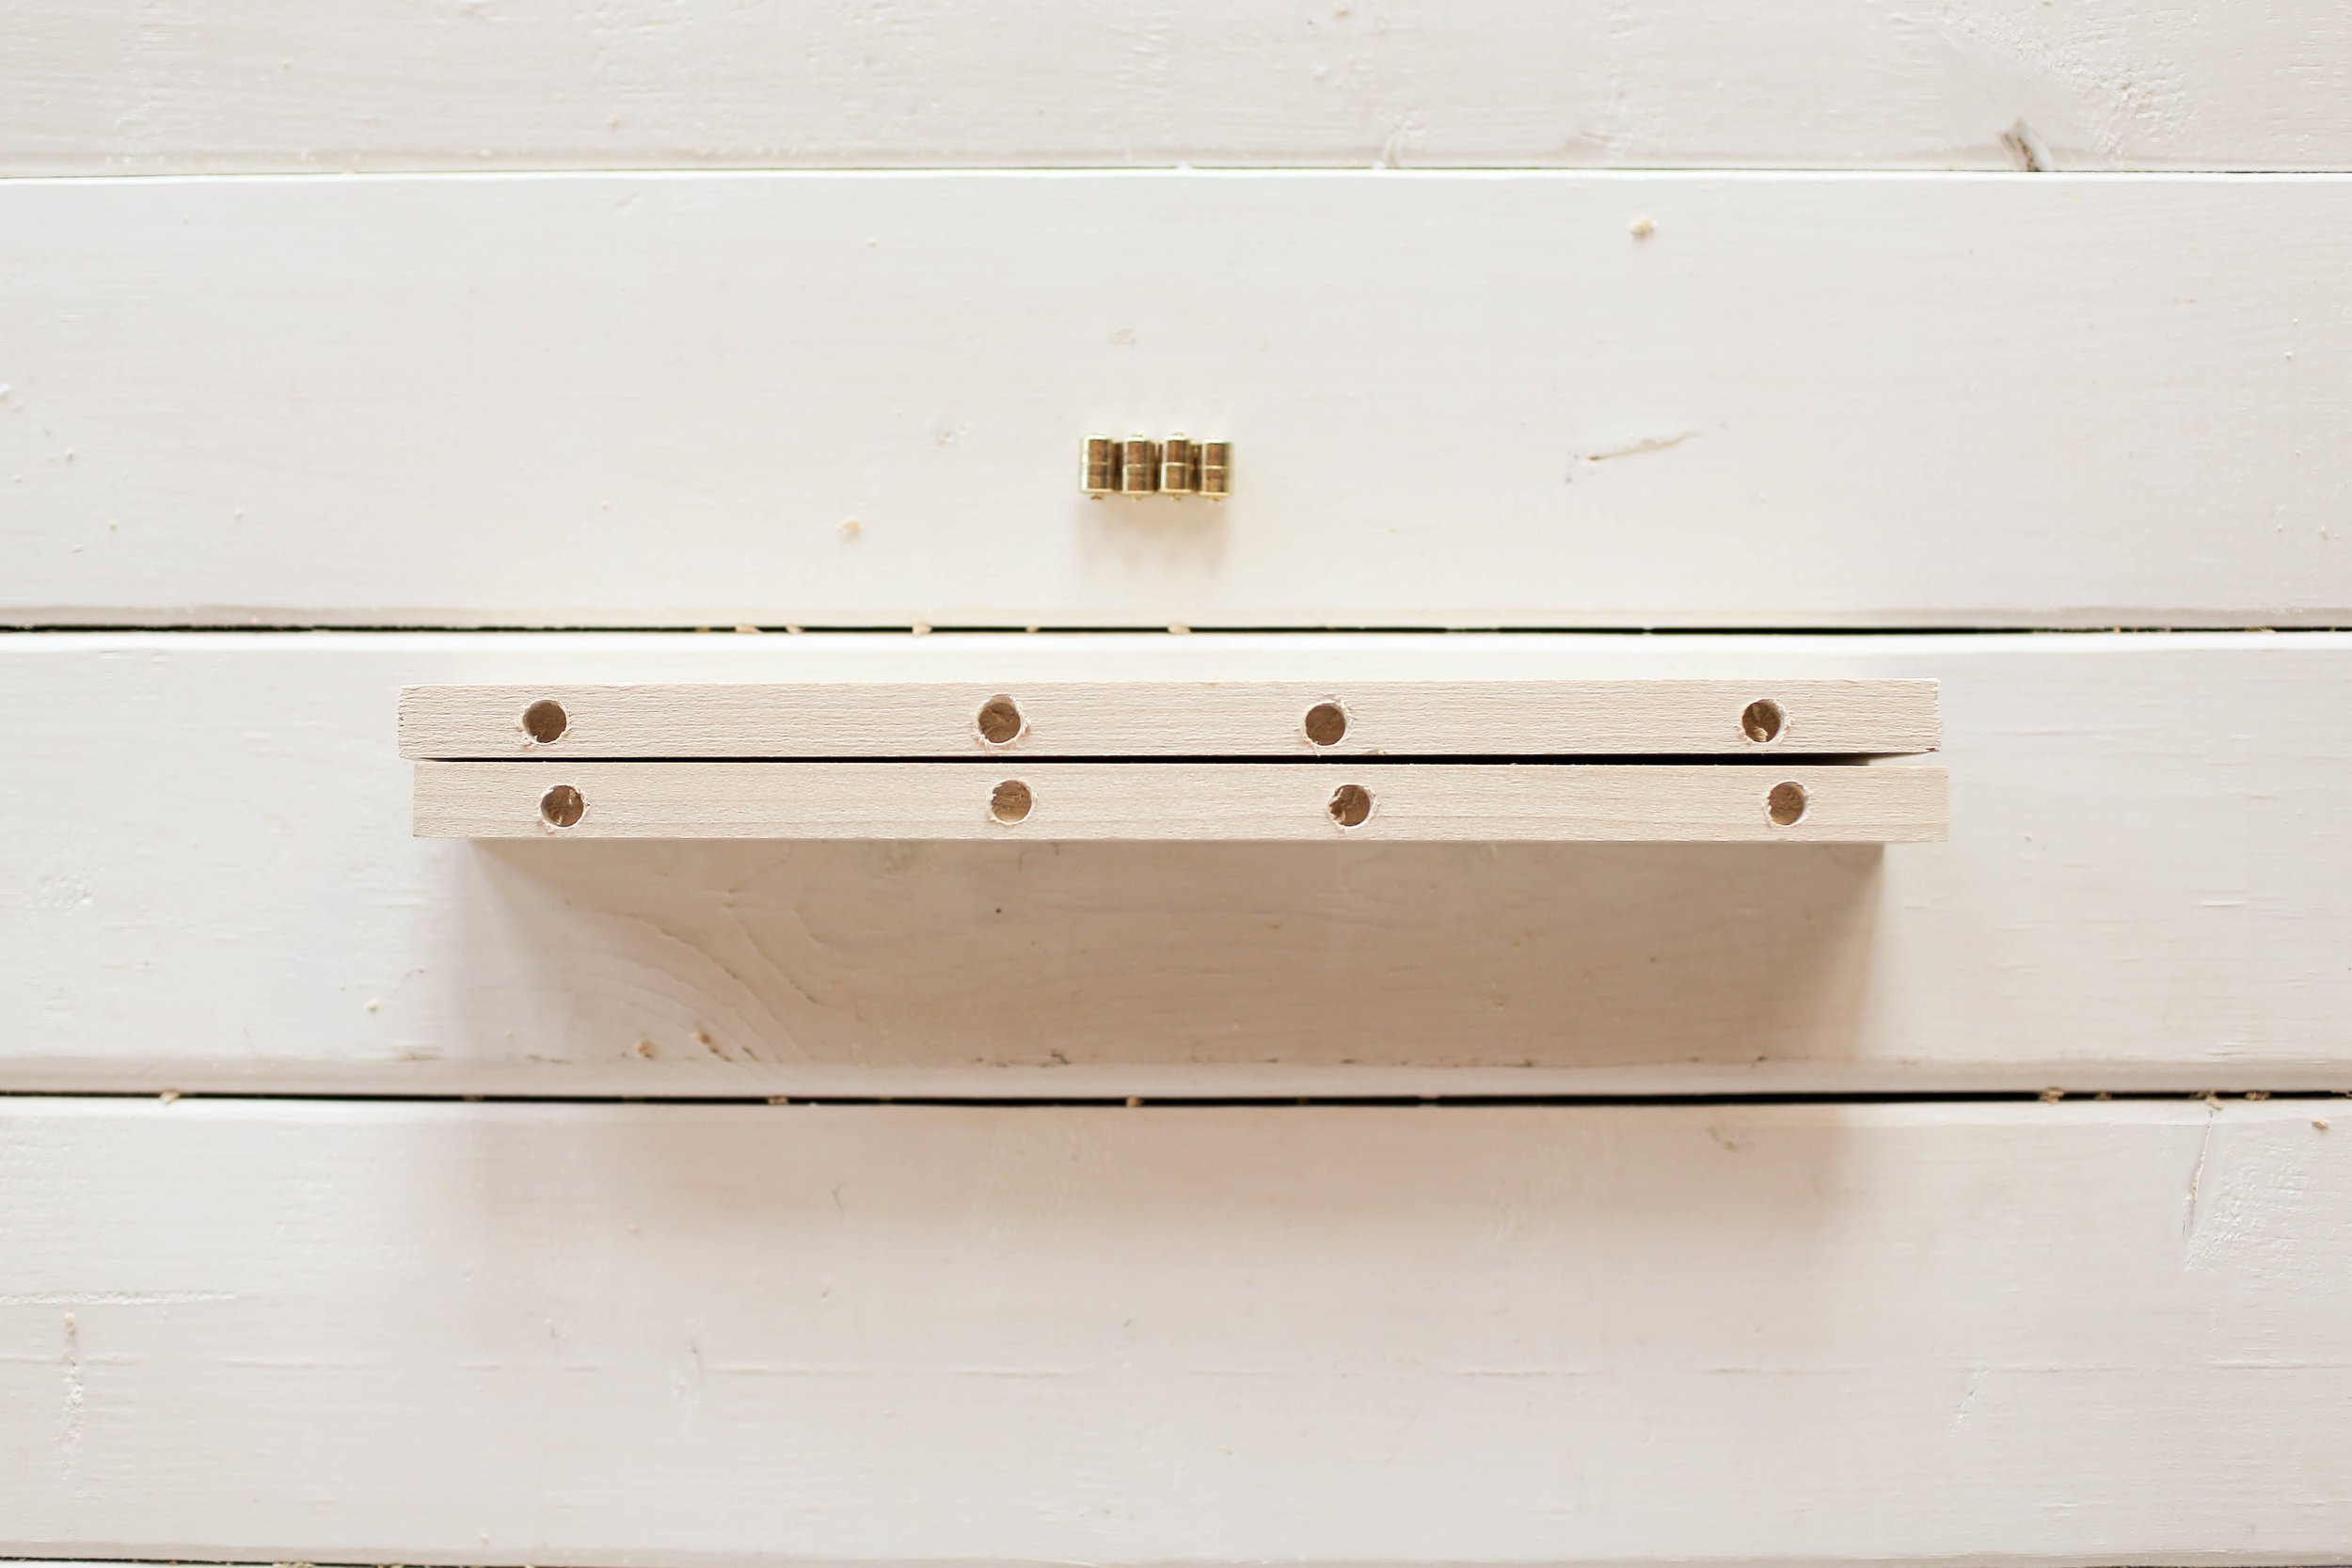
To add the handle, you’ll need two types of wood. Grab one piece of pine that is 1x2 (2.5 x 5 cm), and one that is 1/16ths by 11/16ths inches (1.5mm by 17.4mm). Cut two pieces of each type of wood that are 10 ¼ inches (26 cm) long. On the two thicker wood pieces, mark four dots. Measure out one inch (2.5 cm) from either side of the piece of wood and add a mark, and three inches (7.6 cm) out from either side of the piece of wood. Next you’ll need magnetic jewelry clasps. These will be used to hold the bag together when it’s closed! Go ahead and drill holes at each of the dots marked on the wood, just big enough to have the clasp sit nicely inside of. Super glue the magnets in place, placing one end of the magnet in each of the wood pieces. Let this dry.
Next, place your thicker piece of wood at the top of the rest of the bag. grab your bag. Trim off the tape on the ends of the wire, and hot glue them flat against the thicker piece of wood.. Next, grab your thinner 1/16ths by 11/16ths inch (1.5mm by 17.4mm) wood and glue it to the inside bottom edge of the thicker piece of wood with some wood glue! We are also going to be using super tiny screws to make sure the two pieces of wood are tight against each other. Repeat this on the other side.
As a final step, we sprayed the bag with a clear coat of Varathane to protect the wood! Let this dry and your bag is finished!


Now you may be thinking, what do I wear with my brand new ‘bamboo’ cage purse! Well don’t fret! We’ve got you covered with some day-to-night summer outfit ideas. Click here to see how we styled this bag!
