Thrift Flip - Holiday Edition!
Welcome back to another edition of Thrift Flip, the show where we go to the thrift store and find items to DIY with! Today we’re going to be thrifting for the holiday season - because the holidays are pretty hard on our wallets. We’re going for some wintery home decor vibes today!
Here’s what we ended up picking up at the thrift store…
Mini Lanterns: $2.00 CAD
Candle Holder: $8.00 CAD
Metal Tealight Lantern: $3.00 CAD
Glass Vase: $5.00 CAD
Pipe Holder: $2.99 CAD
Candle Wall Sconce: $4.99
Ornaments: $3.99
Let’s get DIYing!
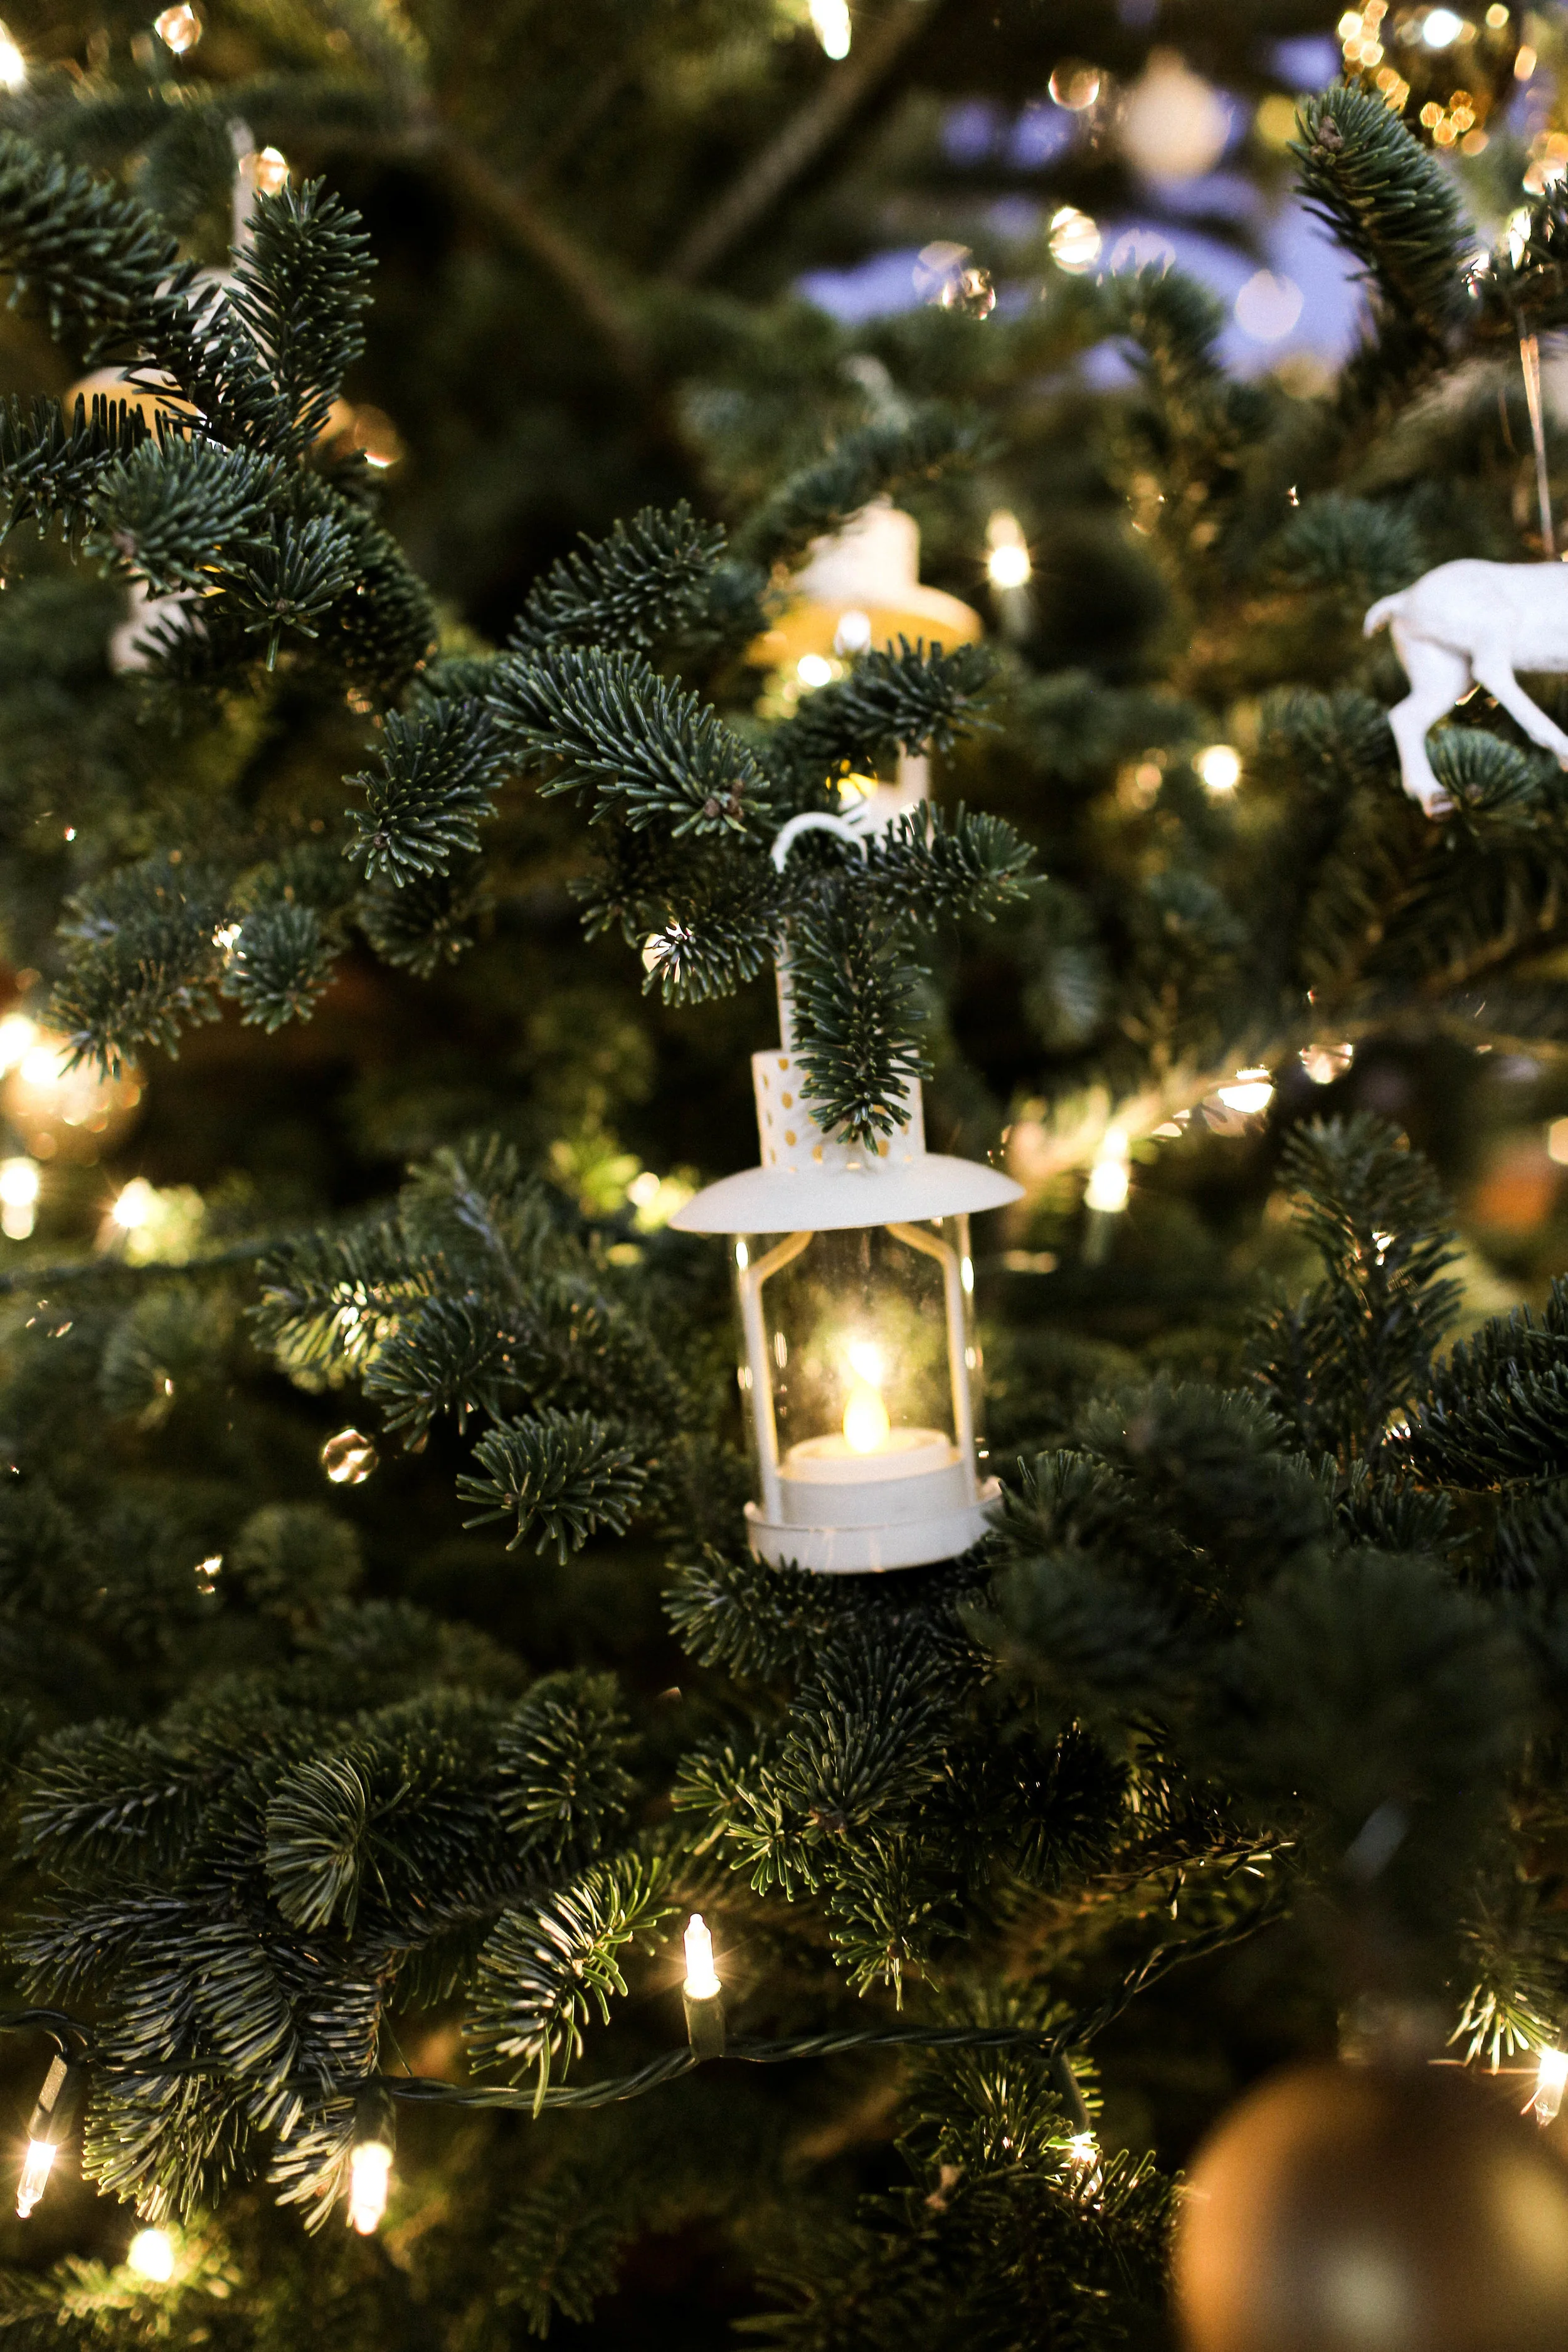
MINI WINTER SCENE
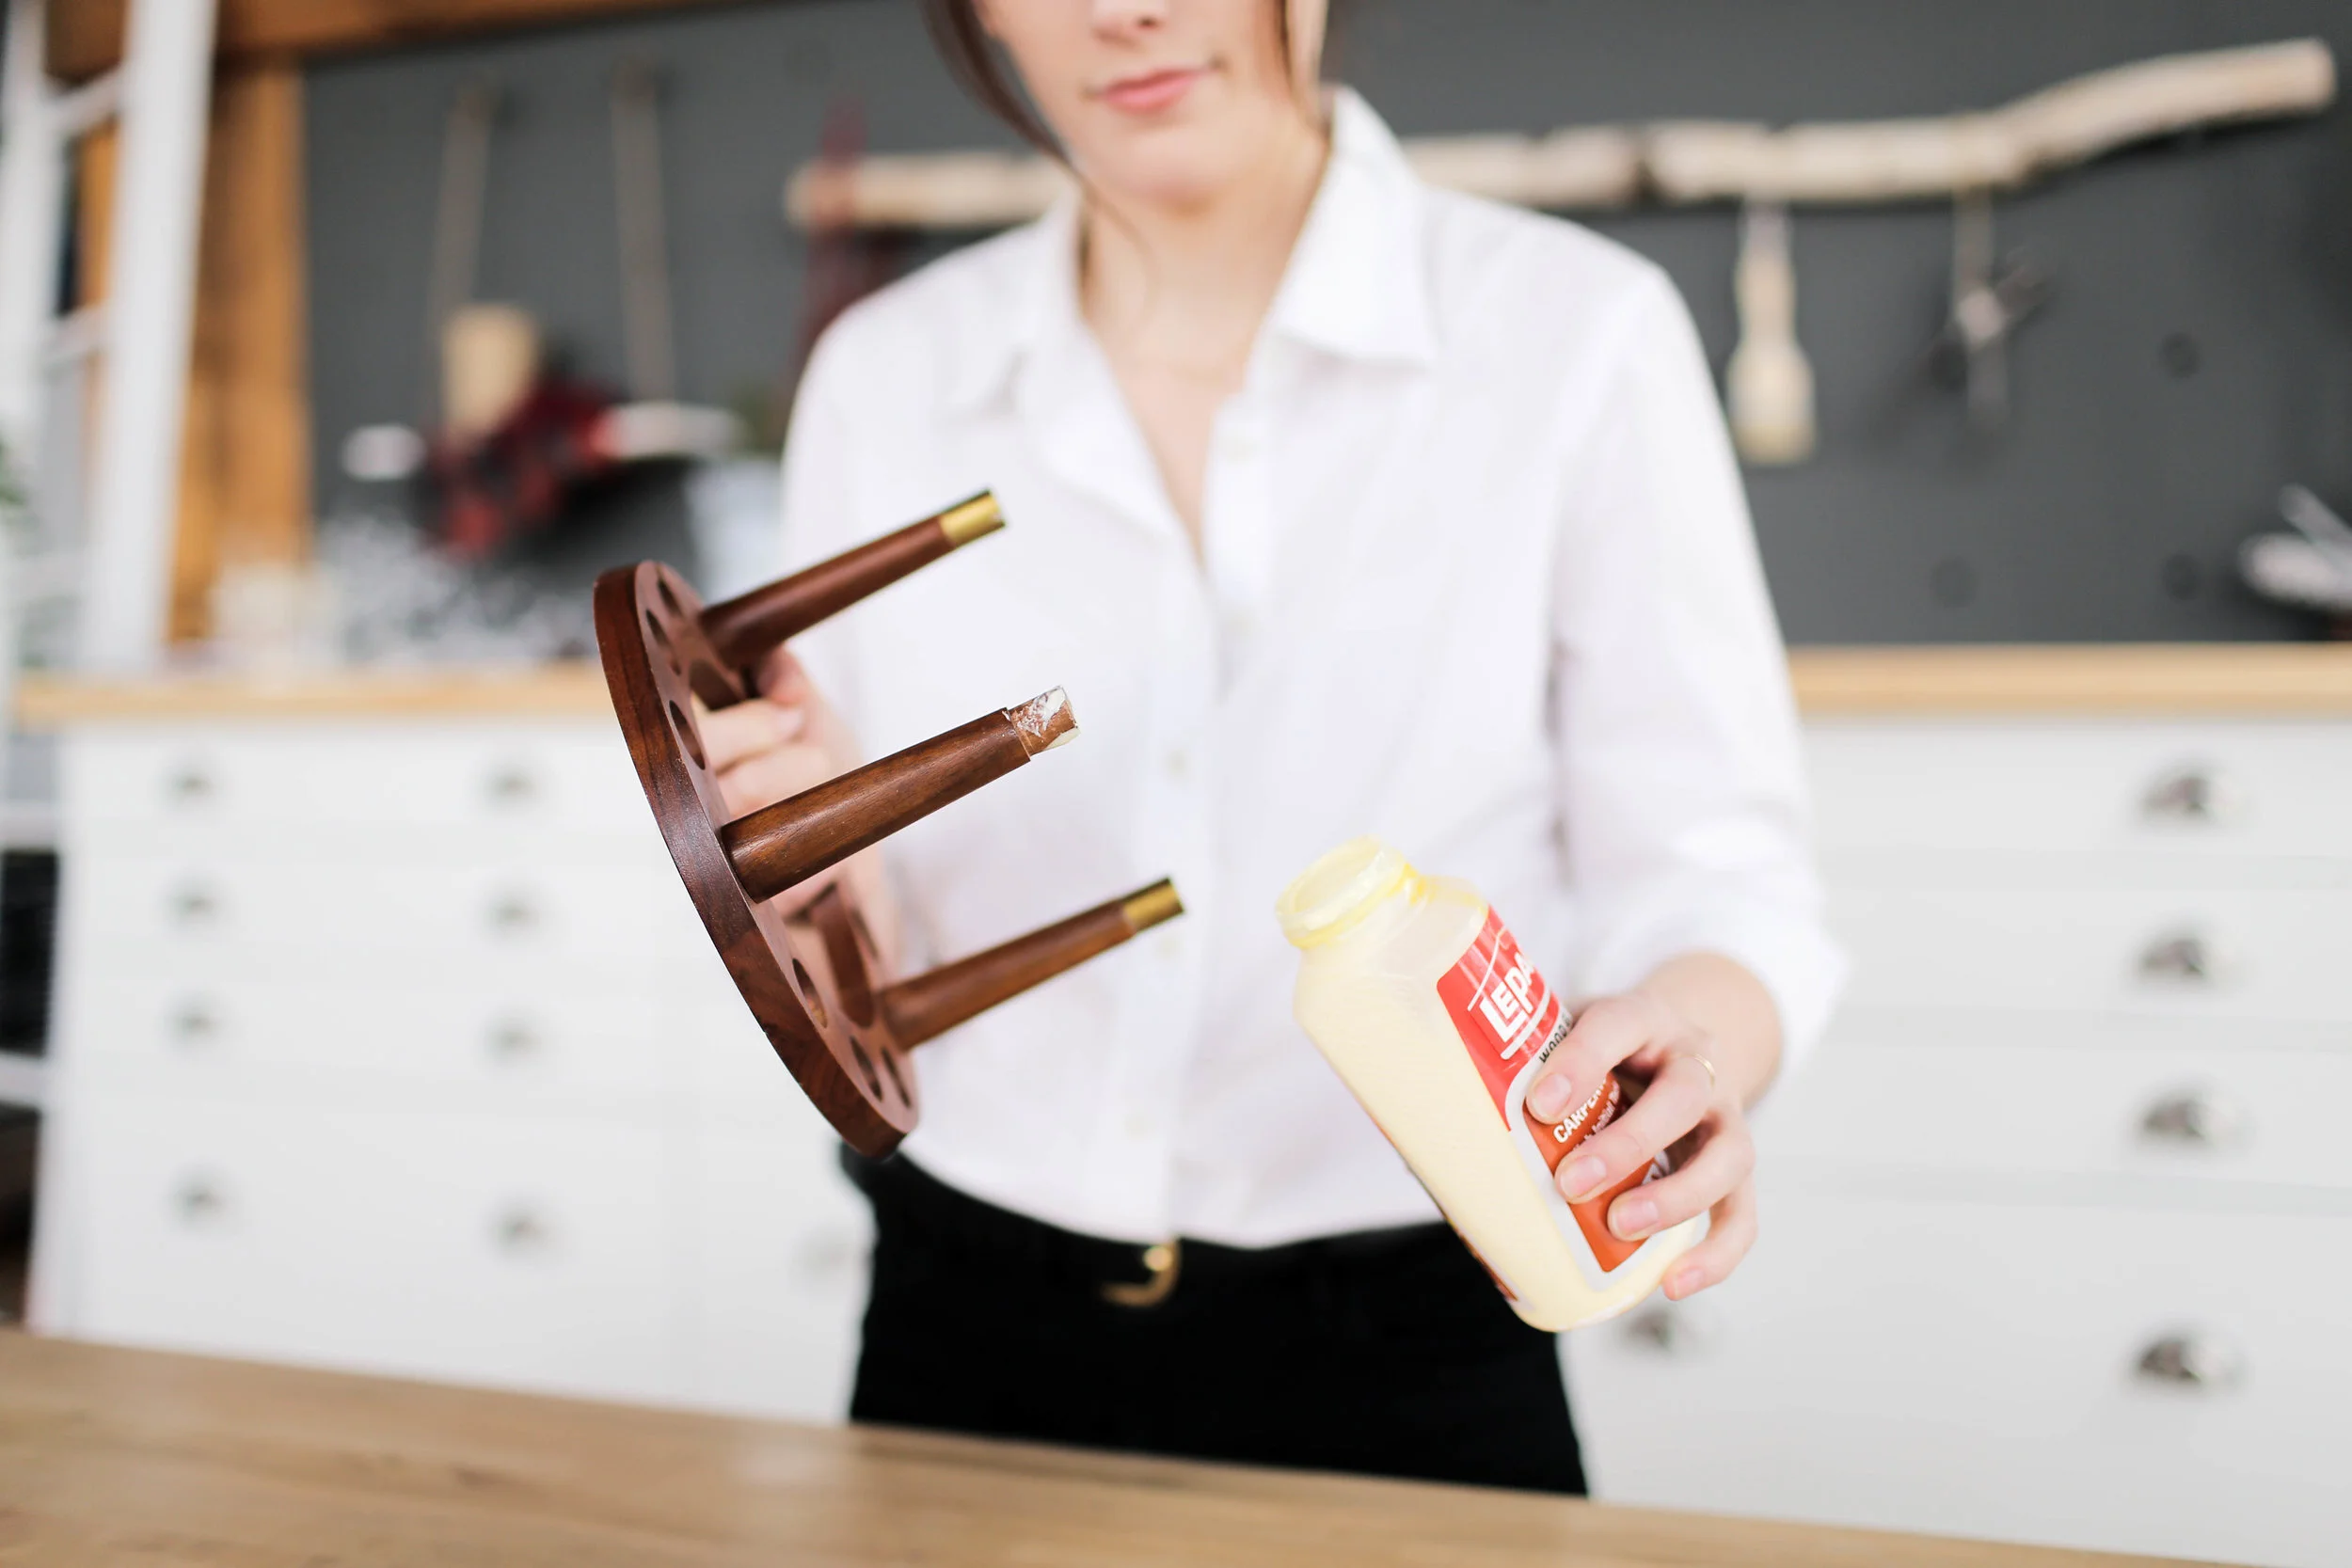
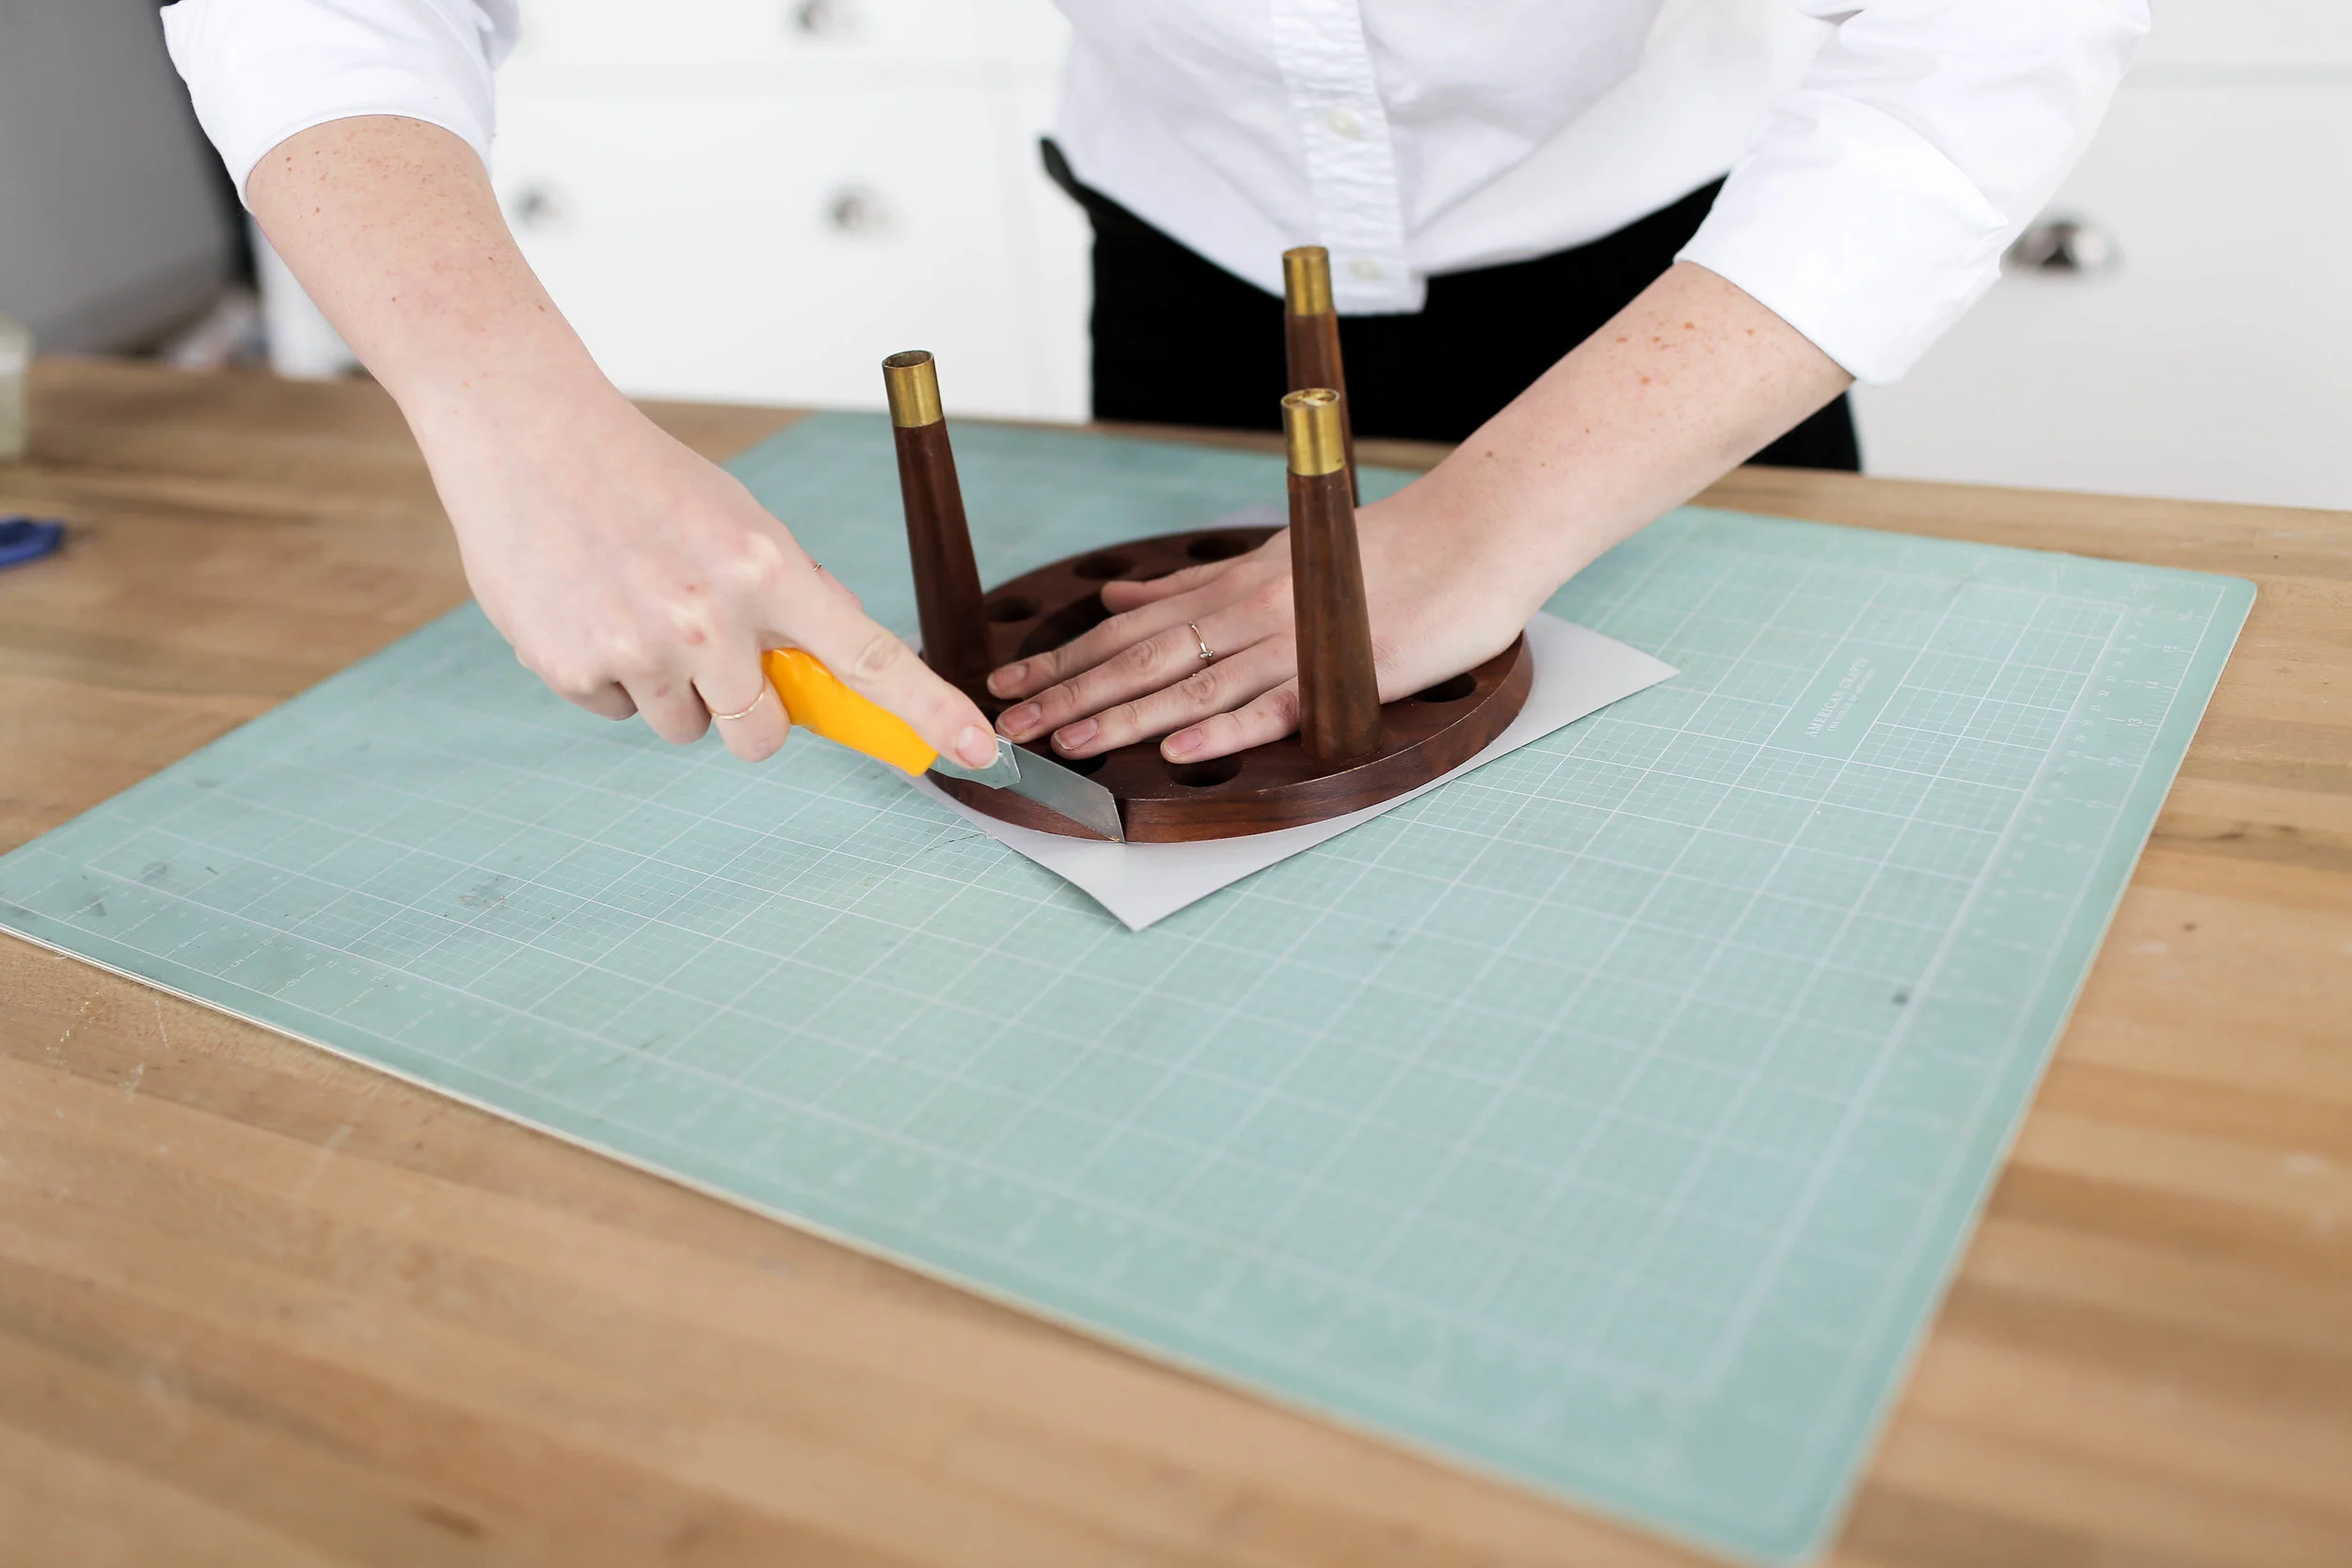
We started making this mini winter scene by grabbing out pipe holder and taking it apart a bit. We realized that the pipe holder was just held together with some dowels, so we simply took a mallet to it and popped off the base. Next, we shortened the legs a bit so that the metal pieces on the ends of the legs would sit right at the bottom of the leg and lays flat. We then went ahead and wood glued everything back together, including the little metal pieces.
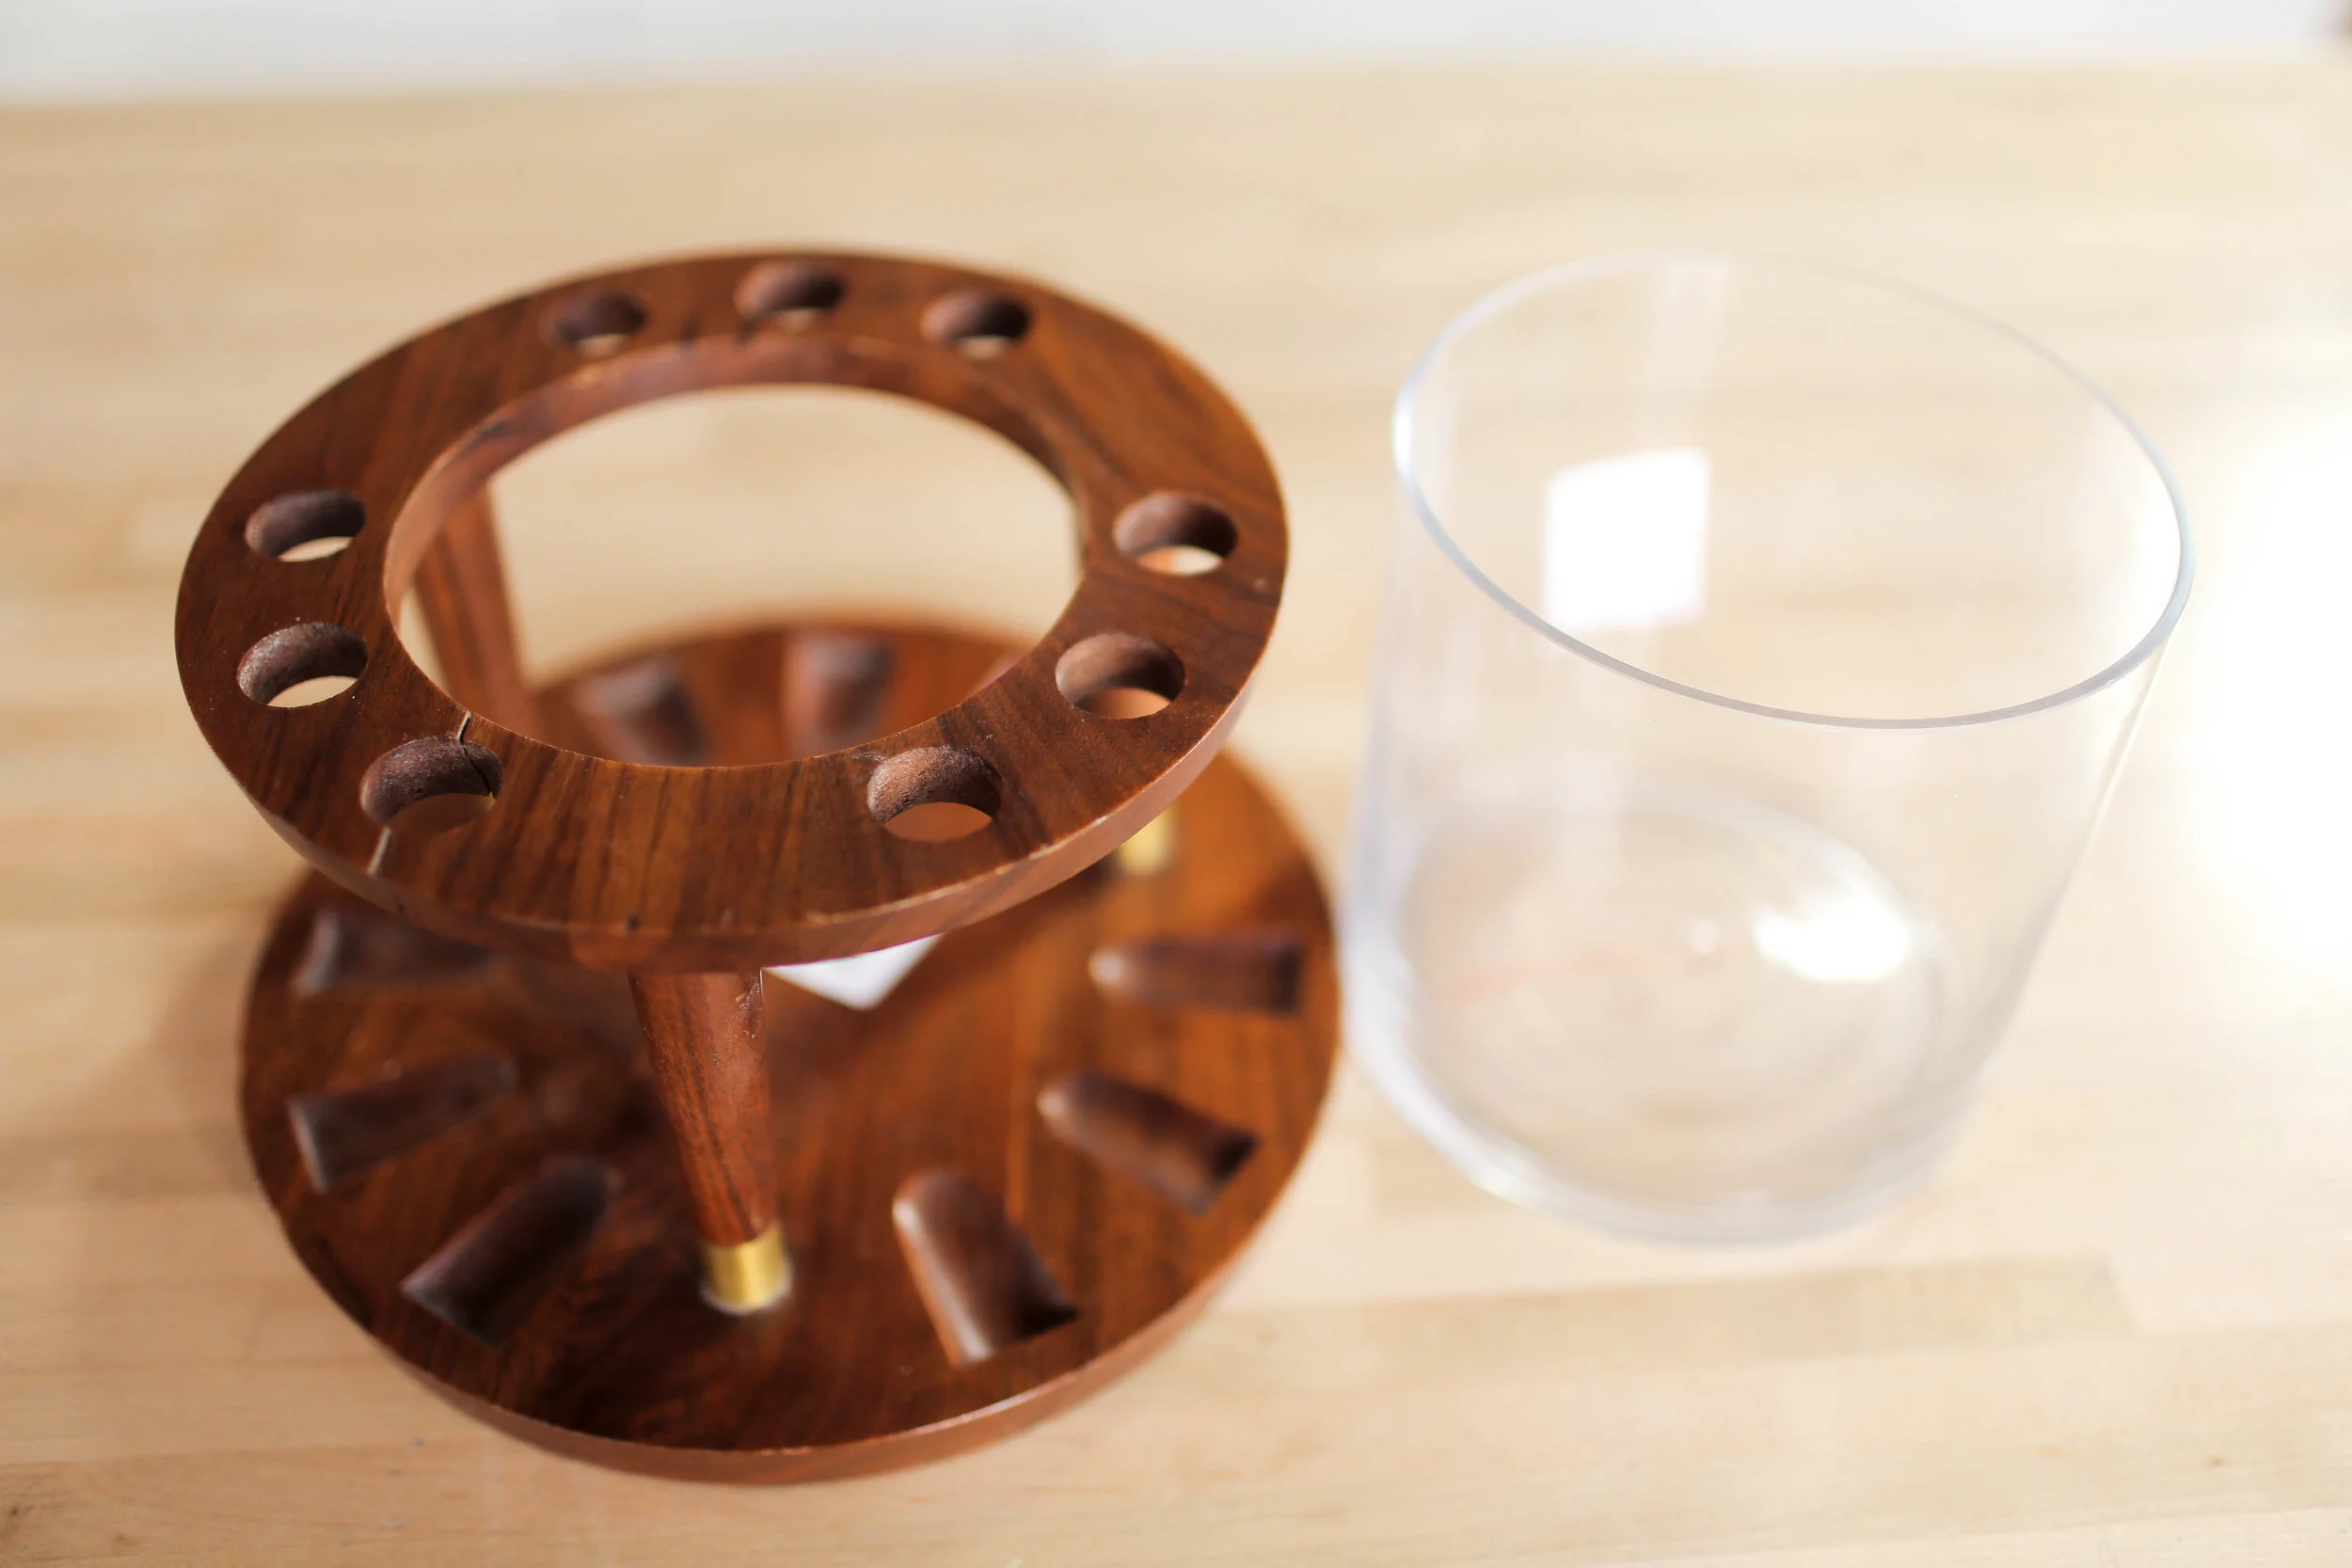

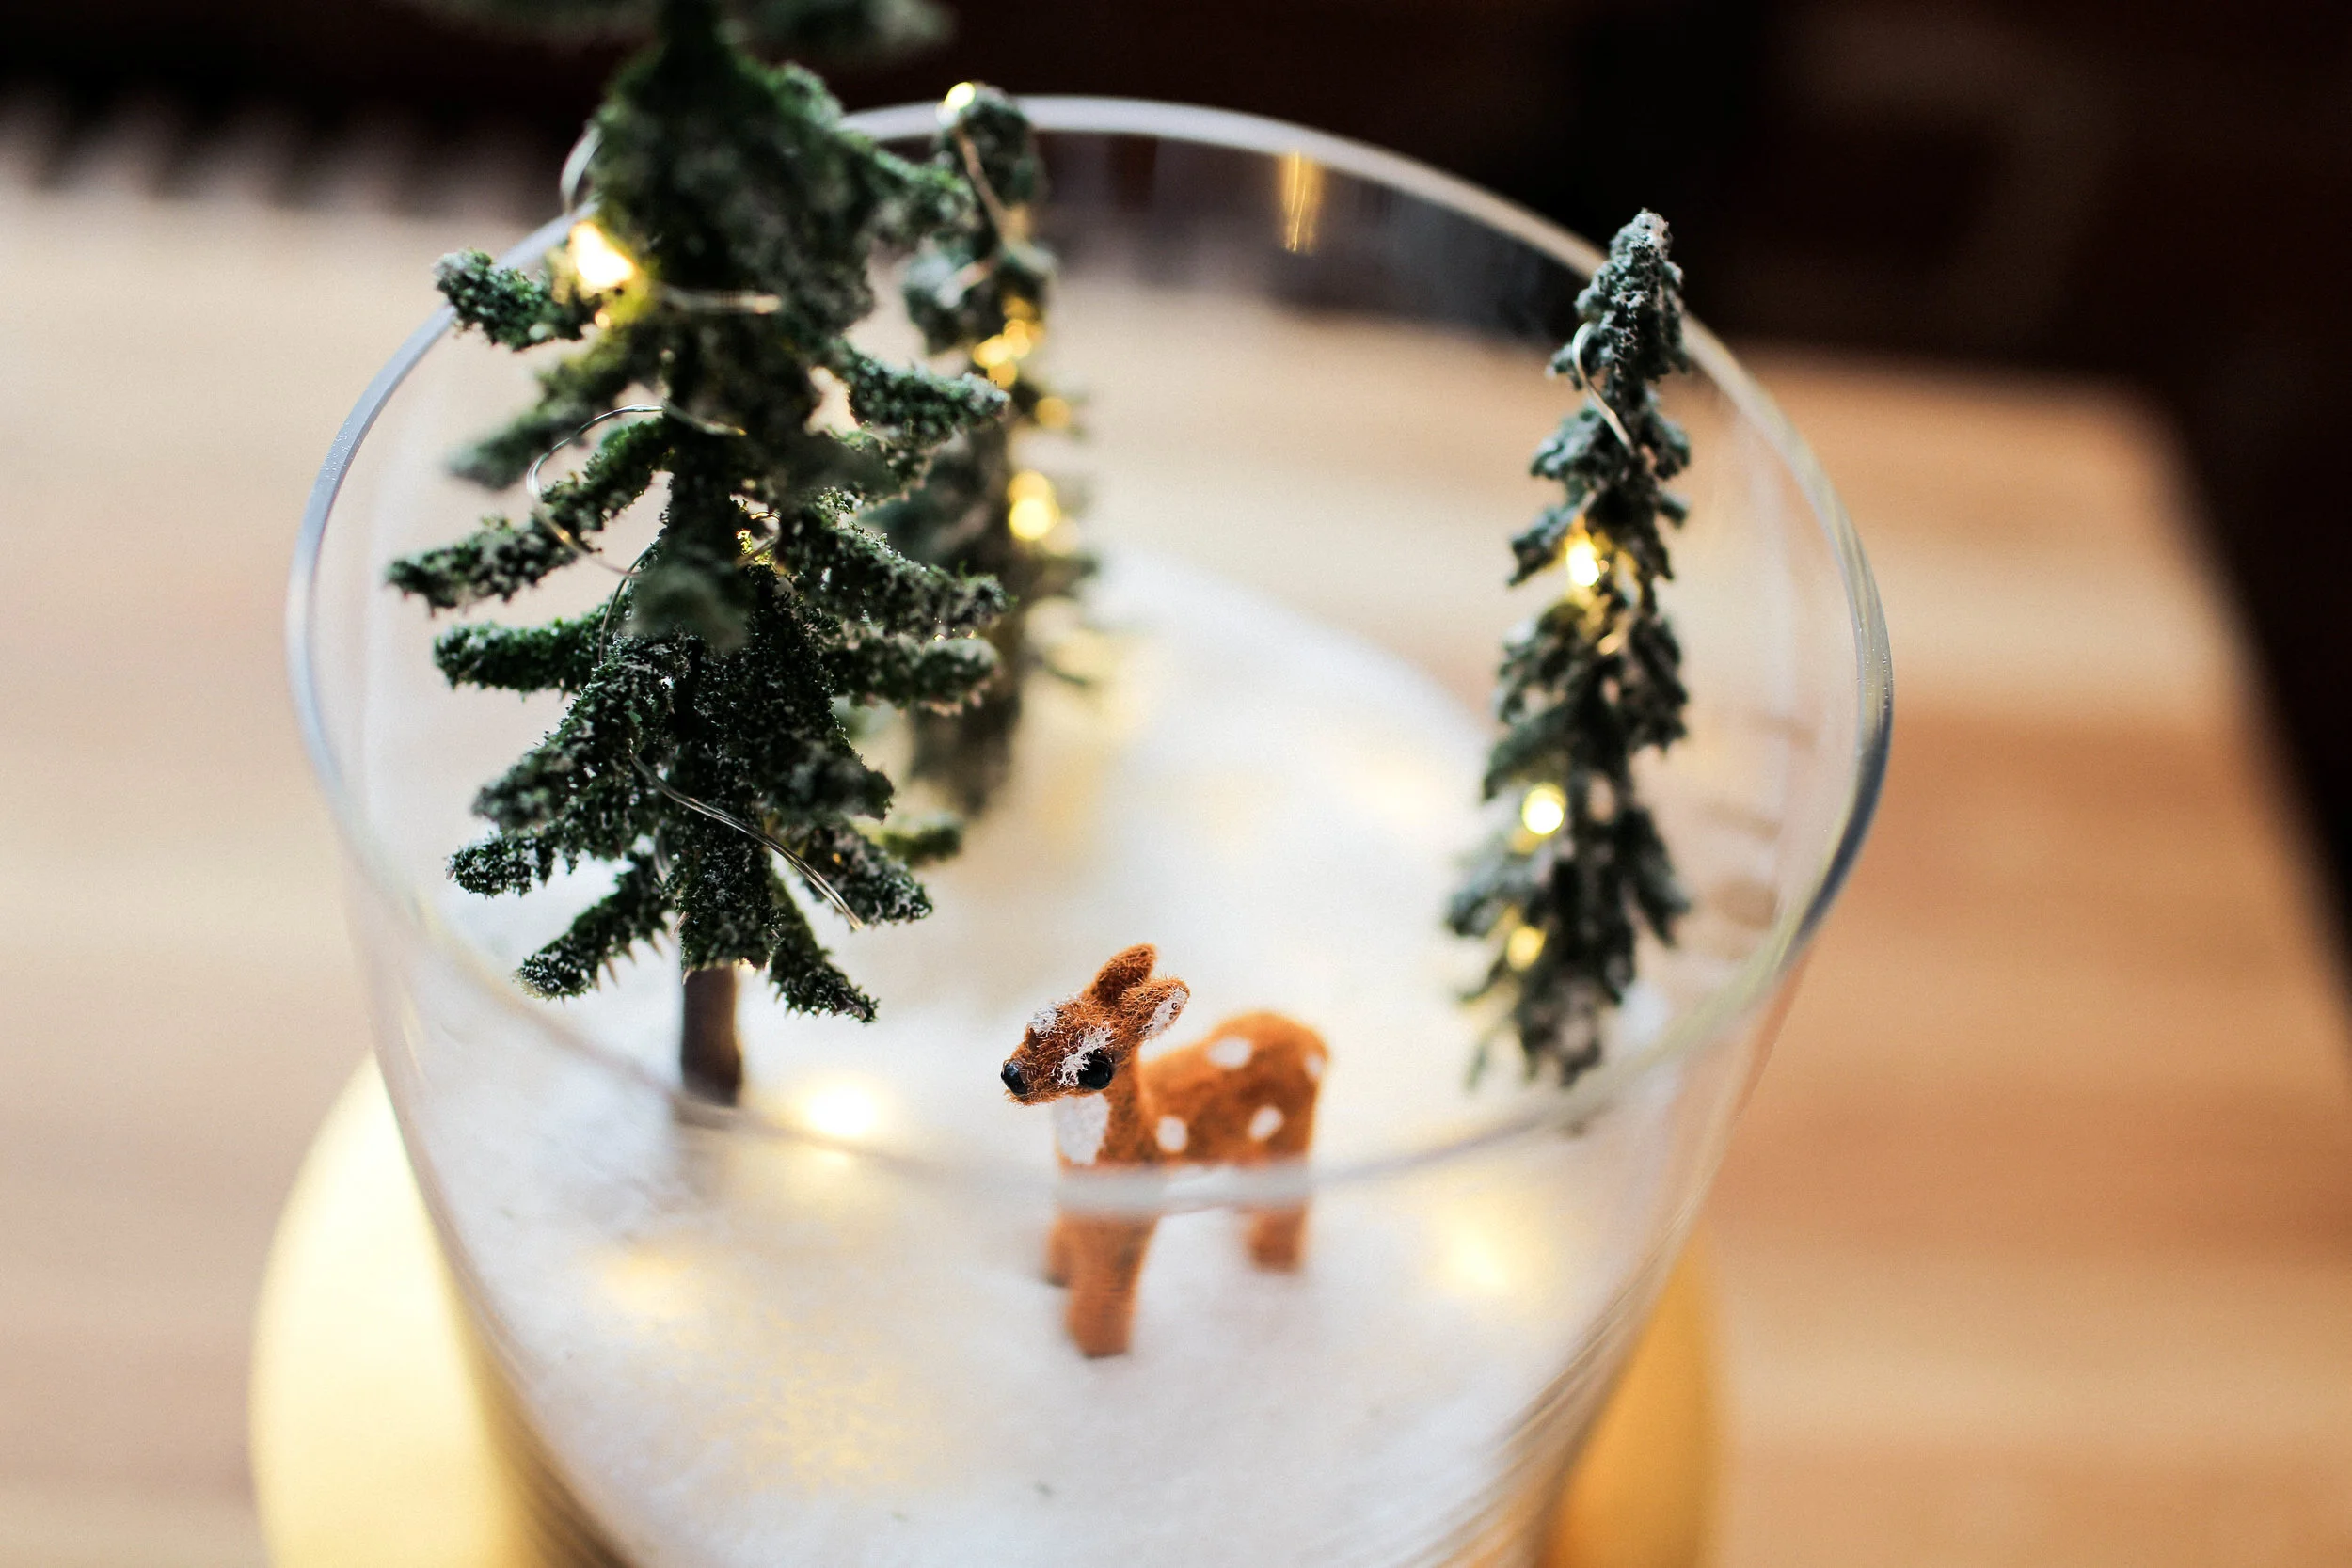
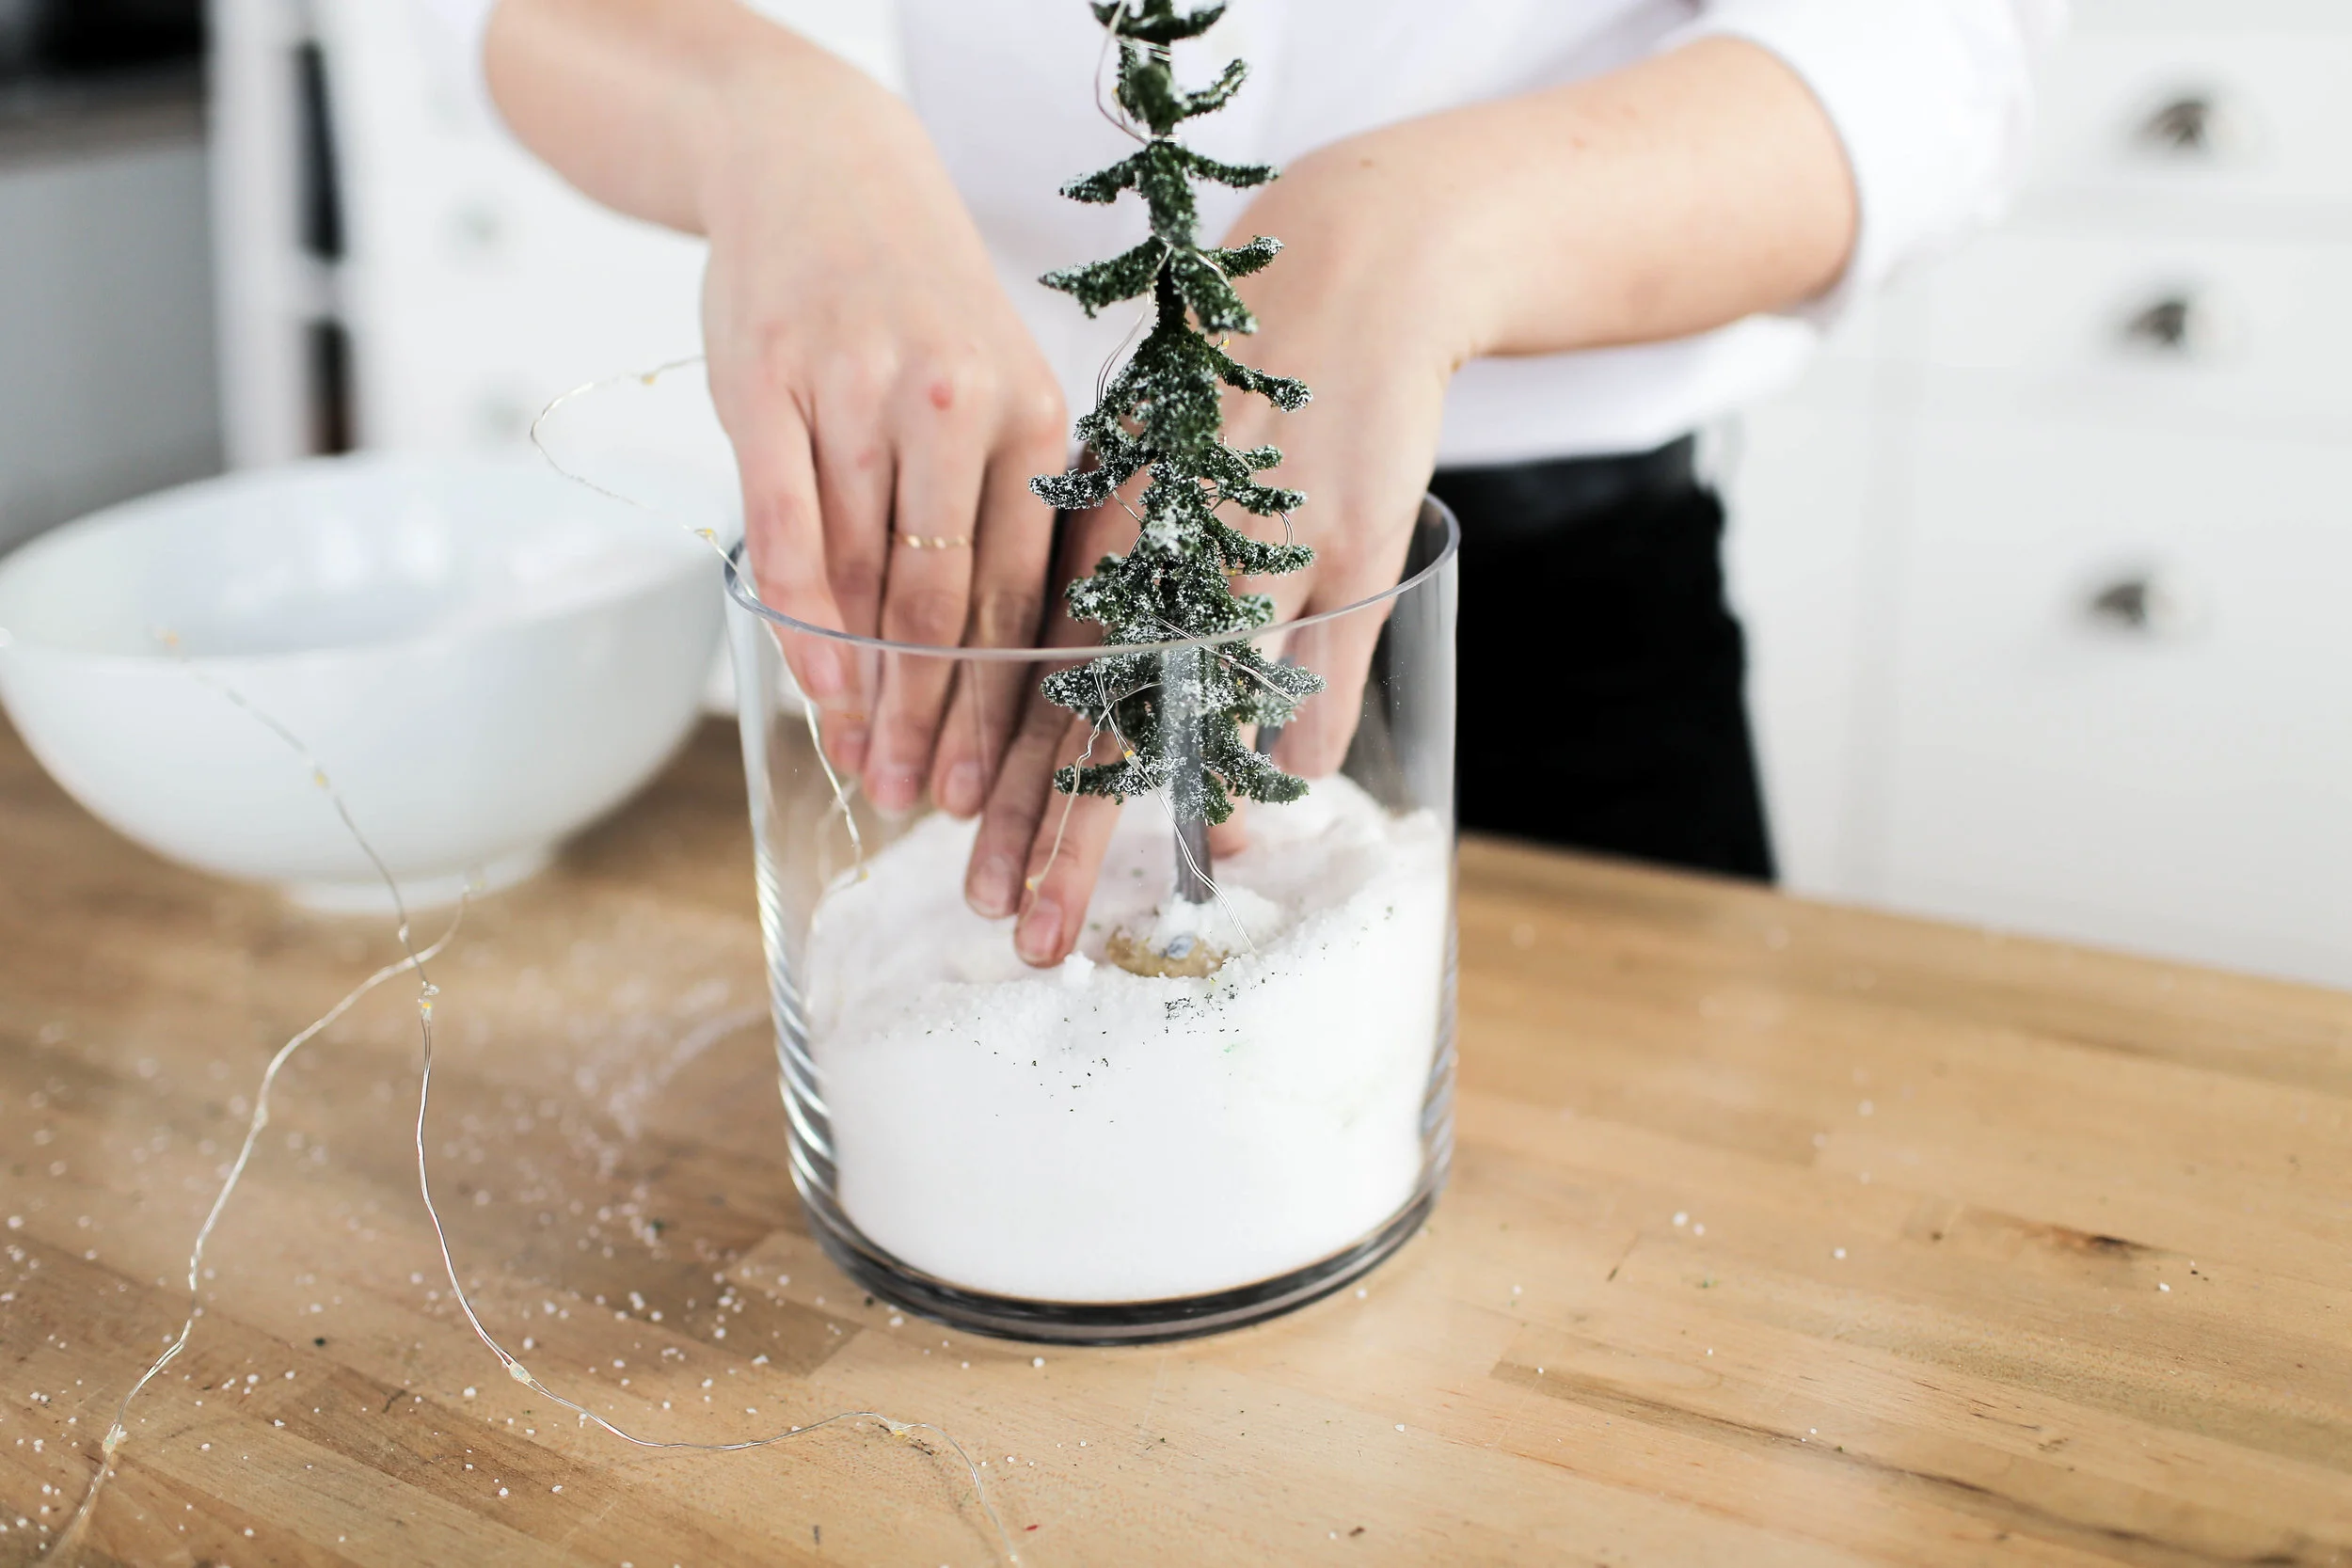
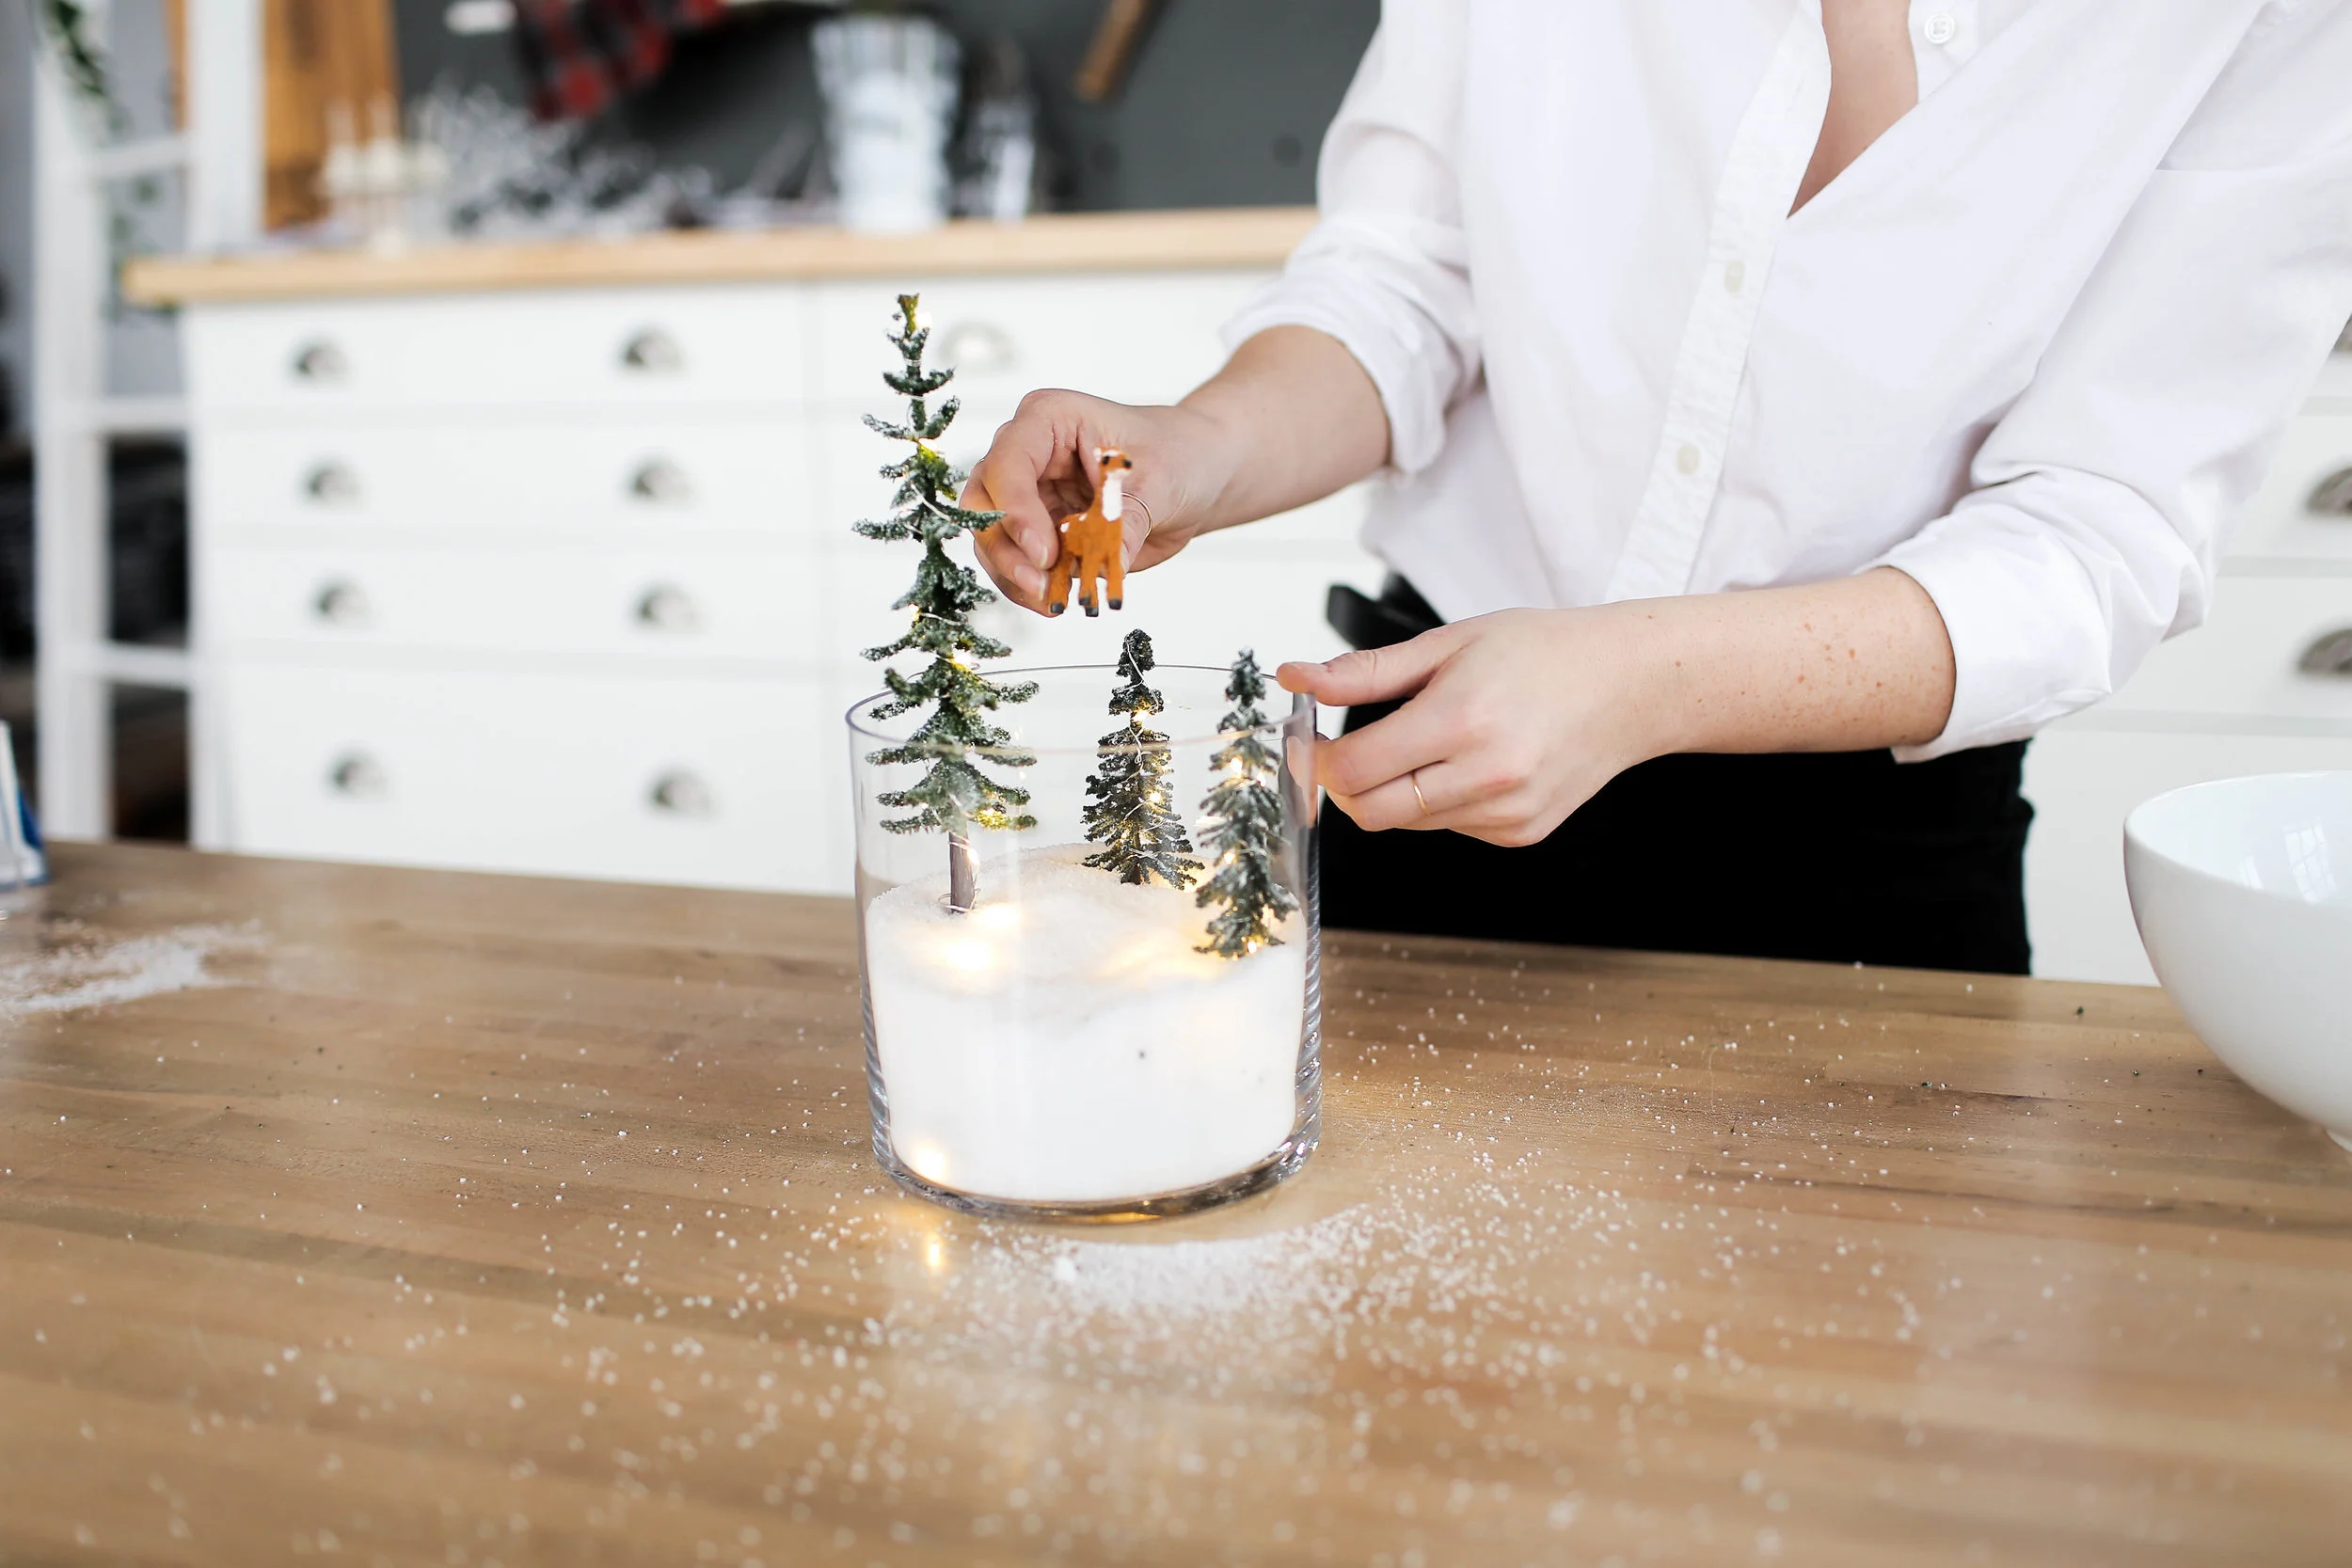
Looks great! Let’s move on to the winter scene! To create this scene, you are going to need some cute mini trees and a mini deer from the craft store, and some snow! To be a bit more eco friendly, we opted for some pickling salt rather than plastic faux snow.
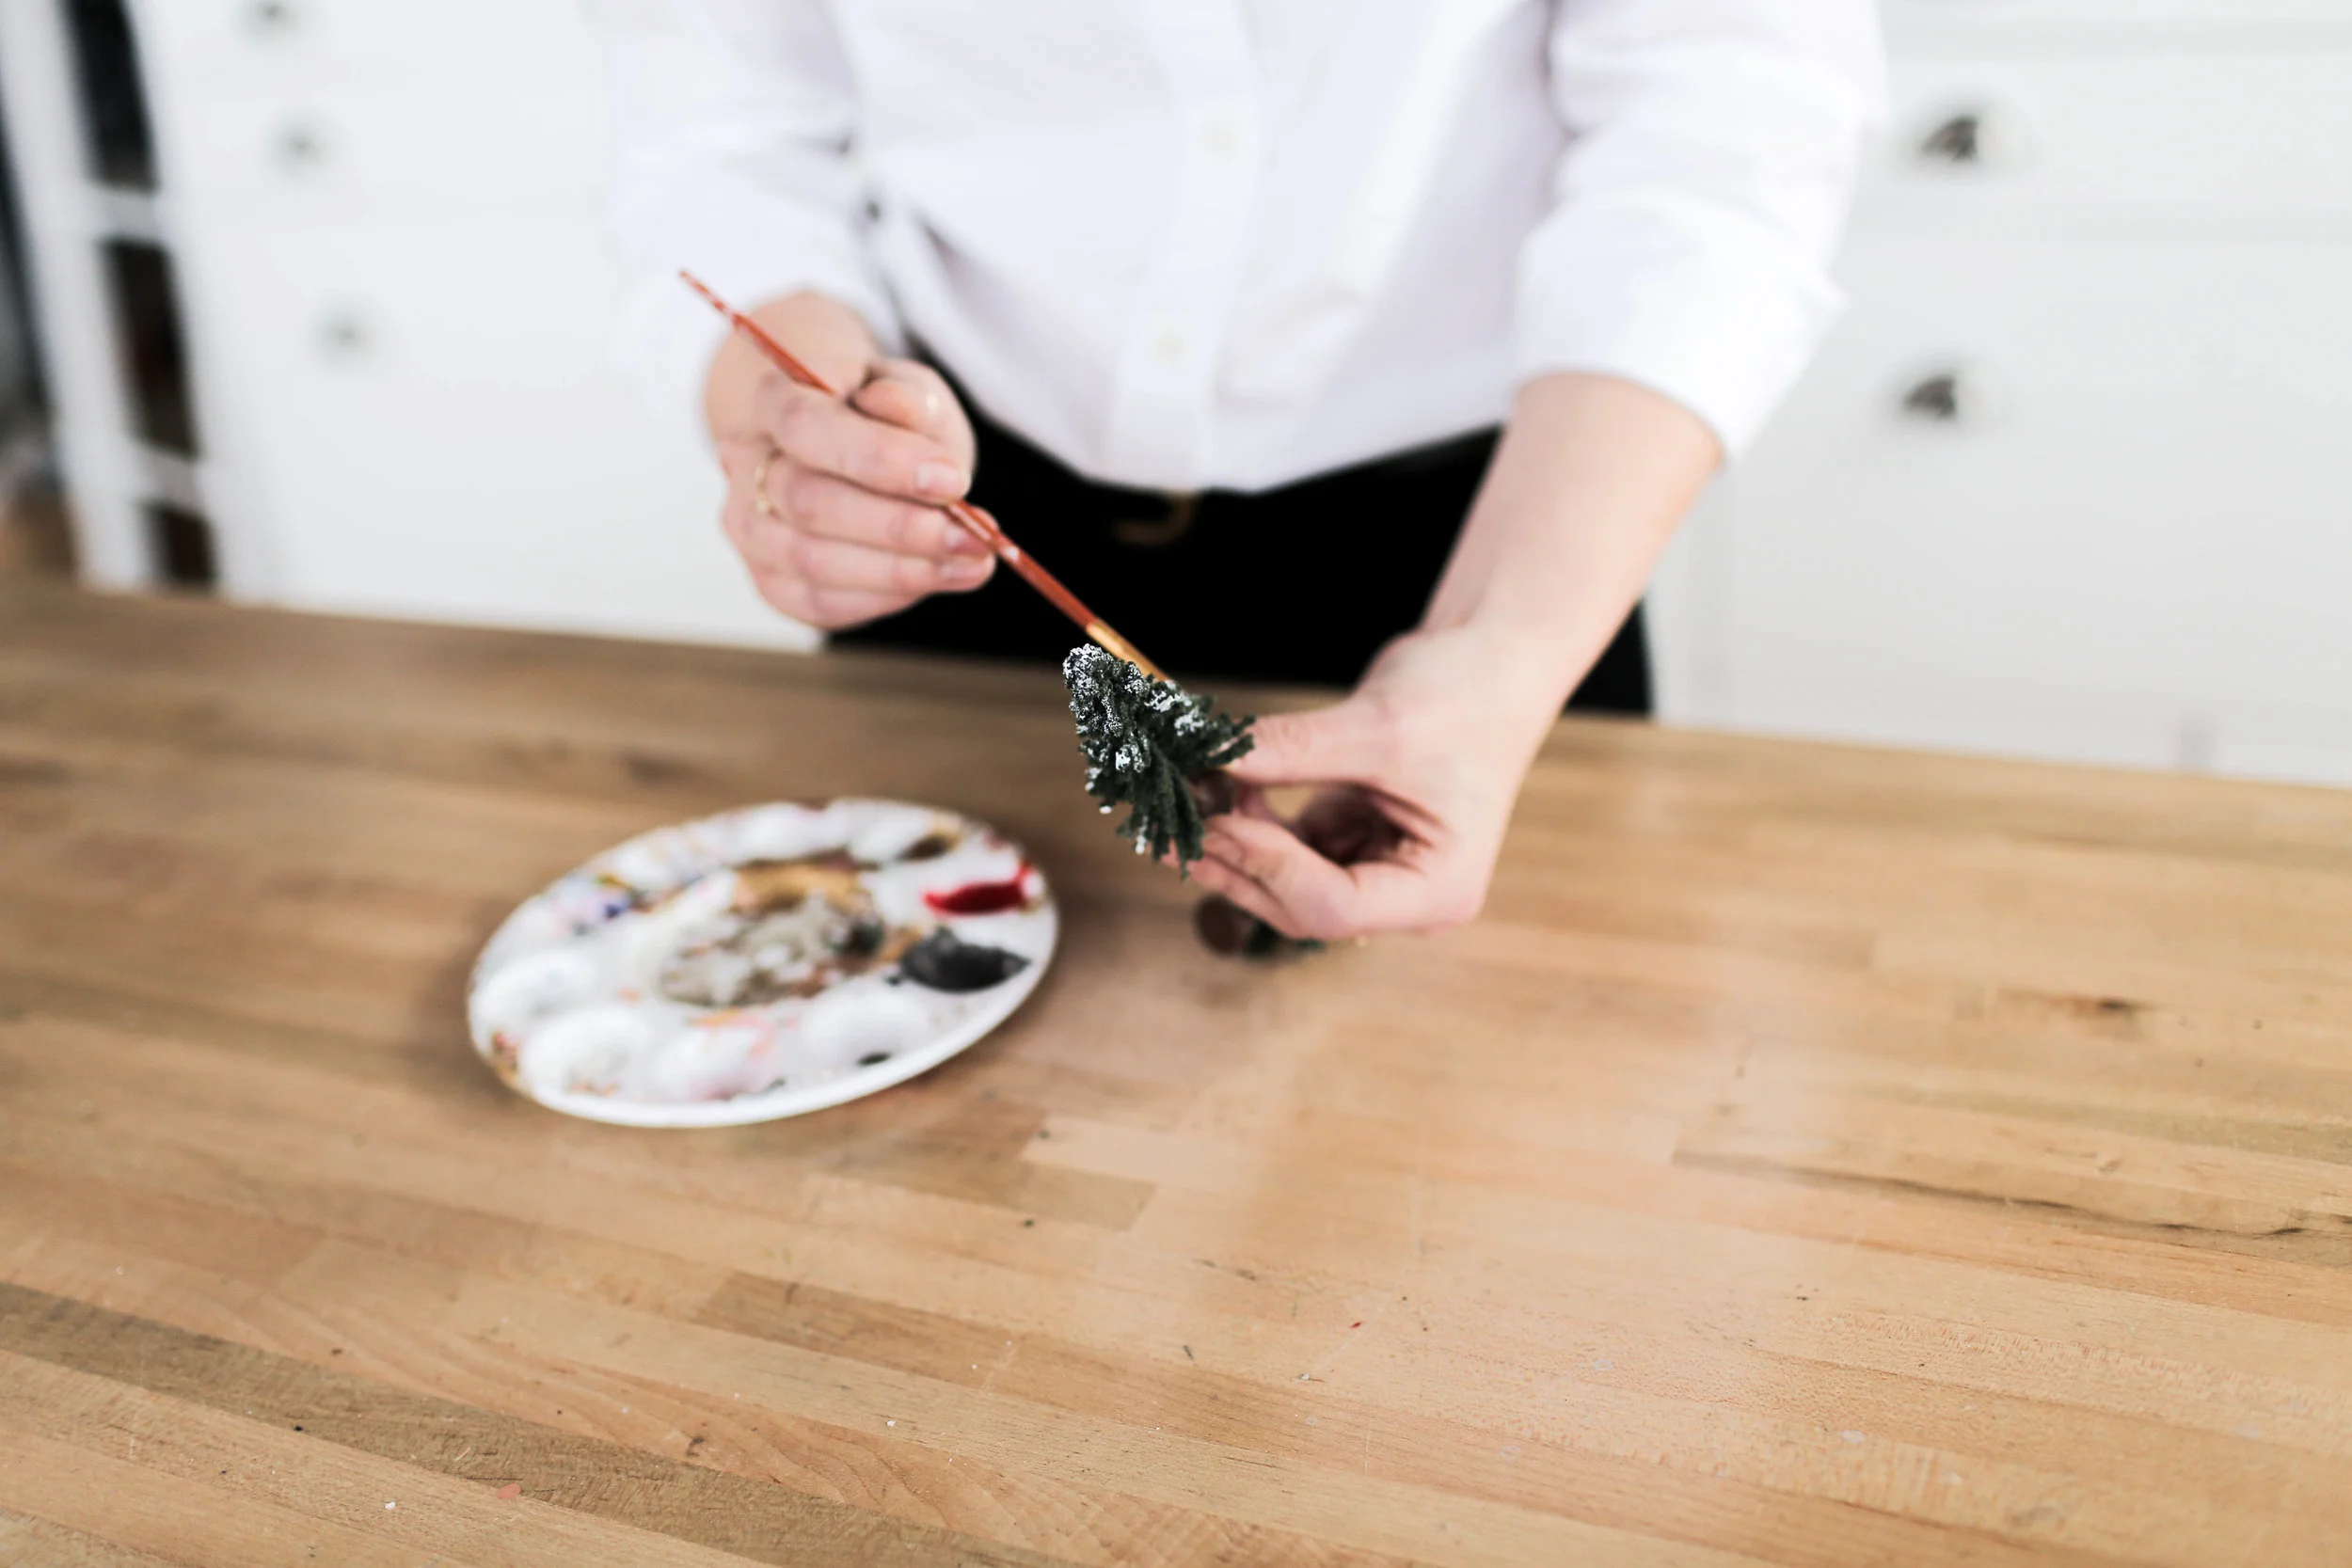
Before we assemble, we are going to flock the trees. This essentially means that we are going to add some faux snow to the tips of the branches. We grabbed some white paint and added some snow to the tips of the branches on these trees.
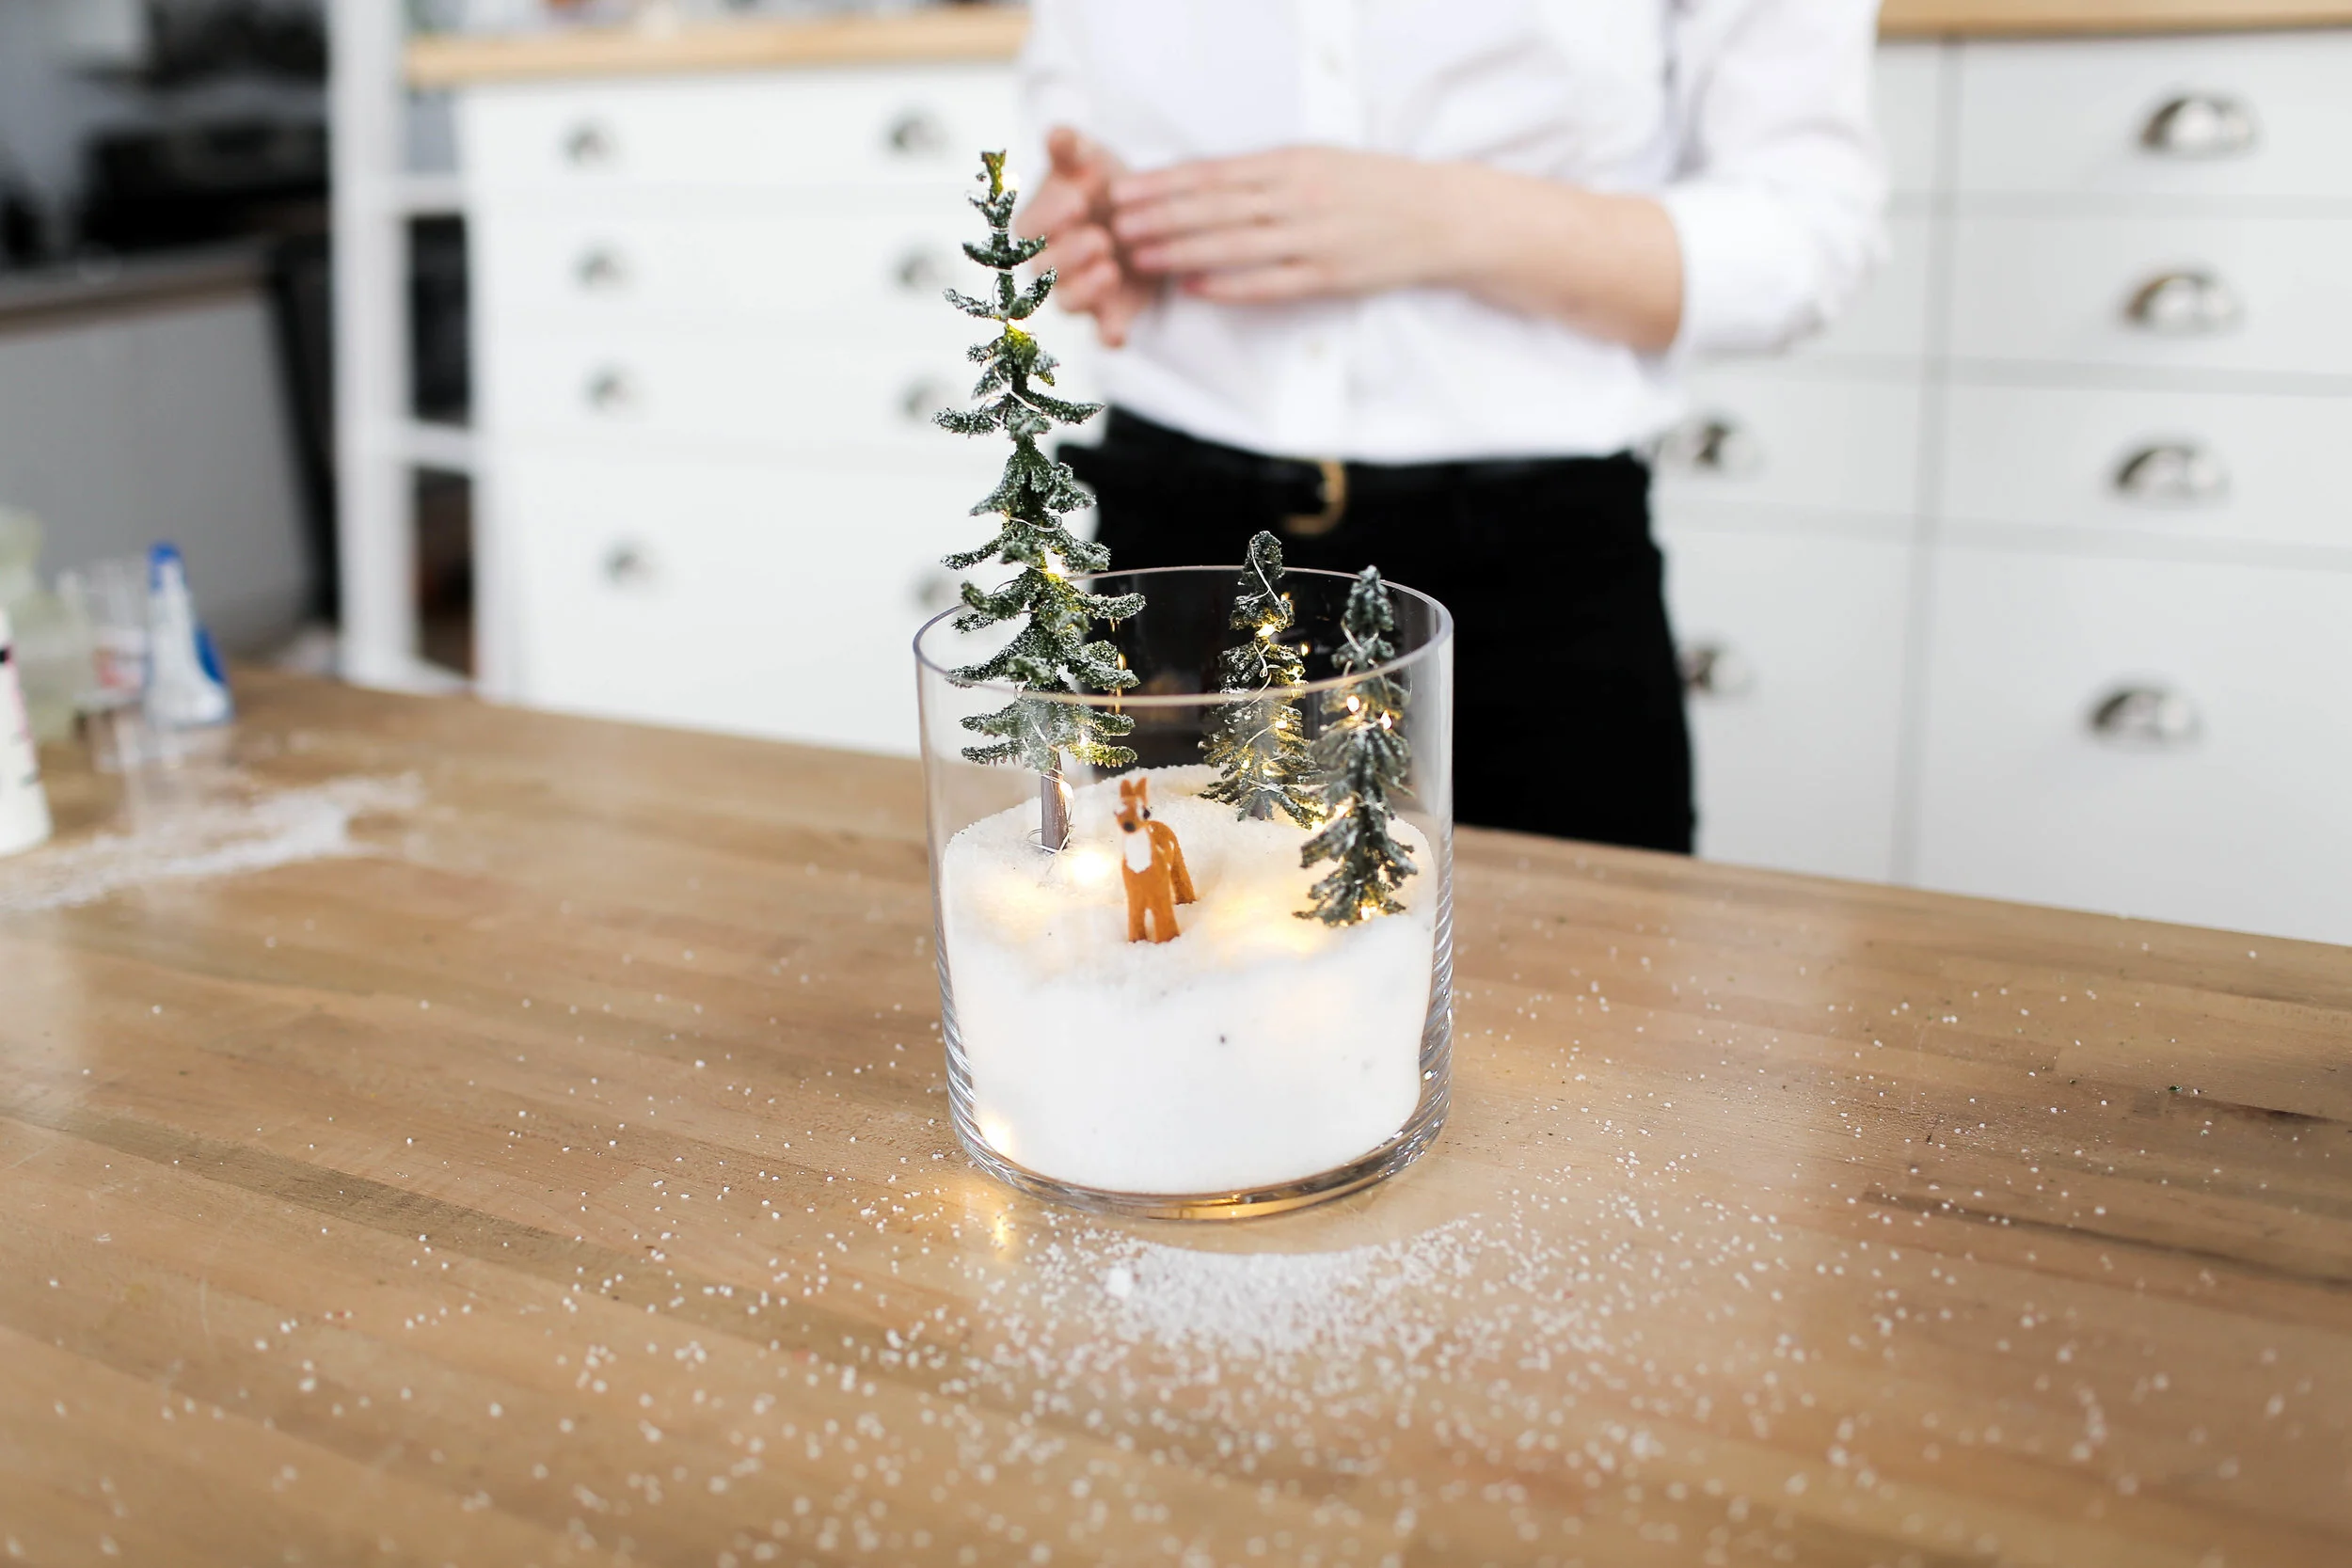
Once the trees are dry, you are going to go ahead and start wrapping the mini trees in some fairy lights. Once we were done with that, we placed the battery pack at the bottom of our glass vase, and coiled up the extra lights around the bottom. We then covered all of this with the pickling salt. Our final step was to place the trees and animals into the snow!
The final step is to cover the top of our stand, since there are holes in the top! We did this by simply cutting a round piece of gold contact paper and sticking it to the top. Place the vase on your stand and you’re done!
CANDLE WALL SCONCE UPCYCLE
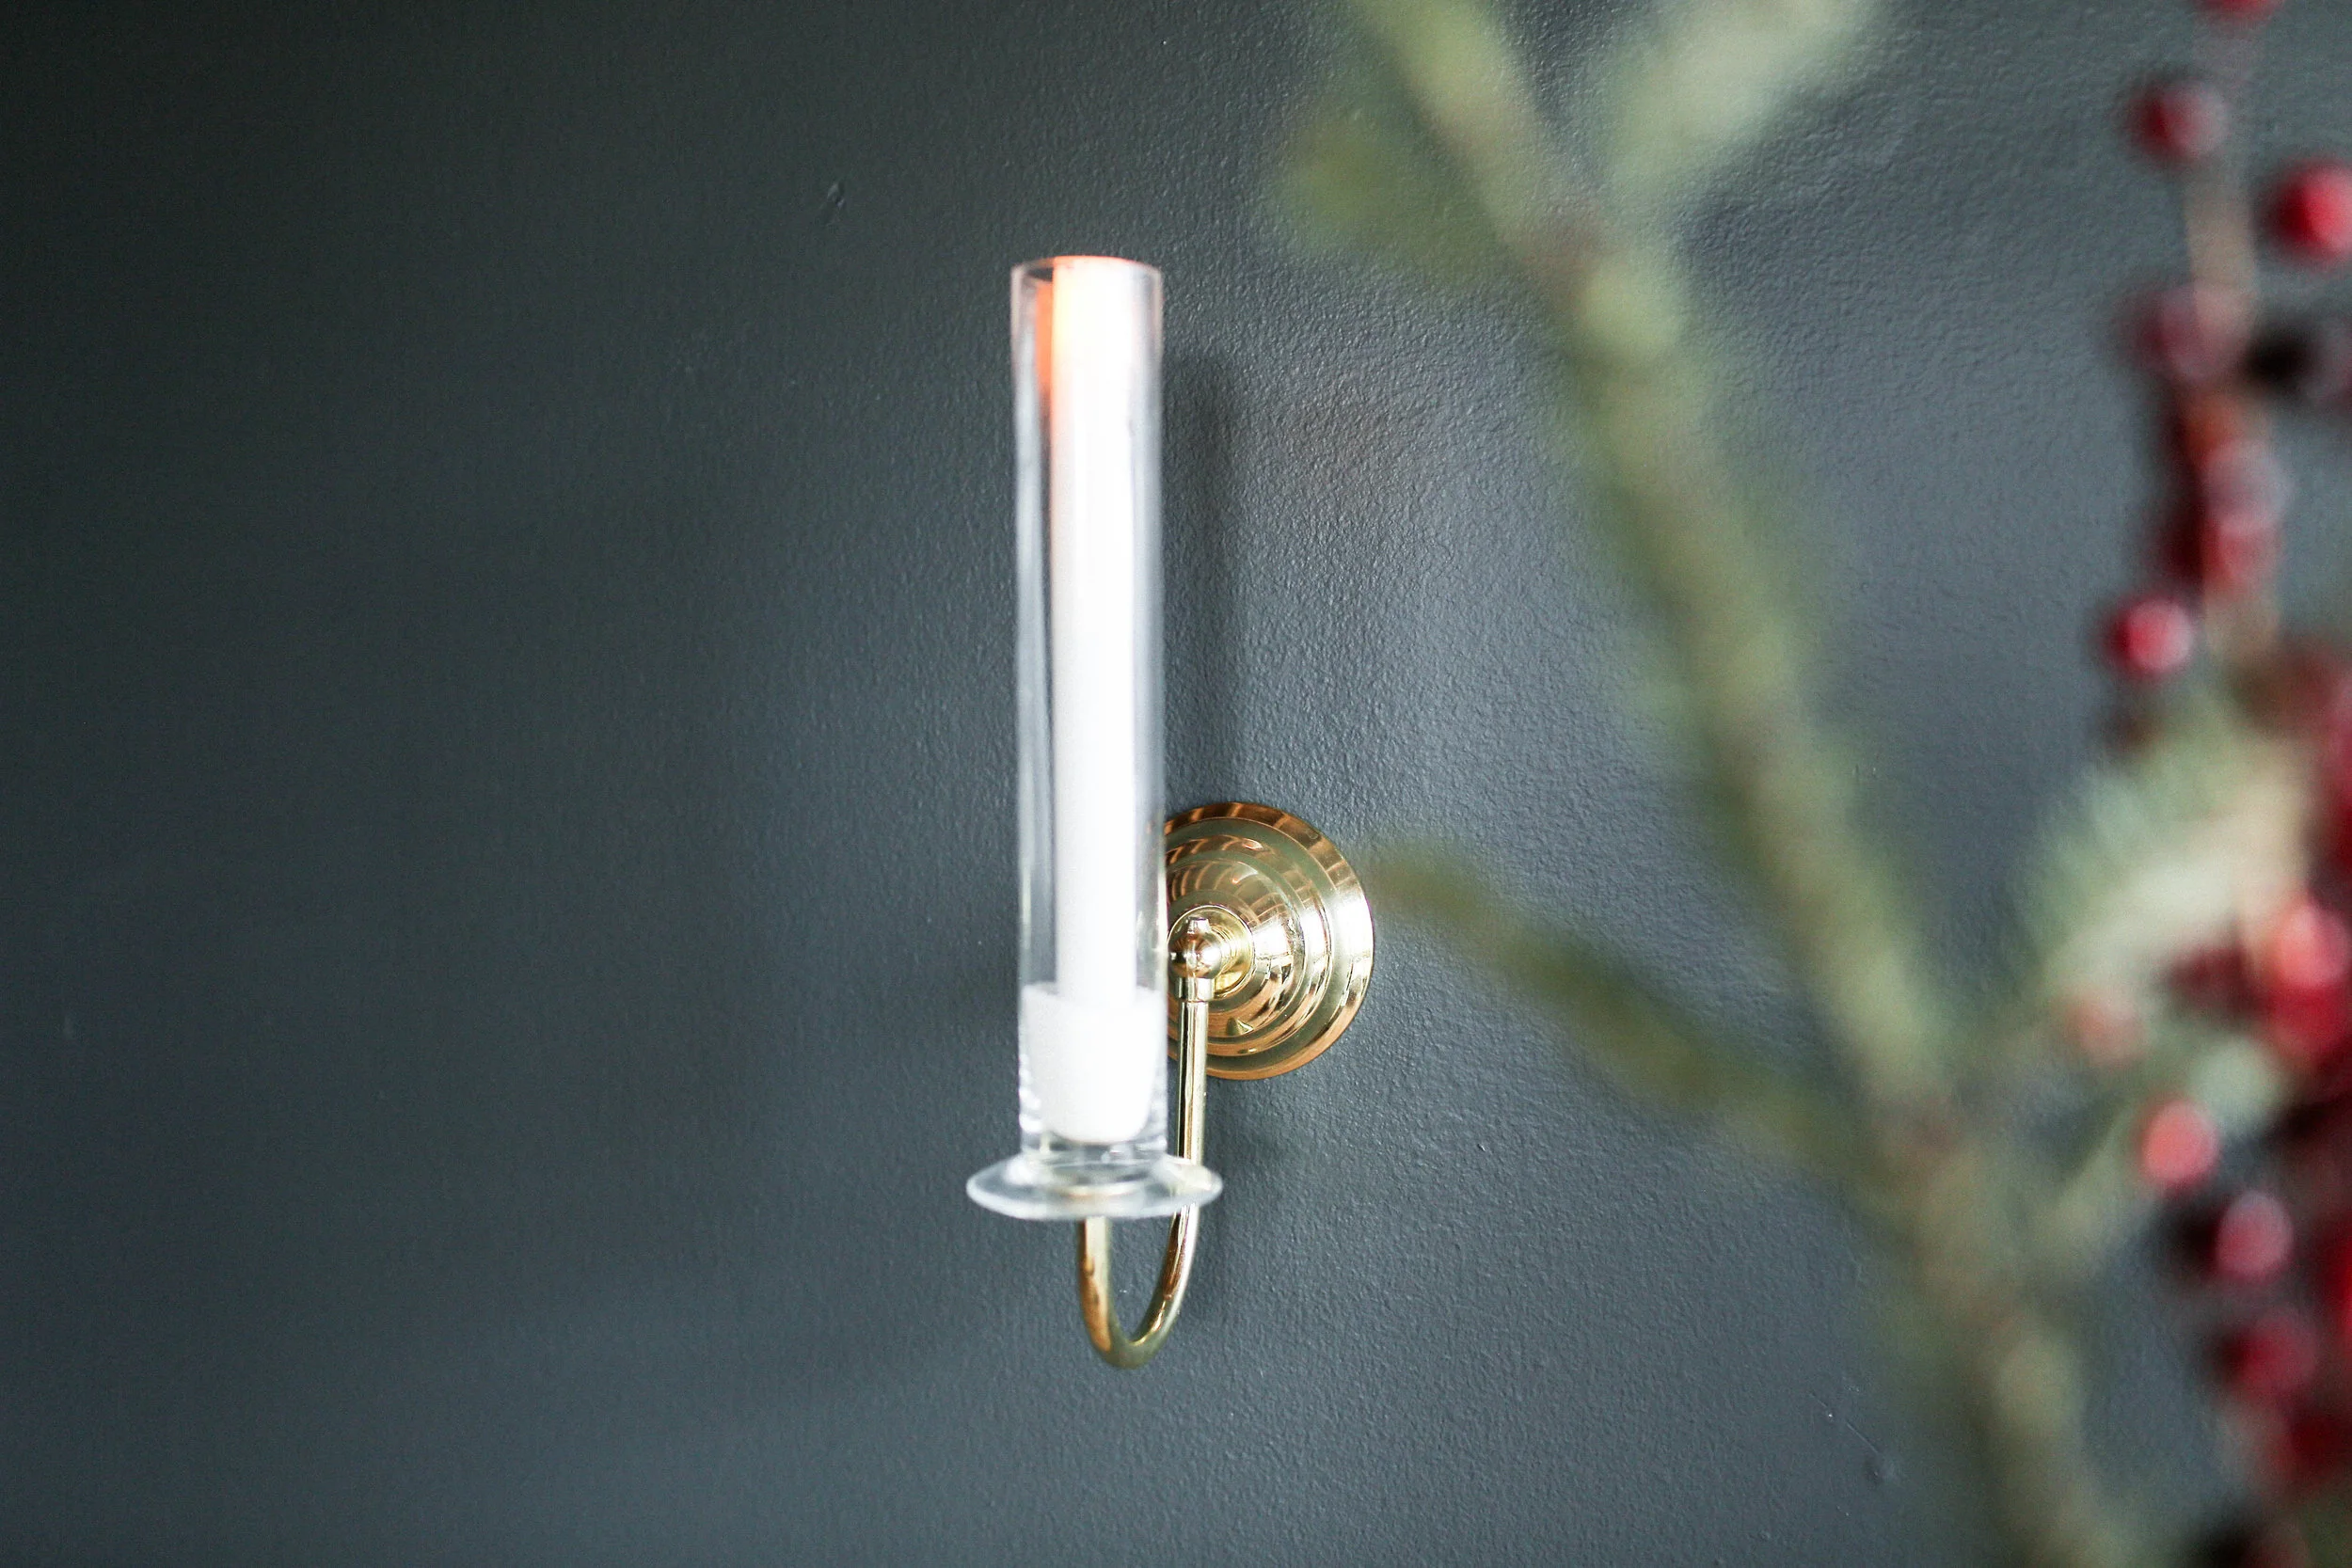
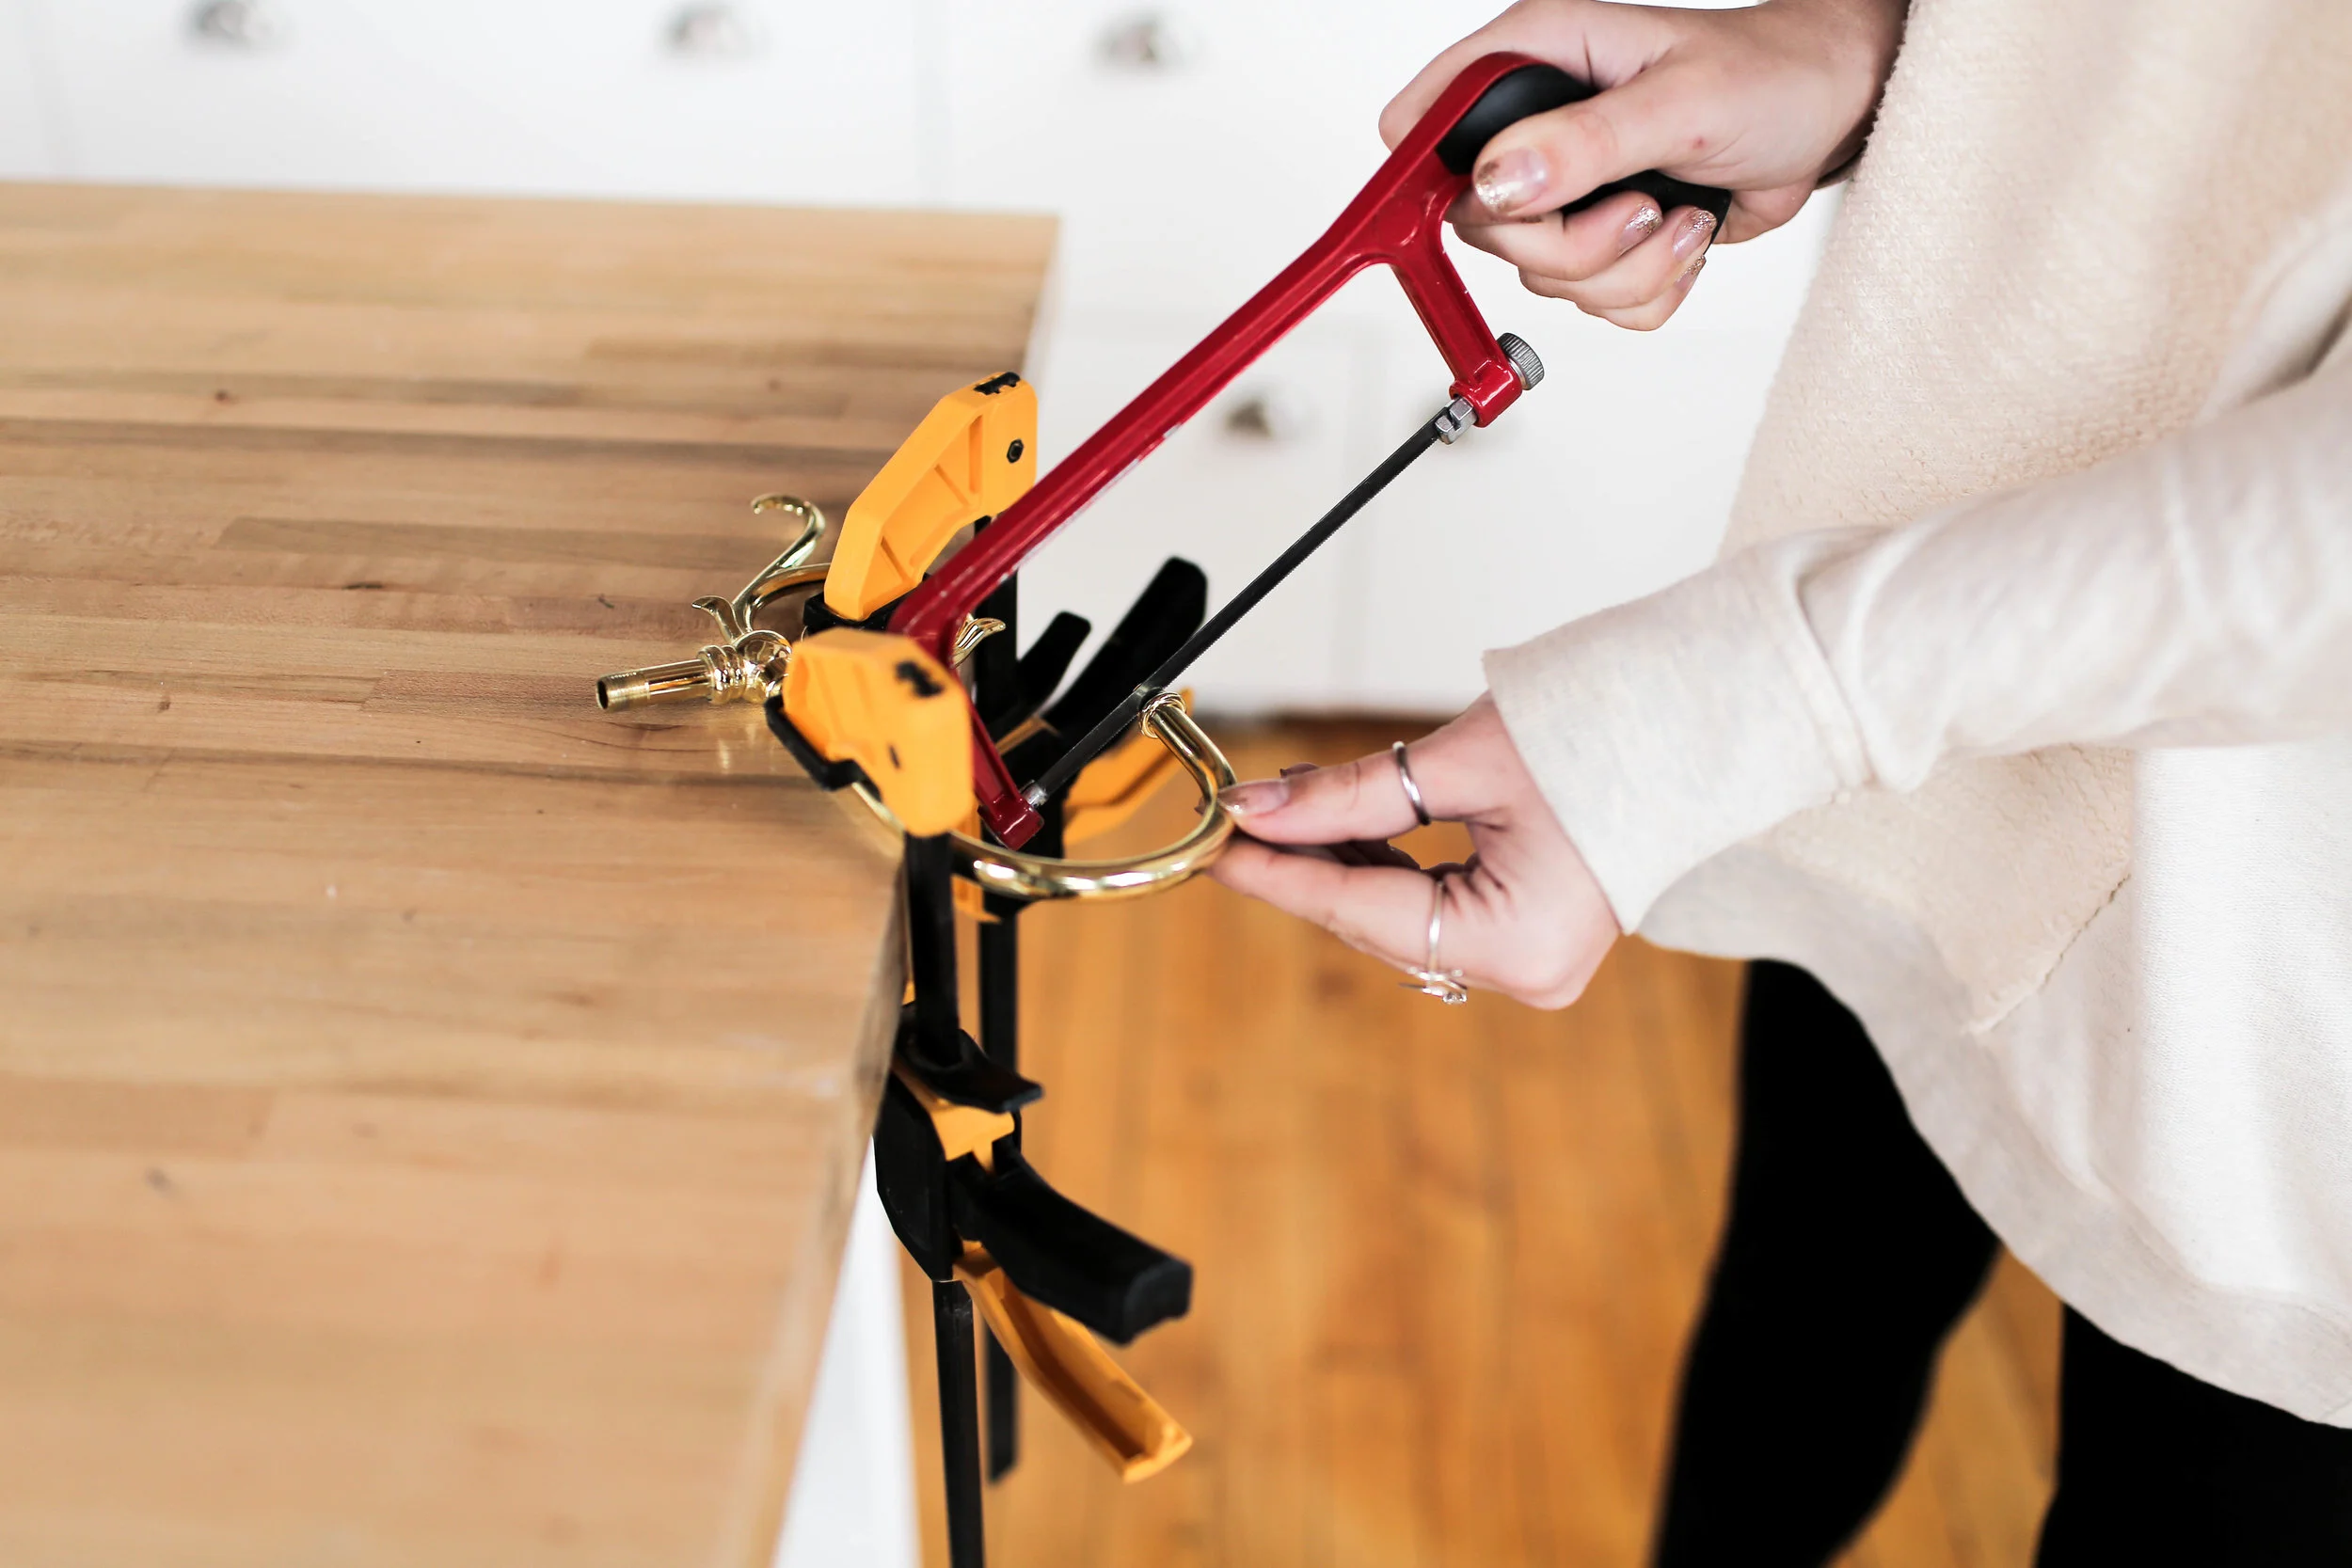
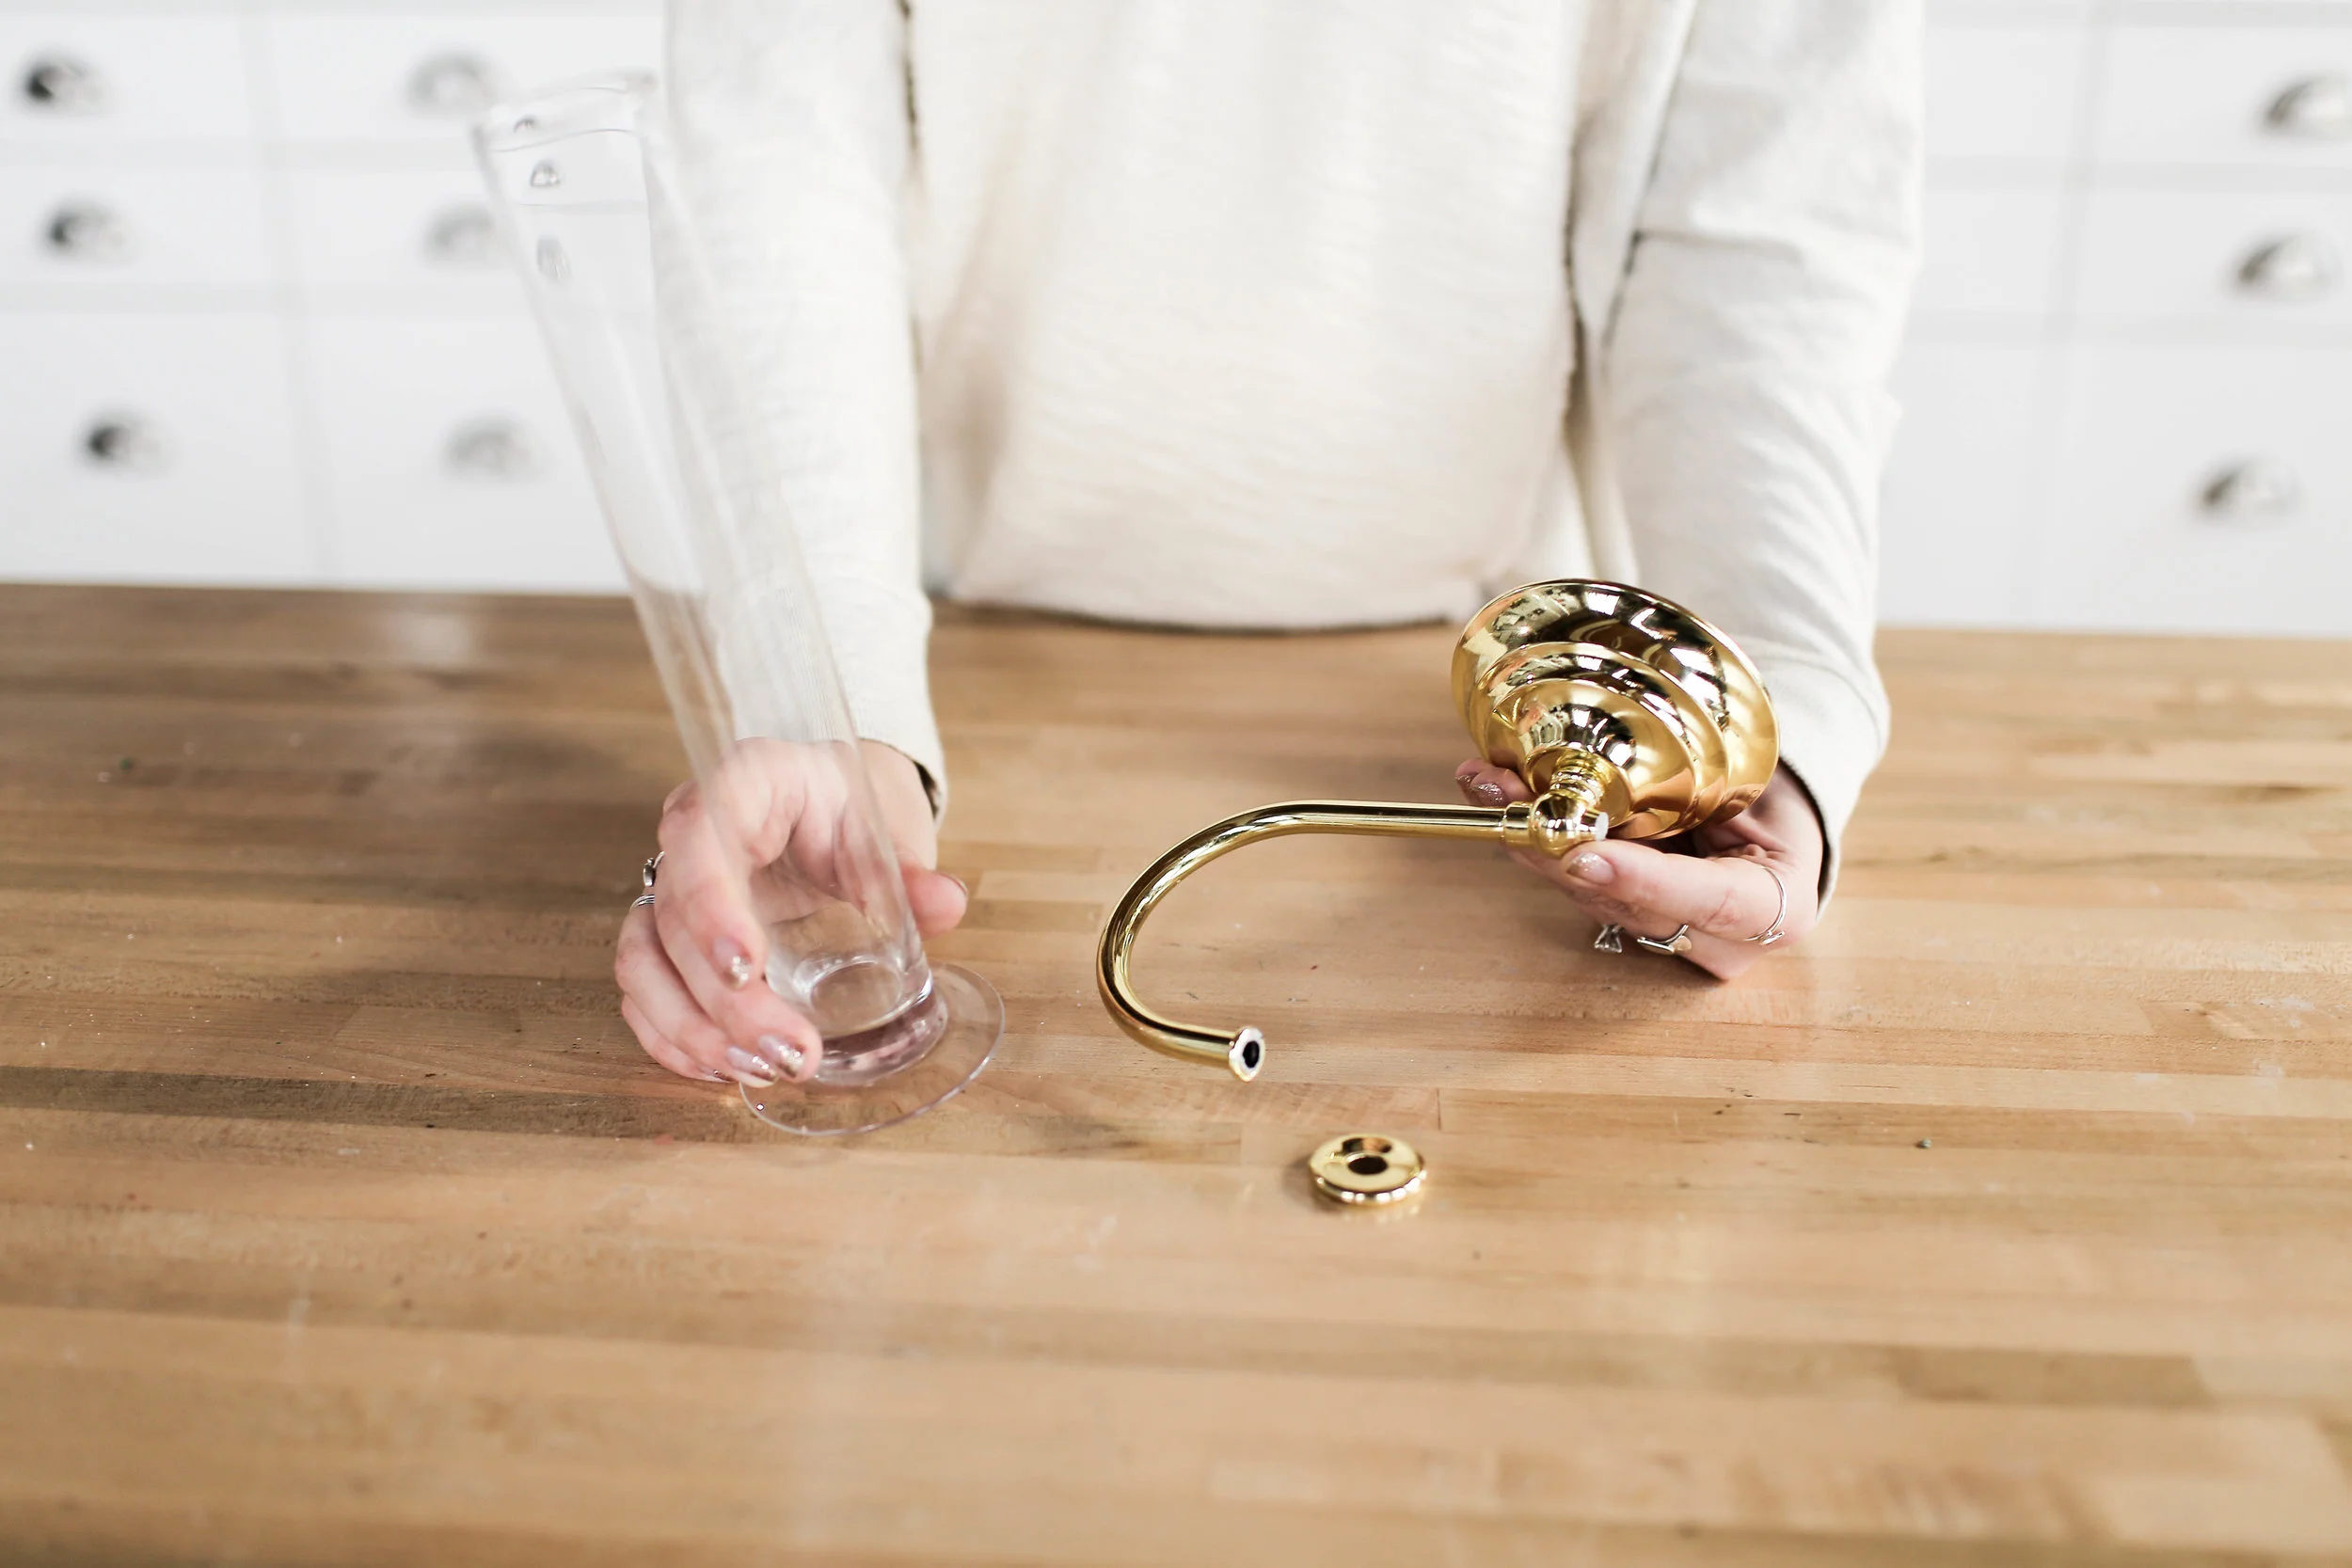
The first step is to take apart this whole wall sconce. Most of it came apart quite easily, but to remove the ornate details on the sconce we are going to take a metal hacksaw to the sconce and cut away what we don’t want. Now that our sconce is super simple, we are going to go ahead and add another item we found at the thrift store - this very simple long vase. The plan is to attach this to the sconce, to turn it into a very simple single candlestick wall sconce! We super glued this small round gold piece to the end of the sconce then glued the glass candle holder to the gold piece! After it dried, we hot glued the bottom of the sconce to add some more stability!


We finished up the project by mounting it to the wall, and poured some of the extra pickling salt into the bottom of the vase to hold the candle in place. We used a faux candle to keep things safe!
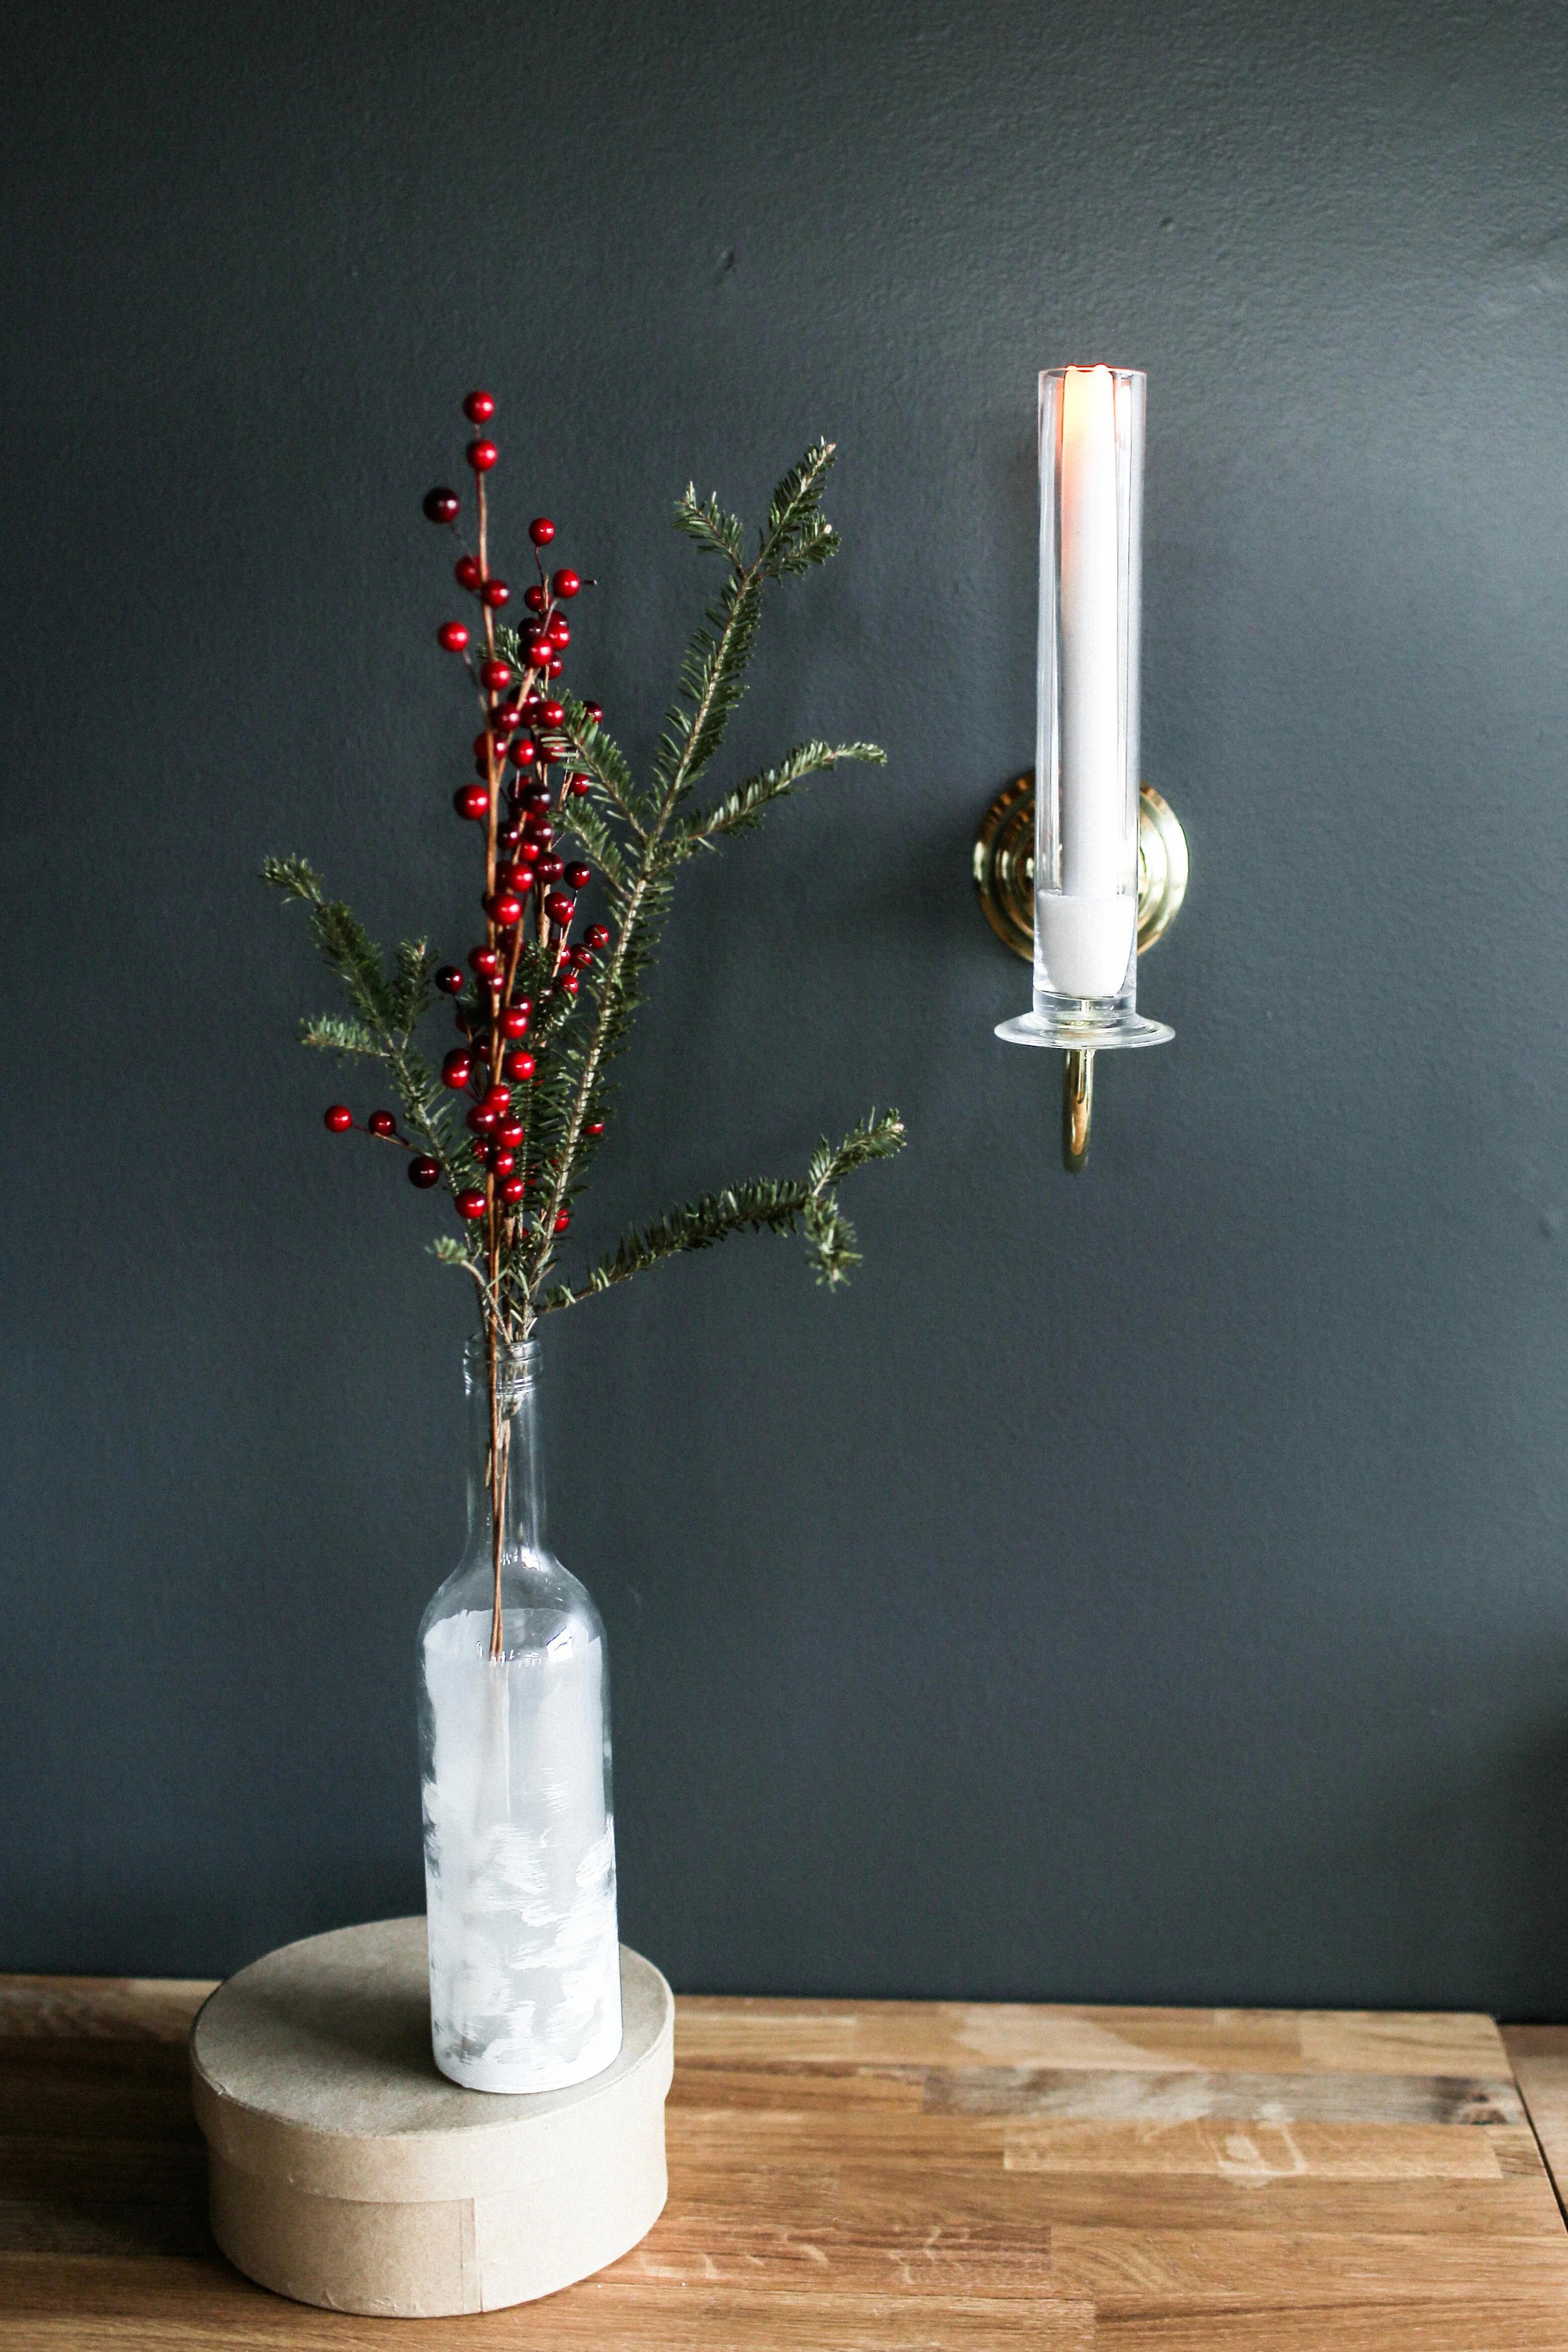

We finished up our decor by adding candles, polishing brass, and putting up ornaments around our space!


Thanks for reading! If you liked this post, check out the video below!