Platform Storage Bed * IKEA hack
Hey everyone, Rach here! I just moved into my dream loft apartment, and I’m so excited to share my first DIY project with you all. I took a basic IKEA Neiden bed frame and transformed it into a beautiful platform storage bed with shelves. Read on to see how I built it!

the inspo


LUMBER LIST:
3 pieces: 1x12x8 Knotty Pine Shelving Board
7 pieces: 1x10x8 Knotty Pine Shelving Board
1 piece: 1x3x8 Knotty Pine Shelving Board
2 sheets: 1/4x4x8 Fir Plywood
Step 1: Get Ready
Find an IKEA Neiden Bed: Start by grabbing an IKEA Neiden bed from an IKEA store or second-hand. (In this case, I got mine off of Facebook Marketplace).
Measure Your Space: Double-check the space where your bed will go to make sure your new storage bed will fit.

Plan It Out: The idea here is to add new legs to lift the bed higher, close off the underside with plywood, and build two L-shaped shelves for extra storage.
Step 2: Cut the Lumber
Vertical Shelf Legs:
Use the mitre saw to cut the 1x10x8 boards into 21-inch legs. You’ll need 20 of these.
Set up a stop block if you have one, so your cuts are all the same.


Top Platform:
Cut the 1x12x8 boards down to 10 inches wide with a circular saw.
Trim the corners at a 45-degree angle so they fit together nicely.
Glue the corners and reinforce them with pocket hole screws.


Horizontal Shelves:
For the long sides of the bed, cut:
2 pieces: 9 1/4 x 4 1/4
2 pieces: 9 1/4 x 11 1/4
2 pieces: 9 1/4 x 21 1/4
2 pieces: 9 1/4 x 7 1/4
2 pieces: 9 1/4 x 3 1/2
For the front side of the bed, cut:
2 pieces: 9 1/4 x 5 1/4
2 pieces: 9 1/4 x 15 1/4
2 pieces: 9 1/4 x 4 5/8
Step 3: Sanding and Prepping
Drill Pocket Holes:
Add pocket holes to one side of each piece, making sure the screws won’t bump into each other later.
Sand Everything:
Give all the pieces a light sand for a smooth finish.


Step 4: Build the Shelves
Make a Wood Guide:
Cut a 7 1/4-inch piece of wood to help keep the shelves at a consistent height during assembly.
Assemble the Shelves:
Apply wood glue to the edges before screwing everything together.
Use a right-angle drill attachment to reach tricky spots and secure all the screws tightly.


Step 5: Stain the Wood
Apply Wood Conditioner:
Use a rag to spread wood conditioner evenly on all pieces before staining.
Stain the Wood:
Go over everything with Varathane’s ‘Early American’ stain to give the wood a deep, rich color.


Step 6: Modify the IKEA Neiden Bed Frame
Extend the Bed Legs:
Cut 4 pieces of 1x3x8 wood to 21 inches and another 4 pieces to 17 inches.
Attach these to the original Neiden bed legs to raise the bed, matching the offset of the original frame.
Do a wobble test to check stability.
Assemble the Bed Frame:
Screw the new legs onto the bed frame using your own screws, not the ones from IKEA.
Attach the shelves and plywood panels, making sure everything is secure.


Step 7: Final Touches
Style Your Bed:
Once it’s all put together, add your favorite bedding, and enjoy the extra storage you’ve created!
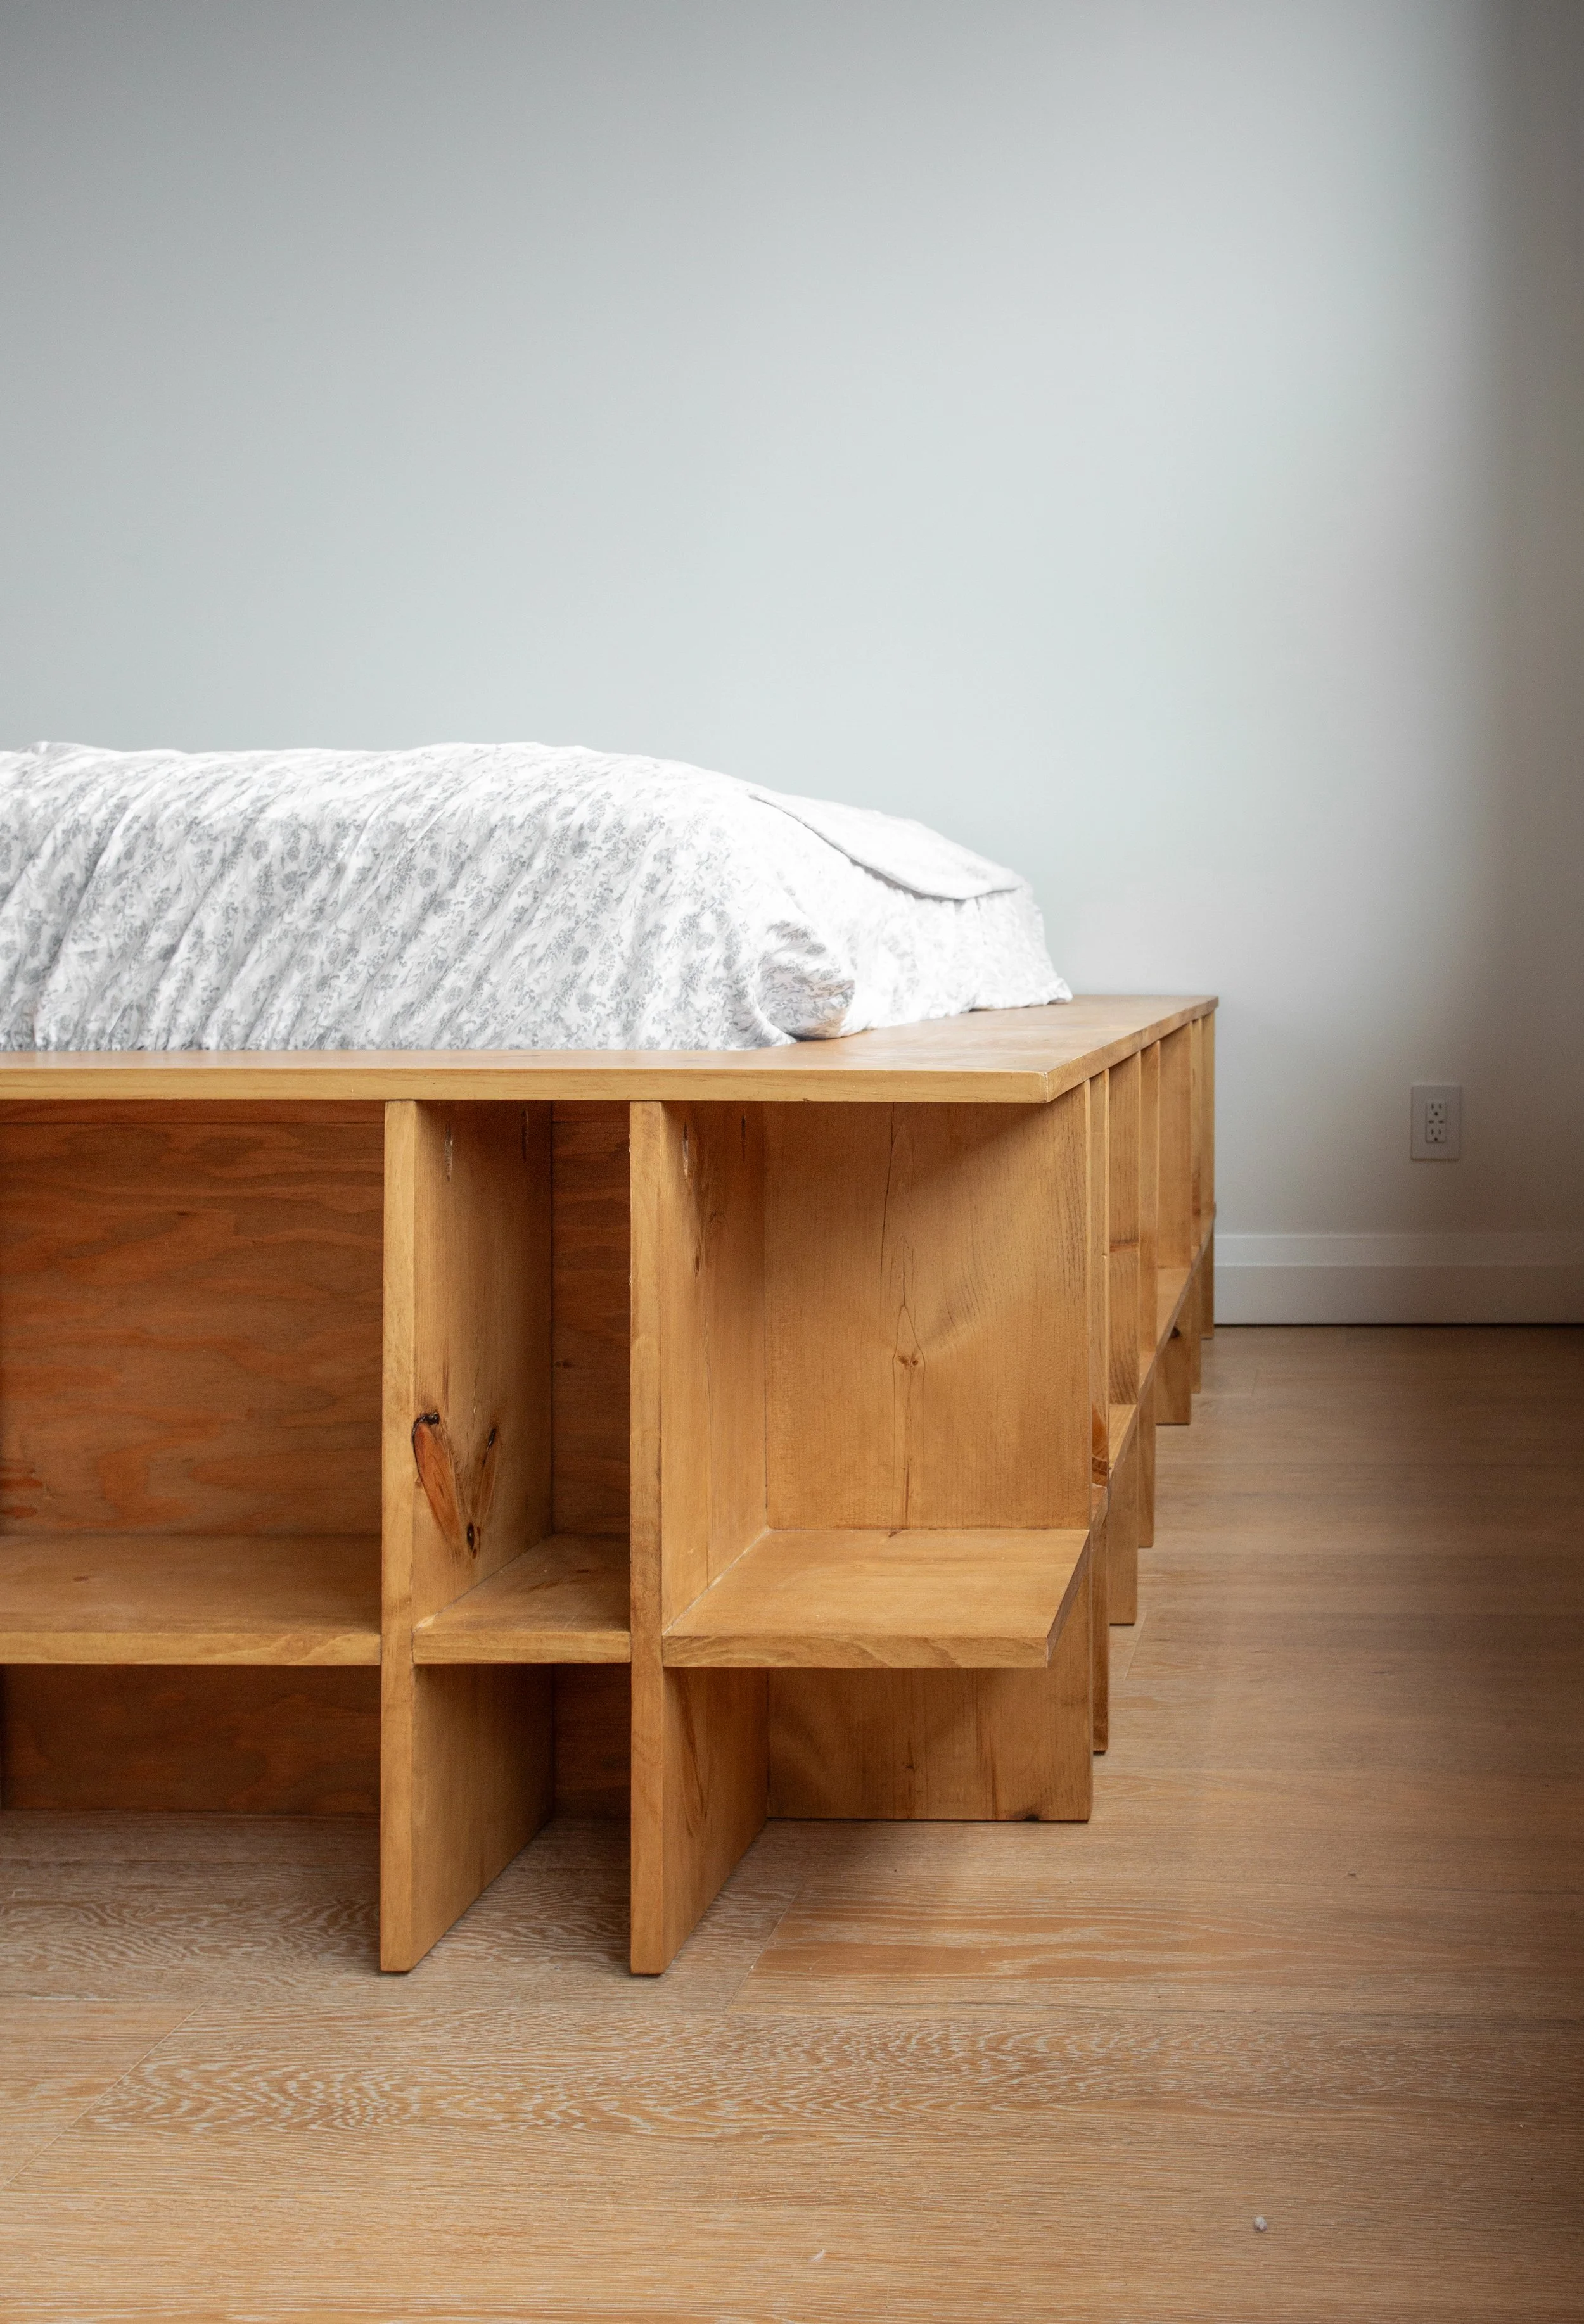


final result!


