A YELLOW BEDROOM MAKEOVER ft. Adelaine Morin

Today we are starting a brand new series called Style Selected! This is a series where we make over people’s spaces, but the twist is that we each design a space and the person has to select which style they want to go with!
Today we are here with Adelaine Morin, a beauty and lifestyle YouTuber (and vlogger!) who needs some help with her Toronto bedroom, and we’re here to help her out!


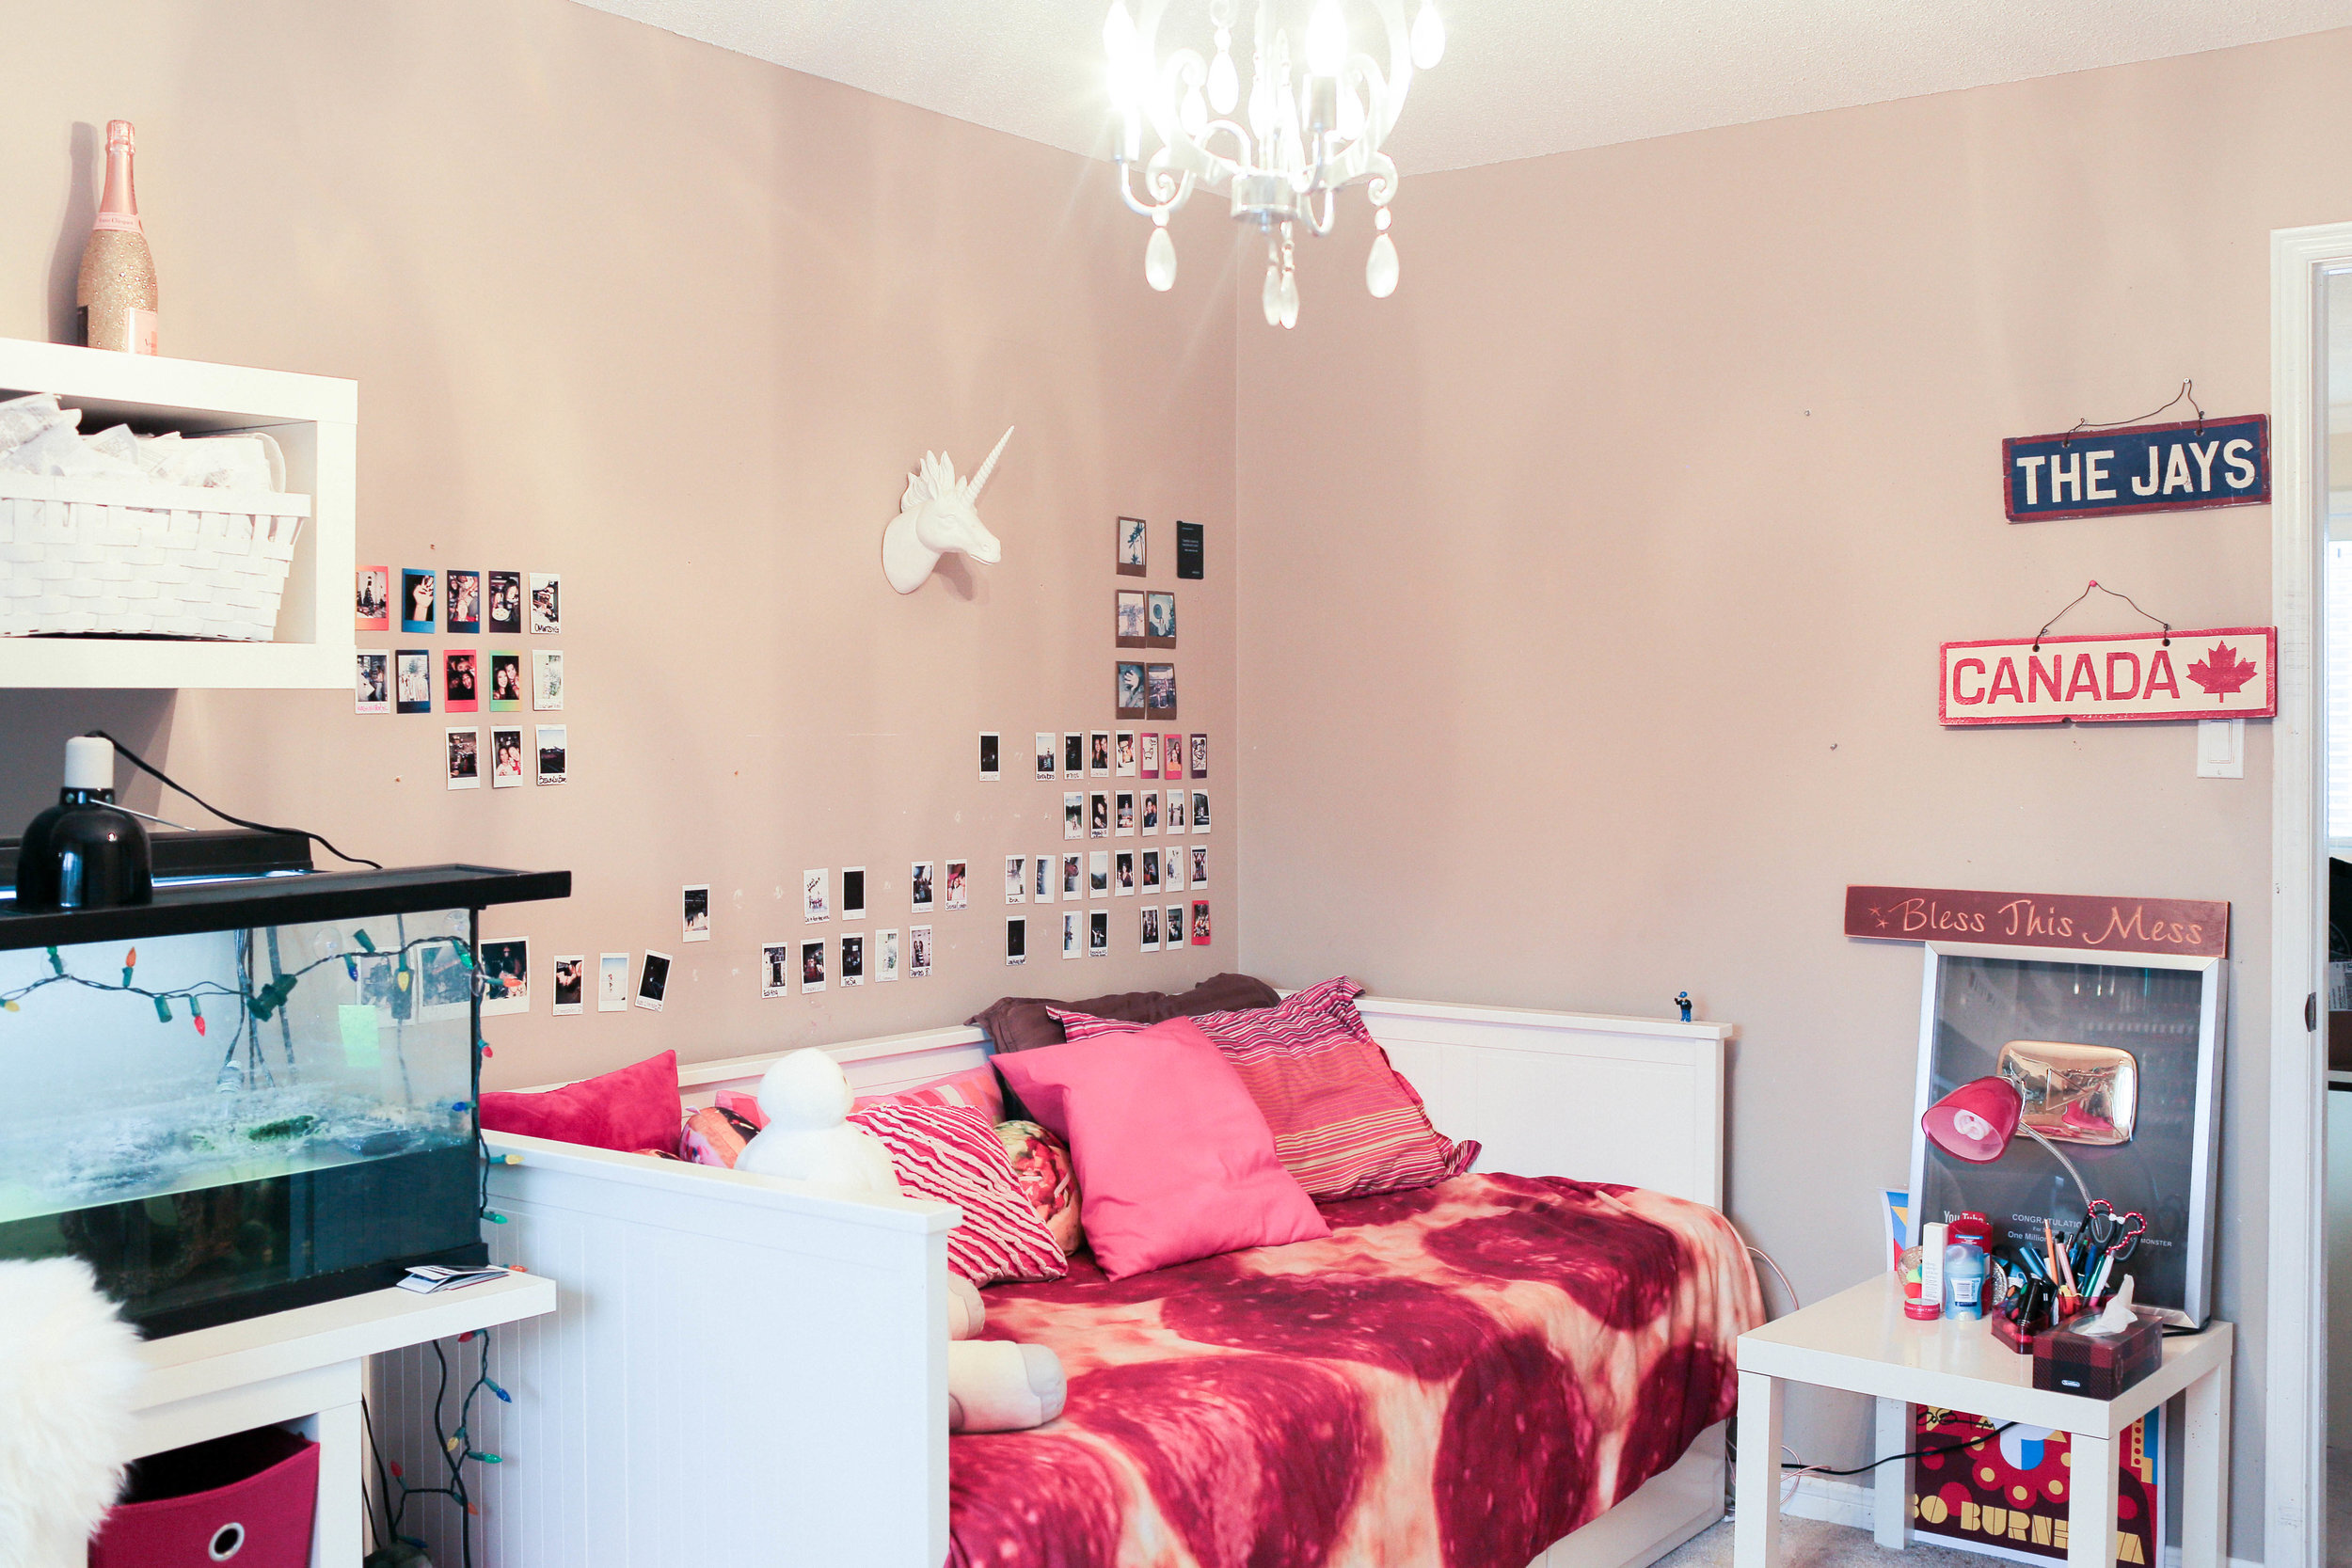
Adeline doesn’t love her childhood bedroom because it’s dark, doesn’t fit with the (very yellow) theme of her YouTube channel, and just needs a huge update!


Let's get started with the ideas!
KELSEY’S PLAN: EVERYTHING ADELAINE

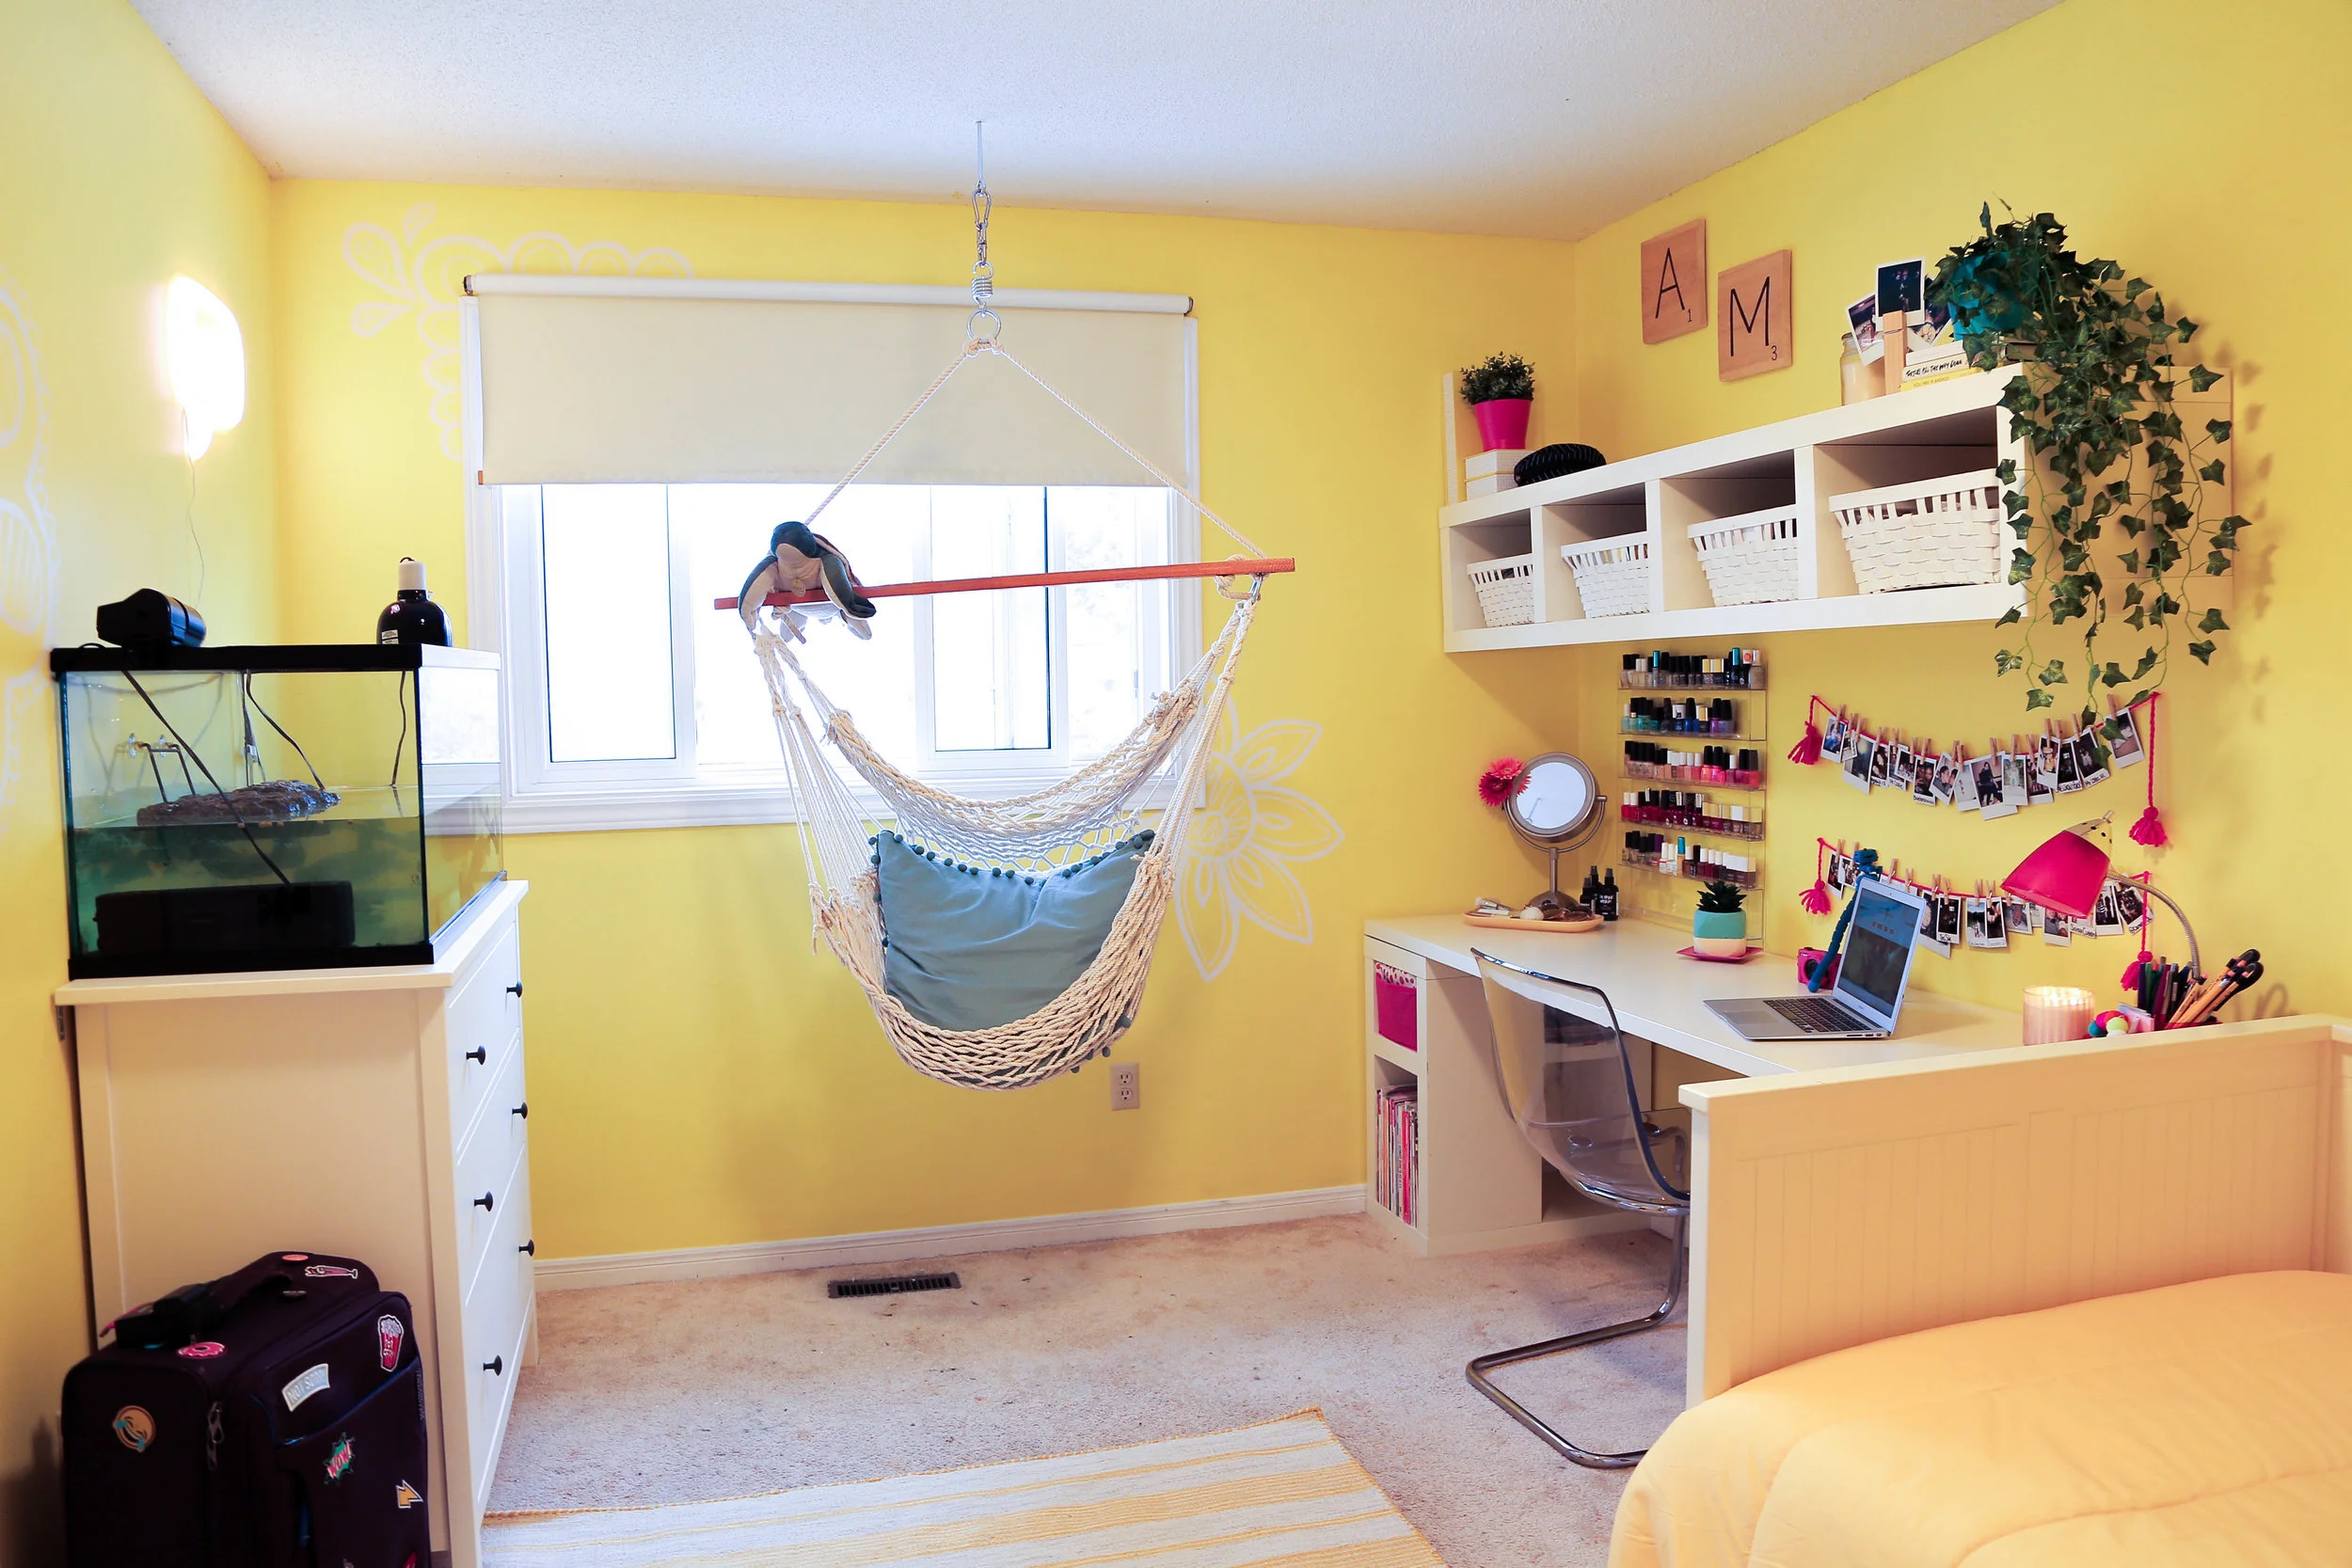
My plan is to go full on Adelaine. Yellow walls, yellow bedspread, and a big off white and yellow rug on the ground. Sheldon deserves his own spot (off of Adelaine’s desk), and so we’re going to put him on top of a dresser right by the window. She of course needs a floor length mirror for all of those selfies, and a gorgeous ladder by her bed instead of the side table to save space but still be super chic! The coolest and most unique thing about this room is the ade-doodles! Adelaine does these awesome doodles on all of her Instagram photos, and i’m thinking of recreating this on her walls!
BECKY’S PLAN: BEACHY VIBES
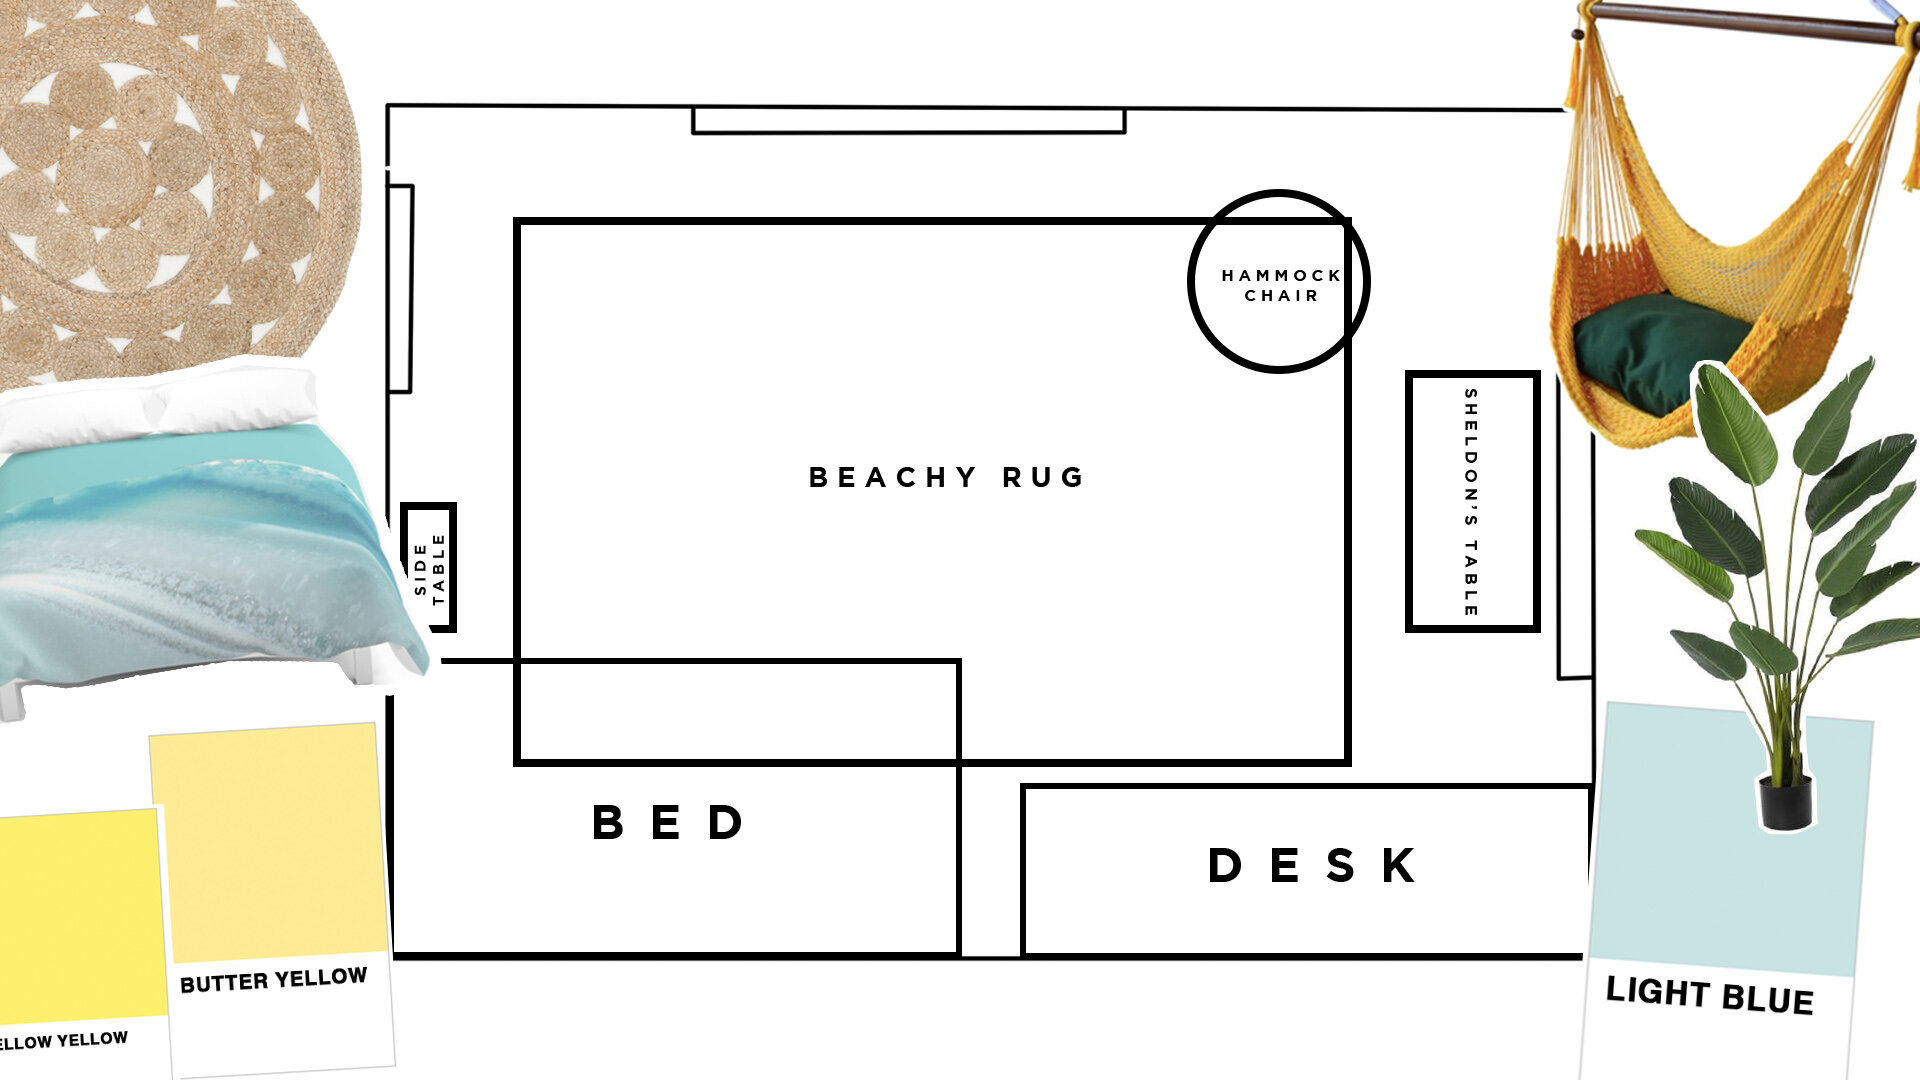
My plan is to incorporate some yellow, but I definitely want to add some other colours as well! I want to add a HUGE sand-inspired rug on the floor, and put Sheldon on top of a dresser under the window. The coolest part about this room is the beachy hanging chair! And of course, lots of beachy plants and palms to bring some LA to Toronto!
After some deliberation, Adelaine decided to pick Kelsey’s plan! Although she didn’t pick Becky’s, she did LOVE the hanging chair idea… maybe we’ll bend the rules a bit and add the chair.
Time to get to work on cleaning up and moving everything to get ready to paint!
While the painter worked on painting the room, we went ahead and shopped/DIYed! We started by making some personalized scrabble letters as artwork for her walls.
DIY GIANT SCRABBLE LETTERS:

Materials:
Scrap wood
Giant Sharpie
Tools:
Circular saw
Sandpaper or power sander
To make these personalized scrabble letters, go ahead and pick up two (or more) square pieces of wood. We cut some squares out of some scrap wood we had using a circular saw. After cutting, we quickly sanded the edges to smooth them out. We added her initials using a super thick sharpie. We finished it off by looking up and adding the point value for each letter for extra authenticity. When we got to Adelaine’s house, we used some 3M picture hanging strips to get them to stick to the wall without stripping the paint.
We also went ahead and DIYed a ladder! (We’ve totally done this before, you can learn how to make it here!).
So… even though Adelaine didn’t choose Becky’s plan for the room, she did really like the plan for the hanging chair. We decided to give her the chair, but we weren’t sure how to safely hang the chair! To make sure we did things right, we asked our handyman friend Chris Palmer to come and help us out!

If you decide to hang a chair, please be sure to contact a handy person or talk to someone at your local hardware store (we don’t want anyone to get hurt!).
Now that the chair is up, we decided to get started on decorating the bed! We decided that there was WAY too much food on the bed, so we scrapped the snacks and opted for some brand new white sheets and this lovely bright yellow bedspread that we got from Society 6. We finished off the bed with these super fun pillows that we also got from Society 6!
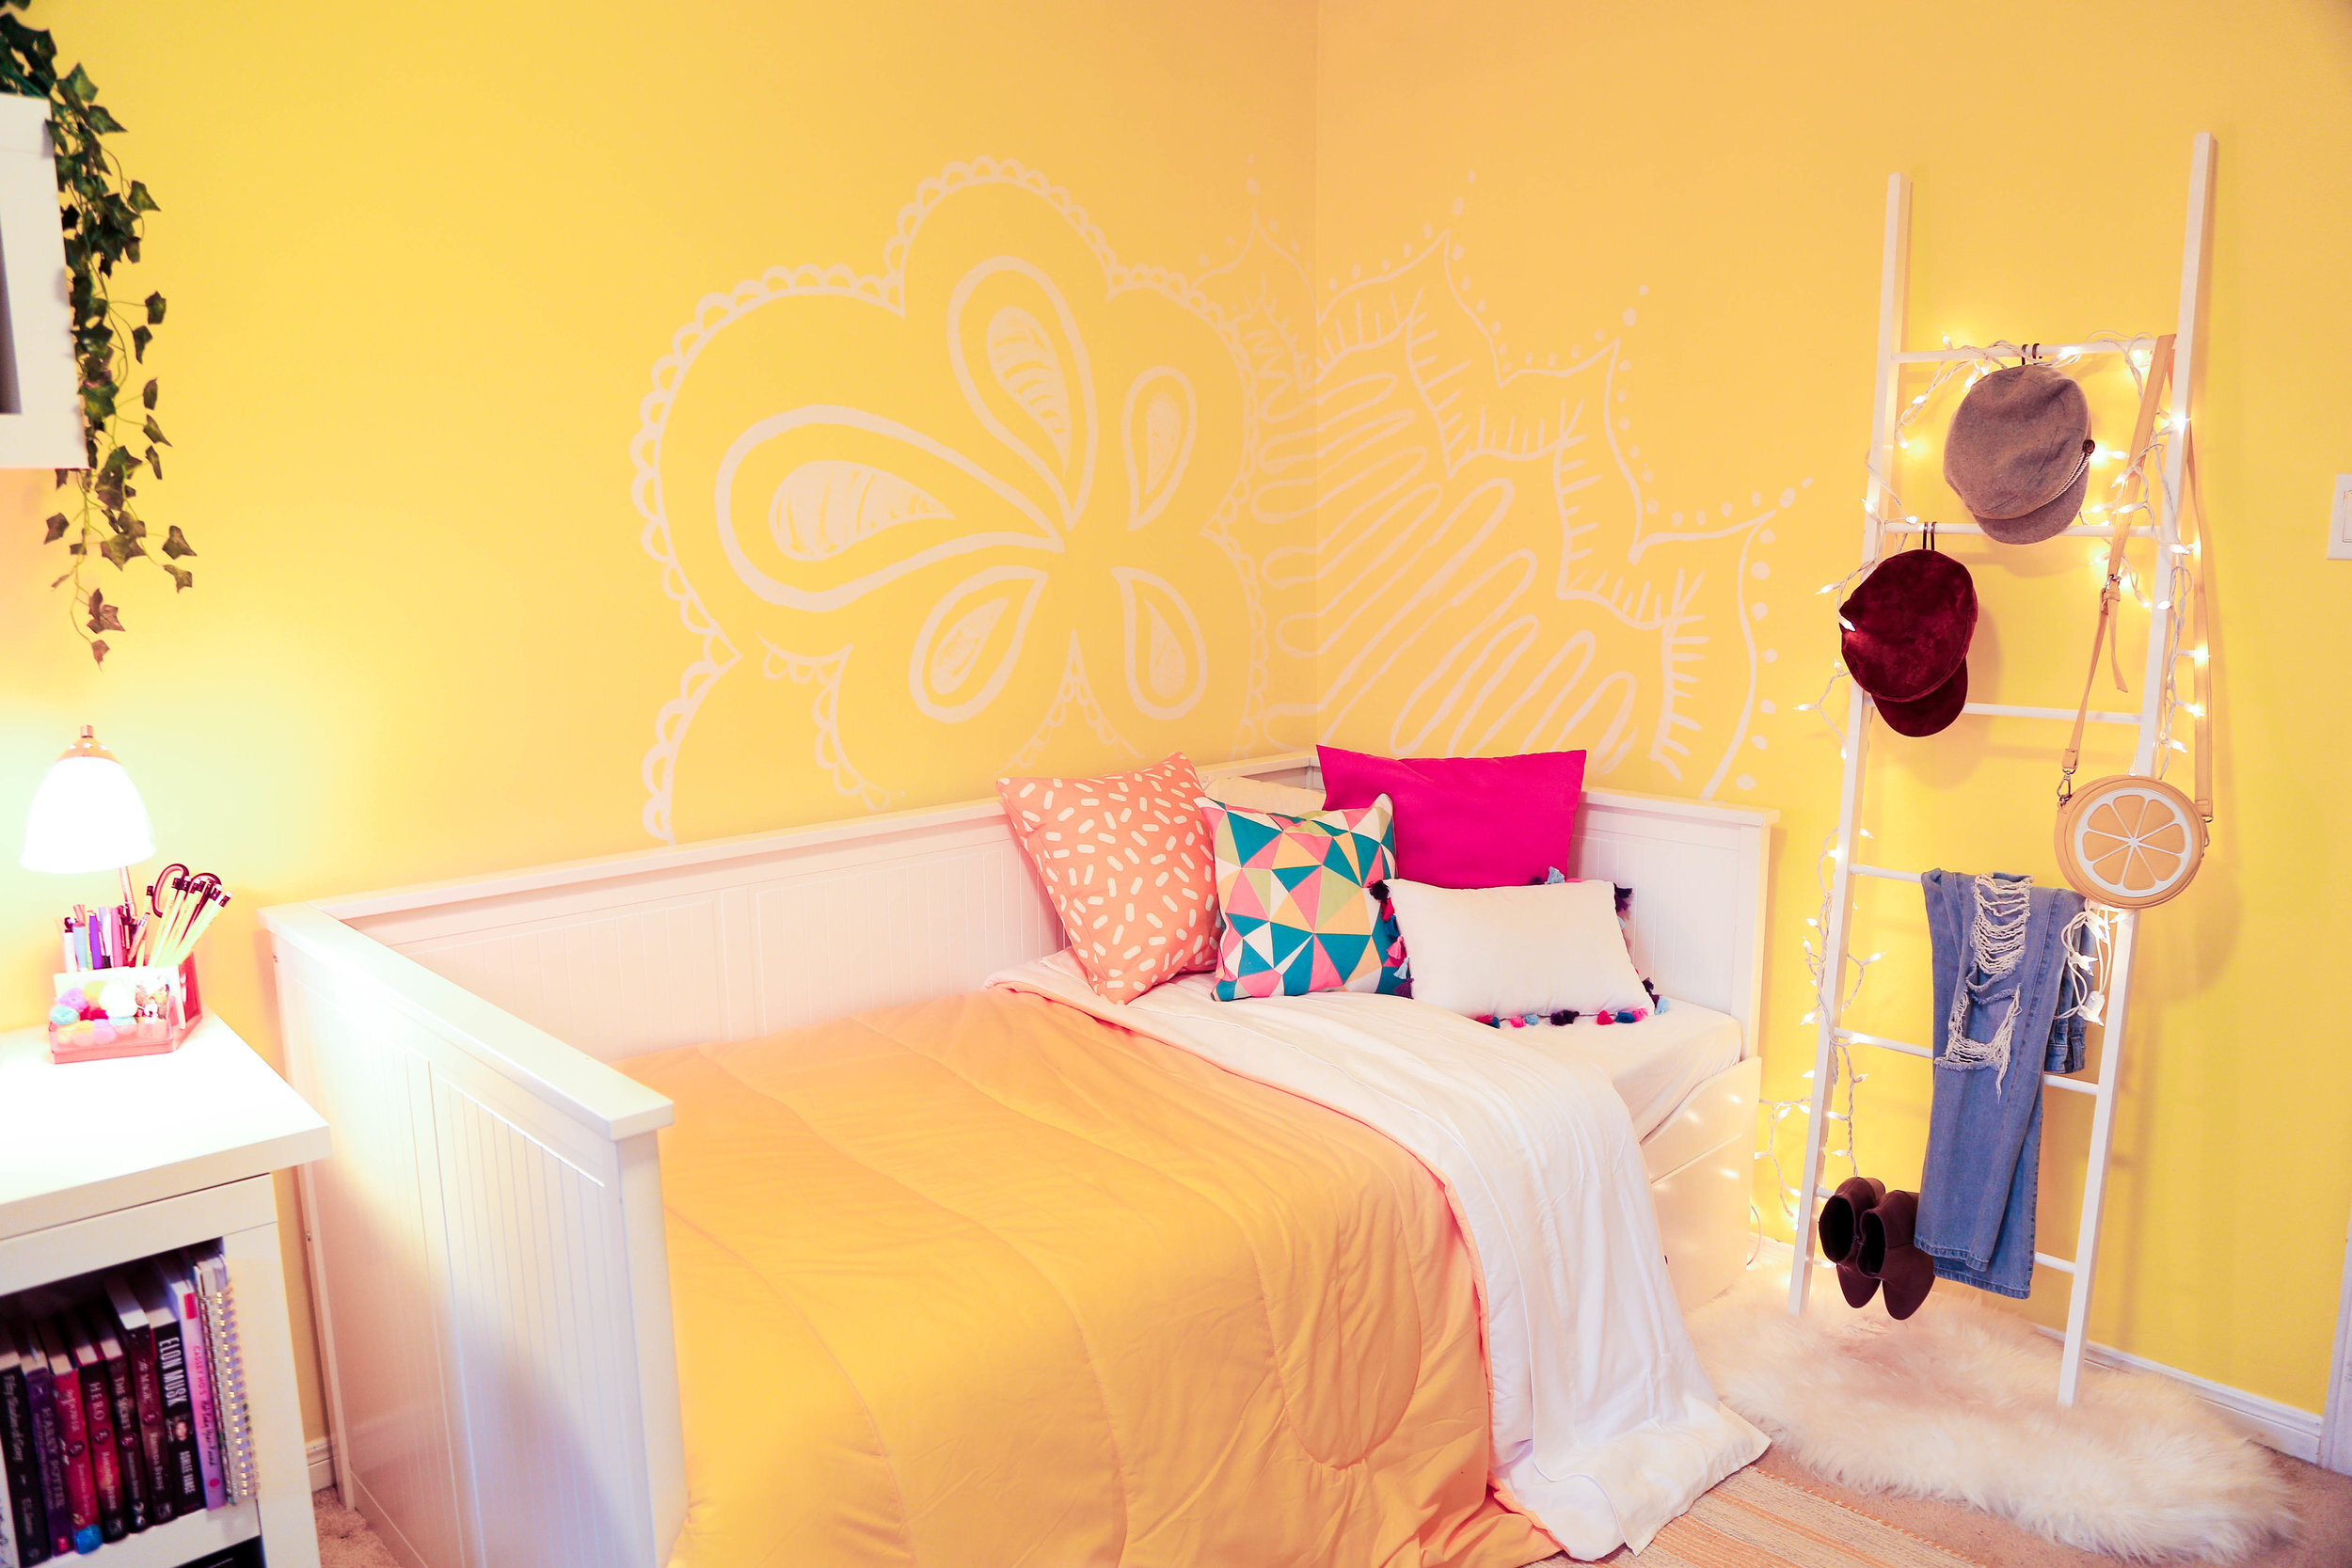
Next, we went ahead and started painting Adelaine’s doodles on the wall! We pulled up her Instagram page, sketched out the designs with pencil, and then went ahead and painted over the pencil with white paint!

We next started bringing some pieces, like a giant mirror and a dresser, into the room! A great tip we have for super small spaces is using a ladder as a side table! It takes up much less room, and look super cute and unique.


Time for some finishing touches! Adelaine has a super cute suitcase that is covered with patches, and so we decided to add our own patch onto it to add some sorry girls flare! YES! You read that right! We have our own merch! Click here to check out our very first piece of merch, the ‘Not Sorry’ patch!

Finally, we added some finishing touches like plants and a brand new lighting fixture. Time to bring her in!
Here’s what the room ended up looking like!
ITEMS IN PHOTO: Hanging Chair, IKEA Dresser, Yellow Rug, 'Not Sorry' patch.
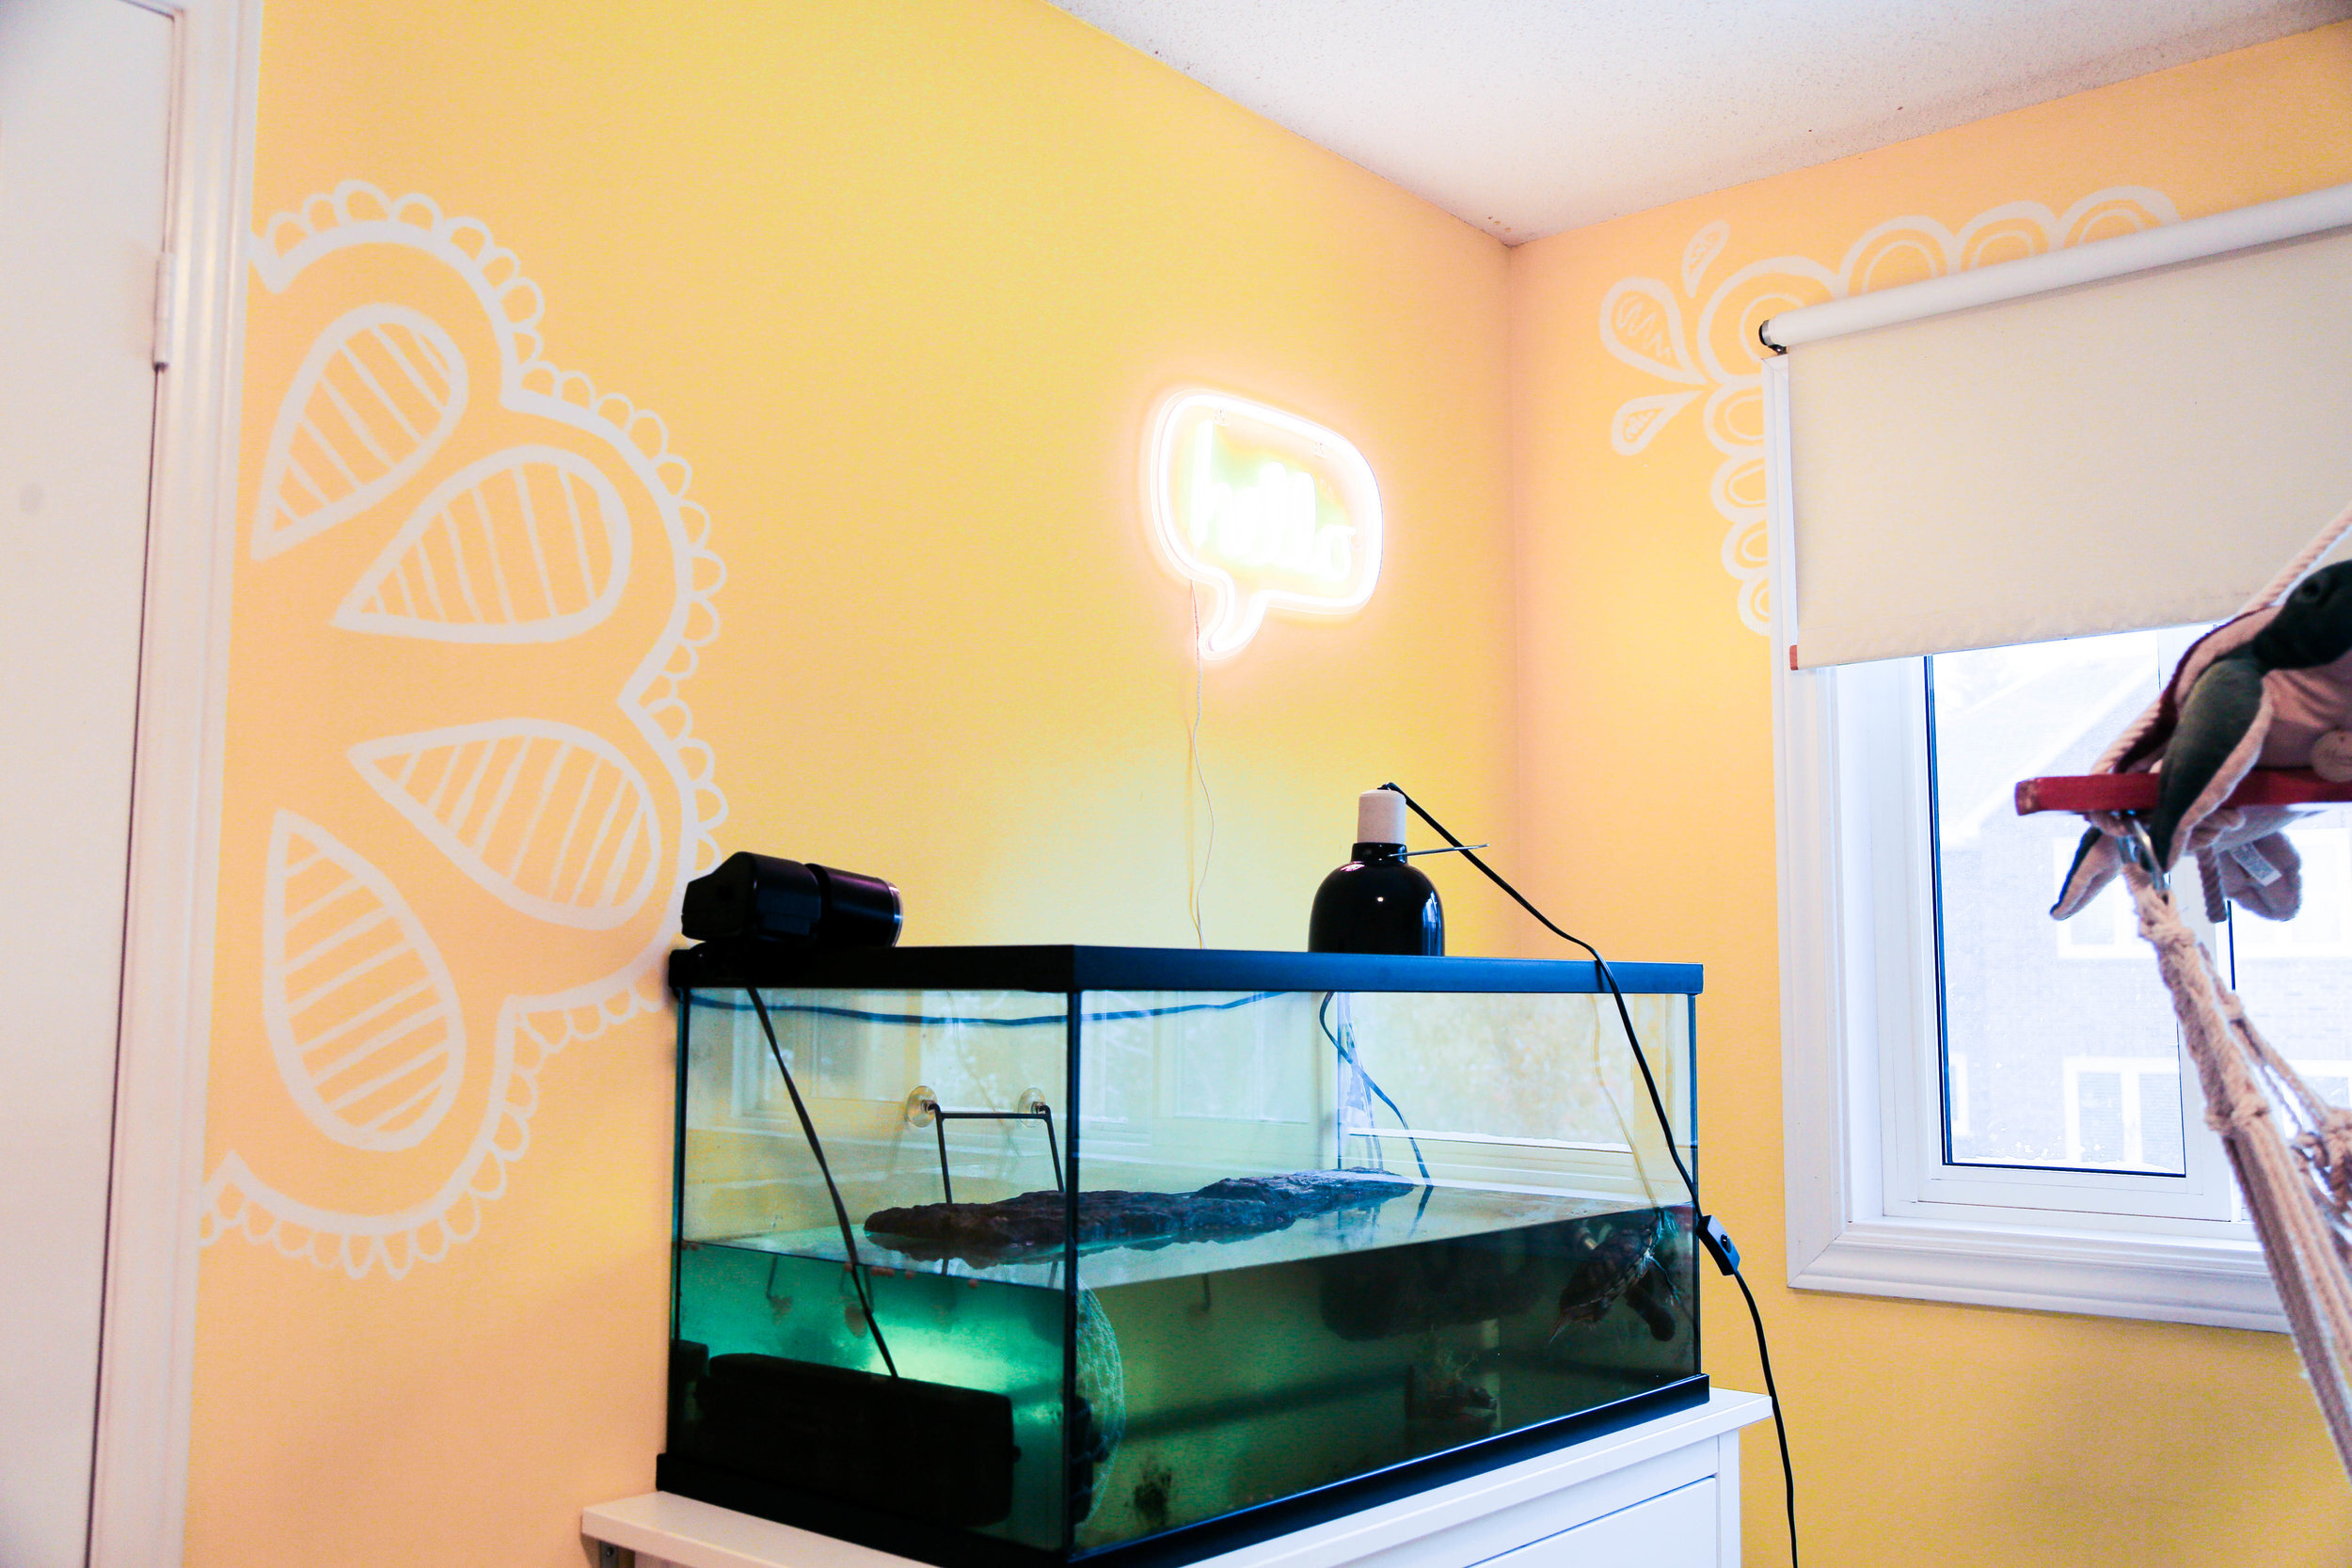

ITEMS IN PHOTO: HELLO Neon Sign

ITEMS IN PHOTO: IKEA Mirror

ITEMS IN PHOTO: Yellow/White lines pillow (link not working - search Somethin' Somethin' throw pillow), Geometric Colours pillow (link not working - search Gentle shades throw pillow), Yellow Comforter (link not working - search Yellow Bright Light Amber comforter), Faux Fur Rug
We LOVE how this turned out!
If you want to see us make over the room, check out the video below! If you pick up any of the items, or decide to decorate your space inspired by Adelaine’s, be sure to tag us using the hashtag #SorryGirlsSquad on instagram!
Thank you so much for reading! Be sure to come back on Tuesday to see us decorate Adelaine’s Toronto studio!