GROW DIY CRYSTALLIZED GEODE IN JUST HOURS

Okay we’ve wanted to try these “grow your own crystal geodes” for a GOOD minute now and we finally found the perfect opportunity! If you haven’t already seen it – we had our hilarious friend Charles Carter do our voiceover for a DIY video on how to make a your own DIY crystal geode. We didn’t tell him what we were making beforehand so you can imagine how hilarious it was trying to explain what was happening. ANYWAYS you have to watch that if you haven’t already but let’s get on to the tutorial!
We’ve seen this done a million ways but we figured out the way that would work best for us.
MATERIALS
– pipe cleaners
– small piece of wire
– large glass jar
– food colouring of your choice
– borax
TOOLS
– kettle for hot water
– wire cutters
DIFFICULTY
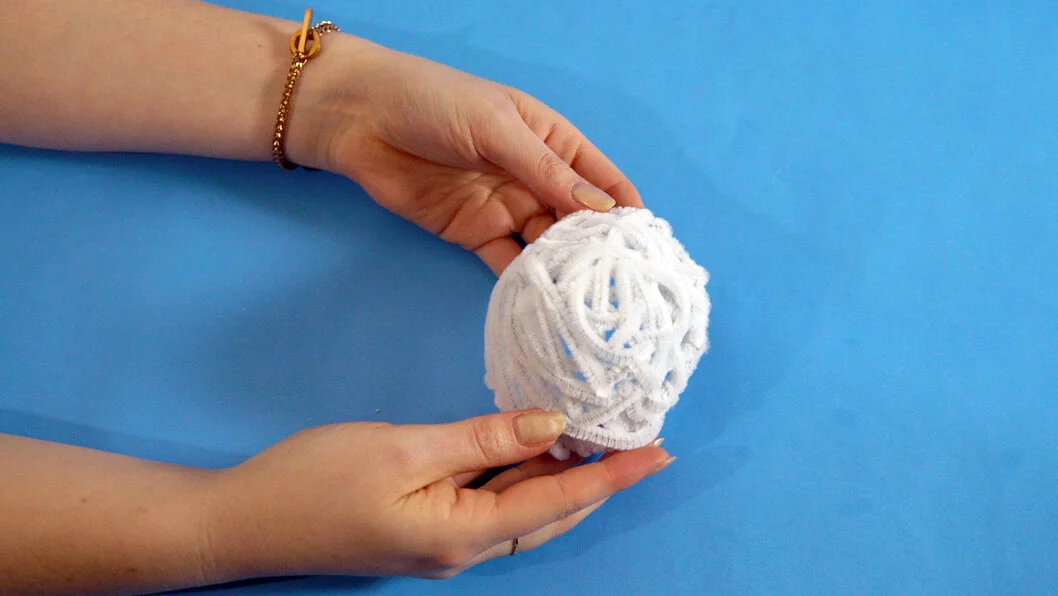
To start grab some pipe cleaners (a lot) and start by making a circle. From there add curved pipe cleaners as if you were making a bowl. We’ve also seen others coil the pipe cleaner around itself. This is another method you could try! Keep adding pipe cleaners to the outside circle, weaving it in and out and connecting to another spot on the circle to create a bowl shape with as little holes as possible.
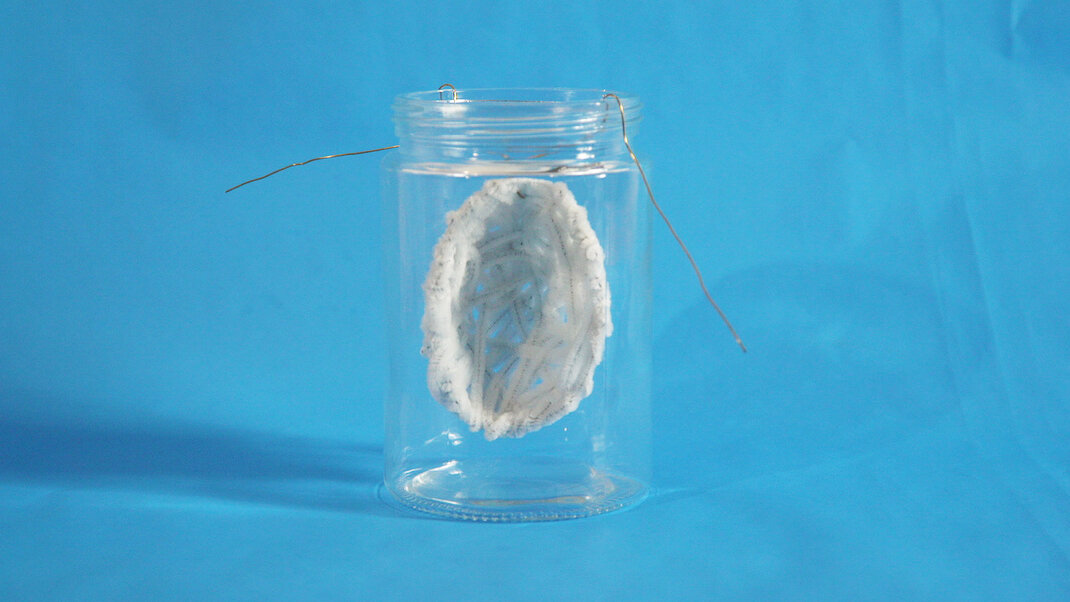
Weave a piece of wire into the pipe cleaner and shape it over a large glass jar that will fit your pipe cleaner bowl shape without touching any of the sides.
You’ll need to pick up some borax, which is a natural laundry booster/ chemical compound known as sodium borate. Please note the Government of Canada has warned about extensive exposure of Borax, read more about that here to determine if this DIY is right for you. Add boiling water into your jar and stir in borax by the spoonful until the borax is no longer dissolving into the water. It took us a couple of minutes to complete this step.

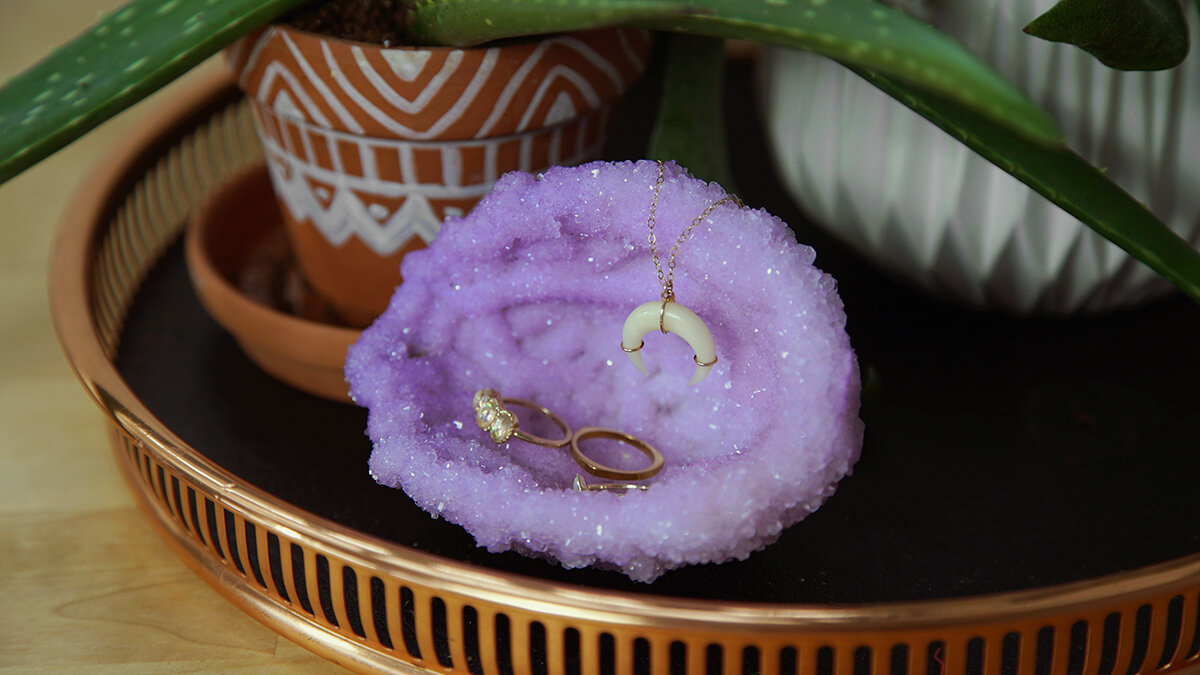
We decided we want our faux geode to be purple so we added about 14 drops total of purple/ red/ blue food colouring to get the desired purple. Make sure to stir it up!
Add in your pipe cleaner bowl and make sure it’s floating in the jar by shaping the wire one last time. Close the jar and leave it still for 6-12 hours. We left ours overnight for 12 hours.

After the time has passed open up your jar and carefully take out your crystallized creation. Slide out or use wire cutters to remove the wire. Let your new DIY crystal geode dry completely.
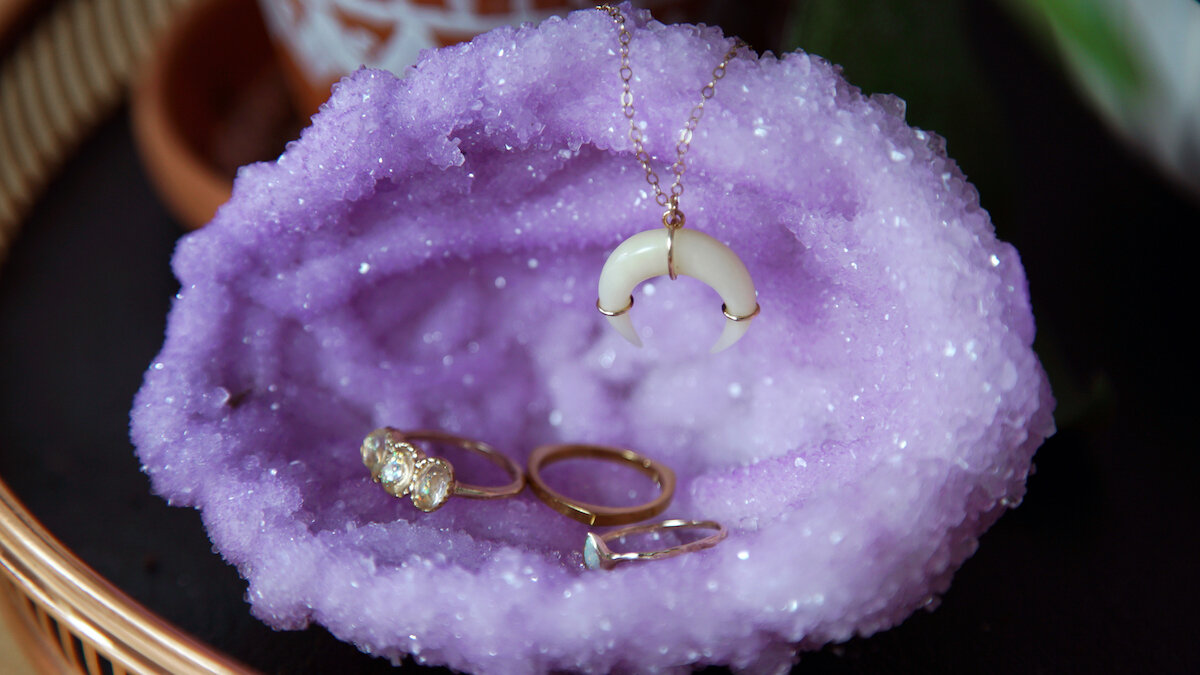
Have fun experimenting with size, colours, shapes and time! Thanks for checking out this post and the video – you HAVE to see it! We’re on Instagram, Twitter and Facebook so tag us if you make one of our DIYs!