DIY LIGHT UP CINEMA BOX

Kelsey and I were invited to the launch of the new YouTube Space in Toronto! Even more exciting was the opportunity to film the very first video there! Obviously we were thinking along the lines of a DIY and the space had this amazing bar set that really had us inspired. The set had multiple variations of light up marquee signs (even an exact replica of our DIY Arrow Sign!) but we still felt like something was missing.. This light up cinema box is something we’ve always wanted and so we figured out exactly how to do it! DIY your own light box quote sign by following the tutorial below!
Also, check out our time at the YouTube Space grand opening here!
Cost: $50~
Difficulty: ✂ ✂ ✂
Materials:
– One 1/2 in. board of wood that is 14.25in. x 12in.
– Two boards of 1/2 in. wood that are 13in. x 3.5in.
– Two boards of 1/2 in. wood that are 12in. x 3.5in.
– White Paint
– Light Bulb Cord set and Bulb
– Wood Screws
– Aluminum Foil Tape
– 1/2 in. PVC Shelf Edging
– Frosted White PlexiGlass
– White Corrugated Plastic Sheet
– Thin Clear Plastic
– Vinyl Alphabet (we cut ours out of a vinyl sheet with our silhouette machine but you can buy a set of letters as well)
Tools:
– Saw (or have your wood pre-cut)
– Hole saw, We used a drill bit attachment that made 1.75 in. holes
– Drill or Screwdriver
– Scissors
– Wood Glue
– Glass Glue
– Ruler
– Exacto Knife
The Process!
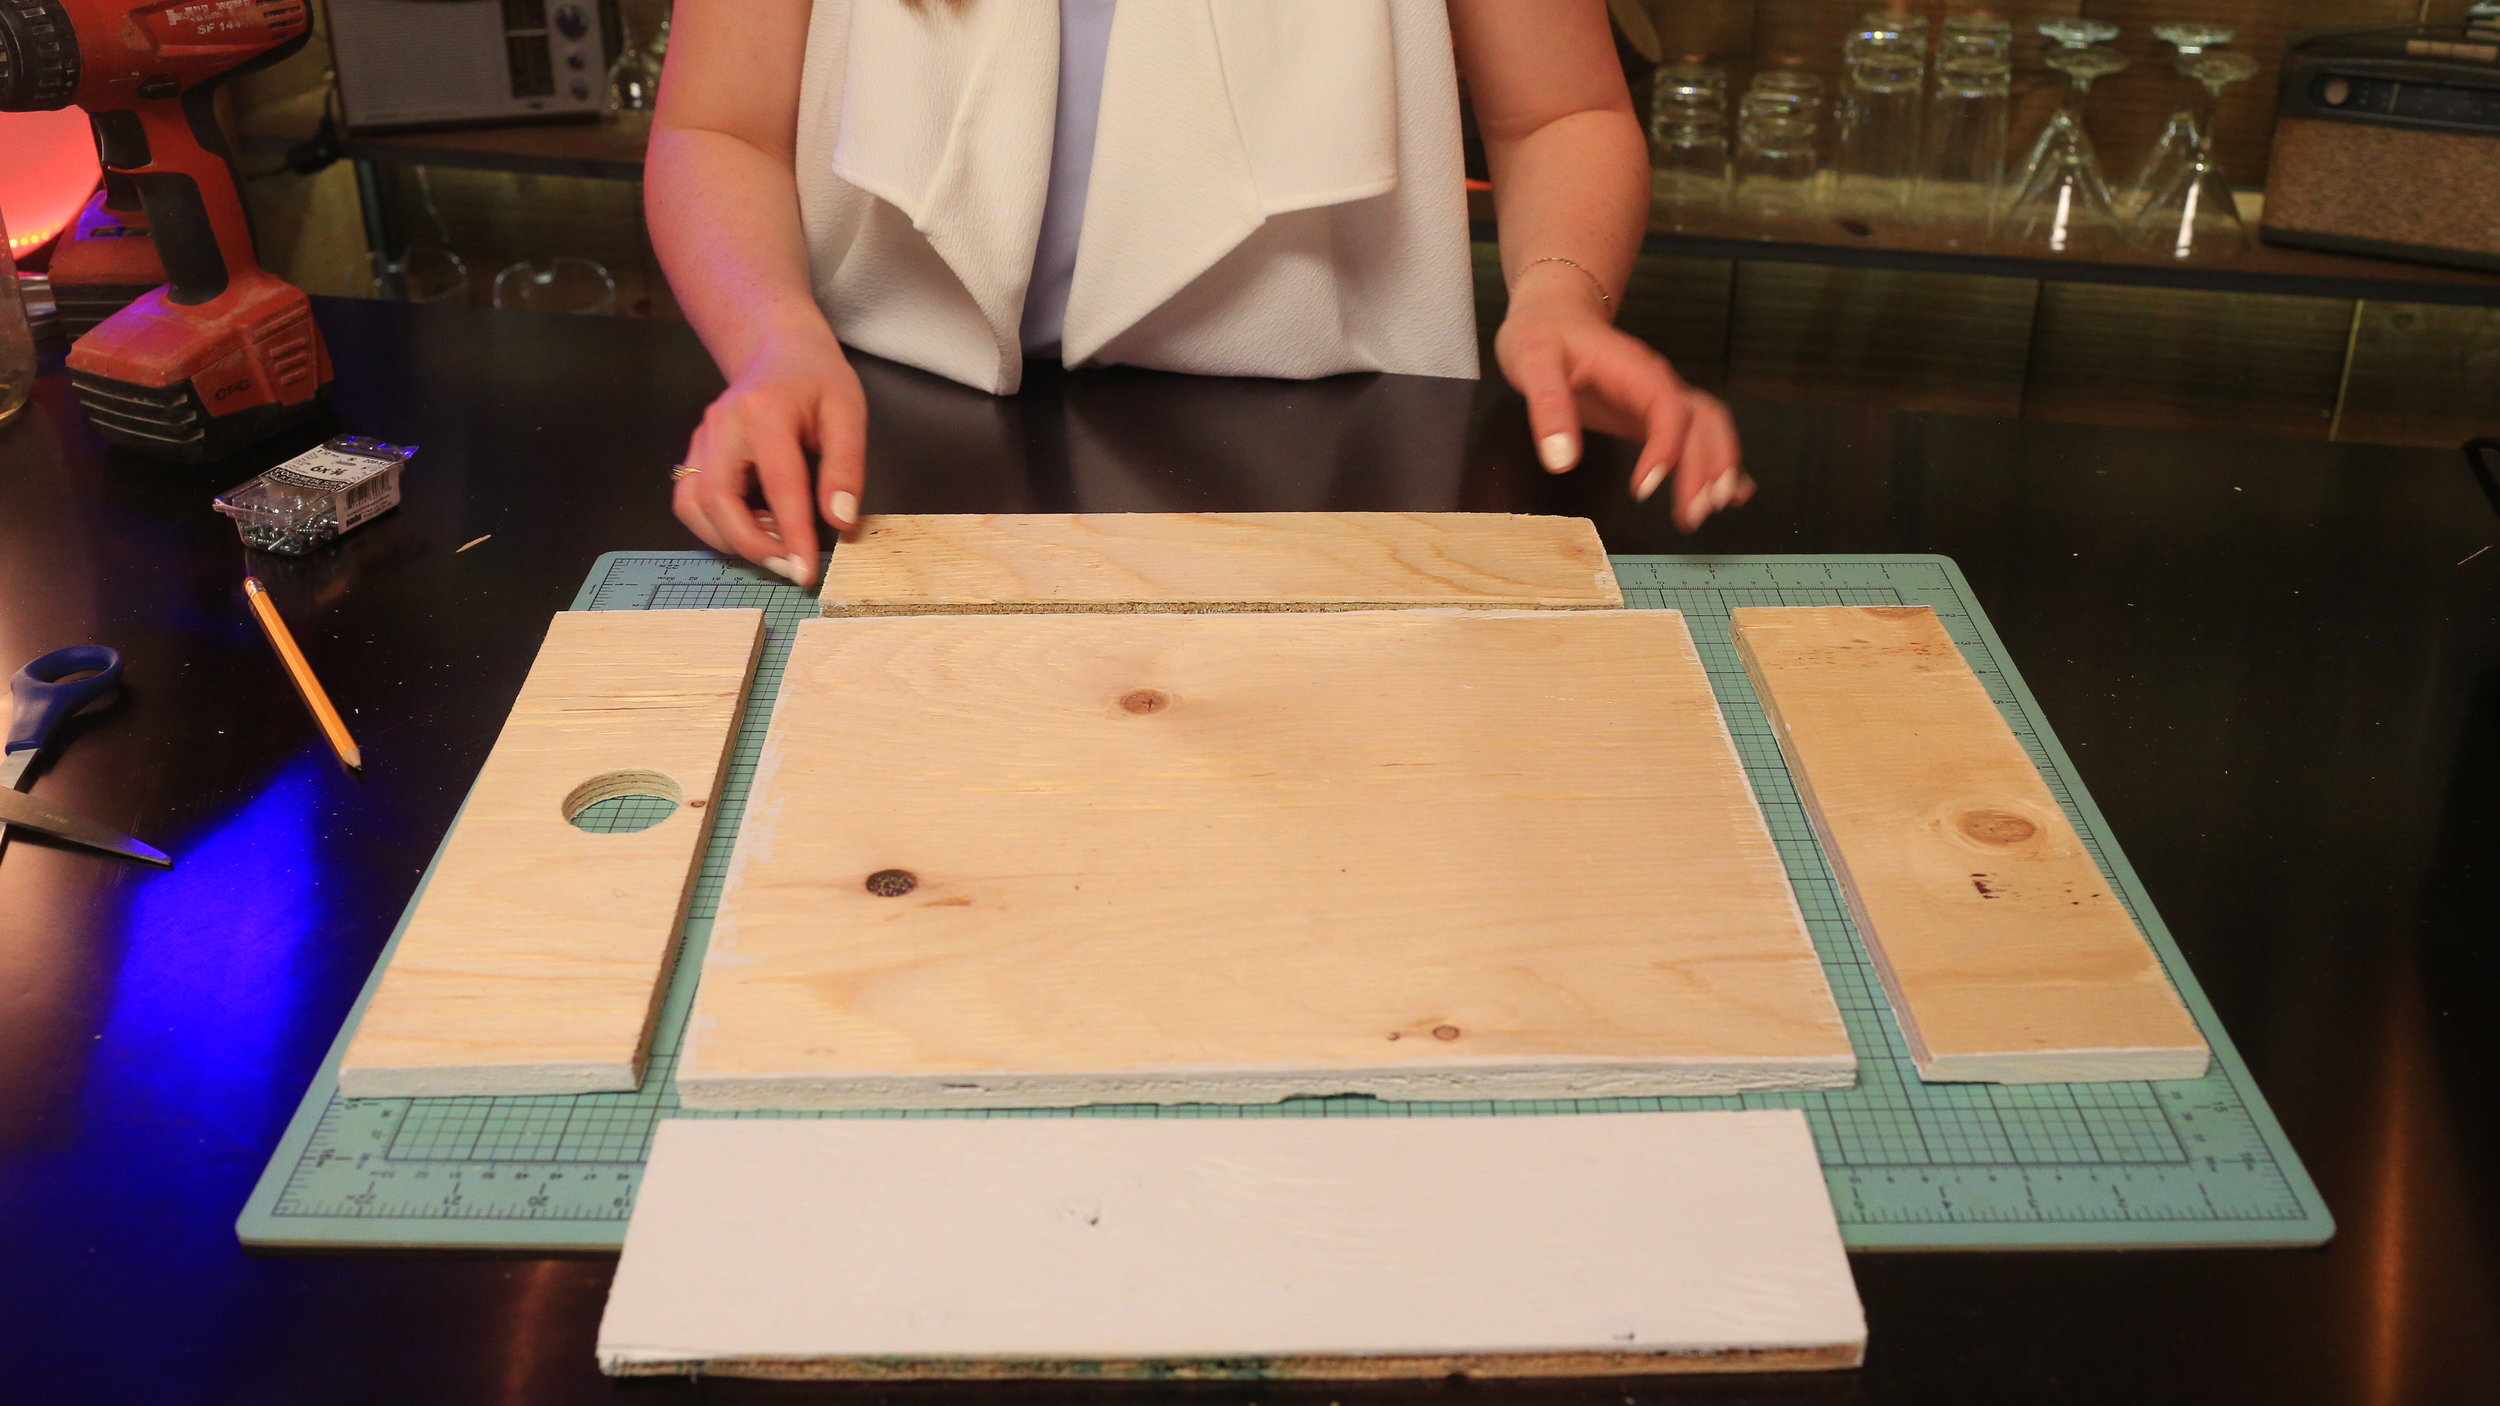
The first step in making this light up cinema box is gathering the right pieces of wood.
You’ll need one rectangle that is 14 ¼ inches by 12 inches, two pieces that are 13 inches by 3 ½ inches, and two pieces that are 12 inches by 3 ½ inches
All of this wood is ¼ inch thick and we pre painted the outsides white
We also used a hole saw to add a hole in one of our short pieces of wood
To make our sign light up, you’ll need a simple light cord, the one we used is from Ikea and you’ll want to make sure your drilled hole is big enough to fit the end of the cord in snugly, our hole was 1 ¾ inches in diameter
Now that we have all the pieces, it’s time to get building, lay your boards together on top of the large rectangle and begin to drill them together
Make sure your longest pieces are on the inside, being sandwiched by your shorter side pieces
It’s helpful to pre-drill holes with a drill bit and then add your screws in after to stop the wood from splitting
To make sure we get the most reflection out of our light, we’re coating the back piece in this aluminum foil tape you can easily get from the hardware store and we also added a few pieces on the sides as well
To make a nice edge for our sign, we found this ¼ inch PVC shelf edging at the hardware store, conveniently the same width of our wood pieces.
Cut 6 pieces out of this that match the same lengths of your wood pieces, 3 in the larger size, 3 in the smaller size.
Take two of those, one of each size, and cut them directly in half, length wise
Take one of your cut halves and lay it inside the full piece of the matching length
Line the edge of your wood box with some wood glue and then snap the shelf edging over top
Make sure that the little half piece we added is on the inside creating a little edge
Repeat the stacking and gluing and adding on of the rest of your edging until the front of the wooden box is all covered and you have a little edge the runs all around the inside
Now we’re going to flip the whole thing over and screw in the back piece
Next add in your light cord and light bulb
For the front piece, we’re using this frosted white plexiglass we got cut a local plastics place. It’s very important to make sure your plexiglass is the size of the inside of your box and not the size of your back piece
Using some glass bonding glue, line your PVC edge with glue; place your plexiglass on top and let it dry
Now we need to make the ledges for our letters. For this we’re using this white corrugated plastic sheet we got from the hardware store. If you cut it on either side of the corrugated holes, it creates a line strip of plastic with ridges on either side
Cut out four strips as wide as your plexiglass and lay them out evenly on your light box

Before we go any further, we need to make our letters, the right kind of plastic for this was tricky to find and we settled on the thin plastic piece in this poster frame from Wal-Mart. You could also use binder dividers or anything you can find that is a fairly thin plastic
For this size cinema box, your letters will need to be 2 inches tall and 1 inch wide
Cut out multiple rectangles out of this plastic using an Exact-o knife and a ruler
For the letters, we used our Silhouette machine, some black sticky vinyl, and the font ‘Americana’. We cut out the alphabet and then stuck one letter on each rectangle of plastic. You could also easily buy sticker letters if that’s easier
You may also need to make some rectangles wider for bigger letters like ‘w’

Once you have all your letters cut out, we can finish adding the ledges
Place one letter between two of the middle ledges and push them together to make sure you are placing them at the right spot
Mark this spot with a pencil and then glue them into place using the same glass glue we used earlier
Make sure you measure each c ledge with one of your letters before you glue it down
Once they’re all glued, allow them to fully dry
Once they’re dry, you can gently bend and pop each letter into place to spell whatever you want!

We also made a larger version of this sign using the same method but just adjusting all of the measurements to be slightly larger!

All is explained in the video tutorial below!
We’d love to see anything you make with your own two hands. Tag us using #thesorrygirls! Thanks for following us, liking, subscribing, sharing, reading – all that good stuff!